Posts: 761
Threads: 56
Joined: Jul 2013
City: Kentucky
(My apologies for not using a Philco. Same technique can be applied to any brand. If this belongs on other radios, please move it. I was uncertain where to post. Since I wanted to learn this technique for Philcos, I decided here. )..
I recently acquired a Zenith 5S319. It needed to be refinished. The problem is, it had a small stripe on one edge that was Photo Finish. I've never tried to recreate photo finish before, so I decided that this would be the perfect project. The photo finish area is small, and it is one stripe. Nothing elaborate. Plus, if it didn't work, I could always strip it off and go without it...
Here is a photo of how the radio is supposed to look originally (borrowed from the web)..
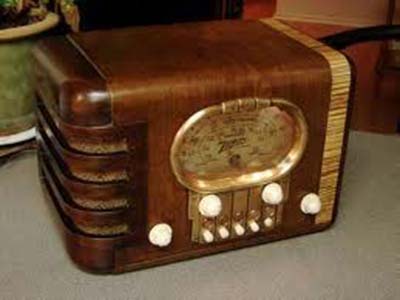
You can see the zebrawood stripe on the right edge of the cabinet.
Keep in mind, I've never done this before, so it was a total experiment.
Here is my project radio, stripped and ready to become a victim..
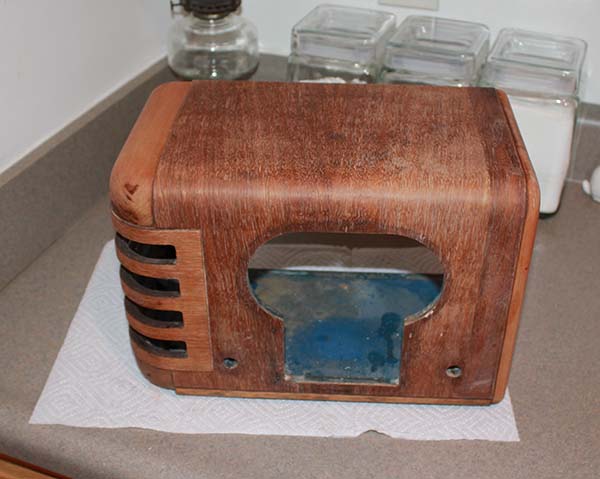
The artist formerly known as Puhpow! 8)
(This post was last modified: 03-17-2014, 03:25 PM by Jamie.)
Posts: 761
Threads: 56
Joined: Jul 2013
City: Kentucky
The first thing I did, was a Google search for Zebrawood. I found hundreds of images. You can find images of any kind of veneer you want. I ended up choosing one, right clicking on it, and saving it to my computer.
Then I loaded it up in Photoshop. You can use MS Paint, or any photo program that will allow you to edit JPG file.
I cropped the photo to use the section that I liked. The original stripe measured exactly one inch wide, so I edited the size of my stripe and made it one inch wide. Then, I copy/pasted to make it 17" long.
Here is the file I used..

The artist formerly known as Puhpow! 8)
(This post was last modified: 03-17-2014, 03:04 PM by Jamie.)
Posts: 761
Threads: 56
Joined: Jul 2013
City: Kentucky
Next, I printed it out on my ink jet printer.. It took two pages because my paper is only 14" long.
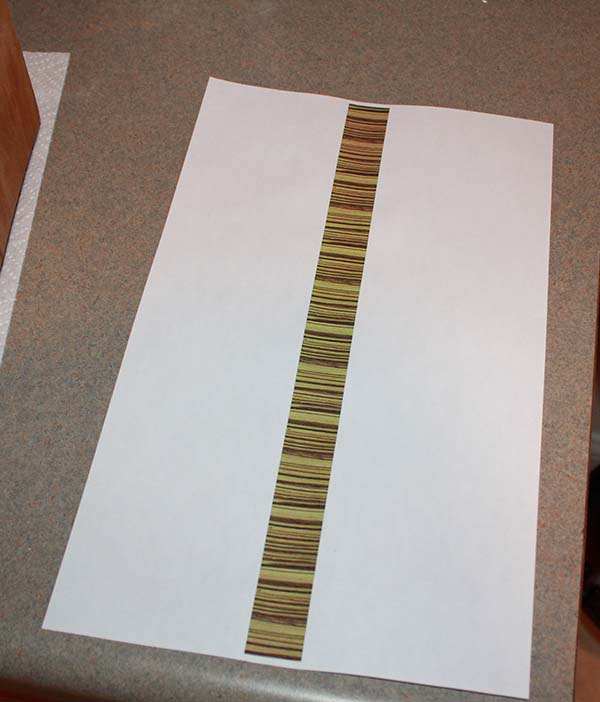
Then I cut it out....
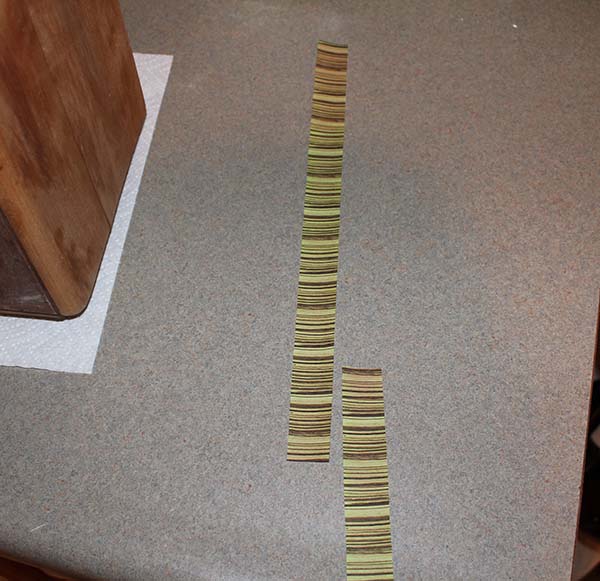
Now, I tested this on a scrap piece of wood first. If you try this, I recommend you practice a little as you go along...
The artist formerly known as Puhpow! 8)
Posts: 761
Threads: 56
Joined: Jul 2013
City: Kentucky
The practice session seemed to go well, so I decided to proceed. I used Elmer's Wood Glue, and spread the glue all over the back of the stripes. You cannot miss even a small area, you must coat the back of the paper entirely. ...
Then I stuck it on the cabinet...
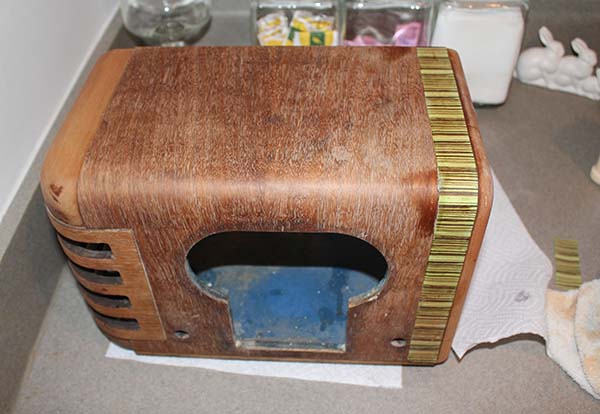
The artist formerly known as Puhpow! 8)
Posts: 761
Threads: 56
Joined: Jul 2013
City: Kentucky
Once you have the paper in the proper position, it is very important to squeeze out the excess glue. Just use your finger and make sure all the edges are glued down and there are no air bubbles. Clean up the excess with a damp paper towel. Then allow it to dry.
After it dried, I decided to coat the cabinet with sanding sealer. I do not know how ink jet inks react with lacquer. I always worry about fisheyes, or perhaps that the ink would dissolve and run. So, the next step was a nice coat of Mohawk Sanding Sealer..
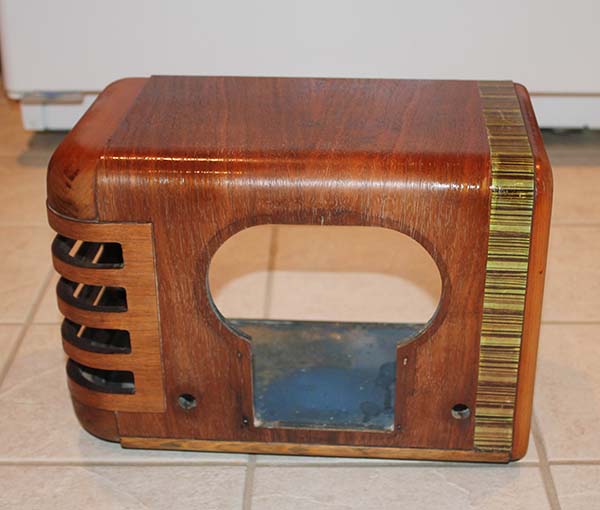
The artist formerly known as Puhpow! 8)
(This post was last modified: 03-17-2014, 03:05 PM by Jamie.)
Posts: 761
Threads: 56
Joined: Jul 2013
City: Kentucky
Alright.. lookin good!..Allow it to dry! ...
Next up was just to use regular refinishing technique. There are already threads on this, so I will skip those steps. Basically, I sprayed a light coat of universal walnut over the entire cabinet (including my paper finish.).. Then, I taped off the main cabinet and did the edges with Extra Dark Walnut. This was followed up with a few coats of Clear Gloss.
Final Result....
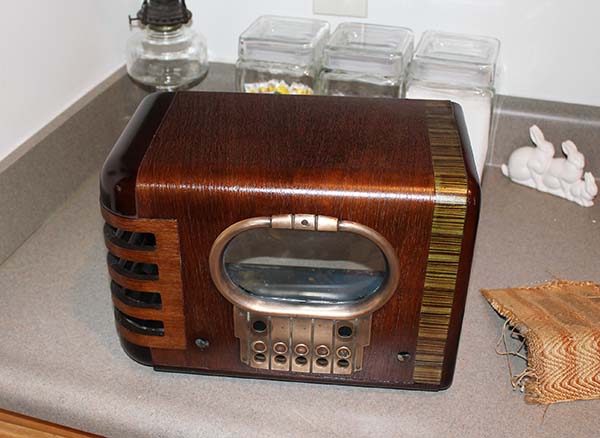
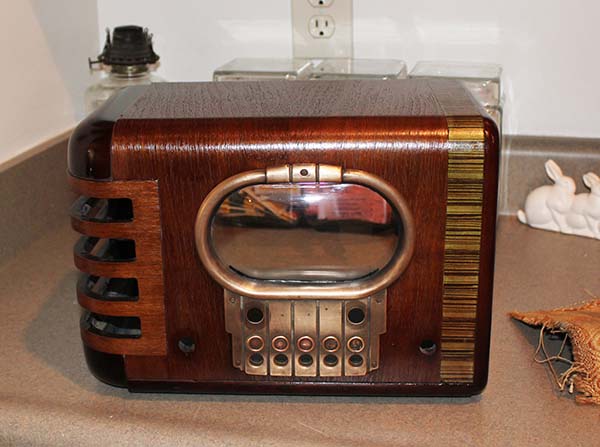
Vs
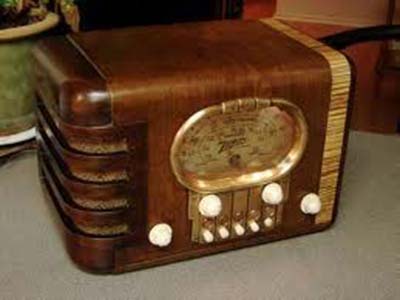
Original look that was desired...
Not too shabby!..
The artist formerly known as Puhpow! 8)
(This post was last modified: 03-17-2014, 02:57 PM by Jamie.)
Posts: 5,000
Threads: 267
Joined: Nov 2012
City: Bandon
State, Province, Country: OR
Posts: 4,106
Threads: 310
Joined: Nov 2013
City: Kings Park NY
Nice,
I am doing something similar with the radio clock lamp but it is 3 full sides and a top,lol
What paper did you use? just white paper?
Times I have been electrocuted in 2021
As of 1/01/2021
AC: 4 DC: 1
Last year: 6
Posts: 761
Threads: 56
Joined: Jul 2013
City: Kentucky
I used cheap white legal paper from Office Depot. Printer is an HP wireless inkjet. My next attempt will be on a Philco that's been sitting in the closet for 6 months. I have no idea how this technique will work on a large project. 
The artist formerly known as Puhpow! 8)
(This post was last modified: 03-17-2014, 05:23 PM by Jamie.)
Posts: 142
Threads: 15
Joined: Nov 2008
City: Glenshaw, PA
Nice work! I like how you left the grill area lighter than the edges and the rest of the cabinet. Nice looking contrast.
Posts: 139
Threads: 8
Joined: Aug 2013
City: Central PA
PuhPow, I really appreciate all of your tutorials! They provide some insight that perhaps things are now quite as difficult as they appear.
Posts: 761
Threads: 56
Joined: Jul 2013
City: Kentucky
Thanks Eric. I enjoy everything about the radio hobby. Of course, the electronics restoration work is what I love most. Cabinet work is just work.... but the best thing about cabinet restoration is that, unless you set it on fire or something, you can easily strip it and start over. So never be afraid to try something new....
That's not as true with electronics. You try something off the wall, or screw up and you can ruin a transformer or something, and then you've created a big problem.
The artist formerly known as Puhpow! 8)
(This post was last modified: 03-30-2014, 07:27 AM by Jamie.)
Posts: 5,000
Threads: 267
Joined: Nov 2012
City: Bandon
State, Province, Country: OR
Don't want to hijack the thread but I'll followup on the results of my Wards Airline photofinish that was a little larger piece. Seemed to work out well so far although I used the technique for using color laser copies described by Stewart Schooley and found here on PhilcoRadio rather than Puhpows approach.
Two photos, one shows an extra copy of the 11 x 17 laser print before its cut, coated and glued along with the glued down strips in place. The second shows the strips on the console before toning and lacquer.
[Image: https://www.dropbox.com/s/6uzz6pmg4tfc3a....jpg?raw=1]
[Image: https://www.dropbox.com/s/54f98qpxbbghm0....jpg?raw=1]
Posts: 761
Threads: 56
Joined: Jul 2013
City: Kentucky
Hey! That's lookin' good! Please post updates! I am no longer put off by cabinets with photo finish. If it's a simple stripe, it's much easier to restore than damaged veneer.
The artist formerly known as Puhpow! 8)
Users browsing this thread: 1 Guest(s)
|


