Posts: 1,544
Threads: 243
Joined: Sep 2012
City: West Bend, Wisconsin
As in woe is me...
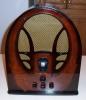
Just started work on restoring this model (I had previously restored a 41-265 console for a friend and liked it so much I sought out the table model version). When I took the chassis out of the cabinet, I knew something was amiss, as the speaker was just flopping around not mounted to anything. Held in place by the two wires attached to it. One of which had the end soldered to the pushbutton support bracket.
So, someone years and years ago substituted a permanent magnet speaker in place of the original electromagnetic one. The replacement speaker measures 2.8 ohms across the terminals, which is pretty darn close to the 3 ohms called for on the schematic. My question is, how can I safely make this speaker work in place of the original electromagnetic? I remember this was discussed in the past, and I seem to recall adding a resistor was in order, but if someone could point me in the right direction, that would be great. It may very well have worked, albeit not too well just flopping around in the cabinet.
Here's a link to a PDF file of the schematic. I have the code 121. And yes, I spent part of my Christmas Eve working on a radio  Merry Christmas!
http://www.nostalgiaair.org/pagesbymodel...013404.pdf
Greg V.
West Bend, WI
Member WARCI.org
Posts: 285
Threads: 27
Joined: Nov 2012
City: Tehachapi. California
Greg
I would use about a 1k ohm at 10 watts to start. It looks like you need to drop 95volts across #54 what use to be the field coil.
The main things to watch for are the voltage at what looks like #38A the 4 uf cap 190v and how hot the resistor gets.
You will be able to tell how close the 1K is once it is up and running. You might even start with a 1.5k ohm.
!!!!!!!!!!!!!!!!!!!RESISTANCE IS FUTILE!!!!!!!!!!!!!!!!!!!!!!
/\/\/\/\/\/\/\/\/\
[Image: http://philcoradio.com/phorum/images/smi...on_eek.gif] Chris
(This post was last modified: 12-24-2015, 08:46 PM by OZ4.)
Posts: 1,544
Threads: 243
Joined: Sep 2012
City: West Bend, Wisconsin
Alas, I was able to get the radio working with the existing permanent magnet speaker! The previous repairman evidently had the right idea, but only used a 500 ohm wirewound resistor. I replaced it with a 10 watt, 1250 ohm and it plays great. Voltages check out OK. I was also able to get the pesky band switch indicator light dial string restrung, so that works now too. Add to that setting the 5 station pre-sets to 5 local stations, and the set functions like it should have in 1941. Even that troublesome off/on pushbutton works!
Here are a couple of before and after restoration pics:
Before:

After:

Yes, I know I didn't use the correct grille cloth, but I had this on hand and quite frankly, I like it better than the original pattern. Incidentally, the fabric on the before restoration pic, as you can see, had been replaced sometime in the past with something that also wasn't correct. It was stained so I replaced it.
Believe it or not that is the original finish on the cabinet in the restored picture! There was that much grease and grime on the cabinet (the radio was probably used in a kitchen) that good 'ol GoJo and a soft bristle brush brought out the light wood original color stain again. All I had to do was touch up the black trim otherwise no other wood refinishing was done to the cabinet. The Tenite dial bezel was another story:


I had to carefully block and clamp the center section flat with wood then heat each end with a heat gun on low to VERY carefully bend each side panel back out again. It still wanted to spring back some despite several attempts, so finally I just used two tiny screws to hold each side flush to the cabinet. That and having to use clear silastic to glue the dial glass to it because everyone of those original little clips that held it in place broke with just the slightest touch. But that's all concealed inside the cabinet behind the dial back plate on the chassis. Steel wool and polishing compound brought the original sheen back to the bezel, so all in all it doesn't look too bad. It was just unfortunate that Philco used that stuff for dial bezels before the war. Of course they couldn't have imagined someone would still be using these radios 75 years later!

Greg V.
West Bend, WI
Member WARCI.org
Posts: 1,544
Threads: 243
Joined: Sep 2012
City: West Bend, Wisconsin
To give you an idea of just how dirty this cabinet was, here is how the top looked before the GoJo treatment:

And here it is after:

Greg V.
West Bend, WI
Member WARCI.org
Posts: 2,579
Threads: 338
Joined: Jun 2013
City: lawrenceville nj
WOW greg 
looks great 
lucky you with bezel 
sam
Some day, and that day may never come, I will call upon you to do a service for me. But until that day, accept this justice as a gift
mafiamen2
Posts: 18,427
Threads: 622
Joined: Oct 2011
City: Jackson
State, Province, Country: NJ
Greg,
Why "Alas"? Would you rather it did not work?
People who do not drink, do not smoke, do not eat red meat will one day feel really stupid lying there and dying from nothing.
Posts: 1,544
Threads: 243
Joined: Sep 2012
City: West Bend, Wisconsin
Huh? Wow. A better question would be why the nit-picking of single words and the over analyzing of them? But to appease you, by "alas", I meant that by using a higher value resistor as suggested by Chris, ALAS it DID work. Sheesh... 
Greg V.
West Bend, WI
Member WARCI.org
Posts: 13,776
Threads: 580
Joined: Sep 2005
City: Ferdinand
State, Province, Country: Indiana
--
Ron Ramirez
Ferdinand IN
Users browsing this thread: 1 Guest(s)
|
|
Recent Posts
|
|
54C Complete Teardown/Rebuild
|
| Hello Roy,
here is this one
sincerely Richardradiorich — 12:45 AM |
|
54C Complete Teardown/Rebuild
|
| Richard,
Had grabbed it already but thank you just the same. I find myself wanting to find some way to block out the...glyphmon — 12:03 AM |
|
54C Complete Teardown/Rebuild
|
| Hello roy,
here is a link to the schematic .
Sincerely Richardradiorich — 11:54 PM |
|
54C Complete Teardown/Rebuild
|
| Richard,
The Silvertone 2014 also is a transformerless set, so I am incorporating a 1:1 600 ohm audio isolation transfo...glyphmon — 11:37 PM |
|
Preliminary work on wife's Silvertone 2014
|
| Did an alignment today which was interesting. IF alignment went great, almost all was already spot-on. Adjusting on th...glyphmon — 11:35 PM |
|
54C Complete Teardown/Rebuild
|
| The main problem with adding a Bluetooth input is that this set lacks a traditional power transformer to isolate it from...radiorich — 11:19 PM |
|
54C Cabinet Refinish
|
|
I started stripping this cabinet before it got super chilly out because I knew I wasn't going to be able to work on ...glyphmon — 11:18 PM |
|
54C Complete Teardown/Rebuild
|
| While I'm waiting to wrap up the final steps on my wife's Silvertone 2014, I started disassembly on the next project. O...glyphmon — 11:07 PM |
|
Preliminary work on wife's Silvertone 2014
|
| Hello roy,
that great news glad it worked out for you !!
Sincerely Richardradiorich — 10:50 PM |
|
Preliminary work on wife's Silvertone 2014
|
| Safety caps arrived today. Soldered one in and had a successful first power-up. No magic smoke escaped and it tunes in...glyphmon — 09:53 PM |
|
Who's Online
|
| There are currently no members online. |

|
 
|