Making a Set of Base Moulding
Posts: 1,409
Threads: 72
Joined: Oct 2007
City: Linn Creek, MO
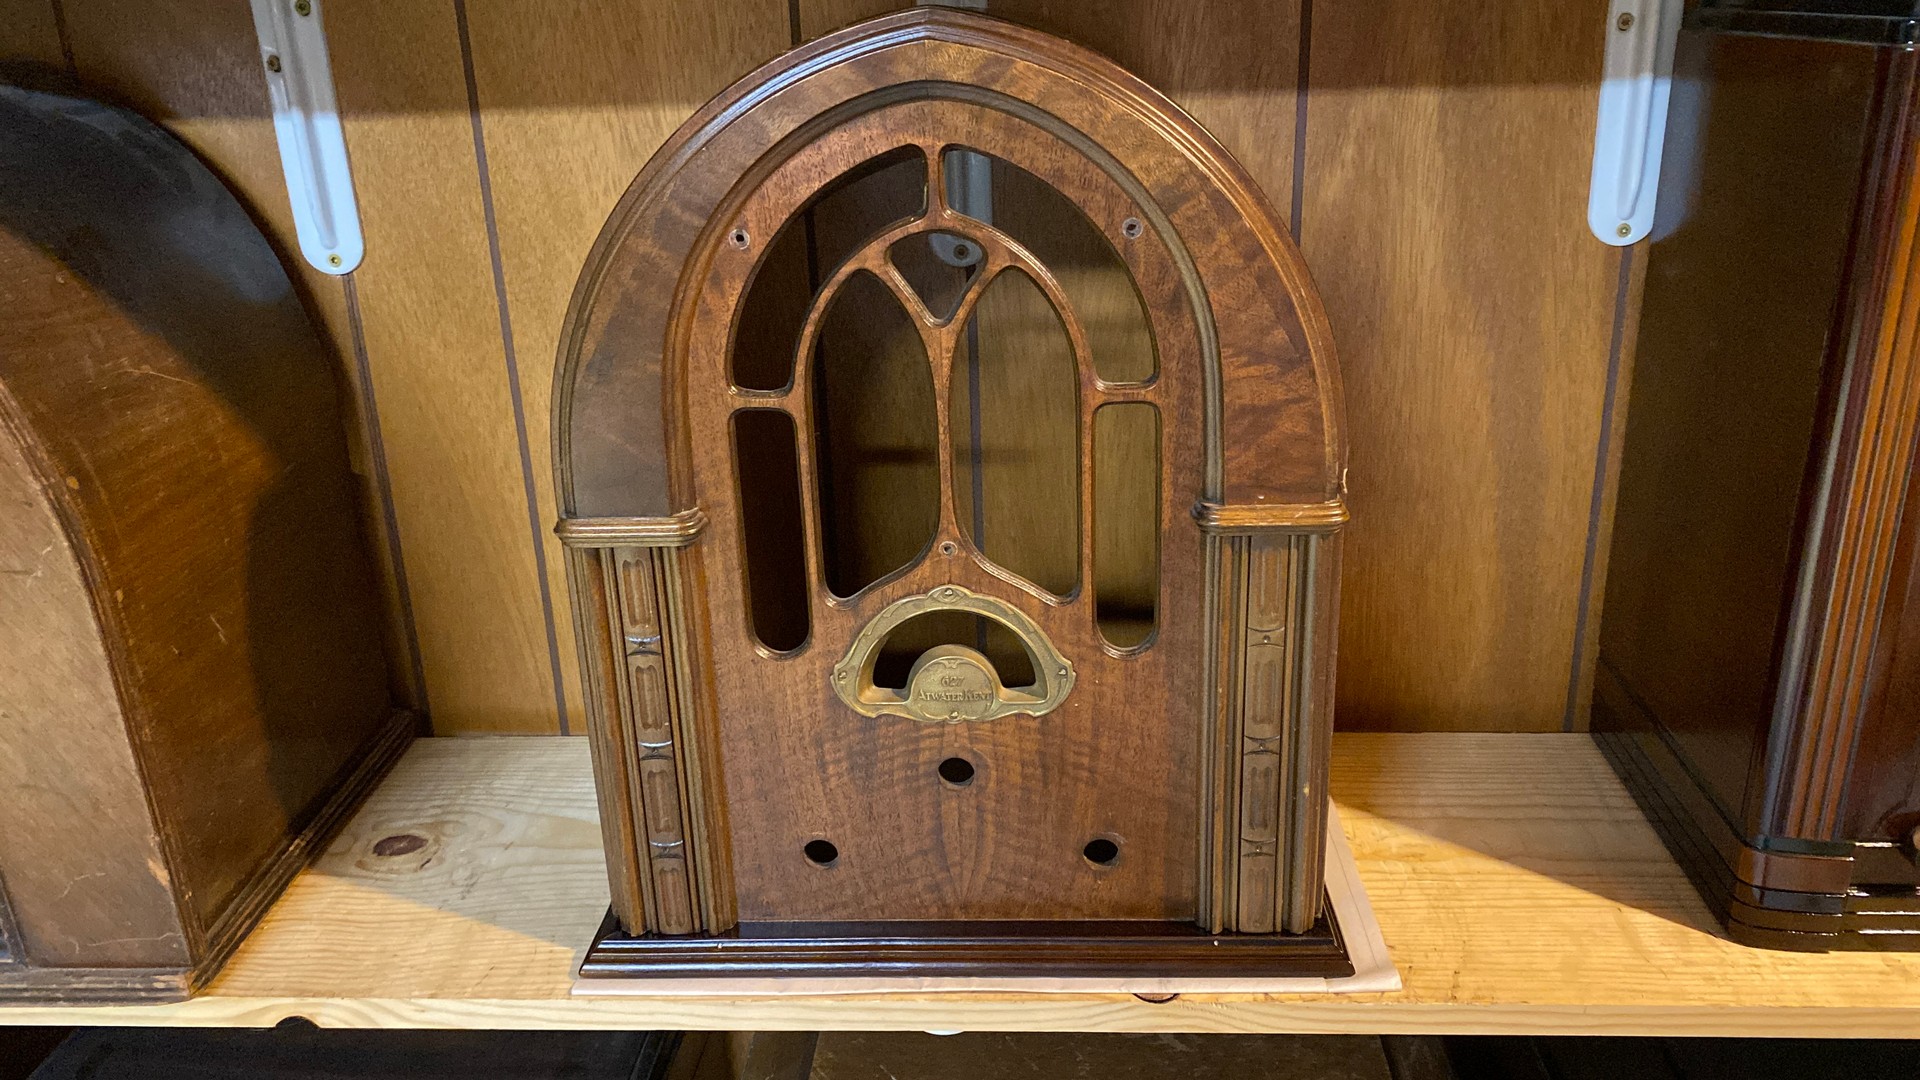
This is a "how to" (or at least the way I do it) on making base moulding. I will be making a one off set for an Atwater Kent 627.
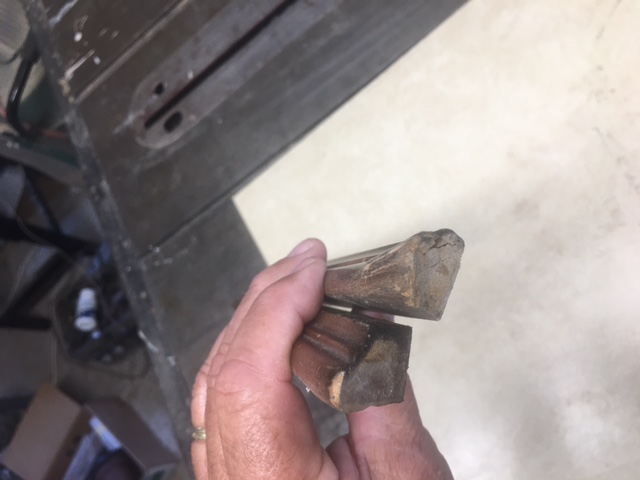
Badly damaged original base.
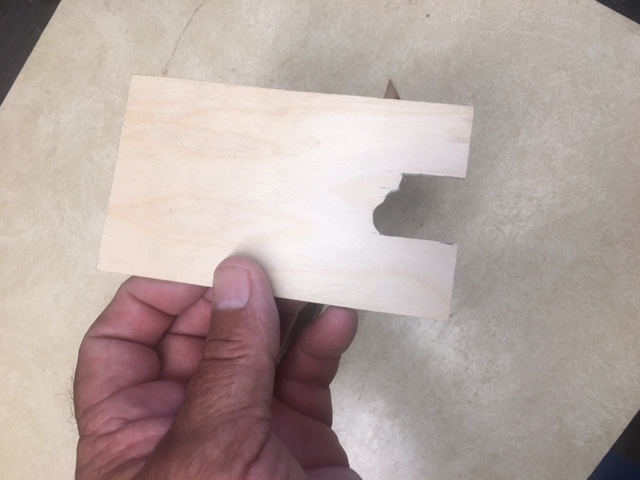
I start by making a pattern using 1/8 ply. First a notch is cut roughly the shape of the original trim but, a little larger.
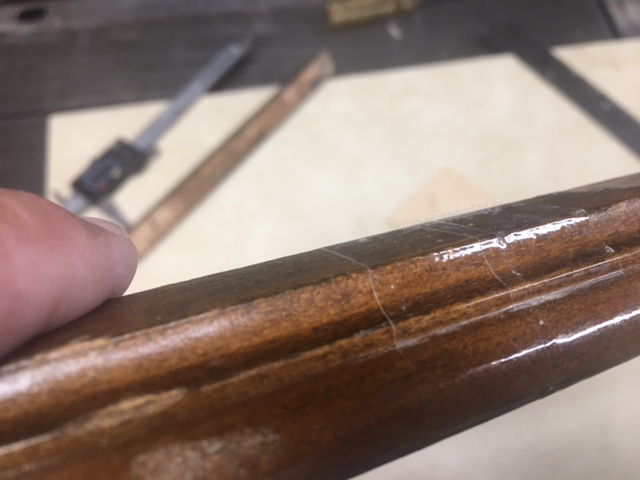
Cellophane tape is applied to an undamaged section of the original trim to protect it.
M R Radios C M Tubes
Posts: 1,409
Threads: 72
Joined: Oct 2007
City: Linn Creek, MO
Posts: 16,467
Threads: 573
Joined: Oct 2011
City: Jackson
State, Province, Country: NJ
Steve,
Then what? (I am a total ingnoramus in woodworking, so ask forgivenes if this is a stupid question).
How is this mold used to malke the actual base trim?
People who do not drink, do not smoke, do not eat red meat will one day feel really stupid lying there and dying from nothing.
Posts: 1,409
Threads: 72
Joined: Oct 2007
City: Linn Creek, MO
I'm now ready to grind the knives and set up the moulding head. Because this set of knives will only be used to run a very few feet, I am going to cheat just a little bit. There are two knives in the head, one will be ground to perfectly match the original trim, the other will be ground a slight bit loose. This makes the whole process so very much simpler. One knife will do the cutting, the other will act as a counter balance. By using a slightly slower feed rate, the cut will still be excellent.
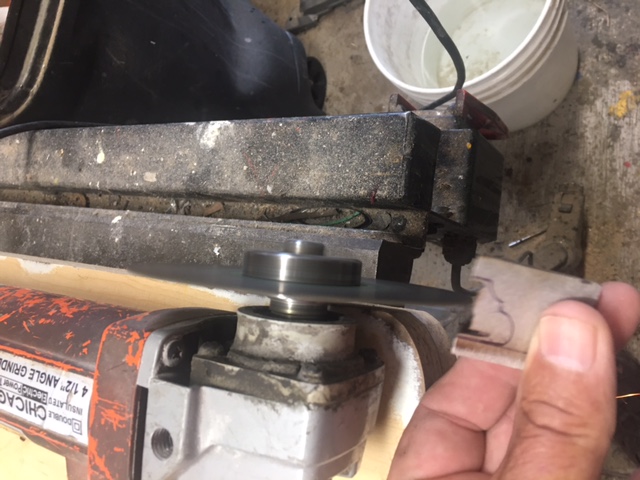
I used the pattern to draw the profile on the knife blank. Using an angle grinder, mounted on a board, I slowly and carefully grind the knives. After grinding, I use a tapered stone to hone the cutting edge.
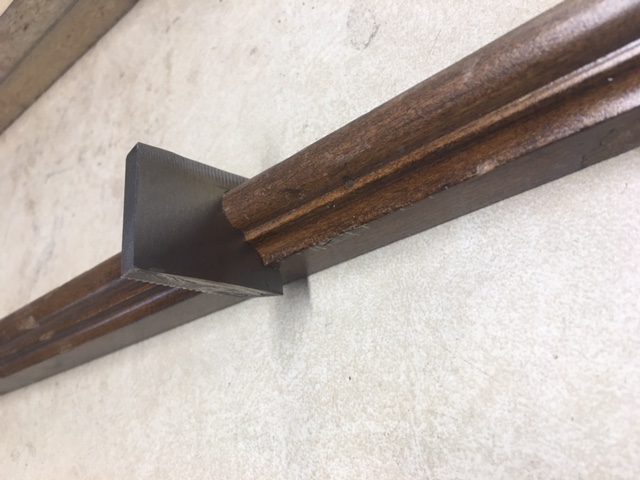
Checking to make sure knife matches the original trim.
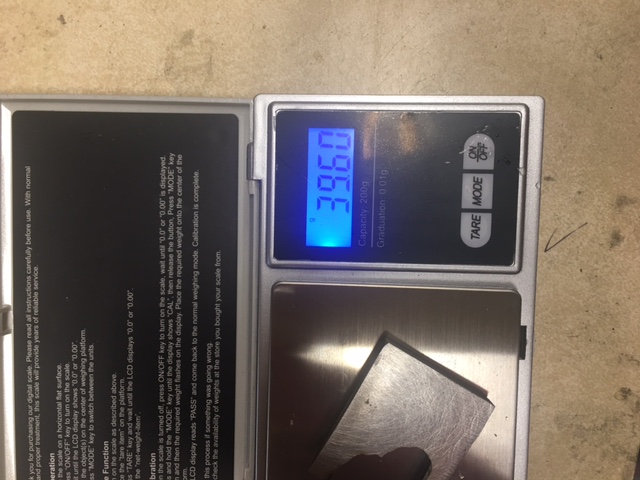
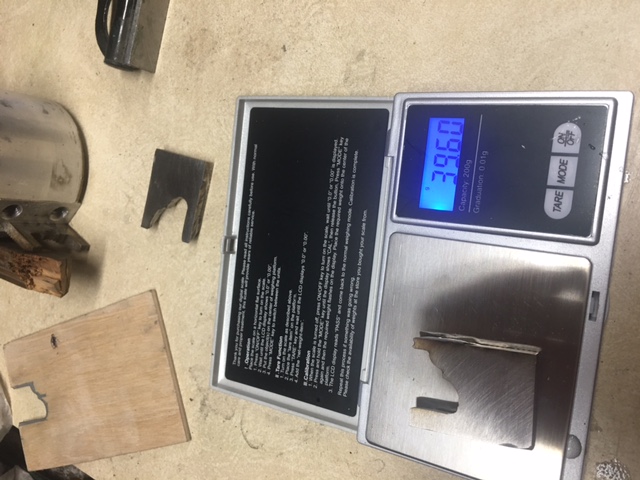
Knives are weighed on a gram scale and material removed as necessary to achieve balance.
M R Radios C M Tubes
Posts: 1,409
Threads: 72
Joined: Oct 2007
City: Linn Creek, MO
Mike, I will be using a wood shaper to do the actual cutting. It is like a giant router, only the machine is fixed and the work moves. I will get to that.
Steve
M R Radios C M Tubes
Posts: 1,409
Threads: 72
Joined: Oct 2007
City: Linn Creek, MO
Setting up the moulding head.
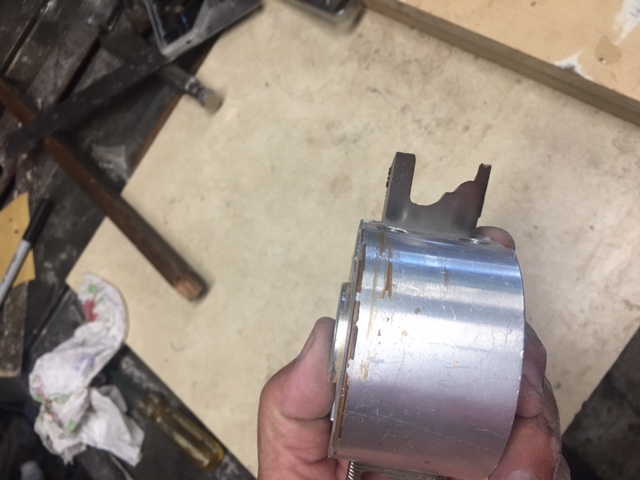
The knives are installed in the head and carefully indexed. The back side of knife blanks are corrugated as is the head so once the set screws in the gibs are tightened there is no chance a knife could be thrown from the head.
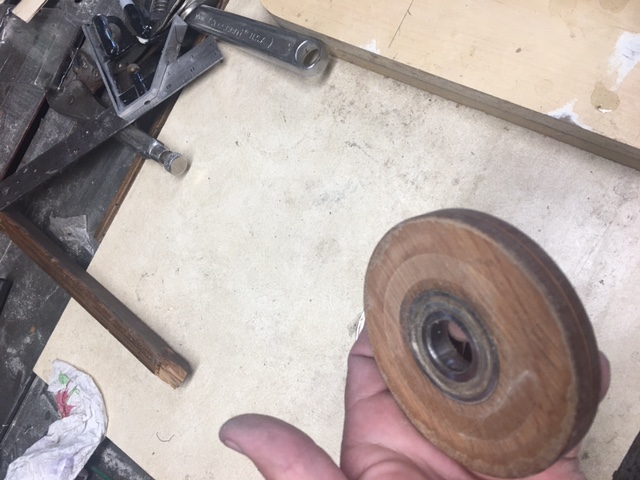
The rub collar goes on the spindle under the moulding head.
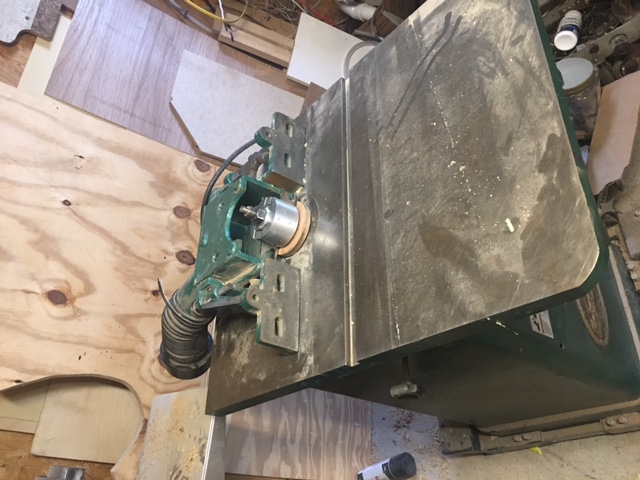
The head has been installed on the shaper, We are now ready to make the chips fly!
To Be Continued
M R Radios C M Tubes
Posts: 1,409
Threads: 72
Joined: Oct 2007
City: Linn Creek, MO
Now, the actual cutting.
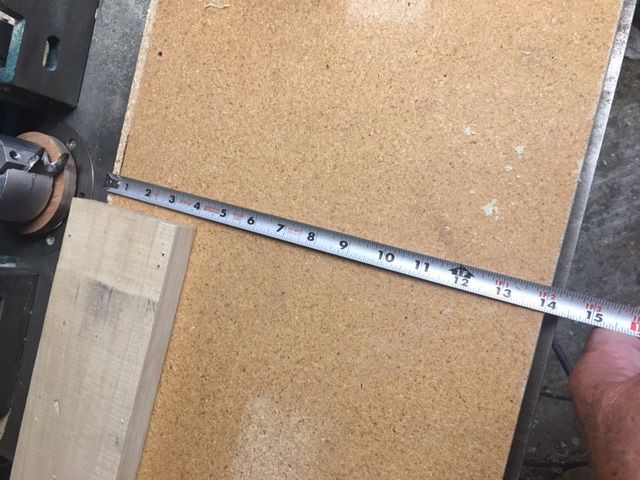
Before someone starts ragging me about having no guarding, I want to say, when using a wood shaper even well designed guards will only provide minimal protection. The best protection is to have a clear mind, pay attention and keep your hands far away from the cutting head. One mistake and your fingers will hit the wall before you know what happened. You can see I am using a very large guide board, this allows me to keep my hands at least a foot from the head. The work piece is screwed to the guide board, the guide board runs along the rub collar to control the depth of the cut.
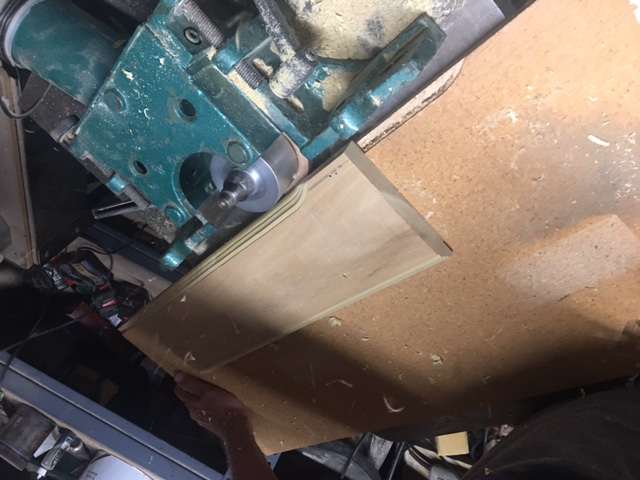
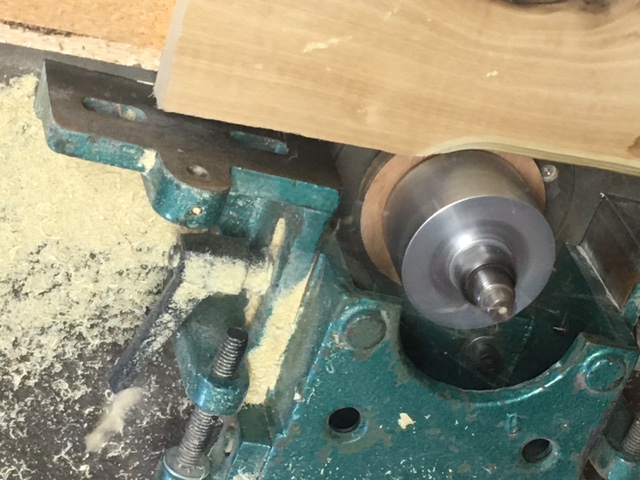
Making the cuts.
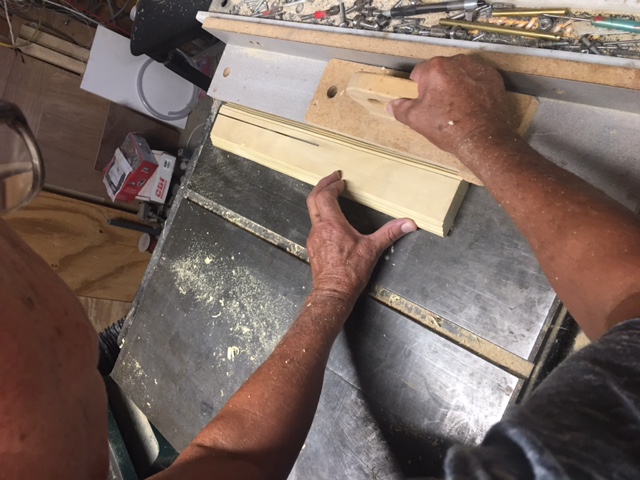
Using the table saw with an axillary fence and a push block to part the trim.
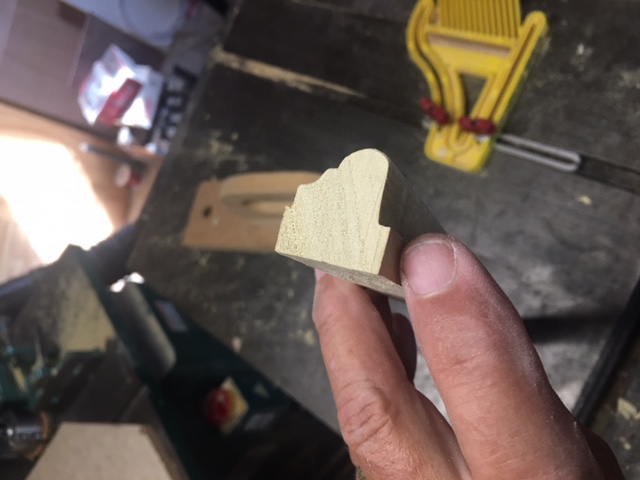
After parting, you can see we have a small step top and bottom that will be removed on the table saw
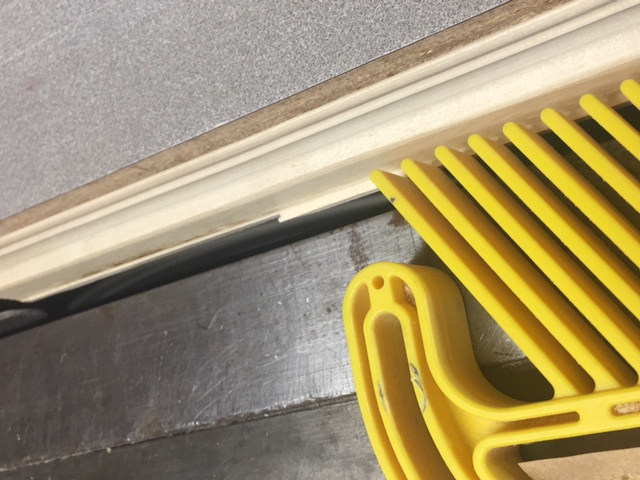
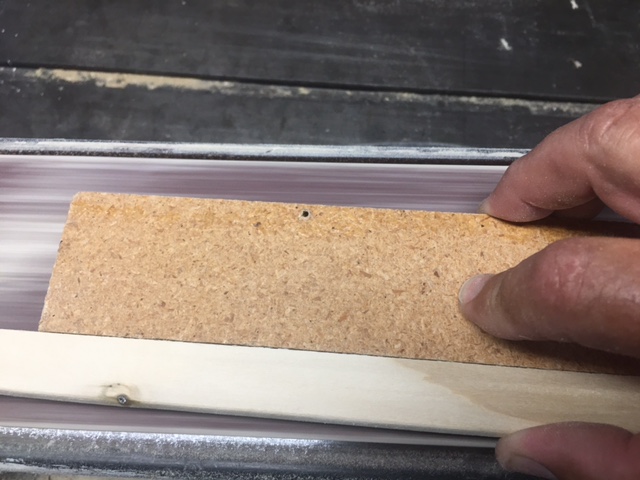
The steps are sawed on the table saw then the last bit is removed on the belt sander.
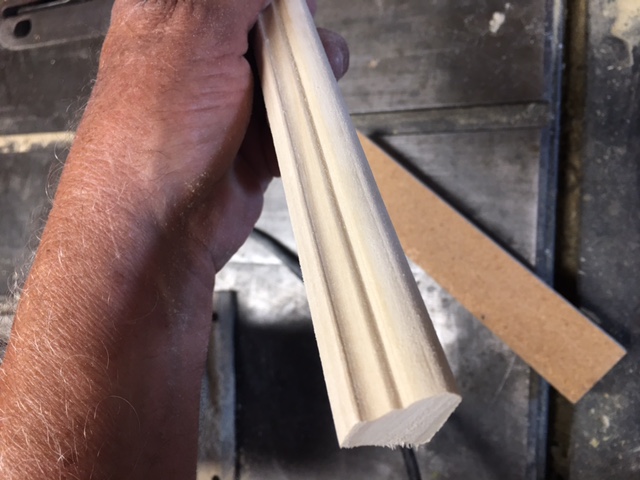
The finished trim.
M R Radios C M Tubes
Posts: 182
Threads: 8
Joined: Apr 2023
City: Roanoke
State, Province, Country: Virginia
Steve -
You must be a very experienced woodworker. I have seen the technique of creating custom knives for a shaper to reproduce antique wood profiles on shows such as "This Old House," but it is way above my pay grade. Thank you for posting the information - I am sure that there are Phorum members who are advanced cabinet restorers and who will benefit from it.
Dale H. Cook, GR/HP/Tek Collector, Roanoke/Lynchburg, VA
https://plymouthcolony.net/starcity/radios/
Posts: 16,467
Threads: 573
Joined: Oct 2011
City: Jackson
State, Province, Country: NJ
This is fascinating stuff.
Thanks, Steve, even if I don't have the slightest idea as to how to do these kinds of things, I am still in awe.
People who do not drink, do not smoke, do not eat red meat will one day feel really stupid lying there and dying from nothing.
Posts: 5,158
Threads: 273
Joined: Nov 2012
City: Wilsonville
State, Province, Country: OR
Thanks Steve! Wonderful skills and knowledge!
Posts: 4,856
Threads: 54
Joined: Sep 2008
City: Sandwick, BC, CA
The last shaper I saw in use had a power feed, rubber rollers, and an iron fence, so you were well away from the cutting head. You can do the same with feather boards of course. I have a router tables but no a shaper, much smaller in scale, though grinding cheap stock router bits is certainly an option, so is a molding head cutter in a table saw, though that is arguably more dangerous then the shaper. There are some people who can do all of this with a series of molding planes too, but I can barely use a jack plane.
Regards
Arran
Posts: 13,776
Threads: 580
Joined: Sep 2005
City: Ferdinand
State, Province, Country: Indiana
I'll take it from here...
Steve sent enough trim pieces to make three sets of trim - if I was careful with cutting it, that is. Otherwise, I had enough trim to compensate for any errors in cutting.
I tried to be careful.
Here is the result after cutting.
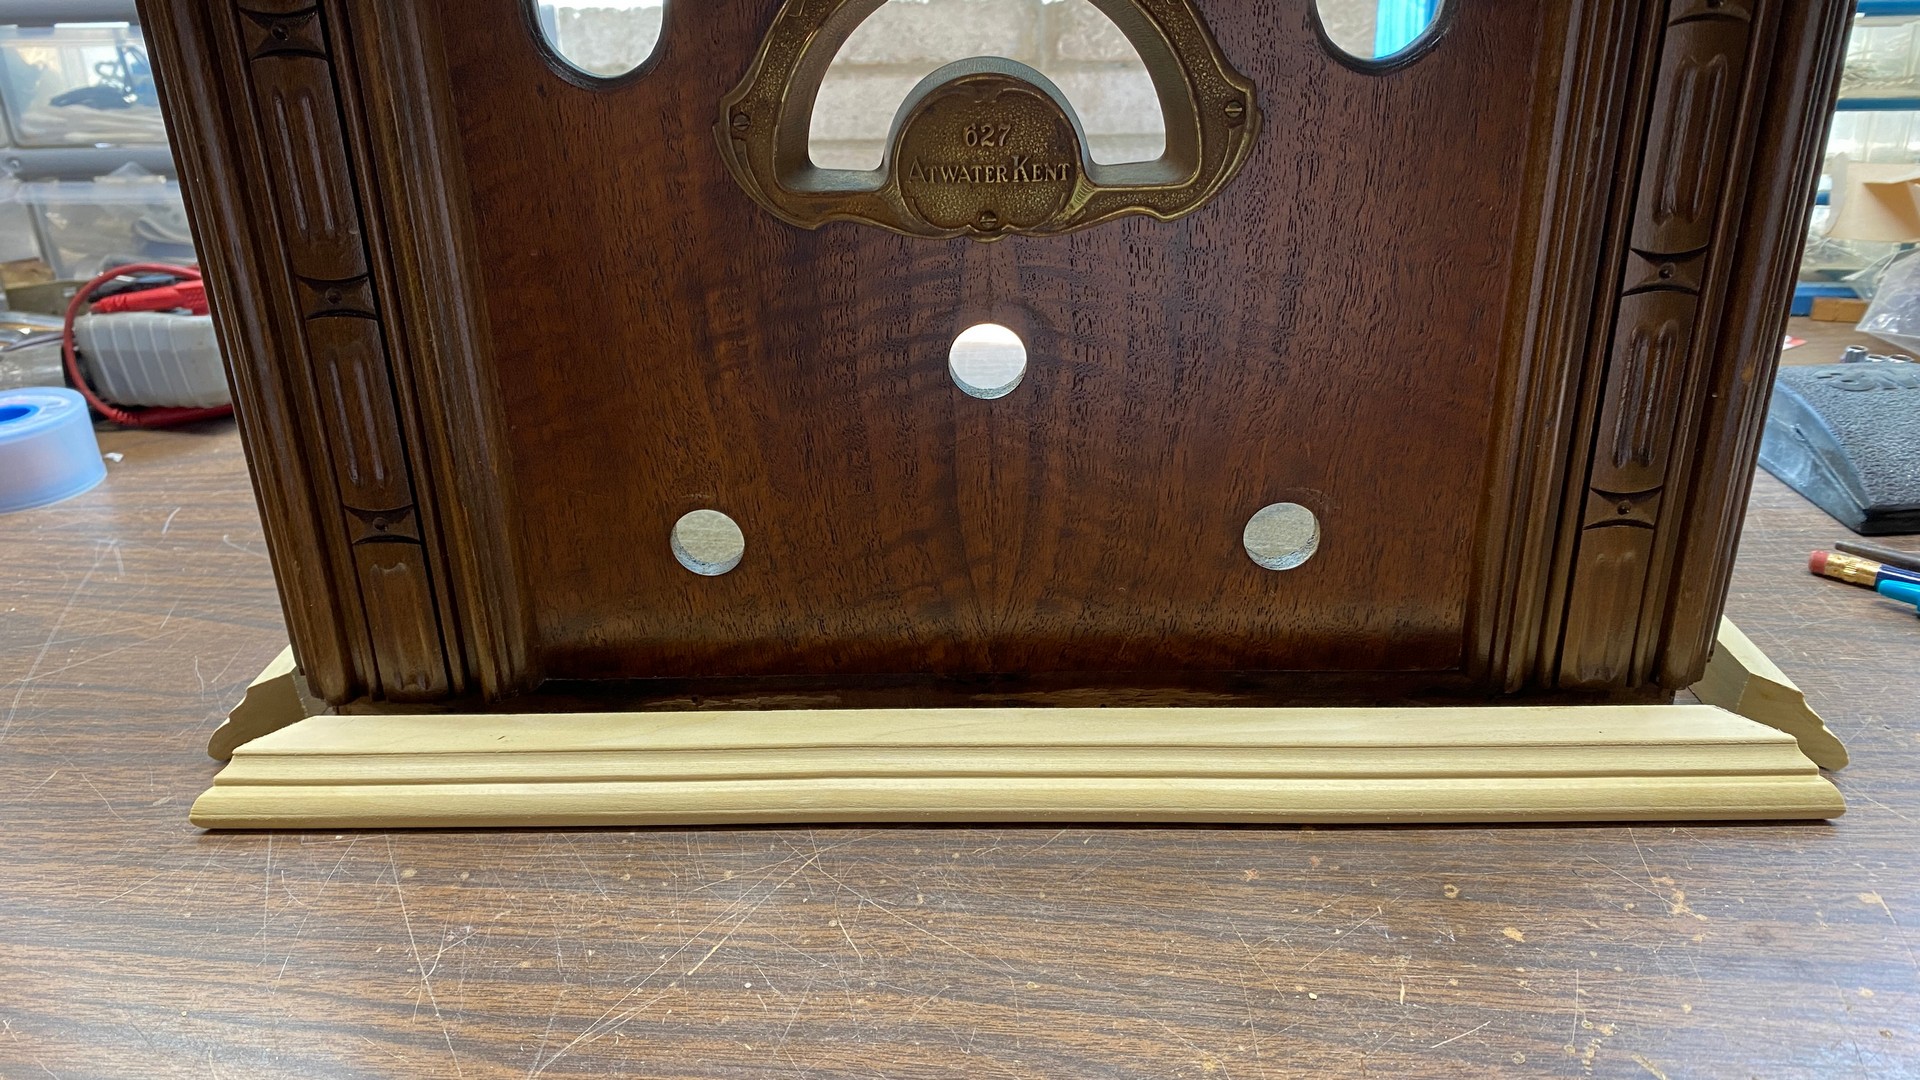
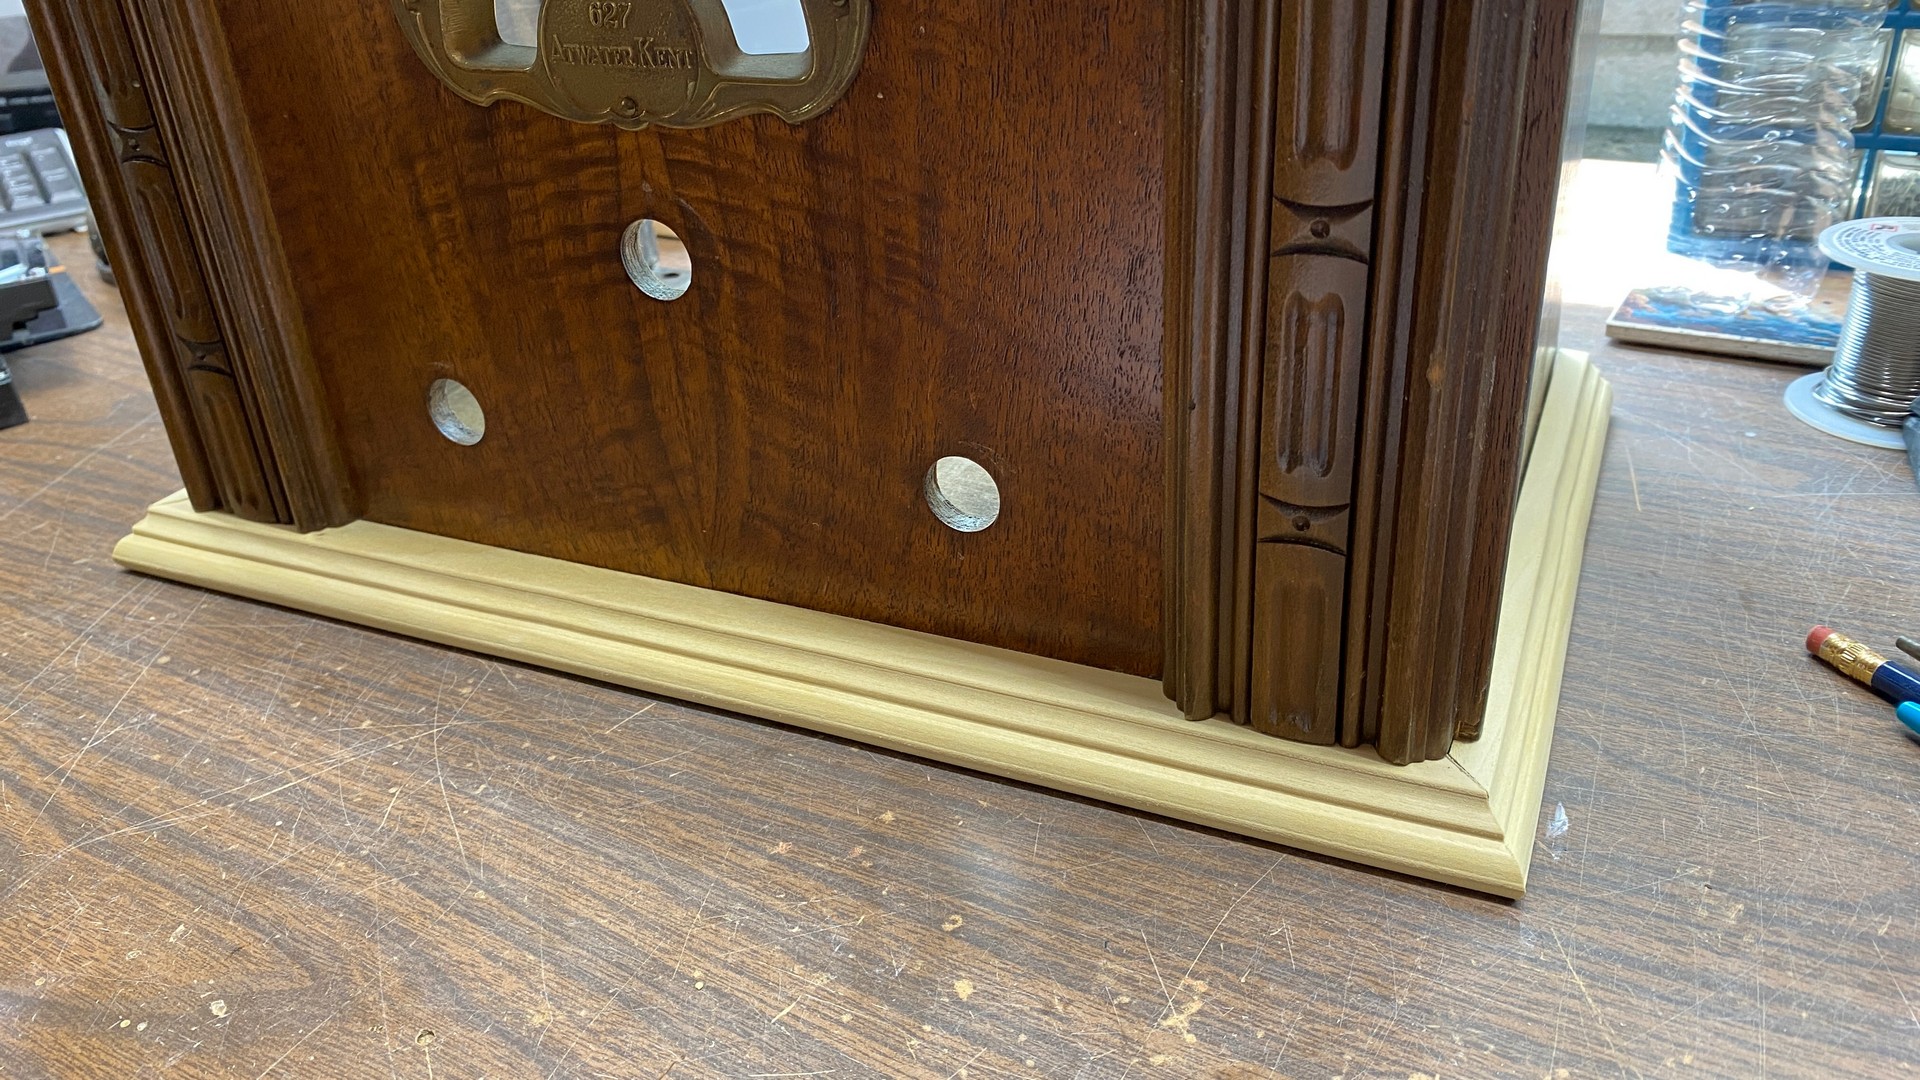
Eventually, I finally got around to toning the trim. I did not like the results at first, as none of the toners I had in stock came anywhere close to replicating the original color of the old trim.
So I stripped it, and started over by first spraying with sanding sealer, then toner.
This time, I used one of the cans of toner I had purchased more recently - Mohawk Ultra Classic Medium Oak/Tavern Pine. A test spray seemed to indicate this color was close to the color of the trim surrounding the cabinet's front arch, so I used it.
As luck would have it, the toner did not go on evenly on the first coat, so I was forced to apply a second. This not only made the trim dark, but the toner also ran on top of the trim!
I was going to trash that trim and cut three more pieces, but I decided to try something first. I took the trim to my workbench once the lacquer was dry, and wet sanded the tops (only) of the trim pieces until most of the toner was gone. Then I gave the tops of the trim pieces two more coats. This seemed satisfactory (if dark), so all three trim pieces were given two coats of clear semi-gloss lacquer.
Here is the result...
Yes, the trim is darker than the rest of the cabinet, but since I had no Mohawk colors which came close to the original colors, this is a pleasing contrast, I think.
I still need to fill in the nail holes with wood filler, then dab a bit of Medium Oak/Tavern Pine on each filled spot. And then to add the new grille cloth, and possibly restore the chassis this fall or winter, Lord willing.
The cabinet still carries some "battle scars", but after careful gluing and the addition of the new trim, it looks much better than it did when it arrived.
Thank you so much, Steve!   
--
Ron Ramirez
Ferdinand IN
Posts: 1,832
Threads: 117
Joined: May 2008
City: Omak
State, Province, Country: WA
Hello Steve,
Well Done I have used a shaper but I have never made my own profiles and I have a molding knife set for my Radial arm saw or to use in my table saw .
Ron ,
That trim work looks nice of that radio !
Sincerely Richard
Posts: 1,409
Threads: 72
Joined: Oct 2007
City: Linn Creek, MO
Great job! It can be really tough to tone "white" wood to match darker veneers. I have many times had to wipe the toner off with lacquer thinner and try again, sometimes several times before being satisfied. I always recommend finishing trim before installing for this reason. That is a nice looking radio.
Steve
M R Radios C M Tubes
Users browsing this thread:
|
|
Recent Posts
|
|
The list of my radio & TV collection!
|
| Peter;
I found an old thread on the ARF, I was wrong about when Rogers took over DeForest Crosley, it looks like it wa...Arran — 06:15 AM |
|
The list of my radio & TV collection!
|
| Thank you Arran, this is very interesting information. With your permission, I will definitely use it when I make a vide...RadioSvit — 04:14 AM |
|
The list of my radio & TV collection!
|
| Peter;
For a start your DeForest Crosley 6D632 was a 1936-37 model, and I believe it had six tubes, and 3 wave bands,...Arran — 03:07 AM |
|
AES type of Battery Eliminator has hum in B+
|
| This is interesting, they actually designed the B+ side with some form of voltage regulation, I think? Most of the B+ su...Arran — 02:21 AM |
|
AES type of Battery Eliminator has hum in B+
|
| They are trying to use a regulator. Essentially it is an LDO schematic. LDOs are supposed to greatly reduce ripple, so t...morzh — 12:11 AM |
|
AES type of Battery Eliminator has hum in B+
|
| So, I just built a 90 volt 40ma battery eliminator for a farm radio and had to use 1000 mfd for the input filter cap to ...RodB — 10:31 PM |
|
AES type of Battery Eliminator has hum in B+
|
| Caps of 1,000 uF 250V are about $7 in Mouser.
C1 could be increased.
A NTC inrush limiter could be employed to limit t...morzh — 10:24 PM |
|
AES type of Battery Eliminator has hum in B+
|
| Bruce B — 09:41 PM |
|
AES type of Battery Eliminator has hum in B+
|
| Bruce
Could you post the schematic if this power supply?morzh — 09:31 PM |
|
AES type of Battery Eliminator has hum in B+
|
| Hello All,
I have built a battery eliminator using the most popular AES K101a. Using plans and all the AES parts order...Bruce B — 09:27 PM |
|
Who's Online
|
There are currently 2406 online users. [Complete List]
» 1 Member(s) | 2405 Guest(s)
|
|
|

|
 
|


![[-] [-]](https://philcoradio.com/phorum/images/bootbb/collapse.png)


