40-180 Restoration First Steps Question
Posts: 285
Threads: 14
Joined: Nov 2005
City: Nashville, TN
Hi tfonzart,
You mention about the button fitting through the holes is not good. You can put a dot of cheap rubber cement to hold in place, but most times they fit snugly.
The poor fitting between cabinet and the buttons is no doubt the tuner section needing some new mounts. They flatten after this long so the tuner assembly drops low. Ever see a nice looking radio with a round dial, but the dial sits low in the window? Same thing. Nothing worse than seeing a non centered dial in the cutout. Well I guess there are worse things.
Renovated Radios has mounts you'll have to buy them by size, I don't know if he lists model numbers and the part #s
Some will use grommets from the hardware store, but often they can be too hard and not squishy enough.
Installing the mounts, you can do one at a time to keep things pretty much lined up.
@RodB All the ones I've seen were the straight, flat pieces the button slips onto.
Posts: 35
Threads: 3
Joined: Apr 2026
City: Andover
State, Province, Country: MN
Good suggestions Mike and Rod!
Posts: 35
Threads: 3
Joined: Apr 2026
City: Andover
State, Province, Country: MN
Hey Gary - thanks for the suggestions.
I do have mounts so everything is sitting properly.
I was able to place a small piece of tape on the posts that the buttons clip on the end to and that was enough friction for them to stay on properly.
Also found a solution to the glass inlay
Took a piece of cloth off a new cloth wire, split it and was able to use that to slip the glass inlay inside the split cloth on each end. Worked surprisingly well.
Posts: 35
Threads: 3
Joined: Apr 2026
City: Andover
State, Province, Country: MN
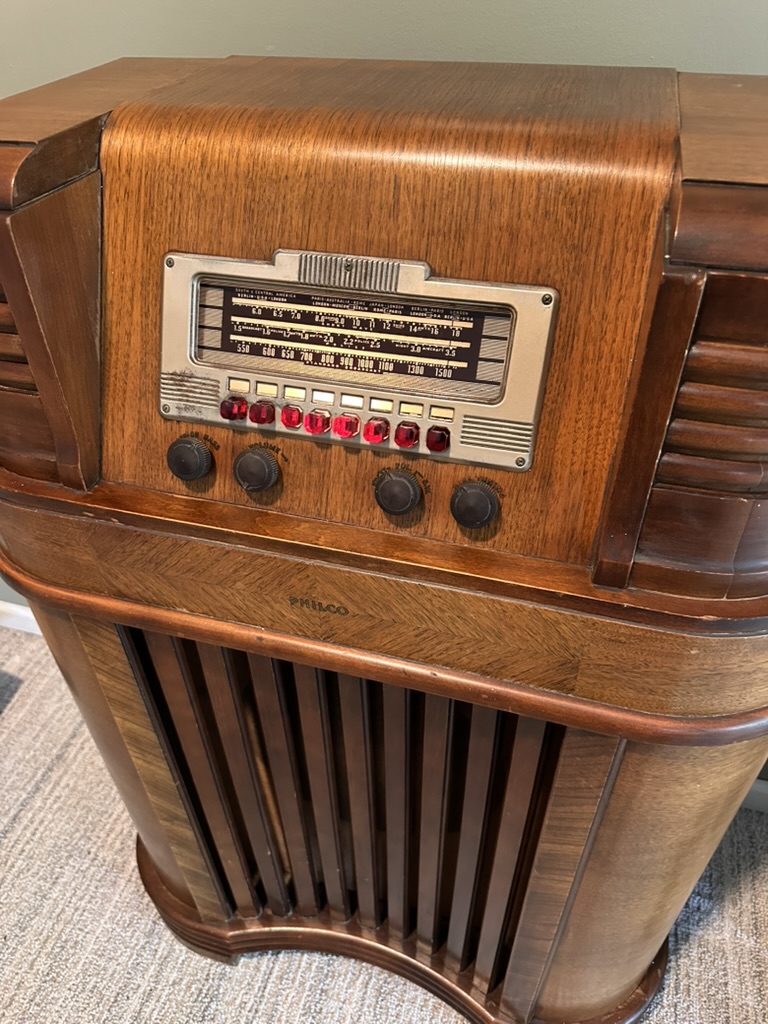
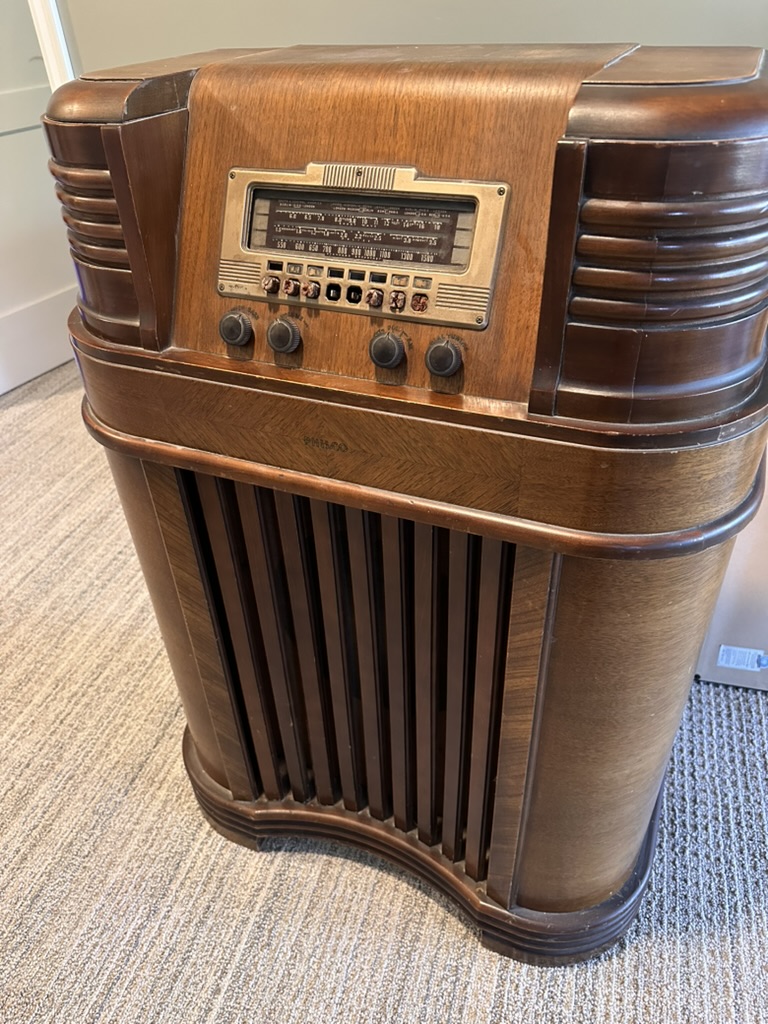
Starting to put everything back together now.
Everything seems to work (though I'm not picking up any shortwave even after connecting to the antenna in the console.)
Overall the reception through the broadcast band is pretty good with noise in the signal dependent on which outlet I use in the house.
A lot of cabinet cleanup, with some restore-a-finish in a few places.
Also, need to somehow replace the station labels - suggestions for that?
Overall, I learned just a ton. Made a number of dumb mistakes in retrospect and still so much to learn.
Thanks for all the guidance along the way!
After:
Before:
Posts: 1,799
Threads: 55
Joined: Feb 2015
City: Roseville, MN
Posts: 35
Threads: 3
Joined: Apr 2026
City: Andover
State, Province, Country: MN
Posts: 75
Threads: 7
Joined: Oct 2017
City: bloomfield, ct
Hi tfonzart,
When you print the labels, I would suggest using a 30 lb. paper, or a matte presentation paper as opposed to regular printer paper. Both the 30lb and presentation papers are thicker than the regular printing paper and disperse the light from behind the labels better
I would also suggest having the labels printed on a laser printer as opposed to an ink jet as the printing with a laser printer is less prone to U V fading. If you do print using an ink jet printer, you can spray the printed labels with an Inkjet print fixative (Local art supply stores as well as Amazon carry this product). This will seal and protect the printing from u v fading as well as water and fingerprints, etc.
Fran
Posts: 35
Threads: 3
Joined: Apr 2026
City: Andover
State, Province, Country: MN
Really helpful.
Thanks Fran!
Posts: 285
Threads: 14
Joined: Nov 2005
City: Nashville, TN
Nice work tfonzart!
Catching up on replies 
If and when you address the metal escutcheon, I found that Duplicolor 'Brass" is close to original. They used to have shorty spray can in their Odds n Ends paint line. It looked good and didn't have the flashy, cheap look of other "gold" paints.
The reproduction pushbuttons really make a difference.
Take care!
Posts: 35
Threads: 3
Joined: Apr 2026
City: Andover
State, Province, Country: MN
Thanks Gary!
Appreciate the escutcheon recommendation!
Posts: 3,190
Threads: 226
Joined: May 2008
City: Omak
State, Province, Country: WA
Hello tfonzart,
I really like those buttons they really look great that cabinet reminds me of my general Electric model L-916 .
Sincerely richard
Users browsing this thread: 1 Guest(s)
|
|
Recent Posts
|
|
Philco 71 Code 125
|
| Ok guys. Thanks for the input. As for AI this is why I ask the experts.
Dandconant — 07:39 AM |
|
Philco 71 Code 125
|
| Technically, that's C-. B- is chassis ground. The resistor between chassis ground and the HV center tap makes the HV c...MrFixr55 — 11:24 PM |
|
54C Cabinet Refinish
|
| hello Roy,
I’d follow Arran’s suggestion and use automotive gasket material, which I keep around for situations like th...radiorich — 10:22 PM |
|
Philco 71 Code 125
|
| This might be one of those cases where it's a ground to an AC voltage and B- to DC.RodB — 08:22 PM |
|
Philco 71 Code 125
|
| Really Rod? I know you would not steer me wrong but AI say this is a short circuit? What if I moved the 6 volt center ta...dconant — 06:40 PM |
|
54C Cabinet Refinish
|
| Roy;
Personally I would have left the asbestos alone if it were my set, but you can find a modern substitute that som...Arran — 04:51 PM |
|
Philco 71 Code 125
|
| Looks like that might be the B- buss, so that would be correct.RodB — 01:32 PM |
|
Philco 71 Code 125
|
| I noticed on the code 121 schematic the center tap for the 6 volt winding and hv winding are tied together. Is this corr...dconant — 12:16 PM |
|
Philco 45-6365 Universal IFT Instruction Manual
|
| The Philco Parts Catalog for 1942 shows it as usable for 175 kHz, 260 kHz, and 465 kHz. The instructions will show how t...DaleHCook — 11:19 AM |
|
Stromberg Carlson 1500 Squeal
|
| Hello Rob,
I agree with you—I have one here at my house that I need to check out. It’s way over-engineered just to make...radiorich — 11:05 AM |
|
Who's Online
|
| There are currently no members online. |

|
 
|







