Posts: 139
Threads: 8
Joined: Aug 2013
City: Central PA
All caps have been changed with the exception of a mica block at the point of AC input. There is one original resistor left in the chassis. Somehow it got skipped or was not on the official parts list when I ordered my replacements. The resistors that I did remove were all very close to spec - within 5-10%. I will measure this one and see about a replacement. The original caps were consistently 50-60% above spec.
The most obvious starting place seems to be the remaining tubes. I know someone with a tube tester that I might be able to impose on for a few tests. Is there a particular tube tester or set of testers that would be most helpful for me to purchase?
Posts: 16,476
Threads: 573
Joined: Oct 2011
City: Jackson
State, Province, Country: NJ
Go with a Hickok and you won't regret it.
As for the mica, the AC block is not mica. It is paper. It will not however cause motorboating.
Also if something says Micamold, it has nothing to do with mica, it is a trademark.
Posts: 1,824
Threads: 114
Joined: Jul 2014
City: Sneedville, TN
I use a Simpson 305 tube tester for most of my testing of tubes, and an EICO 628 for more modern tubes.. The circuit in the Simpson is very simple and it is very well built. All I had to do on mine was replace the line cord and the single condenser in it and it works like new. It is very accurate repeatable in its evaluations. You find them on eBay every now and then.
Posts: 139
Threads: 8
Joined: Aug 2013
City: Central PA
Thanks for the recommendations on tube testers. Are there different "time periods" for each of these brands that I should pay attention to for tubes that are common to the 1920's and 1930's?
I was able to borrow a tester from a friend and test the Loctal tubes - all are good. The new rectifier that I purchased is also good. I need to get the rest checked out next. Might some of this trouble come from the variable resistors? I just realized that I never cleaned them while I has the chassis apart...
Posts: 671
Threads: 147
Joined: Jun 2011
City: Elko,MN.
You mean the padders. The ones with the adjusting screw?
I just give them a blast of aerosol electronics cleaner(plastic safe)
As far as testers, try to get one that checks the 4 pin tubes and up to loctals and you should be good.
murf
Posts: 139
Threads: 8
Joined: Aug 2013
City: Central PA
Hmm, wasn't thinking about the ones in the back. I was talking about the four on the front with the knobs. I have found the cleaner from Radio Shack to work well on most electronics and it is plastic safe.
Posts: 139
Threads: 8
Joined: Aug 2013
City: Central PA
SUCCESS! Many thanks to everyone for their help and support along the way! It has been quite a learning experience.
My 74 year old radio sings again! Like all else in life, most problems are related to user error. I reconnected one of the new caps to the incorrect pin on the 7J7 det/osc tube and somehow missed replacing another wire during the rewire. A friend of mine (same guy that lent me a tube tester) had just started working on the very same radio and allowed me to take it home for a wiring comparison. A systematic comparison revealed my errors and now it works.
Many of the stations sound rather quiet but become quiet loud when I put my finger on the antenna connection. Rotating the antenna helps some, but not as much as touching the left most antenna connection on the back of the chassis.
Are these issues that allignment can help with? How do you know if alignment is necessary?
(This post was last modified: 08-29-2014, 09:03 AM by
EricS.)
Posts: 139
Threads: 8
Joined: Aug 2013
City: Central PA
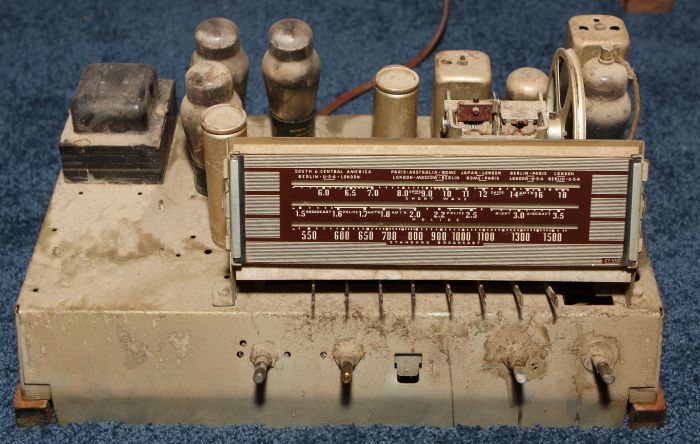
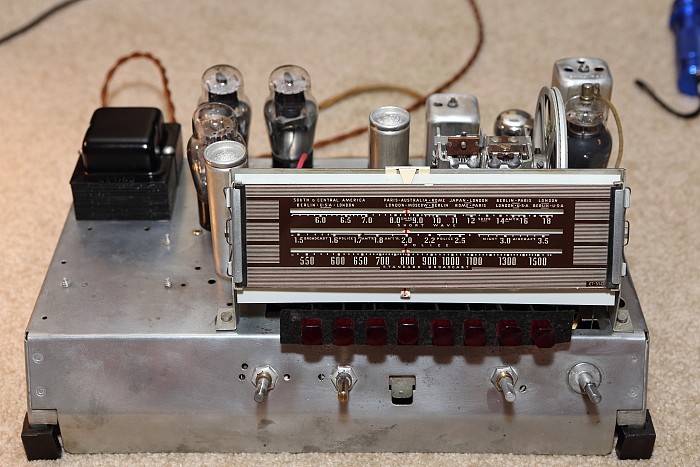
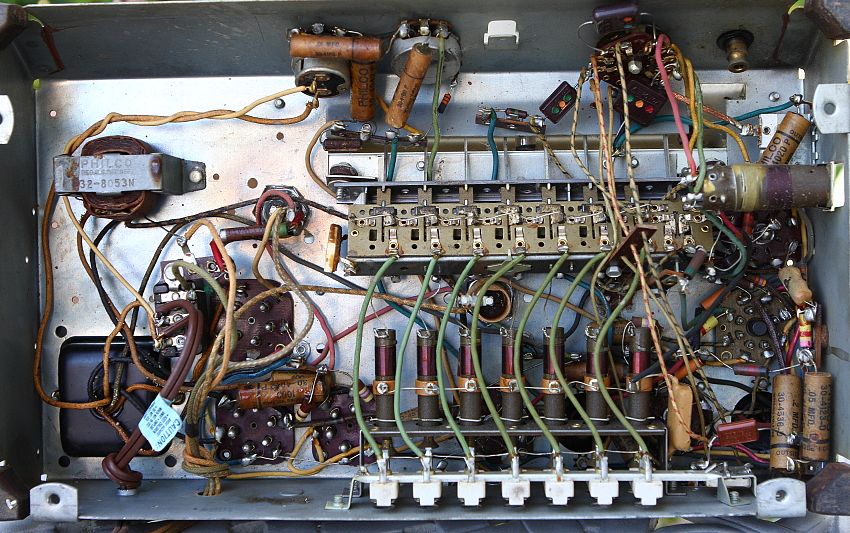
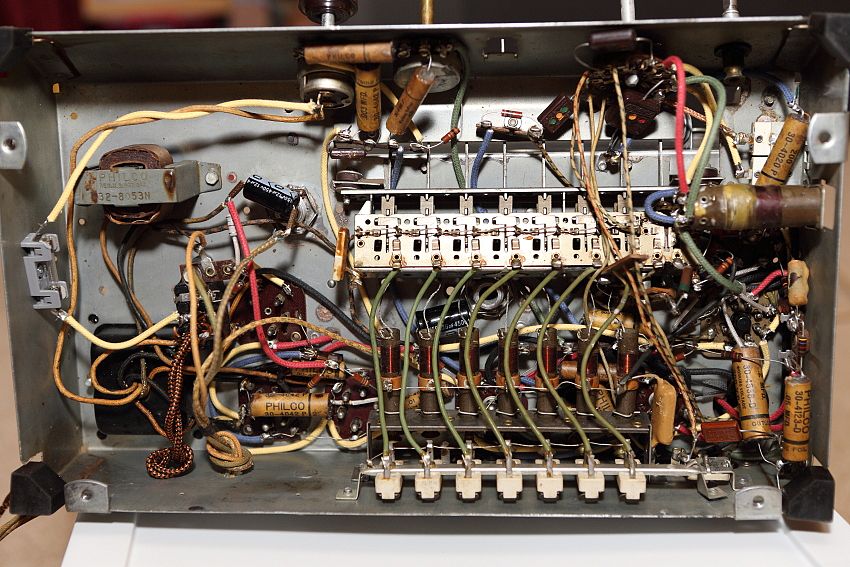
Just for fun, here are the before and after of the chassis rebuild.
First the topside:


And the underside:


Not much difference on the bottom except for the new AC power cord and the new fuse. I even restuffed the old caps with new ones and hot glued the ends...
Many thanks to all for the help - I wouldn't have been able to do this on my own!
(This post was last modified: 09-18-2014, 08:31 AM by
EricS.)


![[-] [-]](https://philcoradio.com/phorum/images/bootbb/collapse.png)


