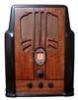
It's French walnut, plain cut rather then quarter cut, as some Philco cabinets used that, it's tricky but I would try patching it, in fact you could try replacing the center section, where the chips are, and use that to patch the area at the lower part of the picture. If you can make the patches blend in with the grain of the wood that would make it less noticeable, like following the rays and such. Bob Andersen tried using the paper backed veneer on a G.E Television cabinet, but then he had problems with it, I think with the finish cracking or something.
Regards
Arran
Yes. I think if I cut out a triangle on the center section that will give me enough to patch the corner.
The finish is really trashed but that’s a different issue to be addressed once everything is stabilized.
Any thoughts on where to find a small veneer sheet? So far just finding huge pieces.
Bridkarl -
I bought some sample from Veneer Supplies . com - https://www.veneersupplies.com/products/...-x-10.html
I've been practicing grain filling and repairing since I've never done it before; I have a cabinet with some chips on the edge (fairly small) for which the sample will work well.
I got the raw wood, and it appears that it will be too thin. The tutorial in the Philco Library suggests that either paper-backed or perhaps 2 layers of raw wood will make it thick enough. Sorry to say that I don't know the answer yet as I'm not at that point.
On a personal note, I lived there in the mid-late 70s, made semiconductors up on the hill.
"Things are not what they seem, nor are they otherwise." -Surangama Sutra, ~700
Yea. That semiconductor place is about three blocks from my house. They got bought out a few years ago.
Do you think the walnut flat cut had a close enough color match for this?
I also haven't tried this before, but this seems doable as I'm just fixing some chips. The original finish is so trashed. I'll have to figure out how to deal with this.
A caveat: I am just in the process of learning, so I can give you zero advice. However, as to the color of the sample pieces, the ones I received look like they're very close to the color of the wood around that big chip in the lower left corner of the picture. I think you have a good bit of work to get it all uniform anyway. Looks like fun!
-Dave
"Things are not what they seem, nor are they otherwise." -Surangama Sutra, ~700
Basically there are two ways to repair this, either by making irregularly shaped patches, mimicking the grain, or by cutting out a strip of veneer in each of the chipped areas, and replacing it with a strip of new veneer. I'm going to use the latter method to repair the front panel on a Stewart Warner cabinet, there are large sections chipped out along the bottom edge, the veneer was laid horizontally. You may have to use shading lacquer to disguise the repairs, but I think Philco did this from new so you would not be changing the original look. The good think about this cabinet is not only that they used plane cut veneer, but they used one sheet of it without any book matching, they just slapped it on, and cut out the holes and slots for the dial, controls, etc.
Regards
Arran
Here’s my first attempt ever to replace veneer. Not sure it’s perfect, but now I have to figure out what to do next.
At least the surface is stabilized.
Maybe the first step is using Citri-strip
followed by 150 and 320 grit sanding followed by a walnut stain???
After an hour with citri-strip applied the surface looks better but no bare wood? Did I just remove the lacquer layer?
Here’s the result after sanding with 220 followed by 340 - utterly smooth- no evidence of patches. Not sure if I should sand down more or just stain as it is.
After first coat of stain followed
by 0000 steel wool.
I’ll do another coat tomorrow.
Finished for now. Not a good job on the finish, but the veneer is now solid. Stained and two coats of crystal clear poly. Still need to a dial mechanism, but as a bench radio plugged into an iso transformer good enough
(This post was last modified: 09-05-2025, 01:52 PM by bridkarl.)