Posts: 22
Threads: 8
Joined: Apr 2009
Hi everyone,
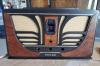
This is on my 46-480. I also have to wiggle tubes to get them to work. My pins are very clean but I don't believe I'm getting the sockets clean enough. All associated components, caps etc. are good. I've tried pipe cleaners with contact spray cleaner and this doesn't appear to be aggressive enough. I tried acetylene torch tip cleaners which work well but are a bit too agressive. What are the rest of you doing for adequete cleaning of these Loctal tube socket contacts?
Thanks much,
Johnny
Posts: 909
Threads: 117
Joined: Jun 2007
ahhh.. the wonderful loctal-socket syndrome strikes again! Sometimes, the loctal sockets are broken internally, between the wafers, that make contact from the tubes pins connections, to the solder pins under the sockets, not visible to the eye. To check for this, is by using your meter set to continuity. Find a small finish-nail that fits easily into the sockets pins connections of socket top-side of chassis,attach your meter leads to the socket individual solder connections under-chassis & finish nail top-side respectively for continuity check, and watch your meter as you move from pin-to-pin around the socket, while carefully "wiggling" the small (shiny clean steel type) finish nail. If a unknown invisible-internal socket pin "break" is located between the wafers, replace the entire socket. AES has replacements if needed. Ive run across several bad loctal sockets over the yrs! Intermittent only when you wiggle the tubes once installed. Very frustrating indeed! The old loctal sockets break (internally) easily, because of the force necessary for removal of the tubes in past servicing attempts. As for cleaning loctal tube pins, I carefully use a exacto-knife blade to scrape the pins to "shiny-clean" around the entire pins diameter. Even tho they look clean, try scraping them again!! If sockets show no signs of breakage, continuity good on all pins, spray a small amt of WD40 into the socket, re-install the tube, and remove it, repeat,re-install it several times, will help clean out debris & keep cleaned shiny tube pins from corroding again in the near future. Best of luck restoring your vintage Philco!
Posts: 59
Threads: 2
Joined: Oct 2008
I have never tried it myself, but has anyone tried using welding torch tip cleaner to clean the sockets?
Posts: 1,703
Threads: 55
Joined: Sep 2005
City: Evanston, IL
I have used a miniature ROUND needle file, tip sprayed with De-Ox-It and that perks 'em right up.
GENTLE swirling & up and down action with a LIGHT touch.
No hard grinding.
Posts: 909
Threads: 117
Joined: Jun 2007
For complicated sockets (internal) cleaning for the really-bad cases, very small metal round small-tooth files used by guitar-luthiers work. I have a set of these very- small-round bastards (hee hee), I ordered yrs ago from a guitar builders luthiers supply house called "Stewart McDonald".These type small metal files are used for cutting very-small grooves in the bone-nuts that seperate the strings on all-stringed instruments, going to the tuners. Stew Mac may have a website by now? Try StewMac.....com. Look for the files there. Mine work fine if need be, but usually a shot of WD-40 does the trick by re-inserting the tube(s),.. remove it,... and "repeat" several times till good contact is assertained for guaranteed continuity all around the orig sockets pins connections. Loctals types tubes-pins (all) are the "worst" for corrosion buildup issues.
However, most tube sockets on vintage radios just need a good shot of WD-40 to clean up the internal connections, that is, if the socket(s) connections isnt broken internally between the orig loctal-type phenolic wafers, hidden from eyesight,.. we all love and adore!?
I like De-Oxit except for the price, & have some here on my workbench. DeOxit doesnt do anything WD-40 wont do at a much cheaper price!! Ive carefully compared both products in many past restorations of vintage vol, tone controls etc, & for my money, WD-40 rules. Water Displacement #40 works well as any the others for removing debris in vintage tube sockets as well. Just my .02