Posts: 285
Threads: 27
Joined: Nov 2012
City: Tehachapi. California
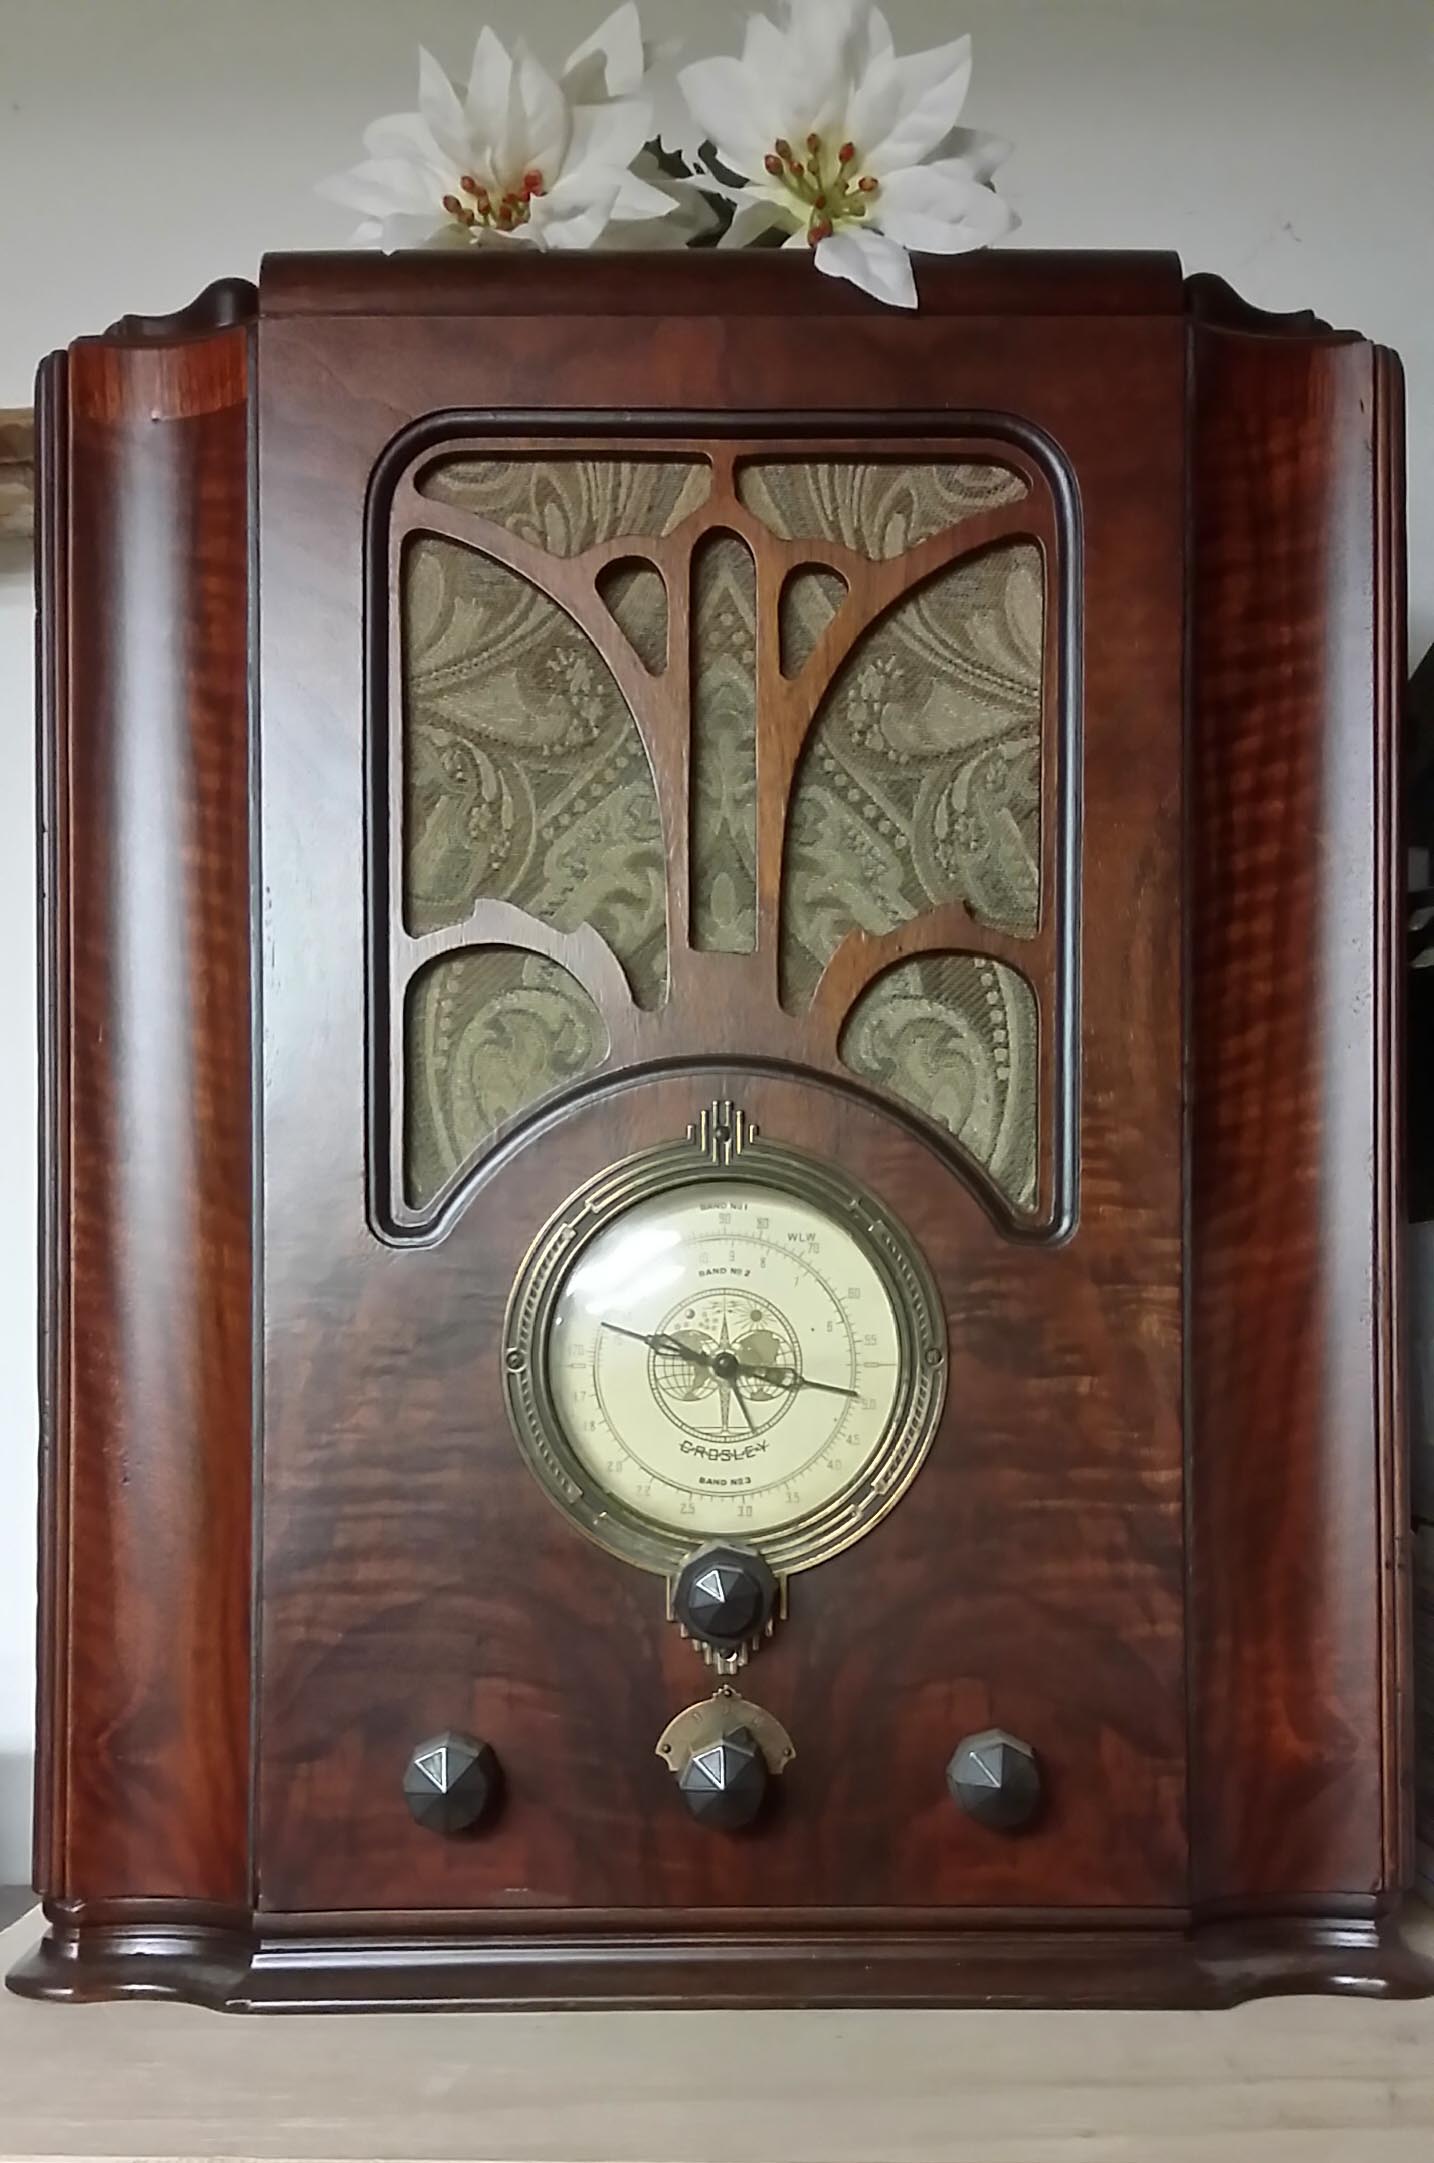
Well I must confess even if i do teabag my speaker cloth and don't like it. It won't be a big deal since it is not true speaker cloth but upholstery fabric only for show.

If I someday find a schematic for it and restore the electronica guts then I will put true speaker cloth in it.
$8.33/running yard
https://www.amazon.com/gp/product/B006P5...UTF8&psc=1
And yes It does need to be a little more orange/brown color, I have already sprayed it with some Perfect Brown. I am a little afraid of gooping it up.
!!!!!!!!!!!!!!!!!!!RESISTANCE IS FUTILE!!!!!!!!!!!!!!!!!!!!!!
/\/\/\/\/\/\/\/\/\
[Image:
http://philcoradio.com/phorum/images/smi...on_eek.gif] Chris
Posts: 3,149
Threads: 56
Joined: Apr 2011
City: Lexington, KY
As a reference I've saved FAQ's from the original Grillecloth.com site and will reprint them below:
"Optional Aging Tips (if needed or desired)
Here are two methods, in order of my preference, that may help you to alter the
look of the cloth beyond what spray starch will do and perhaps make it look more
weathered and worn. Obviously, if you want to do this you should do this prior to
installation.
Method #1: Use a strong solution of black coffee or tea or a mixture of both. It
may appear that you are going to ruin a good grille cloth, I assure you that will not
happen. The rayon/polyester will not take too readily to dyes and stains and once
your cloth has dried out it will look much improved over the original. The shine will
have been reduced and it will have a slight brown dullness to it. Whether you leave
it in for 20 minutes or 8 hours, the effect is more or less the same. Rinse in warm
water after removal to wash out the coffee smell.
Method #2: Use a very diluted solution of shoe dye. I use Fiebings because it is
soluble in alcohol. I start with a bottle of light brown, which costs around $3, and
dilute a small amount (somewhere between a thimble or a shot glass) in a ratio of
1 dye to 3 or more alcohol. You may want to start out very weak and work
backwards to be sure not to ruin your cloth. The shoe dye is very potent and will
permanently dye anything it touches including your hands, so be sure to use
gloves. At a ratio of about 1:6 it approaches the mildness of the coffee/tea
method.
Acknowledgements to all of the many collectors and restorers who helped make
these instructions possible."
John KK4ZLF
Lexington, KY
"illegitimis non carborundum"
Posts: 481
Threads: 18
Joined: Jan 2013
City: Mesa, AZ
SEE! I wasn't cracking up after all. (Been there, done that already)

Posts: 285
Threads: 27
Joined: Nov 2012
City: Tehachapi. California
Here's an update on this one. This is how it finally ended up looking. The color is a little off it's under fluorescent light. Oh and those knobs cost me $50 I just happened to find them on ebay.

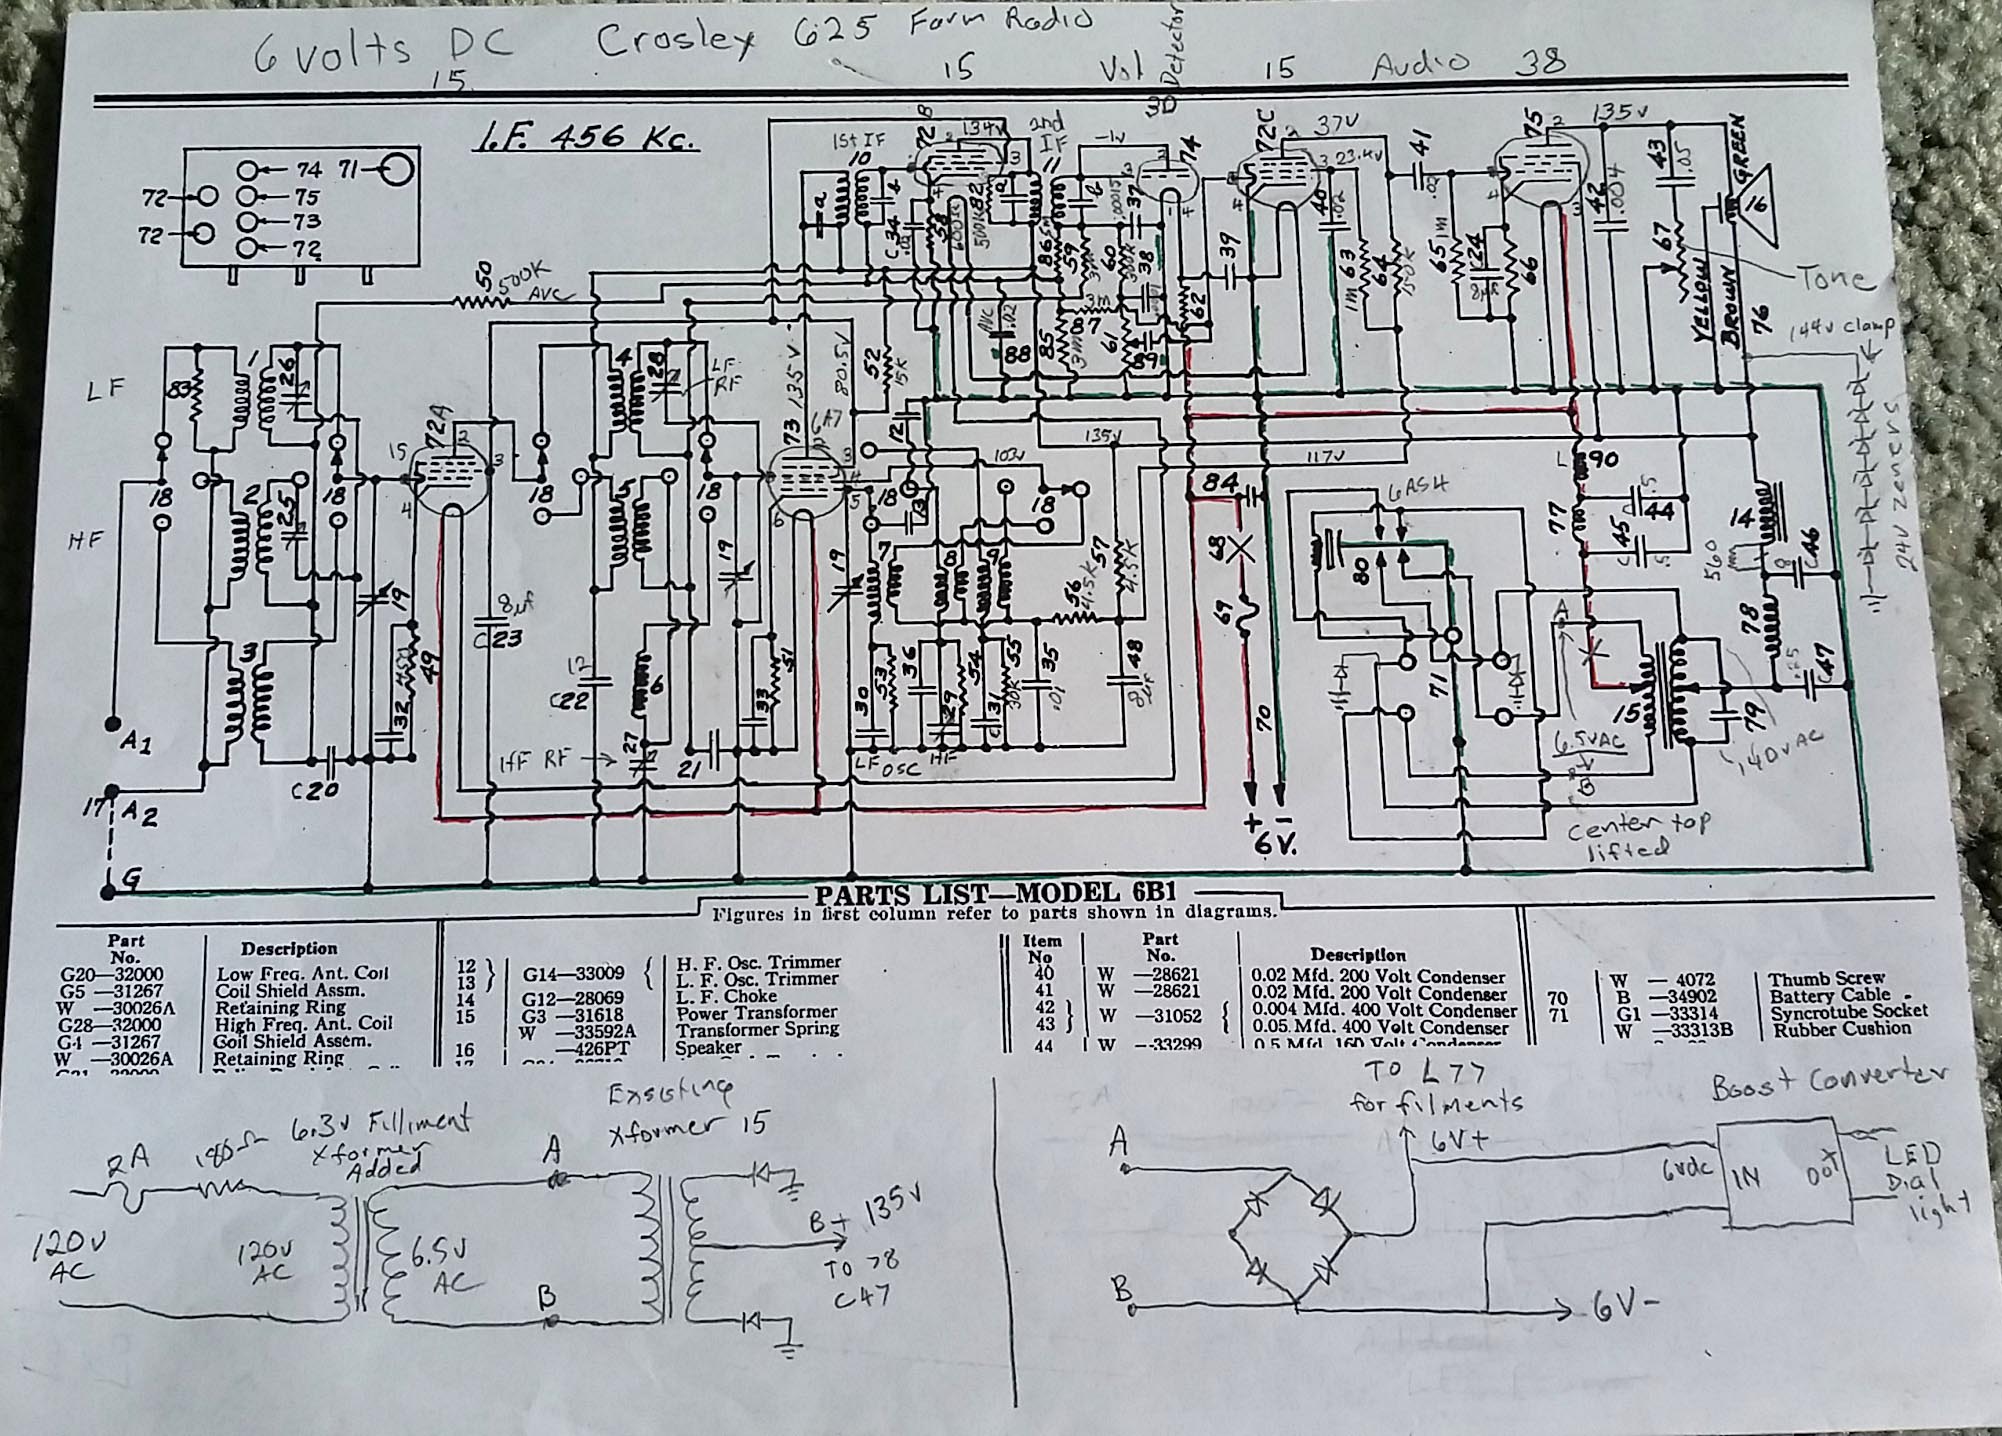
And here's the circuit mods. (This is one messy looking schematic even before I scribbled all over it.)
First of all it's a farm radio 6 volts DC. I am thinking how to power up this beast. The vibrator is no good. First I tried cleaning the contacts but to no avail.
Next I am thinking to build a switching unit to replace the vibrator. But this still needs a power supply.
Then it occurred to me why do I need a switcher when I want to run the radio on 120vac. What if I put 6vac to the primary of the step up transformer and see what comes out. And this worked, in fact it worked too well.
(And this is with a small 1.5 amp filament transformer). So I added a dropping resistor to keep the B+ voltage down. It went on the 120vac side of things.
I also added two diodes to the secondary side to take the place of the switching of the vibrator.
Next I added a bridge rectifier for the filaments and a dc to dc boost to run a string of LEDs for the dial. It had no dial light.
And lastly tried a string of Zenners for a high voltage clamp while the tubes warm up. It worked like a charm. I hope they don't ever burn out. I know this is living dangerous. Now it's works pretty well. It's amazing how little power it needs.

!!!!!!!!!!!!!!!!!!!RESISTANCE IS FUTILE!!!!!!!!!!!!!!!!!!!!!!
/\/\/\/\/\/\/\/\/\
[Image:
http://philcoradio.com/phorum/images/smi...on_eek.gif] Chris
Posts: 36
Threads: 8
Joined: Oct 2014
City: Belleville, Arkansas
Radio looks great! That is an interesting way to power it. I had never thought of that. I have a Fairbanks Morse that is a 6volt farm radio. It has an external vibrator box and everything was in there. I replaced the old vibrator with a new solid state one and some diodes. It works pretty well. I built a external 6v power supply, but can still run it of 6 volt batteries.
Posts: 3,149
Threads: 56
Joined: Apr 2011
City: Lexington, KY
That turned out really well, that's a very handsome radio

Is that upholstery material you used as grille cloth, and if so, does muffle the sound?
John KK4ZLF
Lexington, KY
"illegitimis non carborundum"
Posts: 4,433
Threads: 419
Joined: Jun 2011
City: Boston
State, Province, Country: Massachusetts
My dad had a friend who routinely used scraps of upolstery fabric for radios, just find cheap not too thick pieces, used to get them from the shop that re -upolstered furniture, remember them? Free, which was the magic word. Some were quite ugly, he did not care, grew up in the 30's and in his head never really cared for exact repro look. Made them play, looks were secondary.
Paul
Tubetalk1


![[-] [-]](https://philcoradio.com/phorum/images/bootbb/collapse.png)


