06-10-2019, 10:36 PM
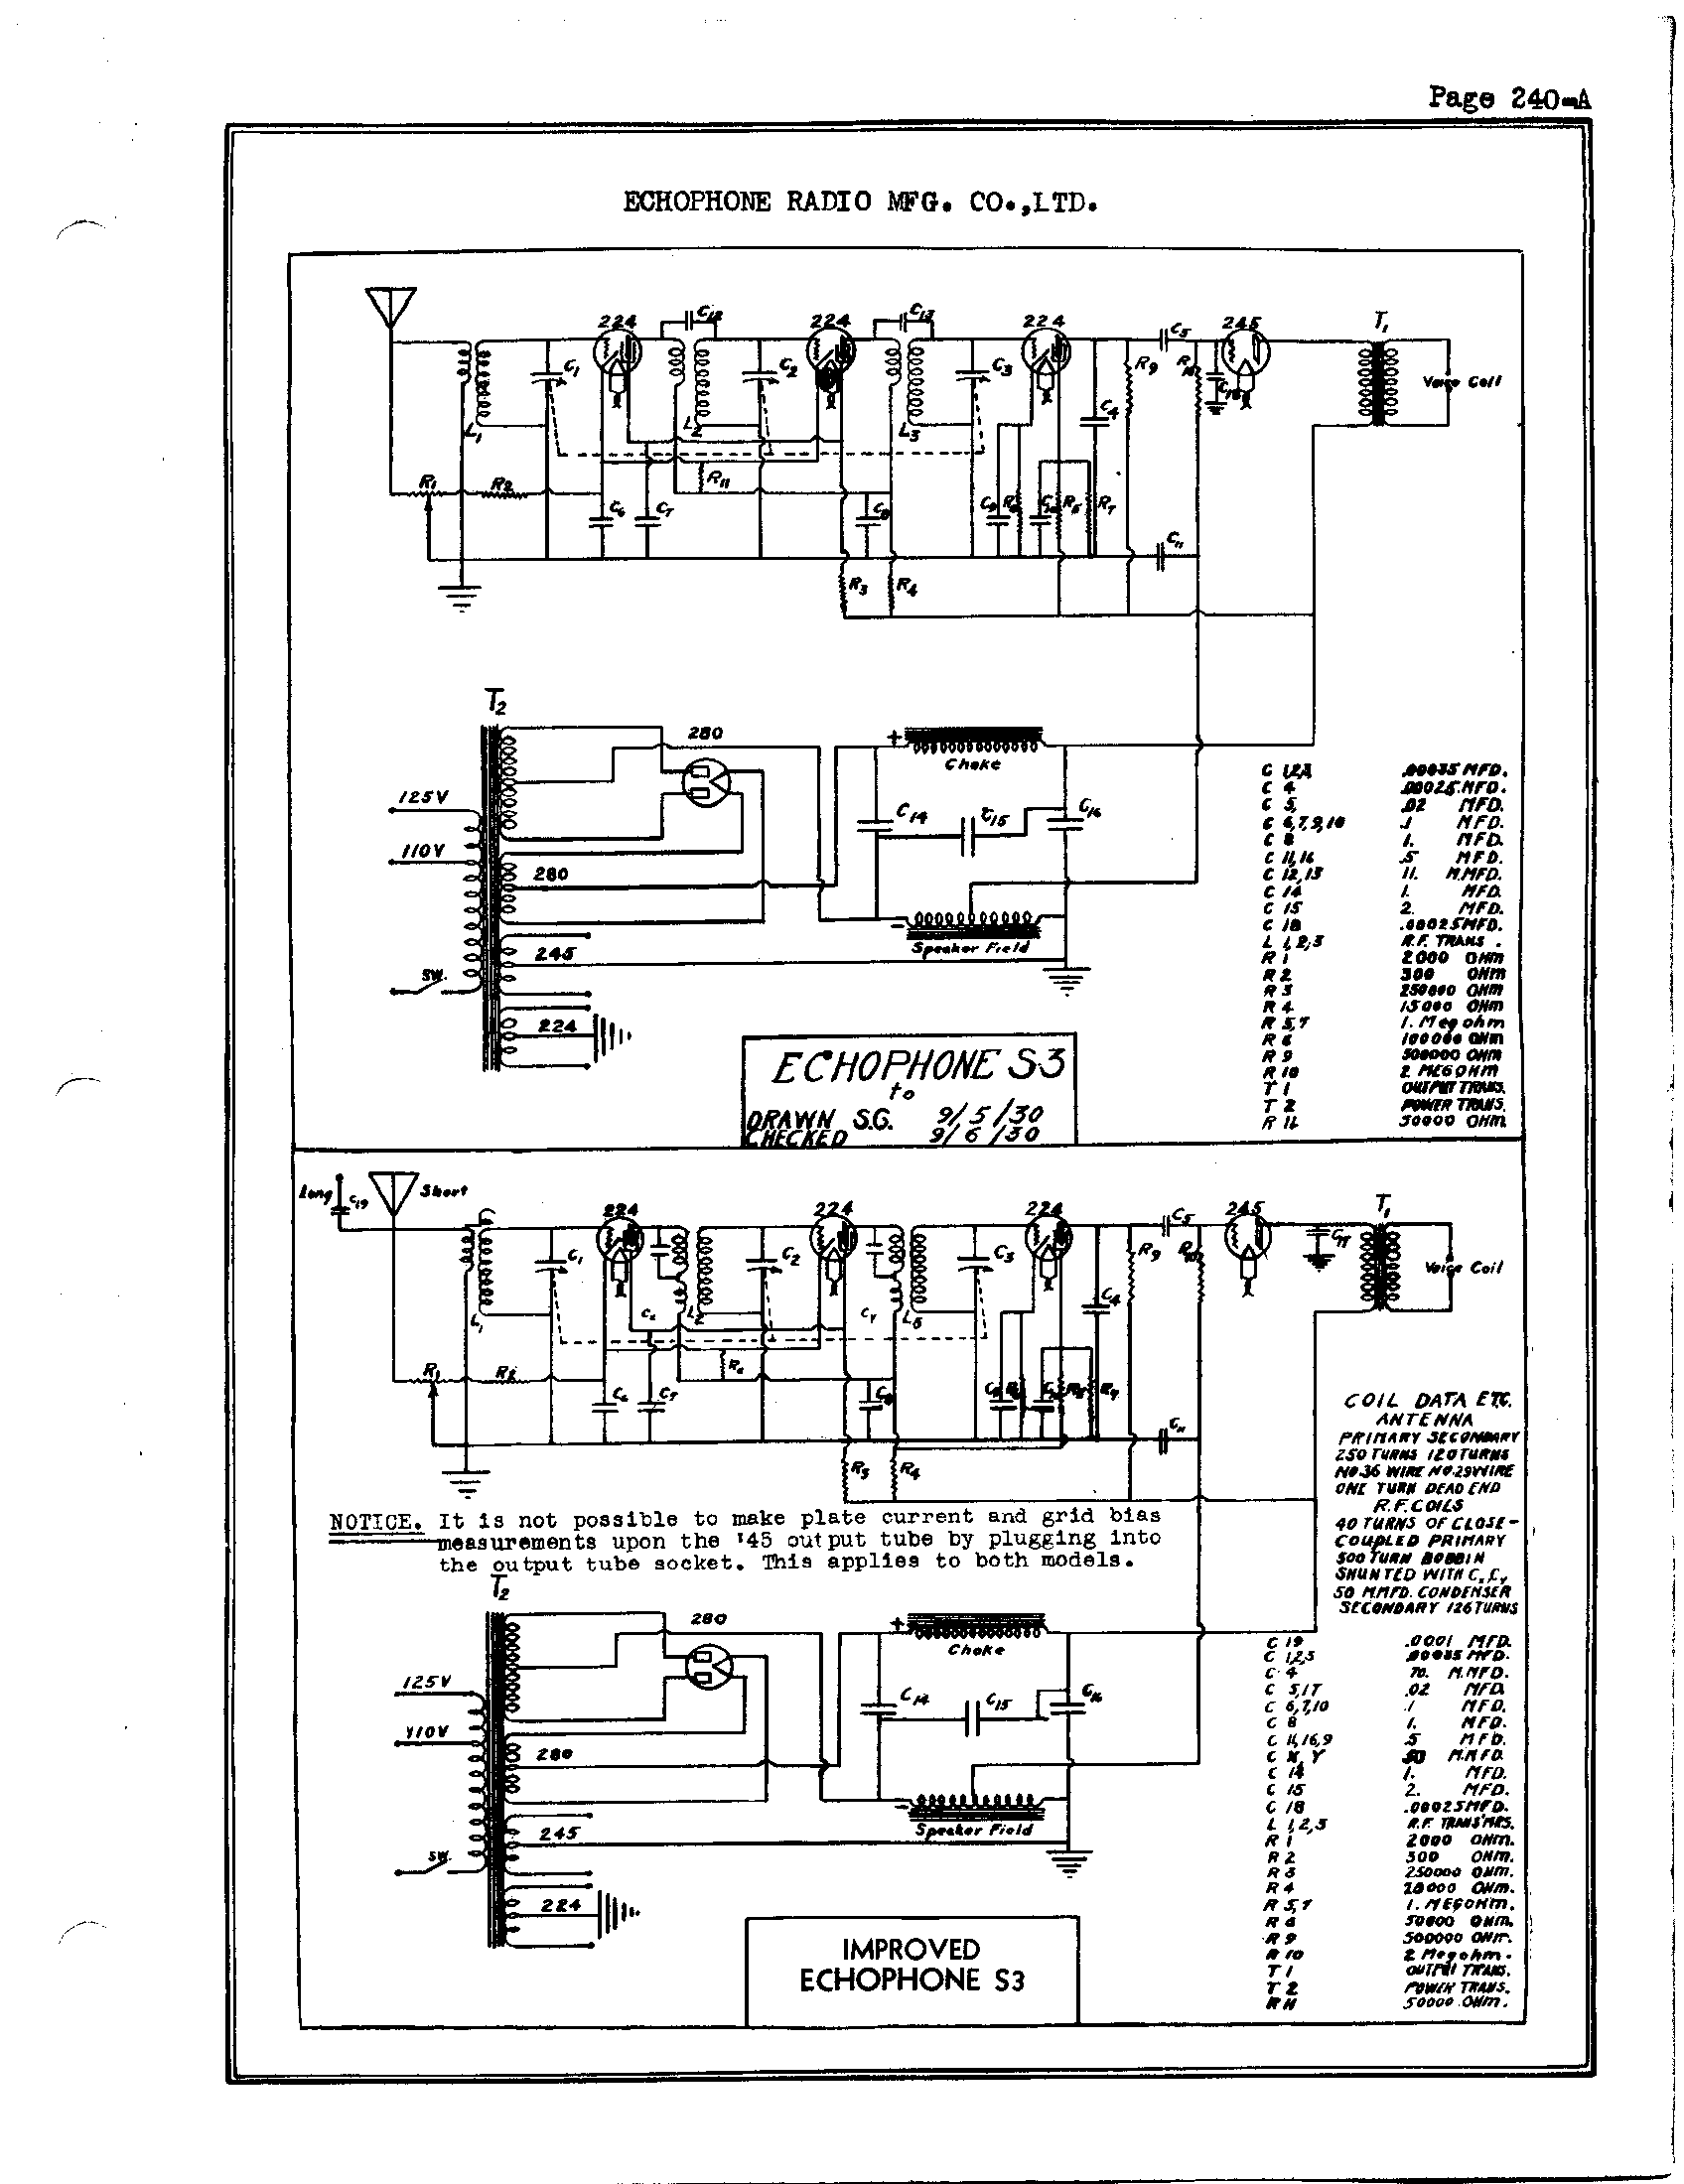
Working on the 5 tube version (three 24's, a 45 and 80) of the 1930 Echophone, this one is a model S3:

My chassis appears to be the "improved" schematic version on the bottom.
I replaced all of the caps, save for the two .02 mfd's (I wanted to replace the "tar boxes" and then see if I could coax some sound out of it). I also read a thread on ARF where Norm suggested changing c14 and c16 to 10 mfd electrolytics and eliminate c15 to improve sound and reduce hum, so that's what I did.
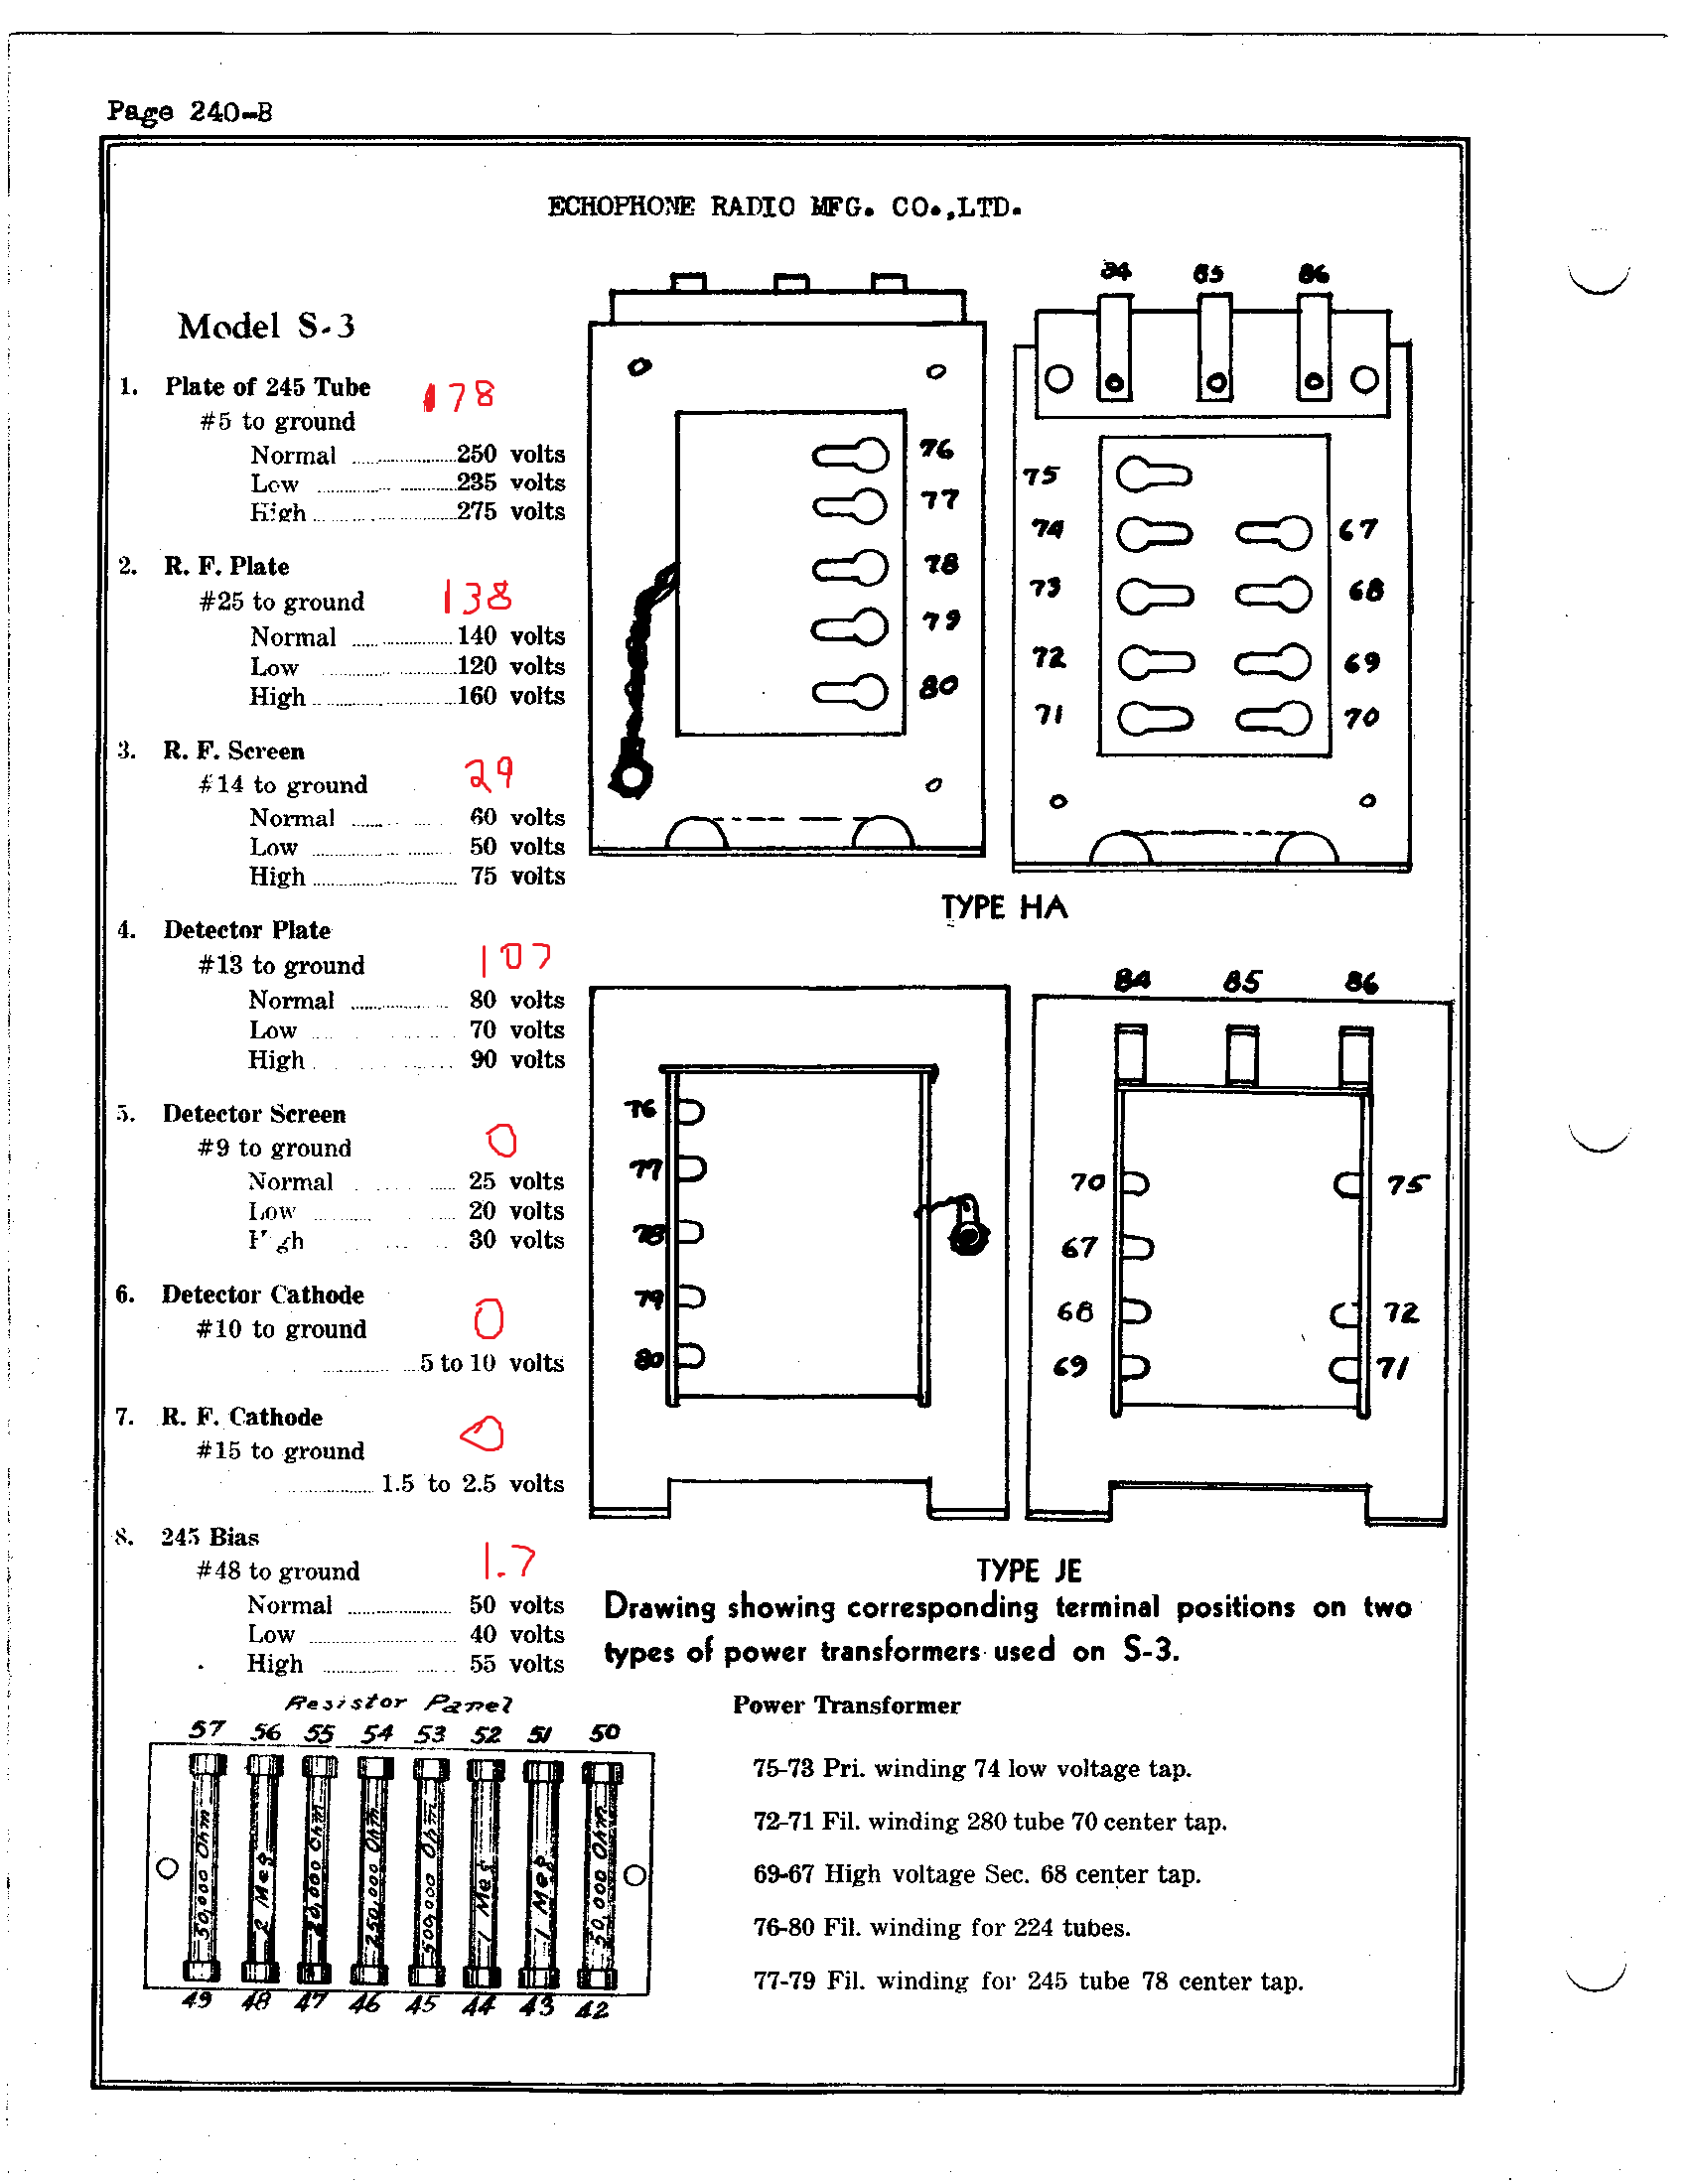
So, after trying several tubes, I'm still getting no sound. My voltages are quite erratic as well (See the chart below...I used the mouse to "color" in red the values I'm getting...hence the hen scratching that looks like a 4 year old wrote it )
)

Trying to inject a signal, I get noise that's controllable with the volume control across both the long and short antenna terminals. On the grid of the output tube I get noise, but no noise on the plate of the output tube. On the plate of the detector tube I get noise, but no noise on the grid of the detector tube. The resistors are a bit high (save for the 2 meg which is reading 5 meg) but none are open.
The choke measures about 400 ohms, so that's not open. Speaker field and output transformer are good.
Anyone (paging Terry) have any thoughts on where to zero in on first? It seems to be a relatively simple 5 tube radio but very ancient in design (it has a multi tap, open air transformer that looks pretty scary in itself but it still putting out voltage and not drawing any amps).
My chassis appears to be the "improved" schematic version on the bottom.
I replaced all of the caps, save for the two .02 mfd's (I wanted to replace the "tar boxes" and then see if I could coax some sound out of it). I also read a thread on ARF where Norm suggested changing c14 and c16 to 10 mfd electrolytics and eliminate c15 to improve sound and reduce hum, so that's what I did.
So, after trying several tubes, I'm still getting no sound. My voltages are quite erratic as well (See the chart below...I used the mouse to "color" in red the values I'm getting...hence the hen scratching that looks like a 4 year old wrote it
Trying to inject a signal, I get noise that's controllable with the volume control across both the long and short antenna terminals. On the grid of the output tube I get noise, but no noise on the plate of the output tube. On the plate of the detector tube I get noise, but no noise on the grid of the detector tube. The resistors are a bit high (save for the 2 meg which is reading 5 meg) but none are open.
The choke measures about 400 ohms, so that's not open. Speaker field and output transformer are good.
Anyone (paging Terry) have any thoughts on where to zero in on first? It seems to be a relatively simple 5 tube radio but very ancient in design (it has a multi tap, open air transformer that looks pretty scary in itself but it still putting out voltage and not drawing any amps).
Greg V.
West Bend, WI
Member WARCI.org


![[-] [-]](https://philcoradio.com/phorum/images/bootbb/collapse.png)


