My first restoration 37-610J
Posts: 9
Threads: 2
Joined: Oct 2019
City: Tuscumbia
State, Province, Country: Alabama
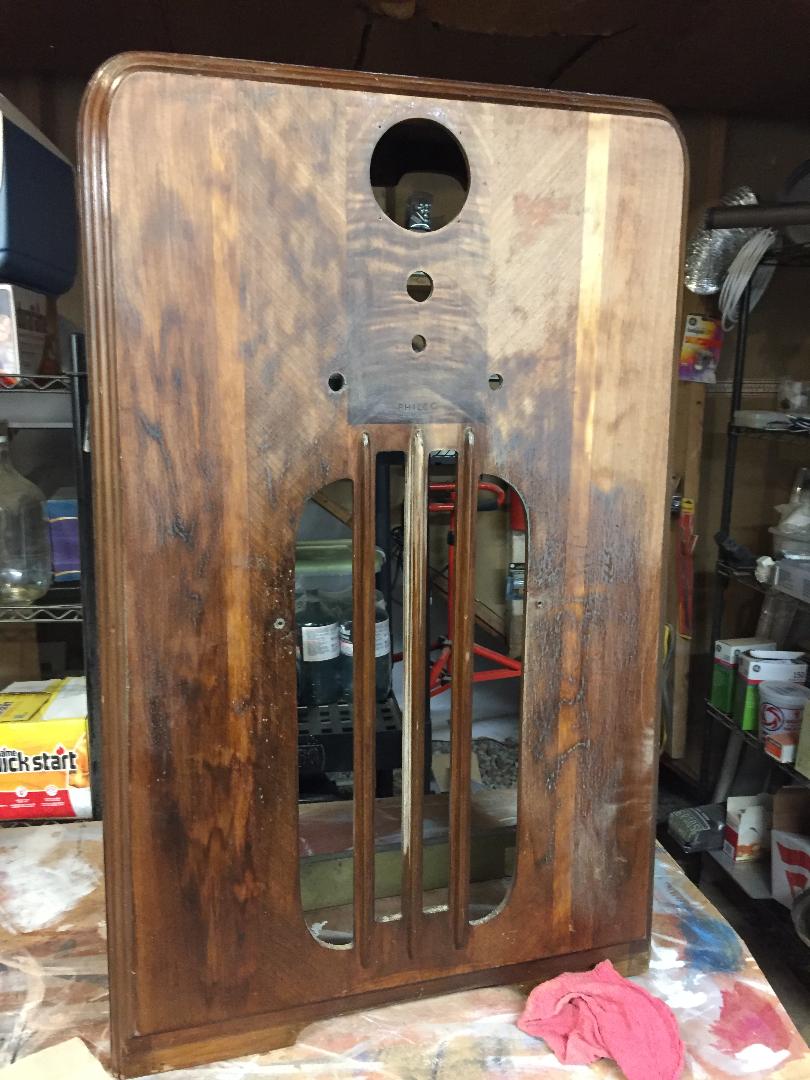
I have never restored an antique radio, but I am excited about my project. I found a 37-610J cabinet at a swap meet with a terrible finish on it. I have sanded the old finish off and I can tell it's been restored before.
I bought a 37-620 tombstone radio (non working). The radio is still in transit so I have not received it yet. From the research I have done so far, I have found that both use a 121 or 125 chassis.
I am not looking for perfection, I would just love to have it looking nice and working. Hoping I can find someone near me, who can work on the radio.
Any advice is appreciated.
Thanks!
Dennis
Posts: 16,533
Threads: 573
Joined: Oct 2011
City: Jackson
State, Province, Country: NJ
The 121 or 125 are the codes, not the actual chassis numbers. The chassis is 37-610 or 37-620 (code 121 or 125 or....)
I am not sure the 620 chassis will readily install in the 610, I will let others who know it tell you this.
People who do not drink, do not smoke, do not eat red meat will one day feel really stupid lying there and dying from nothing.
Posts: 5,182
Threads: 276
Joined: Nov 2012
City: Wilsonville
State, Province, Country: OR
Welcome to the Phorum!

The model 37-610 chassis is different from a 37-620 (see schematics at Nostalgiaair.com) The 121 and 125 designations are code numbers, essentially version numbers for a given model year. (see Identification Guide in our library)
Posts: 13,776
Threads: 580
Joined: Sep 2005
City: Ferdinand
State, Province, Country: Indiana
Hi,
You're in luck as there is a good club in your state:
https://www.alabamahistoricalradiosociety.org/
If you don't feel comfortable working on your own 37-610/620, then contact the club by all means. They should be able to direct you to someone who can do the work.
Being as how a 37-610J is a console, you will have no issues fitting the 37-620 chassis into the 37-610J cabinet.
--
Ron Ramirez
Ferdinand IN
Posts: 4,106
Threads: 310
Joined: Nov 2013
City: Kings Park NY
1st thing.. No sanding off the finish.
Use lacquer thinner and #0000 steel wool and the finish will melt off.
Welcome...
Kirk
Times I have been electrocuted in 2021
As of 1/01/2021
AC: 4 DC: 1
Last year: 6
(This post was last modified: 10-03-2019, 11:43 AM by OldRestorer.)
Posts: 9
Threads: 2
Joined: Oct 2019
City: Tuscumbia
State, Province, Country: Alabama
Thanks for admitting me to the boards and for all the info. I'm a newbie and have a lot to learn. As soon as I figure out how to attach a picture, I will post some.
Thanks again!
Dennis
Posts: 13,776
Threads: 580
Joined: Sep 2005
City: Ferdinand
State, Province, Country: Indiana
Glad to have you aboard, Dennis.
Adding photos is easy. Two ways to do it, both discussed in the Phorum's How to Do Things in the Phorum section:
Method 1 - using photos hosted at a third party source - https://philcoradio.com/phorum/showthread.php?tid=29
Method 2 - attaching images directly to your posts - https://www.philcoradio.com/phorum/showt...p?tid=4407
--
Ron Ramirez
Ferdinand IN
Posts: 9
Threads: 2
Joined: Oct 2019
City: Tuscumbia
State, Province, Country: Alabama
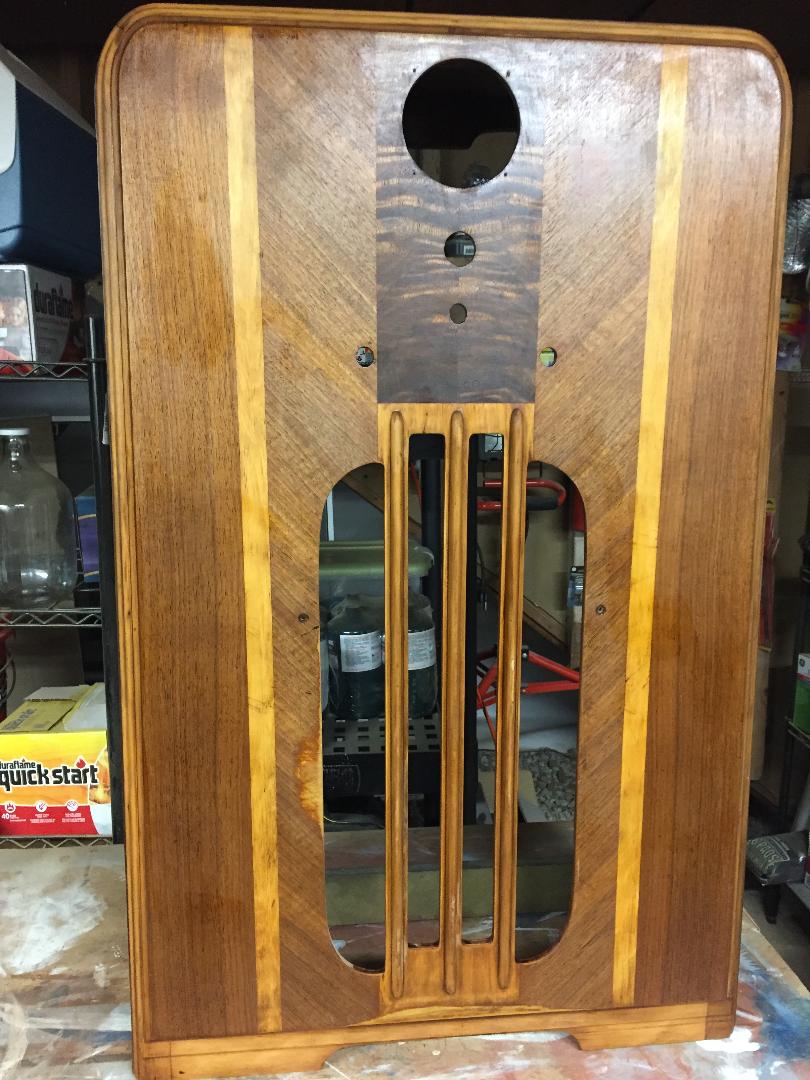
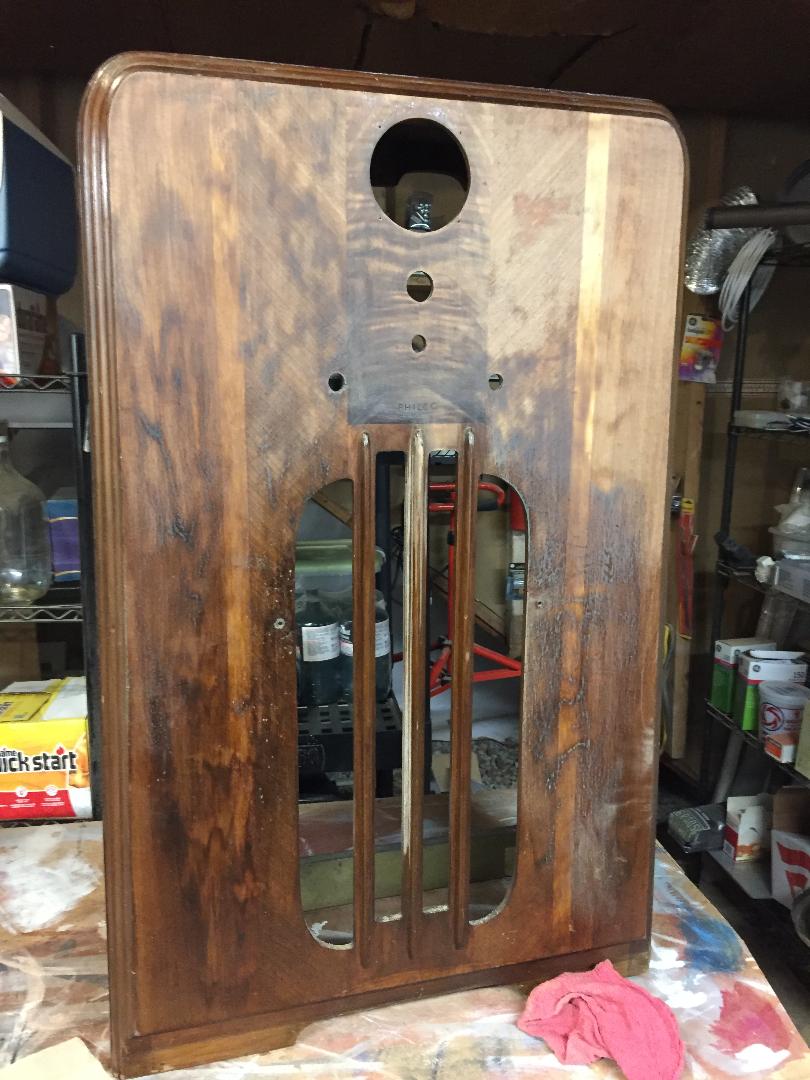
Here are three pics. The way I bought it for $5.00. I sanded and found several spots that a prior restoration had sanded through the veneer. I really don't mind. Not looking for a perfect restoration. I like it with all it's scars. I finished getting the old finish off and then the latest pic with one coat of amber shellac.

[attachment=20271][attachment=20272]
Posts: 9
Threads: 2
Joined: Oct 2019
City: Tuscumbia
State, Province, Country: Alabama
Thanks Ron. You are a huge help. Now, how do I add a profile picture?
I really appreciate your time!
Dennis
Posts: 13,776
Threads: 580
Joined: Sep 2005
City: Ferdinand
State, Province, Country: Indiana
Again, go to the How to Do Things in the Phorum (near the bottom of the Phorum home page, within the Rules, How-To, Donations section).
Click How to Do Things in the Phorum.
Look for the subject Phorum How-To #6: How Can I Add or Change an Avatar?
--
Ron Ramirez
Ferdinand IN
Posts: 9
Threads: 2
Joined: Oct 2019
City: Tuscumbia
State, Province, Country: Alabama
I accidentally removed two photos...


Posts: 102
Threads: 14
Joined: Jul 2017
City: Bakersfield, CA
Very nice job! The cabinet is beautiful.
Posts: 4,106
Threads: 310
Joined: Nov 2013
City: Kings Park NY
Looking good!
A 640 was my first radio ever... Still have it.

Times I have been electrocuted in 2021
As of 1/01/2021
AC: 4 DC: 1
Last year: 6
Posts: 9
Threads: 2
Joined: Oct 2019
City: Tuscumbia
State, Province, Country: Alabama
Thanks. I hope I can find someone to help me fix the radio I bought for it.  
Posts: 1,824
Threads: 114
Joined: Jul 2014
City: Sneedville, TN
You have come to the right place for that. There are a lot of folks here who have experience with various models of Philco radios. I'm sure they will be glad to help you get it up and running. Welcome to the Phorum.
Users browsing this thread: 1 Guest(s)
|
|
Recent Posts
|
|
Philco newbie with P-1891-WA console questions
|
| Hello Jeff ,
Far as the Electrolytic capacitors go here is a list of parts.
that will work . I like using Nichicon and...radiorich — 09:50 PM |
|
Philco newbie with P-1891-WA console questions
|
| Well, I've been stumped at trying to get the first of 11 electrolytic capacitors. I got a schematic and have a list of t...Jeffcon — 07:54 PM |
|
Model 80 Antenna Issue?
|
| Thanks Gary and Rod.
I also found an article in the Philco Repair Bench under Service Hints and Tips, about installi...Hamilton — 12:32 PM |
|
Model 80 Antenna Issue?
|
| Hello Hamilton, here is a little information found in our Philco Radio Library at the bottom of the Home page. Hope it ...GarySP — 11:28 AM |
|
Model 80 Antenna Issue?
|
| I did as you suggested and touching the middle of the volume control did nothing so the coil has to be rewound. Any idea...Hamilton — 10:19 AM |
|
1949 Motorola 5A9M
|
| This would be the second portable in the "other radios" forum where I have a similar one in my collection. I h...Arran — 12:41 AM |
|
Looking for any info: 1977 Ford-Philco Console Hi-Fi Turntable and Radio
|
| Hi PittsburgTost.
The record changer looks like a Garrard or BSR (Likely Garrard). The spindles just pull out and pu...MrFixr55 — 11:57 PM |
|
Looking for any info: 1977 Ford-Philco Console Hi-Fi Turntable and Radio
|
| Hello PittsburghToast ,
Welcome aboard and it looks like gary may have something for you !
now if I dig through my se...radiorich — 11:35 PM |
|
Model 80 Antenna Issue?
|
| You are kind of on the right path. You can touch the grid cap of the Detector/Oscillator 36 tube. I'm expecting a respon...RodB — 08:48 PM |
|
Looking for any info: 1977 Ford-Philco Console Hi-Fi Turntable and Radio
|
| Welcome to the Phorum, PittsburghToast! I found an old thread that my interest you regarding the quality and worth of P...GarySP — 08:48 PM |
|
Who's Online
|
| There are currently no members online. |

|
 
|


![[-] [-]](https://philcoradio.com/phorum/images/bootbb/collapse.png)


