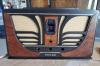
16B Cathedral Cabinet Restoration
Posts: 1,419
Threads: 71
Joined: Oct 2007
City: Linn Creek, MO
[Image: https://live.staticflickr.com/65535/5134...25e0_c.jpg]
I use this fixture for clamping veneer to wraparounds. In this case, I am using it to clamp the wrap while re-gluing the inside veneer.
M R Radios C M Tubes
Posts: 1,419
Threads: 71
Joined: Oct 2007
City: Linn Creek, MO
[Image: https://live.staticflickr.com/65535/5133...3ec2_c.jpg]
All of the delamination has been re-glued, the extra holes plugged, the inside veneer patched and the outside sanded. The wrap is now ready for veneer.
[Image: https://live.staticflickr.com/65535/5134...a7e2_c.jpg]
Gluing the veneer. I use yellow wood glue thinned with water, about two and a half to three parts glue to one part water, I use the TLAR (That Looks About Right) system on that. I brush a coat of glue on about the top third of the wraparound and on the veneer. In this photo, The glue has been applied, the wrap and veneer have been placed in the clamp fixture. The bolts at the bottom will now be tightened (there are four on each side). This will pull the band down tight and clamp the veneer. There is a layer of felt on the inside of the band and also under the wrap, this insures an even clamp pressure. The clamp fixture doesn't apply much pressure to the lower side portions of the wrap so, only the upper curved portion is glued in this fixture. After the upper part has dried, the wrap will be removed and the lower side portions will be glued and clamped using flat clamp boards.
M R Radios C M Tubes
Posts: 1,419
Threads: 71
Joined: Oct 2007
City: Linn Creek, MO
I have been away for a few days so not much has been done.
[Image: https://live.staticflickr.com/65535/5134...7502_c.jpg]
The original wraparound after re-veneer. I am going to spray the lacquer on the wrap before installing because sanding is difficult in the area where the wrap joins the front arch after it has been installed.
M R Radios C M Tubes
Posts: 1,419
Threads: 71
Joined: Oct 2007
City: Linn Creek, MO
Posts: 13,776
Threads: 580
Joined: Sep 2005
City: Ferdinand
State, Province, Country: Indiana
--
Ron Ramirez
Ferdinand IN
Posts: 5,584
Threads: 291
Joined: Nov 2012
City: Wilsonville
State, Province, Country: OR
It's lookin' pretty!

Posts: 1,419
Threads: 71
Joined: Oct 2007
City: Linn Creek, MO
Thanks, guys! I will probably have a few more photos this evening.
Steve
M R Radios C M Tubes
Posts: 1,419
Threads: 71
Joined: Oct 2007
City: Linn Creek, MO
[Image: https://live.staticflickr.com/65535/5135...8216_c.jpg]
The rear arch support in a 16B cabinet is pretty large so, it takes lots of clamps! Note the piece of scrap under the clamps to protect the wraparound.
[Image: https://live.staticflickr.com/65535/5136...a834_c.jpg]
The stiffeners being added to the back edge of the sides.
M R Radios C M Tubes
Posts: 1,419
Threads: 71
Joined: Oct 2007
City: Linn Creek, MO
[Image: https://live.staticflickr.com/65535/5136...e79d_c.jpg]
The gussets have been added to the inside of the cabinet
[Image: https://live.staticflickr.com/65535/5136...da17_c.jpg]
I decided to replace the original base as it was in really bad condition. The new base has been fit to the cabinet. I will finish all the moulding before installing. I am now ready to start spraying lacquer.
M R Radios C M Tubes
Posts: 1,474
Threads: 98
Joined: Jul 2012
City: Poughkeepsie, N.Y.
What a great job! Thanks for posting your progress.
Posts: 1,419
Threads: 71
Joined: Oct 2007
City: Linn Creek, MO
I have had a few things going on so, the cabinet work has been a little slow. Getting back to it now.
[Image: https://live.staticflickr.com/65535/5140...ebab_c.jpg]
I have sprayed the toner and installed the moulding
Steve
M R Radios C M Tubes
Posts: 1,419
Threads: 71
Joined: Oct 2007
City: Linn Creek, MO
[Image: https://live.staticflickr.com/65535/5142...ee98_c.jpg]
New brass feet have been installed
[Image: https://live.staticflickr.com/65535/5142...811b_c.jpg]
FINISHED!
Clear lacquer has been sprayed and the cabinet has been assembled. I have some work to do on the chassis before installing. That probably won't happen until winter.
[Image: https://live.staticflickr.com/65535/5131...9dca_c.jpg]
Again, the before picture.
Steve
M R Radios C M Tubes
Posts: 7,323
Threads: 270
Joined: Dec 2009
City: Roslyn Pa
Very nice!!
When my pals were reading comic books
I was down in the basement in my dad's
workshop. Perusing his Sam's Photofoacts
Vol 1-50 admiring the old set and trying to
figure out what all those squiggly meant.
Circa 1966
Now I think I've got it!
Terry
Posts: 5,584
Threads: 291
Joined: Nov 2012
City: Wilsonville
State, Province, Country: OR
Posts: 13,776
Threads: 580
Joined: Sep 2005
City: Ferdinand
State, Province, Country: Indiana
Wow! Looking at the "after" photo, one would not believe that it once looked as it did in the "before" photo.
Great work as always! 
--
Ron Ramirez
Ferdinand IN
Users browsing this thread: 2 Guest(s)
|
|
Recent Posts
|
|
Philco P45-6365 Universal Transformer Instruction Manual
|
| Can anyone guide me to where this may be found?GRG — 03:00 PM |
|
54C Complete Teardown/Rebuild
|
| I don't think that I have encountered a 12Z3 before, curious how it uses one of those but includes a #43, which is a 25 ...Arran — 02:17 PM |
|
HiFi (Chifi) tube amp build - but my own design.
|
| It's the other forum. I'm also in DIY, but mostly read there. Honestly, I kinda jumped into this without much thought to...TV MAN — 10:43 AM |
|
Philco 71 Code 125
|
| Hello,
I am in need of a schematic for this radio. Mine has the three separate circular tube shields and a shadow me...dconant — 08:06 AM |
|
Stromberg Carlson 1500 Squeal
|
| And life just keeps getting more complicated.dconant — 07:57 AM |
|
54C Complete Teardown/Rebuild
|
| Hello Roy,
here is this one
sincerely Richardradiorich — 12:45 AM |
|
54C Complete Teardown/Rebuild
|
| Richard,
Had grabbed it already but thank you just the same. I find myself wanting to find some way to block out the...glyphmon — 12:03 AM |
|
54C Complete Teardown/Rebuild
|
| Hello roy,
here is a link to the schematic .
Sincerely Richardradiorich — 11:54 PM |
|
54C Complete Teardown/Rebuild
|
| Richard,
The Silvertone 2014 also is a transformerless set, so I am incorporating a 1:1 600 ohm audio isolation transfo...glyphmon — 11:37 PM |
|
Preliminary work on wife's Silvertone 2014
|
| Did an alignment today which was interesting. IF alignment went great, almost all was already spot-on. Adjusting on th...glyphmon — 11:35 PM |
|
Who's Online
|
There are currently 1816 online users. [Complete List]
» 2 Member(s) | 1814 Guest(s)
|
|
|

|
 
|