Push Pull tube amp kit from China
Posts: 1,213
Threads: 85
Joined: Jan 2014
City: Annapolis, IL
State, Province, Country: USA
What better way to hibernate on a snowy winter day than to spend the day in the radio room than to grab a tall cup of coffee, open the blind so I can watch it snow and break open a brand new kit! Oh, cant forget the really cool nostalgic music playing on a tube amp I built a few years ago! Ok, so I found a deal on this kit and pulled the trigger. It's not a Knight or Heath, but really isn't bad. It is the Douk kit using 6 tubes, basically a 6GH8a driver phase splitter and a pair of 6BQ5 outputs in push pull. They are really a 6P1 set, which is electrically similar to the 6BQ5/EL84 but suppose to be a kinda industrial version. The pinout is different so it's not a direct swap. Pinout on the 6F2 is identical to the 6GH8a, 6U8 and a couple others I think. My experience with the China tubes probably means a NOS set will find their way into the socket. But I'll give them a chance. Since this kit uses a PC board, rewiring the socket to use a 6BQ5 or 6V6 isn't easy, so for now, I'll run what is supplied with the kit. I think using the PC board will make things simpler. As in previous offerings, no instructions and need some mods, but so far hasn't been too bad. I'm taking notes as I always do, so if anyone wants to tackle one of these after I get finished, just fire me a PM and I'll send my notes. It's rated at 12w per channel, and can be had on the auction site for the neighborhood of $250, although I bought mine for less on sale.
Alright, here we go:
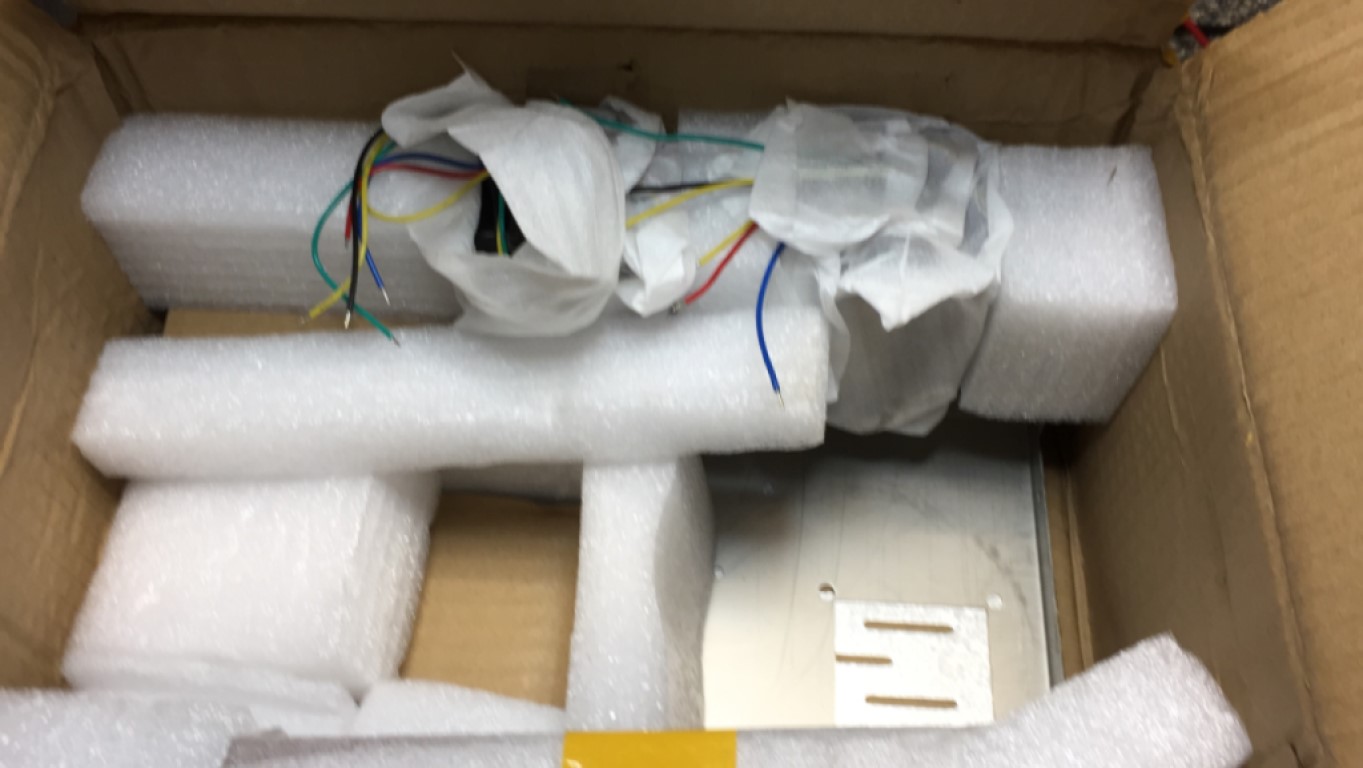
Break open the box
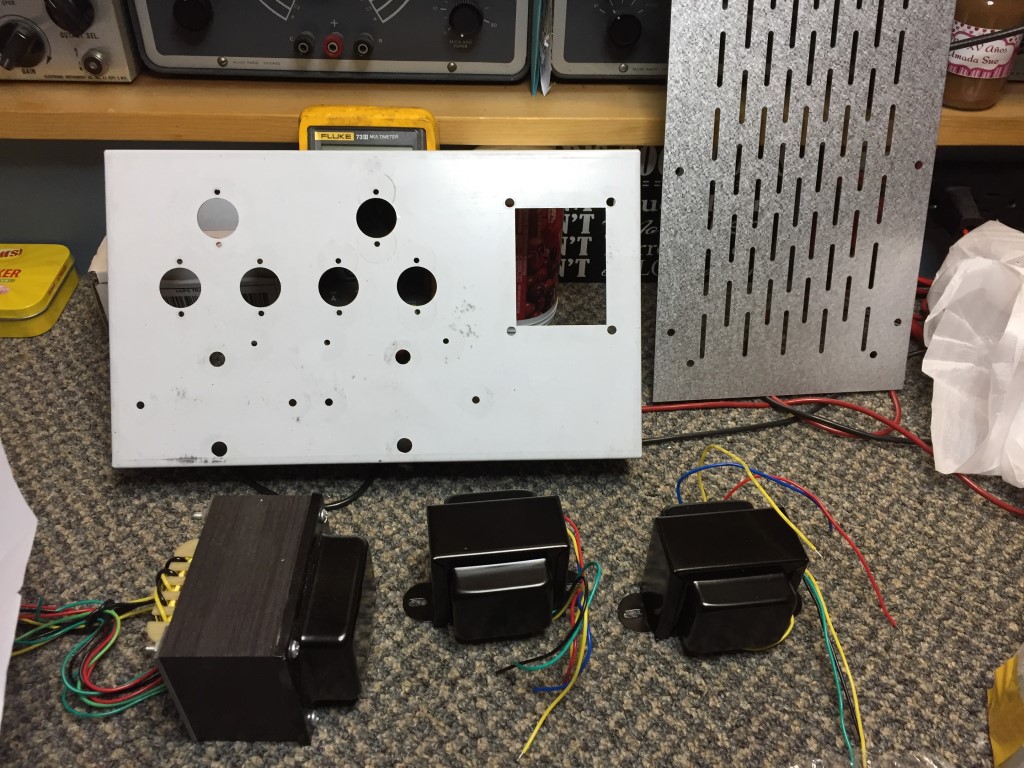
A pile of parts. Nice solid chassis!
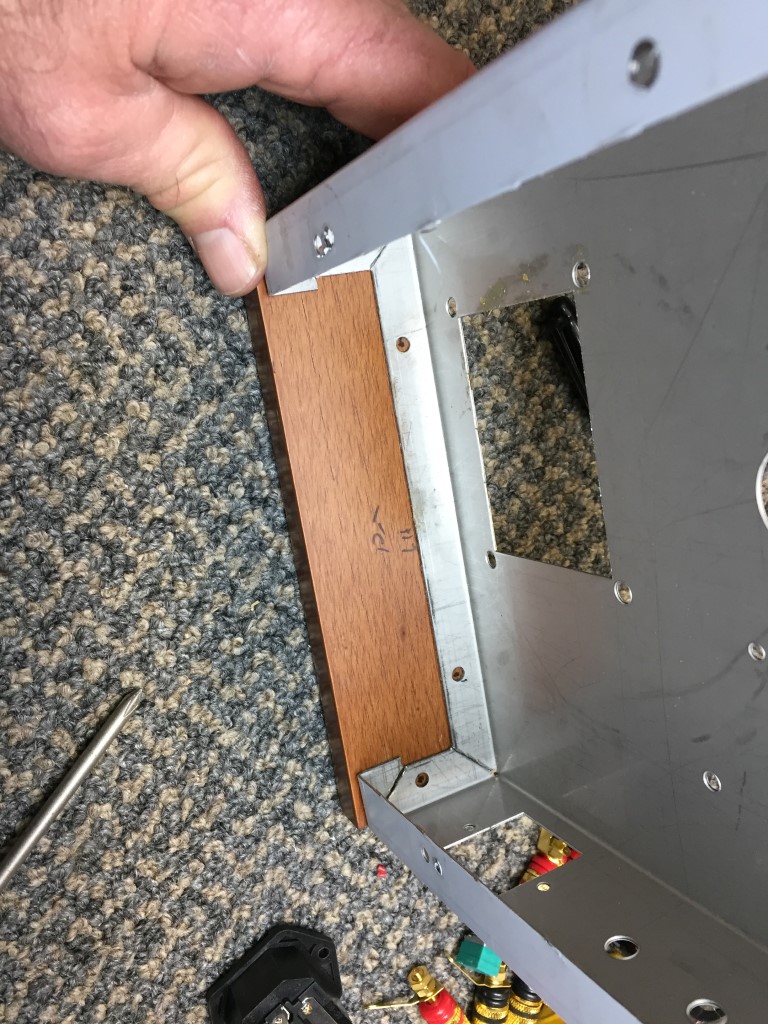
Putting on the end panels. These are actually solid wood and nicely finished. Mark these carefully and drill pilot holes. They fit real nice.
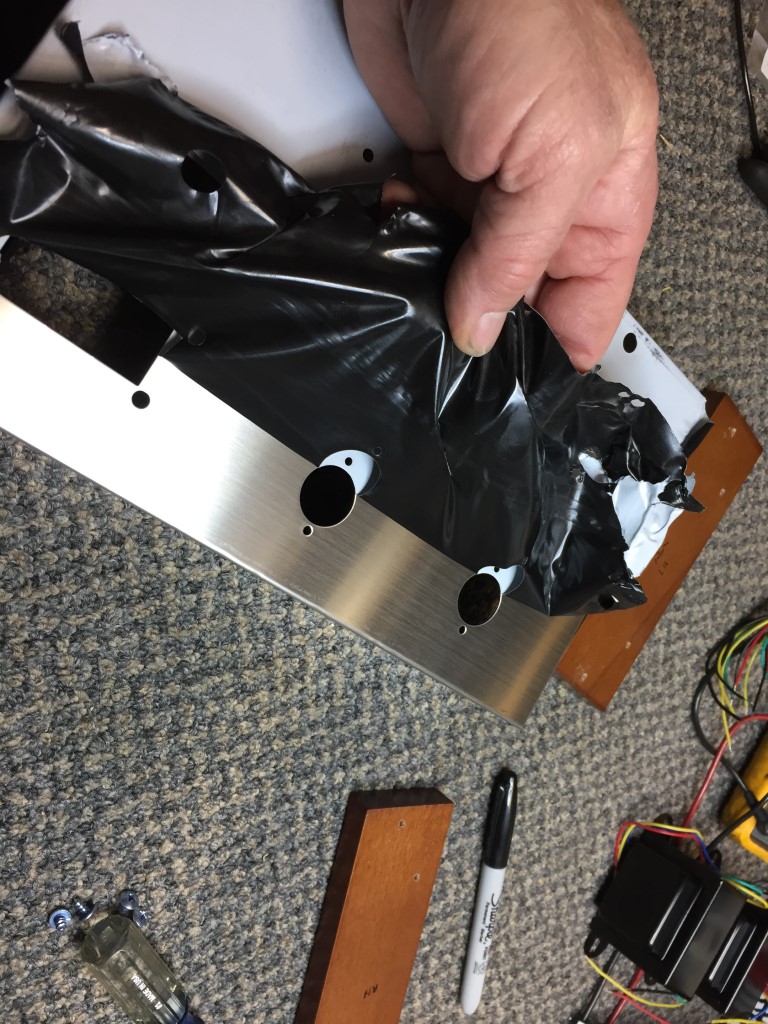
Peeling off the protective layer. Take care not to scratch the stainless chassis while assembling. Slow and easy takes you all the way here!
If I could find the place called "Somewhere", I could find "Anything" 
Tim
Jesus cried out and said, "Whoever believes in me , believes not in me but in him who sent me" John 12:44
(This post was last modified: 02-04-2022, 05:26 PM by TV MAN.)
Posts: 1,213
Threads: 85
Joined: Jan 2014
City: Annapolis, IL
State, Province, Country: USA
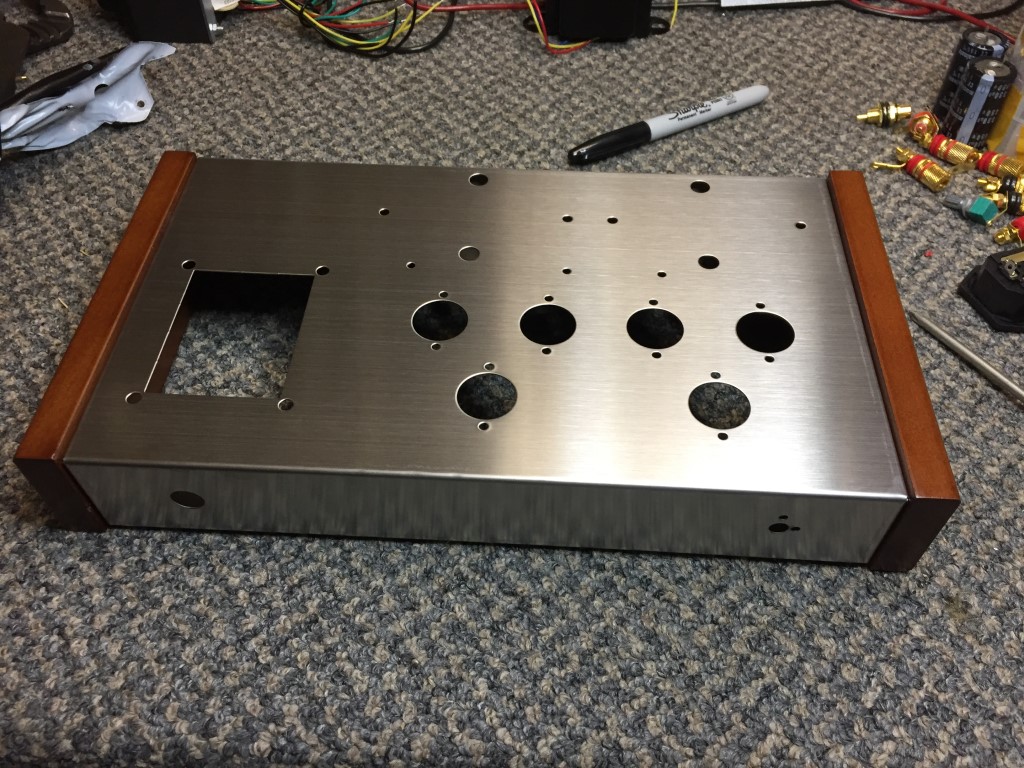
Got the ends on...
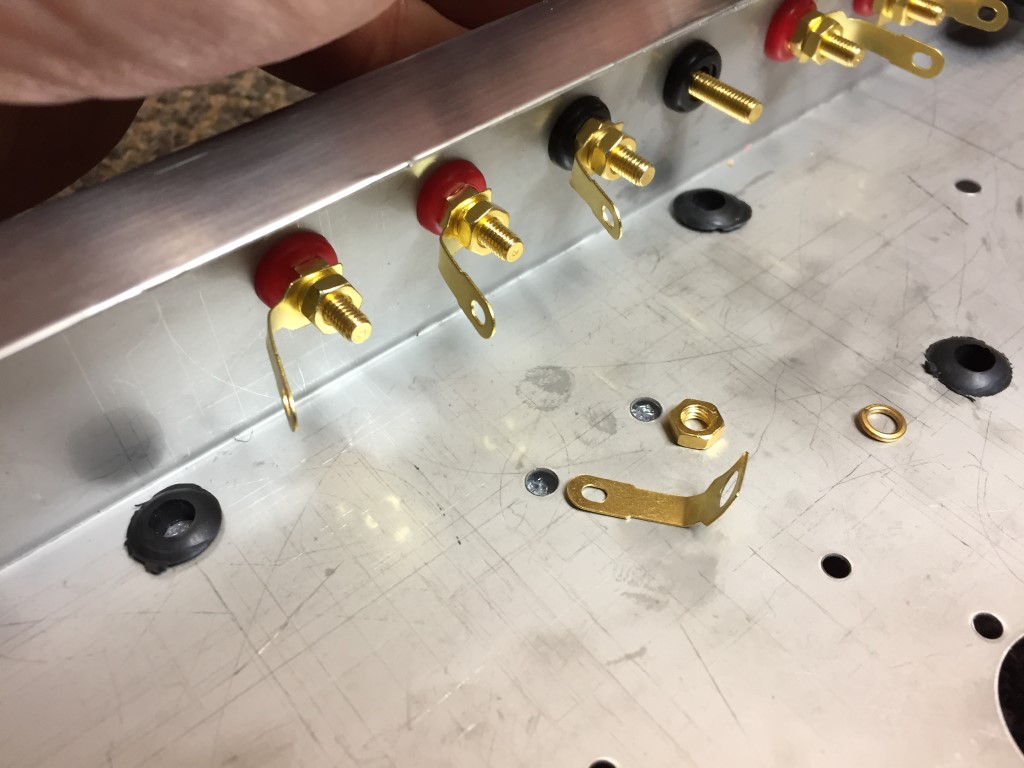
Working on the speaker connectors. Like before, had to glean a little off the insulators so it will fit tight. Oh, the best way to put on is a nut 1st, then the connector, lock washer then the 2nd nut. These aren't too bad quality, much better than what came with my 1st kit. I used a small screwdriver to lock while I tightened down.
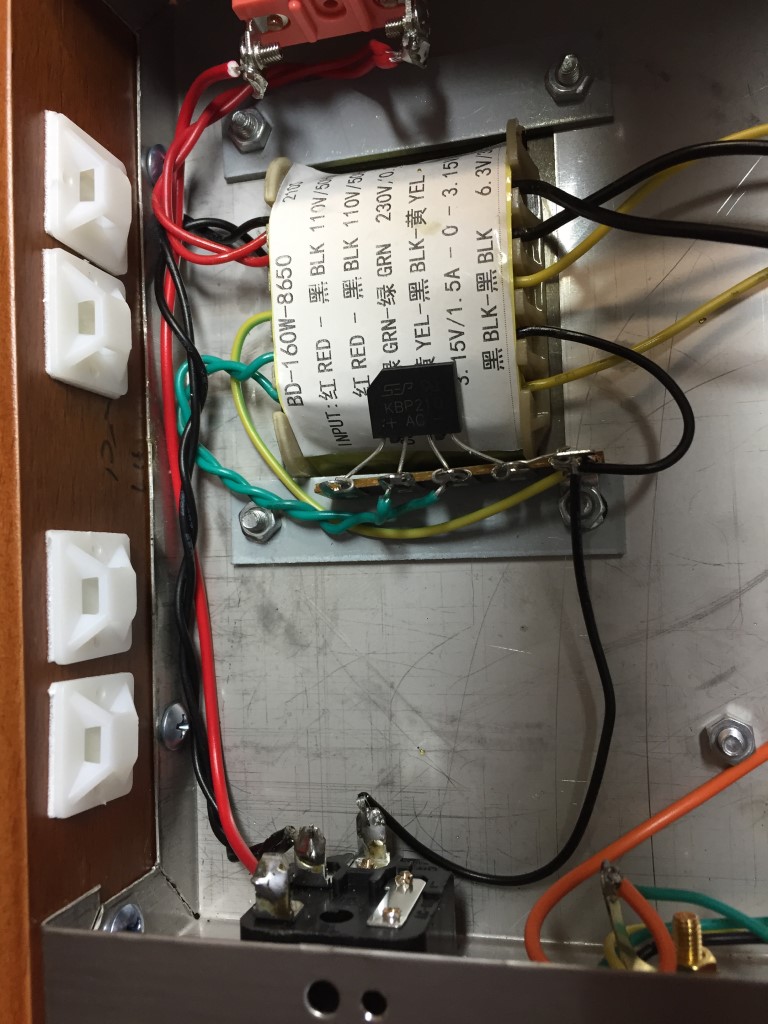
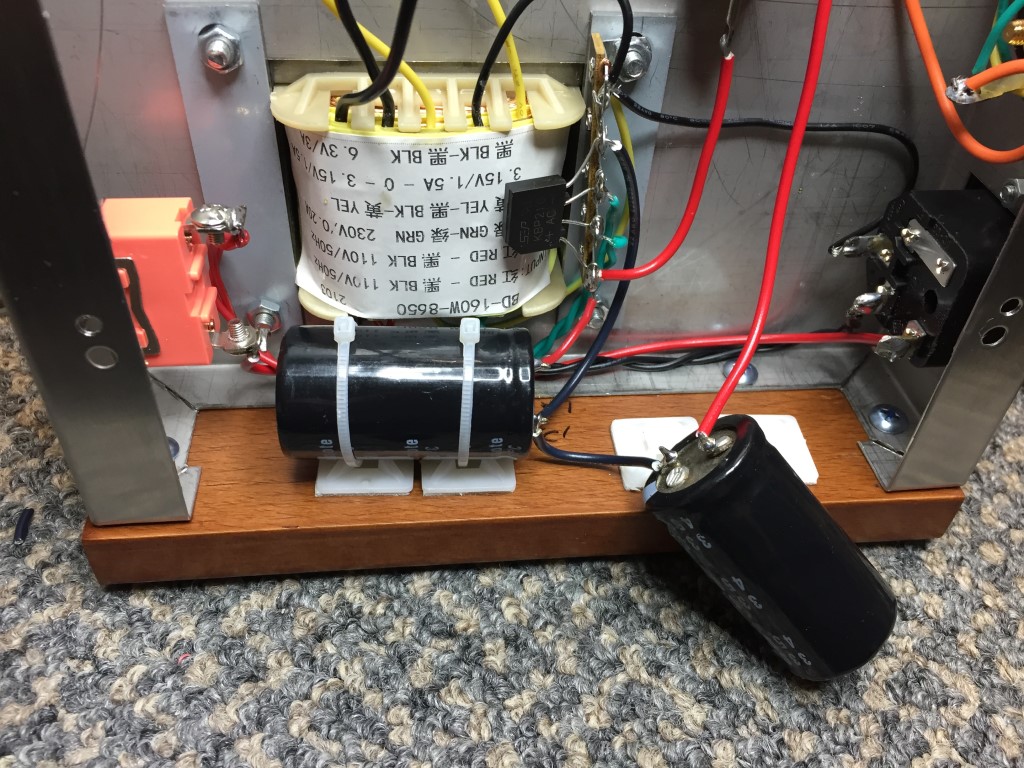
Putting the sticky pads on to mound the 2 big electrolytics and mounted the bridge. I found an old school terminal strip fit real nice. Also connected the primary of the transformer, power switch, ac plug and HV secondary winding. I also grounded the CT on the heater winding.
Putting the big electrolytics in place
Ready for the PC board. Got all the power resistors and transformers mounted. Note: The 10w 250ohm resistors had to have the holes drilled out for it to allow the supplied screw to pass through.
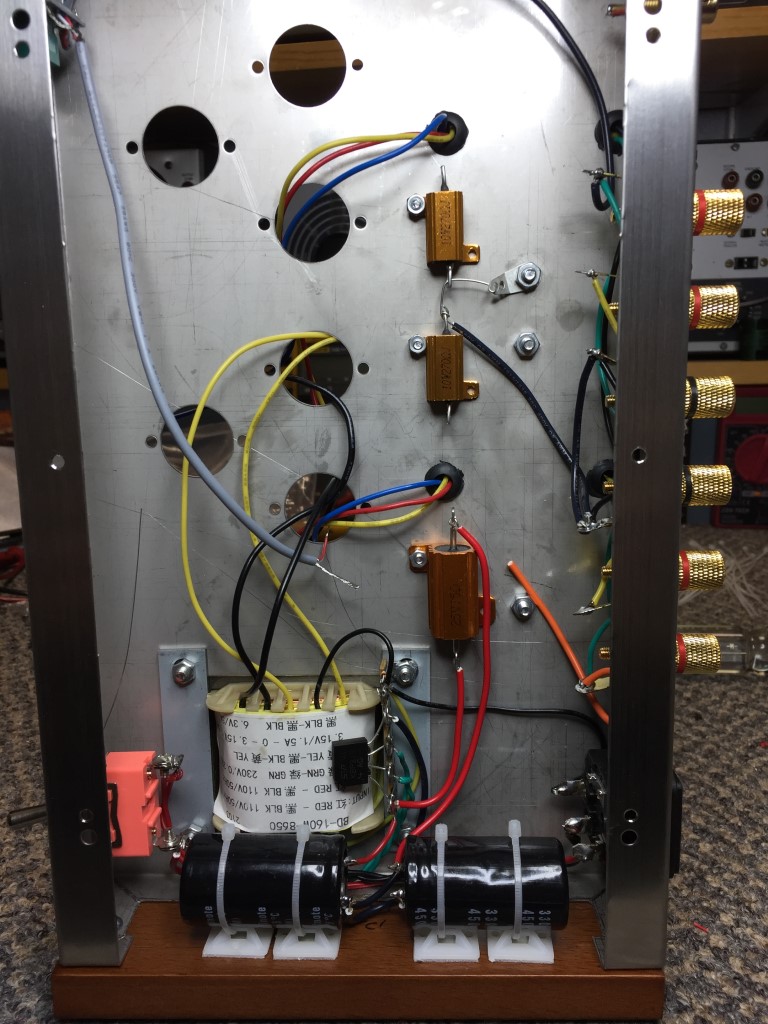
This is where I quit for the night. Time to eat supper and watch a movie with the family!
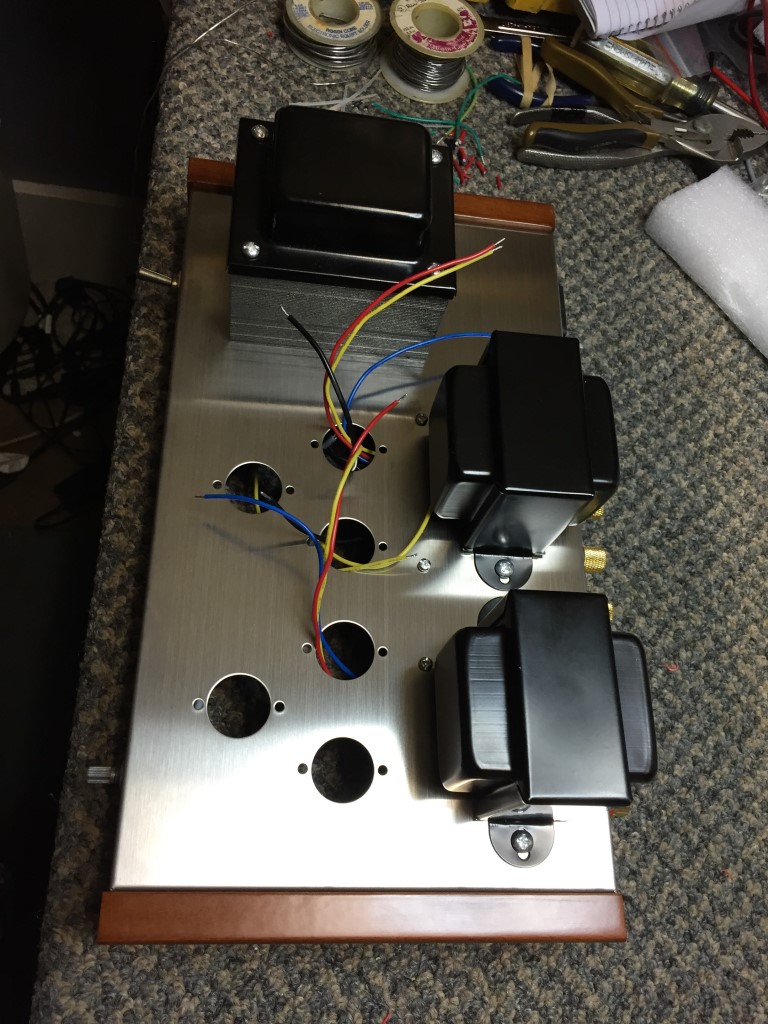
If I could find the place called "Somewhere", I could find "Anything" 
Tim
Jesus cried out and said, "Whoever believes in me , believes not in me but in him who sent me" John 12:44
Posts: 1,213
Threads: 85
Joined: Jan 2014
City: Annapolis, IL
State, Province, Country: USA
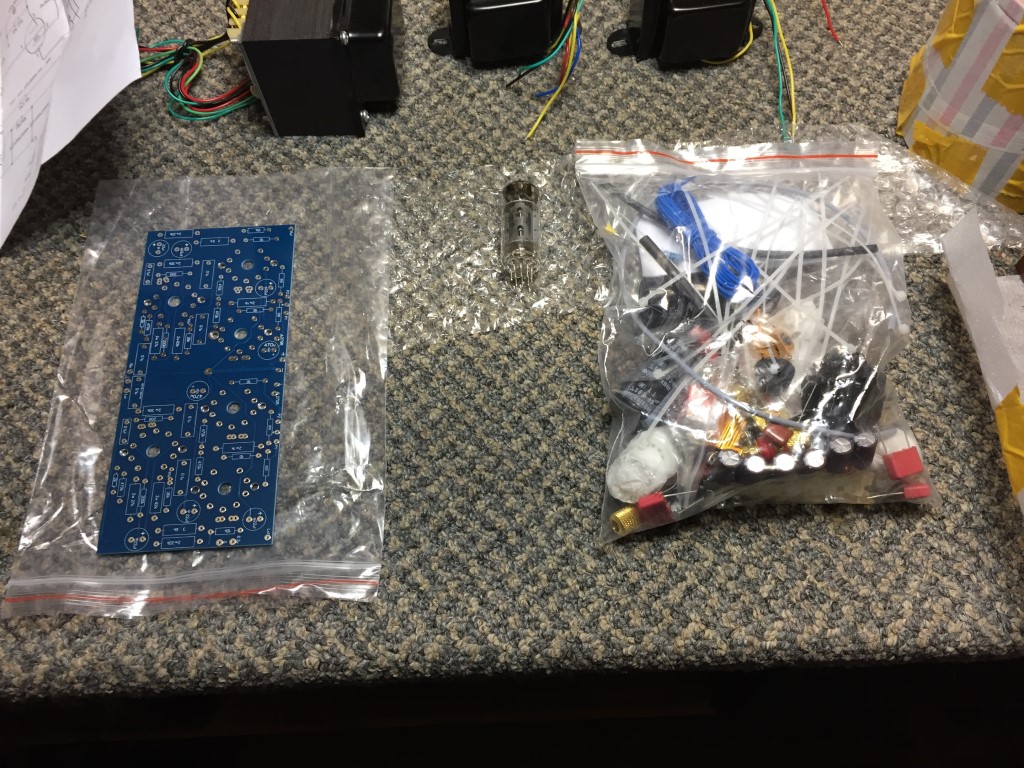
Another snow day! I spent the afternoon working on the PC board. They had it labeled clearly with the value of each part. I only wish they had the part location related to the schematic, such as "C1, R22, V1 etc. This part went pretty good. It was straightforward and simple. As in a previous build, I used a small box labeled with each part, then stuck the wires in the cardboard as shown. This idea was picked up from an old Heathkit manual.
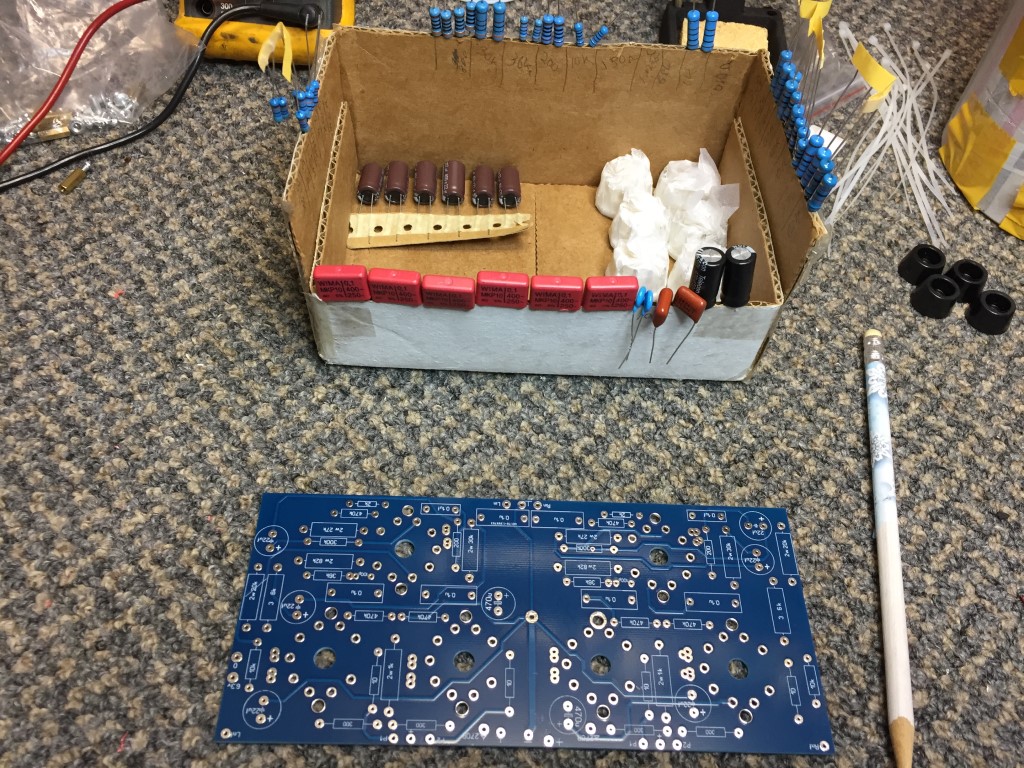
Started with the resistors. I checked each one before I installed.
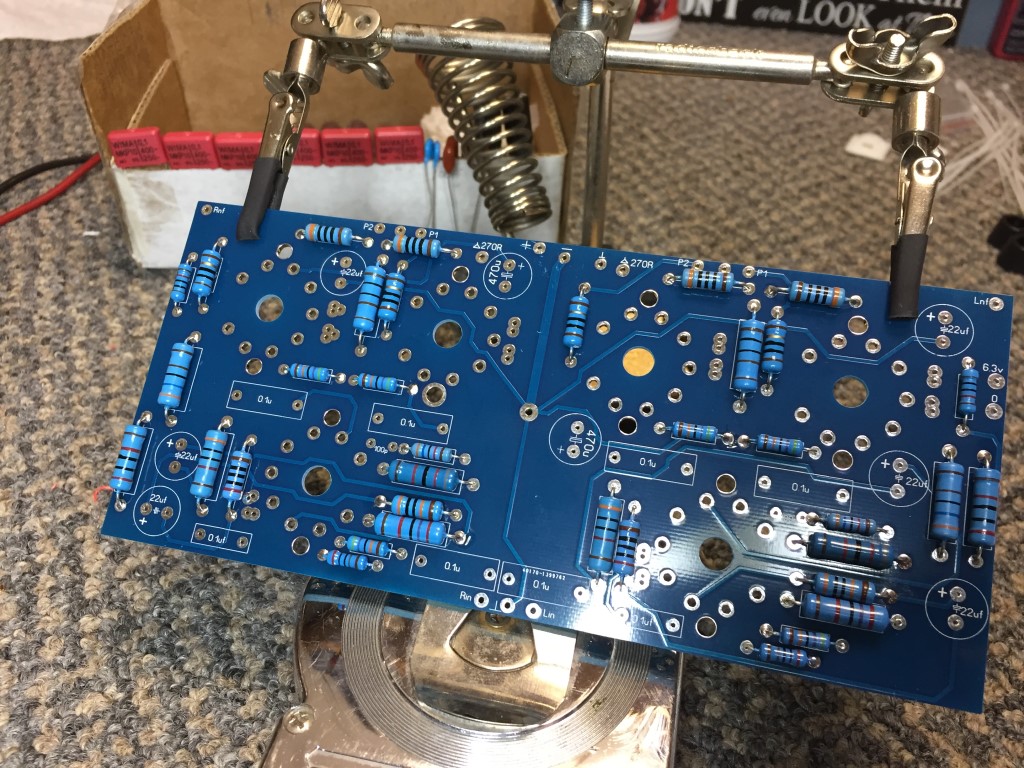
Next I put the Electrolytics, then the smaller caps.
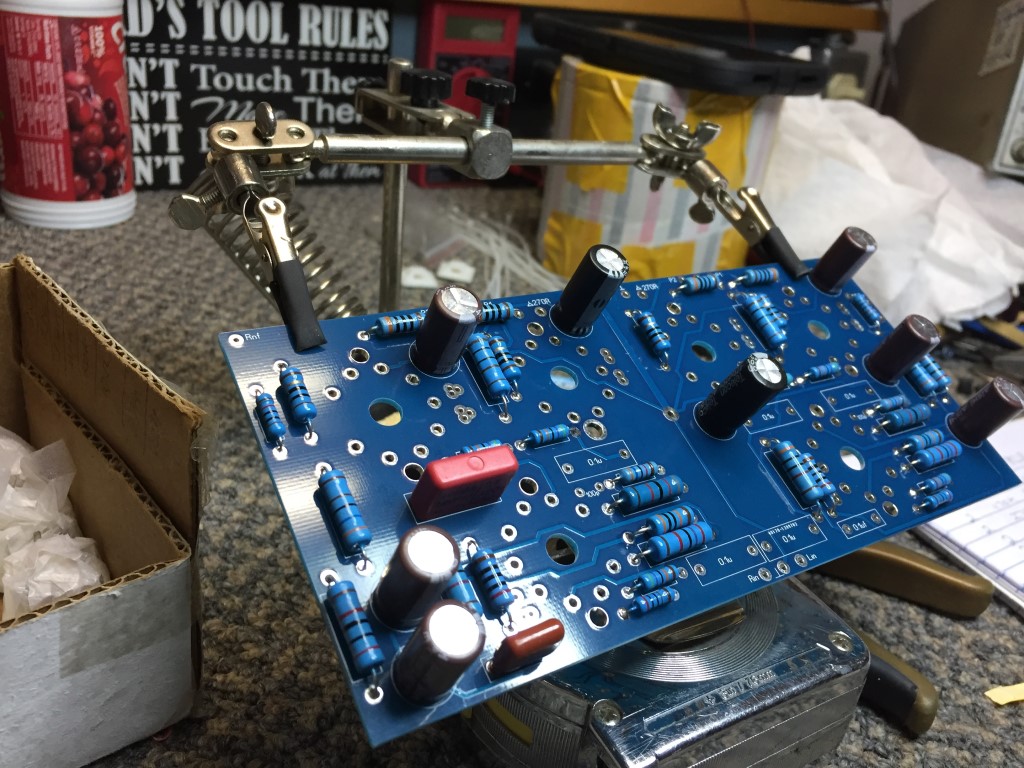
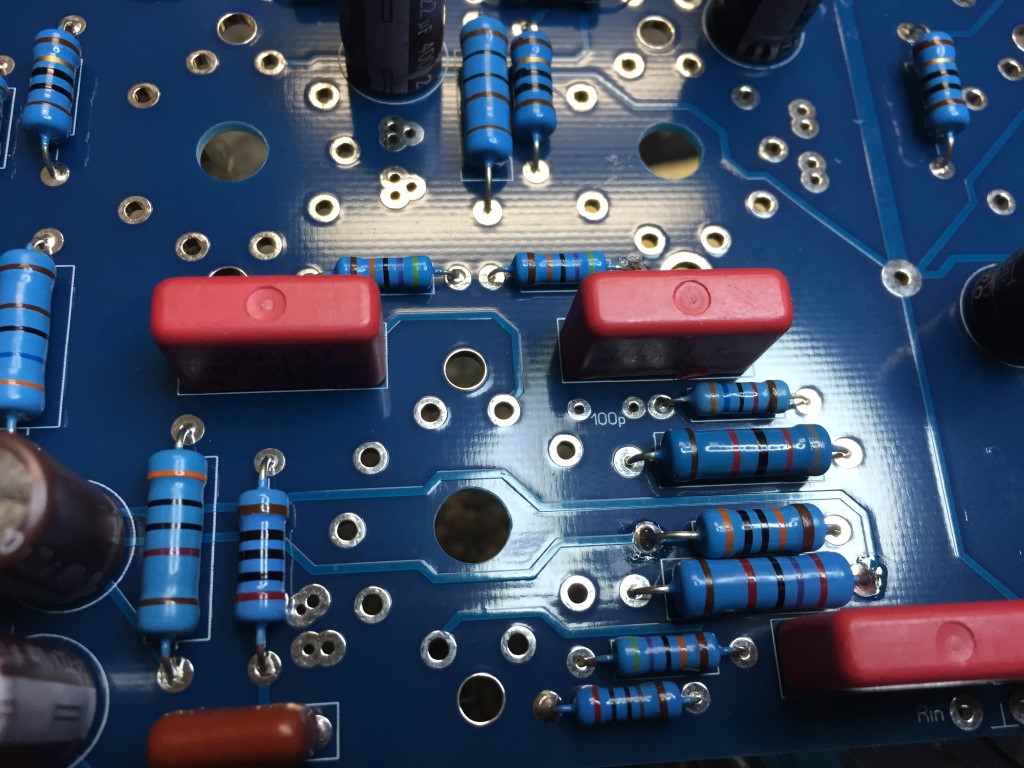
This one was a little harder to locate, It's a 100pf disk and I had to hunt to find its location.
If I could find the place called "Somewhere", I could find "Anything" 
Tim
Jesus cried out and said, "Whoever believes in me , believes not in me but in him who sent me" John 12:44
Posts: 13,776
Threads: 580
Joined: Sep 2005
City: Ferdinand
State, Province, Country: Indiana
Tim, is that a double sided board?
I think I would be tempted to replace the electrolytics they furnish with the kit with Nichicon and/or Panasonic, and the film caps with WIMA, for greater reliability. But that's just my opinion. I hope the kit turns out well!
--
Ron Ramirez
Ferdinand IN
Posts: 358
Threads: 4
Joined: Aug 2015
City: Monteith, Ontario CA
Watching .... interesting ..... keep up the good photos and text !!
Posts: 16,533
Threads: 573
Joined: Oct 2011
City: Jackson
State, Province, Country: NJ
Ron
>>replace the electrolytics they furnish with the kit with Nichicon and/or Panasonic,
I'd do the same, only first I'd like to ask if by any chance the caps are of some good brand in the first place. From the photos I wouldn't be able to tell.
People who do not drink, do not smoke, do not eat red meat will one day feel really stupid lying there and dying from nothing.
Posts: 1,887
Threads: 120
Joined: May 2008
City: Omak
State, Province, Country: WA
Hello Tim,
Nice Kit . and I agree with Ron,
Sincerely Richard
Posts: 1,213
Threads: 85
Joined: Jan 2014
City: Annapolis, IL
State, Province, Country: USA
I may go ahead and replace the 2 big power supply electrolytics. They didn't look that impressive and will be hit hard right off the bridge. I couldn't find any of the brands mentioned (in the size and value) but I did find a few CDE caps. Most all say "from China". The smaller ones on the PC board "appear" to be operated well below their rated values, and shouldn't be hit with much ripple current. I think the B+ is in the 250v neighborhood and they are 400v caps. I did a hunt for some WIMA caps and found quite a few offerings. But I have a dumb question, just what is WIMA? A brand or type?
If I could find the place called "Somewhere", I could find "Anything" 
Tim
Jesus cried out and said, "Whoever believes in me , believes not in me but in him who sent me" John 12:44
Posts: 1,114
Threads: 14
Joined: Feb 2013
City: Irvington, NY
Wima is a brand of polyester and polypropylene caps supplied in a red box type package. They look identical to the red rectangular caps mounted on your PCB. They are well regarded by audiophile types, although really just another film cap.
The ones you have appear to be Chinese clones of the Wima caps.
Posts: 16,533
Threads: 573
Joined: Oct 2011
City: Jackson
State, Province, Country: NJ
WIMA is a German brand. Supposedly made in Germany too.
People who do not drink, do not smoke, do not eat red meat will one day feel really stupid lying there and dying from nothing.
Posts: 1,213
Threads: 85
Joined: Jan 2014
City: Annapolis, IL
State, Province, Country: USA
Progress ...
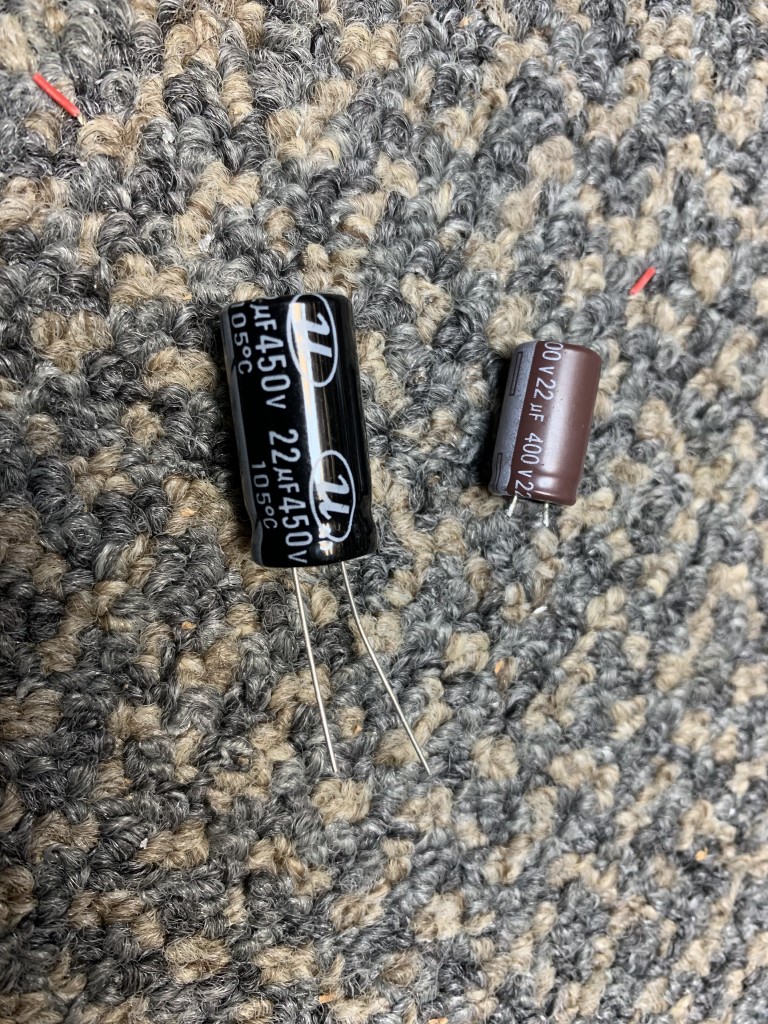
I decided to follow Rons advice to some degree and am upgrading the main filter caps and screen caps with some I had from Mouser. You can see the size difference here on the 22uf 400 vs. 22uf 450v from mouser. The others in the circuit wont have as much voltage or ripple.
You have to kinda watch the pins on the tube sockets when inserting to the PC board, Seems like they kind of want to escape. I found it was best to install the spacers 1st on the PC, then insert the tube sockets.
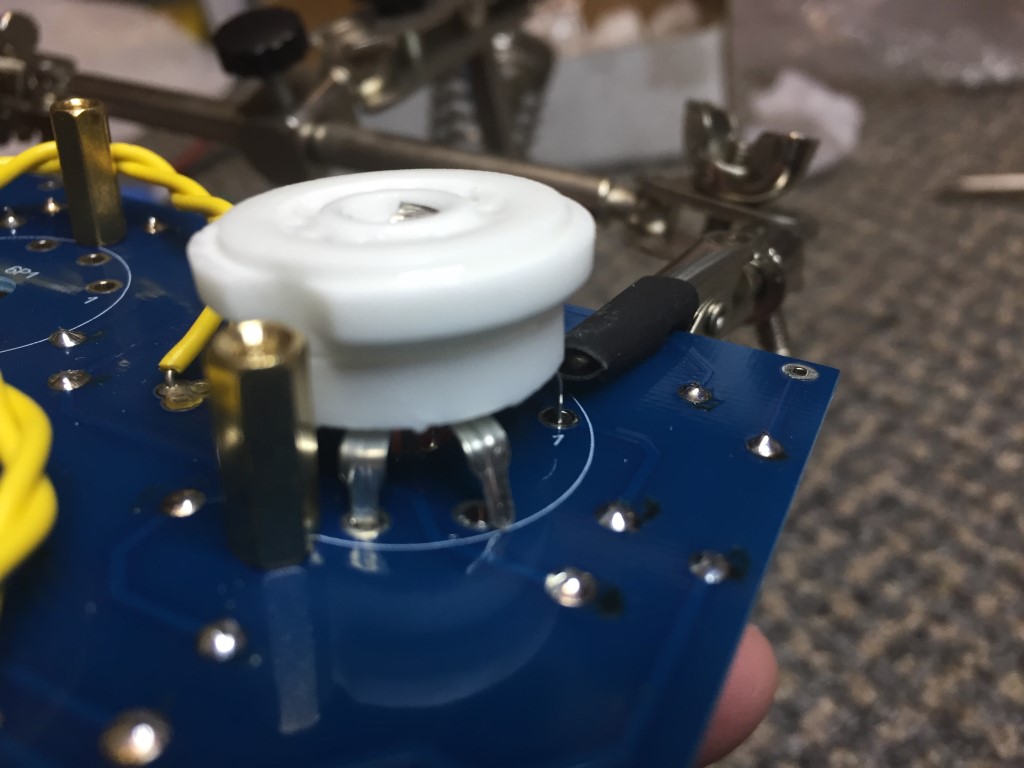
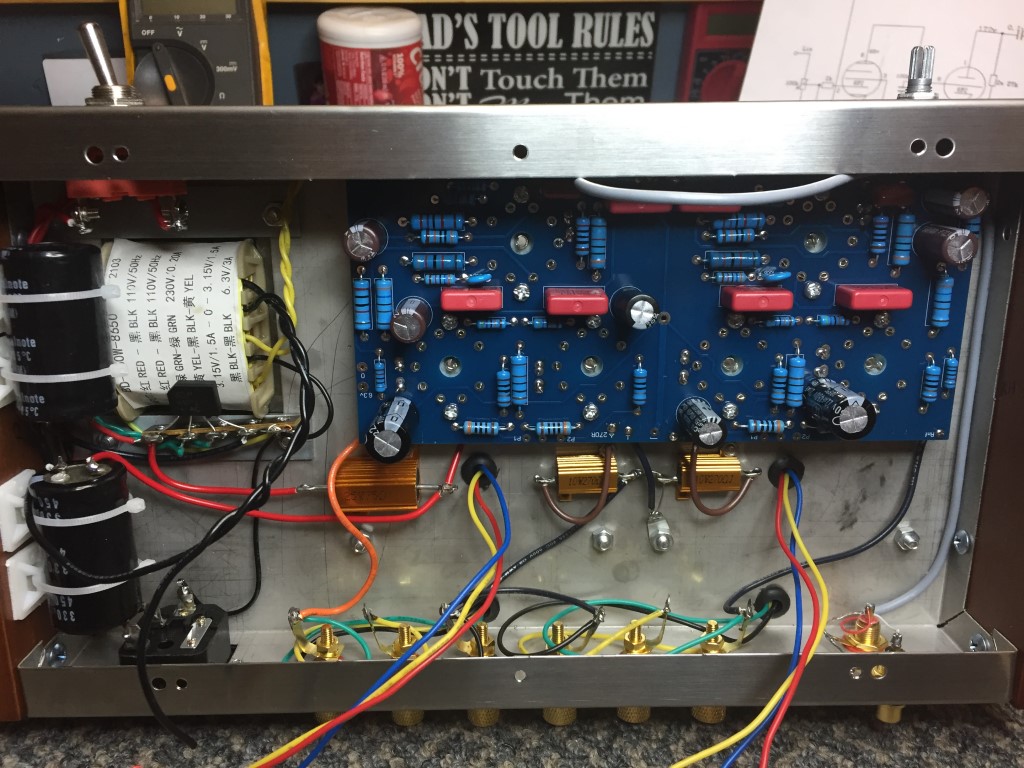
The completed PC board. I did not solder the tube sockets at this point. I will wait until the board is mounted and the sockets are level with the chassis before I solder. I detest crooked tubes and sockets.
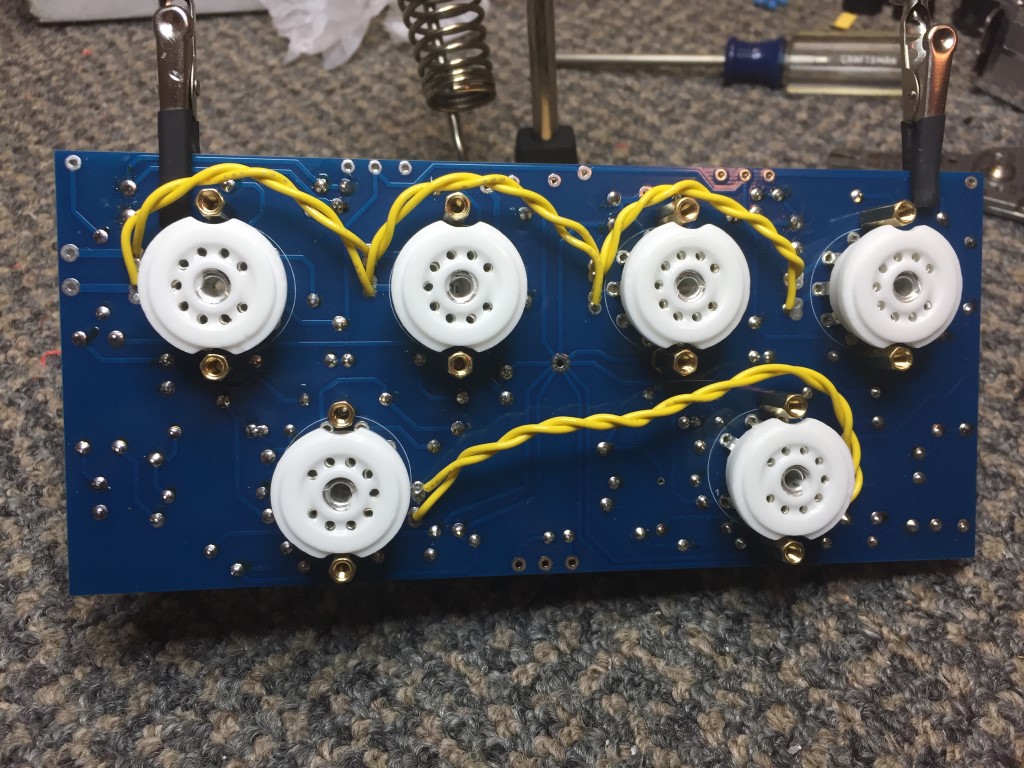
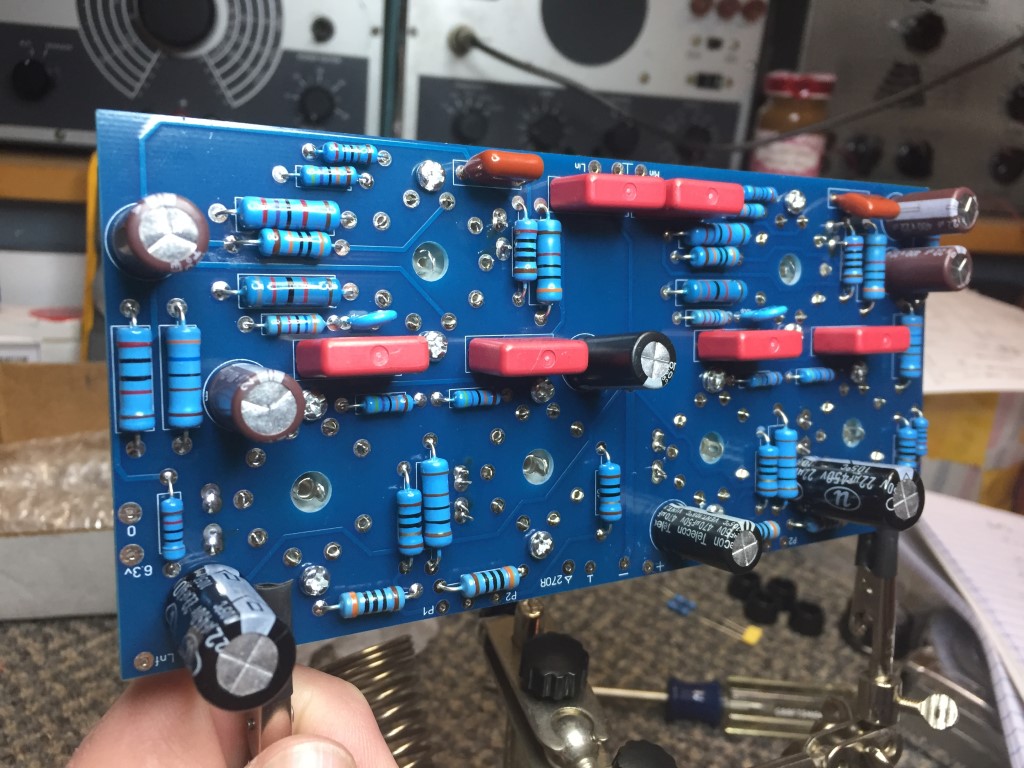
I left plenty of wire so the board can be removed for service if needed without unsoldering. The input cable is shielded and the filament wires will go straight down against the chassis.
*Note that the output tubes and voltage amp tubes are on separate filament windings, also on the voltage amp tubes, you have to solder the filament leads on the PC board on a couple extra pads near the tube sockets. Not a fan of this but it works. The output tubes have clearly labeled pads on the edge of the PC board. You have to jumper the filaments of the output tubes as shown. There are no connecting traces, just extra pads to solder to. Again, not a fan of this, but it works.
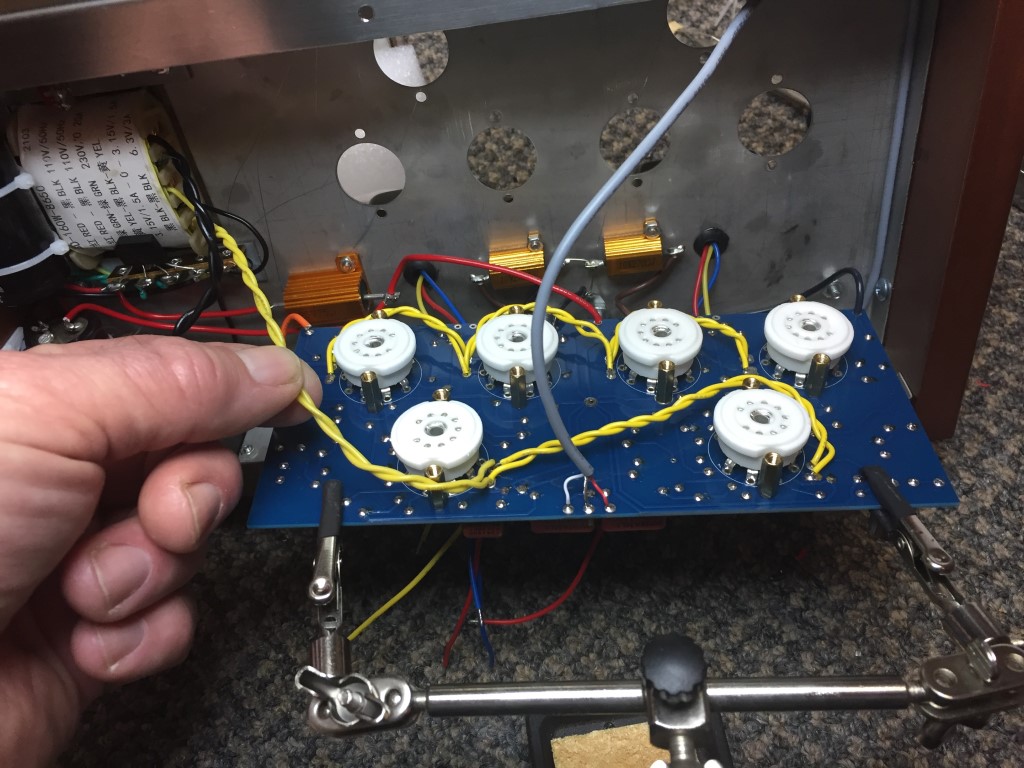
The final installation. I still need to solder the wires for the output xformers and a few other things. This is where I quit for the night.
If I could find the place called "Somewhere", I could find "Anything" 
Tim
Jesus cried out and said, "Whoever believes in me , believes not in me but in him who sent me" John 12:44
Posts: 1,887
Threads: 120
Joined: May 2008
City: Omak
State, Province, Country: WA
Hello TV Man,
that amp is coming along really nicely and that was a good choice on the filter capacitors I mostly use Nichicon Capacitors, but I also use united chemical and some sprague .
Sincerely Richard
Posts: 116
Threads: 25
Joined: Jul 2006
City: Lebanon, NJ 08833
CDE (Cornell Dublier) electrolytics are aslo very good.
Steve D
Posts: 1,394
Threads: 46
Joined: Nov 2017
City: Menlo Park
State, Province, Country: CA
Nice project!
I built a valve (tube) amp kit many years ago (push pull stereo with EL34 outputs). This was going strong for many years, but last week, suddenly developed a pronounced hum in the speakers which I took to be failing electrolytics. New caps are on order. The originals lasted ~ 20 years and many hours, despite being a brand of which I had never heard (Trobo). The replacements will be Nichicon 105°C types.
Looking forward to the outcome of your project.
Ed
I don't hold with furniture that talks.
Posts: 16,533
Threads: 573
Joined: Oct 2011
City: Jackson
State, Province, Country: NJ
Tim,
I might've missed the place where you wrote it, but: who did you choose as the electrolytics mfr, the one you boughtr from Mouser?
People who do not drink, do not smoke, do not eat red meat will one day feel really stupid lying there and dying from nothing.
Users browsing this thread: 3 Guest(s)
|
|
Recent Posts
|
|
New find. 91X code 225
|
| Thanks all. To be honest I don’t know what to make of it being in this cabinet style but I like it a lot. I specifically...pdieten — 12:47 PM |
|
New find. 91X code 225
|
| Nice grab! It appears to be a 19X cabinet. This wasn't unusual. Philco often retrofitted to other cabinets as invento...GarySP — 12:32 PM |
|
1949 Motorola 5A9M
|
| I would certainly write down step-by-step the progression of disassembly of the works, and probably cuss out the electri...GarySP — 12:18 PM |
|
New find. 91X code 225
|
| Nice looking! This annotated schematic from our library shows parts that are slightly different in the early and later ...klondike98 — 11:33 AM |
|
1949 Motorola 5A9M
|
| LOL!! Well Arran, if you do dive into it and come across any advice on dealing with accessing components let me know. I...klondike98 — 11:56 PM |
|
1949 Motorola 5A9M
|
| Bob and Gary;
I have the further complication on the Phillips that they decided to use some 200 volt rated paper caps...Arran — 10:05 PM |
|
1949 Motorola 5A9M
|
| Thx Arran & Gary. Yes its super crowded in the chassis and I've debated whether to try to restuff caps or not. I t...klondike98 — 07:40 PM |
|
1949 Motorola 5A9M
|
| That's got to be one of the tightest conglomeration of components I've ever seen! I wonder how the line workers felt bu...GarySP — 05:46 PM |
|
1949 Motorola 5A9M
|
| Bob;
I think that the Phillips was actually manufactured in Canada, though they may have imported many of the compone...Arran — 02:28 PM |
|
1949 Motorola 5A9M
|
| I've started replacing the electrolytic caps now. As Arran mentioned, they are housed under a metal strap. Here's a ph...klondike98 — 12:22 PM |
|
Who's Online
|
| There are currently no members online. |

|
 
|


![[-] [-]](https://philcoradio.com/phorum/images/bootbb/collapse.png)


