07-13-2025, 04:58 PM
New stuff are installed, capacitors are ready for final assembly.
If you want to work, lie down and sleep, and everything will pass.

|
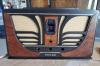
Rogers Majestic R-646

07-13-2025, 04:58 PM
New stuff are installed, capacitors are ready for final assembly.
If you want to work, lie down and sleep, and everything will pass.
07-13-2025, 05:00 PM
Finally the capacitors are ready.
If you want to work, lie down and sleep, and everything will pass.
07-13-2025, 05:34 PM
The next step is to restore the volume control potentiometer (regeneration level) and the tone control rheostat.
Both are in very poor condition, the main resistor horseshoe plates are open, and changing the position of the resistance interrupts the contact completely. A complete disassembly, inspection and repair will be required. I would categorically not want to replace these parts with new ones, since they are very specific, especially for these years and this model. If you want to work, lie down and sleep, and everything will pass.
07-14-2025, 01:32 PM
Yesterday I tried to examine these resistors. I was surprised by the unknown design inside. The moving point does not directly contact the resistive plate, but is simply pressed against an additional contact spring that contacts the resistive layer at the desired point. Such a design should eliminate mechanical impact on the resistor and ensure a long service life.
But, unfortunately, this successful design completely failed due to the unsuccessful design of the resistive plate. It is made of cardboard with a carbon layer. As a result, the carbon layer oxidized, and the rating not only increased several times, but in some places the carbon layer of the resistor was completely open off. I restored the tone rheostat. Not completely, the rating is higher than the original and is interrupted in the extreme position. But since this tone control is not important for functionality, and its rating is not critical, I can use this rheostat, restoring the carbon layer with a graphite pencil. The situation is worse with the volume control potentiometer. It is the same in design, but with an added switch. The resistor condition is the same as above. In addition, the switch turned out to be unreliable. But the requirements for the circuit do not allow changing the resistor value and are sensitive to the quality of the contact. Unfortunately, in the case of the volume control potentiometer, it will have to be replaced with a new one. I am currently buying both resistors online, but I will try to keep the original tone control but update the volume control. If you want to work, lie down and sleep, and everything will pass.
07-14-2025, 01:35 PM
Tomorrow I'll start working with audio transformers.
If you want to work, lie down and sleep, and everything will pass.
12-04-2025, 01:39 PM
After a break, we return to the fascinating process of reviving centuries-old technologies.
The break arose for various reasons, but at the root of them all was... laziness. First, I spent a month away from Edmonton, half a month with my daughter in Toronto, and the remaining half a month relaxing on the Atlantic beaches of Cuba. Then... then, in between chores, I played with toys. In between leisurely restoration of this radio, I completed a very interesting "Frankenstein," assembled by a local craftsman with a very steady hand from a farmers battery radio Rogers-8R662. And a small portable Motorola-5M2U. I'll write a separate article about them as soon as I overcome another bout of potential laziness. If you want to work, lie down and sleep, and everything will pass.
12-04-2025, 02:23 PM
Let's get back to the restoration of the vintage Rogers Majestic R-646.
A little about the disassembly and reassembly process. In many cases, the instrument must be thoroughly disassembled, sometimes right down to the very foundation. To avoid racking your brain trying to find "unnecessary" parts and to get as close to the original as possible, the most reliable method is to photograph each stage of disassembly. These photographs will make the restoration much easier. Example of documenting the disassembly process: If you want to work, lie down and sleep, and everything will pass. 
12-04-2025, 02:36 PM
Hi Vlad. Is this the original Rоgers case or has it been modified? It is very beautiful.
Old tube radios and gramophones museum TV channel https://www.youtube.com/user/RadioSvit Sincerely Peter З повагою Петро
12-04-2025, 03:27 PM
And now for the sad, but fortunately resolved, issue: audio transformers.
As I already wrote, the original transformers are clinically dead. To find a suitable replacement, I examined the output transformer of my working Philco-20A, which has a completely identical audio amplifier output stage and the same 8-ohm speaker impedance. With the speaker unplugged, I applied 3 volts to the output and measured the voltage at the tube anodes. The result was about 60 volts. This means the required transformation ratio for each anode is about 20. Therefore, a suitable replacement would be a 120 + 120 volt to 6 volt line transformer. And I found one at a very reasonable price—only about $11. It's a Jameco Reliapro 9W TR4820-91-R Power Transformer. https://www.jameco.com/z/TR4820-91-R-Jam...BEbDF7kXTv Primary winding: 115+115V, 9W. Secondary winding: 6+3V, 1A. This transformer is suitable for the output transformers as is, and only the primary winding will be used as a phase-inverter autotransformer (FIAT). An additional 10kΩ resistor and 0.1μF capacitor for the modified circuit were built into the casing, resulting in the connection of the transition transformer remaining exactly the same as in the original circuit. If you want to work, lie down and sleep, and everything will pass.
12-04-2025, 03:33 PM
Quote:RadioSvitFull original. I fell for it because it was cute. And secondly, it fits my weakness for battery-powered devices. But as it turns out, that wasn't quite true, or rather, completely wrong. I'll write more about it in a separate article. If you want to work, lie down and sleep, and everything will pass.
12-04-2025, 03:44 PM
Just then, an Amazon order arrived for this project - Tung Oil, Wood Putty, and Speaker Cloth.
If you want to work, lie down and sleep, and everything will pass.
12-04-2025, 04:16 PM
Speaker restoration.
It appears the speaker was replaced a long time ago, as the cable was clearly re-soldered rather carelessly. However, the speaker itself is in excellent condition and only requires cosmetic repairs and replase totally broken wires. All previously removed chassis parts were also painted. If you want to work, lie down and sleep, and everything will pass.
12-04-2025, 04:30 PM
Preparing the main chassis for restoration.
This is what it looked like before: Prepared for painting. Attention followers: To maintain maximum authenticity, it's also important to protect minor, small parts, such as tubes socets, rivets, screws, etc. If you want to work, lie down and sleep, and everything will pass.
12-04-2025, 04:40 PM
And this is what the chassis looked like after restoration:
If you want to work, lie down and sleep, and everything will pass.
12-04-2025, 05:03 PM
After restoring all the parts, it was time to put everything back together.
This turned out to be easy, as I took detailed photographs of each disassembly step. All that was left was to carefully retrace the steps. Along the way, I had to replace almost half of the rubber-insulated wires, which had simply peeled off to the bare core. I had some original wires in good condition, and in some cases I used a tried-and-true method: threading modern wire through shoelace sheathing. As you can see in the next photo. If you want to work, lie down and sleep, and everything will pass.
« Next Oldest | Next Newest »
Users browsing this thread: 1 Guest(s) |

|

|