37-620B Cabinet Restoration
Posts: 172
Threads: 10
Joined: Mar 2026
City: Franklin
State, Province, Country: Maine
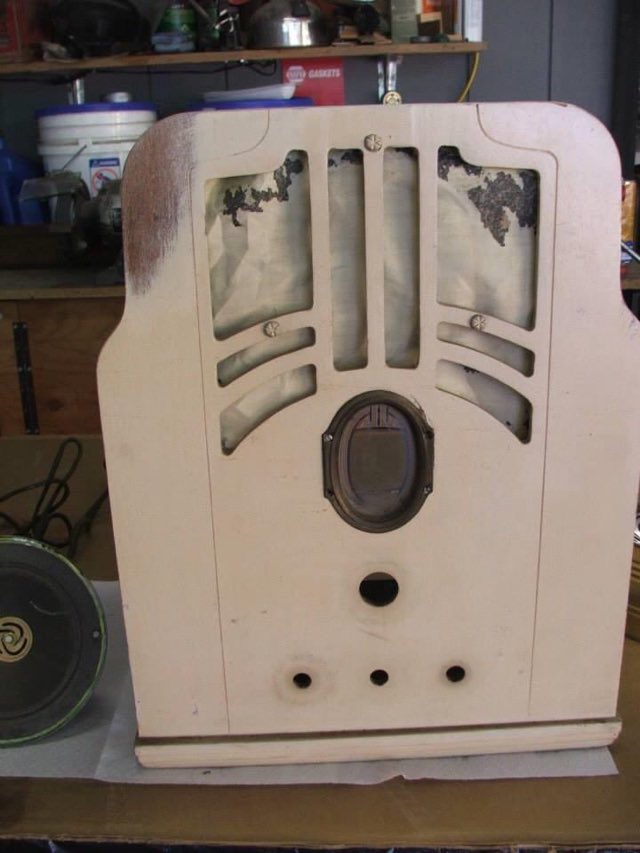
While I'm finishing up the electrical restoration in my other thread, I figured it would be a good time to gather some tips for options for the cabinet. Below are some photos of the cabinet's present state. This radio had the photo finish front and there were quite a few damaged spots, but even more than that, I think it had simply sat in the sun and the colors were very washed out. The contrast was particularly noticeable when I removed the escutcheon - the finish underneath was beautiful, if still fake. I did initially try to do some color matching repair with some art supplies but the remaining finish was just crumbling, so I decided to take it off altogether.
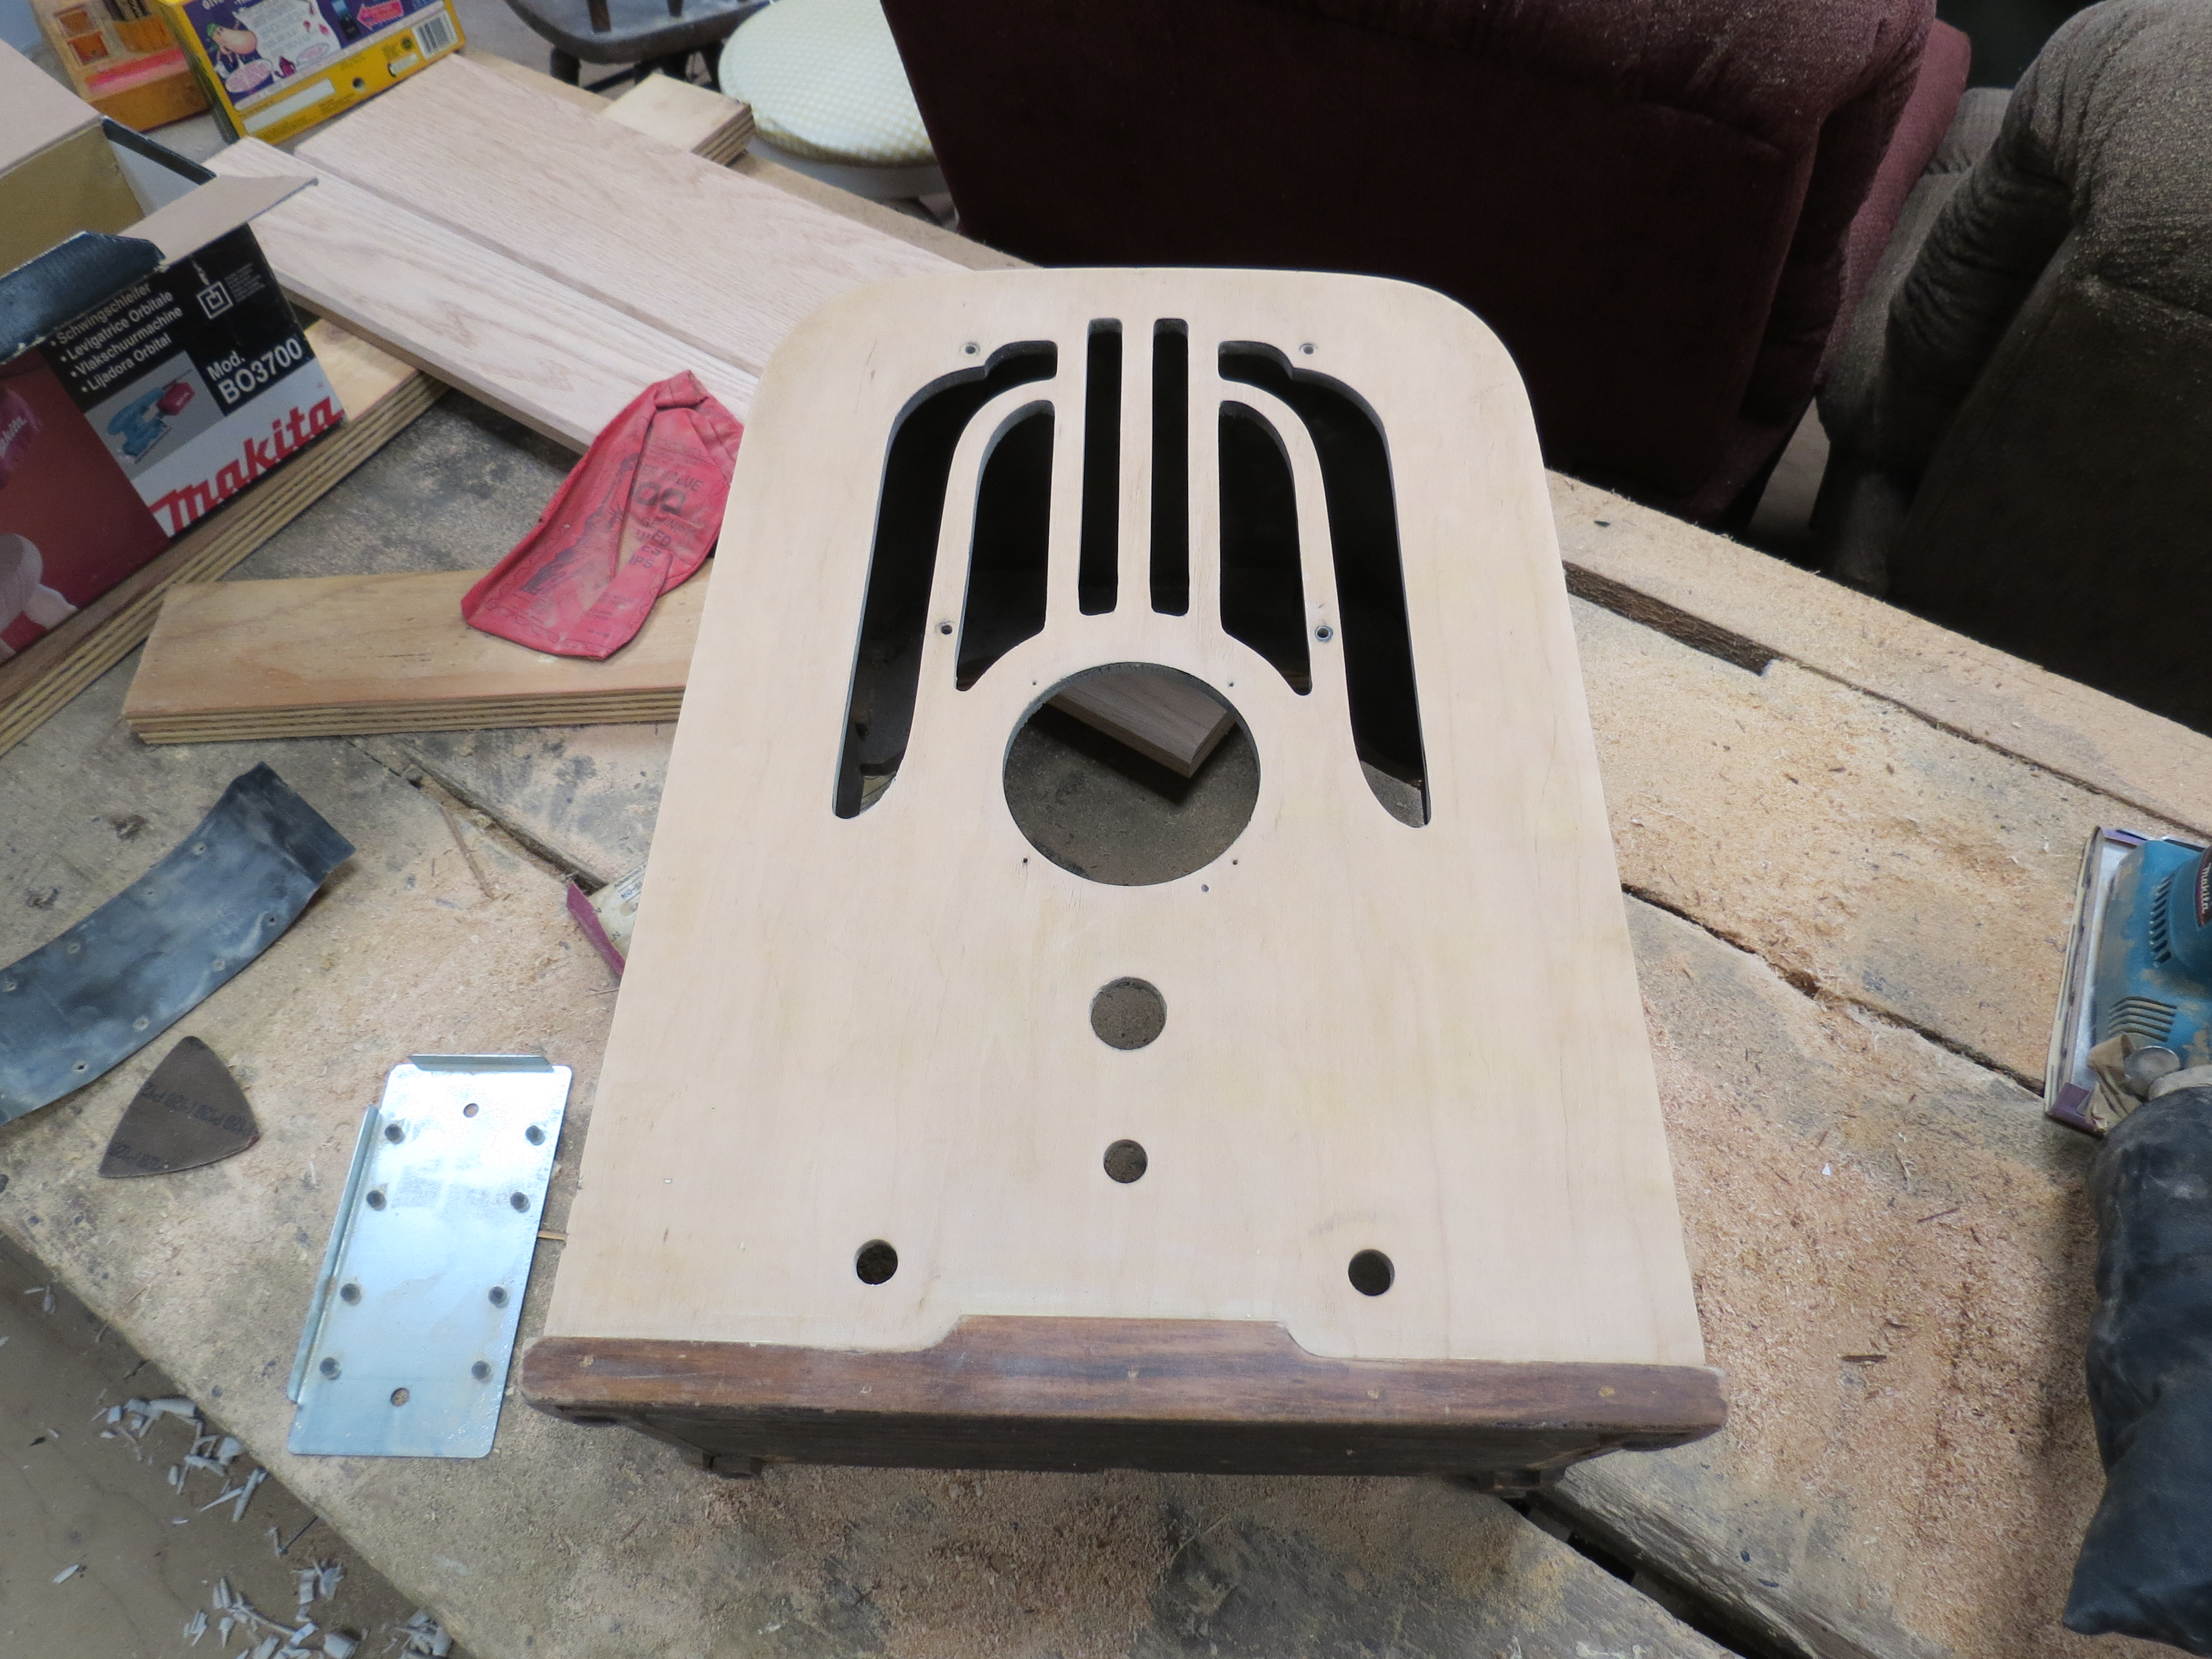
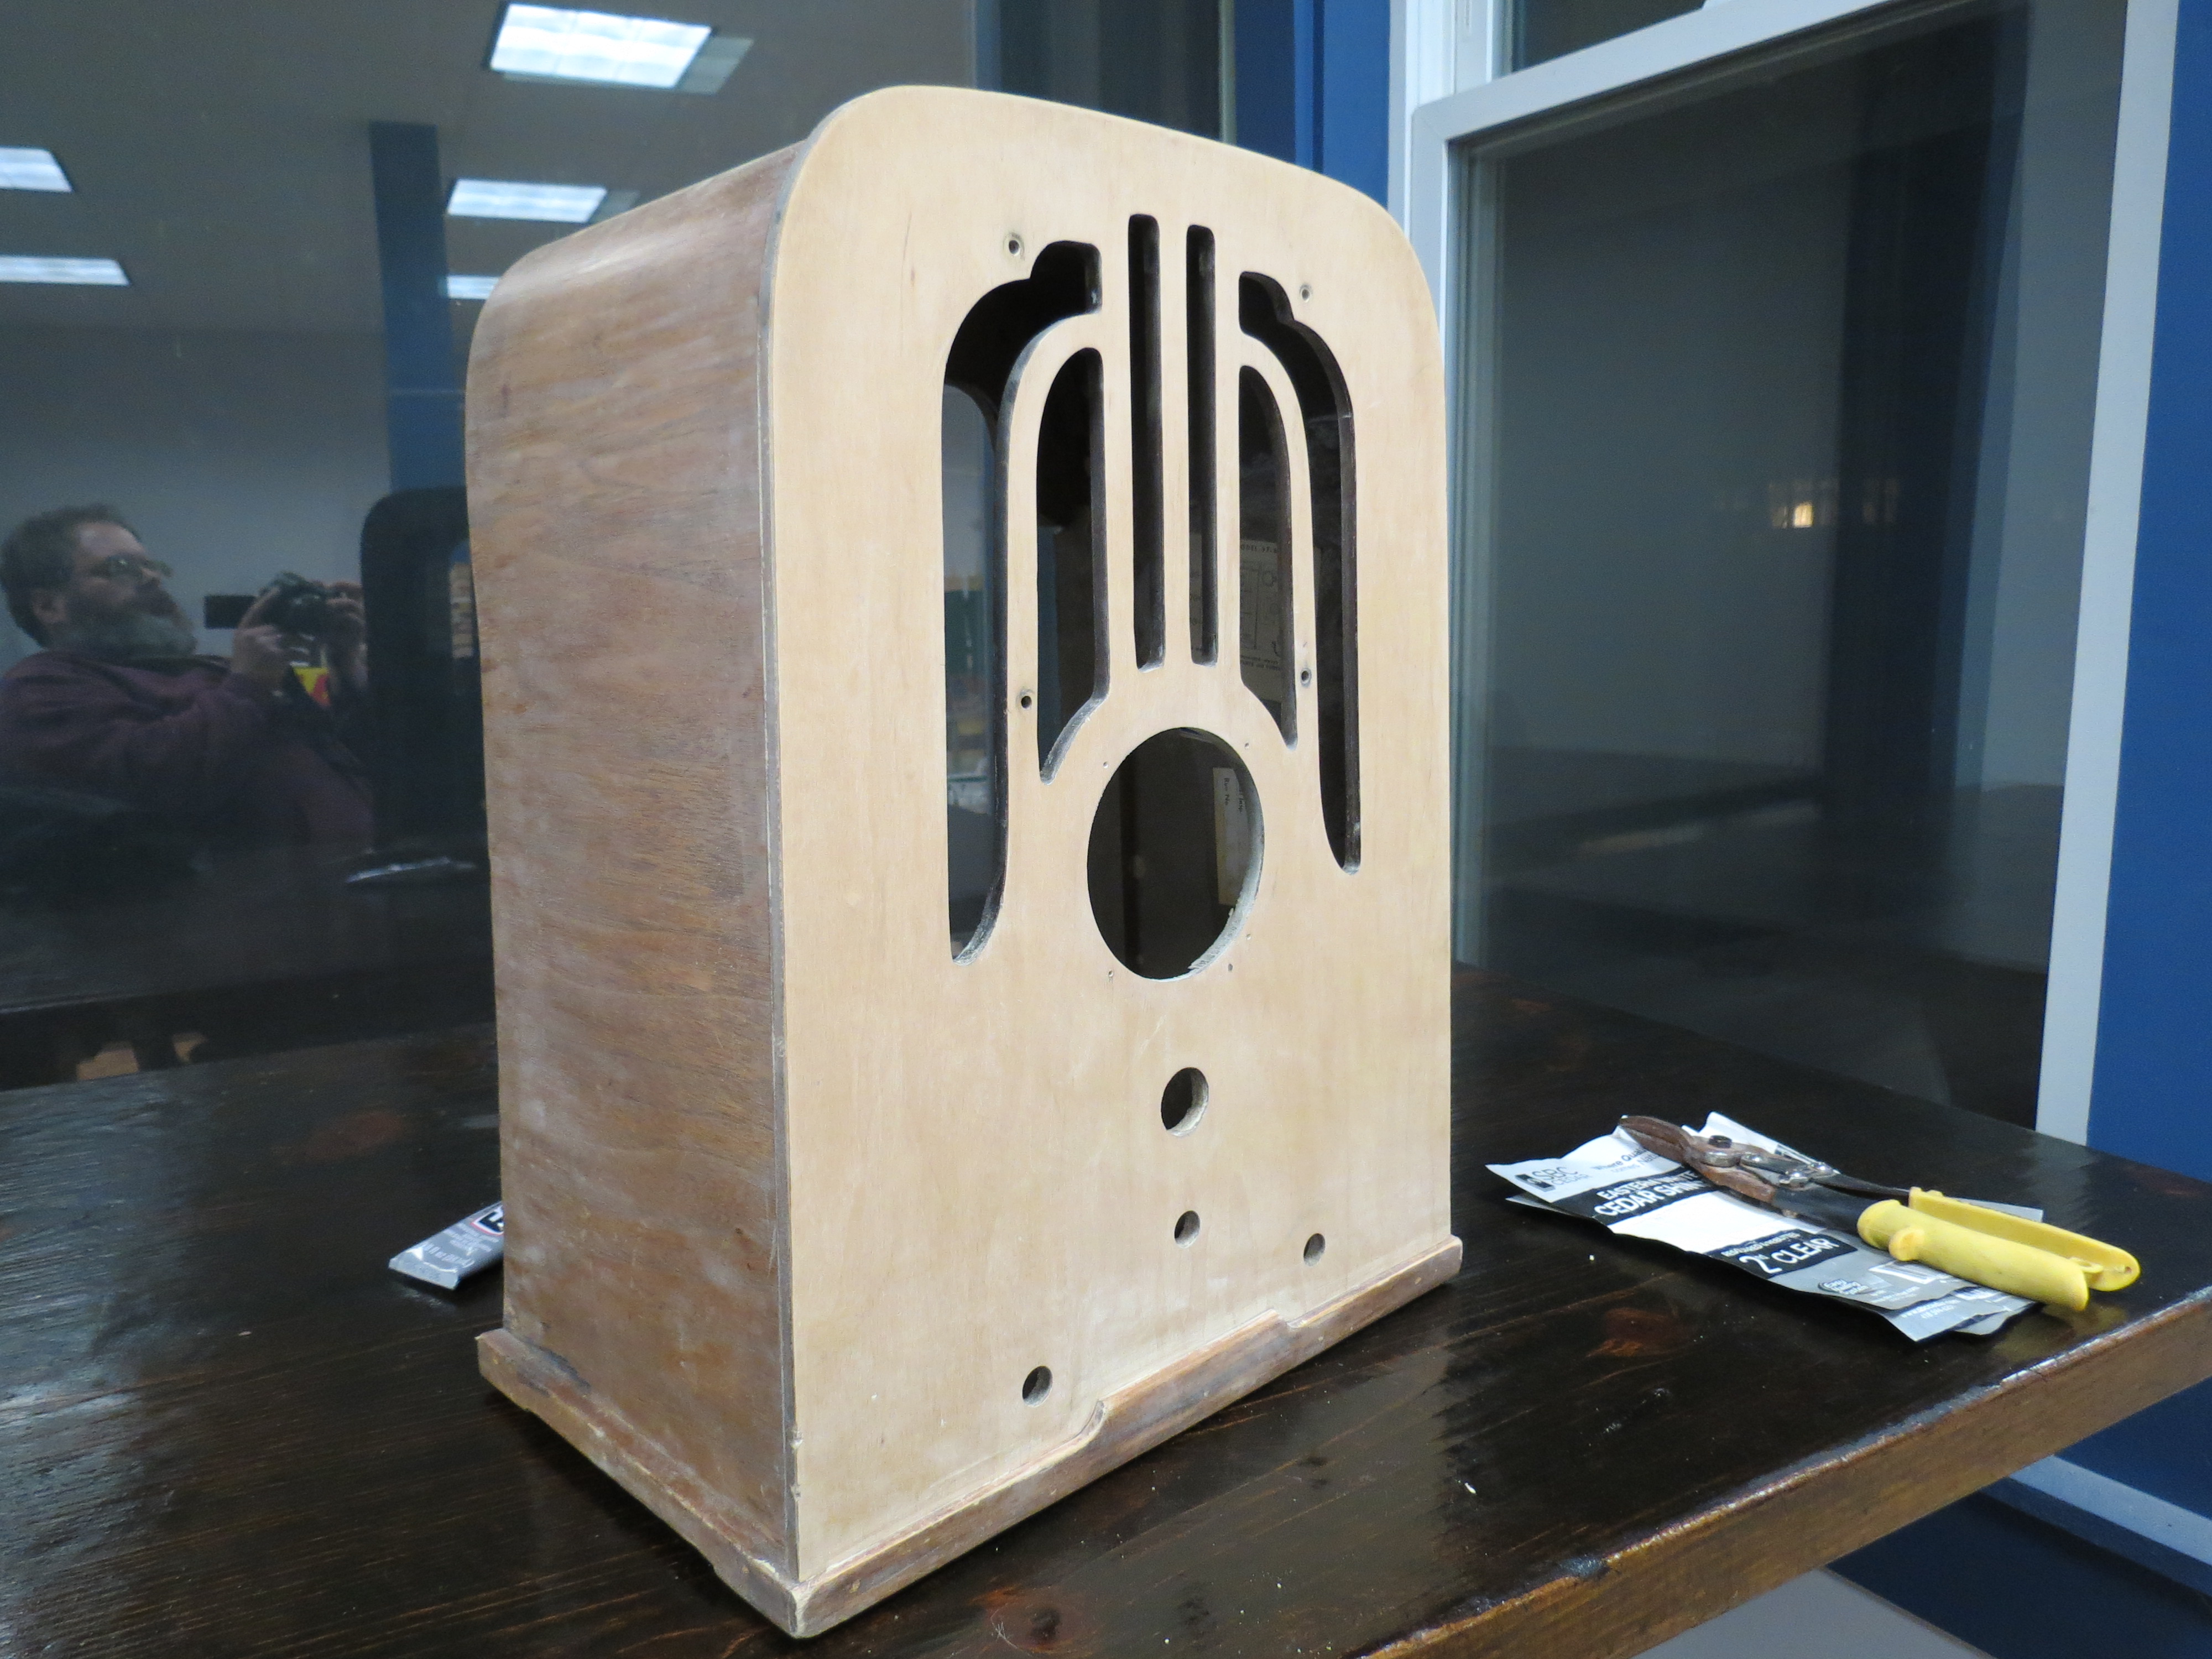
I've read that this "white wood" is difficult to stain, so I know it's a battle either way. I have a couple thoughts. First, I would be completely interested in trying to reproduce the photo finish design on this radio if I could find anyone with some high-resolution photos or scans of it in good condition. There's a local print shop and I'd love to take the project idea to them. So, if anyone has one in great shape that would be willing to take those super-high-res photos, that would be awesome; alternatively, if you know where to find them if you don't have them yourself.
Option B of course is to try to do a digital repair of the original that I have (I've composited six close-ups of the front of my radio to generate a larger high-res image) but this is going to be very time consuming given the number of scratches and bad areas, plus, as I said, the color is very washed out and I suspect the outcome would not be very good.
Option C would be just to apply some different stains to the sections and try to recreate the color pattern of the original. Given the photos below, I think it could look nice, but there wouldn't be much in the way of wood grain to show off.
Option D would be to do as I've seen done in at least one other case here on the forum which is to find me some veneer and make a front that looks nice, even if not in the original style. That could be fun, but not sure if it's for me as a first attempt.
Separate from the front face of the cabinet, the veneer around the sides and top seem to be in decent physical condition. I've taken the old finish off with a razor blade - the cabinet was small enough that this was pretty straightforward to do in about an hour. There are two sections on top where the prior finish had worn away long ago and so the wood was exposed. Those are the darker patches in the photo. I guess my first question is what wood do we think this is, and second, how best to even this up with the darker patches in the finishing process.
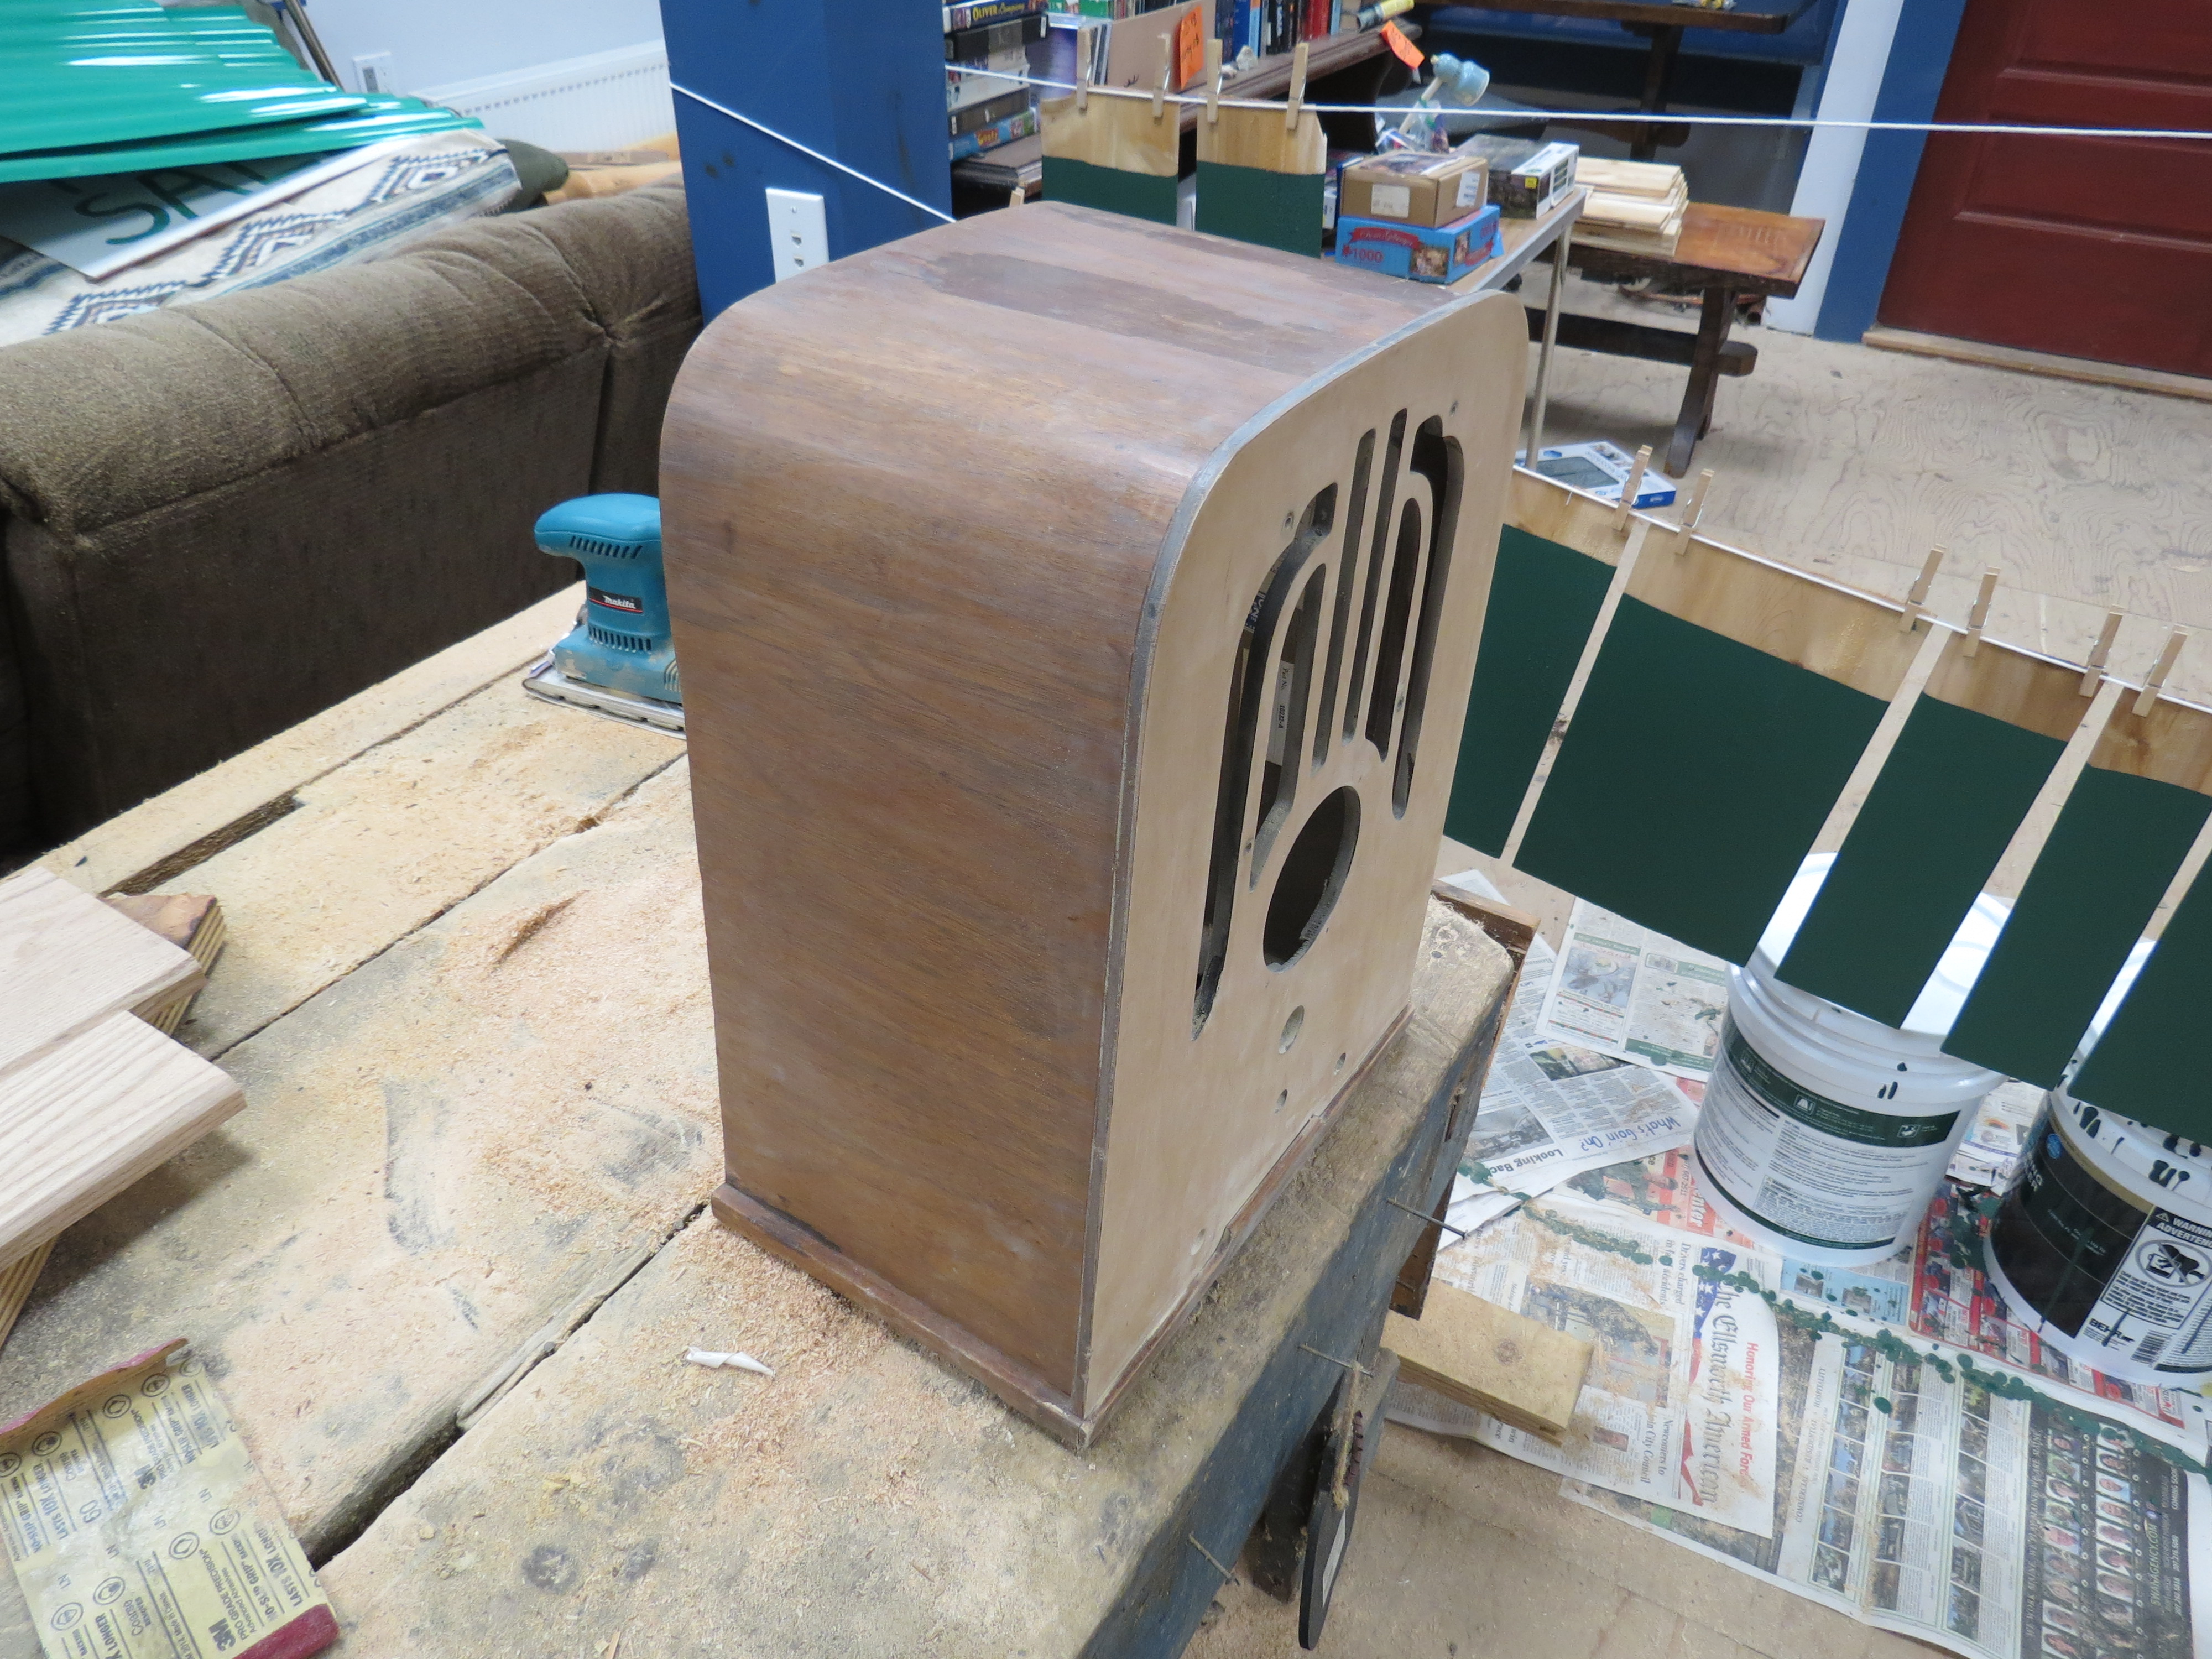
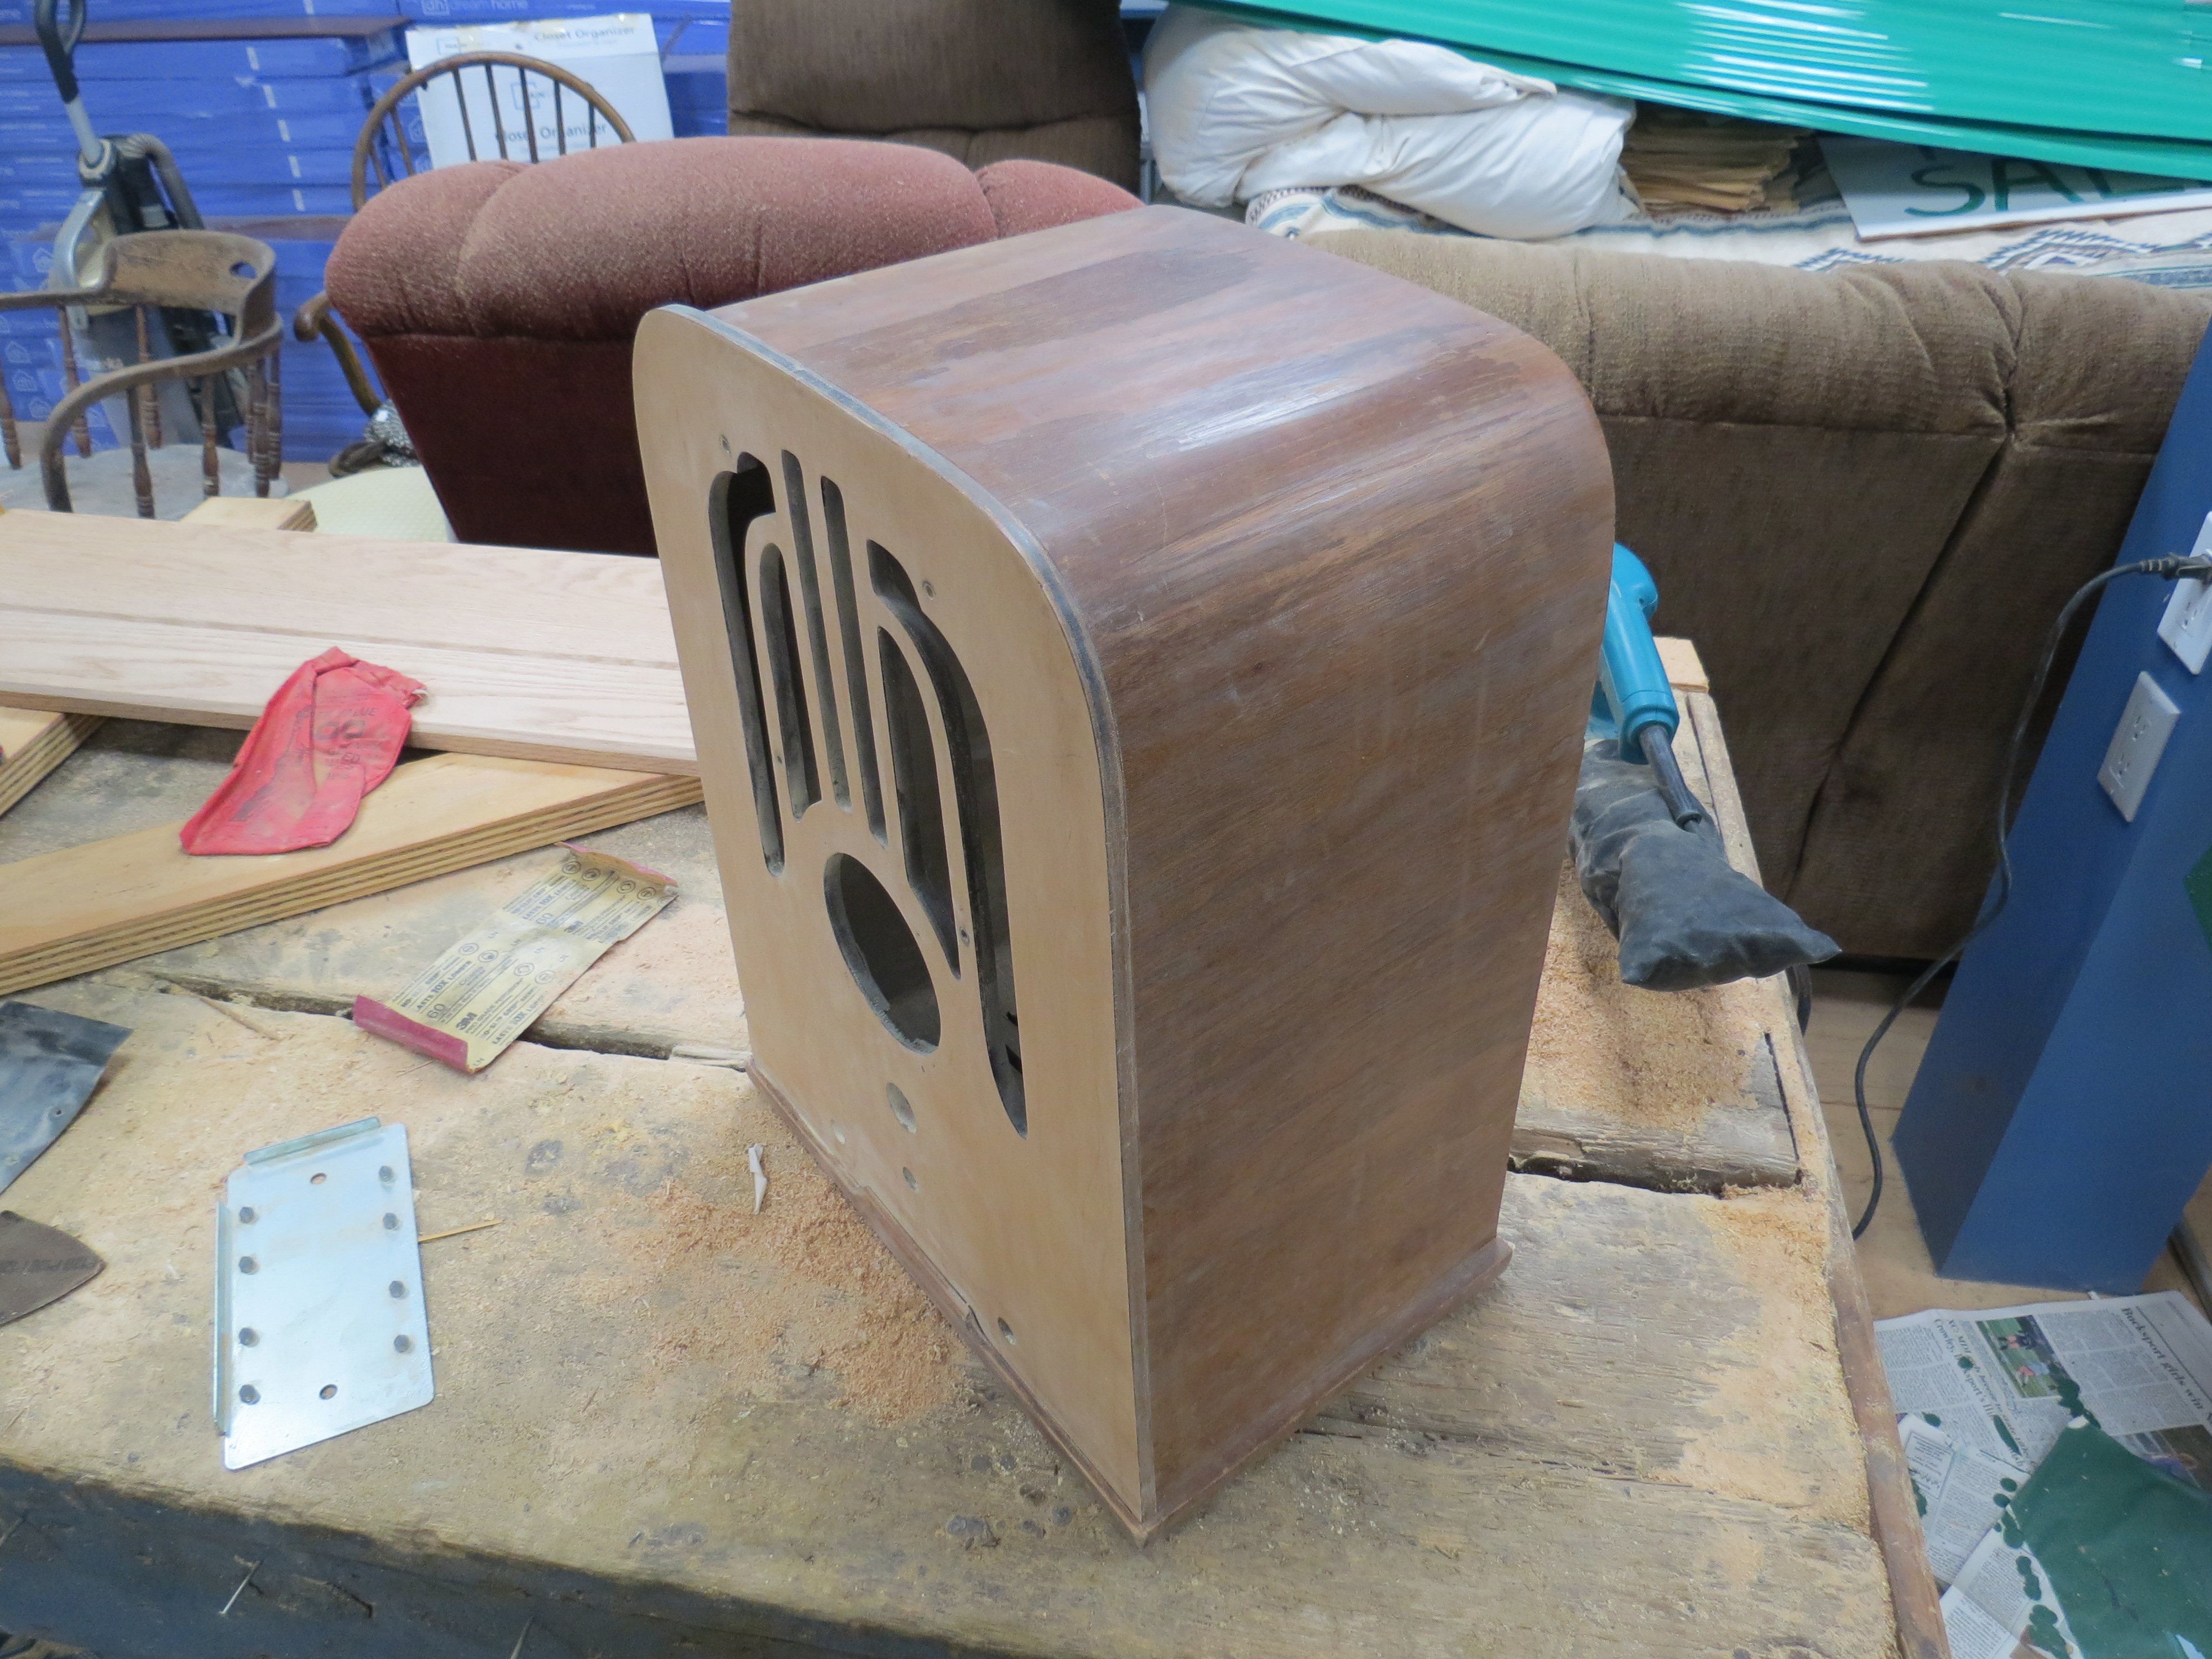
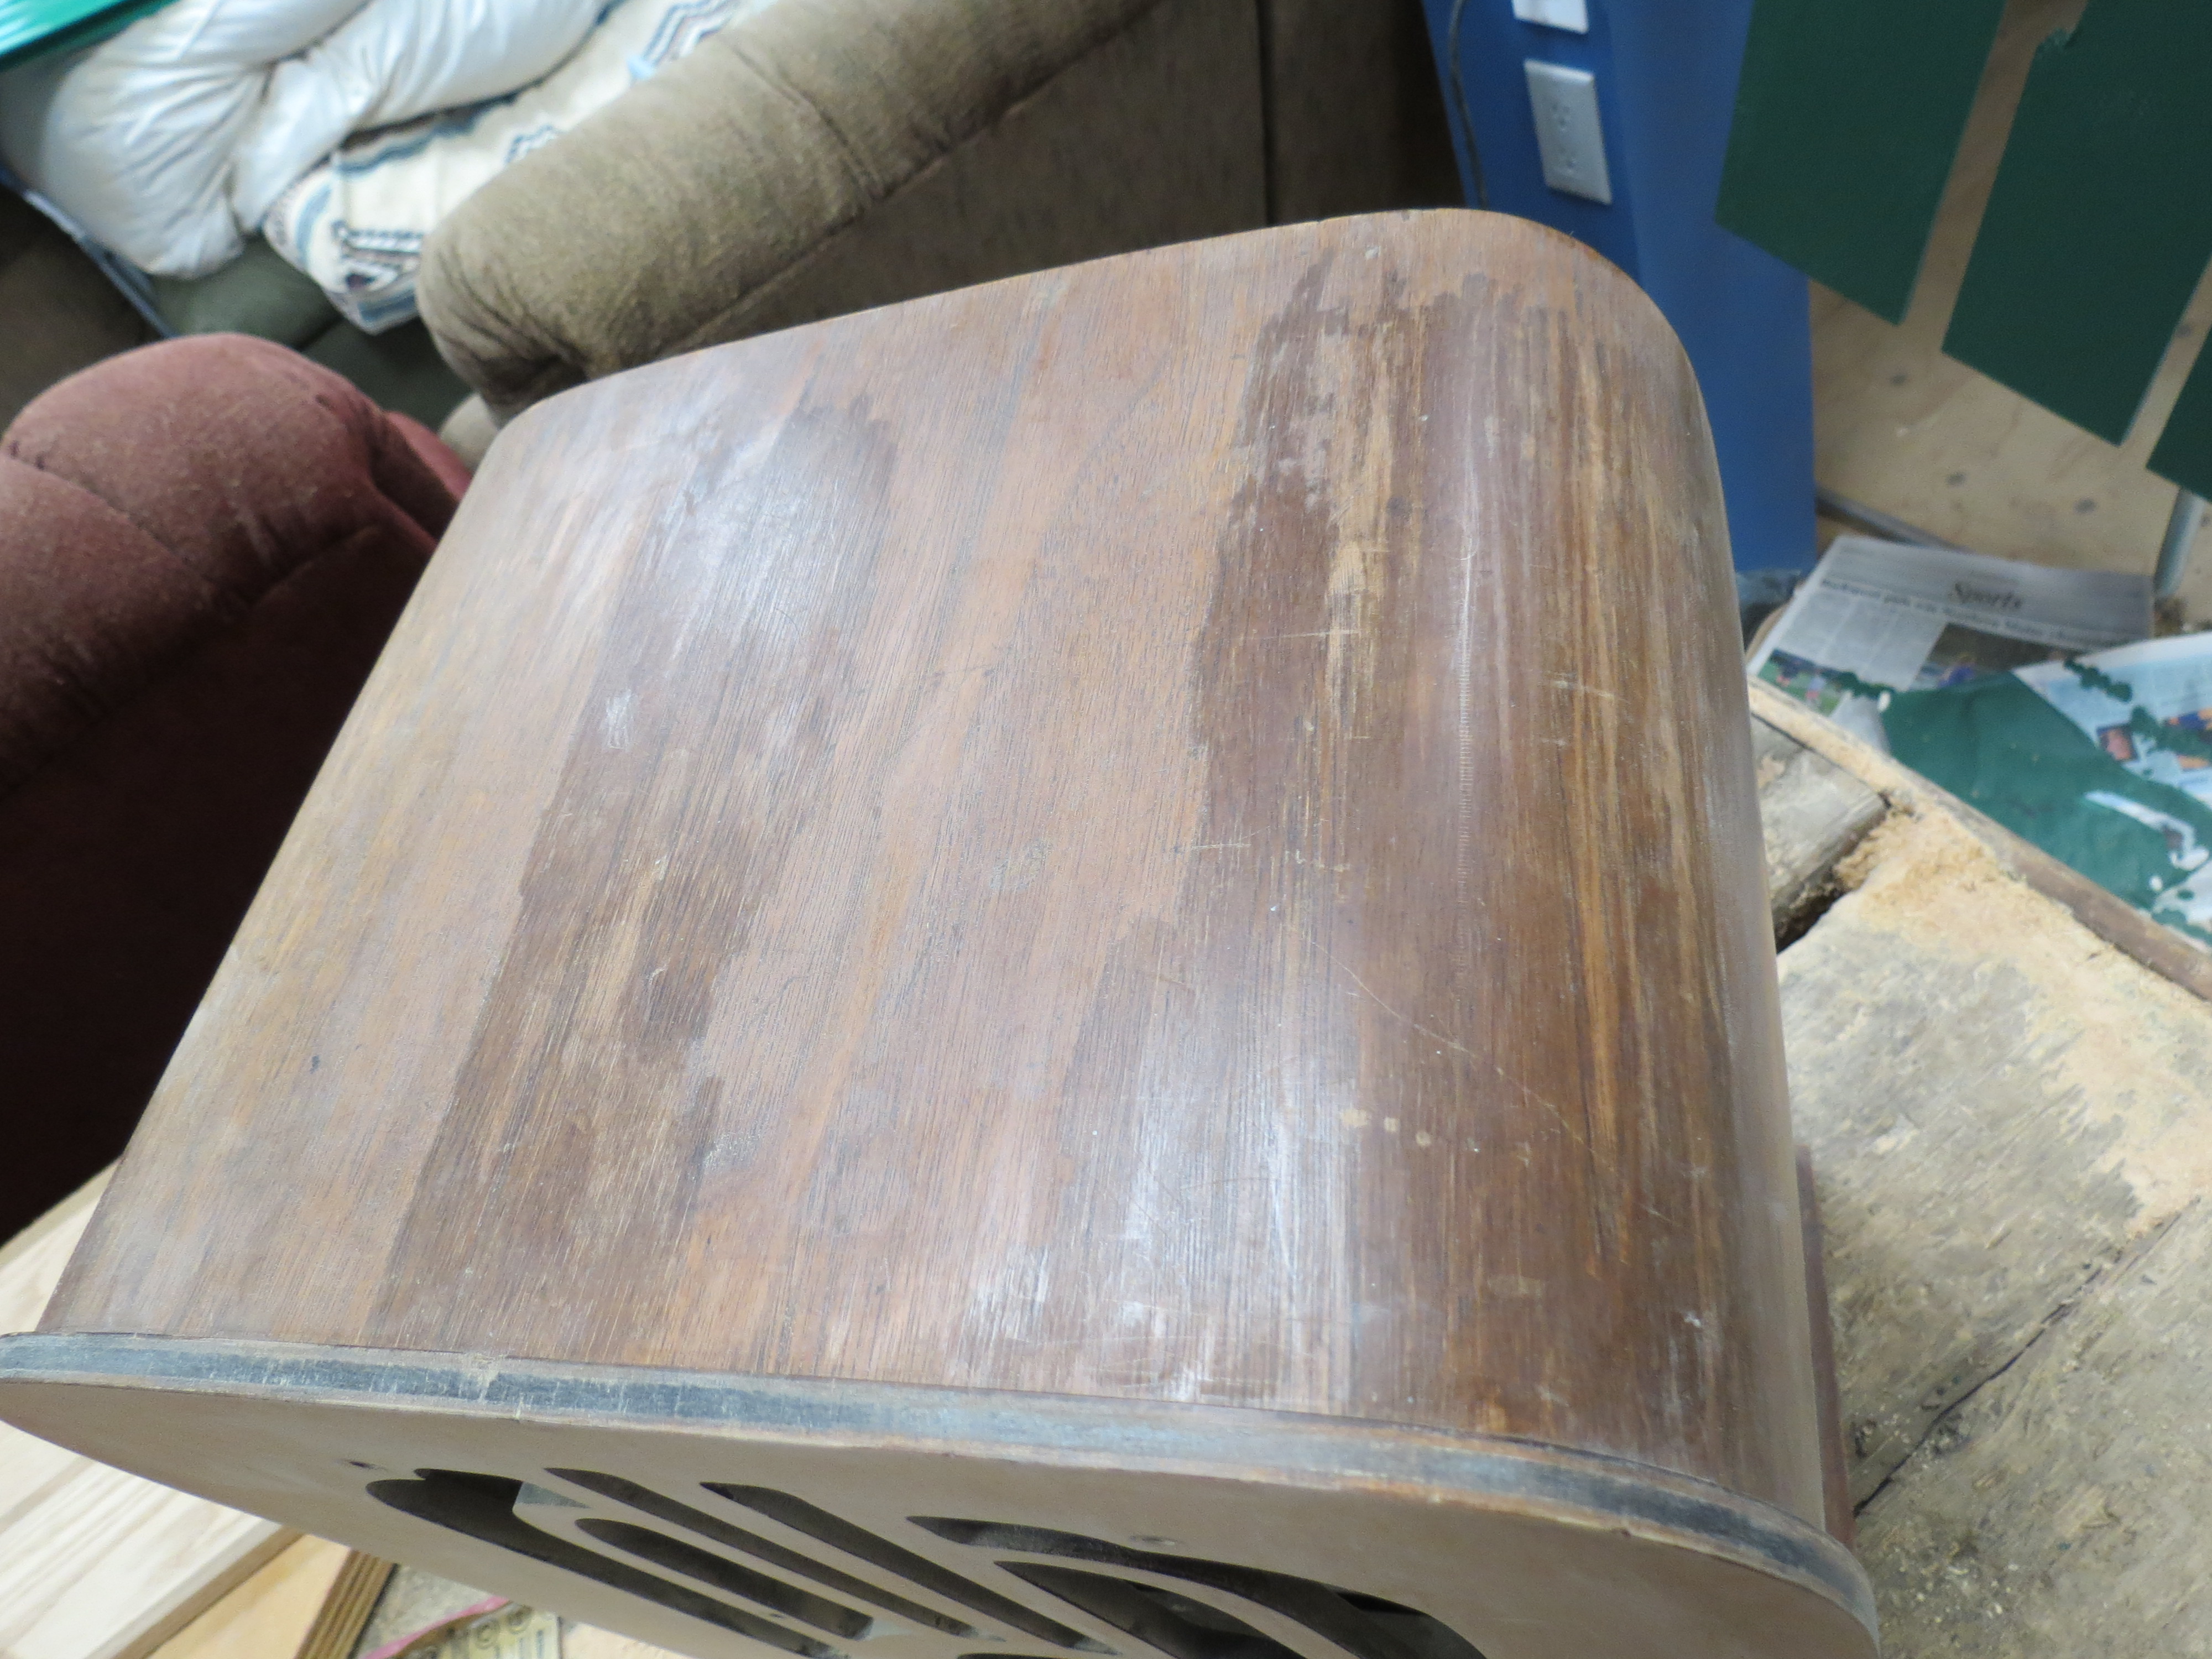
Lastly, there is a little black stain around the bottom back corner on one side. Not sure what this is from - water or something else - but its placement on both the veneer and the base seems to suggest it's not just a regular water stain. Should I just try to sand it off or is there another thing I should try?
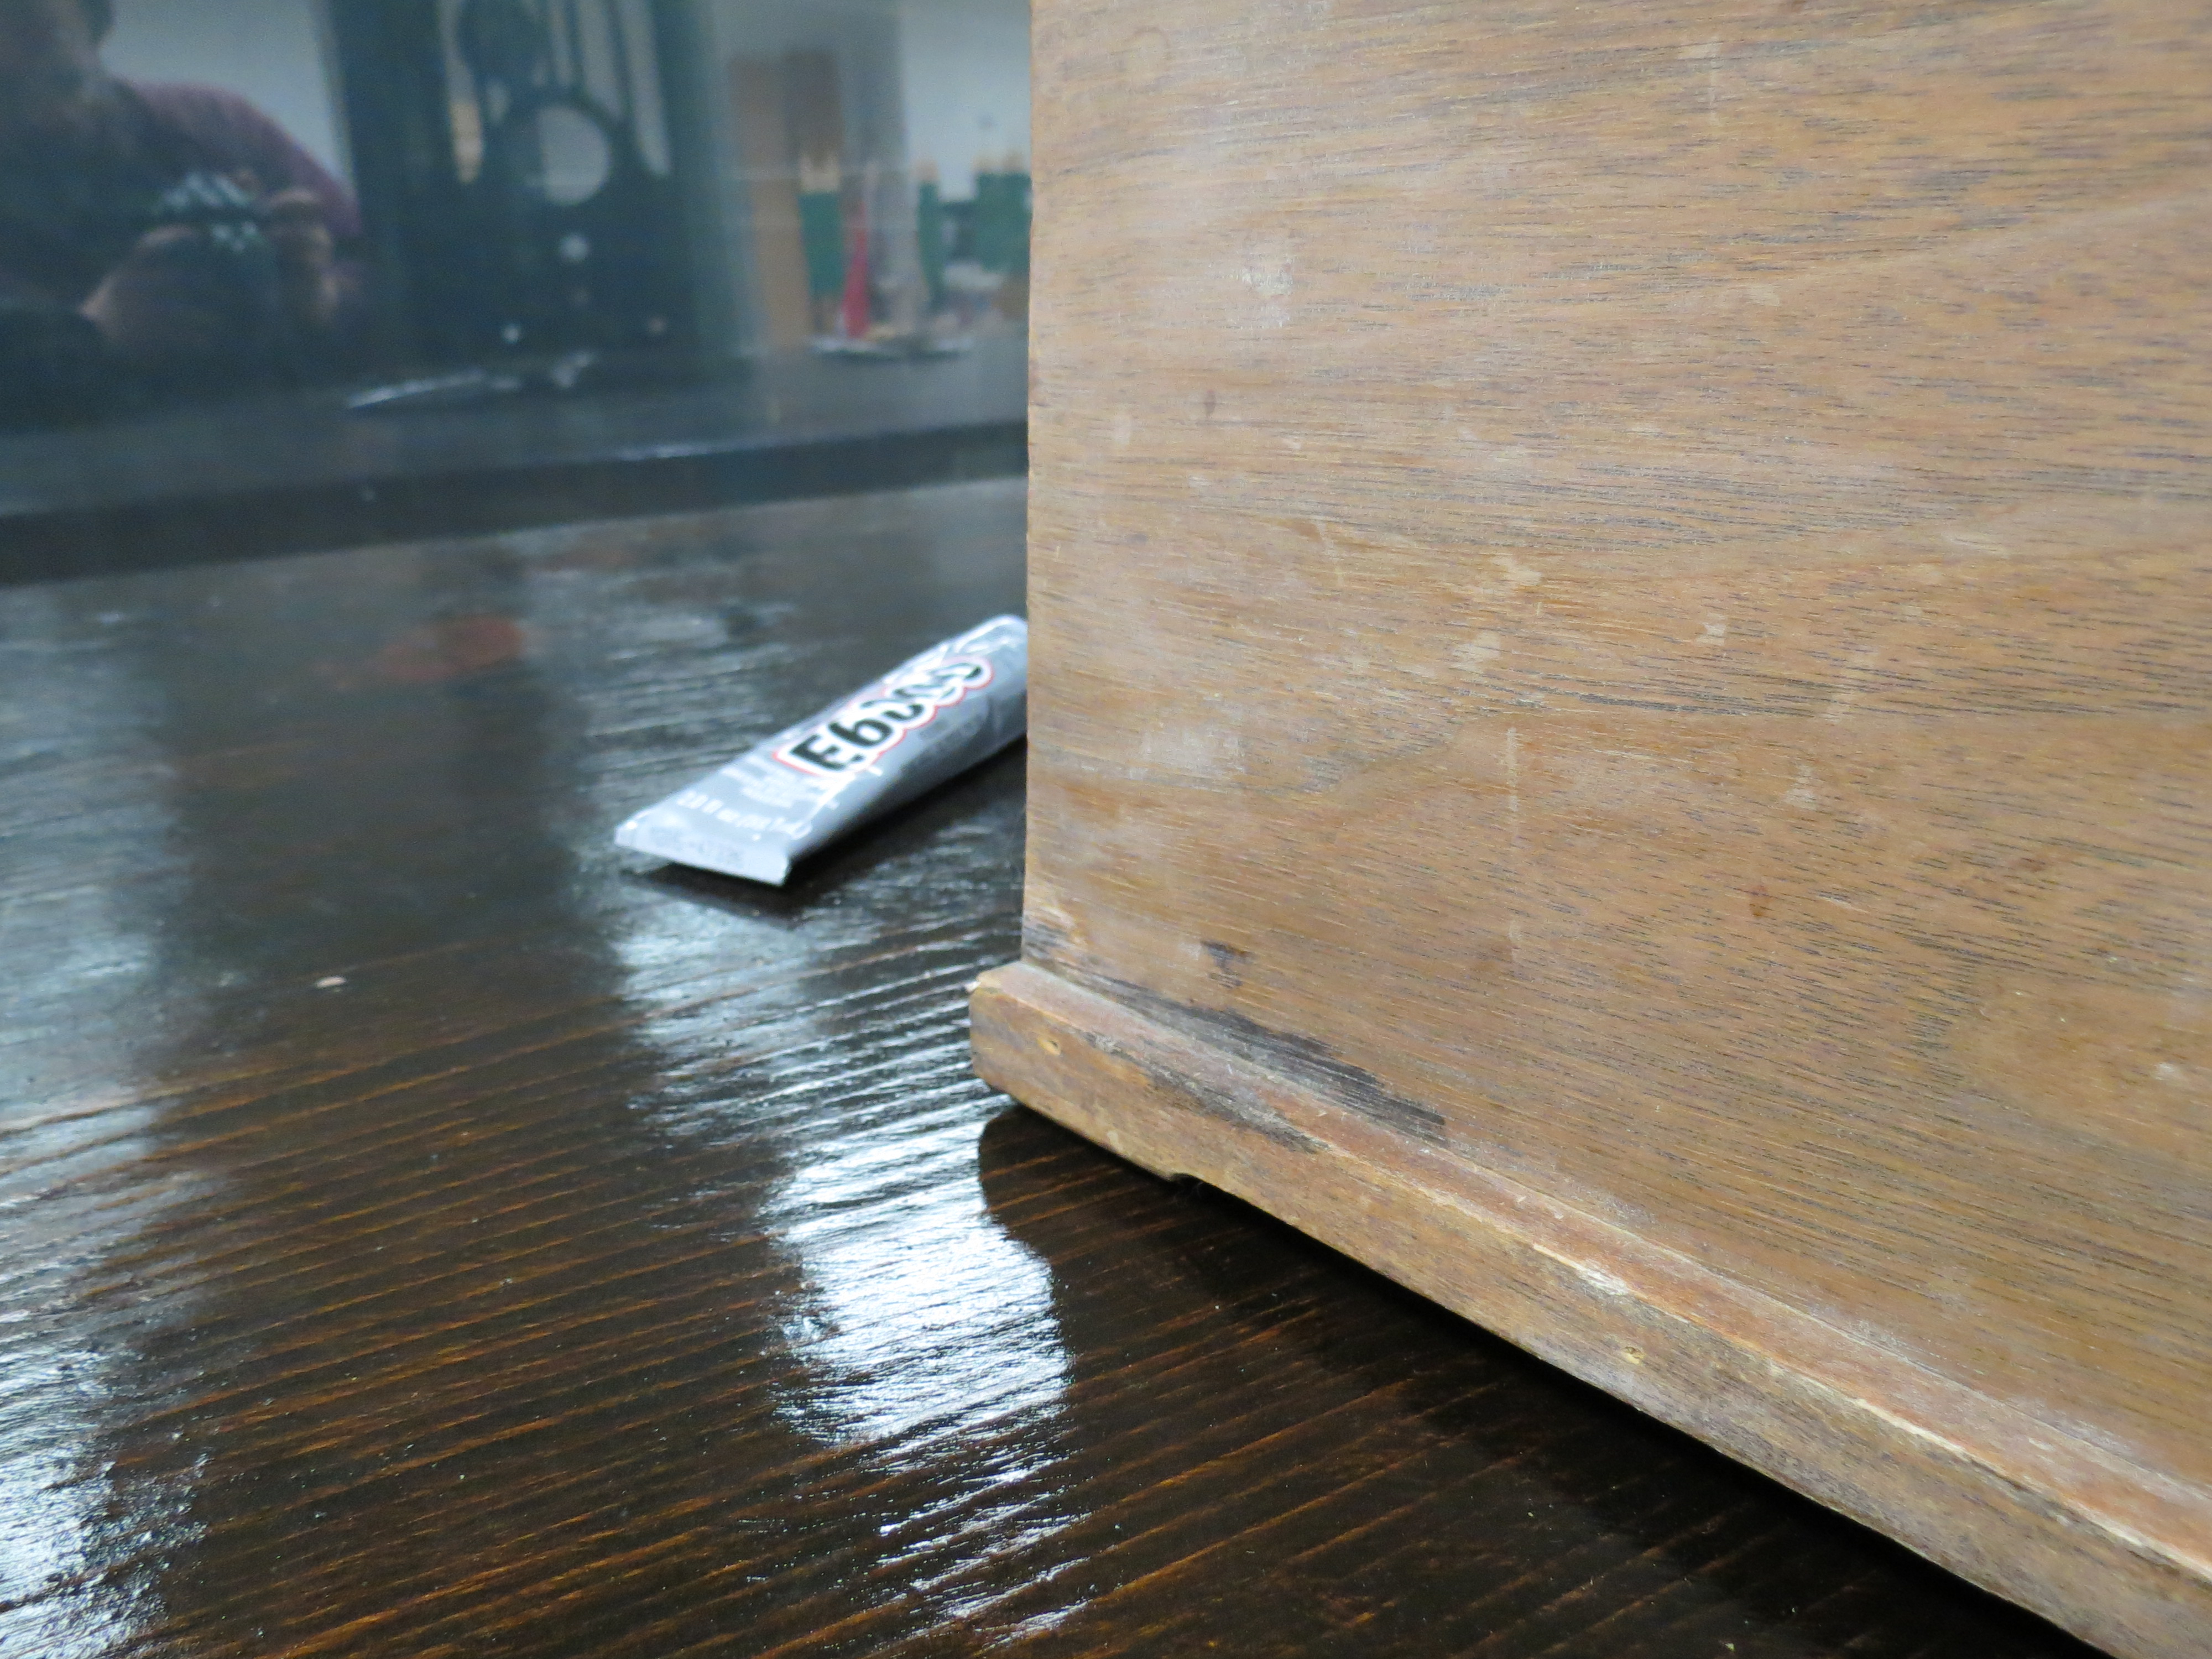
Thanks to everyone who has assisted on the electrical restoration so far, and anyone who can offer tips to a novice on the woodworking side of it now.
Best wishes,
Roy
Posts: 136
Threads: 38
Joined: May 2015
City: Brandon, SD
The finish on my 37-620 was I would say good to very good as far as the photo finish goes. I stripped the rest of the cabinet which is walnut and stained it. I then top coated the whole cabinet, front included, with Mohawk clear. I don’t have a way to take high resolution pictures and my photo of mine is too large of a file to upload on the Phorum. I know there was a company years ago making the reproduction front decals for these. Watched a YouTube video once about it. Don’t know if they are still in business or not… I think if the photo finish is gone, just stain the sides and top as you normally would, and spray the front with a toned Mohawk lacquer. That way you will get the color in the top coat instead of trying to get it to take stain. Then when you get the shade you are happy with, clear coat the whole cabinet for a uniform sheen.
(This post was last modified: 04-19-2026, 09:47 AM by sdradioman.)
Posts: 172
Threads: 10
Joined: Mar 2026
City: Franklin
State, Province, Country: Maine
sdradioman, thanks for your guidance. Is there a particular kind of stain you recommend for the sides, or is is just any old Minwax/Varathane/etc liquid stain with color to suit that you recommend? I've also seen a fair amount of talk about grain filler, especially I think with walnut veneer. Did you do that with your cabinet?
Best wishes,
Roy
Posts: 5,654
Threads: 56
Joined: Sep 2008
City: Sandwick, BC, CA
It looks like the top, and sides was covered in French walnut veneer, it's likely that Philco used a tinted lacquer over it just to even it out, they did not use stain as a rule, the closest would be Mohawk light walnut, but you would want the dye based version as you don't really want to obscure the grain too much. Another option would be to use a dye on the wood directly, Lee Valley sells proper wood dye but I have used fabric dye for this purpose, though usually on bland blond wood like the front panel has under the faux wood grain.
There are a number of techniques I've seen used to redo the front panel, in addition to the decal kit mentioned I've seen something involving B&W photo copies tinted after they want on, painted faux grain, and in some cases real veneers, though usually in combination with paint as replicating the stringing details would be difficult. Another option would be to paint the cabinet white, or black, I'm not sure whether this was a factory option like it was with some RCA and brand Z models, but there you have it.
Regards
Arran
Posts: 172
Threads: 10
Joined: Mar 2026
City: Franklin
State, Province, Country: Maine
Arran,
Thanks for the info. I'd seen another thread where you suggested a wood dye would be about the only thing to penetrate this type of wood on the front, so I'm going to give that a try first. While it won't match the original pattern of the grain, I think I'll try to replicate the overall pattern of the sections of faux veneer.
I've got some denatured alcohol on the way to make sure I clean up any remaining finish from the sides and top. Is there anything else you could suggest for me to even up the long-time naked patches on the top that are now darker than the rest? Should I do a very light sanding on it?
Any thoughts on a grain filler? I've seen many restorers on Youtube apply some, but it seems to vary from a paste form to a liquid, to simply applying and sanding down multiple layers of lacquer or shellac - not sure exactly which.
And lastly, there's that dark stain near the bottom corner. Is there something I should try to lighten that up and get it back to normal-ish color? I see some people have used some bleach-like products to address water marks and similar damage.
Appreciate your guidance with this radio.
Best wishes,
Roy
Posts: 5,654
Threads: 56
Joined: Sep 2008
City: Sandwick, BC, CA
Roy;
After you finish stripping the top and sides I would lightly sand the darker areas. I'm Not sure what to suggest with that black area, I once took one of those stains out with phosphoric acid, others have used oxalic acid, or some other wood bleach. As an experiment you could try wiping it down with acetone, just to see if it's something soluble like ink rather then an iron stain.
Regards
Arran
Posts: 172
Threads: 10
Joined: Mar 2026
City: Franklin
State, Province, Country: Maine
After some denatured alcohol wiping and a light sanding, I've got the majority of the walnut looking pretty uniform. Besides the stains near the bottom, there is one darker patch up top still that I may try to sand down a little more, but I almost think I can live with it the way it is.
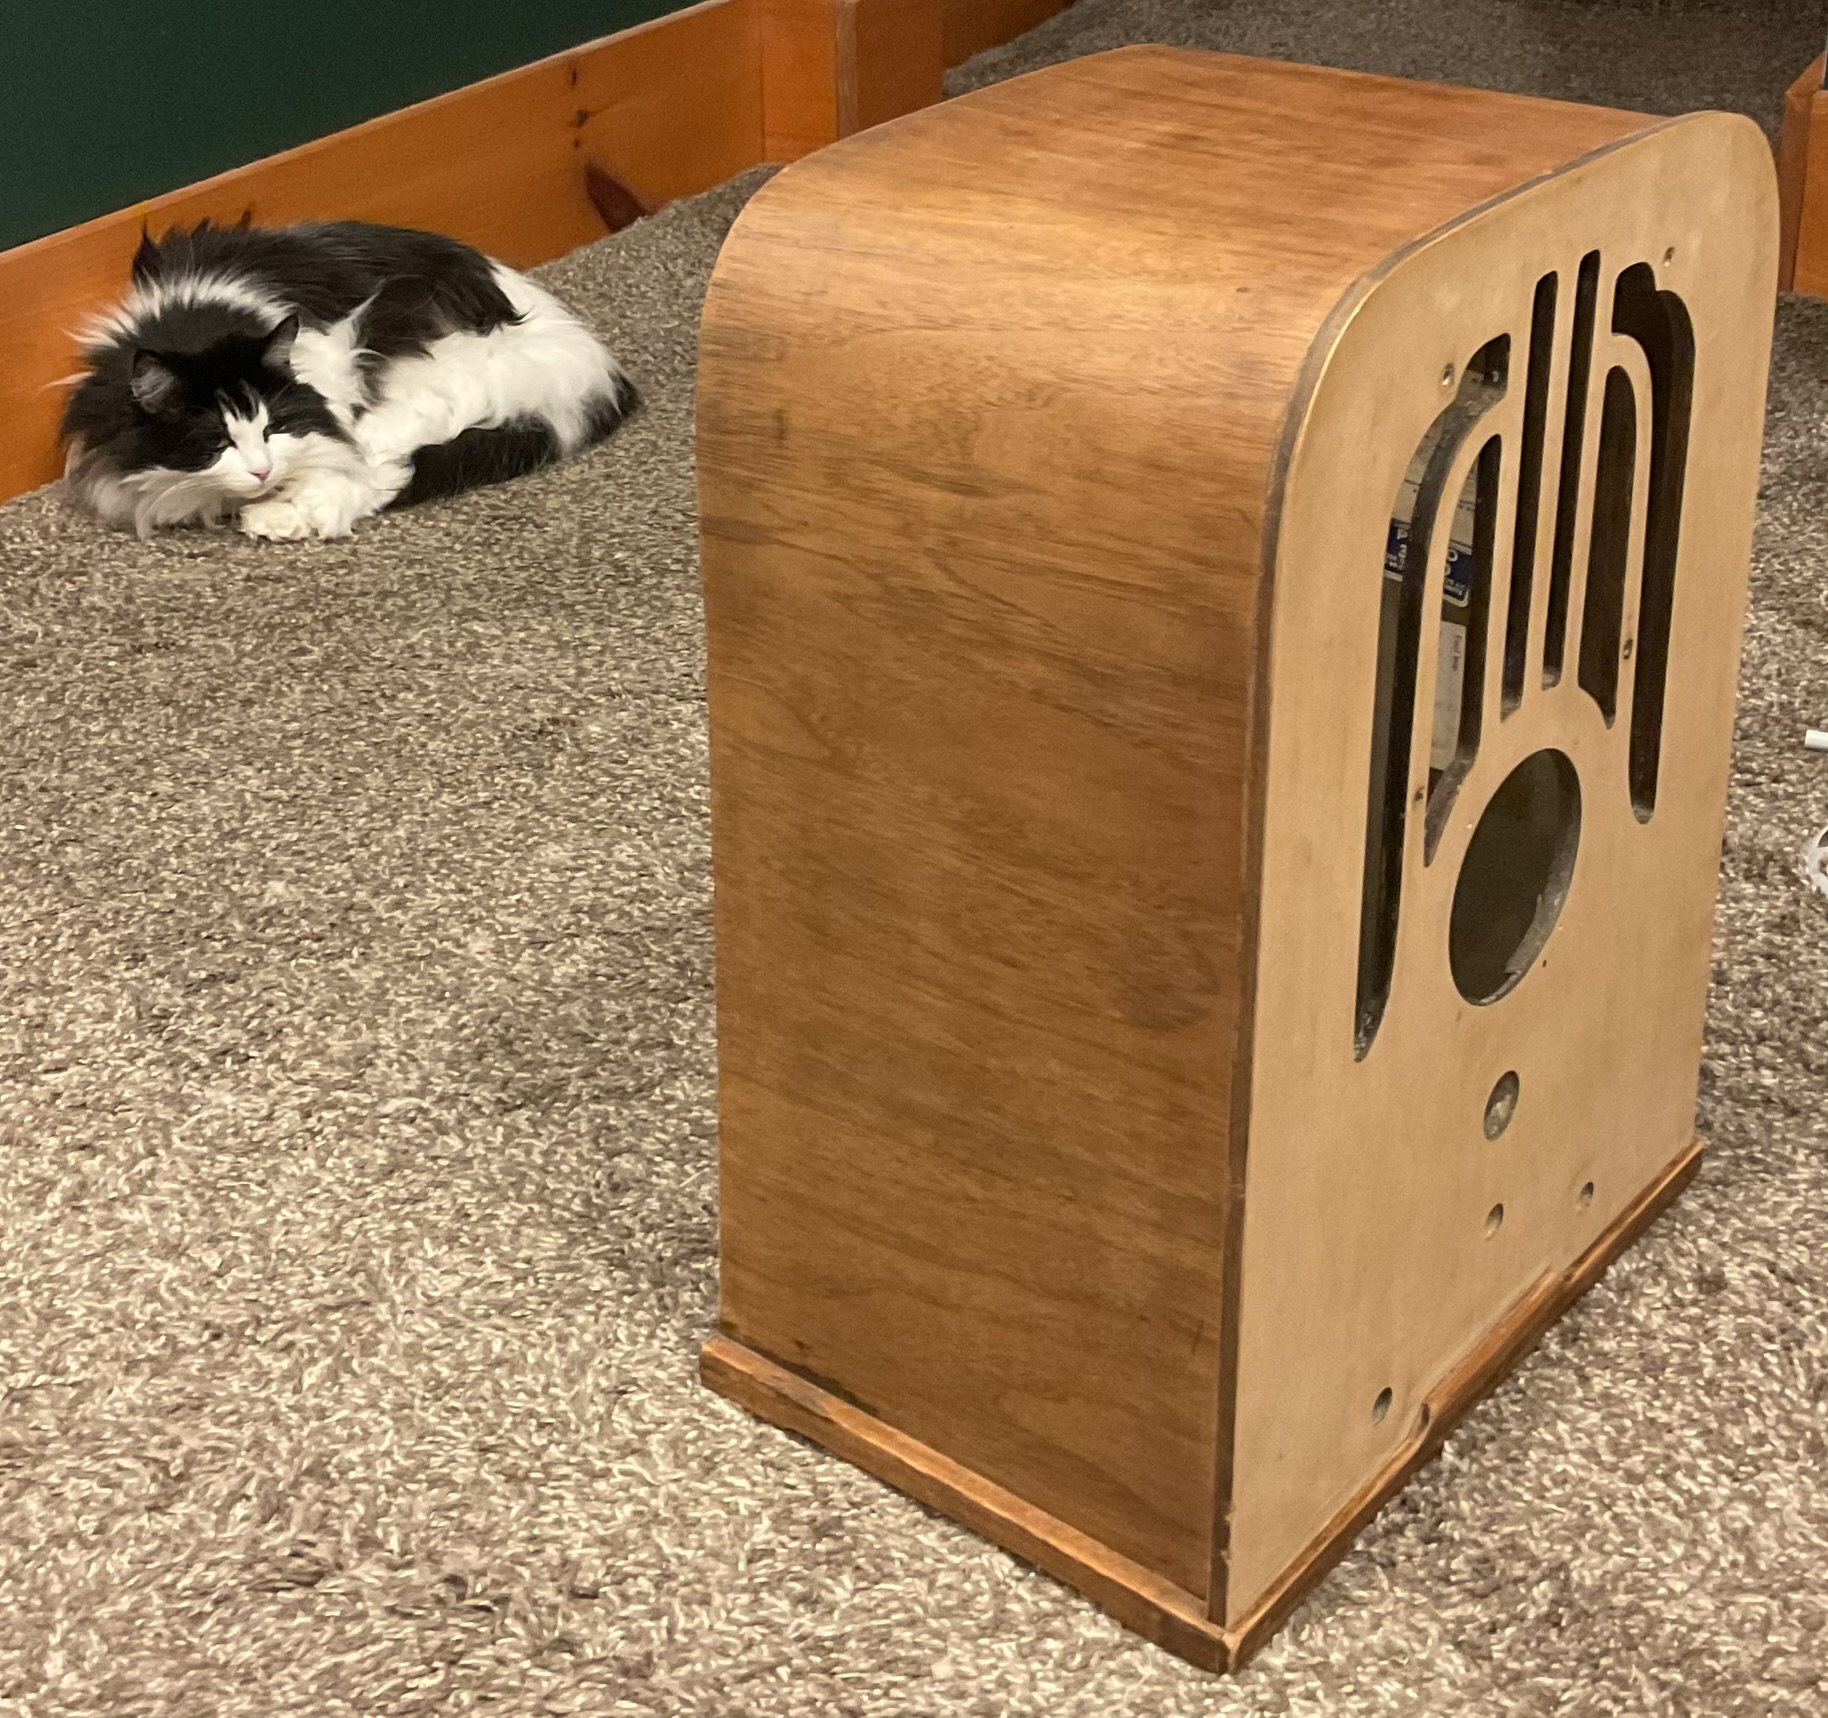
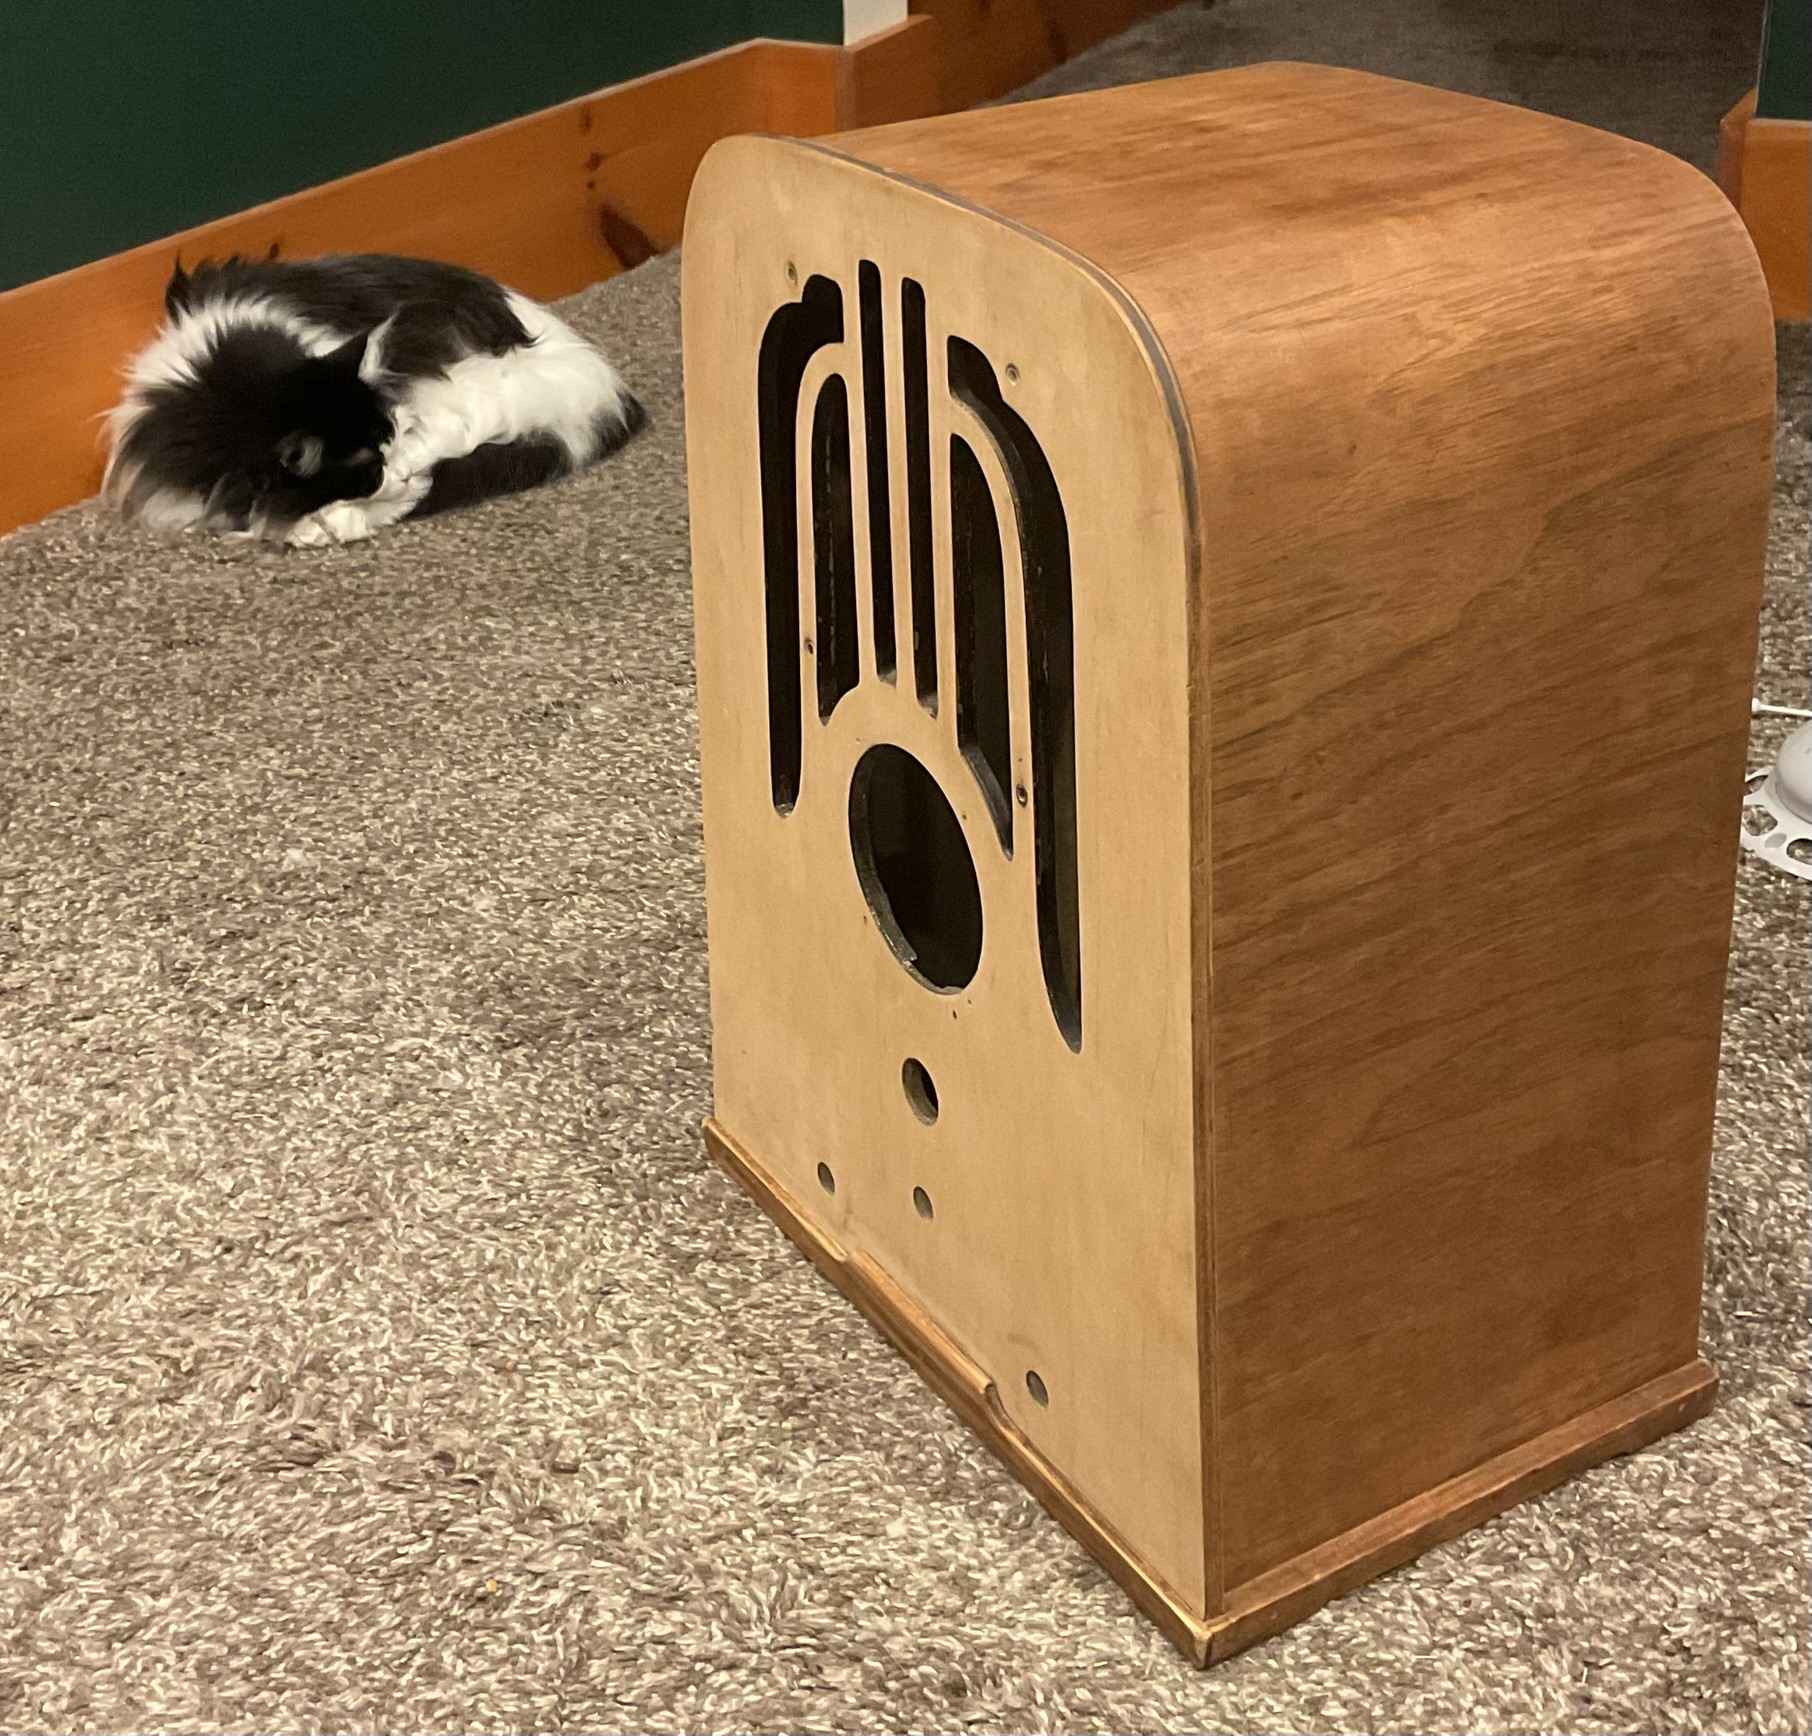
Note the supervisor in the photo silently judging my efforts.
I've been digging into old posts about grain filler and sanding sealer and I think I want to go with the Timbermate Walnut grain filler.
That said, I found in a reply in a from Russ (I think) in a thread from 2018, that the proper order would be:
1. Sanding sealer
2. Grain filler
3. Toner
4. Top coat(s)
Now, I think I'd like to stick with the current color of the walnut on the sides and top, rather than attempt to tone it further. Once the grain filler is applied and I'm happy with the outcome, should I go over it with sanding sealer again, as I saw Ron did on his 38-14 and 39-7 projects from 2011? And then directly from that to top coat?
Are there any specific product recommendations for the sanding sealer and top coat? Lacquer seems to be the general consensus on the way to go for the top coat to stay somewhat authentic. Keep in mind, I'll need to use aerosols at this point as I lack a compressor and accompanying spraying equipment. I've seen Mohawk's products touted a lot, but for a person new to this space as well, picking the right one(s) is a bit overwhelming.
As far as end result, I'd like to avoid a really high gloss. I'm good with semi-gloss outcome, not sure if satin might be too dull. Ron's outcome on the 38-14 and 39-7 look what I can only describe as velvety, and I like it a lot.
As for the front wood, hopefully I'll get a chance to start working on something interesting for that in the next few days. Dyes have arrived and I need to strategize.
Best wishes,
Roy
Posts: 3,188
Threads: 226
Joined: May 2008
City: Omak
State, Province, Country: WA
Hello Roy,
That Cabinet looks good andfar as order goes that exactly how I refinished my Philco 610B .
Here is a before and after picture !
 https://philcoradio.com/gallery2/1936a/#Model_610B
Sincerely Richard
Posts: 172
Threads: 10
Joined: Mar 2026
City: Franklin
State, Province, Country: Maine
Though one part of me wants to wait until a more significant milestone to share, another part wants to see what people's thoughts are with the attempt. Though it's not entirely visible here, the left gold pinstripe on each of the two outer sets of stripes has been done and is drying before I attempt the right stripe of those sets. Then I'll have to do the left and right from the center group (around the center black stripe) separately.
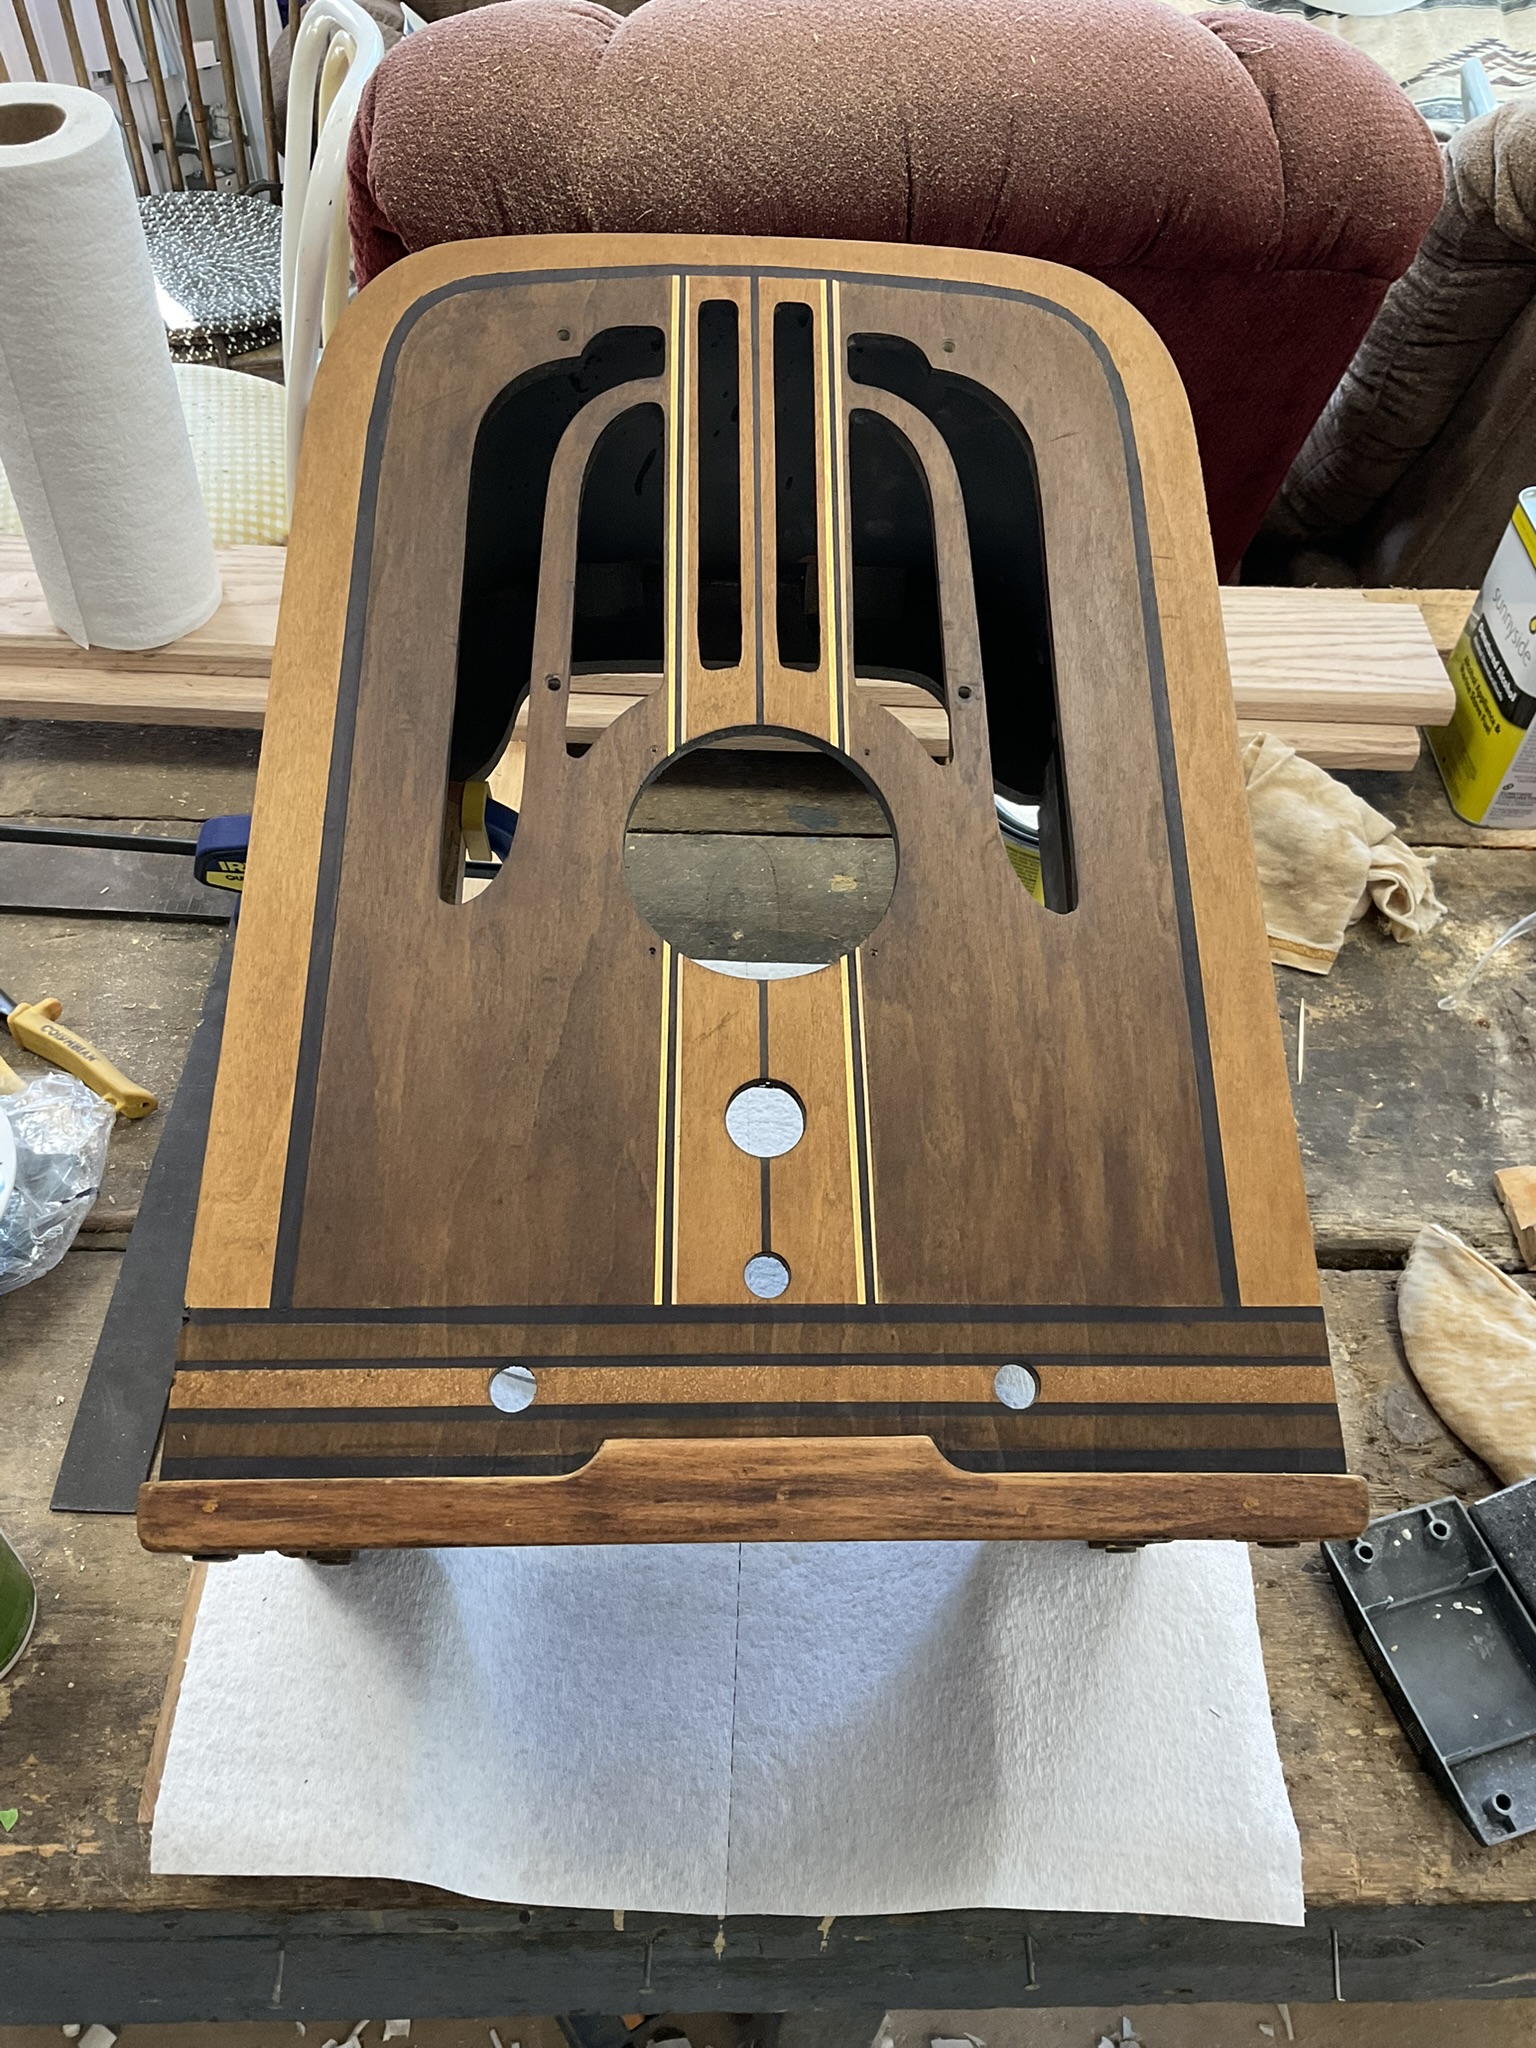
So far, yes, the design is kind of flat, but I expected that. I don't think it looks horrible though. I am toying with trying to dress up the outer "arch" of the design with some detail like was part of the original but it may take some experimentation first.
In the meantime, what are people's recommendation on sanding sealer? I've sent an email to Mohawk to see what they have to say for the use cases for their 6 aerosol products.
Best wishes,
Roy
Posts: 109
Threads: 15
Joined: Mar 2024
City: BERTHOUD
State, Province, Country: CO
Roy,
Your cabinet is looking fantastic, nice one!
I personally do the sanding sealer after I do grain filler. I find that the grain filler blends in well without the sealer on. Then after the grain filler process is complete and any light sanding done, then I apply sanding sealer before toner. And I just spray a light coat of sanding sealer. If you don’t have it, you can use a very light spray of lacquer. I feel like the goal is just to seal things before you apply toner to ensure the toner is uniform. And I do very light coats of toner and I do three. Then I move on to lacquer spray. When you strip down the cabinet like this don’t go heavy on first few coats of lacquer go light and take your time. Once you have a base built up you can get wetter in each spray of lacquer.
Now, take all this and add it to what others say, since I’m not an expert. Full disclosure I’ve only used grain filler twice now, but found the process pretty straightforward. I have grown to enjoy the cabinet refinishing process and with each one I’m getting more comfortable. But it does take some practice for sure. Samples attached of my most recent two, both in lacquer cure stage.
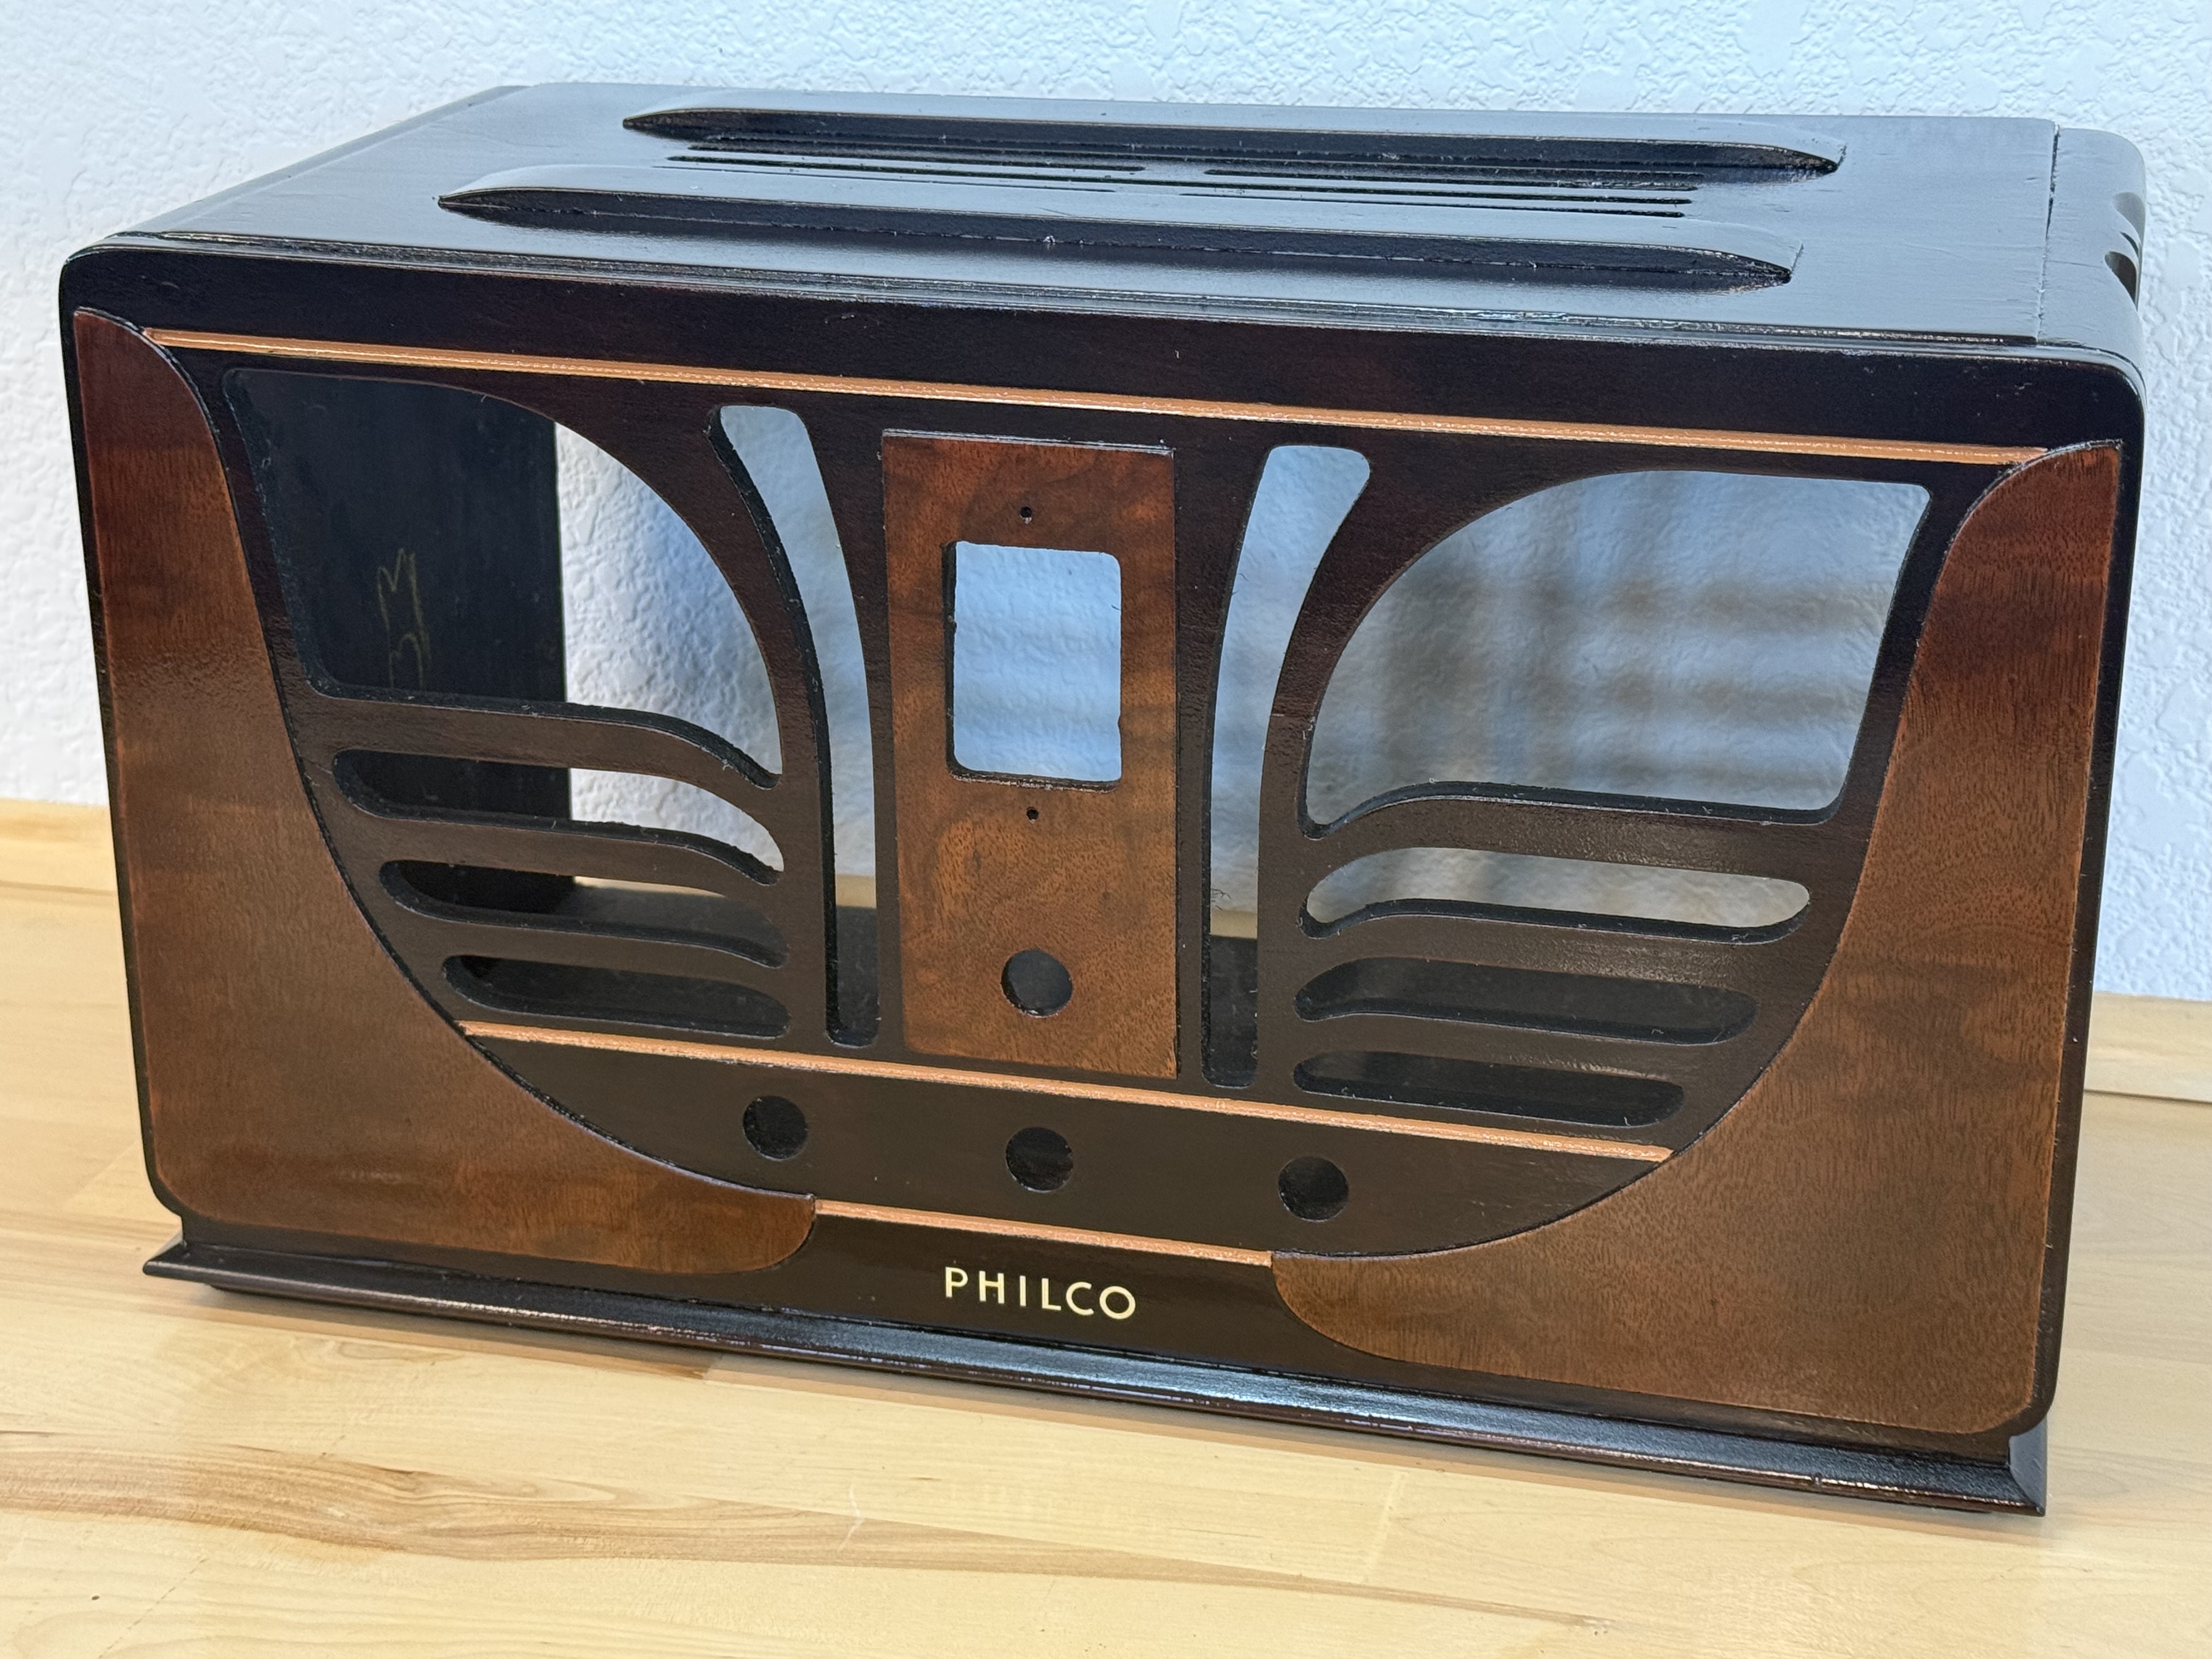
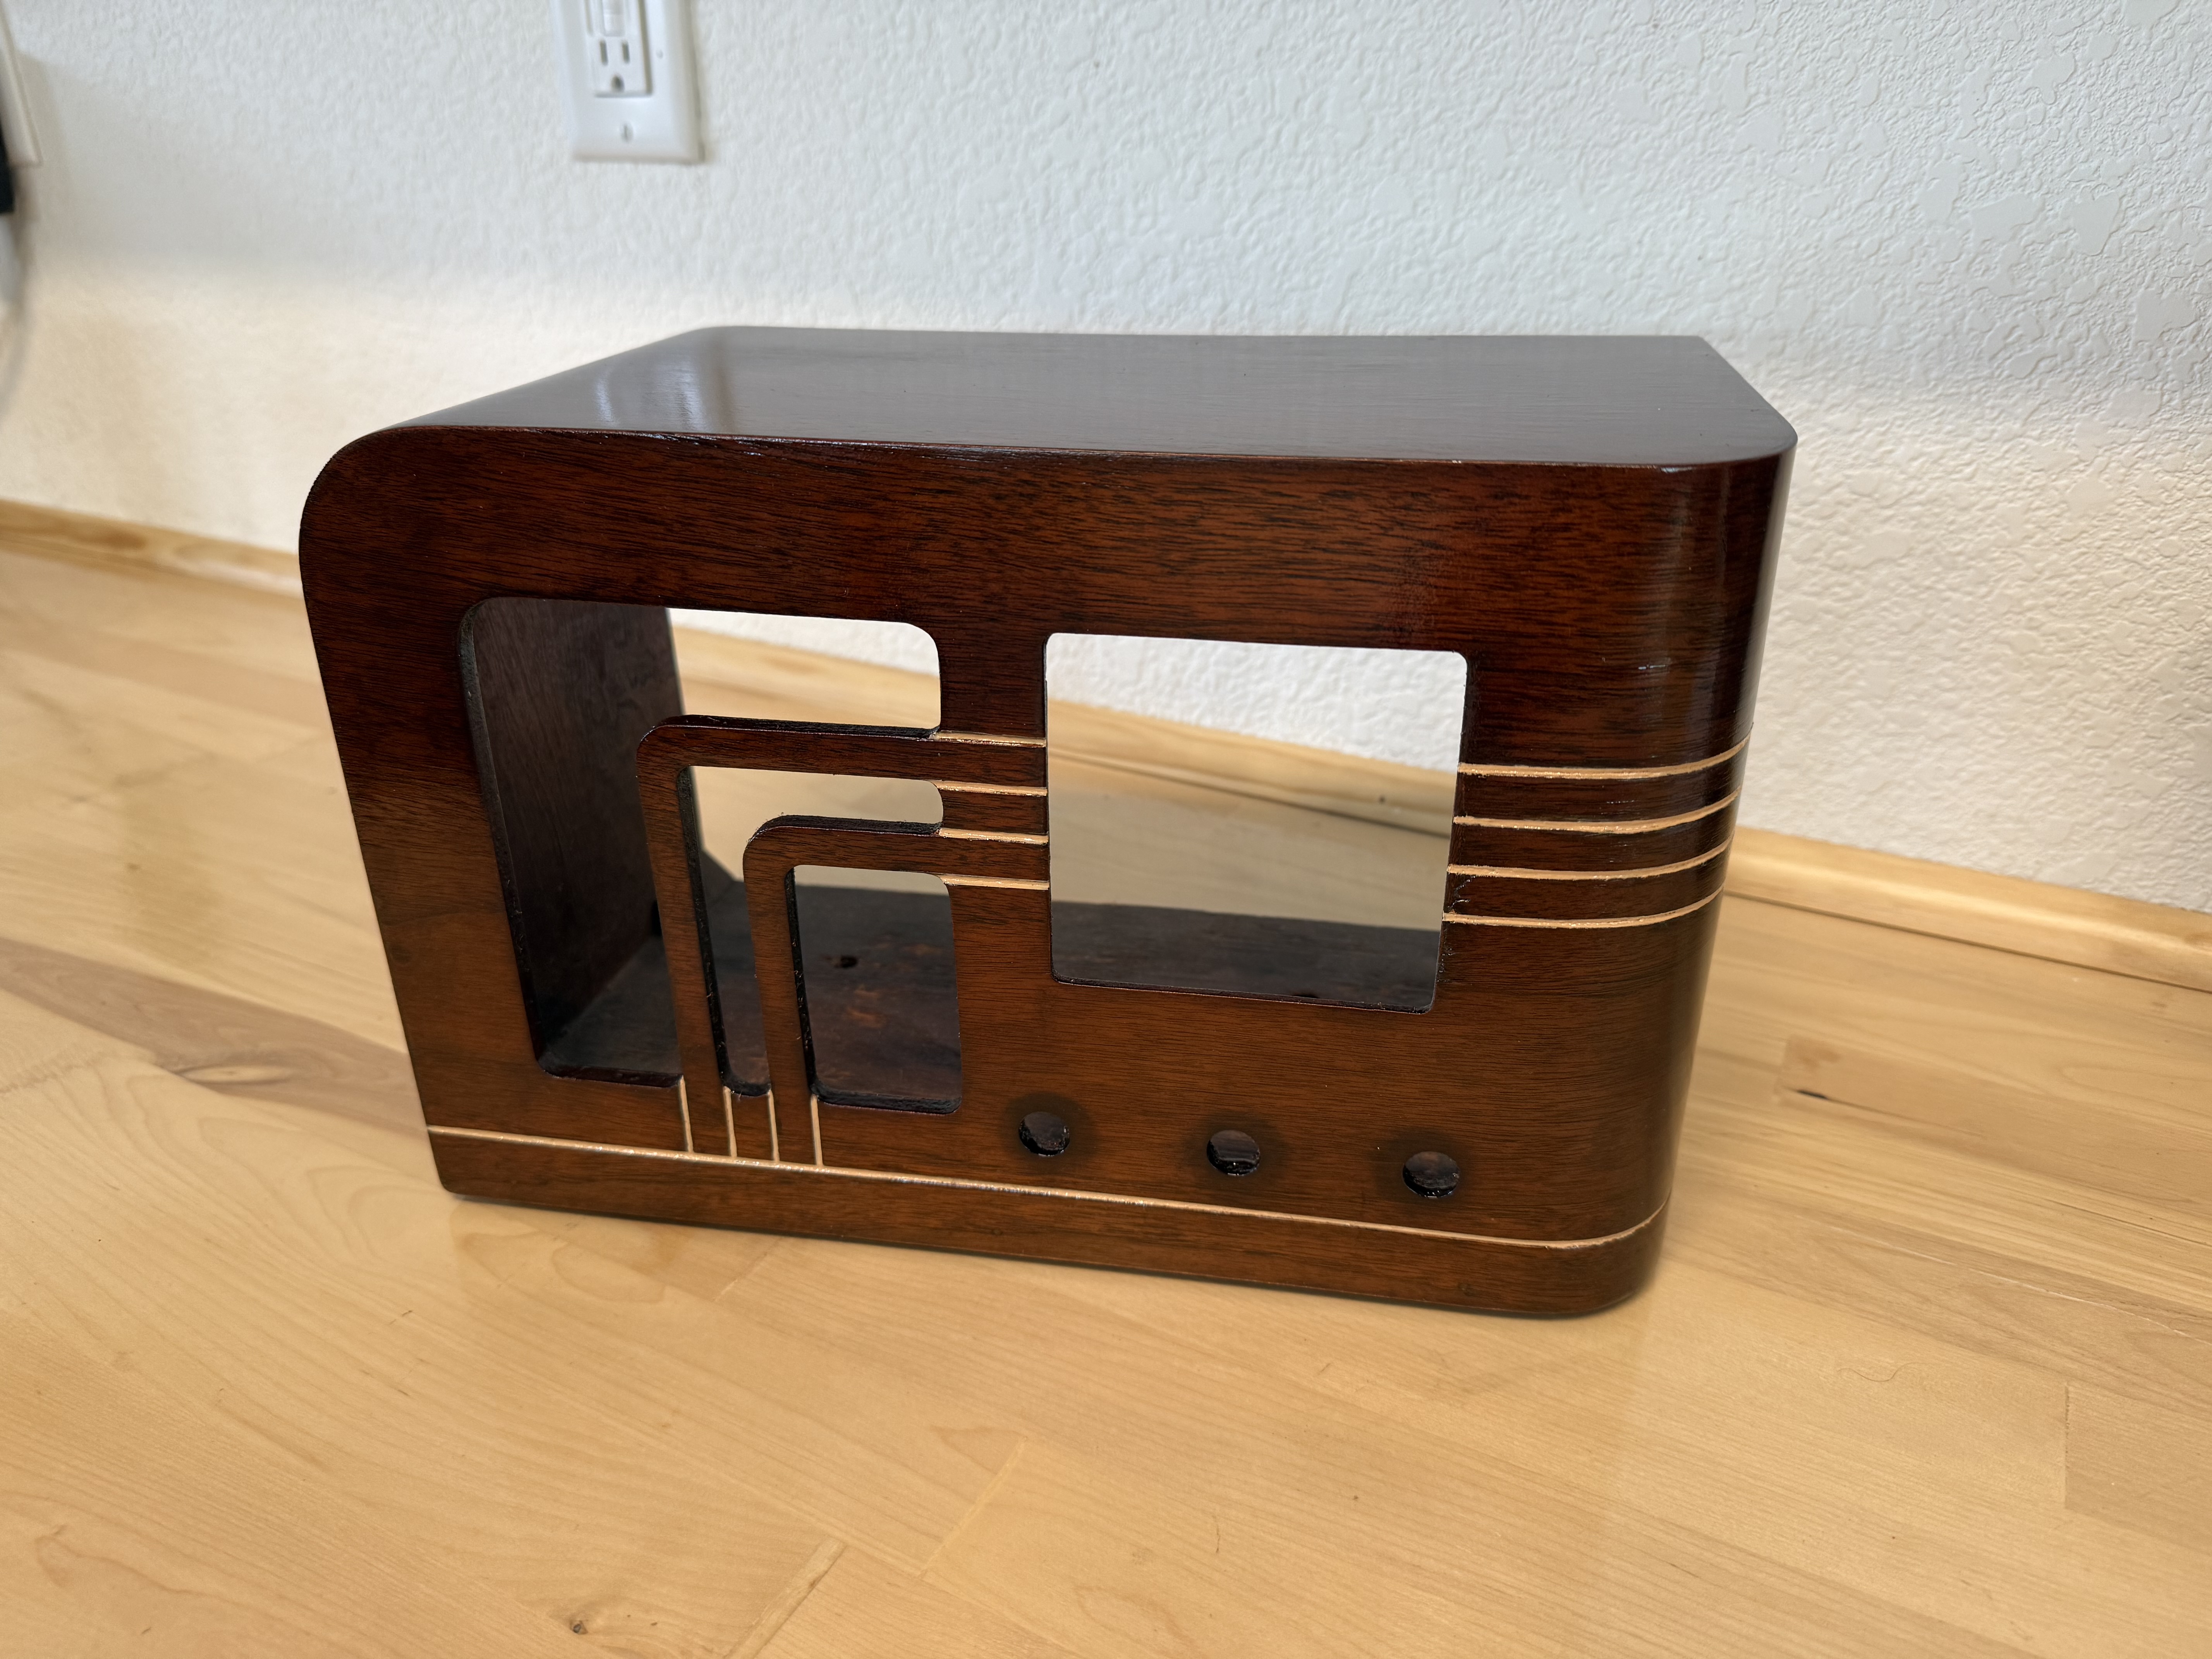
Craftsmanship is an ongoing cycle of learning fueled by patience, persistence, and care, where every project refines our judgment and challenges our skills, in the steady pursuit of the Path to Mastery.
(This post was last modified: 04-26-2026, 07:21 PM by SRv2.)
Posts: 172
Threads: 10
Joined: Mar 2026
City: Franklin
State, Province, Country: Maine
George,
Beautiful work on those two cabinets, and thanks for the tips.
Best wishes,
Roy
Posts: 172
Threads: 10
Joined: Mar 2026
City: Franklin
State, Province, Country: Maine
I'm waiting on a response from Mohawk to find out which of their six aerosol sanding sealers would seem to be the best fit for this application. Once I hear back and get the appropriate product ordered, I'll be able to move forward.
For now, this is where the cabinet stands with all the gold pinstriping done. I have thought of trying to simulate some of the original pattern in the photo finish, especially around the lighter edge and perhaps the burl in the larger panels, but I don't know that I have the artistic skill to pull it off.
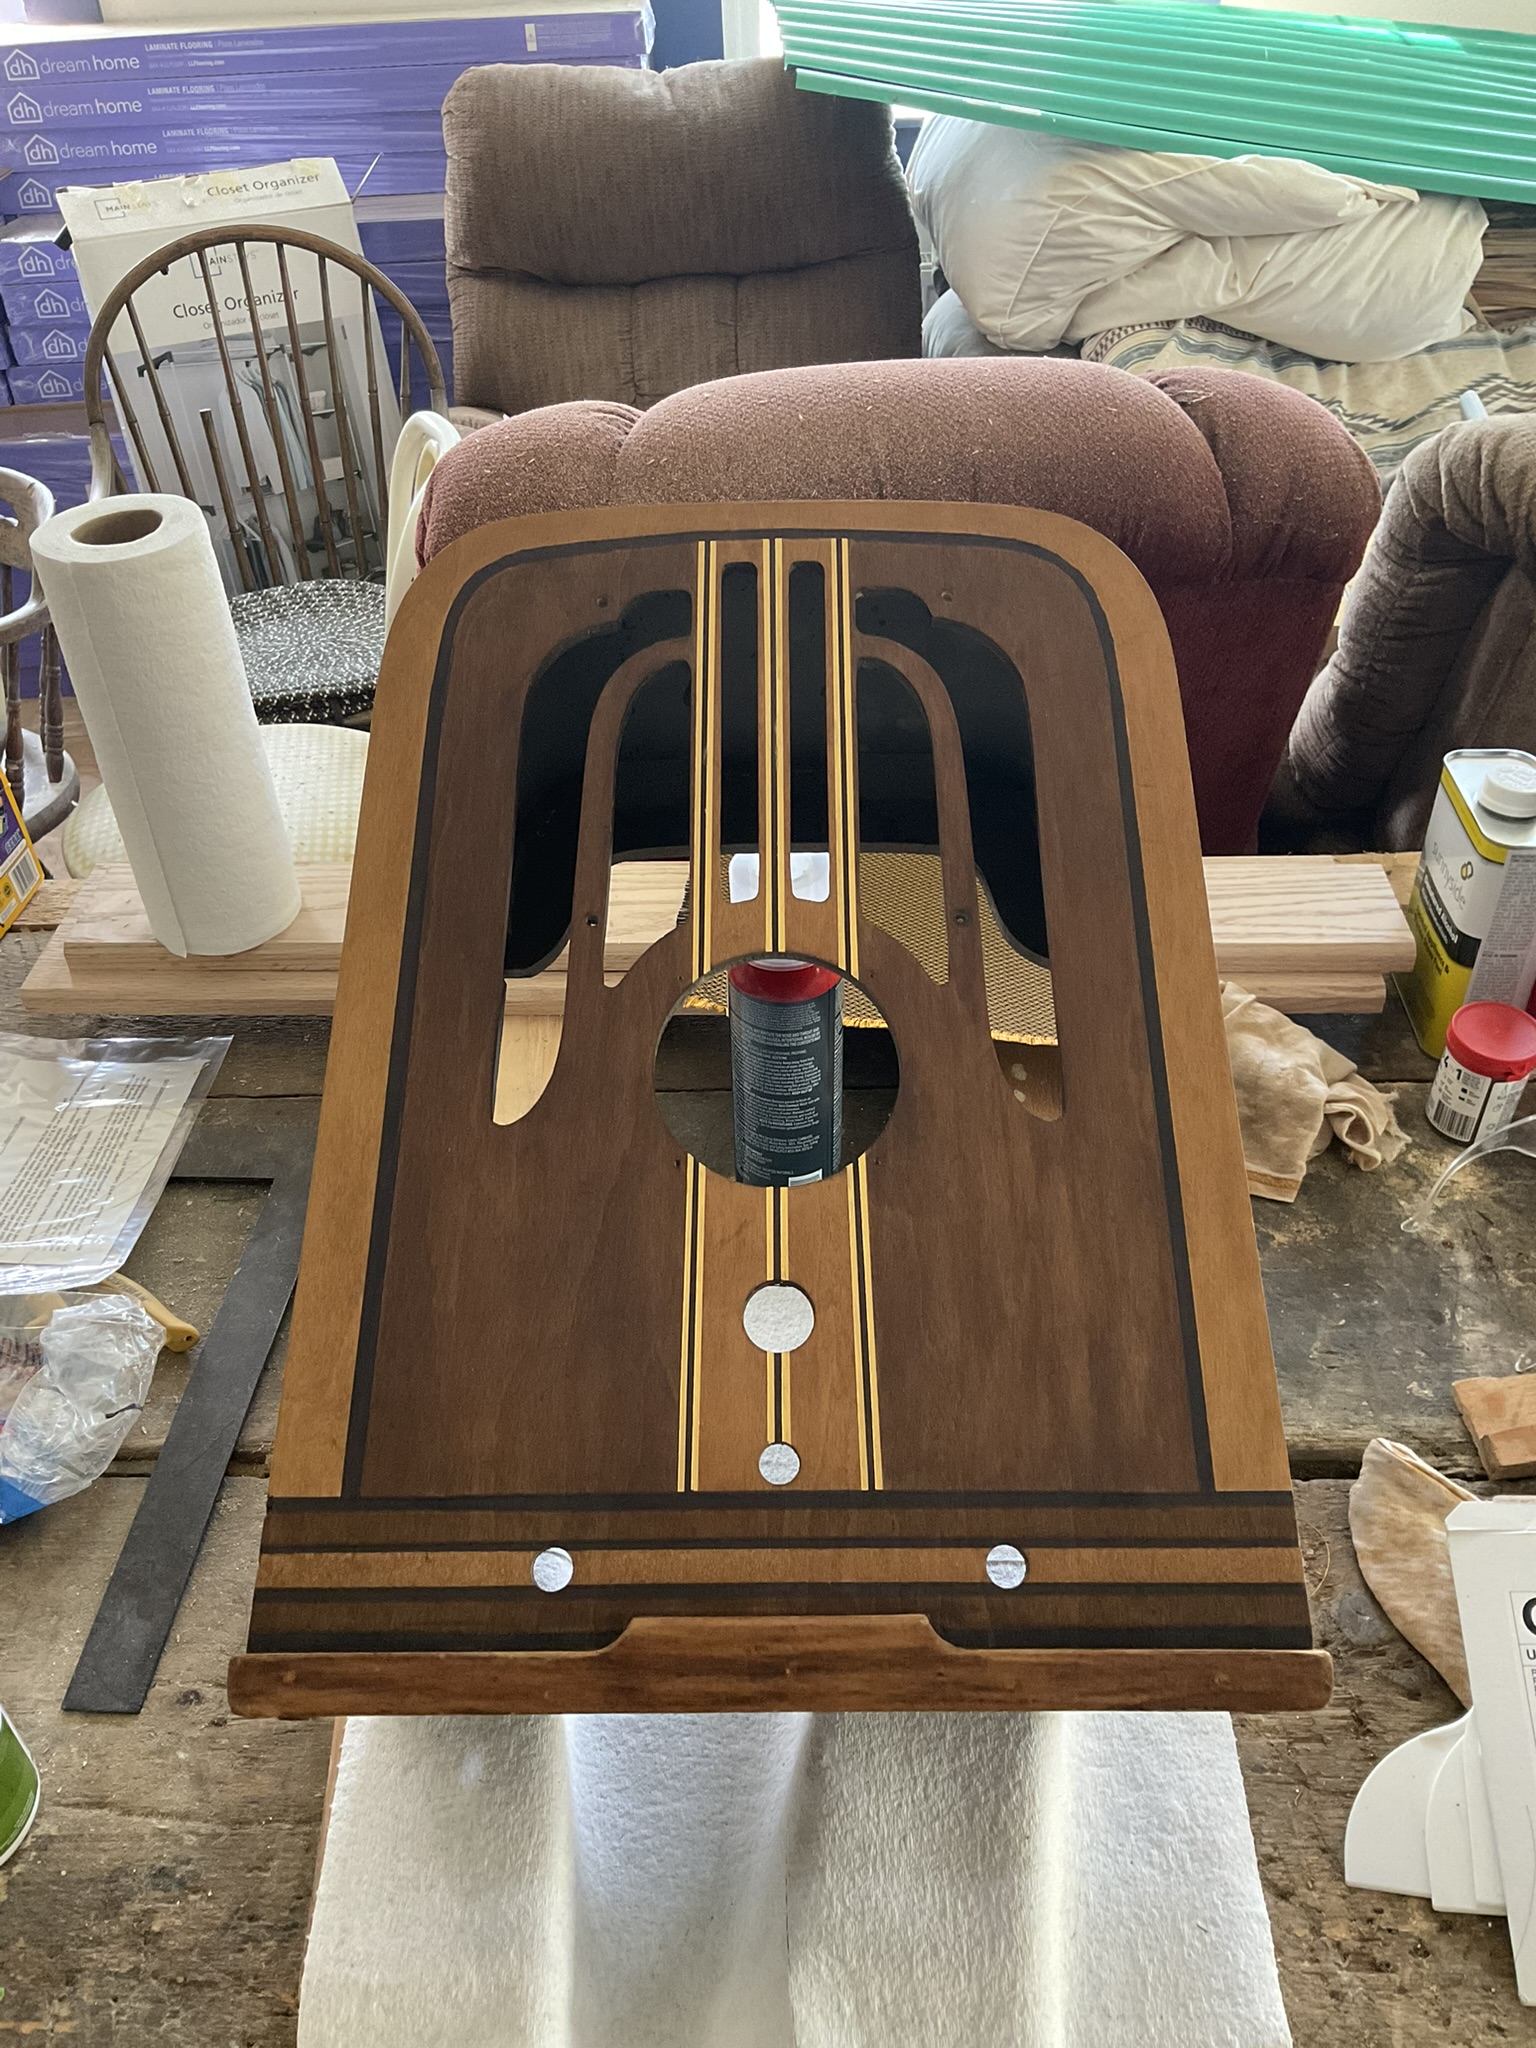
I did order and receive replacement decals, though seeing them in person, I think I may have ordered too big a size. I'm not going to stress over it since nothing about the face of this cabinet will probably end up as original. While we're talking about deviating from original, I was thinking, for contrast, I might do the same gold on the surface of the four bolts that mount the speaker. Thoughts?
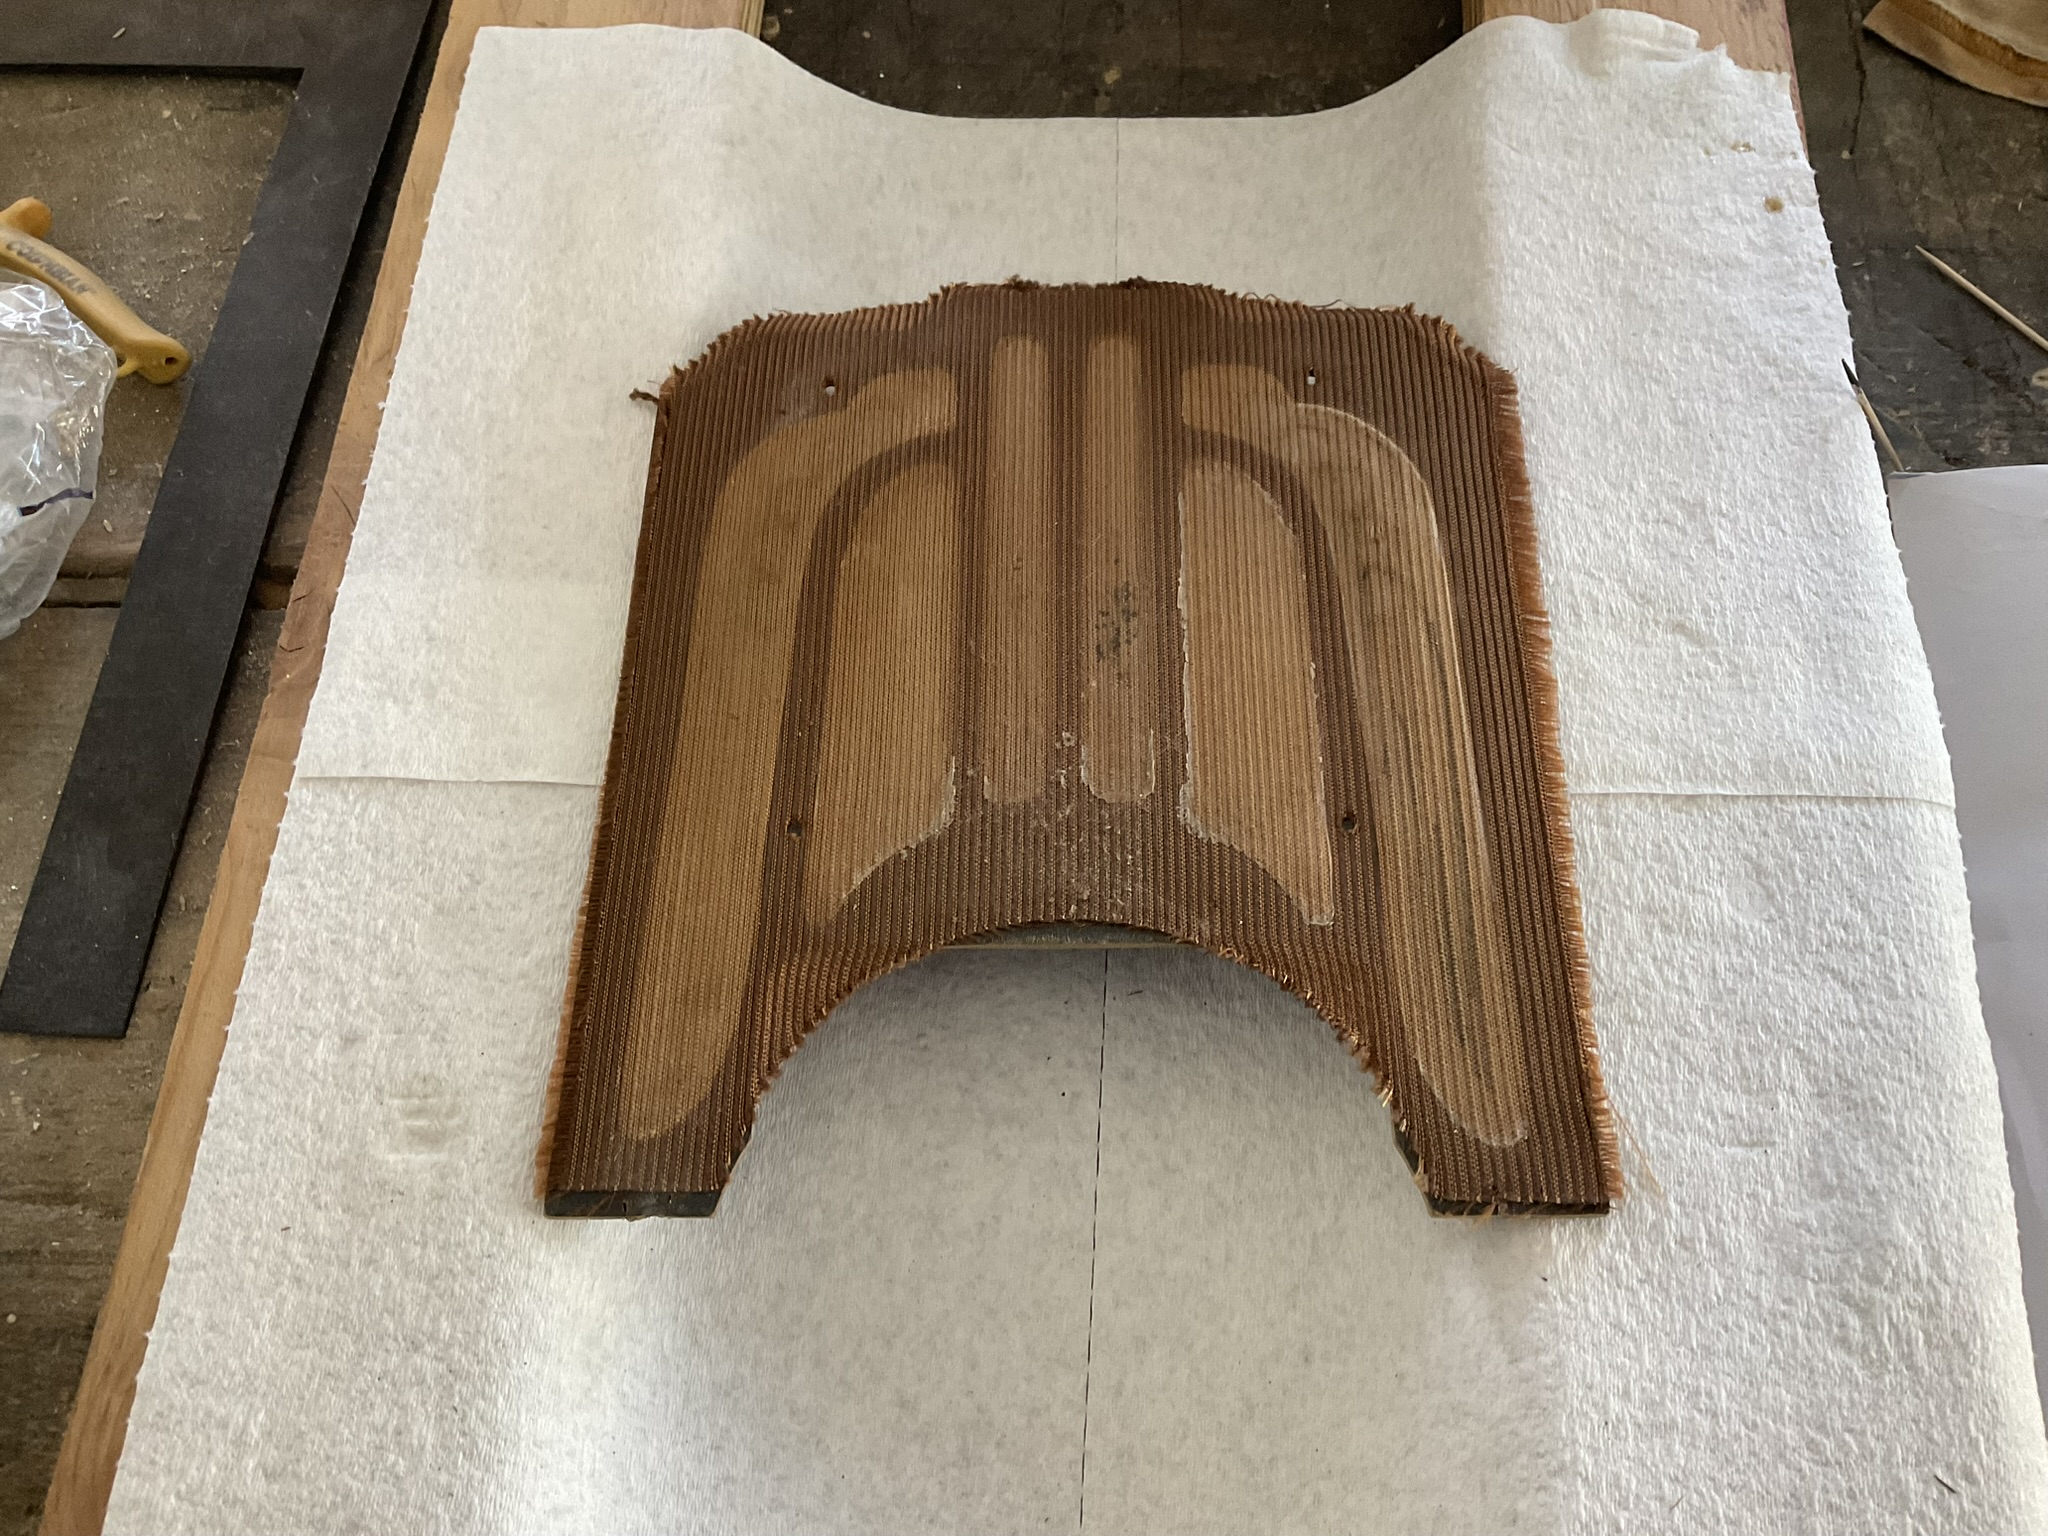
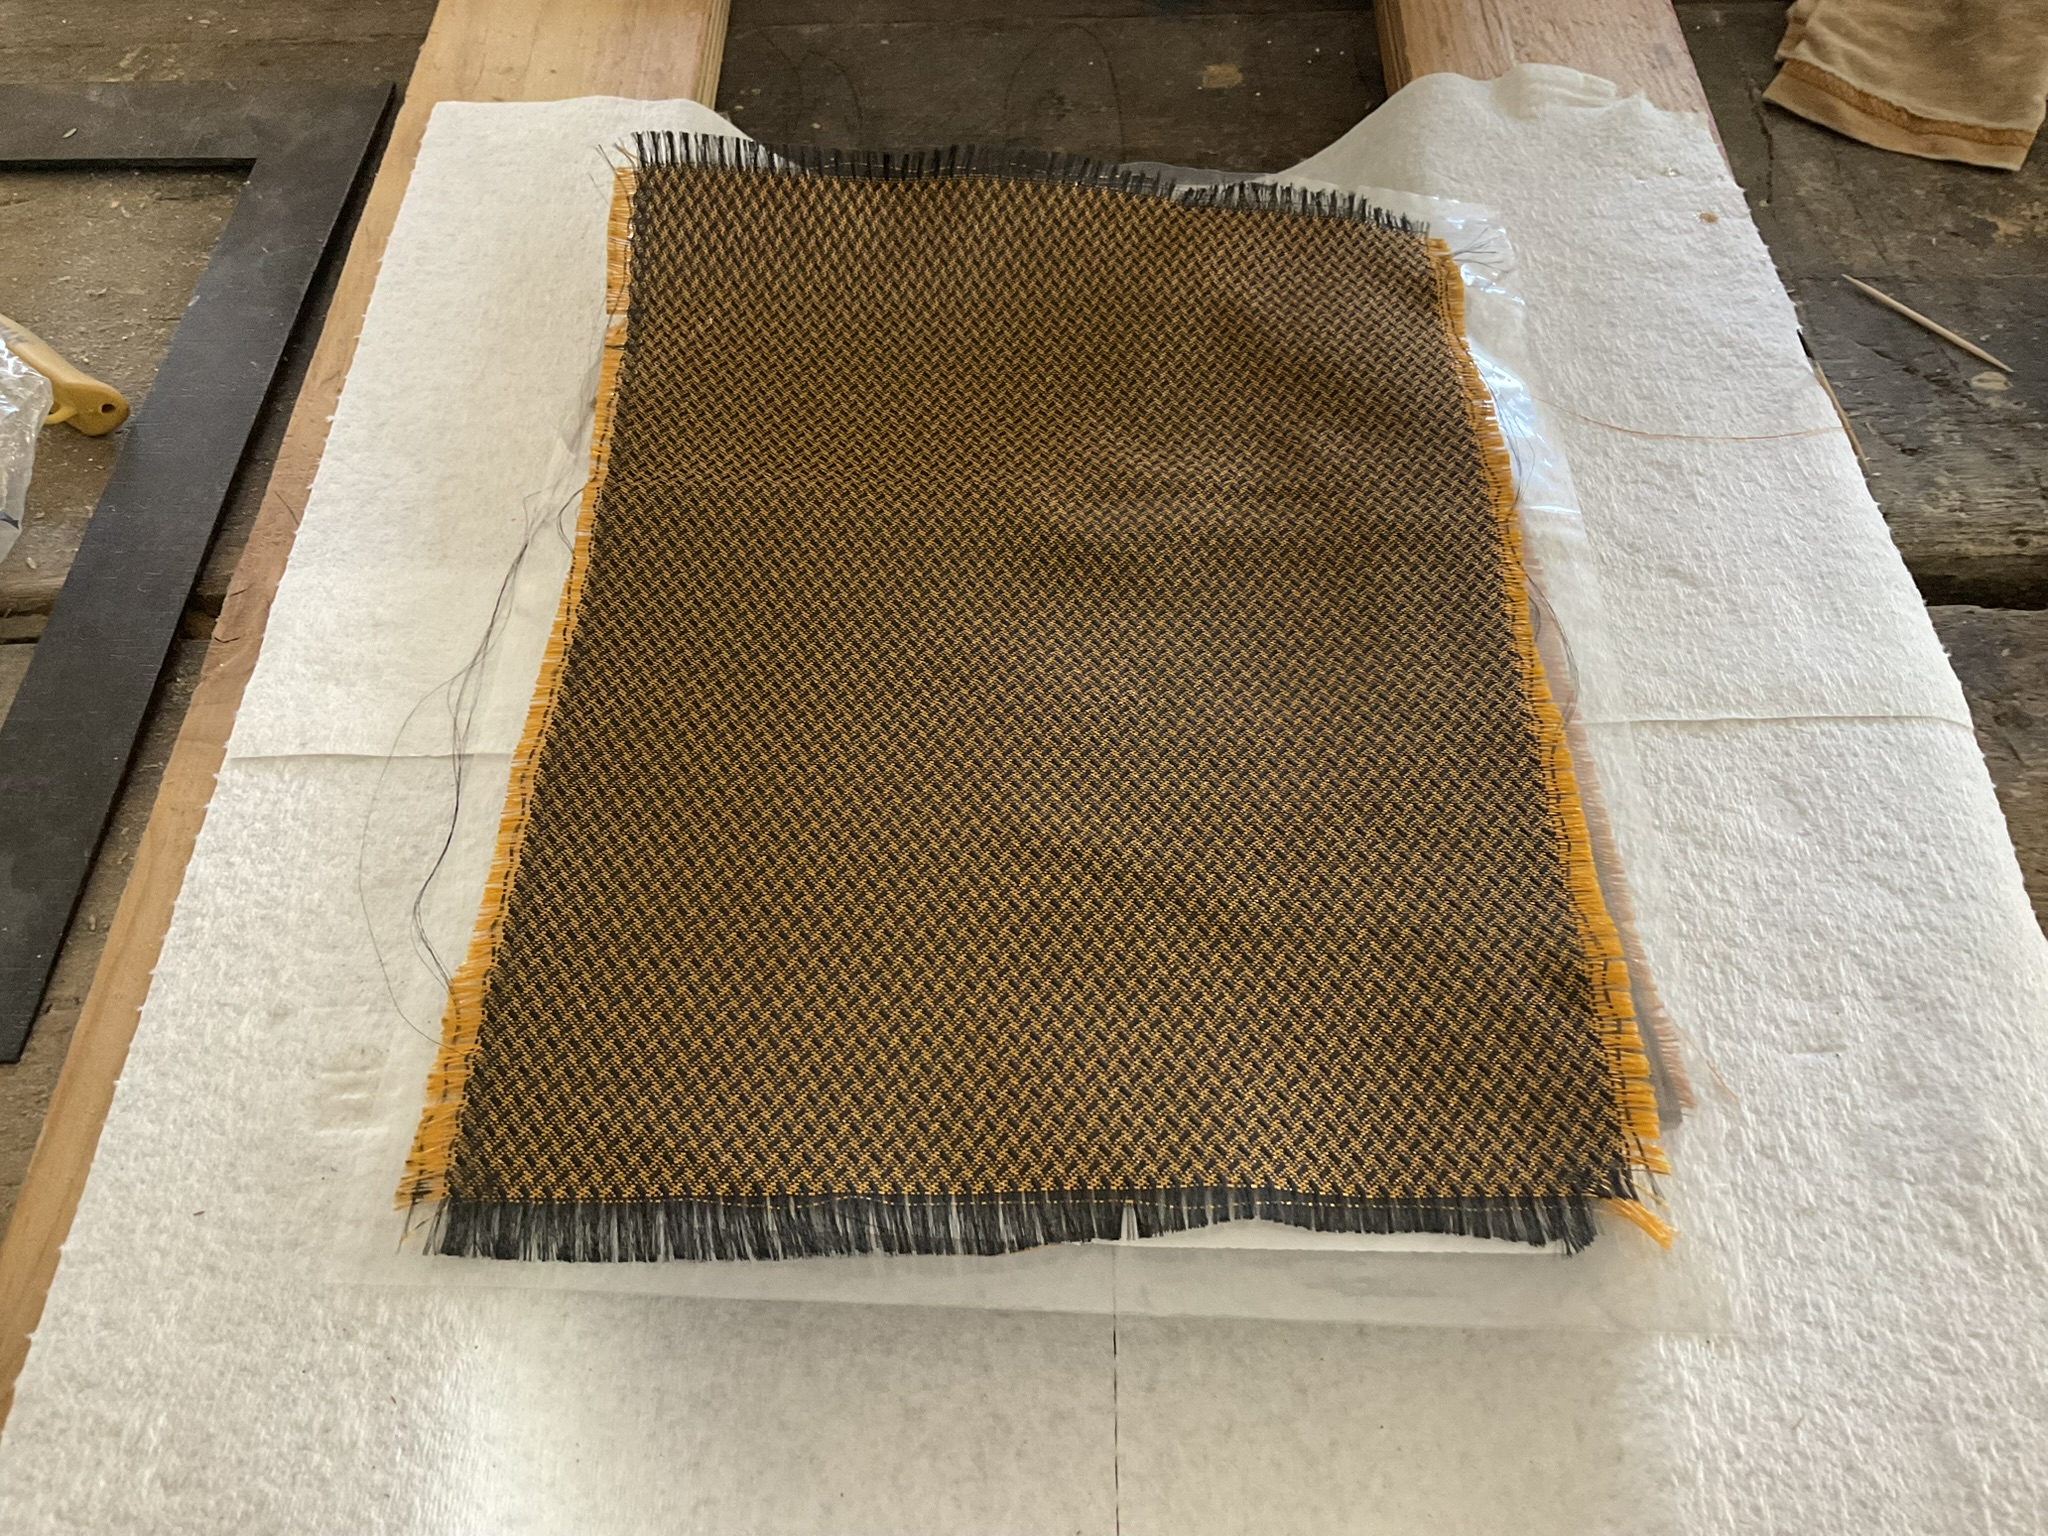
To say the grille cloth had faded would be a gross understatement. While there was a ribbed pattern for this era of Philco radios, I didn't find one that looked like it had the dark that this original fabric did, so I went with a different pattern that is at least period appropriate and near the original in tone.
To pour salt in the wound, since my last post, not one but two 37-620 radios with cabinets in darn near perfect condition were listed on eBay. Of course, they were in the $150 - $200 range and not that I'd want to even try to transplant just a face, but I will admit, despite the artificial nature, it was a beautiful design.
Best wishes,
Roy
(This post was last modified: 05-05-2026, 04:21 PM by glyphmon.)
Posts: 109
Threads: 15
Joined: Mar 2024
City: BERTHOUD
State, Province, Country: CO
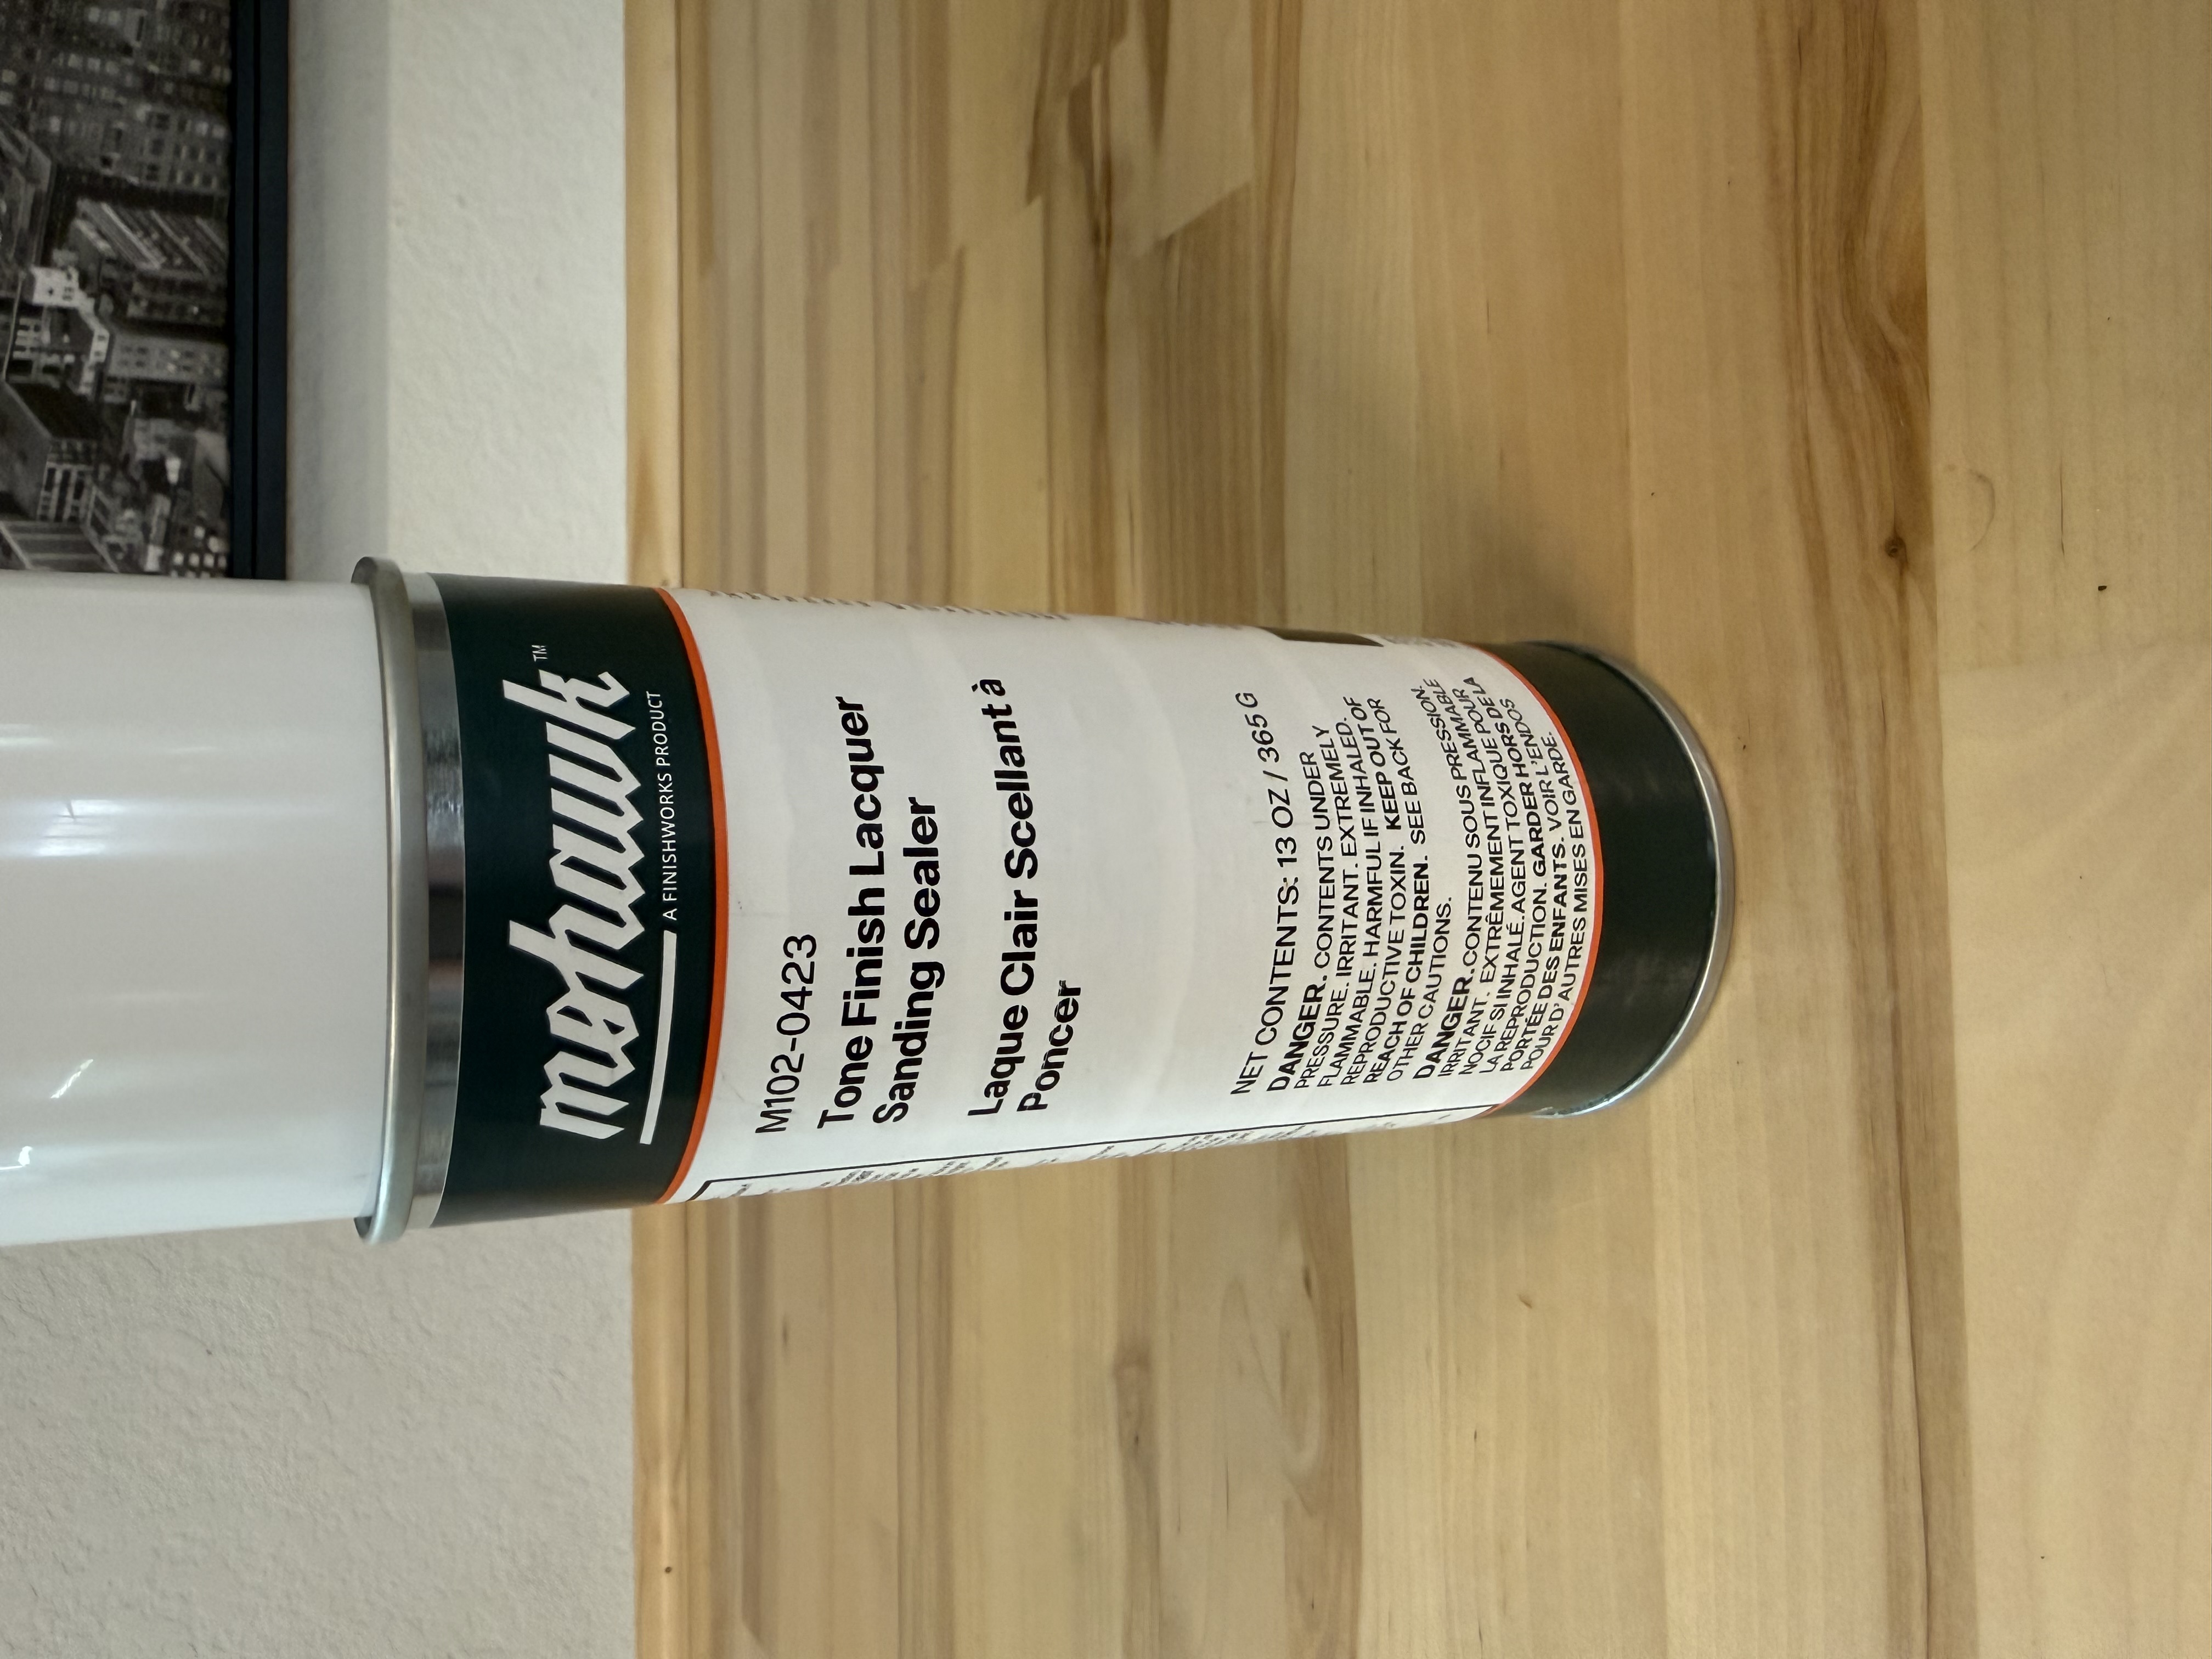
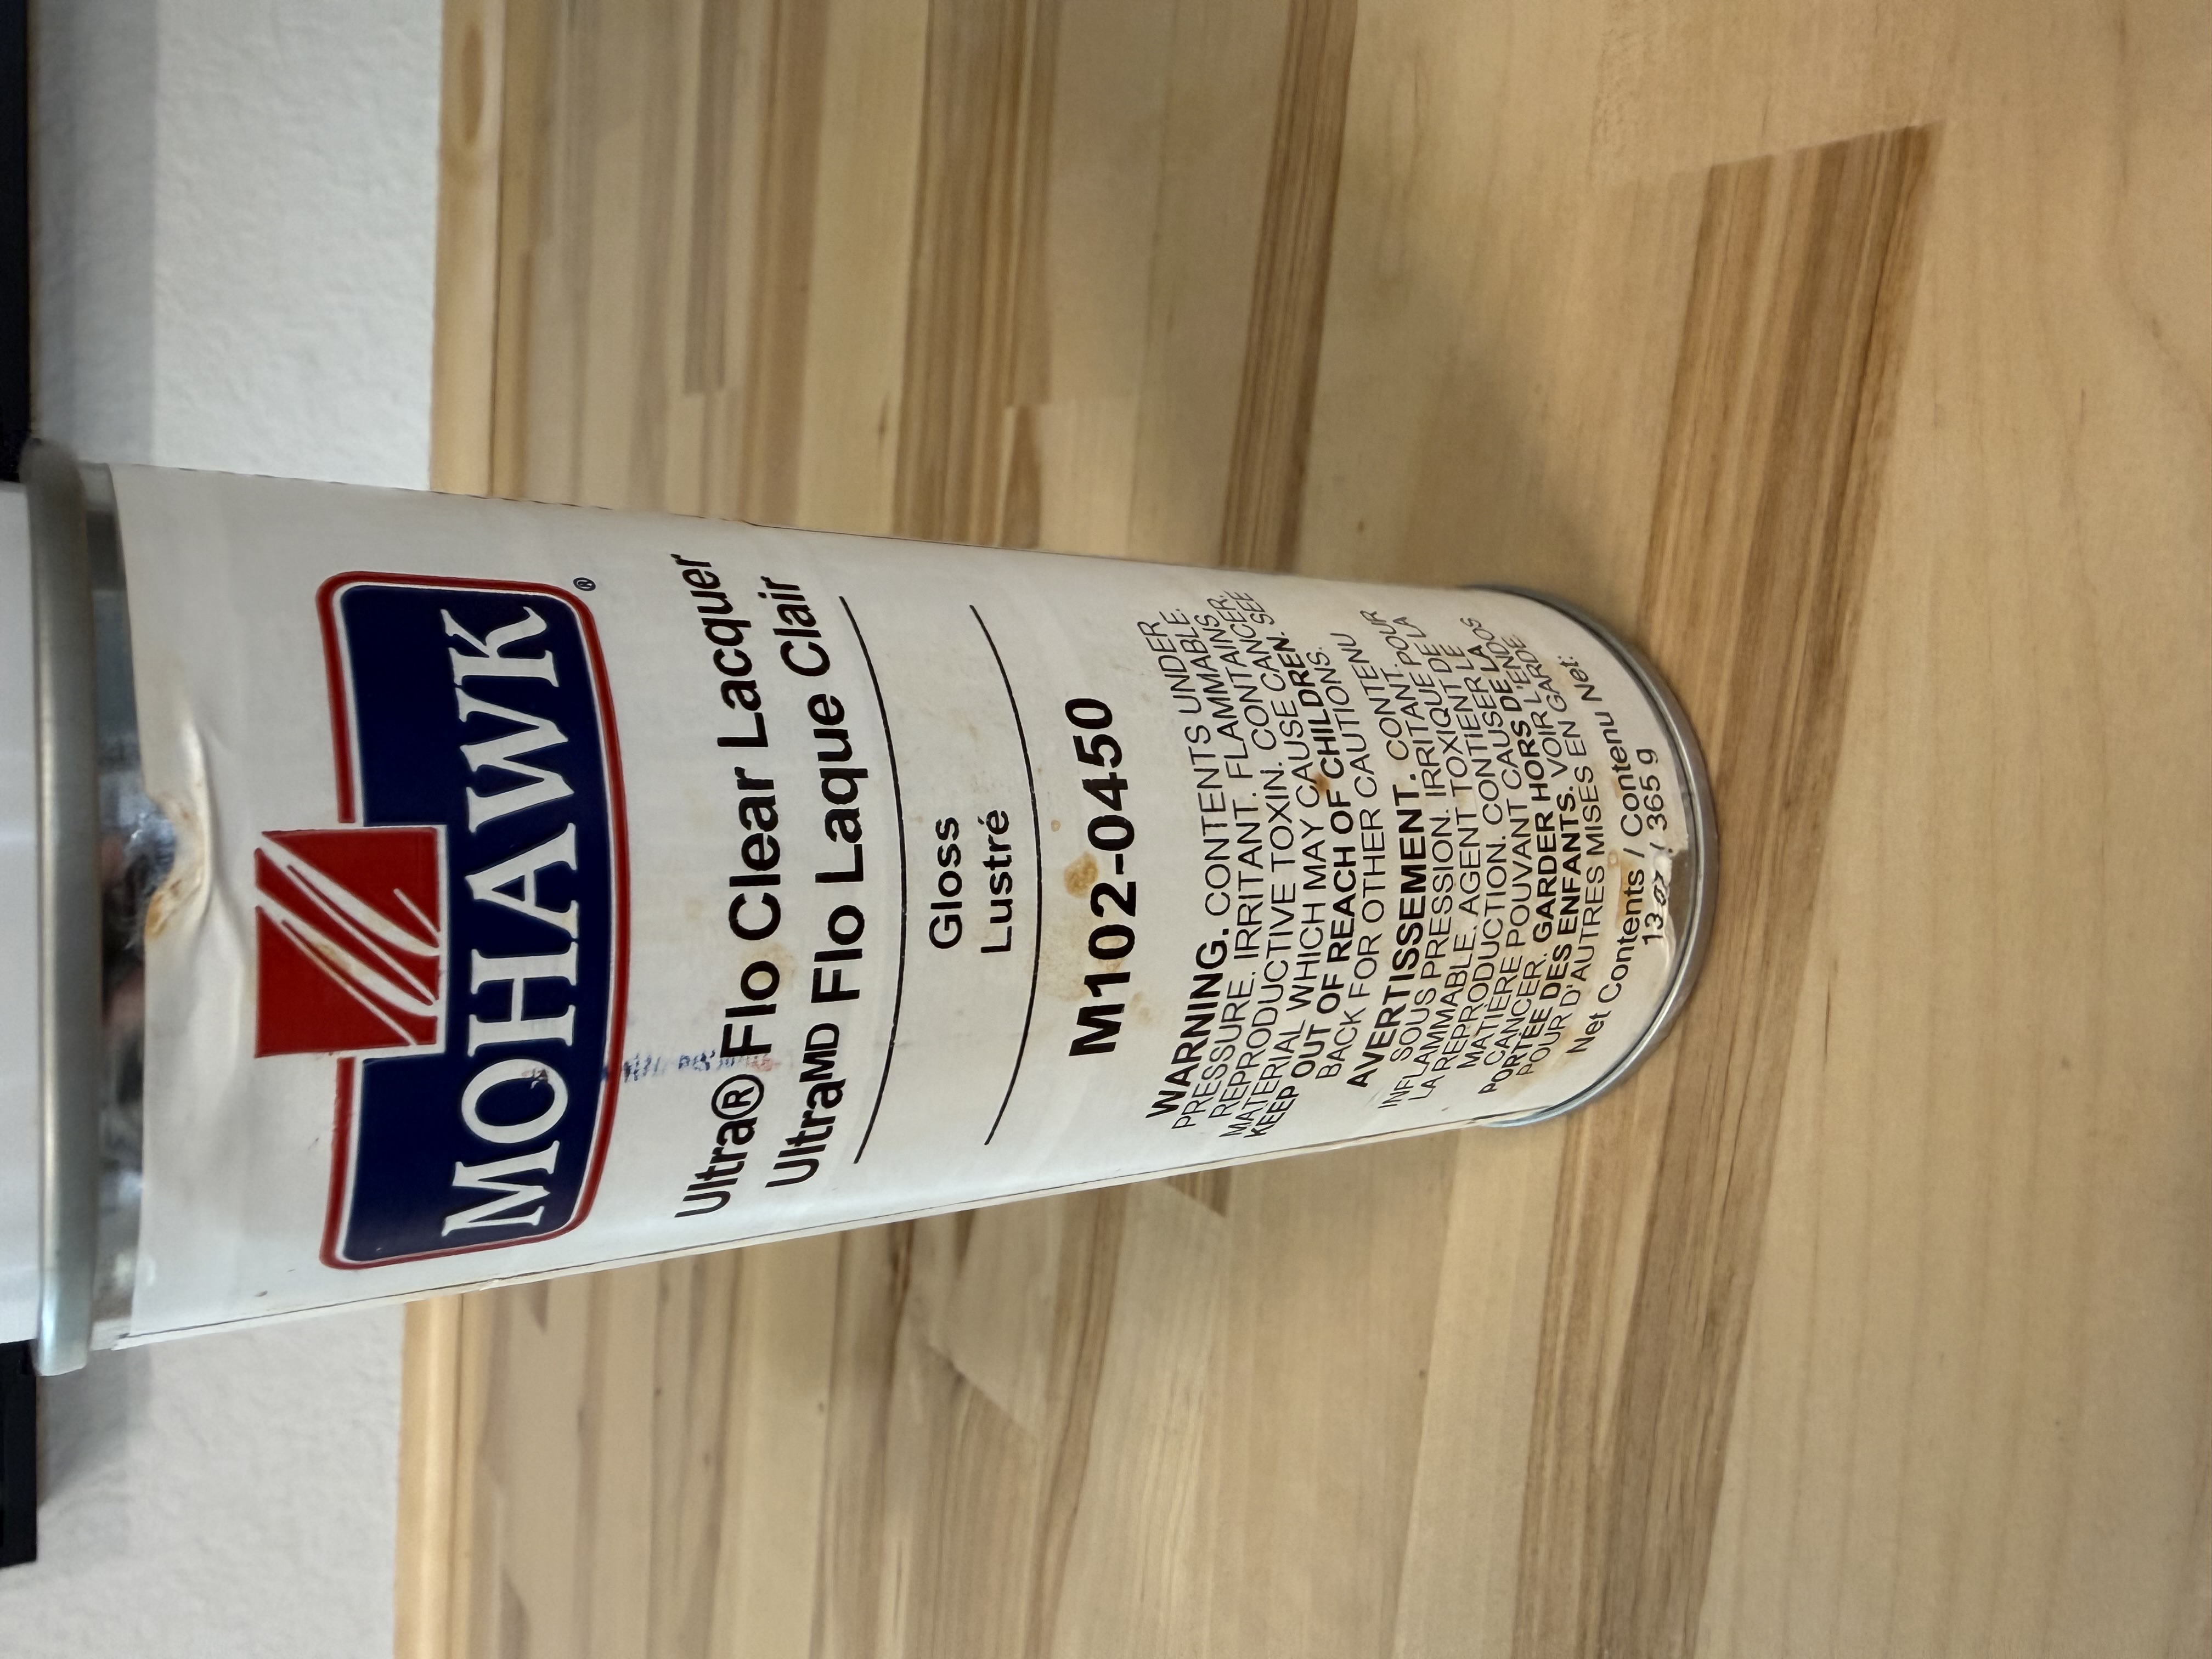
Roy, that cabinet is looking awesome, nice job. Attached are pics of the sanding sealer and lacquer that I use. I can't say for certain on a photofinish if these are correct. And I'm nowhere near a cabinet restoration expert. But these have worked well for me. Cabinet is looking great!
George
Craftsmanship is an ongoing cycle of learning fueled by patience, persistence, and care, where every project refines our judgment and challenges our skills, in the steady pursuit of the Path to Mastery.
Posts: 1,797
Threads: 55
Joined: Feb 2015
City: Roseville, MN
For the speaker bolts I would try to find a brass or bronze bolt, no paint, just a clear lacquer on the heads.
Posts: 172
Threads: 10
Joined: Mar 2026
City: Franklin
State, Province, Country: Maine
George, to be clear, this isn't a replacement photo finish product. I simply did three different dyes on the underlying wood after the removal of the photo finish so hopefully it will hold up just like any other wood.
Thanks for the product recommendations. Is the Tone Finish sanding sealer a completely clear product? I wasn't sure if that one incorporated any sort of coloration thanks to the closeness to "Toner".
Rod, good thought on the bolts. I'll see if I have anything in my collection and if not, I need to pick up a glass cutter at Home Depot. They may have something compatible.
Best wishes,
Roy
Users browsing this thread: 2 Guest(s)
|
|
Recent Posts
|
|
Stromberg Carlson 1500 Squeal
|
| And life just keeps getting more complicated. By dconant.
Dittos'Jimradio — 08:01 AM |
|
Plug Voltages Needed For A 1943 CRV-20130 Power Supply
|
| That looks a lot like an aircraft connector of some kind, even if it's a U.S.N power supply. I have a book somewhere abo...Arran — 02:56 AM |
|
Plug Voltages Needed For A 1943 CRV-20130 Power Supply
|
| hello david,
I have a similar generator in my collection that features a cast iron, single-cylinder Briggs & Stratt...radiorich — 01:00 AM |
|
under chassis parts locator diagram for 1938 Zenith 9s262
|
| Has anyone gone to the trouble of creating an under chassis parts locator image? Yes, I can identify components by foll...bobloney — 08:57 PM |
|
Plug Voltages Needed For A 1943 CRV-20130 Power Supply
|
| Try looking at this site the book mark is for a old generator that I was given. David https://radionerds.com/index.ph...David — 08:36 PM |
|
Plug Voltages Needed For A 1943 CRV-20130 Power Supply
|
| Hello Everyone,
I am looking for voltage identification for all the pin positions on the socket of a CRV-20130 power su...Tonym4704 — 08:16 PM |
|
Philco P45-6365 Universal Transformer Instruction Manual
|
| Can anyone guide me to where this may be found?GRG — 03:00 PM |
|
54C Complete Teardown/Rebuild
|
| I don't think that I have encountered a 12Z3 before, curious how it uses one of those but includes a #43, which is a 25 ...Arran — 02:17 PM |
|
HiFi (Chifi) tube amp build - but my own design.
|
| It's the other forum. I'm also in DIY, but mostly read there. Honestly, I kinda jumped into this without much thought to...TV MAN — 10:43 AM |
|
Philco 71 Code 125
|
| Hello,
I am in need of a schematic for this radio. Mine has the three separate circular tube shields and a shadow me...dconant — 08:06 AM |
|
Who's Online
|
There are currently 2268 online users. [Complete List]
» 1 Member(s) | 2267 Guest(s)
|
|
|

|
 
|