Posts: 5,654
Threads: 56
Joined: Sep 2008
City: Sandwick, BC, CA
Mike;
I'm of the same view, I've bought sets that were unknown, but someone decided to overhaul them, and they did a decent job, finding the set worked perfectly. Then there were the ones that were supposedly "restored" which I have to re-restore because the reason they were put up for sale was because they didn't work properly, the last being a Westinghouse 780A where the it had been worked on at least twice in recent years, by the clip and pigtail method, sometimes they didn't even close the loop they made. In the case of that set they had changed out the cathode resistor on the 6F6 audio output tube, and replaced a 2 Watt resistor with a 1/2 Watt, so the set played fine for about 10 minutes, and the audio became distorted after that from the resistor drifting, it was rather brown looking when I found it, which was wherever the previous guy thought it should be physically, with the bypass cap piggybacked across this hot resistor.
Regards
Arran
(This post was last modified: 06-01-2026, 05:09 PM by Arran.)
Posts: 18,427
Threads: 622
Joined: Oct 2011
City: Jackson
State, Province, Country: NJ
Yep, that I also have encountered during my restorations before.
Meantime, I am questioning if I should attempt to restuff the cap can.
While the same big menacing thing as in R-73, it is not right next to some flimsy magnetics that can be broken with one unfortunate move of a screwdriver.
I am still not entirely convinced I should do it, but It's a thought.
People who do not drink, do not smoke, do not eat red meat will one day feel really stupid lying there and dying from nothing.
Posts: 3,188
Threads: 226
Joined: May 2008
City: Omak
State, Province, Country: WA
Hello Mike and Arran,
I’m with you on buying restored sets—I have fewer than five in my collection. Arran, a late friend of mine named Jerry loved “Jerry rigging” things, and many of the radios I’ve picked up, as well as items that came into my repair shop, were just plain jerry-rigged to the max.
Sincerely Richard
Posts: 18,427
Threads: 622
Joined: Oct 2011
City: Jackson
State, Province, Country: NJ
Jerry rigs because Jerry can.
People who do not drink, do not smoke, do not eat red meat will one day feel really stupid lying there and dying from nothing.
Posts: 3,188
Threads: 226
Joined: May 2008
City: Omak
State, Province, Country: WA
Hello Mike,
I remember Jerry having an old GMC pickup with a broken wiper control, so he mounted an outlet box to the dash and installed a light switch and plate on it. Anyway, I’m sure you’ll figure out the wires and connections on this set, and know exactly where each part goes.
Sincerely Richard
Posts: 1,797
Threads: 55
Joined: Feb 2015
City: Roseville, MN
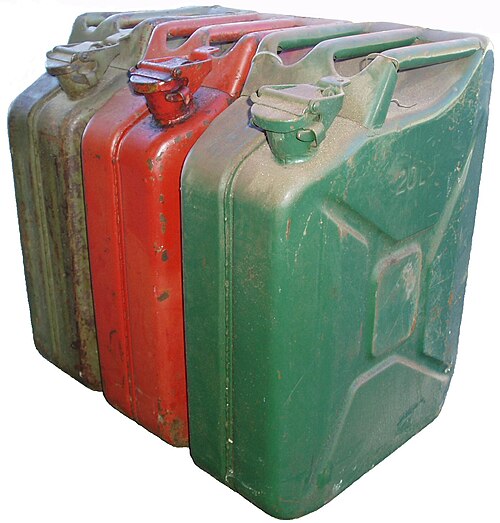
Here's a real jerry-can
Posts: 18,427
Threads: 622
Joined: Oct 2011
City: Jackson
State, Province, Country: NJ
Different Jerries, but yes, they could also.
And the three handles...genius!
When the Soviets made theirs (and called them "kanistra", a canister, which is what it was called in German, Kanister or Einheitskanister), they copied everything. Except the tripple handle. Which was the claim to fame.
Russians could never copy anything right.
Though...maybe not anything. They did copy this RCA140. Or B-29 Superfortress / Tu-4. The latter more successfully.
But then they tried Concord. Came up with Concordsky Tu-144. Somehow all those cloned plane became "Tu".
A real German Einheitskanister was highly prized.
People who do not drink, do not smoke, do not eat red meat will one day feel really stupid lying there and dying from nothing.
Posts: 5,654
Threads: 56
Joined: Sep 2008
City: Sandwick, BC, CA
Mike;
I repaired an H-82 for a fellow, and I did what you did with the R-72, but I put the bypass caps right under where the block condenser can was located, reusing the original wires. A few years ago I got my own example of a CGE H-82, and have been debating whether to do the same, or restuff the can, but haven't done much with it since I still need to find , or make a pair of chassis mounting brackets, or slides for it, as well as find some tube shields that will fit the bases on the chassis. For whatever reason the S-42A used different diameter tube shields even though the basic chassis layout is very similar, the main difference is that the S-42A has push pull #47s rather then a single ended #47, with an AVC tube, electrically different, but still has eight tube sockets in the same places.
I will probably get into the S-5 Echophone since it's more complete, however someone had a go at restoring it, but obviously aborted the attempt, emptying the bypass condenser can, leaving the removed, and empty can, sitting on top of the chassis. Their bright idea was to try installing the bypass caps where the wires were connected, so there are a lot of disconnected things under the chassis, fortunately they did not break the antenna/R.F coils, but did manage to break the antenna terminal assembly, Why? This is an interesting set in it's own right, they have a pair of #45s in push-pull, but no audio interstage transformer, in all honesty I thought the previous fool may have removed it and lost it, until I checked the schematic. I think I will restuff the can, it was only the depth of a sardine can so it would not be difficult to fill the voids in it, the wires came out the ends through rubber grommets. I think it will be easier then your 140, but still not easy, but after working on an H-82 I know it will be about the same level of difficulty, but in a different way.
What some guys have done with those sorts of block condenser cans was basically to make a wood box to go inside the steel box, then they would mount terminal strips to the wood and mount the capacitors on those. I think these cans are spot welded together so they don't really need to be filled with something to stiffen them up.
Regards
Arran
Posts: 3,188
Threads: 226
Joined: May 2008
City: Omak
State, Province, Country: WA
Hello Arran,
that S-5 Echophone does sound interesting and one member I can think of who really does some amazing work on the older sets is Dave Zenith on facebook .
Sincerely Richard
Posts: 18,427
Threads: 622
Joined: Oct 2011
City: Jackson
State, Province, Country: NJ
Philco cap boxes were fairly easy as they had those phenolic boards with solder posts on them, where the replacement caps would normally be mounted, and, other than extracting the tar block, they were not that challenging after all.
This one is a bear to extract, then I am not even sure how to open it, and, once I find out (IF I find out), there is that question of how to mount the caps. The can is huge and so, short of potting the caps with wires attached (do not like it), it will require manufacturing of some support.
Actually I have just thought of one. I could cut a folded sheet of fishpaper. Or a plexiglass. Size of the crossection of the can. Drill holes in nit, put the caps under it, thread the wires through that board/paper.
Extend the wires and pot some part of the can, just enough to immobilize the board and the caps (just enough, no one's going violently shake that radio).
Put the wires through that orifice at the bottom of the can, mount it back.
Done.
Easy-peasy.
People who do not drink, do not smoke, do not eat red meat will one day feel really stupid lying there and dying from nothing.
Posts: 18,427
Threads: 622
Joined: Oct 2011
City: Jackson
State, Province, Country: NJ
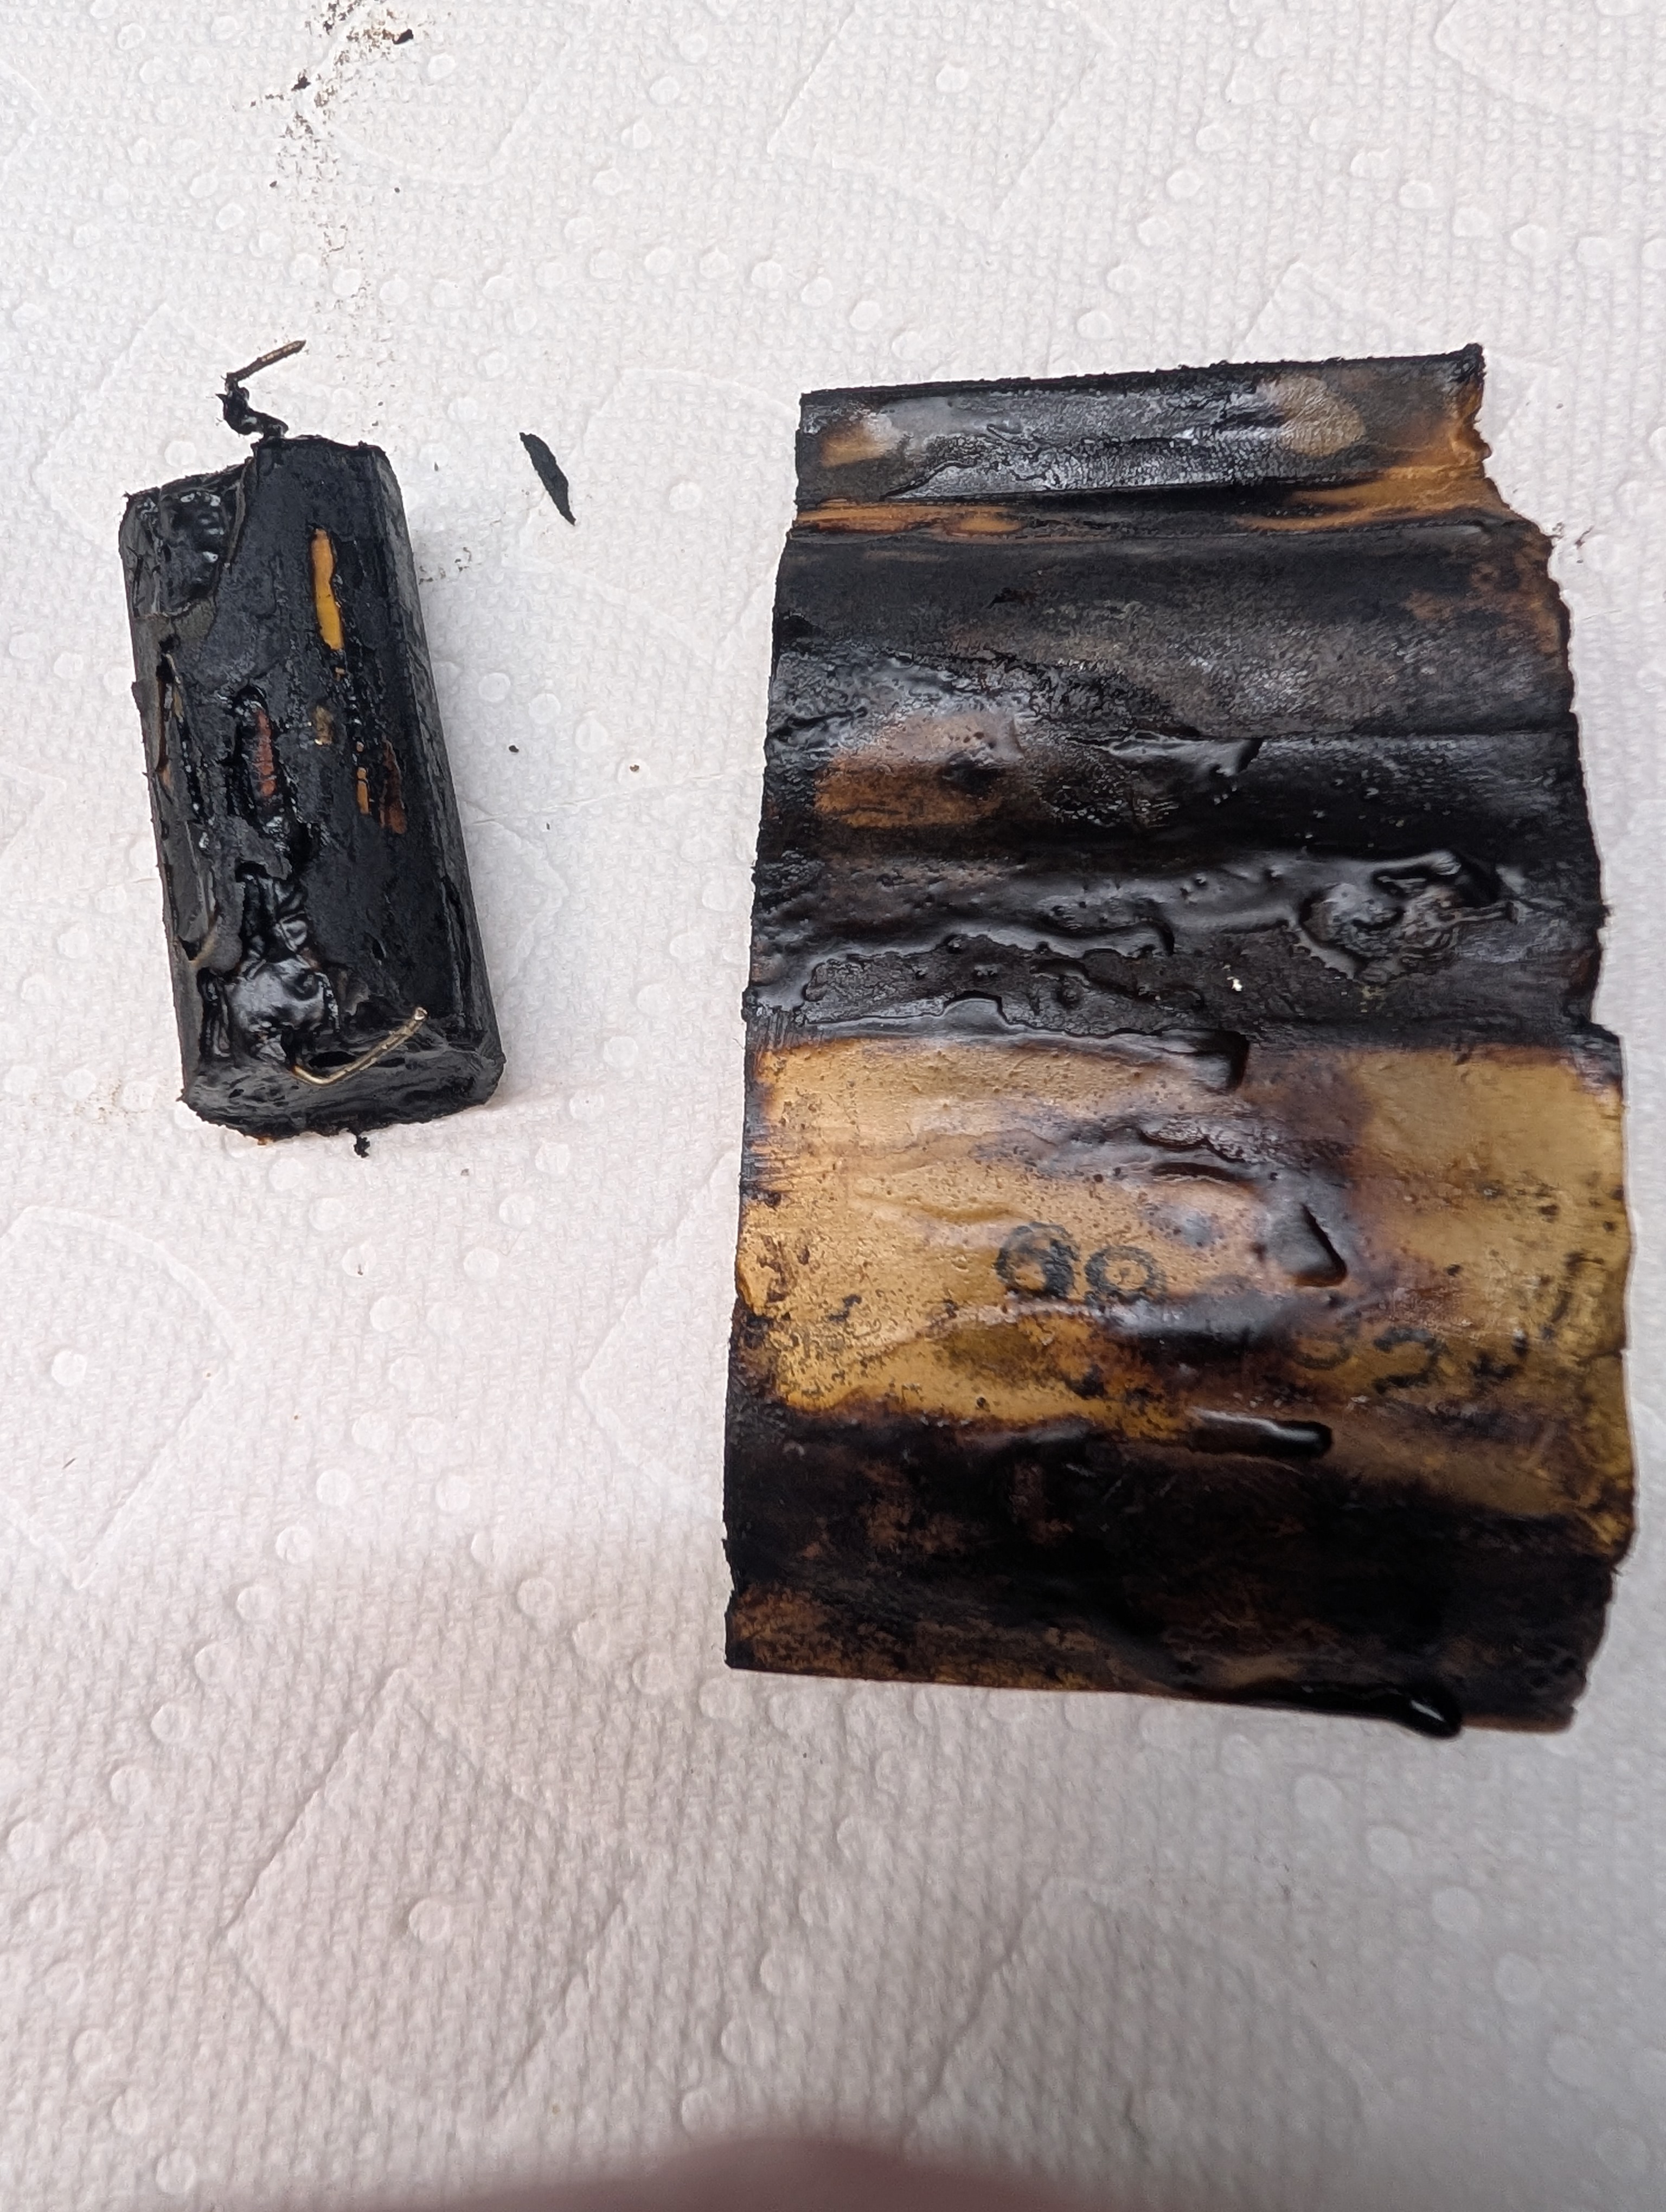
Just to illustrate the way they made the caps.
For instance, this is a 0.5uF cap.
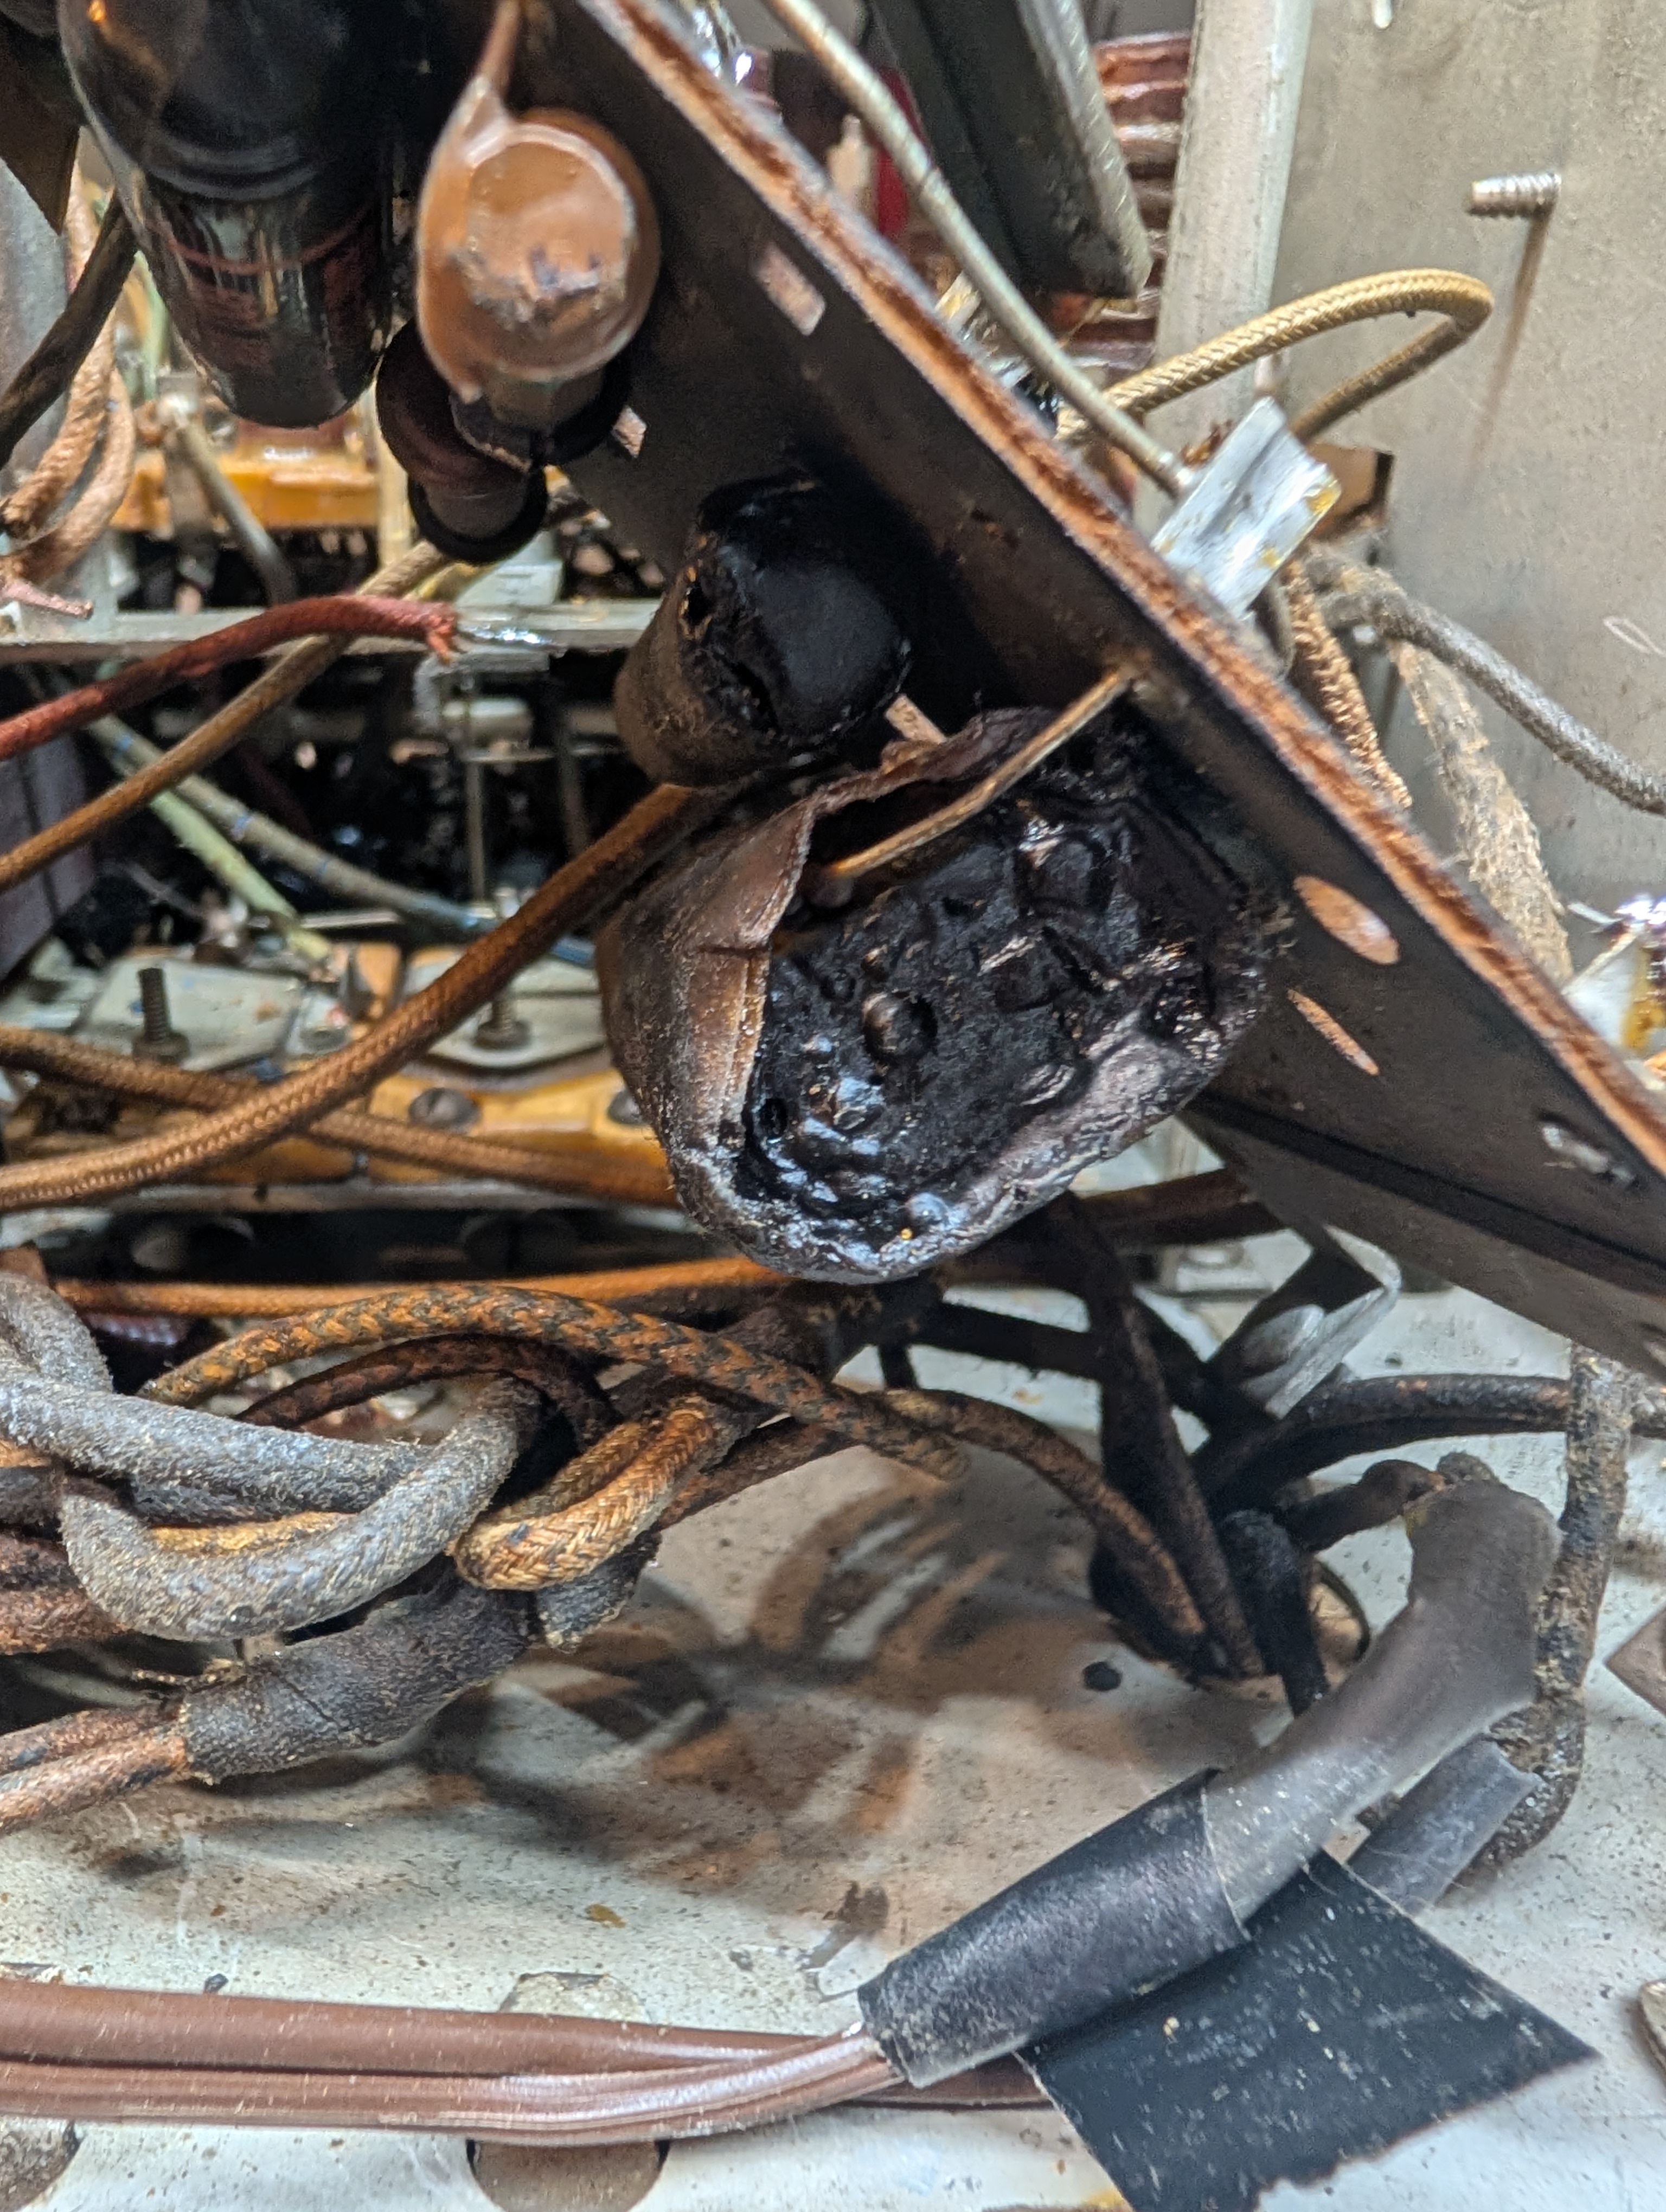
Upon heating it, there is no need to yank the leads. The cap is simply warmed up a bit and then the paper is simply unwrapped.
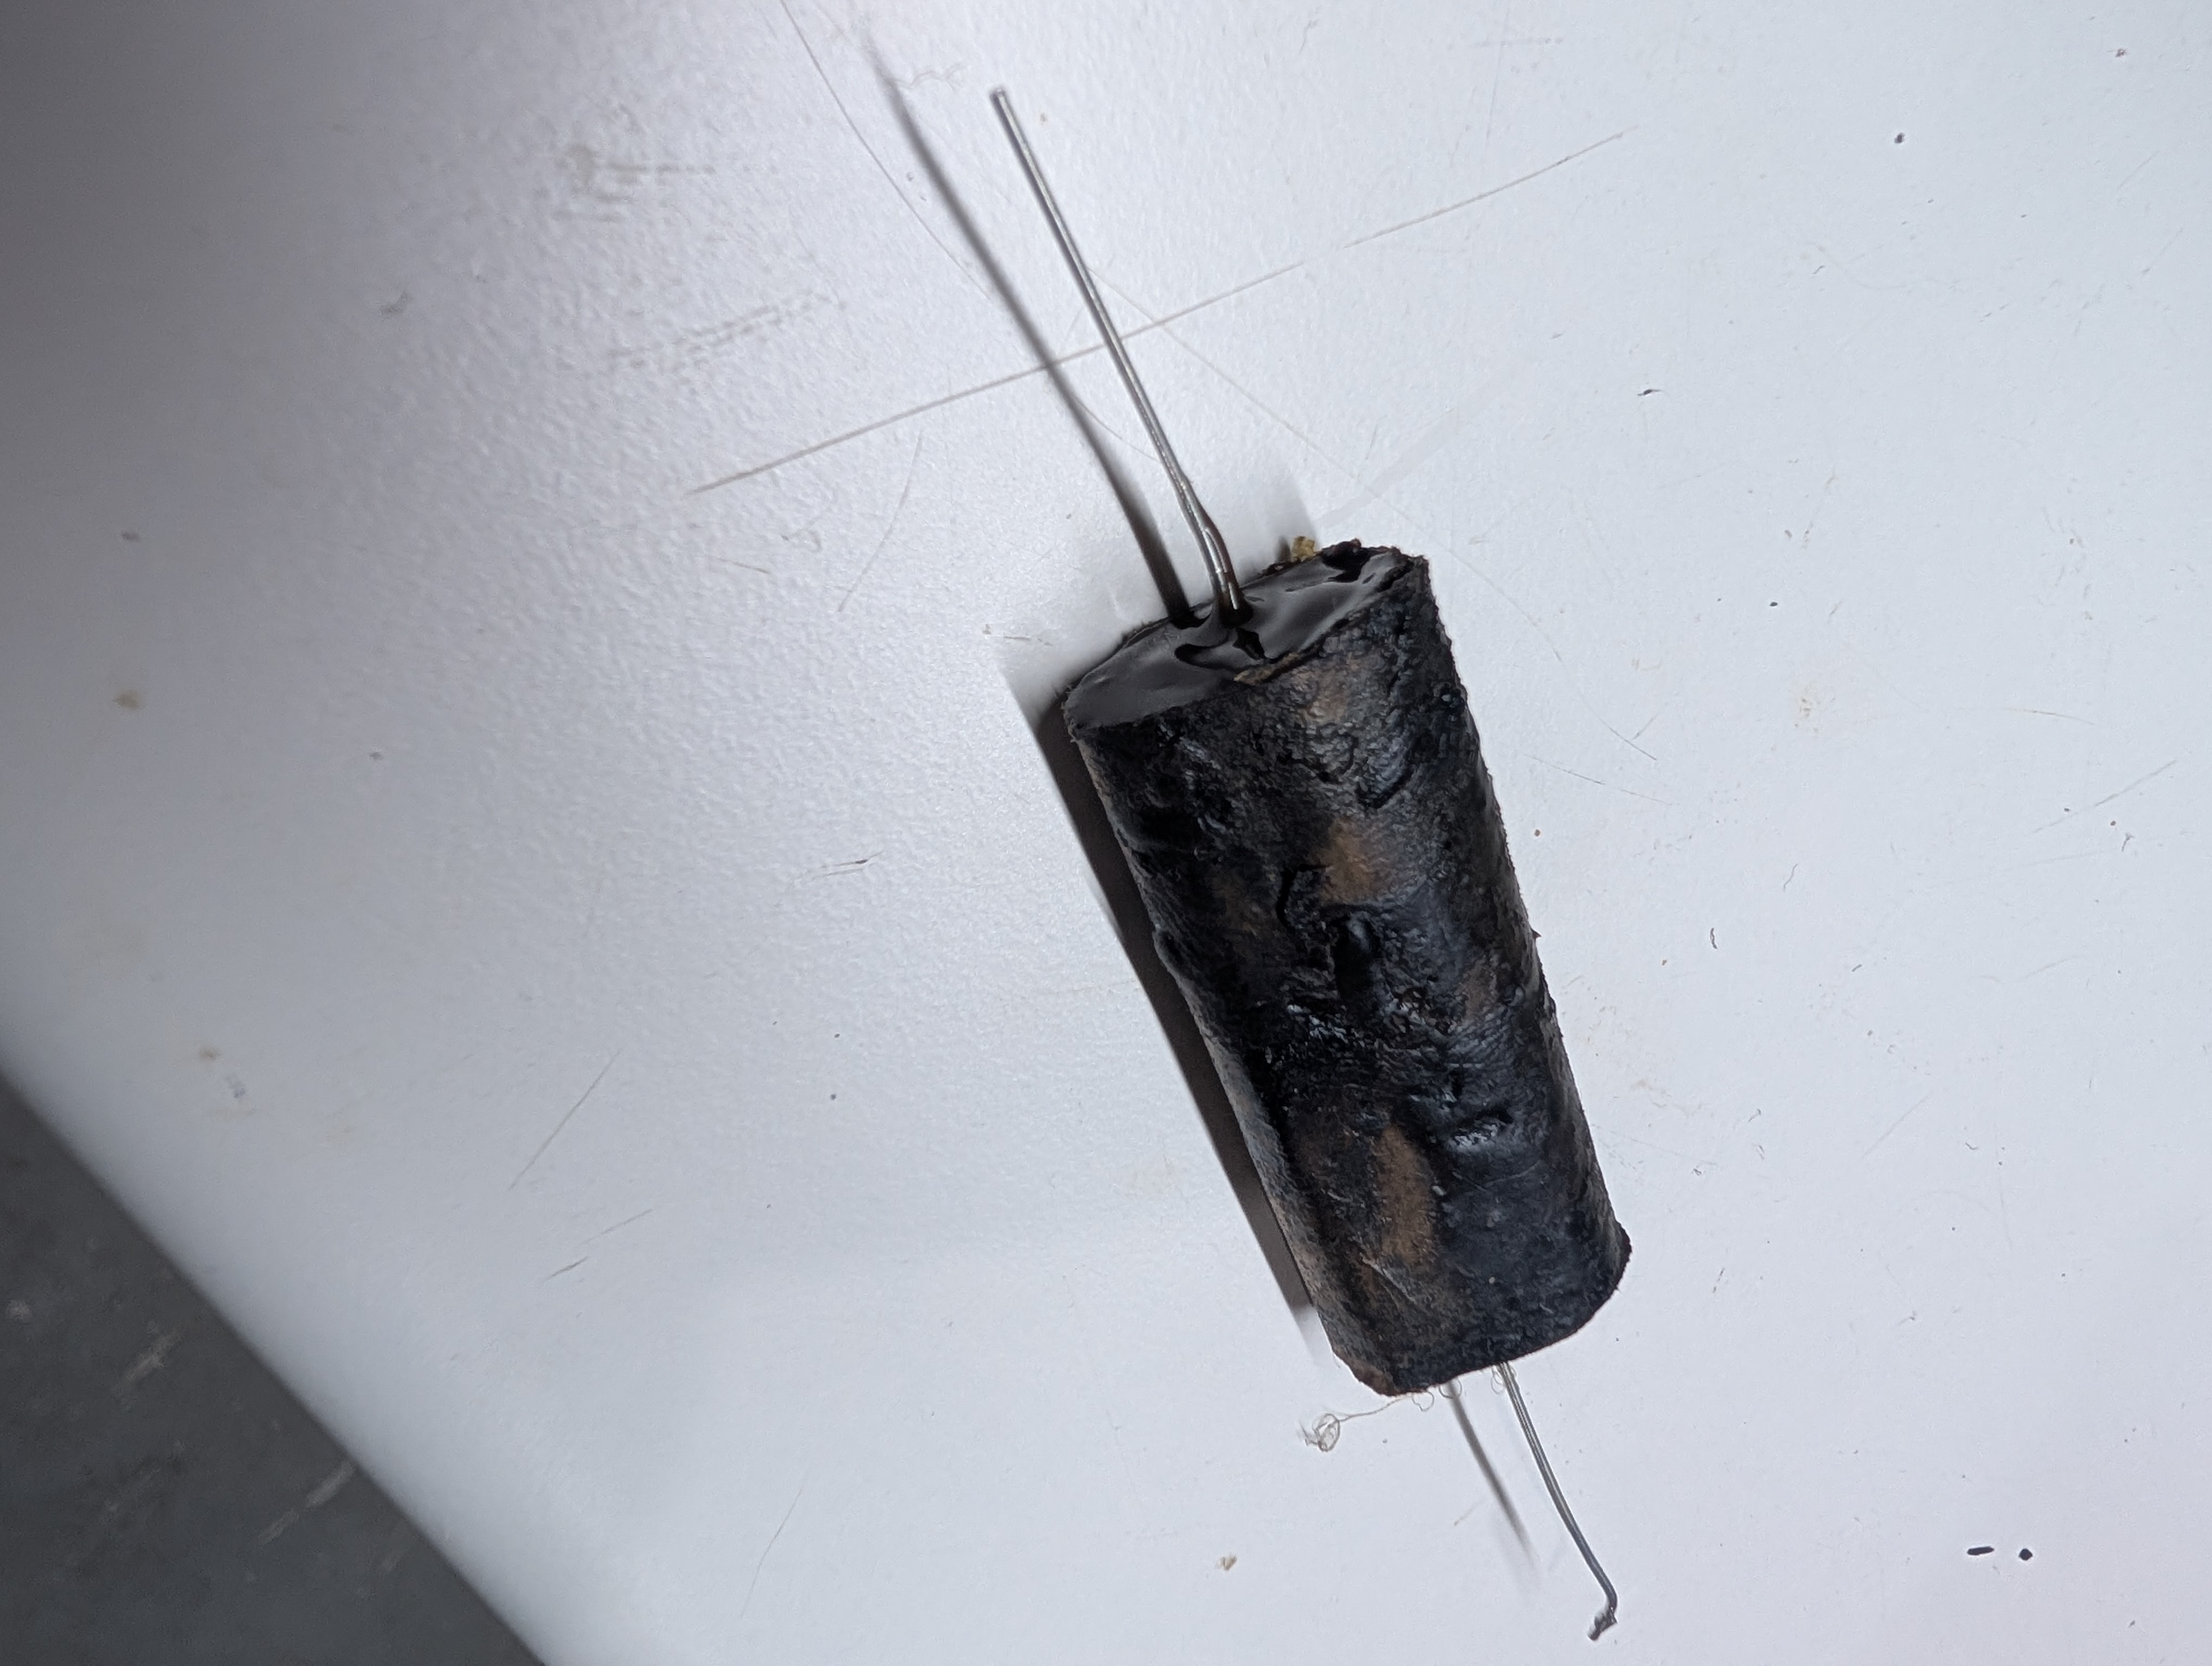
Then I had a 0.47uF 600V cap of pretty much the same size and also oval, not round, so I simply wrapped it, potted it, and warmed up to self-glue the paper back on itself.
People who do not drink, do not smoke, do not eat red meat will one day feel really stupid lying there and dying from nothing.
Posts: 3,188
Threads: 226
Joined: May 2008
City: Omak
State, Province, Country: WA
Hello mike,
Nice job !
Sincerely Richard
Posts: 18,427
Threads: 622
Joined: Oct 2011
City: Jackson
State, Province, Country: NJ
Well, considering the grime and tar, looks pretty darn close to the original 
People who do not drink, do not smoke, do not eat red meat will one day feel really stupid lying there and dying from nothing.
Posts: 5,654
Threads: 56
Joined: Sep 2008
City: Sandwick, BC, CA
Mike;
So are you going to make a reproduction one of these to replace that black beauty on the same board? I have restuffed those sorts of caps before, or rather Sangamo "Little Chiefs" it's not as easy as those tar caps in the RCA, but Russ did it so I decided to give it a try, just for the challenge. The trick is finding a film cap small enough to fit inside after you bore it out.
Regards
Arran
Posts: 3,188
Threads: 226
Joined: May 2008
City: Omak
State, Province, Country: WA
Hello Arran,
Yes, that is the trick finding a small Capacitor I would like to try restuffing one I also thought of molding a black beauty or when I get my 3d printer to print one .
I am going to buy a prusa .
Mike you could go to home depot and get tube of that chaulk that like for roofing or pavement.
Sincerely Richard
Users browsing this thread: 5 Guest(s)
|
|
Recent Posts
|
|
Stromberg Carlson 1500 Squeal
|
| And life just keeps getting more complicated. By dconant.
Dittos'Jimradio — 08:01 AM |
|
Plug Voltages Needed For A 1943 CRV-20130 Power Supply
|
| That looks a lot like an aircraft connector of some kind, even if it's a U.S.N power supply. I have a book somewhere abo...Arran — 02:56 AM |
|
Plug Voltages Needed For A 1943 CRV-20130 Power Supply
|
| hello david,
I have a similar generator in my collection that features a cast iron, single-cylinder Briggs & Stratt...radiorich — 01:00 AM |
|
under chassis parts locator diagram for 1938 Zenith 9s262
|
| Has anyone gone to the trouble of creating an under chassis parts locator image? Yes, I can identify components by foll...bobloney — 08:57 PM |
|
Plug Voltages Needed For A 1943 CRV-20130 Power Supply
|
| Try looking at this site the book mark is for a old generator that I was given. David https://radionerds.com/index.ph...David — 08:36 PM |
|
Plug Voltages Needed For A 1943 CRV-20130 Power Supply
|
| Hello Everyone,
I am looking for voltage identification for all the pin positions on the socket of a CRV-20130 power su...Tonym4704 — 08:16 PM |
|
Philco P45-6365 Universal Transformer Instruction Manual
|
| Can anyone guide me to where this may be found?GRG — 03:00 PM |
|
54C Complete Teardown/Rebuild
|
| I don't think that I have encountered a 12Z3 before, curious how it uses one of those but includes a #43, which is a 25 ...Arran — 02:17 PM |
|
HiFi (Chifi) tube amp build - but my own design.
|
| It's the other forum. I'm also in DIY, but mostly read there. Honestly, I kinda jumped into this without much thought to...TV MAN — 10:43 AM |
|
Philco 71 Code 125
|
| Hello,
I am in need of a schematic for this radio. Mine has the three separate circular tube shields and a shadow me...dconant — 08:06 AM |
|
Who's Online
|
There are currently 1962 online users. [Complete List]
» 1 Member(s) | 1961 Guest(s)
|
|
|

|
 
|







