06-18-2026, 08:23 PM
Hello bob,
Nice job on the chassis !
Sincerely Richard
Nice job on the chassis !
Sincerely Richard

|
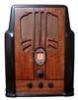
1935 Gilfillan 43-A

06-18-2026, 08:23 PM
Hello bob,
Nice job on the chassis ! Sincerely Richard 
06-18-2026, 08:31 PM
Thx guys, it was not a difficult recap. Lots of space and only a few to do. Just some more cabinet glue up today for some additional structural improvement.

06-19-2026, 02:57 AM
Bob;
I stopped into the local Home Depot today, and they do indeed have Crud Cutter in stock, the ingredients sound familiar though, and it looks like it can go a long way if you dilute it. They also have TSP but it isn't the best price I have seen on the stuff. I will keep my eyes open in thrift stores, a lot of people buy TSP for painting walls but never use the whole amount, so the stuff get's donated when they move house, or someone passes away. Regards Arran
06-19-2026, 04:10 AM
I used TSP to clean a garage floor one time. I think it did OK but I don’t recall anything spectacular about it.
06-20-2026, 08:16 PM
There was even more cabinet glue up that was needed after I finished the last round. Some of this structural stuff may have been the reason the veneer cracked and failed although I agree with Arran that lifting by the handle could easily cause problems. While I was waiting for glue to dry I started cleaning the dial glass and pilot lamps. The dial glass comes off easily by bending 4 metal tabs back but the pilot lamps require removing the dial face assembly so you can access them....an then, lo and behold, the pilot lamps are soldered into the metal frame! Clearly this has been done post-factory because its a terrible solder job but I suspect that it may have originally also been soldered in and these are replacement lamps. (ignore the spring touching the bulb, its just the loose dial string) Its a 2.5v circuit so they are likely supposed to be #41 or #43 bulb. At the moment both lamps are working so I'm inclined to leave well enough alone for now.
The veneer came off relatively easily with a moist towel, heat from an iron and putty knives slowly working the glue between the veneer and base wood. Even the veneer around the grill cut out came off well although the underlying wood did need a little glue up to put it back in shape. I'll sand the base wood to smooth it out, scrape/strip off the black lacquer from the sides and then I should be ready to try and put the new veneer onto it.
06-21-2026, 02:18 AM
Hello Bob,
Crud Cutter is a great product one the furniture restore guys I watch on you tube uses it ! Richard
06-21-2026, 03:11 AM
06-21-2026, 03:27 AM
Bob;
Now that you have the veneer stripped off it more obvious what the point of failure was, the laid the walnut veneer directly over that piece of oak or ash quarter round molding. The set was obviously stored in a damp place, judging by the condition of the finish, the chassis rust, and the failed glue joints, so that piece of 1/4 round likely swelled up cracking the veneer across the grain. The typical practice was to place a layer of veneer under the finished layer, with the grain running in the opposite direction, rather like in plywood, which would make it more stable, in fact the best way would be to use five layers, it looks like they only used three here. Regards Arran
06-21-2026, 04:09 AM
That makes sense Arran. I’ll look at it more closely again tomorrow but I think the veneer I took off may indeed have actually been two layers.

06-21-2026, 09:02 PM
Yep, you were correct Arran. Under the walnut veneer there is another layer of a white wood veneer. The two came off as one piece in most places but on the edge shown in the photo you can see they are separate sheets of veneer, and yes, the underlayment veneer has its grain perpendicular to the walnut grain. I suppose that means I should put down two layers also with opposite grain directions. I have enough walnut veneer to use it in both directions, I expect that would work as well as any other wood?

06-21-2026, 09:15 PM
@Arran, I have one of those S22s (The handle is completely missing, hardware and all). The radio was designed and built by RCA at the Victor factory in Camden, NJ. Ther is a label on the back of the set in big letters,
Made for (in very small point type) GENERAL ELECTRIC (in large point type) by RCA (in very small point type) Attached is an ad from the Saturday Evening Post touting the advantages of this set, available in tabletop and console cabinets. In the bottom left pane is a boy carrying the set upstairs by its handle, like a lantern. Either it was a very strong boy or the cabinet was empty, as this radio weighs a TON! I cannot see anyone carrying this set by the handle, and sure, when it gets old and the glue dries, that top is coming right off if you pick it up by the handle. "Do Justly, love Mercy and walk humbly with your God"- Micah 6:8 "Let us begin to do good"- St. Francis Best Regards, MrFixr55
06-21-2026, 09:52 PM
Bob;
I'm not sure if they used the white wood as an underlayment because of stability, or because of cost verses using walnut. I'm not sure whether it was poplar, maple, or some other cheap hardwood. Regards Arrn
06-21-2026, 10:25 PM
Mr. Fix;
I'm not sure who made the Canadian versions of the S-22, or S-42, I have the S-42A which is the same as the consolette in the center of the ad. I have a feeling that C.G.E was making the sets themselves as the U.S Anti Trust suit of 1930 didn't really apply to Canadian production. The odd part is that you could buy a Radiola 18 as a C.G.E model, and a Canadian Westinghouse version, the G.E was identical other then the escutcheon, the Westinghouse had a different cabinet. Most of what were RCA sets were sold under the Victor brand until the mid 1930s, without mentioning RCA, Victor had a plant in Montreal so my guess is that keeping the Victor name had something to do with obligations towards it's dealer network formed prior to the RCA takeover. Regards Arran
06-23-2026, 07:14 PM
Got the old cabinet ready for the first layer of veneer(with horizontal grain) and took off the old black finish on the sides as well. After reading and watching a number of videos on youTube I decided to use the veneering technique of coating both the base and the veneer with some Titebond original, letting it dry and then using an iron to heat them up and bond them together. I used a piece of kraft paper (a brown grocery paper bag) between the veneer and the iron and a rounded piece of hardwood board to burnish and press down the veneer after heating. I didn't take as many pictures as I wanted but here's one of the videos I watched to show the technique (clearly not me in the video):
[Video: https://www.youtube.com/watch?v=agvQ0vuvJmE&t=106s] After going through the procedure here's that first layer on the cabinet before I removed any of the yellow Frog tape or did any trimming. I did brace the face of the cabinet where the grill cut out is so that I could press hard on the veneer without fear of breaking through the grill. It was just a piece of 2x4 and a flat board cut to the right lengths. I had done a dry run on a flat piece of board just to try things out and make sure the yellow Frog tape would come off after the heating process. For the most part it did come of and any residue that remained on the veneer was easily rubbed off with my finger (like the adhesive used to hold credit cards to the letter and piece of paper they send you with a new card). As it turned out the width of the walnut veneer I had would have caused the butt join of two pieces to fall right on the curve so rather than cut out a third piece of walnut I used a 3" wide piece of mahogany I've had in the drawer for years. Since its all underlayment I don't think it will matter. Next task will be trimming the edges. I'll leave the grill cut out until I have the next veneer layer bonded on. The final veneer grain will be vertical. I was at the woodworking store getting the veneer and chatted up the clerk who was also a woodworker and interested in my project. I asked him for any hints on doing the grill cut out and showed a picture. His answer, "Its best to use a CNC router to cut it out." I'll run right out and get one! I think it will be drilling, coping saw blade, razors , files and maybe my Dremel tool in router configuration. My worry on the Dremel is it would be so easy to slip and screw up the cutout. Overall I'm happy so far with how its going.
« Next Oldest | Next Newest »
Users browsing this thread: 3 Guest(s) |

|

|