Posts: 18,427
Threads: 622
Joined: Oct 2011
City: Jackson
State, Province, Country: NJ
I eventually realized I need a soldering gun and ordered one from Amazon.
At the same time I also realized the flush cutter I ordered yesterday hadn't come and despite the page saying "Arriving today" the tracking showed "not shipped."
I call Amazon and immediately was offered both refund on the existing tool and then suggested I order the new one and it would be also refunded.
Mighty generous of them.
So I will have either one, or two, free flush cutters.
The iron I need because some parts are soldered directly to the chassis, and in a couple of places I was not able to desolder leads even with my iron at 850F (in some cases it did work). Instead of killing my good smaller iron, I will have an industrial one that is made for these kinds of jobs.
And the reason was...couple of those tabs I need unbent are tacked with solder and I need to clean it first.
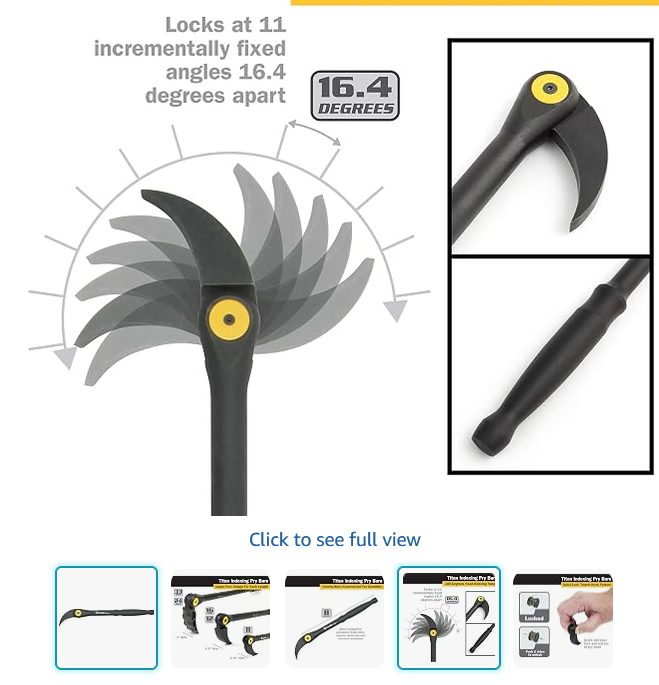
The indexed claw arrived and it is a great tool, actually. Well-made (or so it seems), "Titan" is the name, the price is reasonable. And the claw is sharp to start with (the lady's foot would require sharpening).
https://www.amazon.com/dp/B078L62SGQ?ref..._title_0_0
People who do not drink, do not smoke, do not eat red meat will one day feel really stupid lying there and dying from nothing.
Posts: 3,188
Threads: 226
Joined: May 2008
City: Omak
State, Province, Country: WA
Hello morzh,
Yes, I was doing a similar repair and also ended up using the small blue one .
I had to bend tabs over and it was in tight quarters too.
Sincerely richard
Posts: 3,188
Threads: 226
Joined: May 2008
City: Omak
State, Province, Country: WA
Morzh,
I too had similar experiences and it was a replacement tip for mt Weller soldering station I ended up get one from mouser electronics .
Wellers inventor must been wrong .
Sincerely Richard
Posts: 5,654
Threads: 56
Joined: Sep 2008
City: Sandwick, BC, CA
Mike;
It sounds like you need to pick up an old school "American Beauty" 100+ Watt soldering iron, or a similar competitor's product. I have a small collection of them now, the first one was bought from a garage sale for $2 20 years ago and is still going strong. If you can't find one of those have a look under irons for stained glass work, it isn't so much the temperature that they can reach so much as the thermal mass. If push comes to shove you can also use a propane or butane torch to unsolder it, very carefully of course.
Regards
Arran
Posts: 18,427
Threads: 622
Joined: Oct 2011
City: Jackson
State, Province, Country: NJ
Arran
Yeah, used to own the type back in the day (well, that was the only type back then).
I hope Weller will be enough.
200/300W will melt just about anything on anything.
People who do not drink, do not smoke, do not eat red meat will one day feel really stupid lying there and dying from nothing.
Posts: 5,654
Threads: 56
Joined: Sep 2008
City: Sandwick, BC, CA
Mike;
That sounds big enough to solder a roof together! I think I have a 300 Watt one as well, I saw it at a car swap meet and the tip is 3/4 of an inch, I bought it mostly for the novelty since it was $5, it does work but is a bit rusty. These things turn up a lot second hand, same with soldering guns.
Regards
Arran
Posts: 18,427
Threads: 622
Joined: Oct 2011
City: Jackson
State, Province, Country: NJ
I figured at $68 (if I were patient and used Capital One Shopping app, it would be $48) I could afford a new one. Especially if it comes next day.
PS. I like buying tools.
People who do not drink, do not smoke, do not eat red meat will one day feel really stupid lying there and dying from nothing.
Posts: 5,654
Threads: 56
Joined: Sep 2008
City: Sandwick, BC, CA
Mike;
This is one of the reasons I have a collection of big irons, it's pretty much what you need for soldering or desoldering things from any pre war radio chassis, and many post war radio and TV ones as well. My first soldering iron was one that my dad brought how from the scrap pile when he was still in the Canadian Air Force, but I think that was a 60 or 75 Watt Ungar iron with a chisel tip, and it still had trouble with soldering to chassis. The element eventually broke, it was housed in a porcelain tube with the tip sticking out the end, the porcelain shattered and it was all over, after that I started using guns and still do mostly.
Regards
Arran
Posts: 18,427
Threads: 622
Joined: Oct 2011
City: Jackson
State, Province, Country: NJ
The flush cutter does a good job but I need a narrower one to get under the tabs that have some solder at one end.
So I ordered the rest of the gauges (I have 10mm, so I ordered 4mm, 6mm and 8mm).
The iron set at 300W did the job but I did struggle a bit. The chassis is thick and is a massive heatsink; also, the device is fairly heavy, which is OK in itself, but coupled with the necessity to keep the trigger pressed makes the hand a bit tired if held for more than a minute. But it is fine, it works eventually.
So when the narrower cutter comes, I will use it and the iron to first lift the tab a bit, and then will finish the job with the pry bar and eventually pliers.
People who do not drink, do not smoke, do not eat red meat will one day feel really stupid lying there and dying from nothing.
Posts: 18,427
Threads: 622
Joined: Oct 2011
City: Jackson
State, Province, Country: NJ
Today a narrower flush cutters came, and I was able to take the smaller can out.
These are the tools I had to use in order to do it.
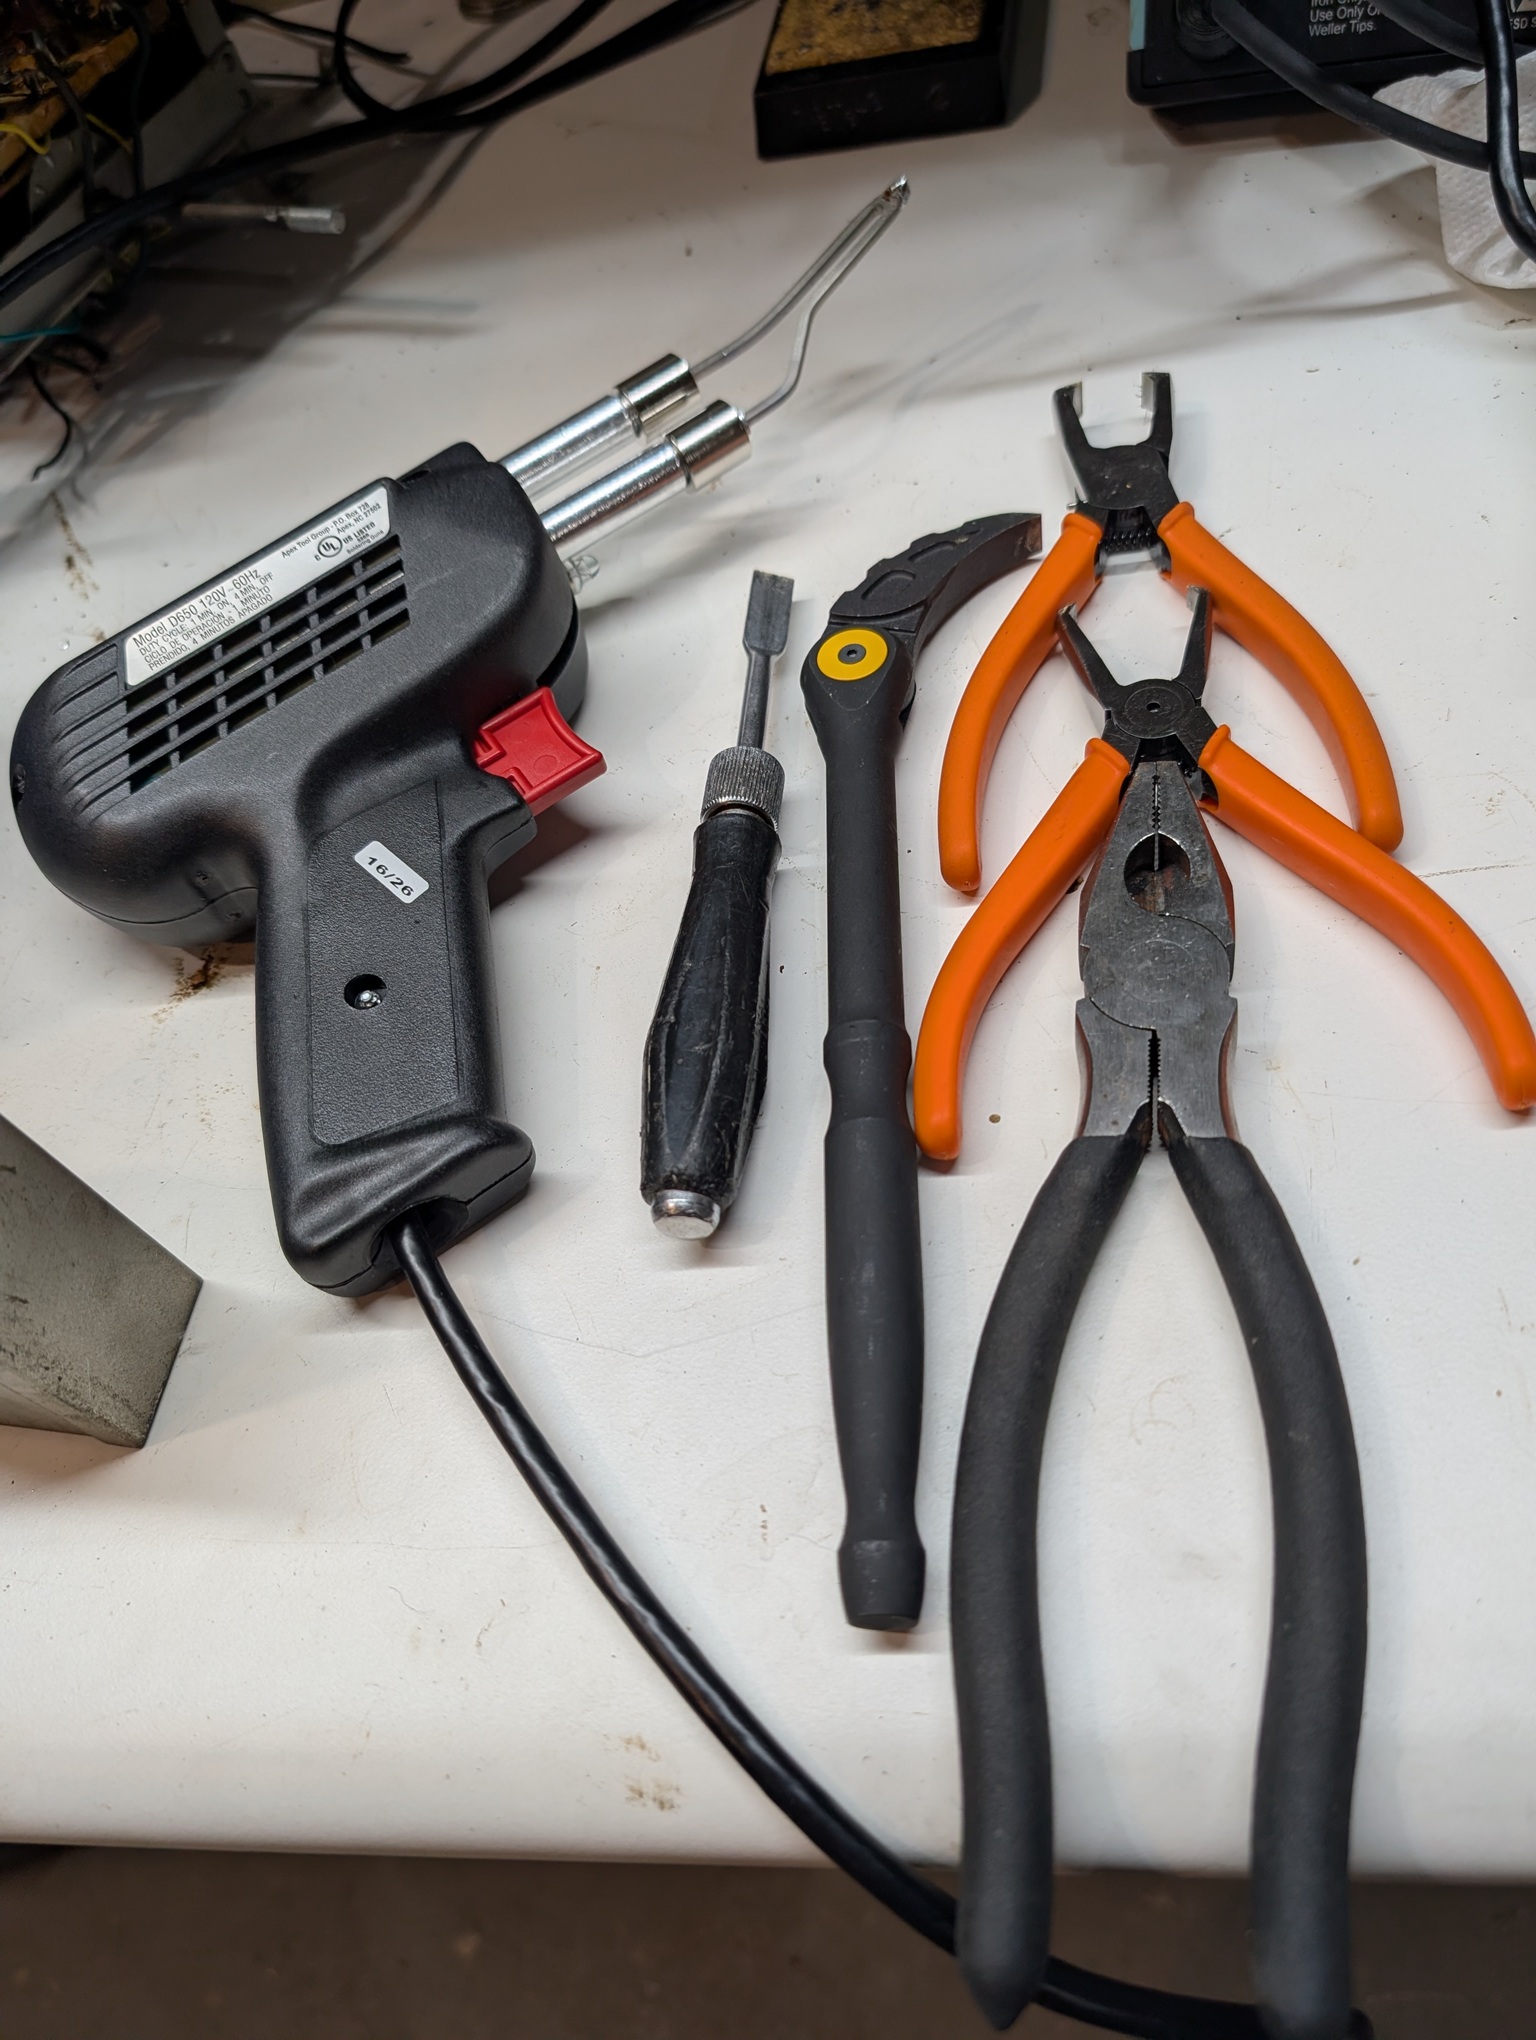
The flush cutters and the soldering iron allowed to separate the tab from the chassis and lift it a little.
The small chiesel allowed to lift it a bit more.
The lady's foot allowed to bend it some more, though I had to use various angles as the foot itself was stomping on other things around or on an already unbent tab.
And eventually the pliers allowed me to grab the tabes, straighten them out, and the can came out.
This is what was left:
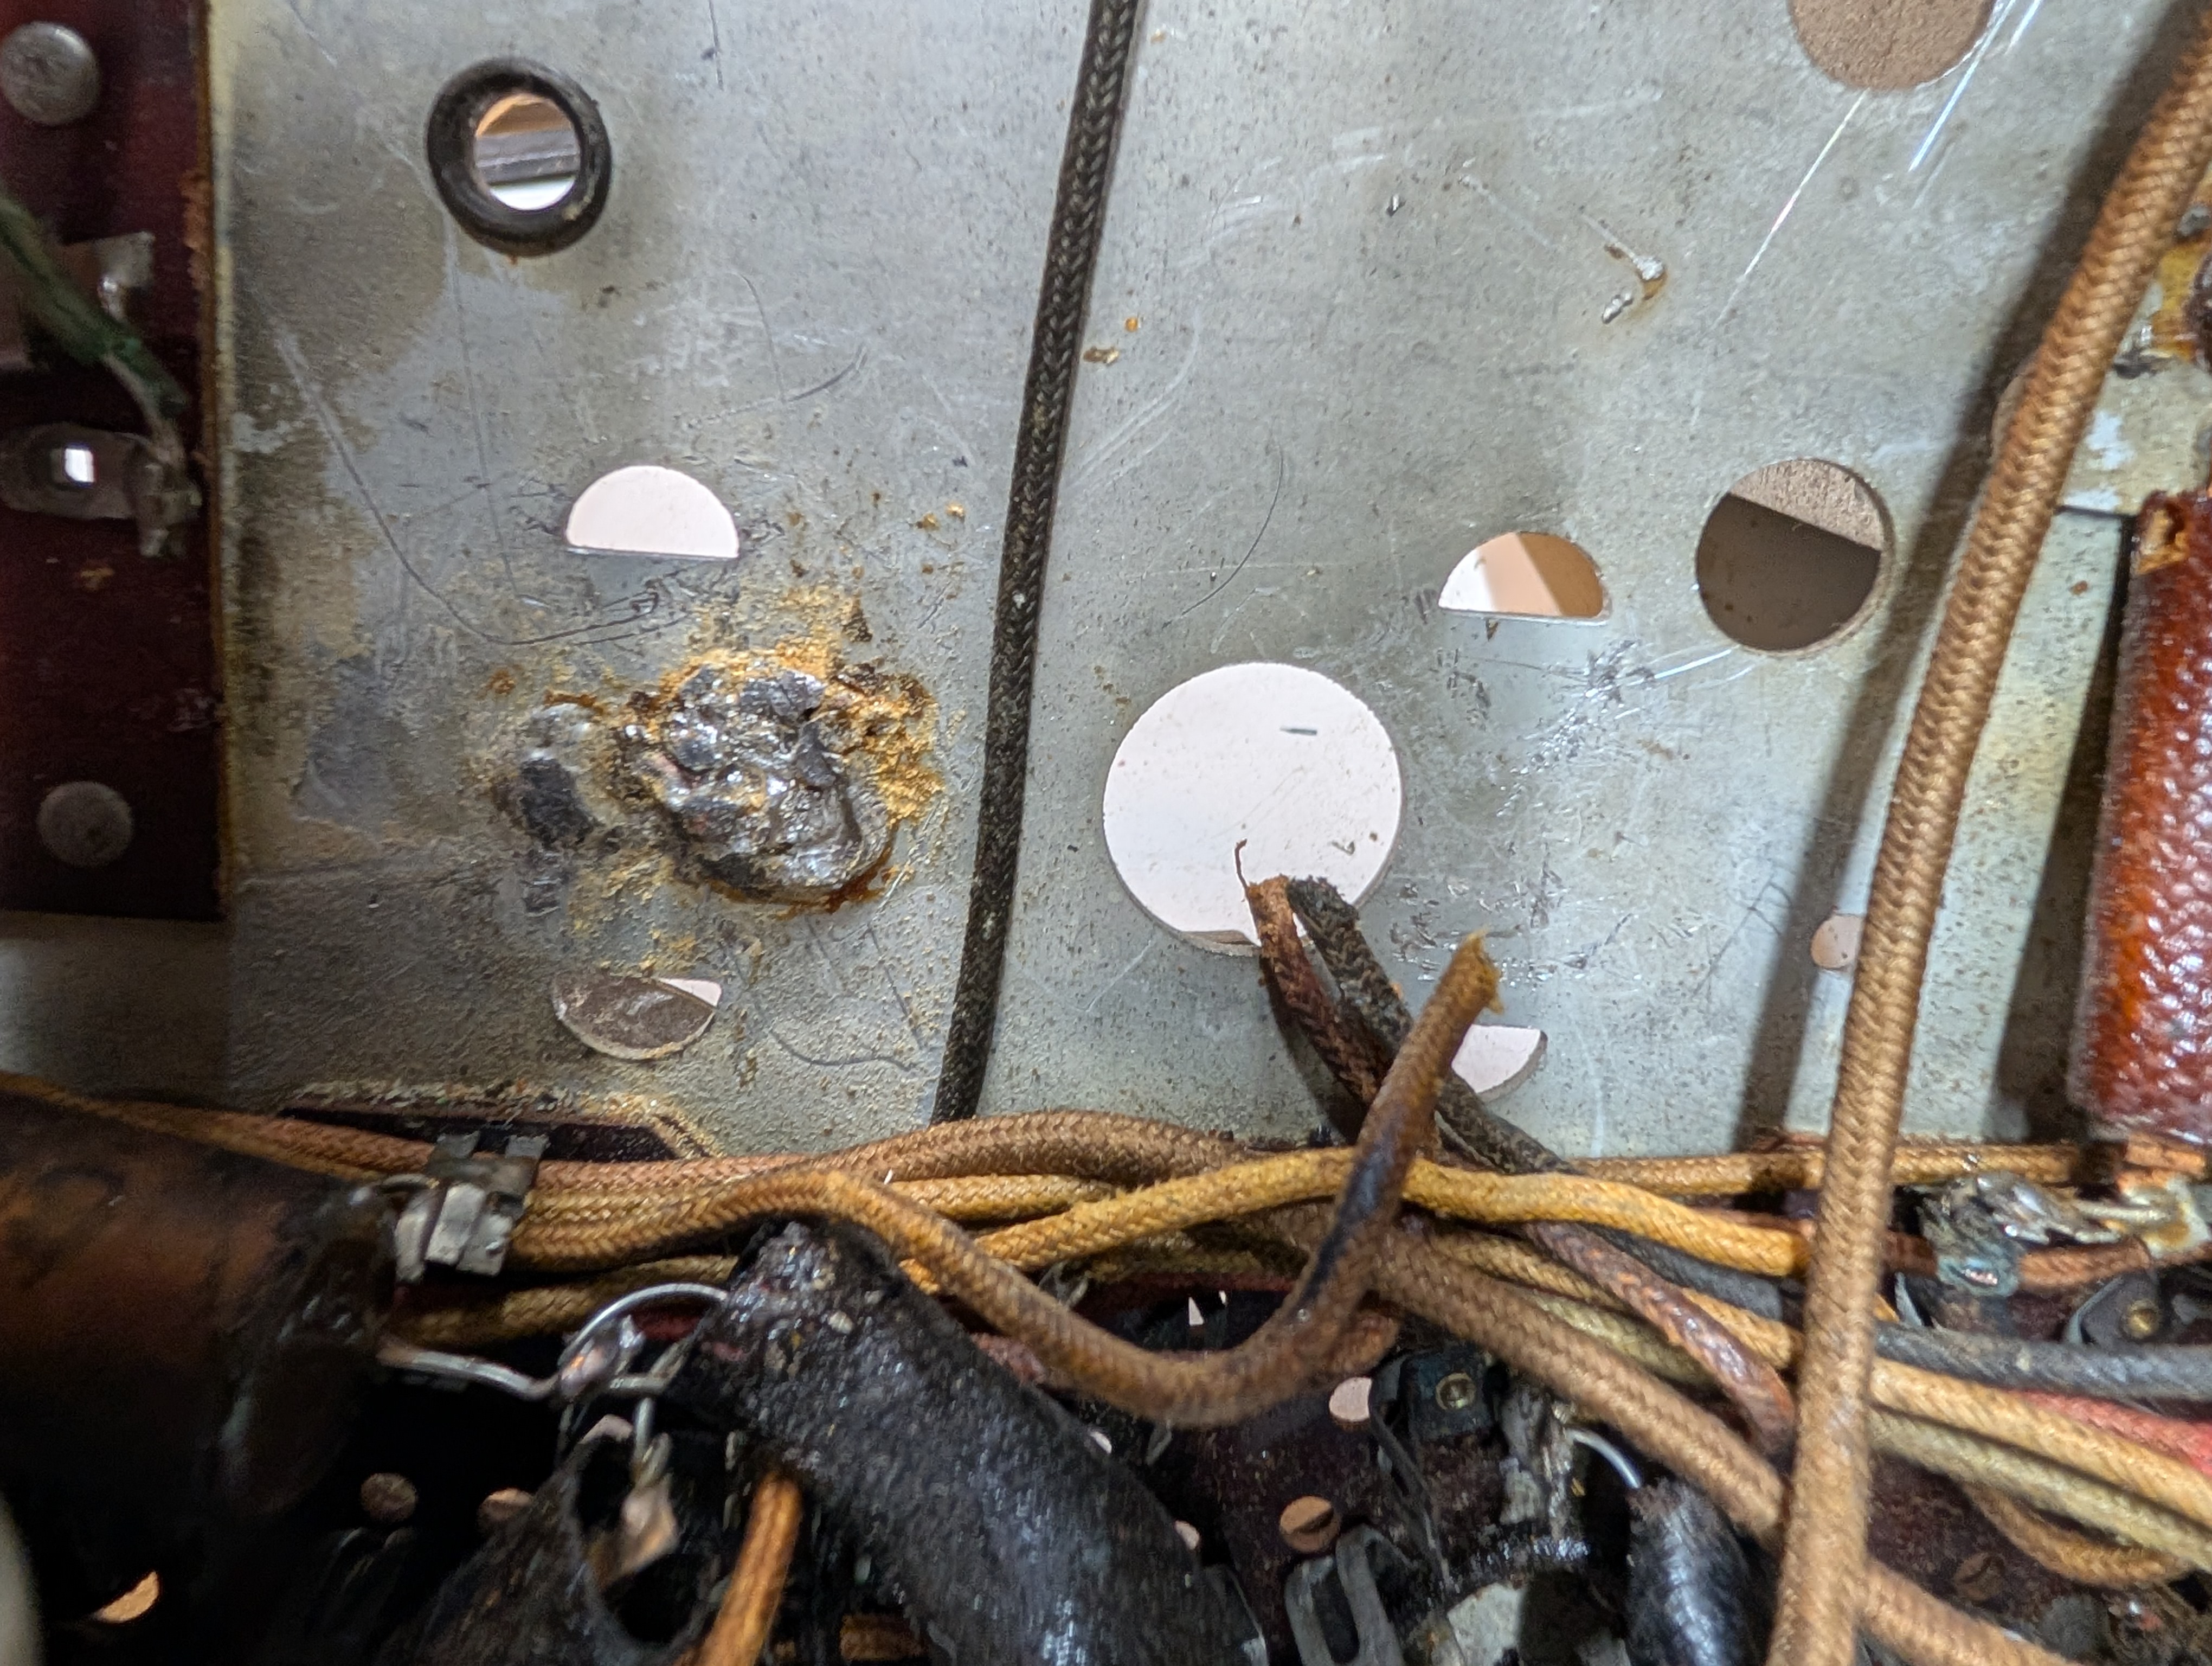
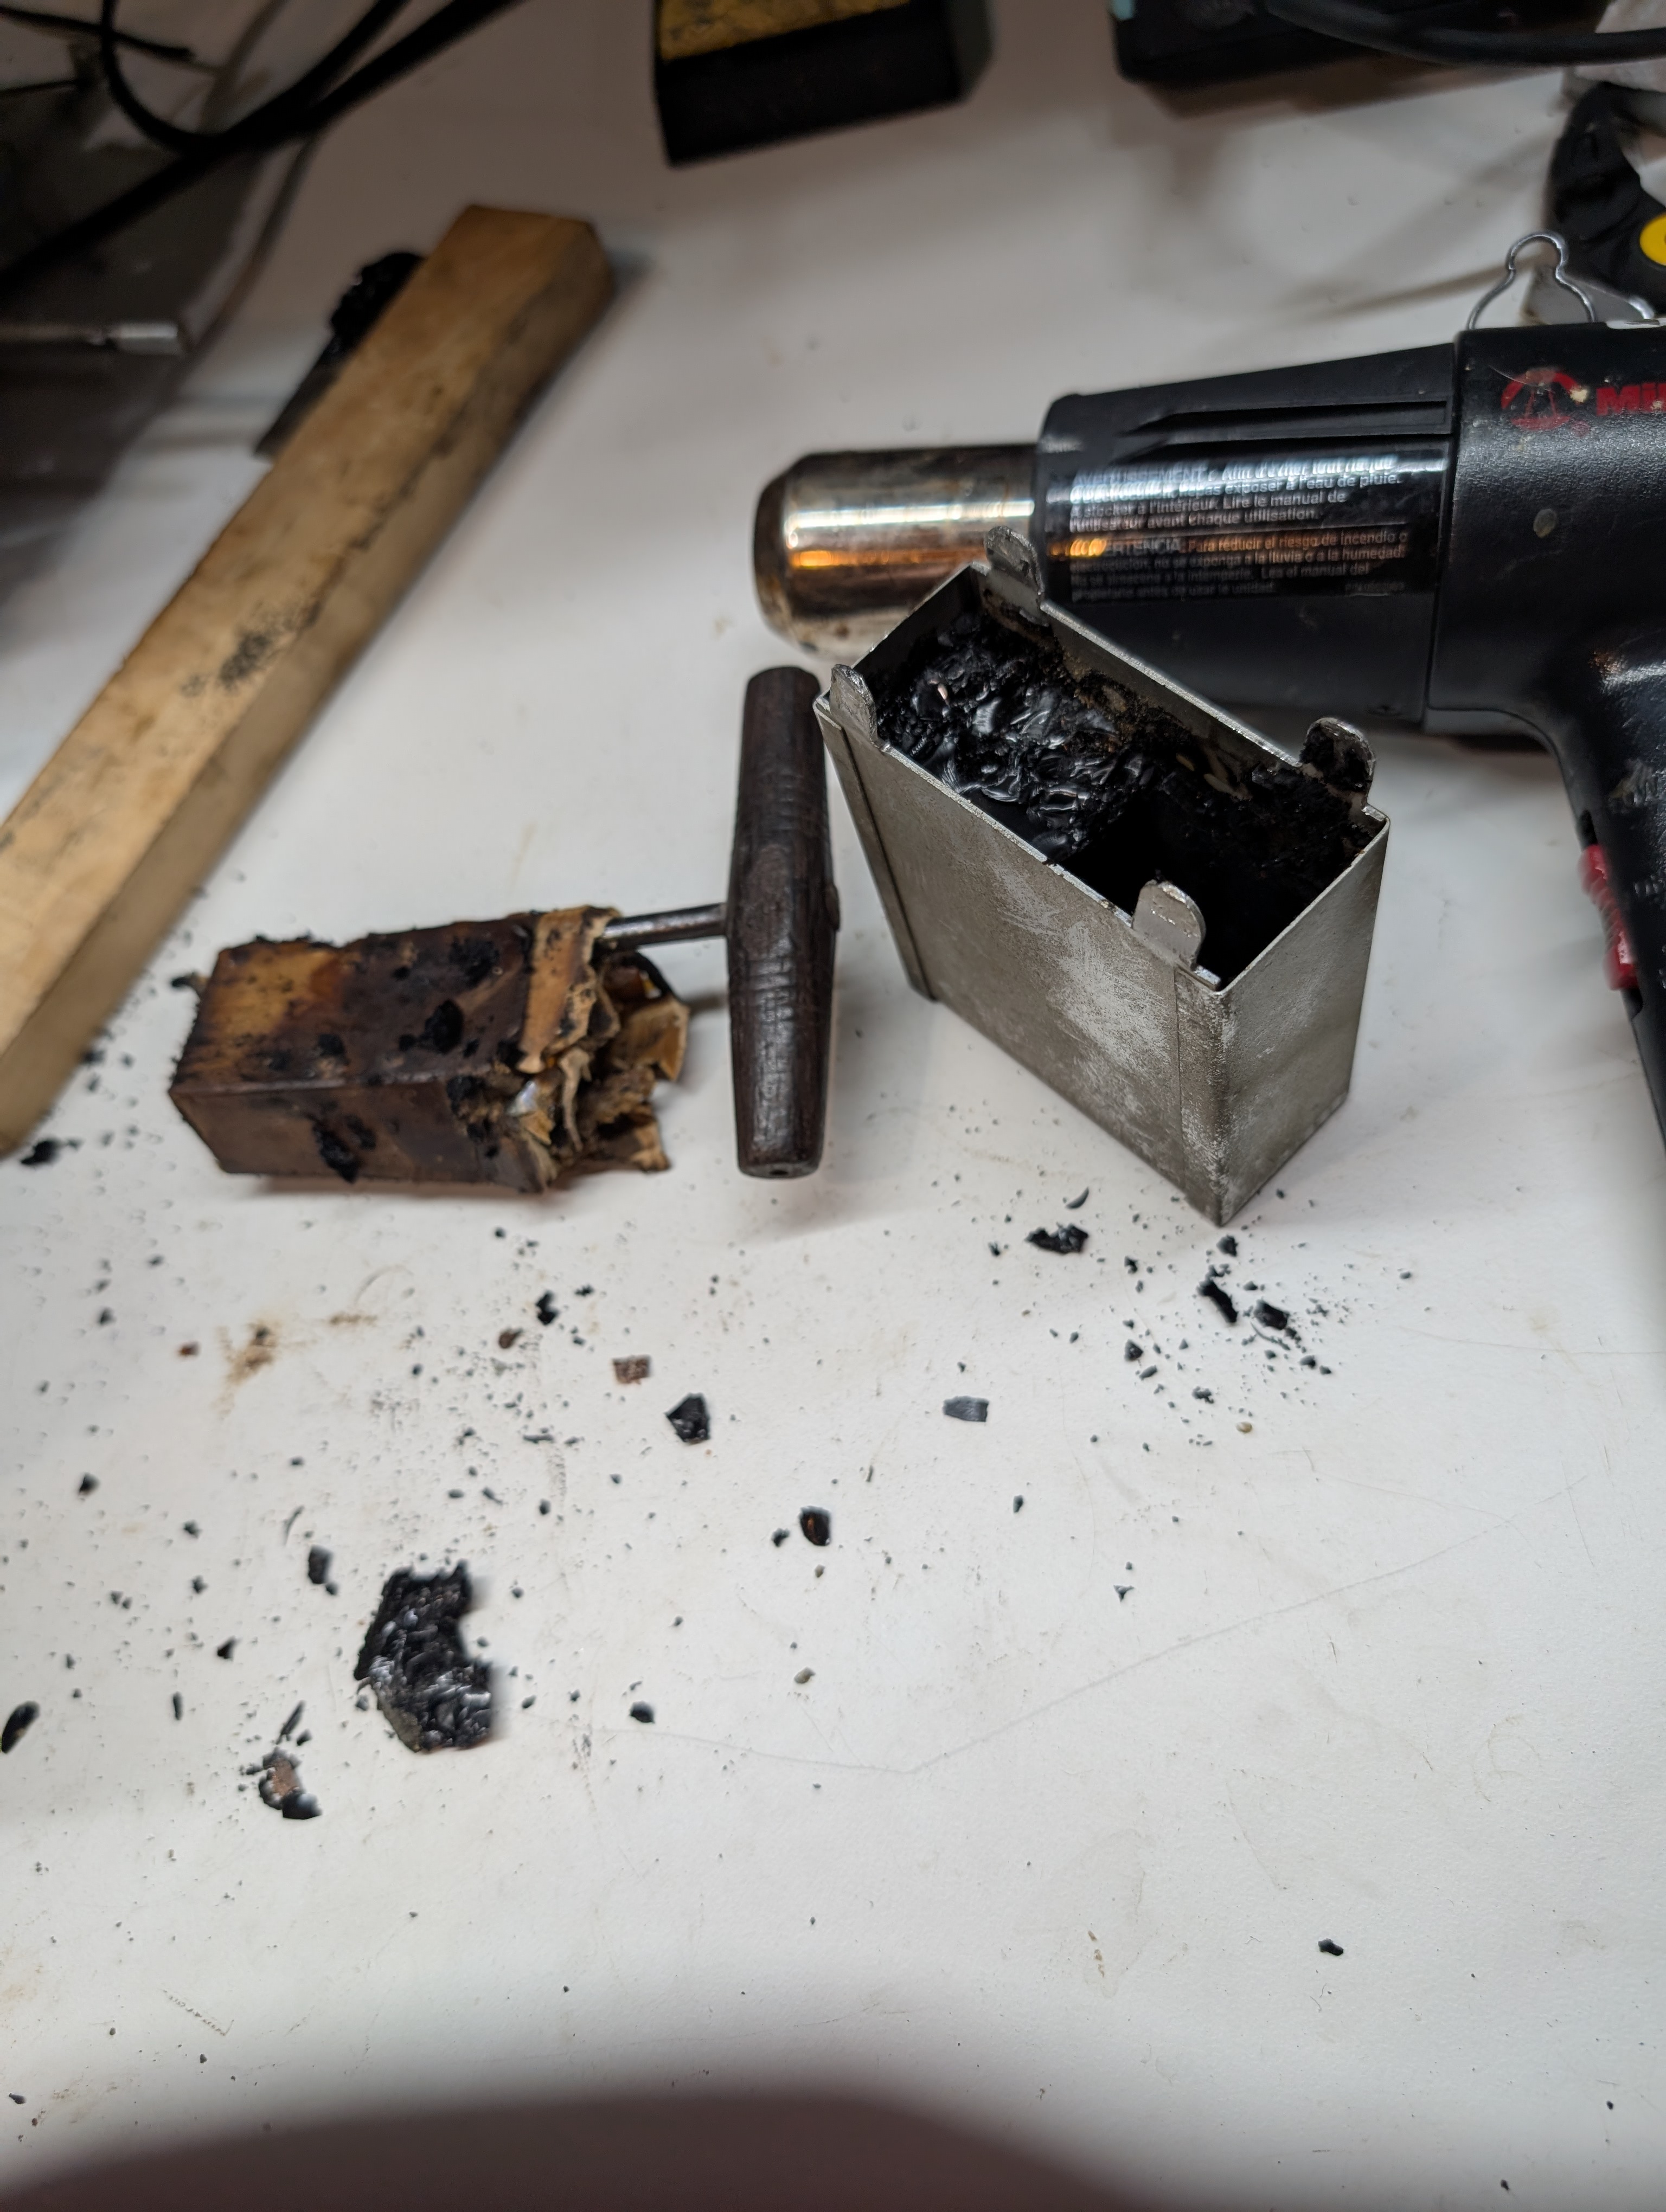
The can
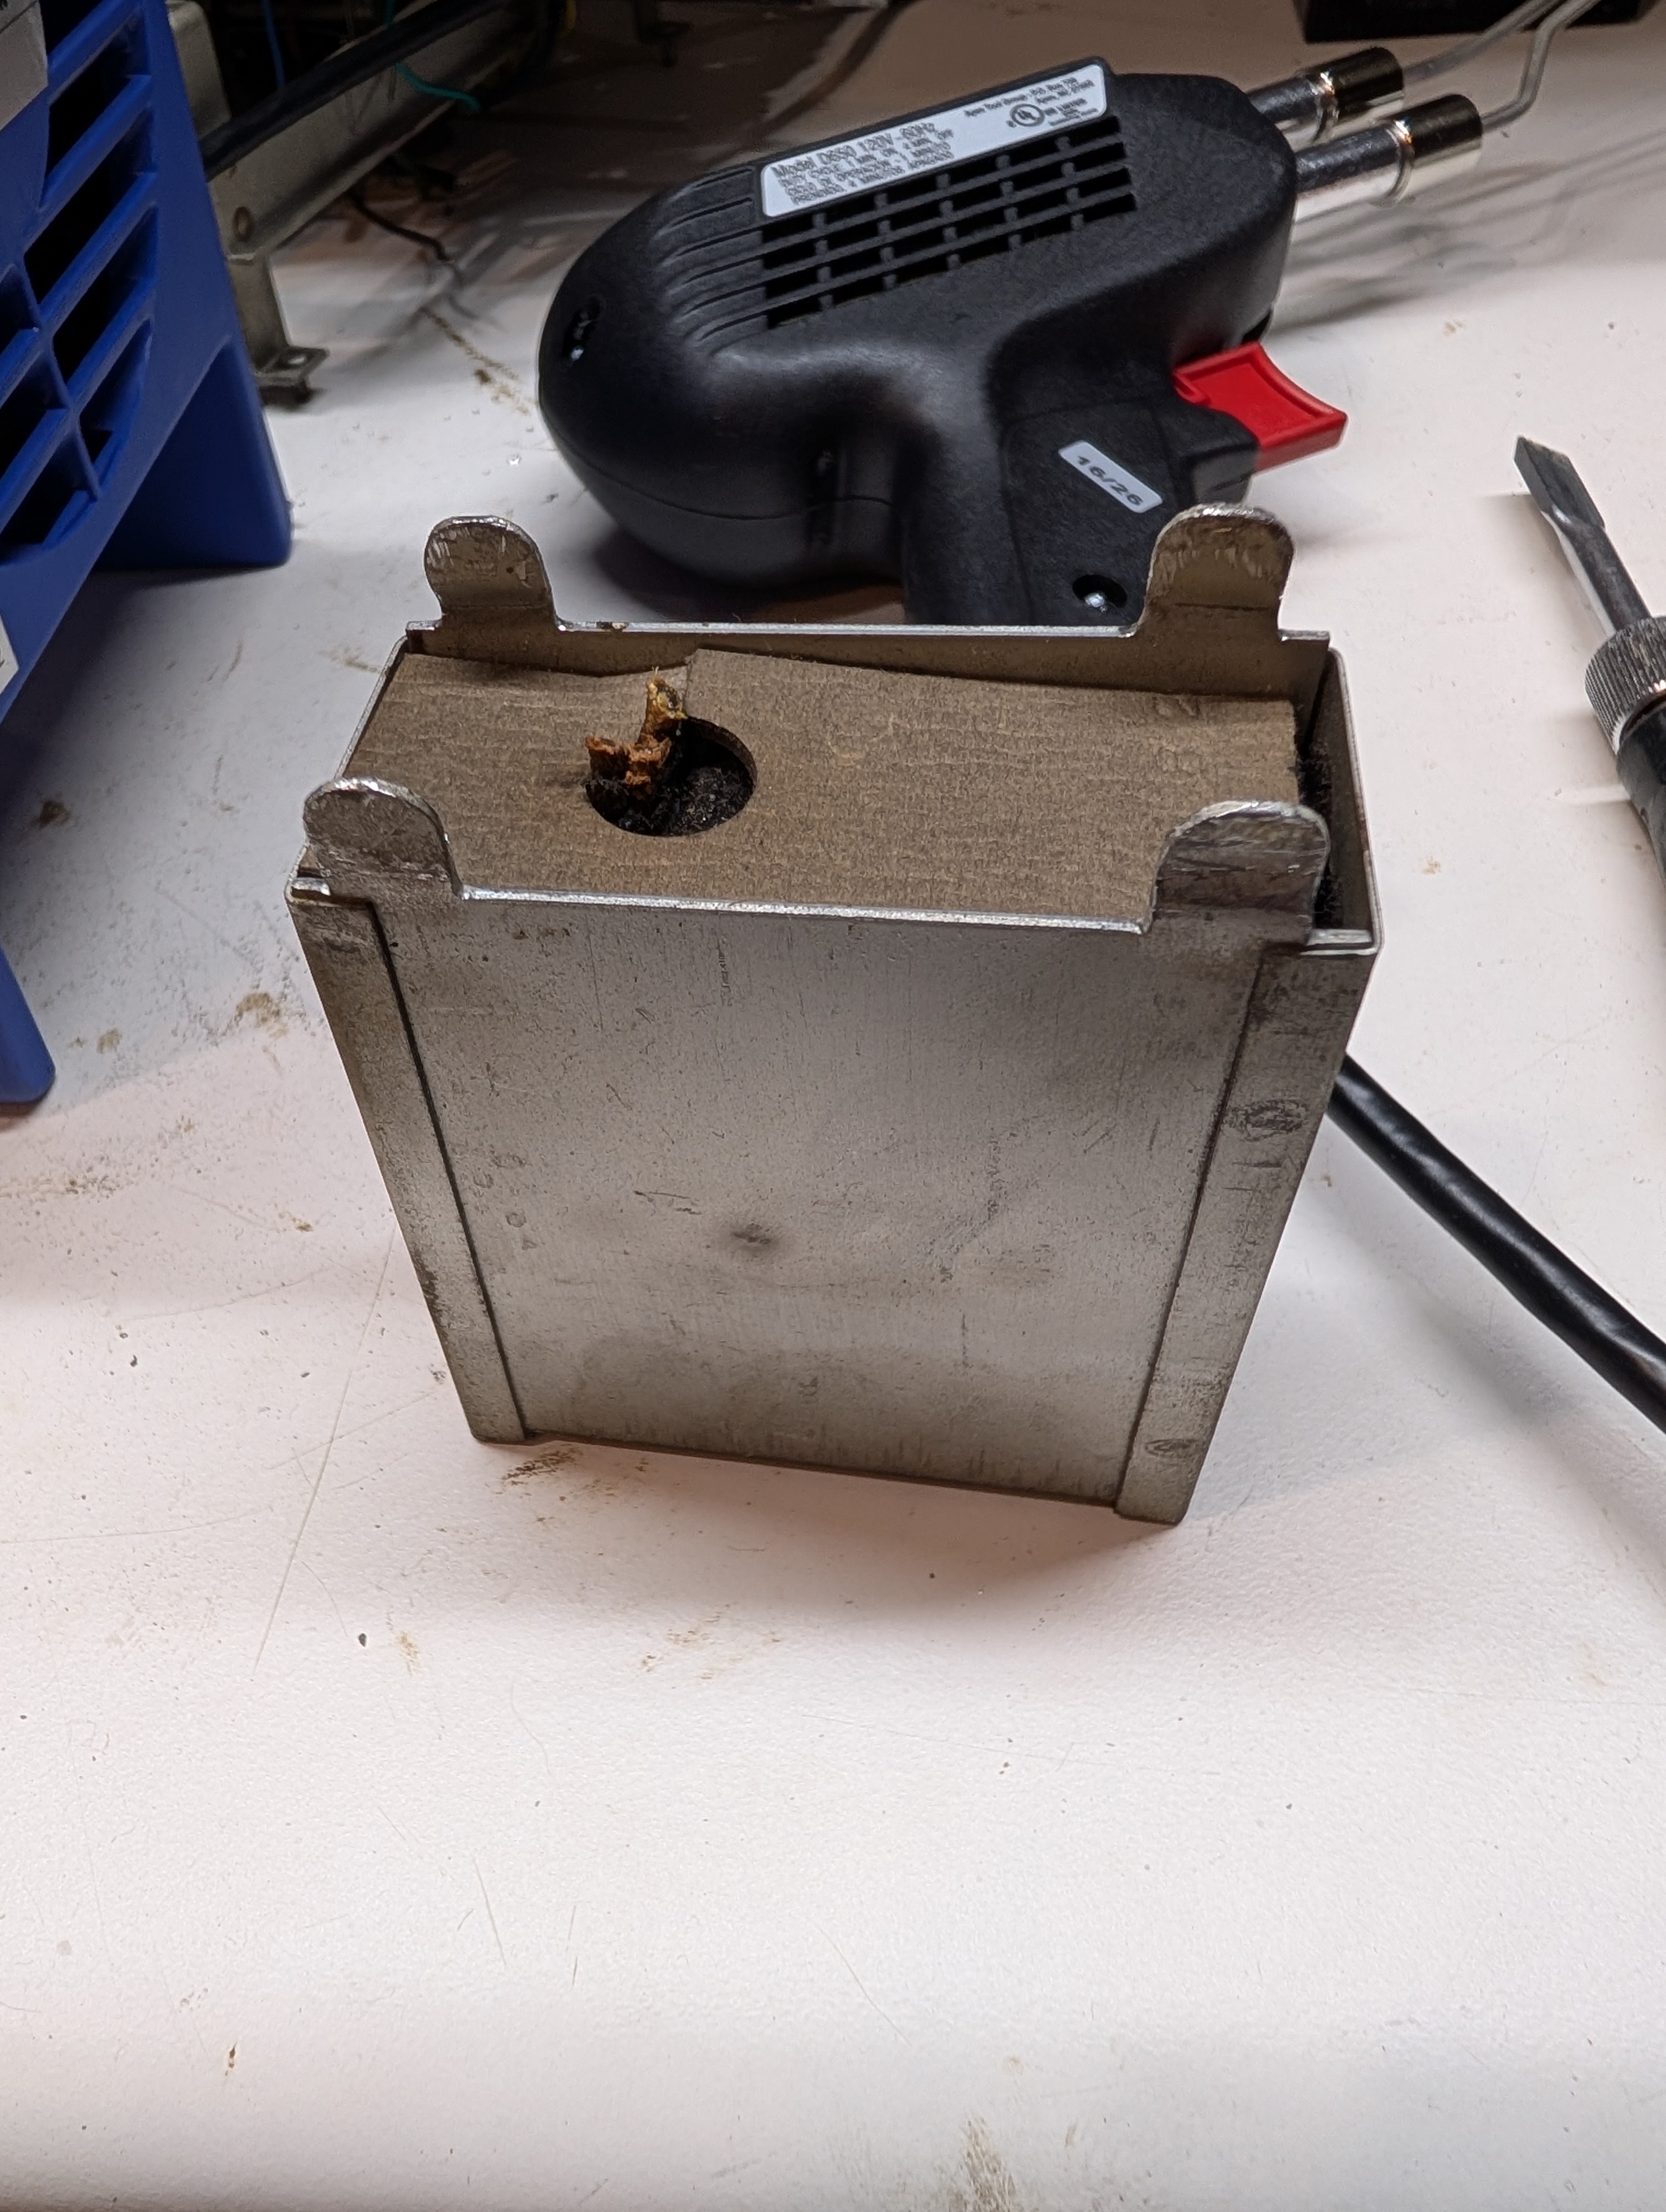
Then I used a heatgun, corkscrew and a wood bar. I heated up the can with the corkscrew in, then hung it between a large vise's grips by the corkscrew's handle and using the wood bar started pulling down on the can. The caps came out.
Only one half of the can was caps, the other just tar. I wonder if I should keep it; probably should.
People who do not drink, do not smoke, do not eat red meat will one day feel really stupid lying there and dying from nothing.
Posts: 1,519
Threads: 69
Joined: Nov 2012
City: Kansas city, MO.
Good job Mike.
I think I would leave the tar. Should be plenty room for the new caps ,maybe some fish paper around the walls and bottom.
Posts: 18,427
Threads: 622
Joined: Oct 2011
City: Jackson
State, Province, Country: NJ
Mike
Yep, that's what I am leaning to.
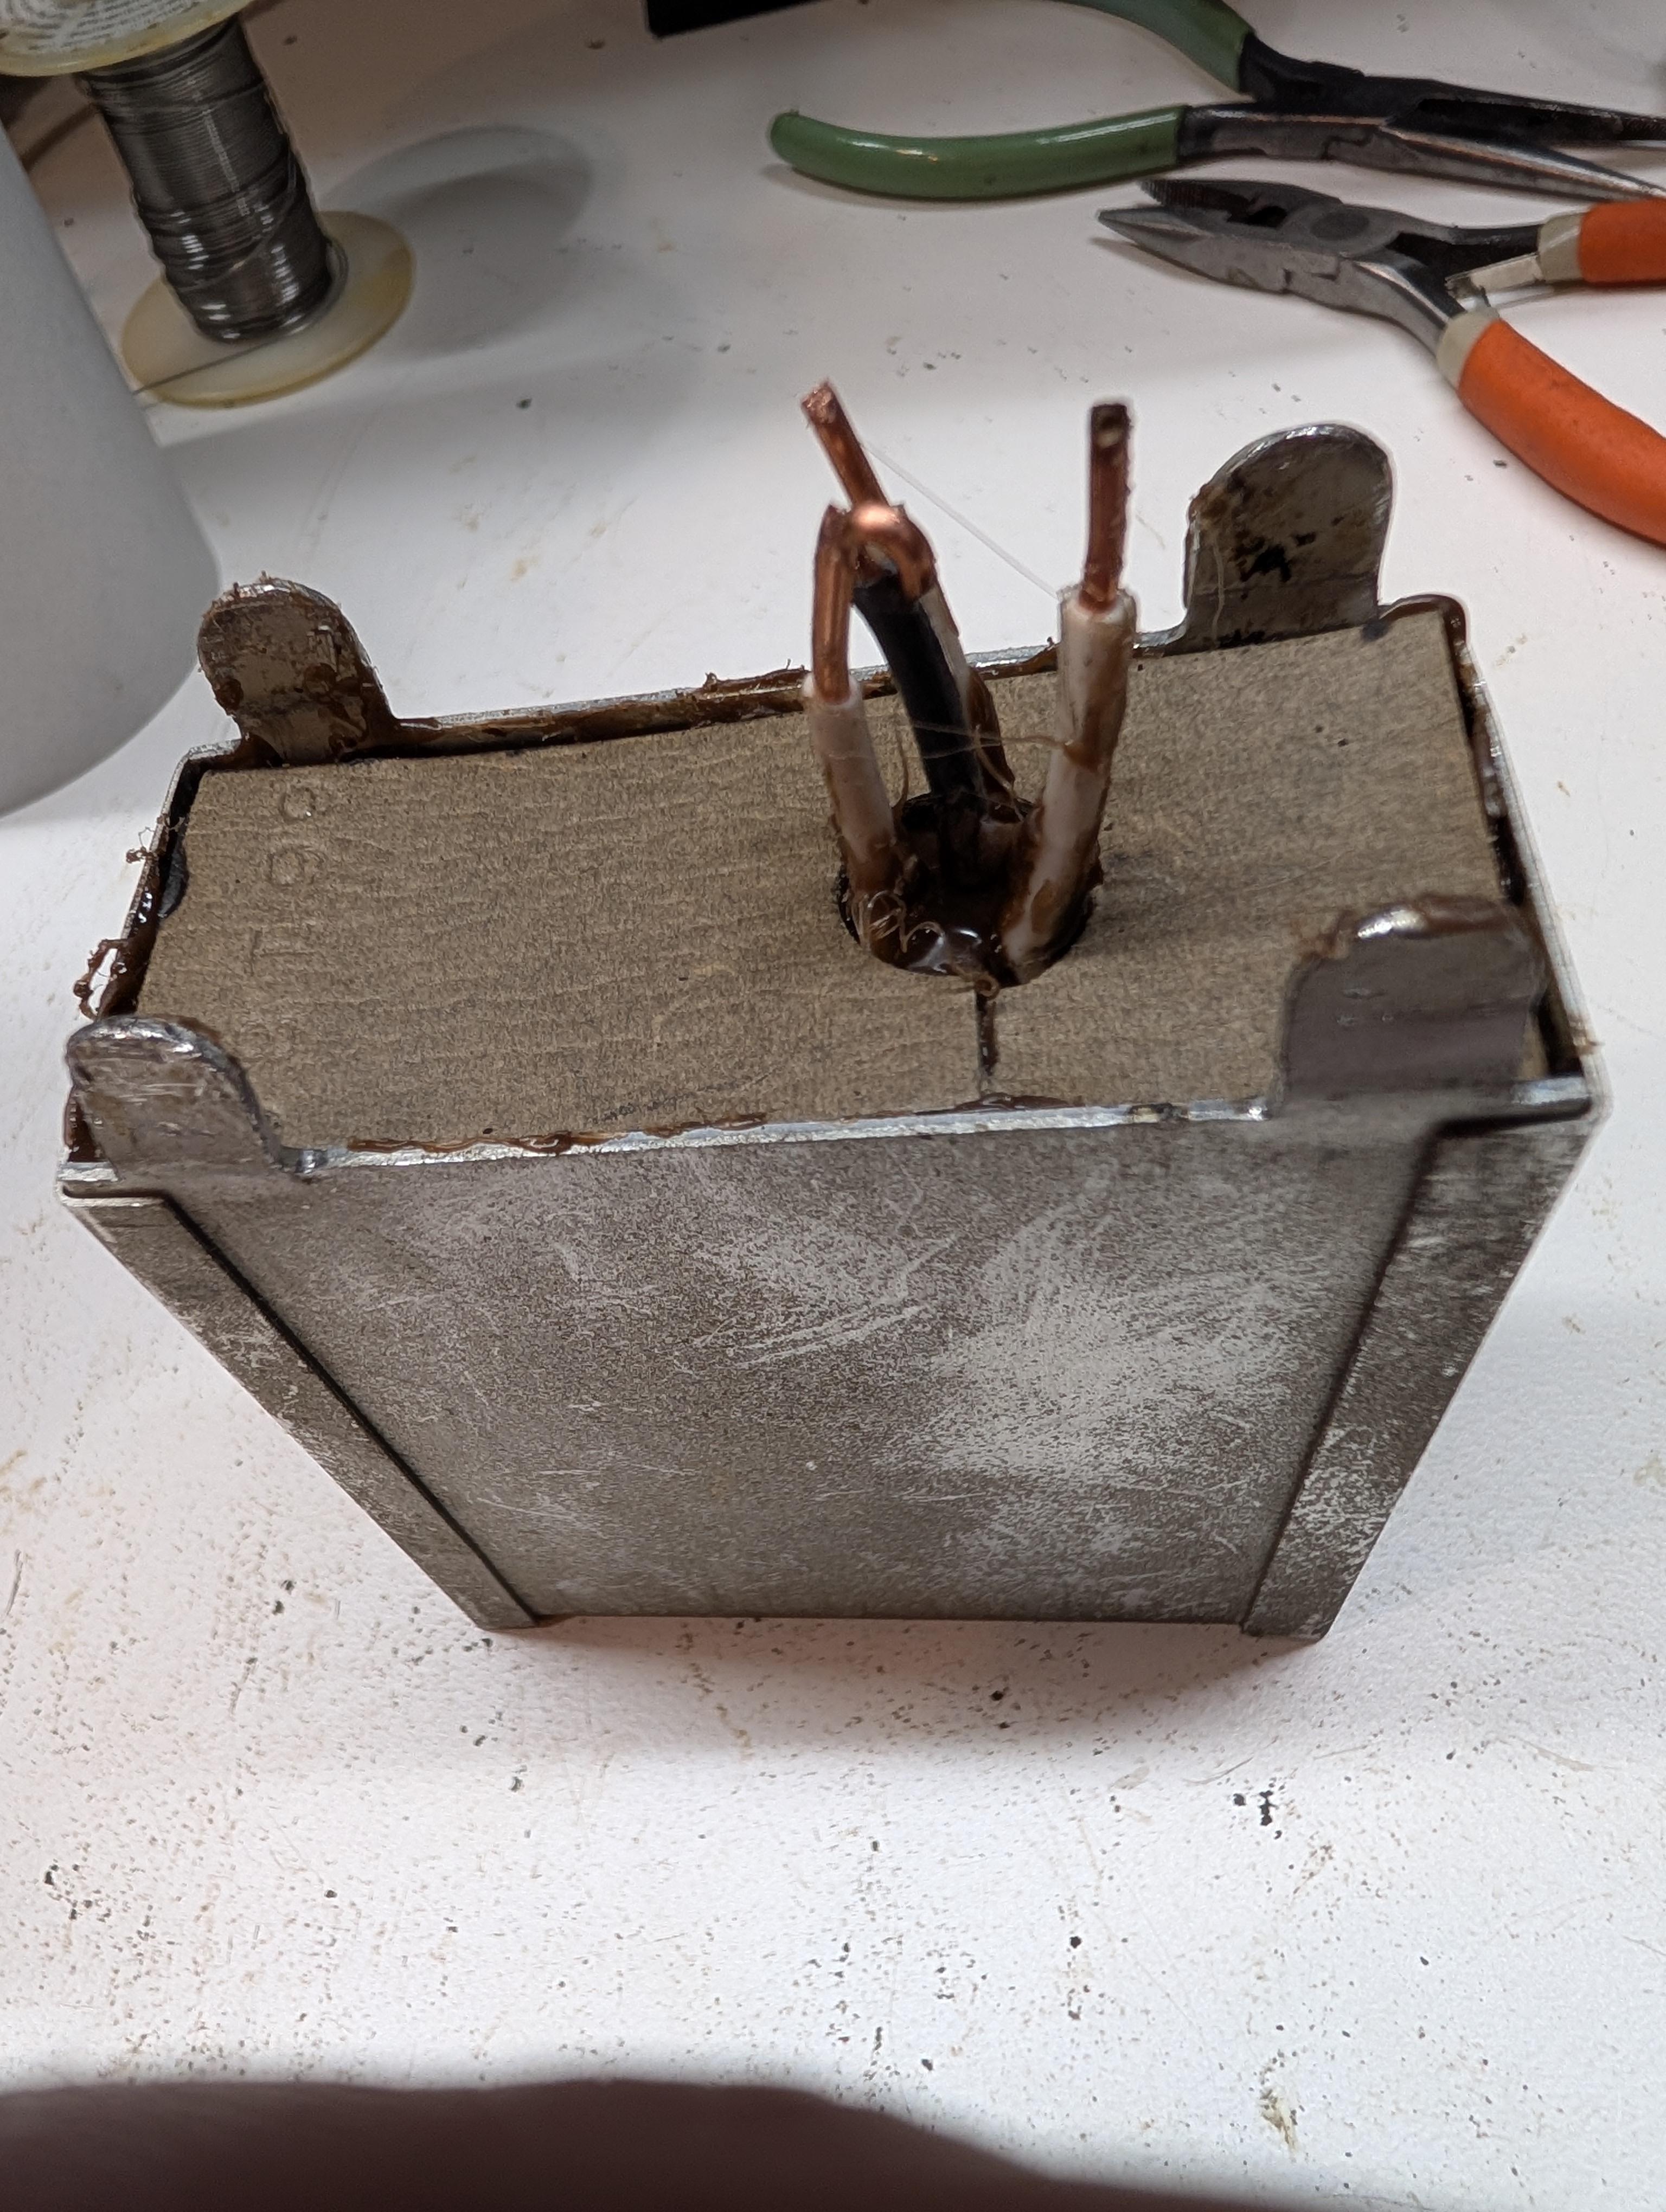
It is just three caps, so it is enough space with the tar left.
People who do not drink, do not smoke, do not eat red meat will one day feel really stupid lying there and dying from nothing.
Posts: 18,427
Threads: 622
Joined: Oct 2011
City: Jackson
State, Province, Country: NJ
Rebuilt little can.
People who do not drink, do not smoke, do not eat red meat will one day feel really stupid lying there and dying from nothing.
Posts: 18,427
Threads: 622
Joined: Oct 2011
City: Jackson
State, Province, Country: NJ
Took out the big can. Was able to do it fairly quick, now that I have all the tools.
Here's how I did it.
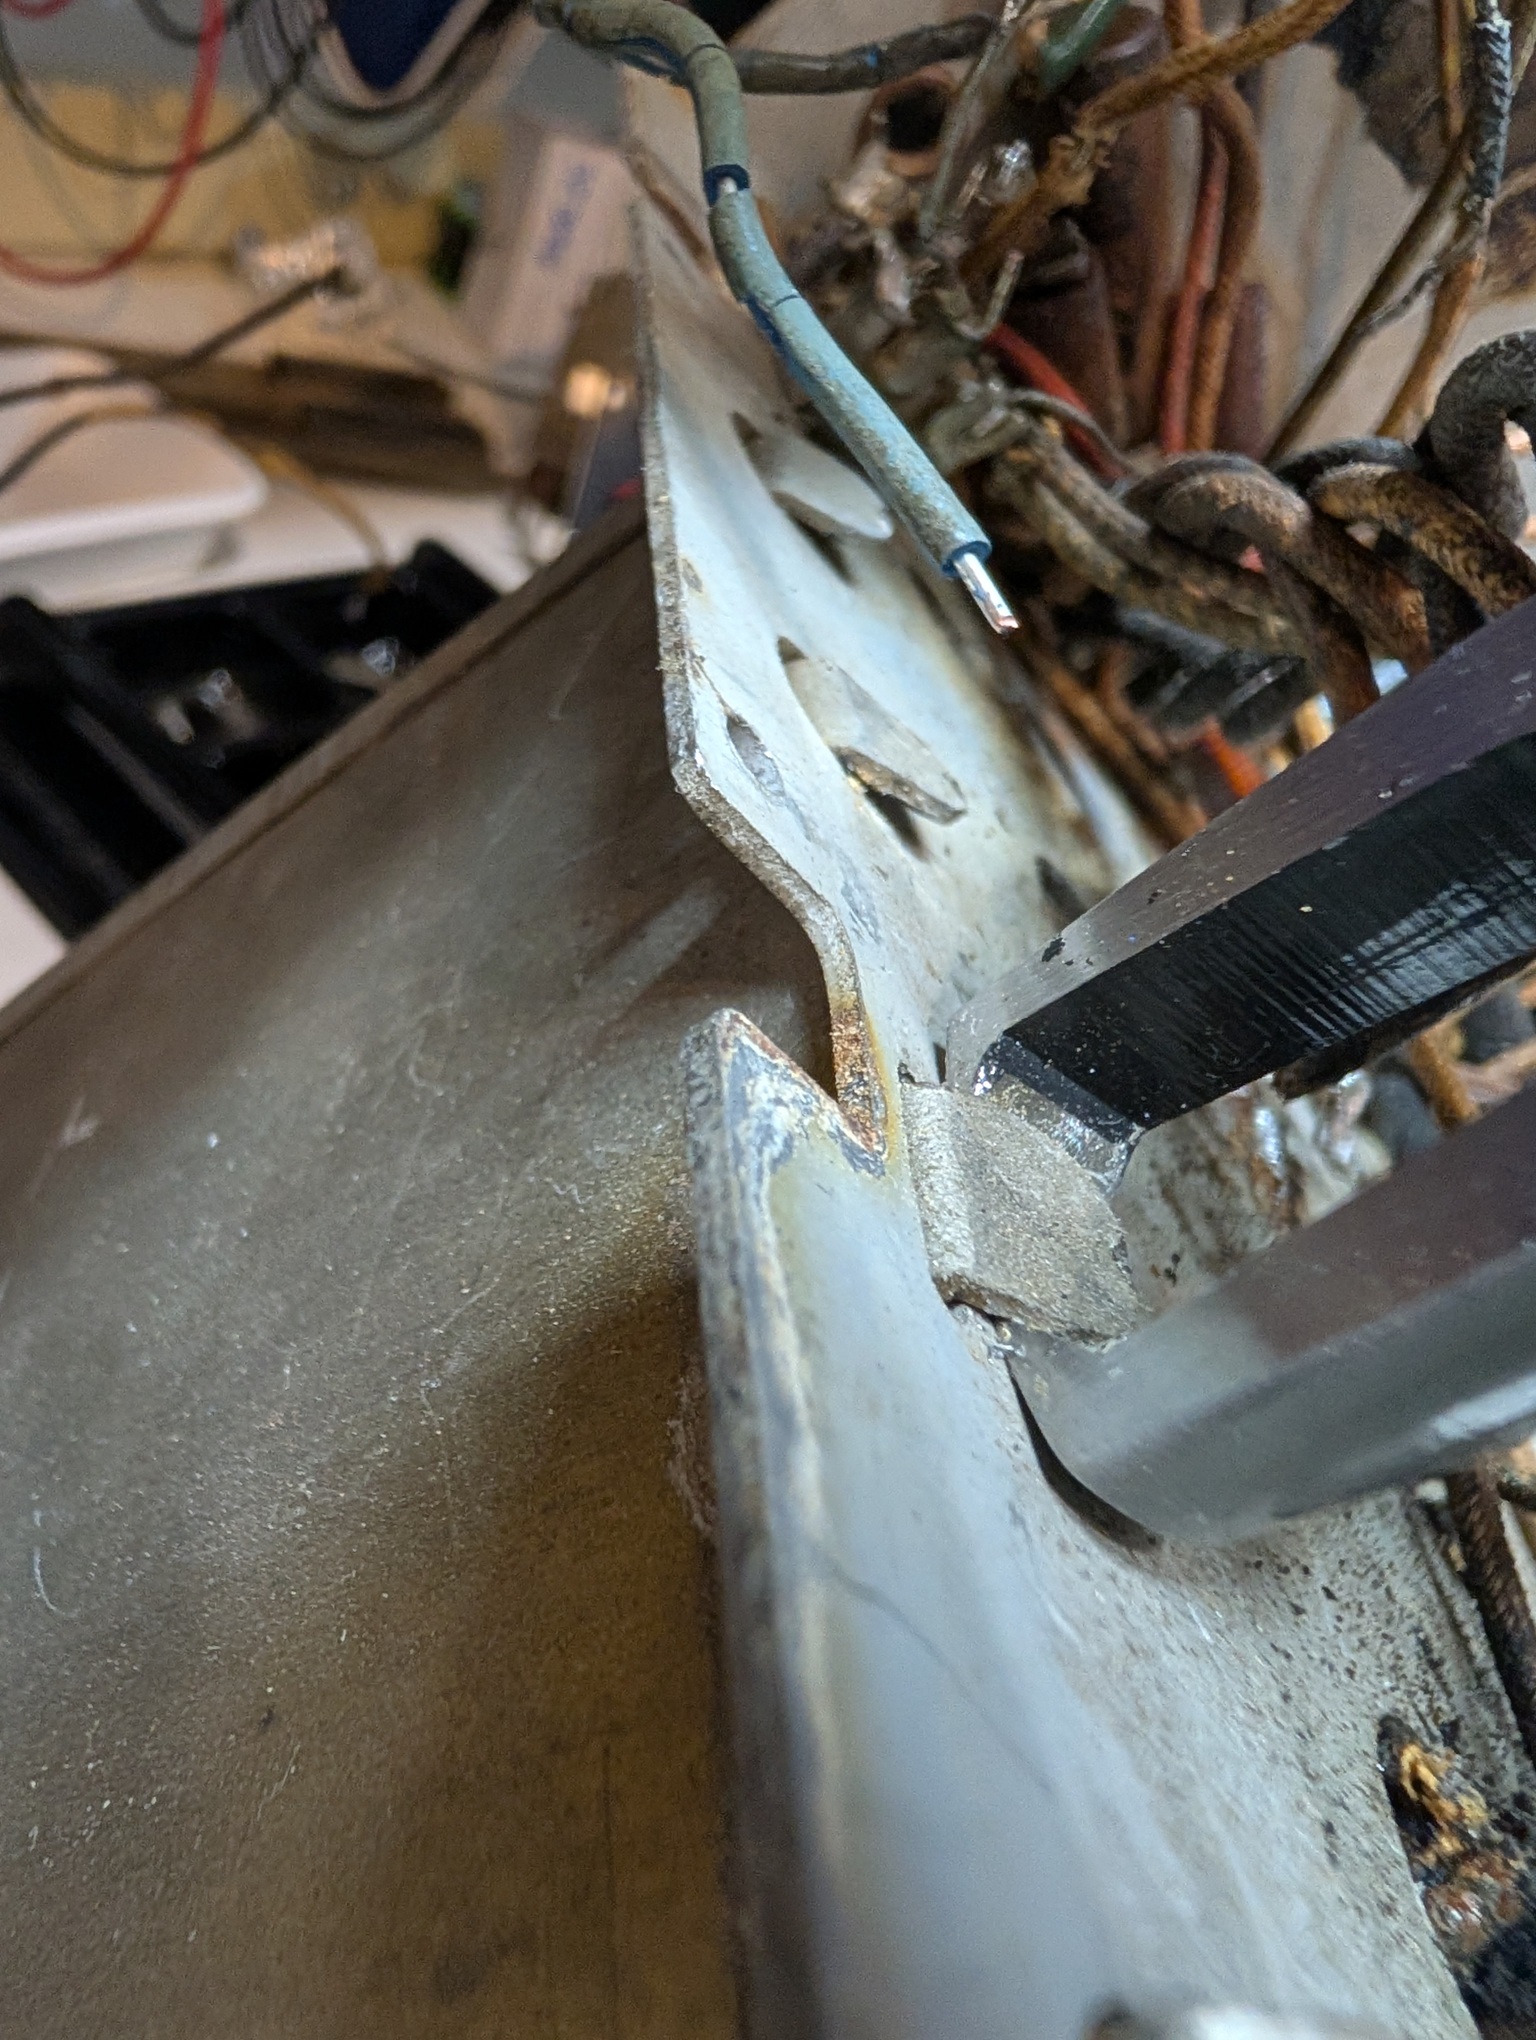
The initial lift is done using flush cutters. Depending on the position, various width tools could be used.
This is the cutter in the position. The idea is, the cutting surfaces get under the tab and then unbend it. The metal of the tool is pretty good, so I did not see any damage to the cutter itself.
Also, unlike a chiesel, it could be operated from the top, when there is little space to use a chiesel, which is long. On the other hand, the chiesel is useful where the cutter would have a handle too close to a chassis wall and could not be positioned well.
The more tools you have, the more flexible the choices are.
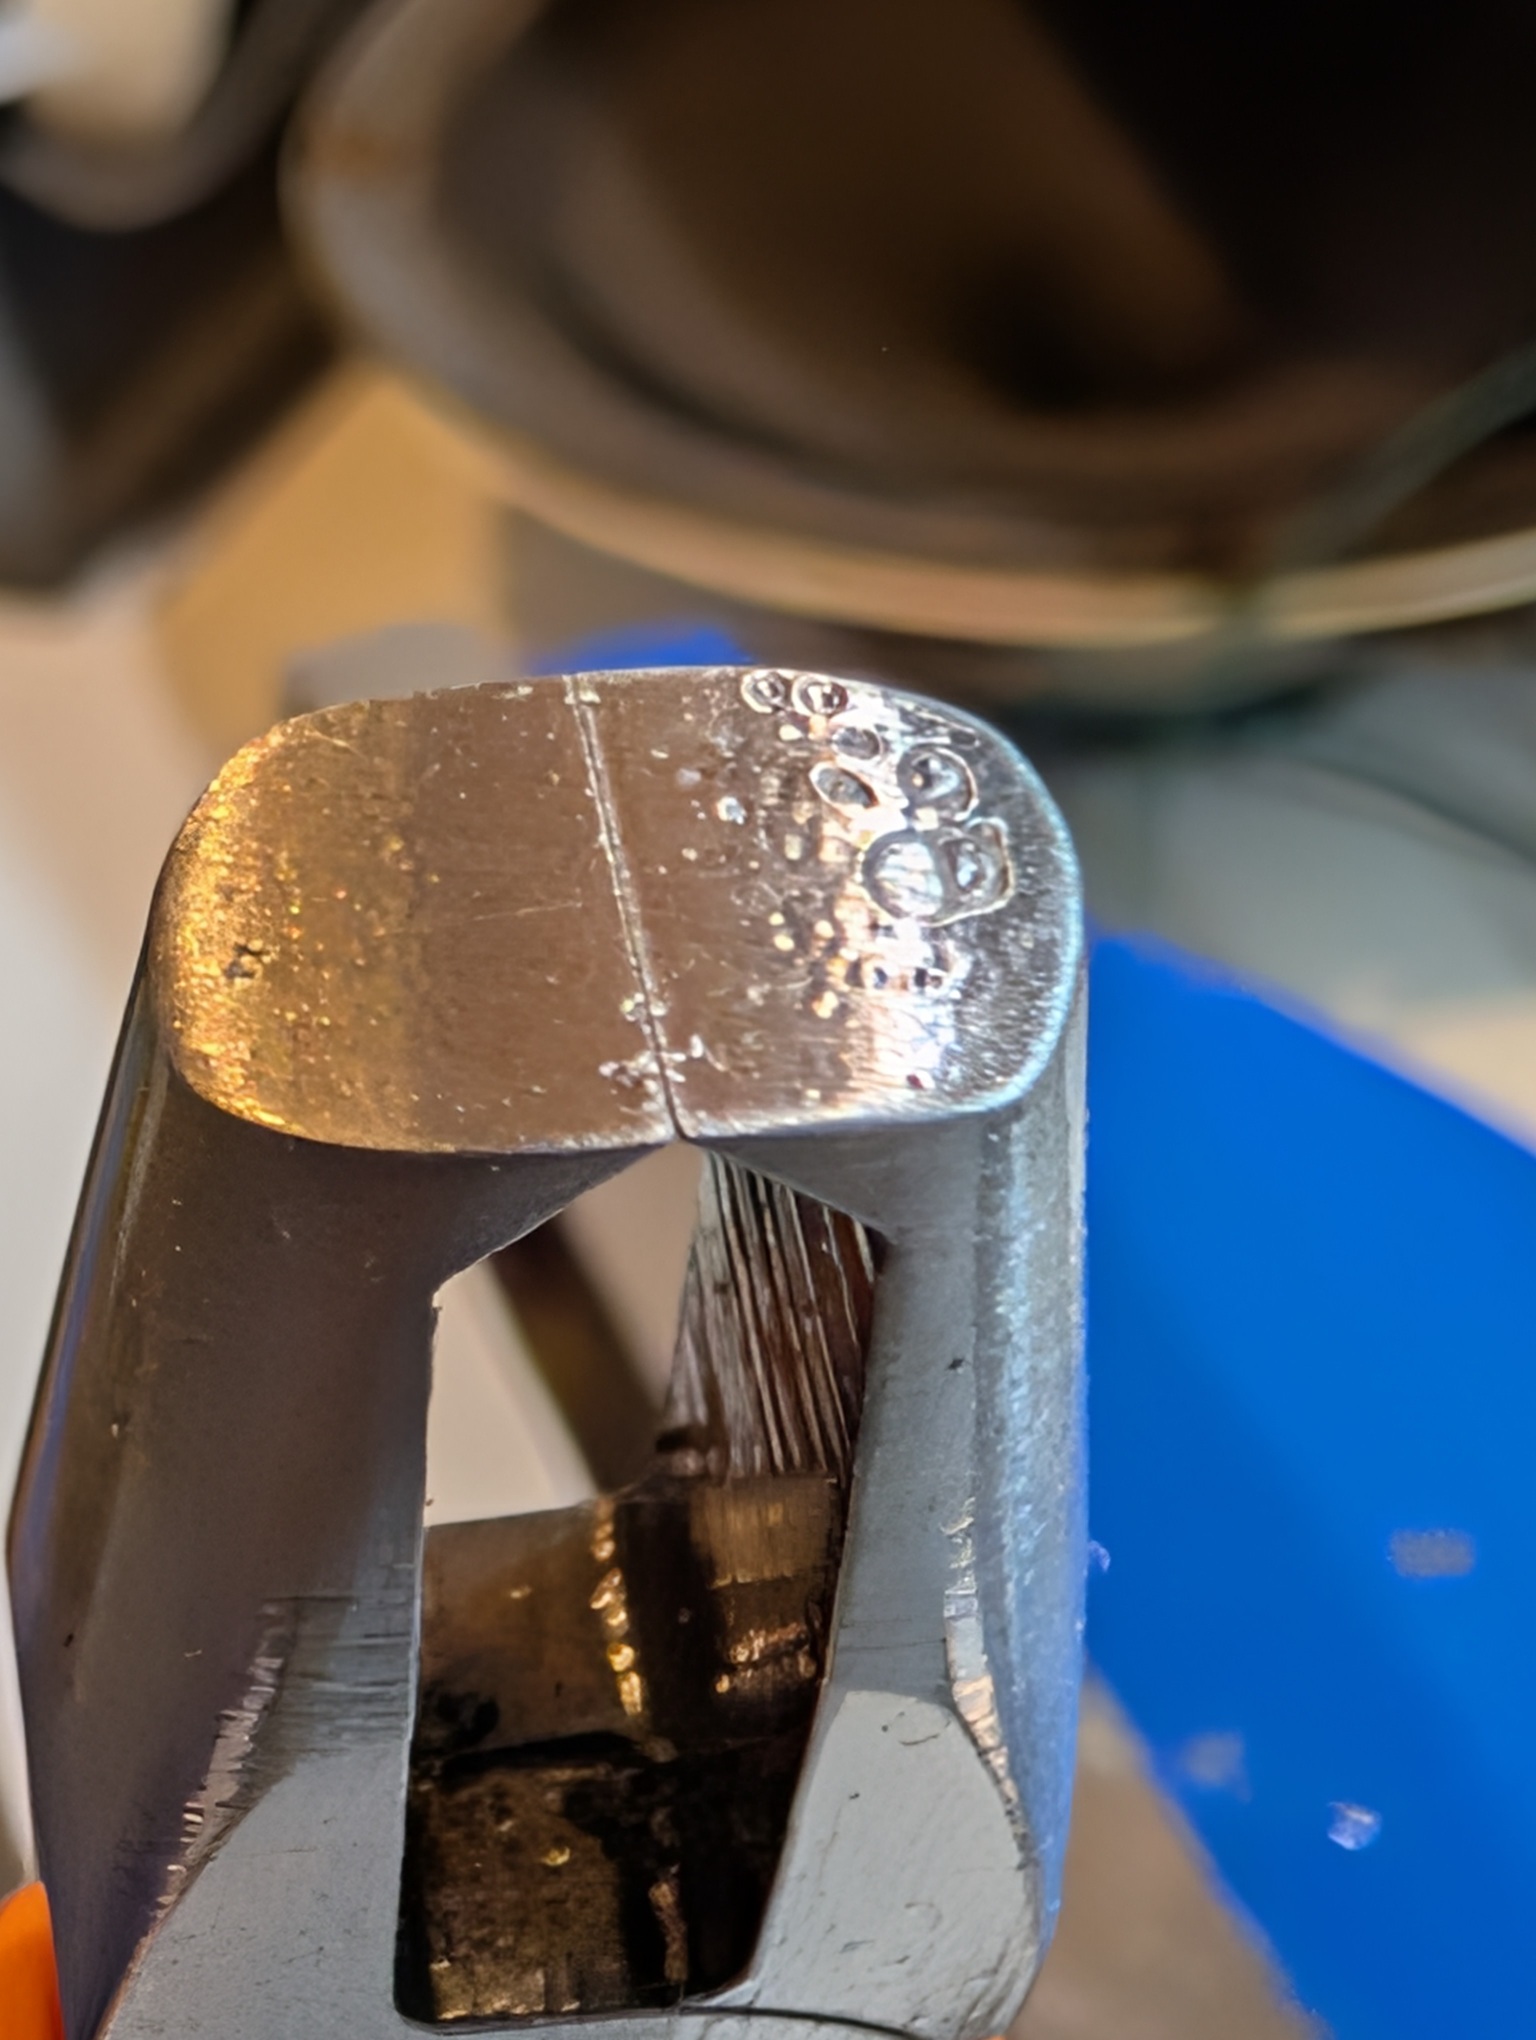
This is what flush cutter is:
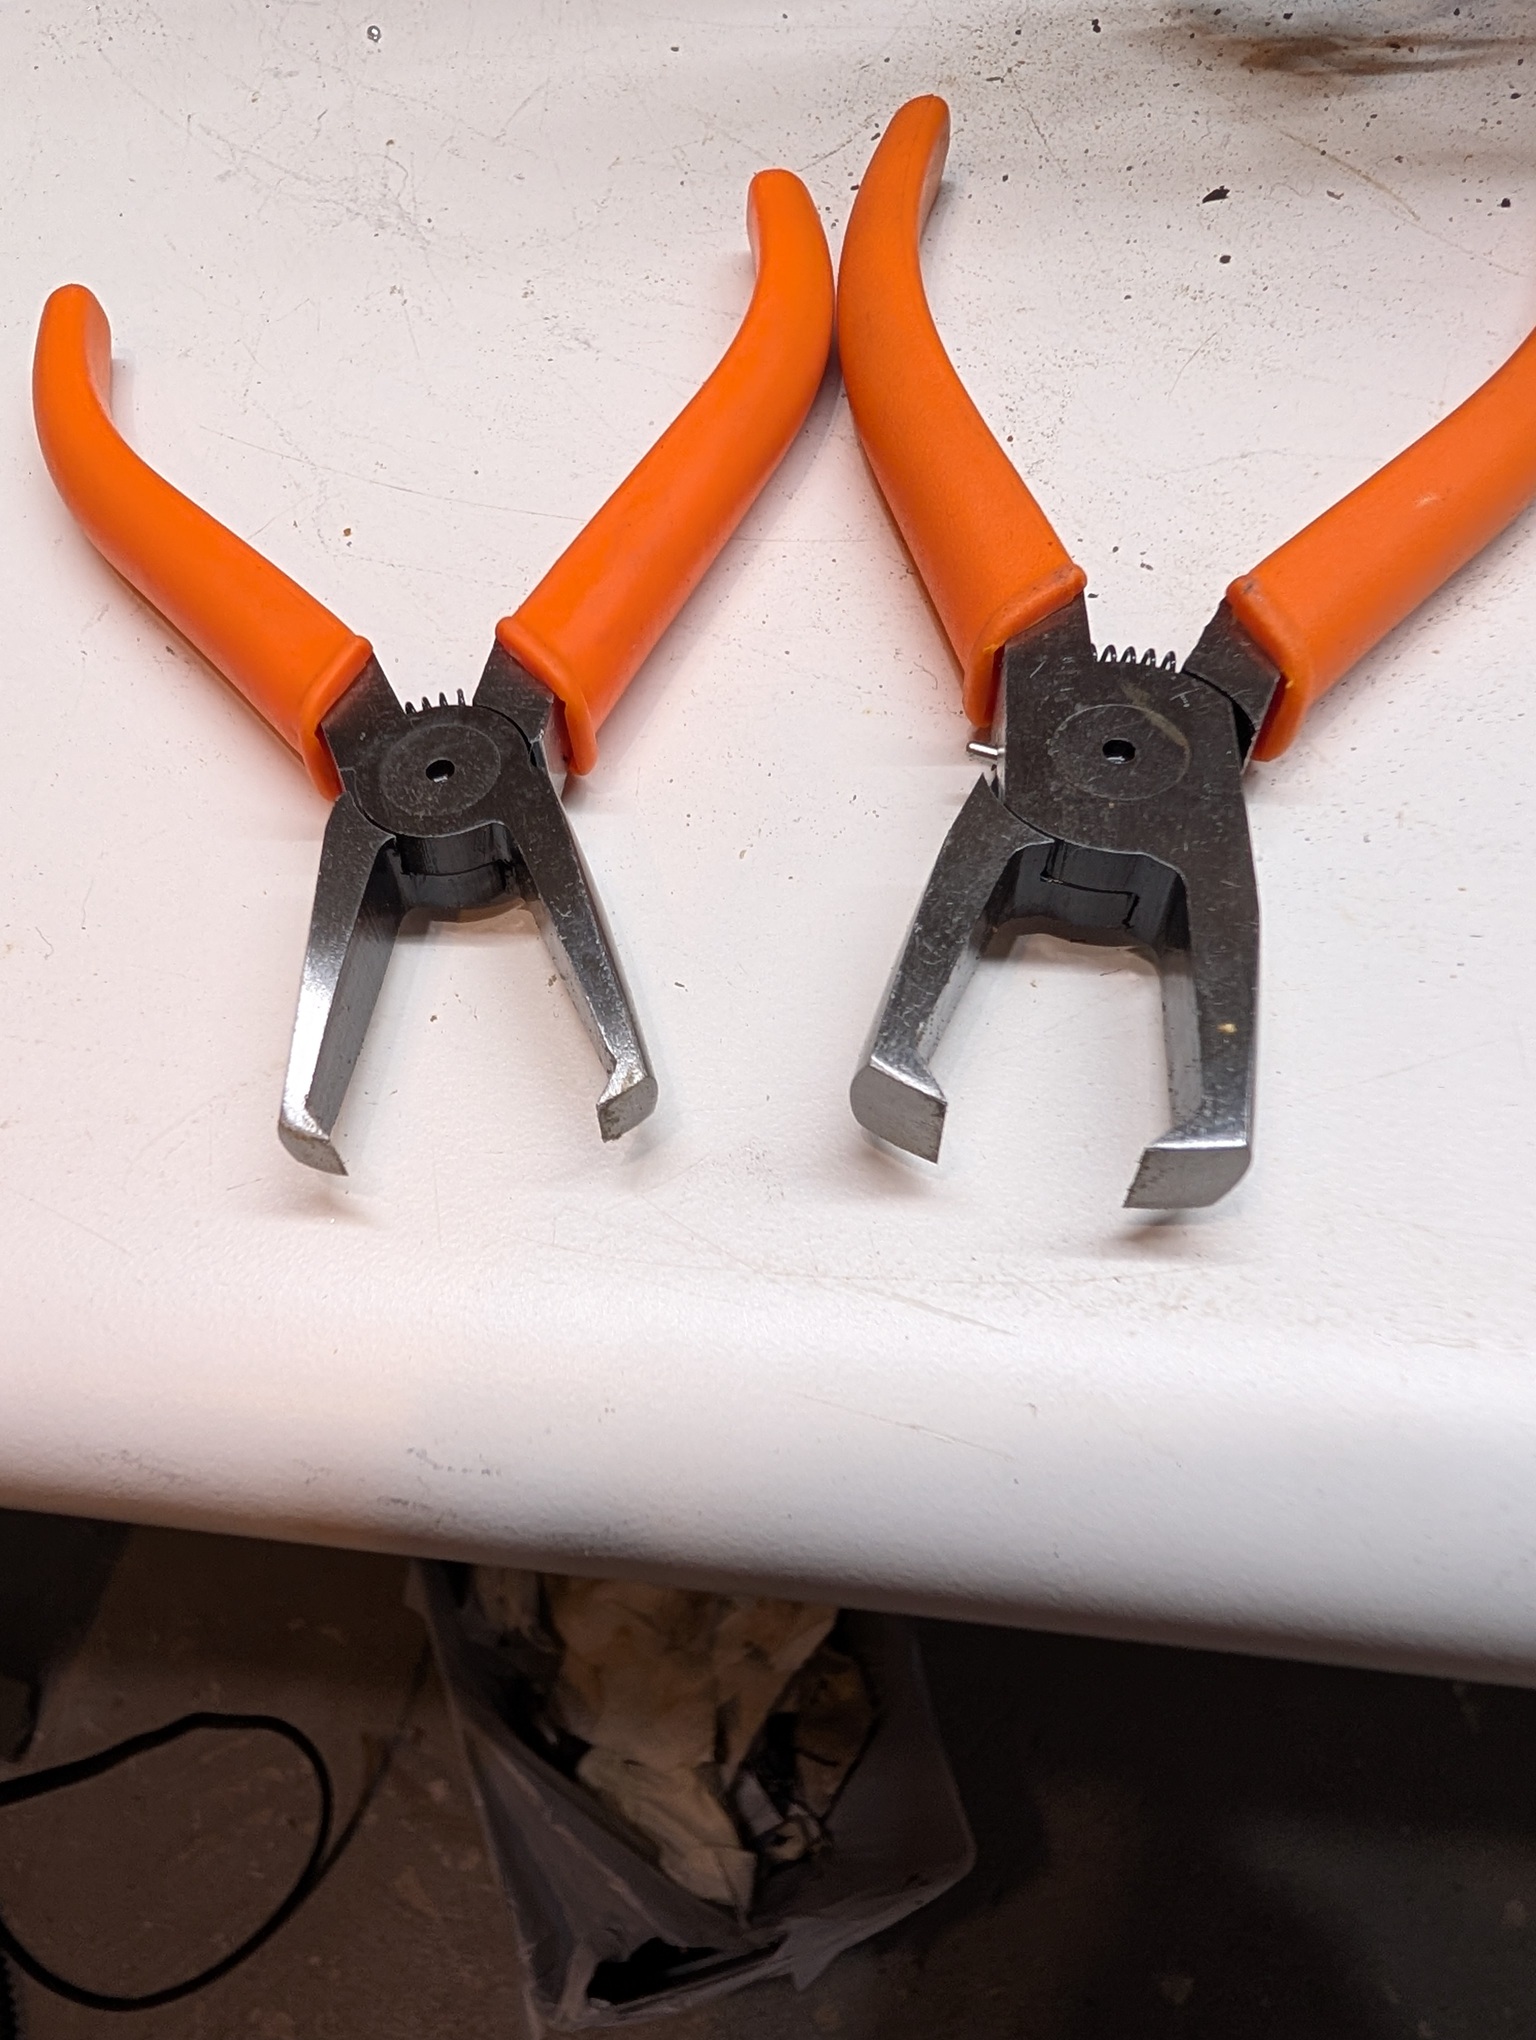
And the surface of it is smooth. Unlike the regular cutter, the groove is inside and the cutting surfaces are on the outside.
Then I proceed with a prying "lady's shoe" tool.
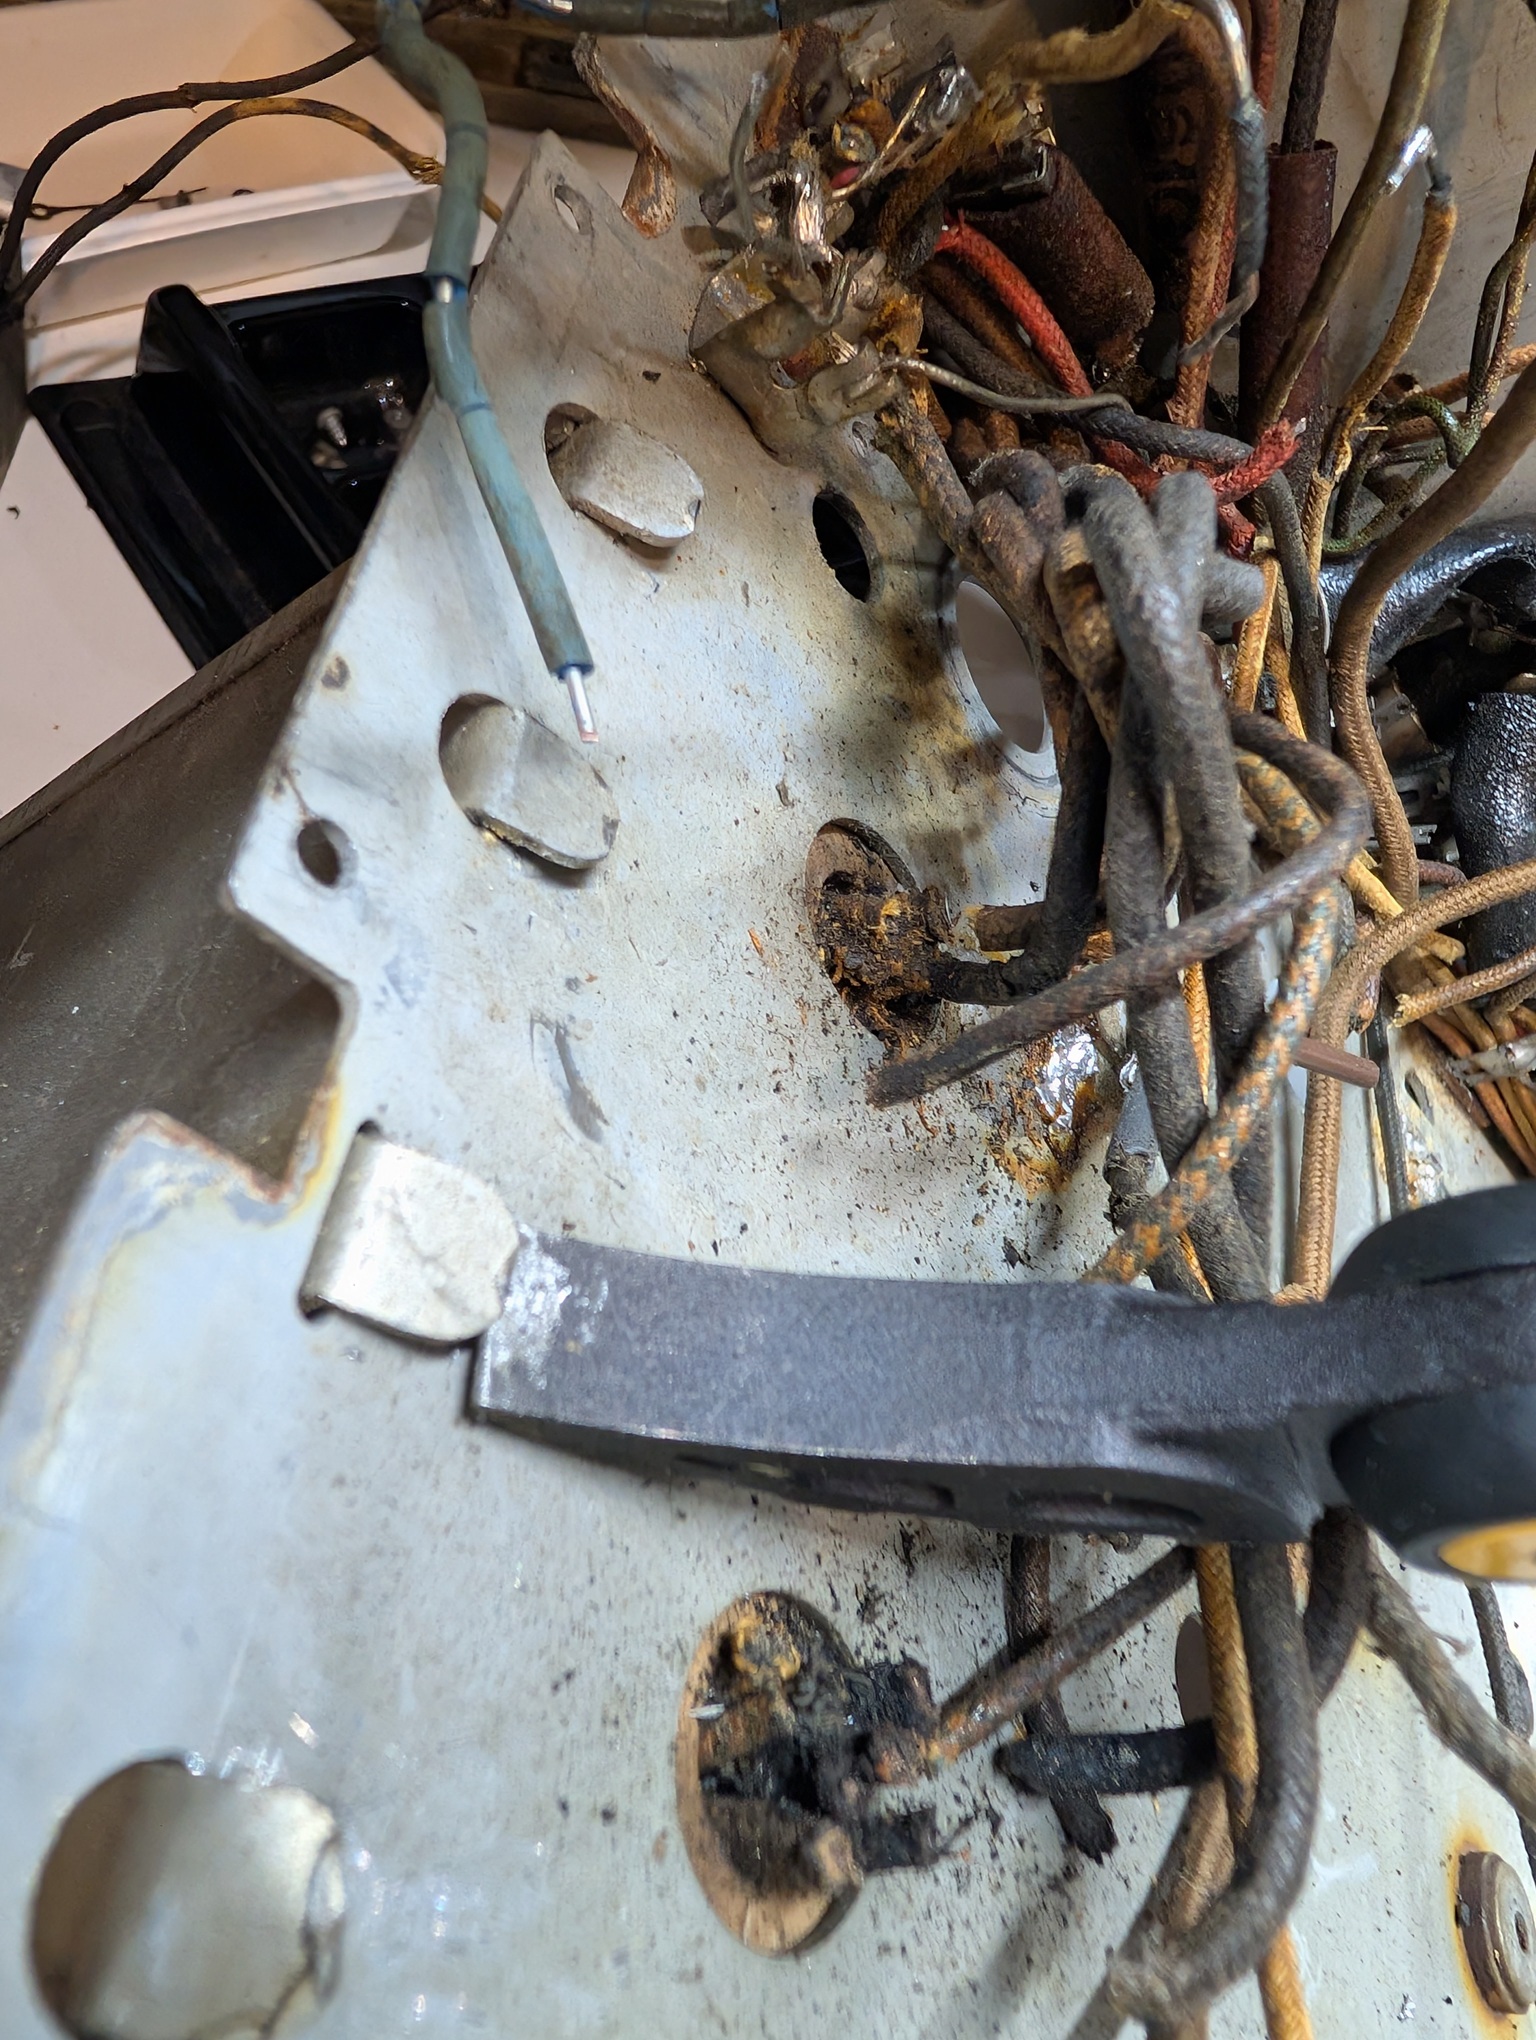
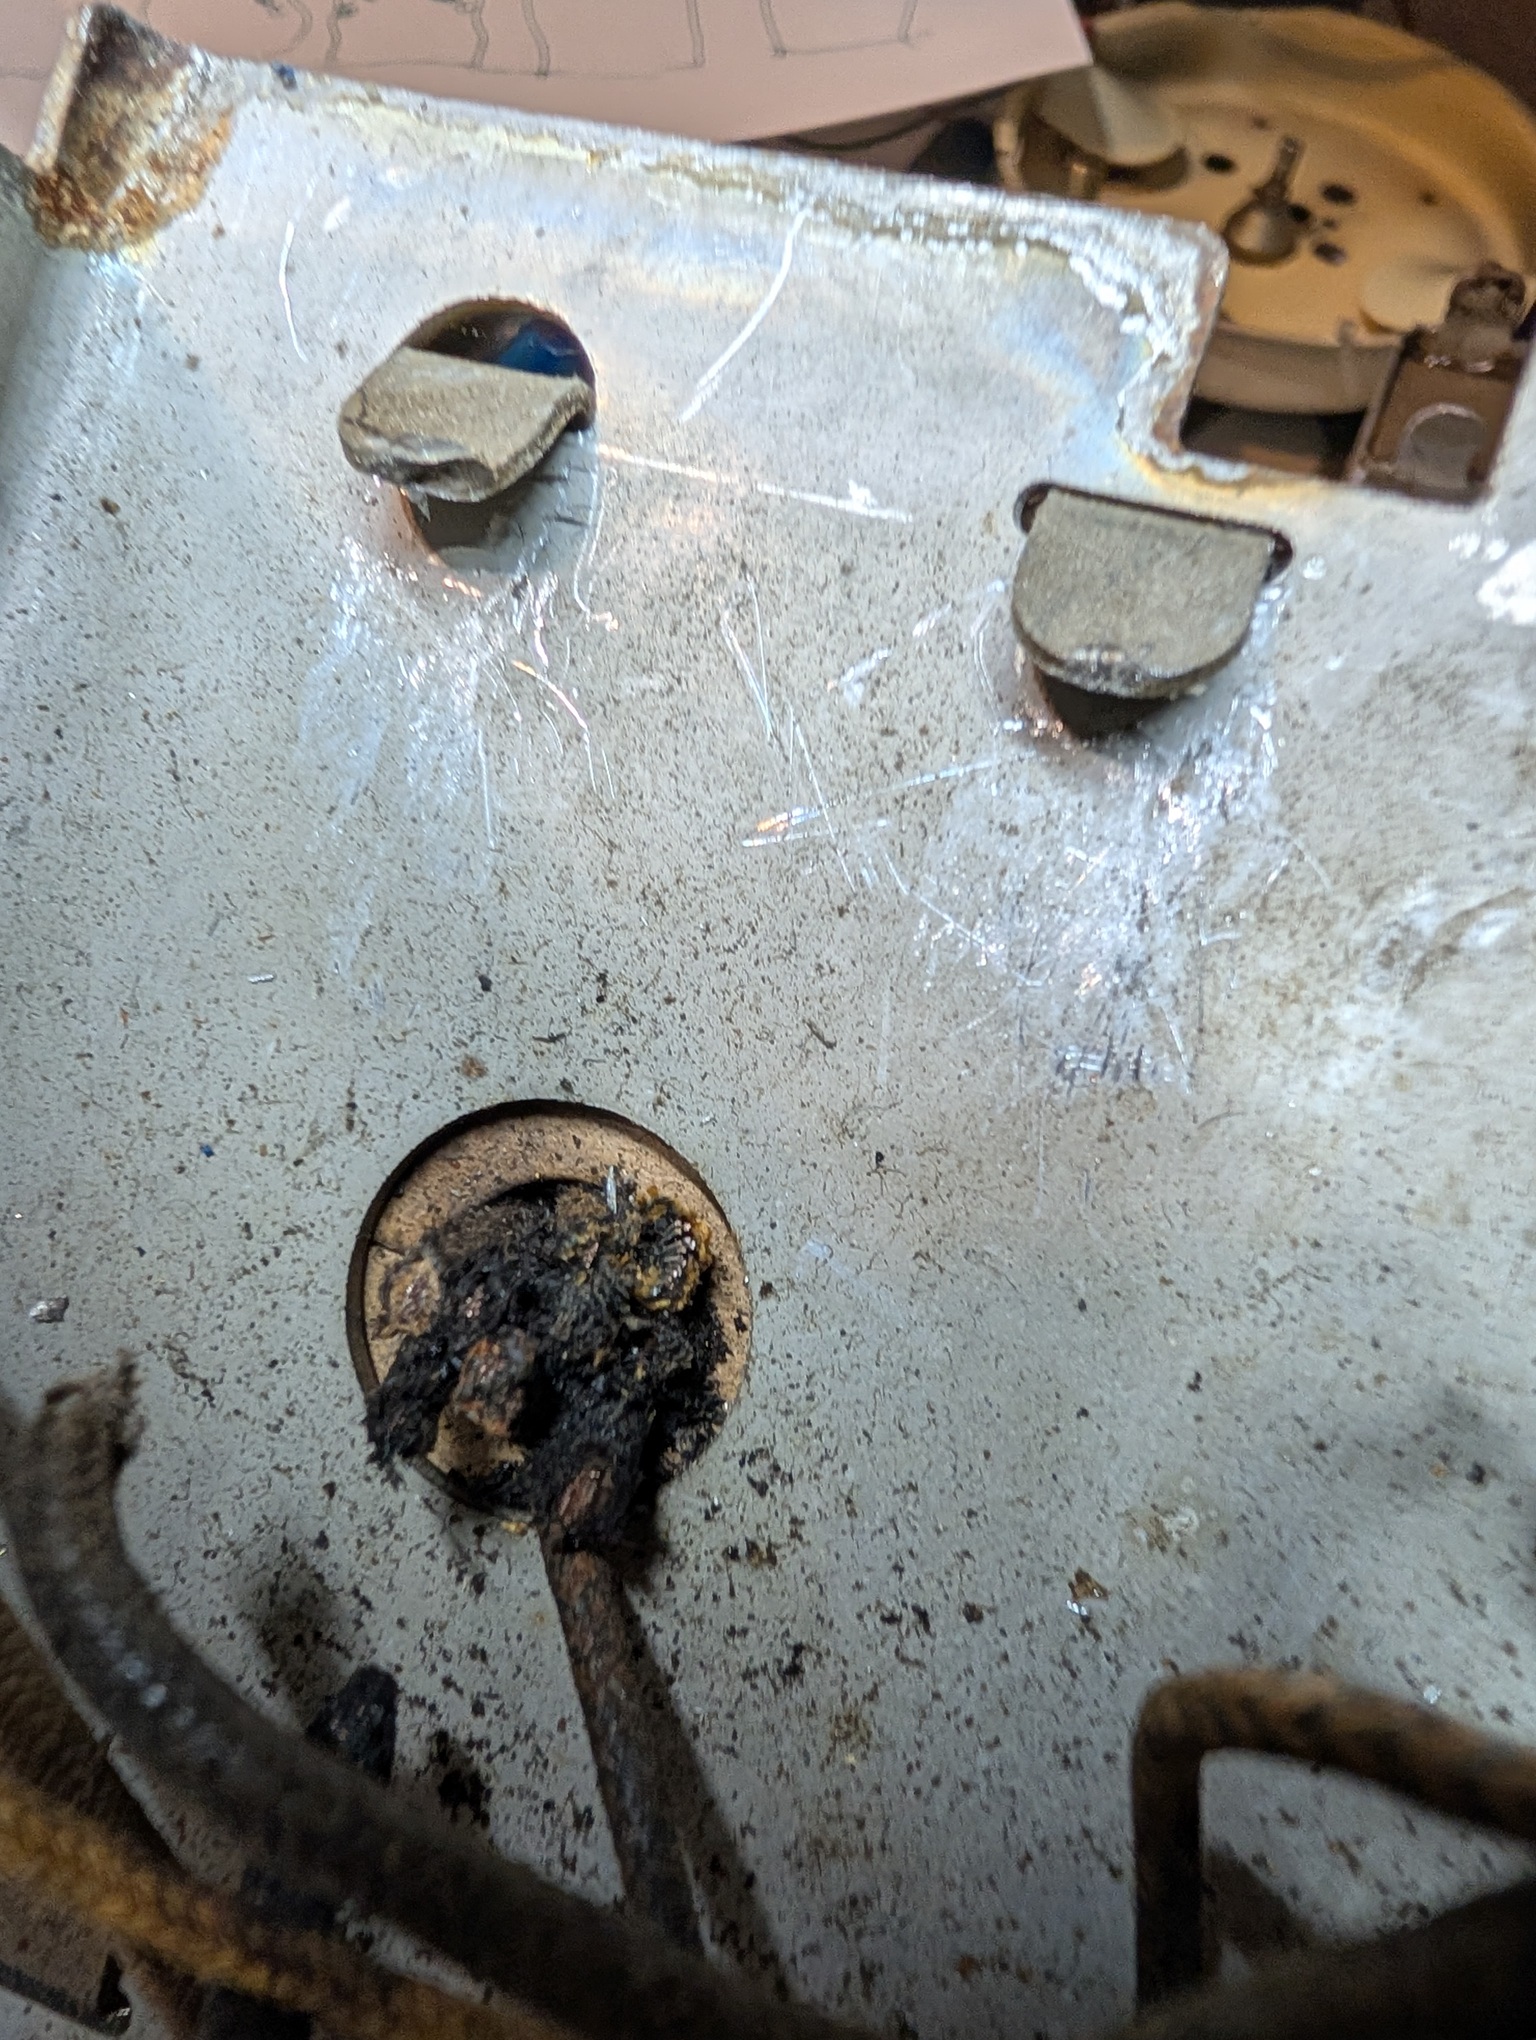
It brings it to this position
Then I proceed with regular pliers:
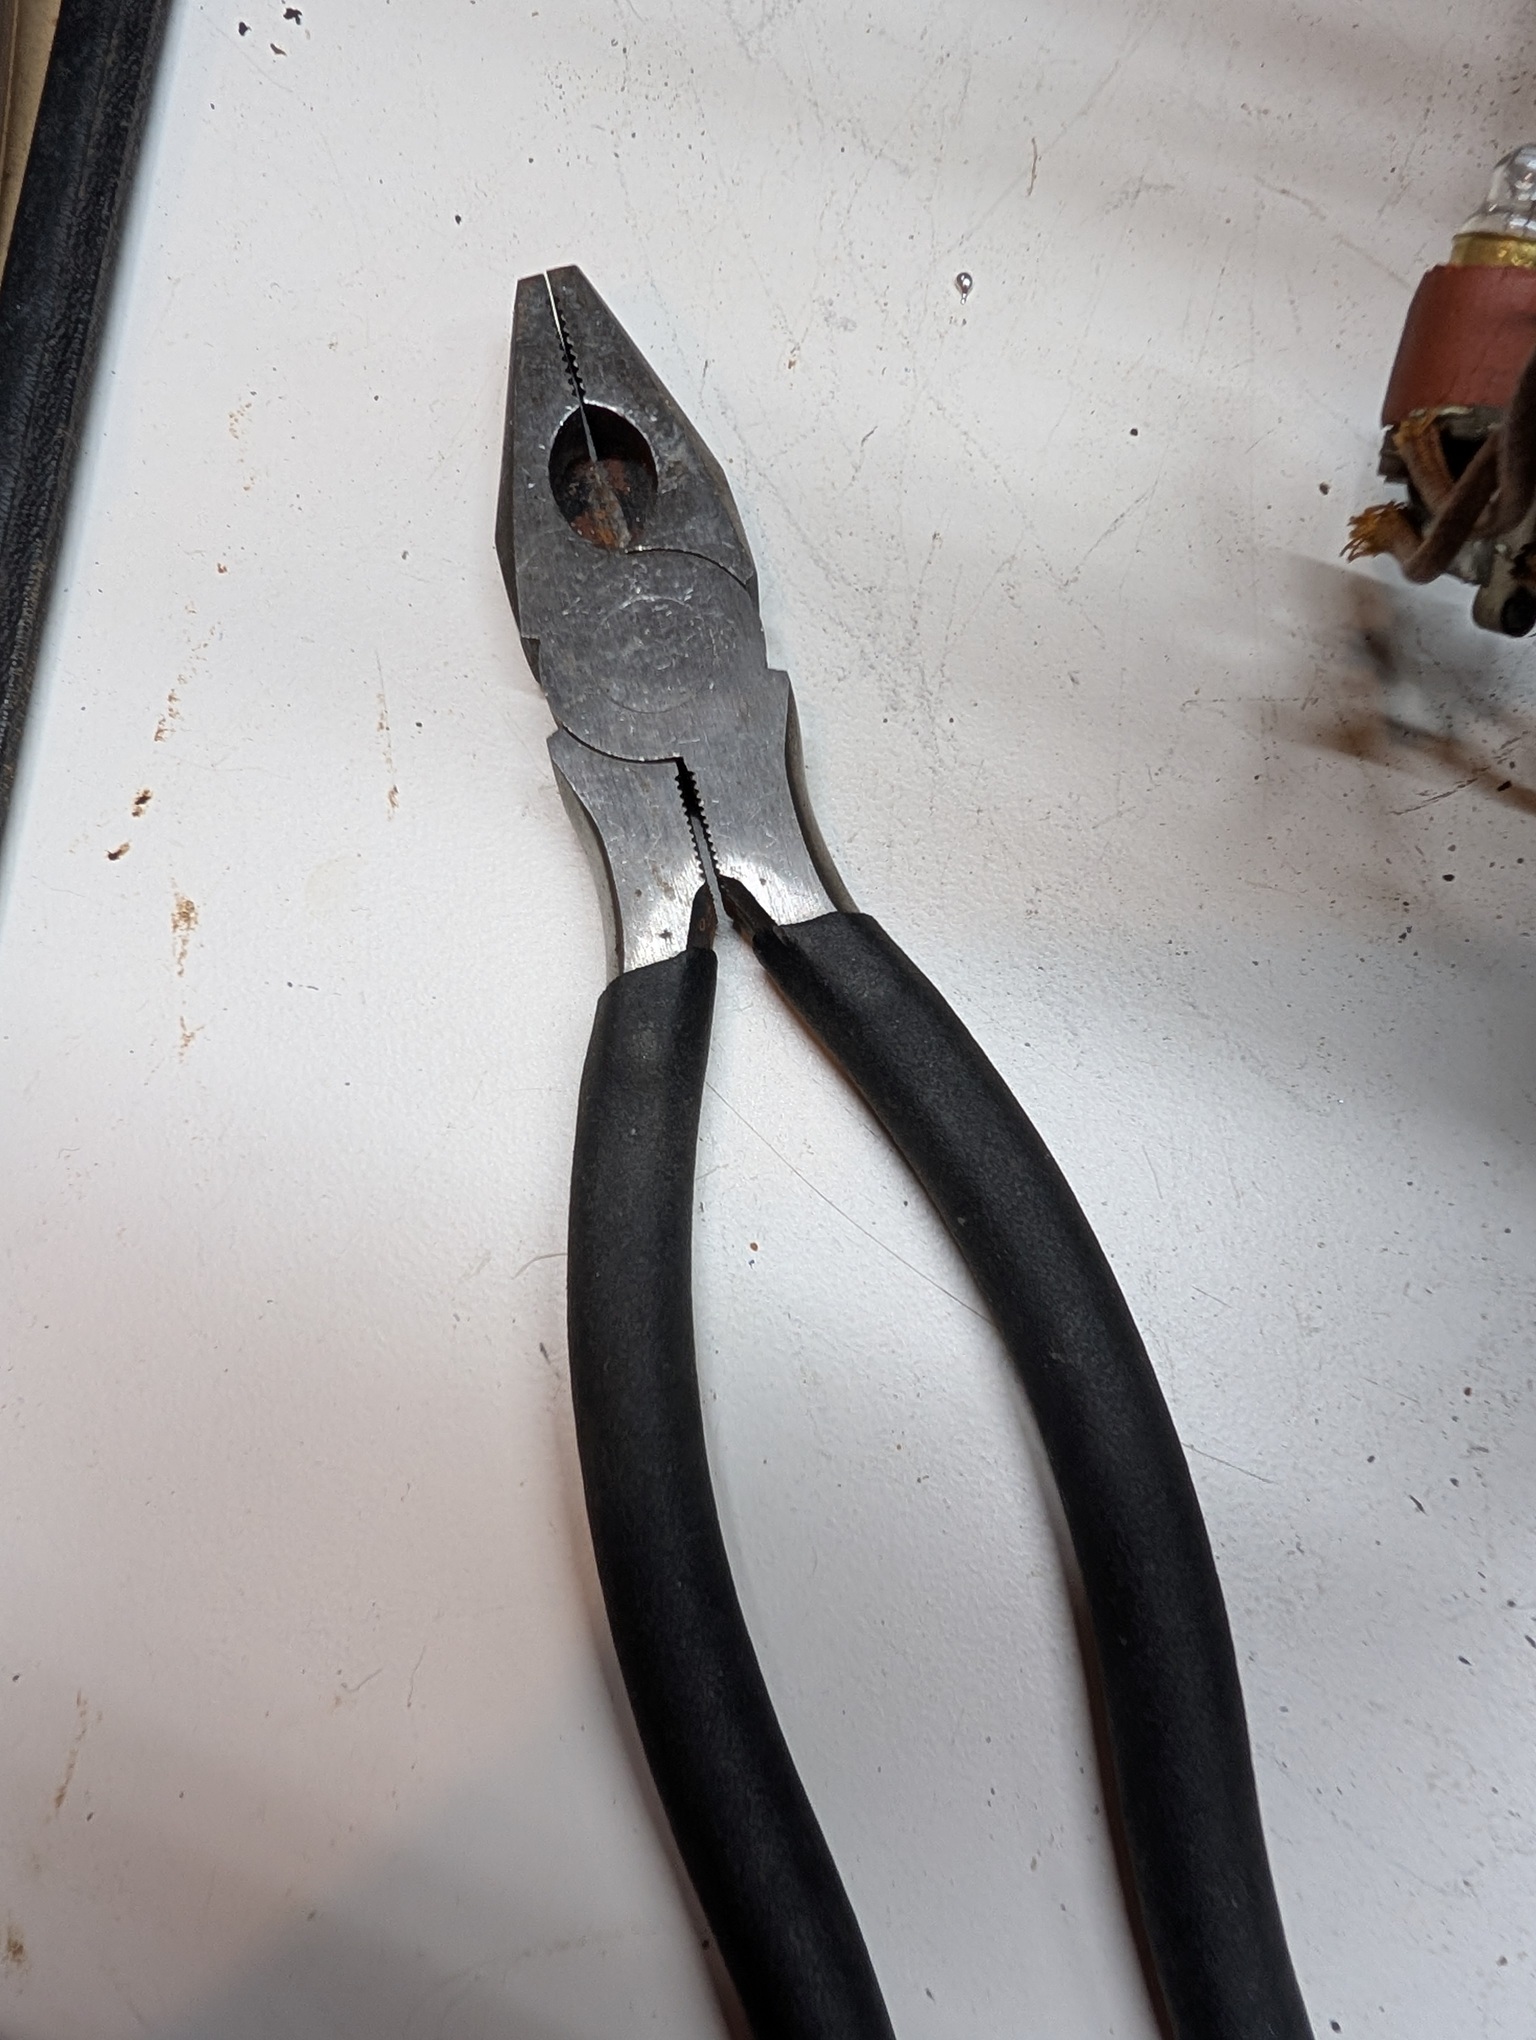
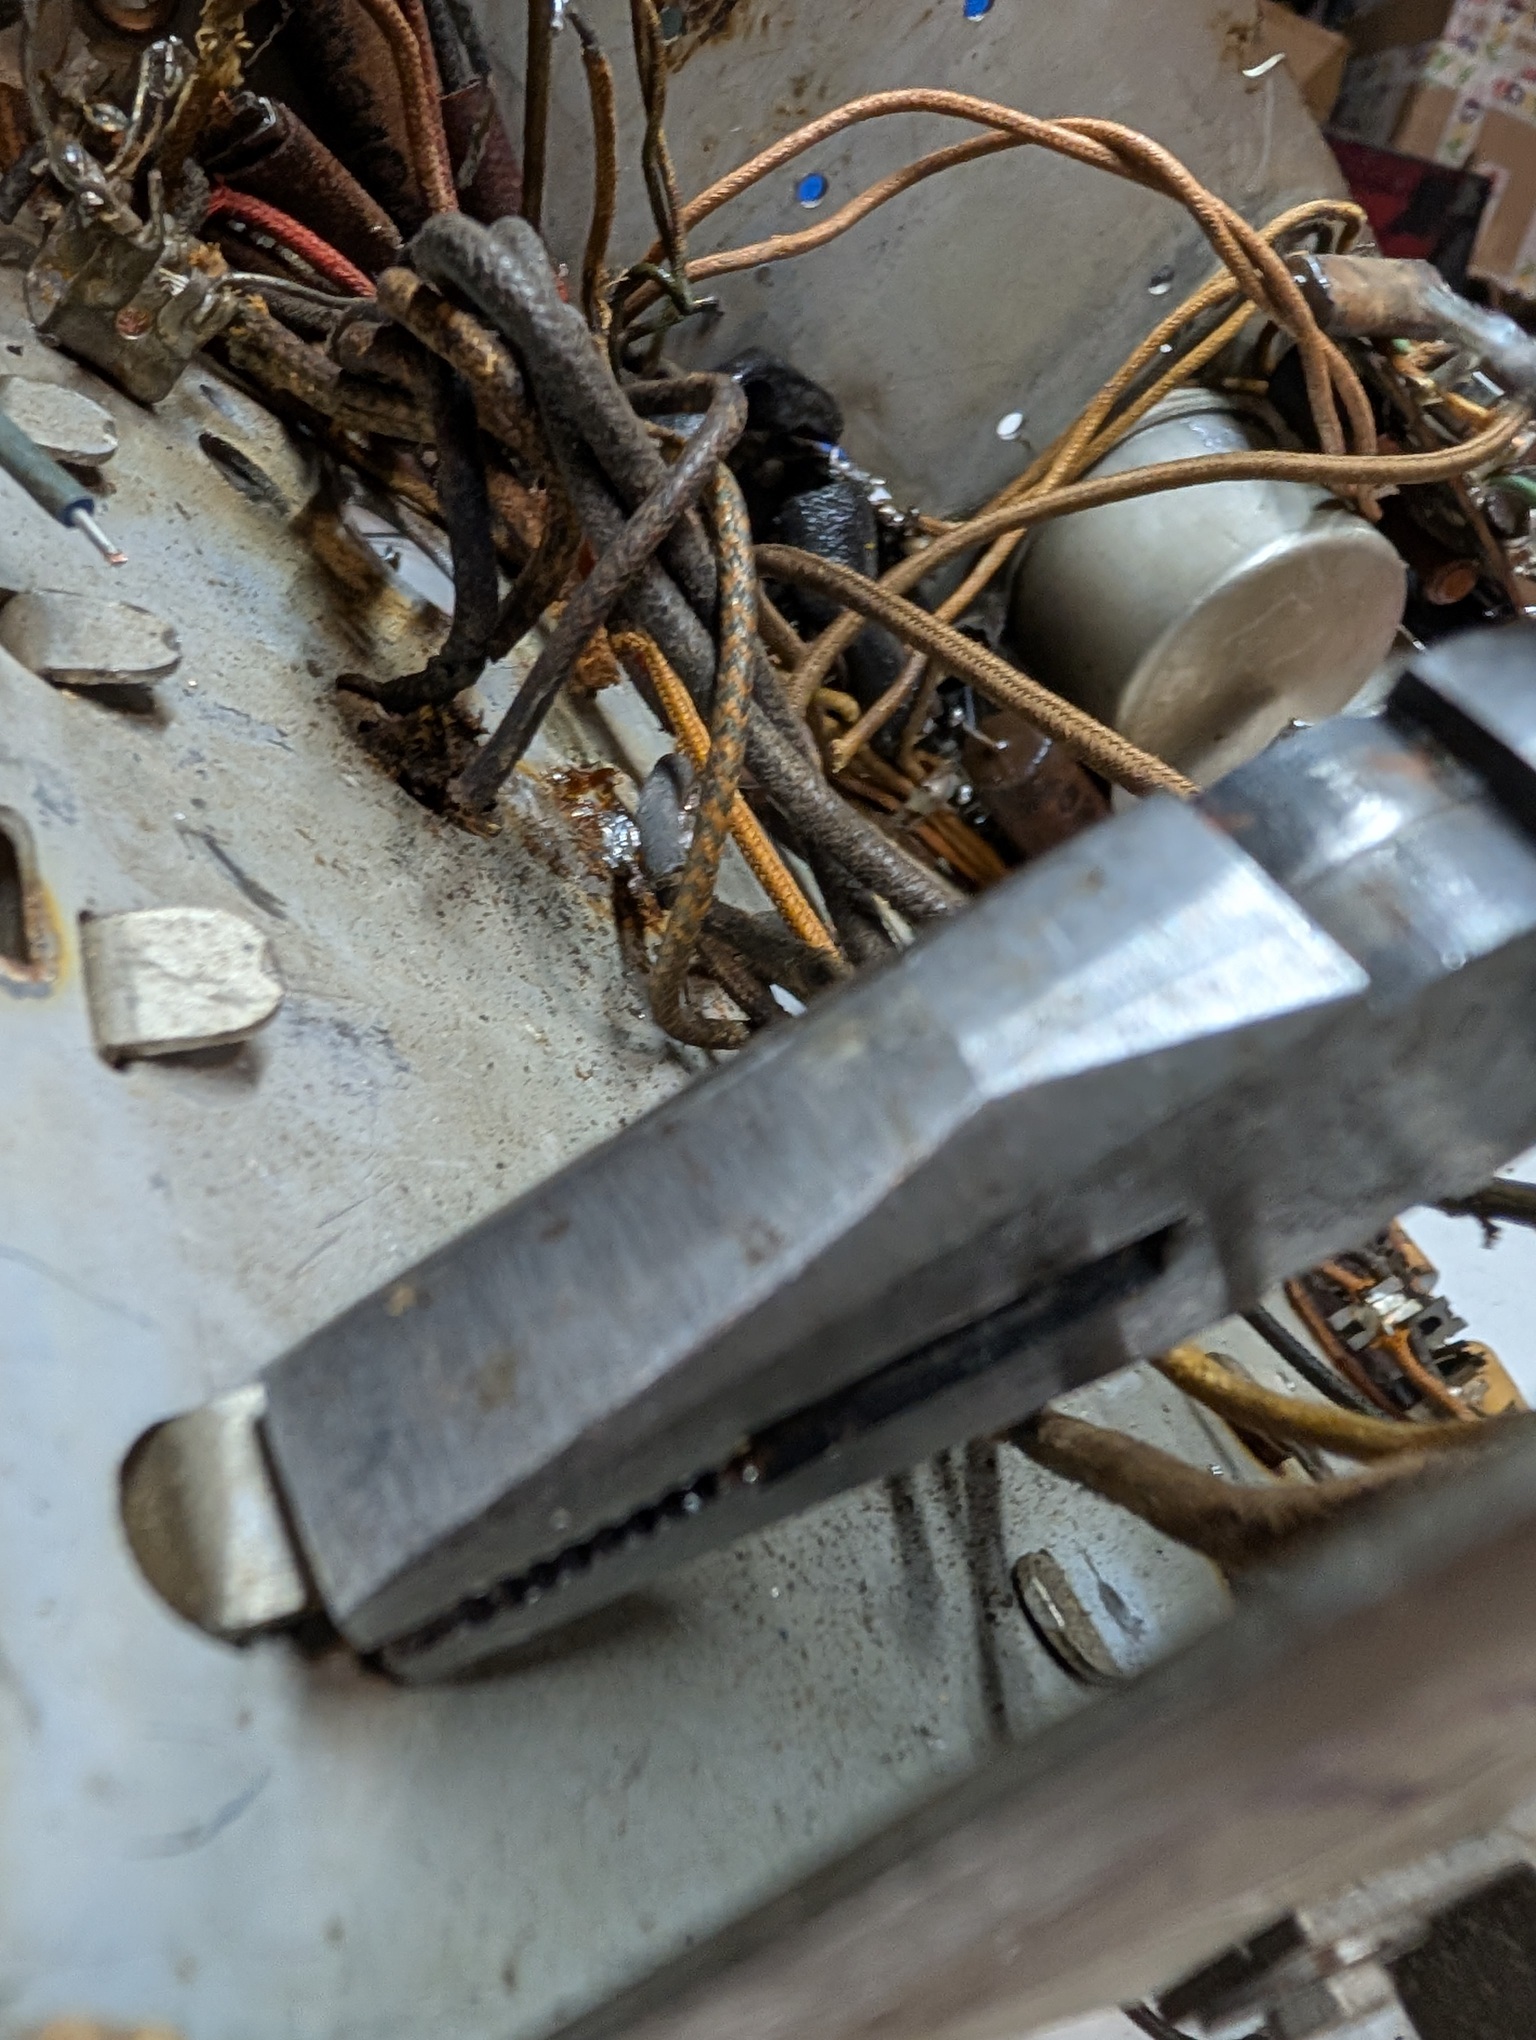
And straighten it out:
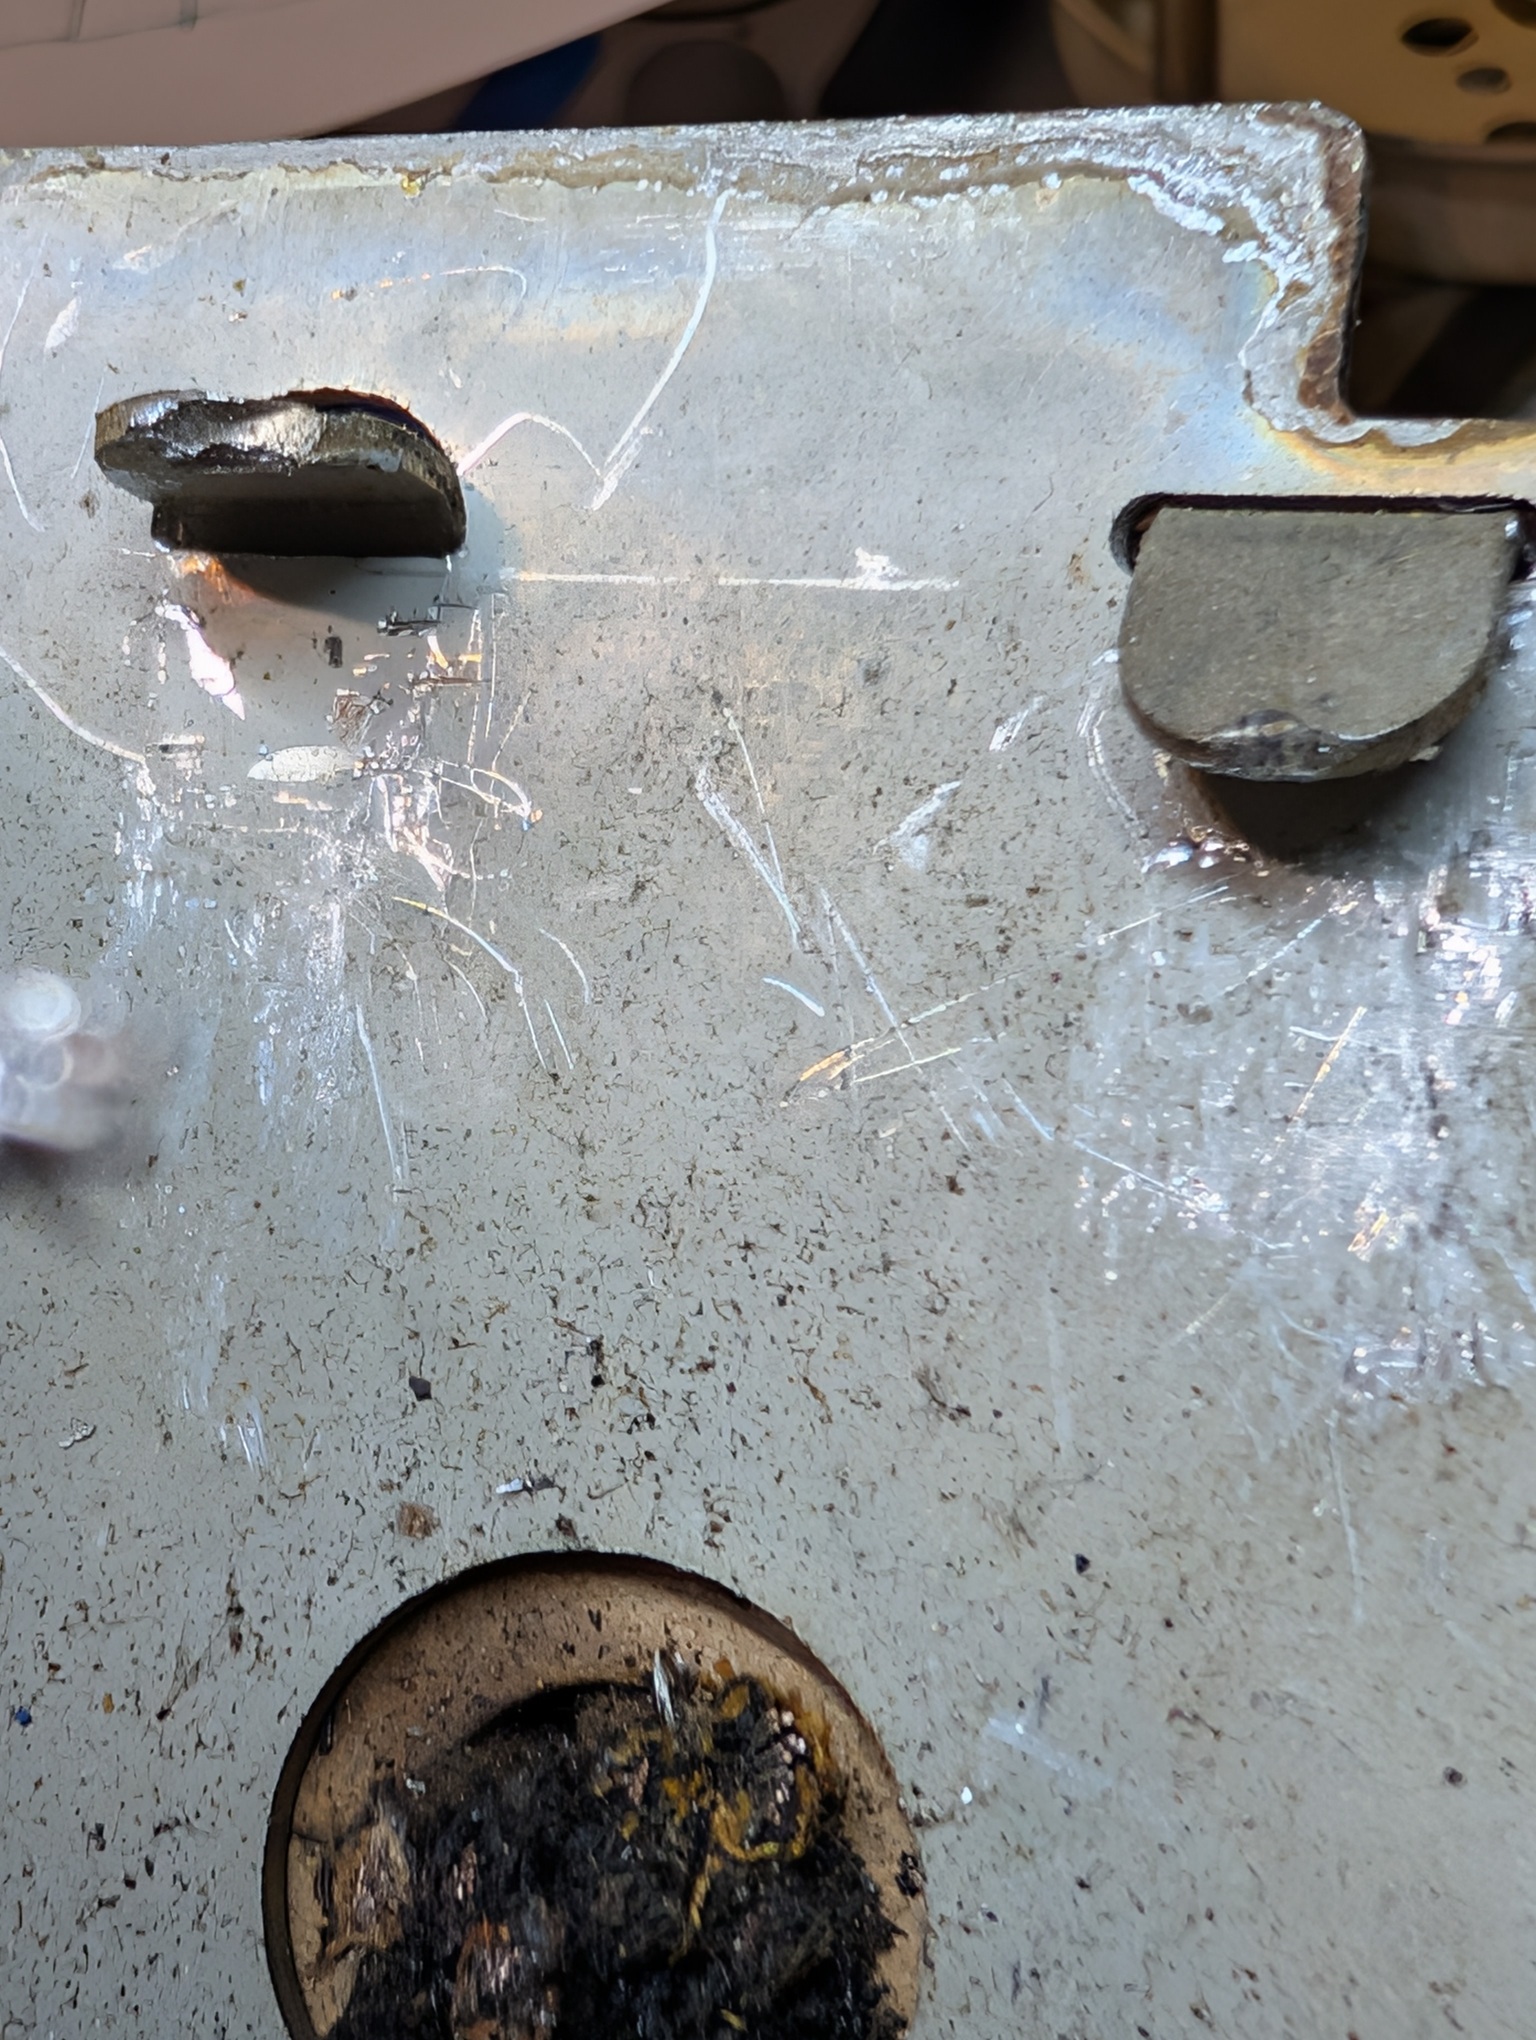
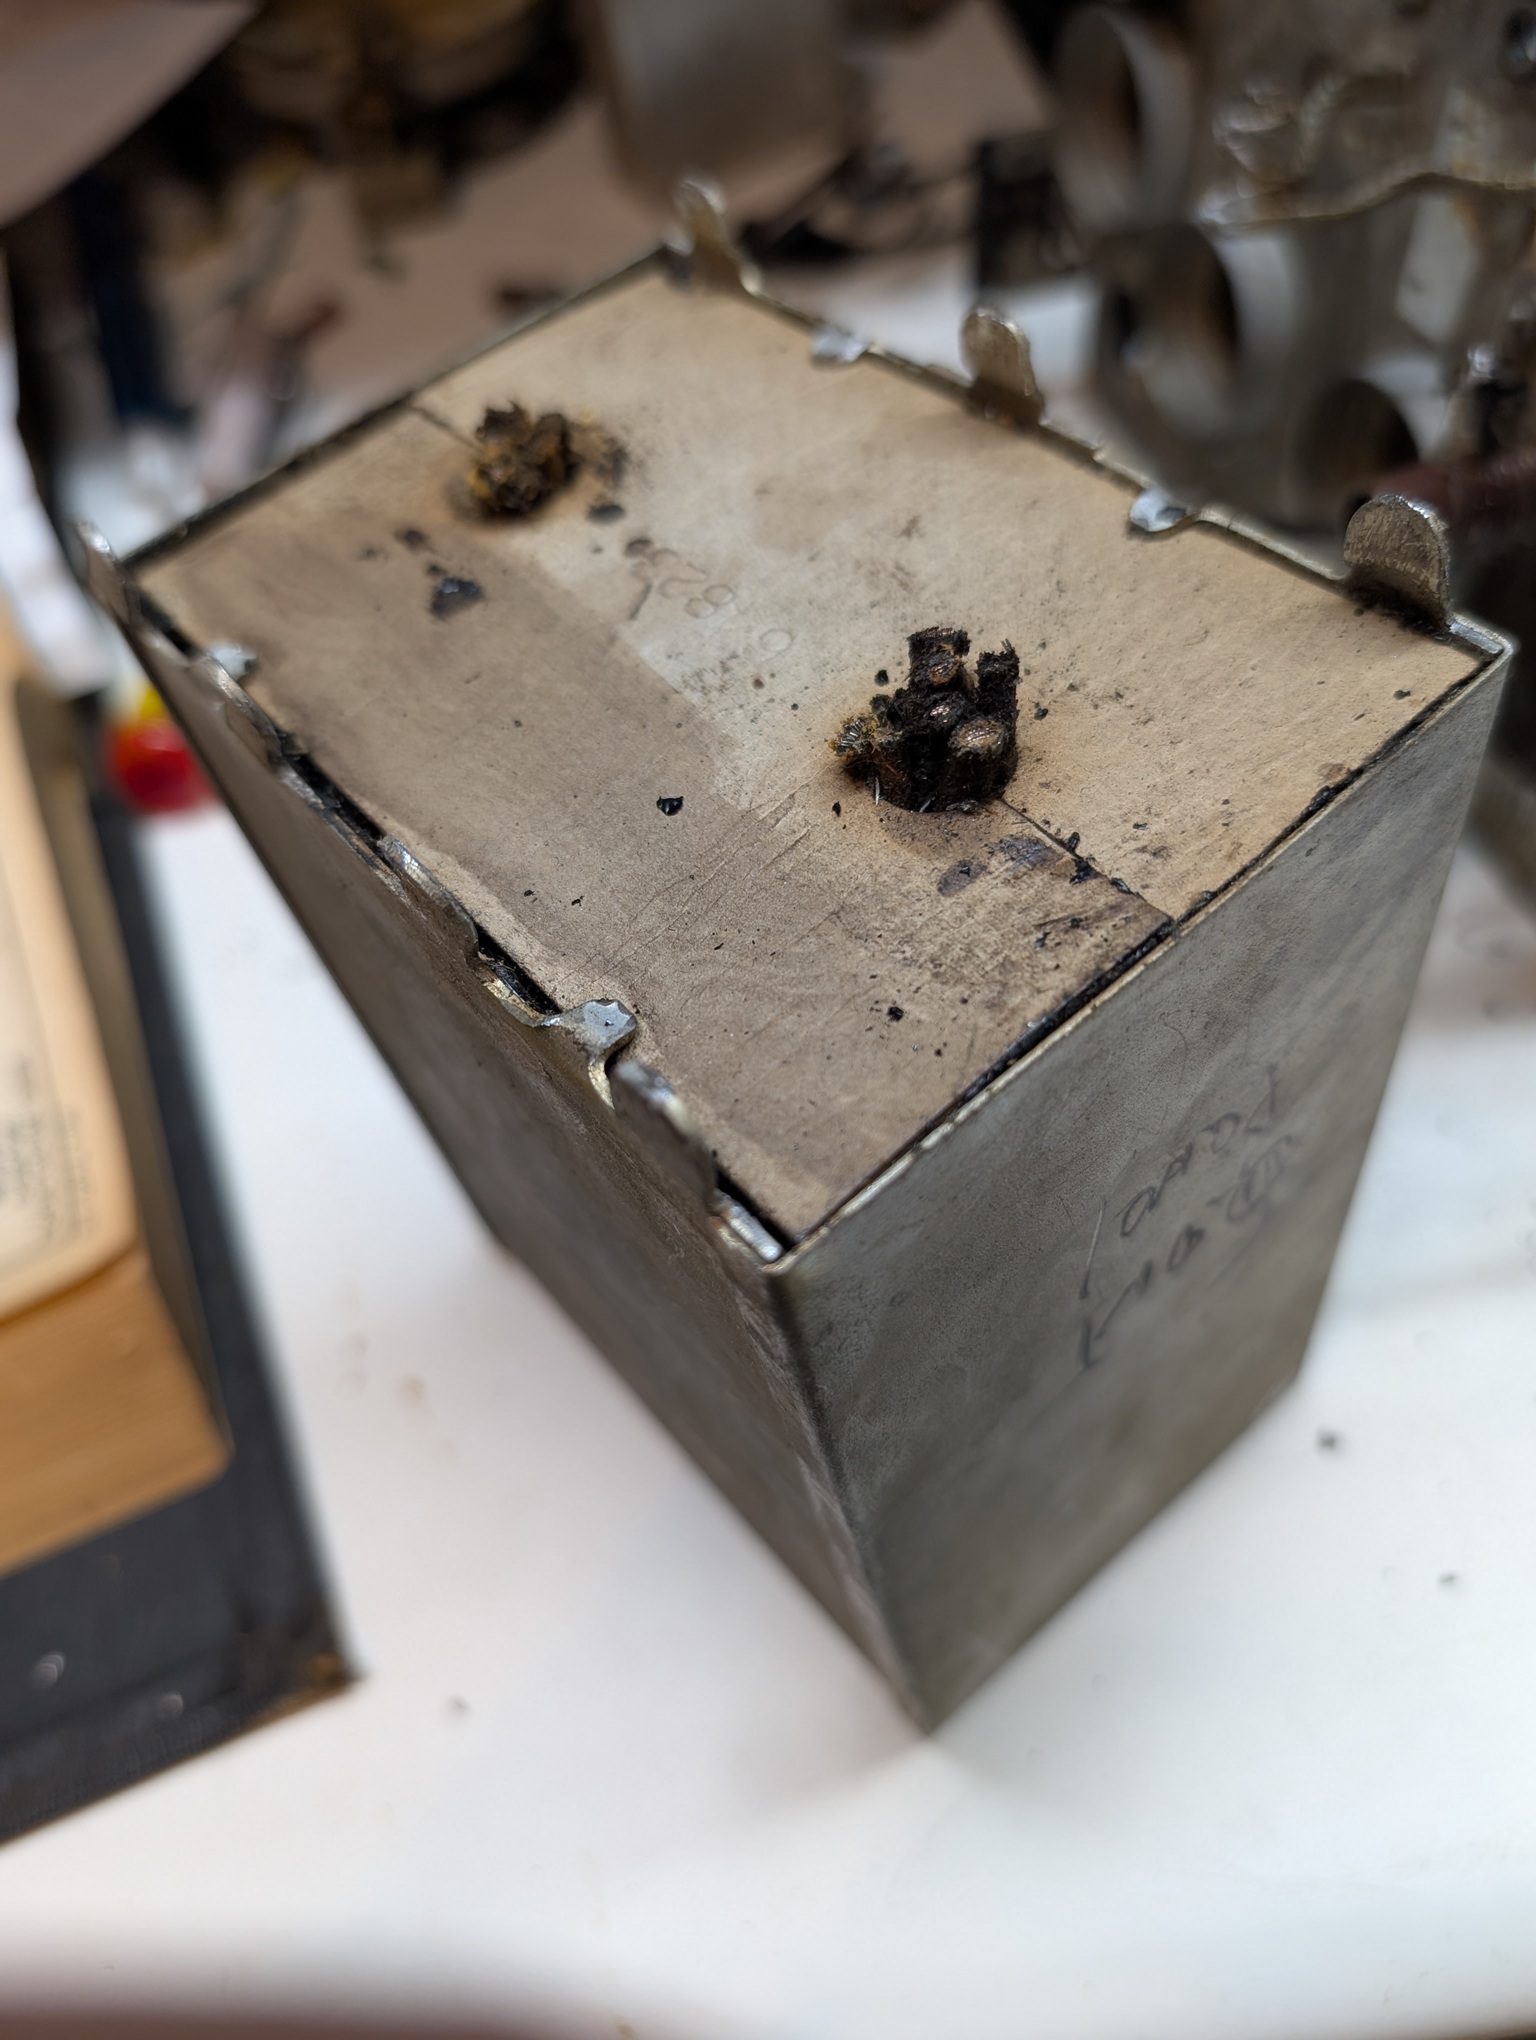
The big can is out:
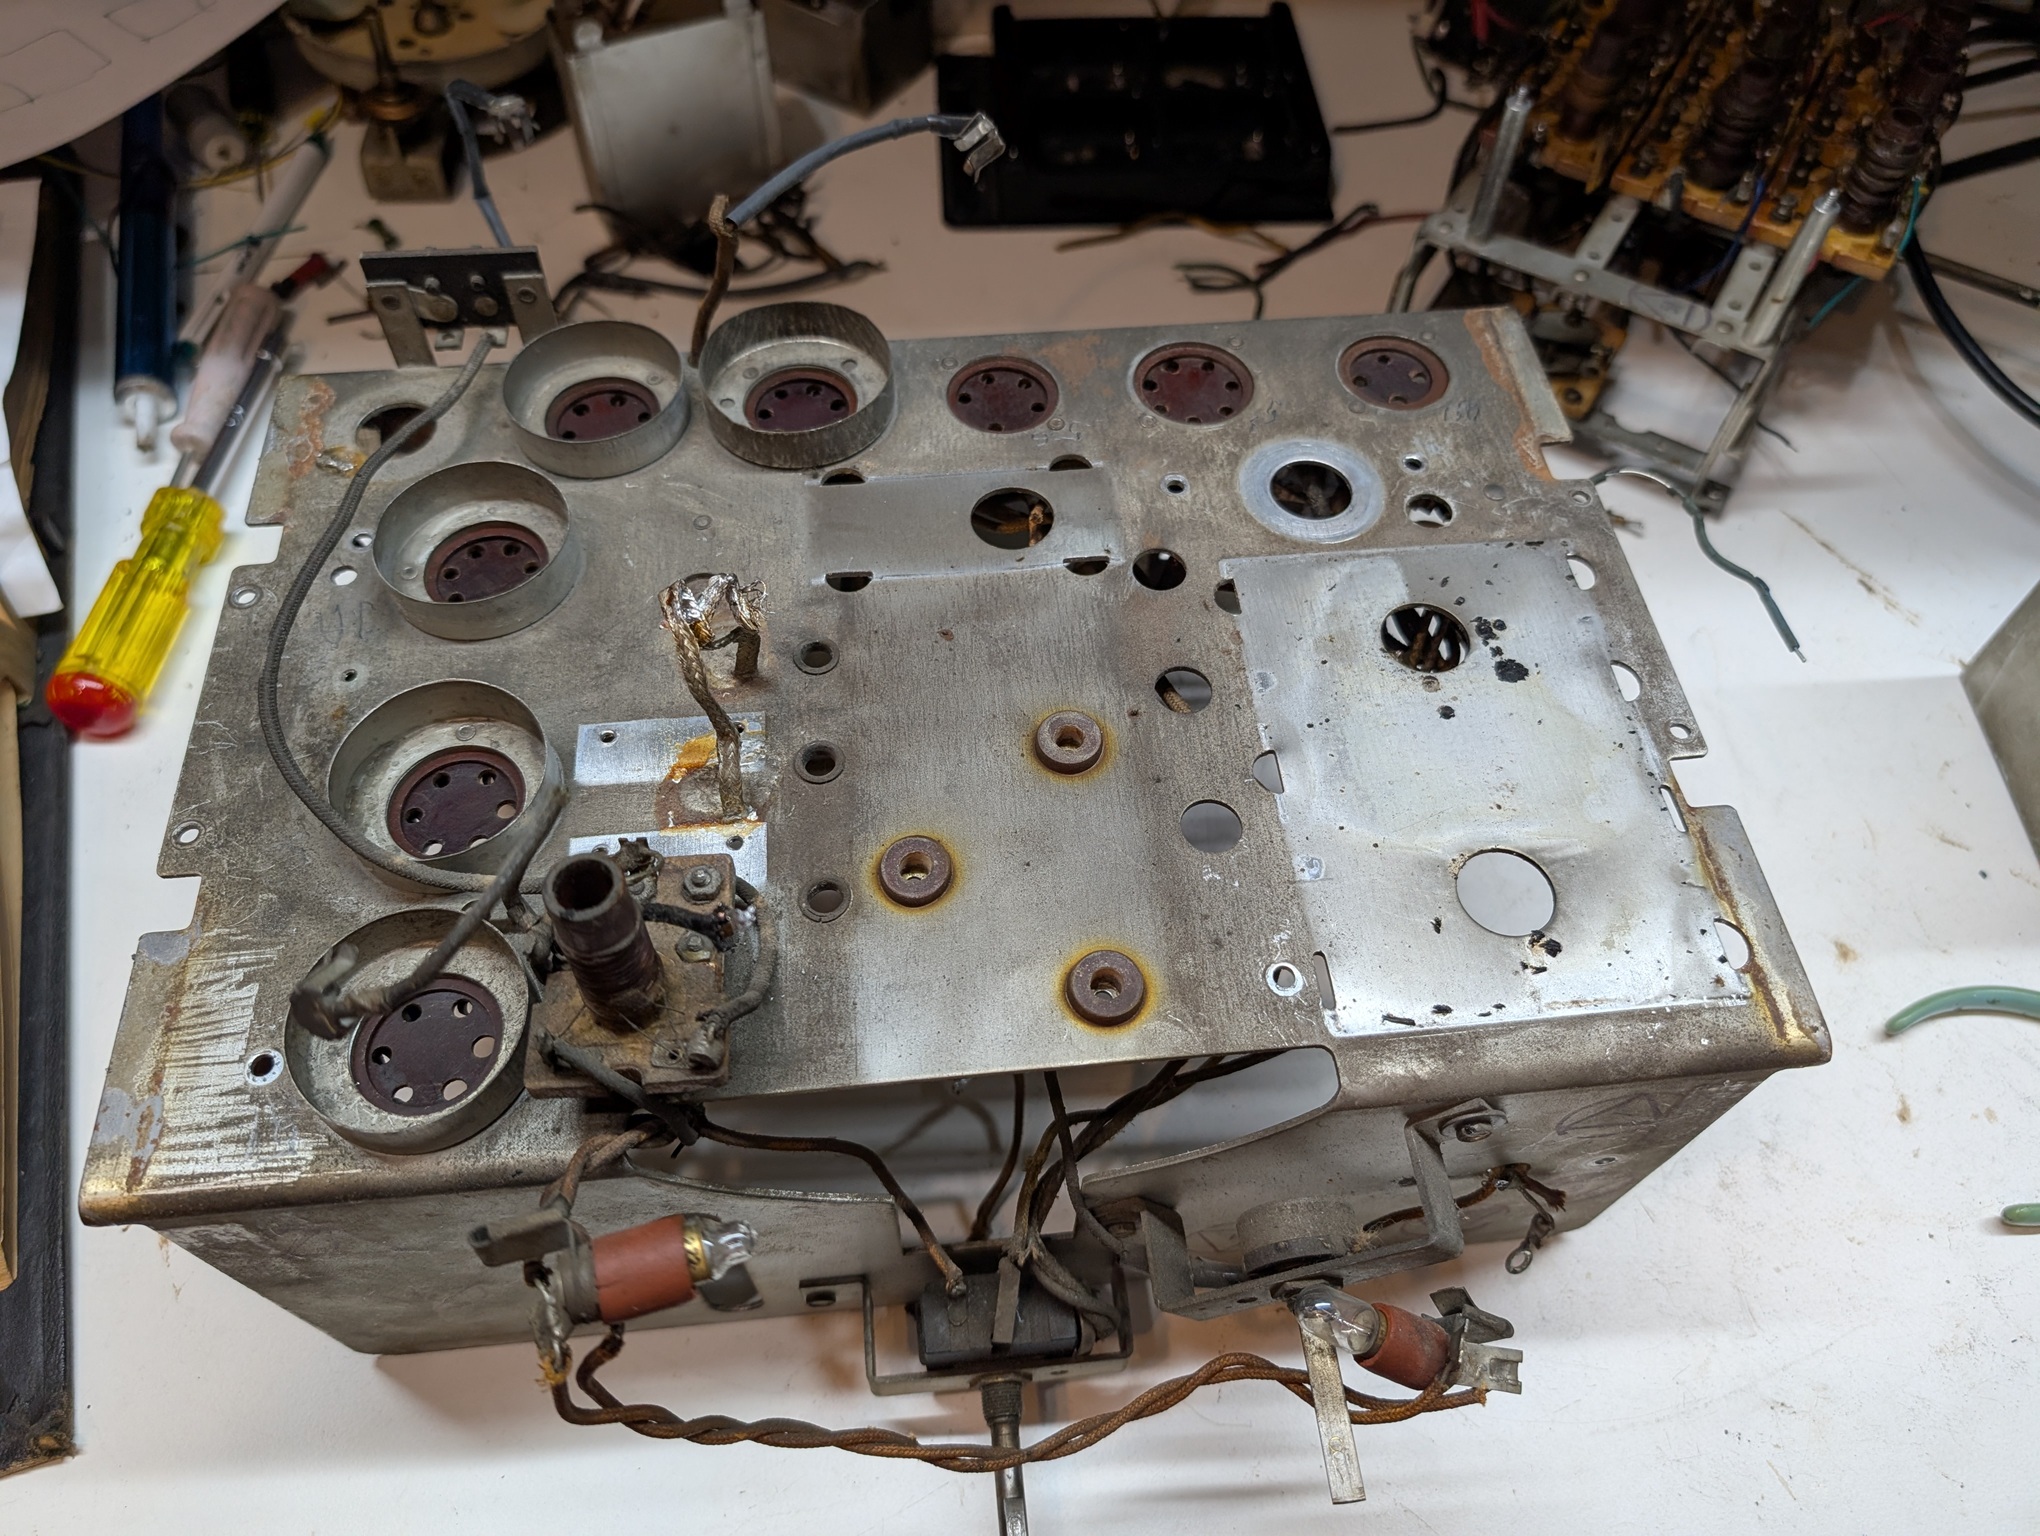
The chassis is ready for cleaning, now that I have very few things left on it:
The can weighs at least 8lbs. Heavy.
People who do not drink, do not smoke, do not eat red meat will one day feel really stupid lying there and dying from nothing.
Posts: 5,654
Threads: 56
Joined: Sep 2008
City: Sandwick, BC, CA
Mike;
Obviously the smaller can was intended to contain more then it did in this case, which caps was it used for in the model 140? There is a very similar can on the chassis of my C.G.E S-42A, so no doubt that once they had committed to manufacturing these metal boxes they wanted to get the most use they could out of them.
Regards
Arran
Users browsing this thread: 4 Guest(s)
|
|
Recent Posts
|
|
Stromberg Carlson 1500 Squeal
|
| And life just keeps getting more complicated. By dconant.
Dittos'Jimradio — 08:01 AM |
|
Plug Voltages Needed For A 1943 CRV-20130 Power Supply
|
| That looks a lot like an aircraft connector of some kind, even if it's a U.S.N power supply. I have a book somewhere abo...Arran — 02:56 AM |
|
Plug Voltages Needed For A 1943 CRV-20130 Power Supply
|
| hello david,
I have a similar generator in my collection that features a cast iron, single-cylinder Briggs & Stratt...radiorich — 01:00 AM |
|
under chassis parts locator diagram for 1938 Zenith 9s262
|
| Has anyone gone to the trouble of creating an under chassis parts locator image? Yes, I can identify components by foll...bobloney — 08:57 PM |
|
Plug Voltages Needed For A 1943 CRV-20130 Power Supply
|
| Try looking at this site the book mark is for a old generator that I was given. David https://radionerds.com/index.ph...David — 08:36 PM |
|
Plug Voltages Needed For A 1943 CRV-20130 Power Supply
|
| Hello Everyone,
I am looking for voltage identification for all the pin positions on the socket of a CRV-20130 power su...Tonym4704 — 08:16 PM |
|
Philco P45-6365 Universal Transformer Instruction Manual
|
| Can anyone guide me to where this may be found?GRG — 03:00 PM |
|
54C Complete Teardown/Rebuild
|
| I don't think that I have encountered a 12Z3 before, curious how it uses one of those but includes a #43, which is a 25 ...Arran — 02:17 PM |
|
HiFi (Chifi) tube amp build - but my own design.
|
| It's the other forum. I'm also in DIY, but mostly read there. Honestly, I kinda jumped into this without much thought to...TV MAN — 10:43 AM |
|
Philco 71 Code 125
|
| Hello,
I am in need of a schematic for this radio. Mine has the three separate circular tube shields and a shadow me...dconant — 08:06 AM |
|
Who's Online
|
| There are currently no members online. |

|
 
|







