Atwater Kent 55C-Kiel Table Redux
Posts: 5,584
Threads: 291
Joined: Nov 2012
City: Wilsonville
State, Province, Country: OR
On to the next adventure. On Facebook Marketplace I came across an AK 55C in a Kiel table that looked to be in reasonable shape and was being offered for free. Could not pass that up although I did give the fellow some cash as he is a fellow radio enthusiast and was primarily looking for a good home for it. It had been on Marketplace for a year when I saw it and messaged him. Just an hour before my message he had put the table on the curb marked "Free" and was going to bin the chassis. There's always a story with these things.
I have restored one of these before back in 2014 but felt it was a good project for summer (the cabinet) and winter (the chassis).
The chassis and speaker (voice coil 2 ohms and field coil 1048 ohms) were already out of the cabinet and the top of the cabinet and a small portion of the front door panel has been stripped already. The speaker does have some tears in the cone but those should repair easily.
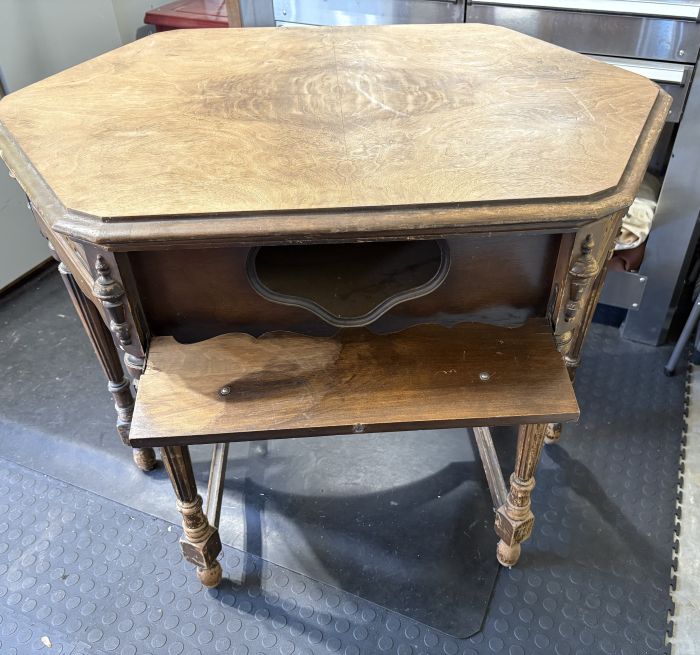
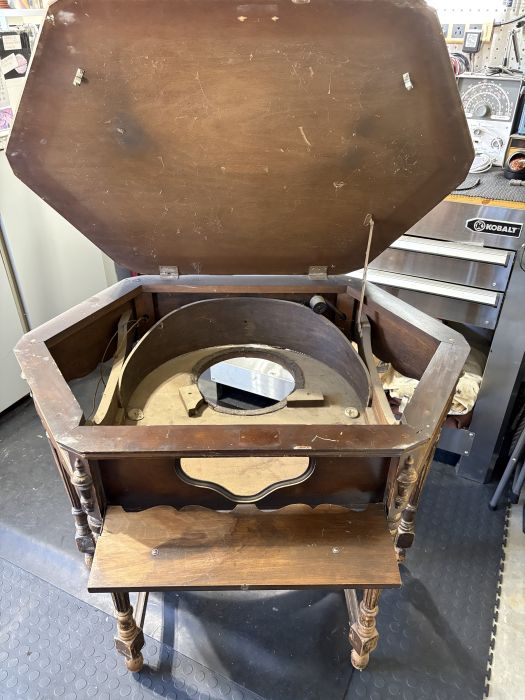
As I go through and clean the cabinet (vacuum and then a damp cloth with detergent and water) I'll look for obvious problems. You notice immediately that someone has removed the Atwater Kent metal plate that goes underneath the top and also the Kiel Table metal plate on the front top of the rim that the top closes onto. Most of the time the Kiel label is a decal but I think some of the early tables had a rectangular metal plate. The RadioMuseum has a photo of one of the tables with a metal plate although you can't read it.
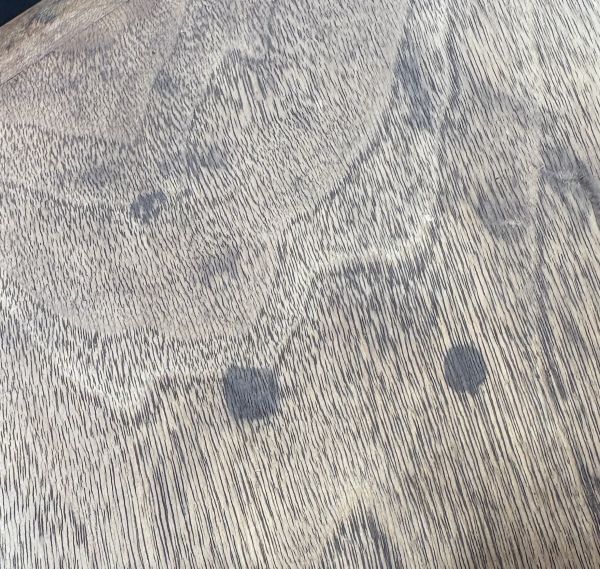
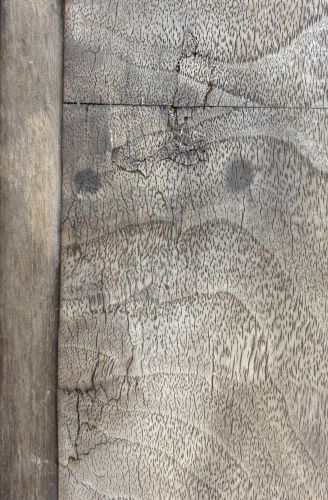
The top I think will come up nicely although there are some nasty spots on it that may not come out. I can not tell if they are ink or stain.
The base that the chassis sits on needs some regluing and reinforcement.
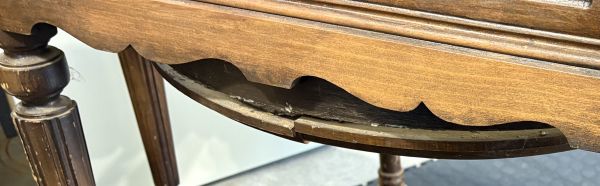
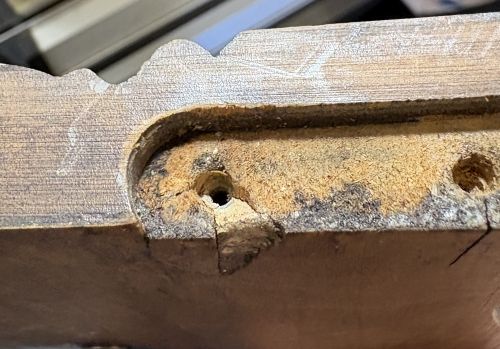
and the front panel door has an old repair for a split out screw that I think will need to be redone.
I've started taking the table apart so I can better clean and strip it but that's as far as I got today. More later...
Posts: 5,584
Threads: 291
Joined: Nov 2012
City: Wilsonville
State, Province, Country: OR
Just a bit of cleaning today but I do have a pdf file with an image of the mail-in Warranty hang tag card for the AK55C that was on the power cord and is the same serial number as the chassis. To bad the original owner did not add their name and dealer. That would have made the story even better! I guess its out of warranty though...
Posts: 18,427
Threads: 622
Joined: Oct 2011
City: Jackson
State, Province, Country: NJ
Those can be made real nice.
People who do not drink, do not smoke, do not eat red meat will one day feel really stupid lying there and dying from nothing.
Posts: 5,584
Threads: 291
Joined: Nov 2012
City: Wilsonville
State, Province, Country: OR
The glue up of the base that the chassis sits on went pretty well. This is a real weak spot in these Kiel Tables. The first one I restored had a similar problem. The weight of the chassis is a bit much for the way it is stuctured. Rather than wood glue I used epoxy for a bit stronger bond plus I did not have a good tight wood to wood surface to glue. Turns out that the large curved flat piece of wood that the base connects to was also missing a screw that connected it to the side of the table, a pretty important structural support component.
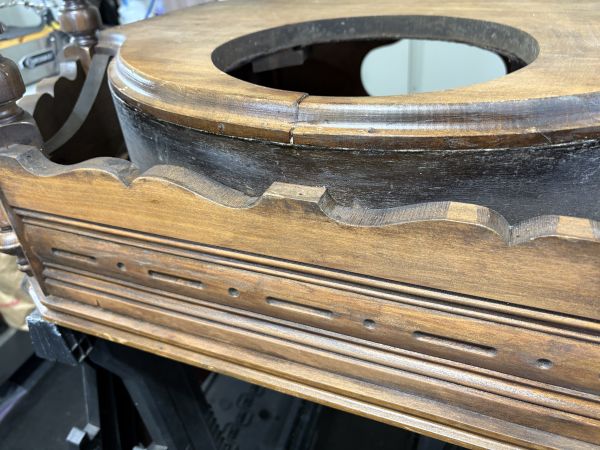
I'll be looking at replacing the spring friction catches on the table top. One was missing completely including the glue block inside the cabinet that the bottom half fastened to. The other had a loose glue block. I didn't think I would find replacements but I did get pretty close:
Original:
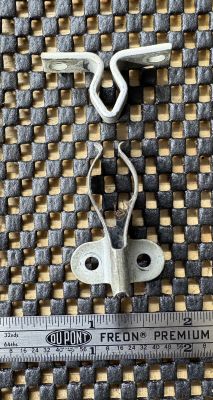
Replacements, from Kennedyhardware.com :
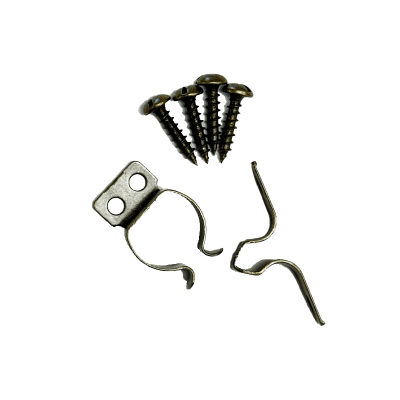
Next will be deciding what to strip. The legs definitely need it as the finish is flaking off. The sides of the table seem to be in decent shape but we'll see how it holds up to a light sand.
Posts: 5,654
Threads: 56
Joined: Sep 2008
City: Sandwick, BC, CA
Bob;
Have you had a look in the Lee Valley hardware catalog too? That original looks a lot like the catches they used to use inside kitchen cabinet doors, with those they sometimes used a round headed screw for the claw part to grab onto.
Regards
Arran
Posts: 5,584
Threads: 291
Joined: Nov 2012
City: Wilsonville
State, Province, Country: OR
No, I had not looked there Arran, thanks for the suggestion. After a look, it seems they don't quite have what I'm looking for. I did go ahead and order a set from Kennedy Hardware.
Posts: 5,654
Threads: 56
Joined: Sep 2008
City: Sandwick, BC, CA
Bob;
I don't know if the online catalog is the same as the print ones for Lee Valley but I can recall that someone (May have been Ron Ramirez) found a close facsimile to the door pulls on a 37-690 on there. Unlike the tools they sell they are not "Boutique" priced, and you can buy in bulk. There are also some outfits that advertise in old house magazines, but I've never looked into them, the ads feature door hardware for house doors, and windows, so I don't know if they deal in the small stuff like a cabinet would use.
By the way, did all of these "Kiel Tables" come with the same chassis or did A.K mix it up like they did with other models? I've never owned an AC powered A.K, though I did see one of their steel box models for sale, I think it was one of the model 40 series with the safe knob. I would guess that they were like FADA where they did sell in Canada in the 1920s, but then closed up their Canadian division after the stock market crash. Unlike Majestic they were not partnered with a Canadian company that kept the brand alive.
Regards
Arran
Posts: 5,584
Threads: 291
Joined: Nov 2012
City: Wilsonville
State, Province, Country: OR
I know they also put the Atwater Kent 60C in those Kiel Tables. After searching around a bit, the only other radio that I think might have been put into the Kiel Table is a model 74 chassis. Only one reference that I found regarding this was: https://antiqueradios.com/forums/viewtopic.php?t=246893
Further down in that thread someone mentions that the Model 66 was also put into the Kiel Tables.
Good to know that Lee Valley is there if I need other hardware for another project.
Posts: 5,654
Threads: 56
Joined: Sep 2008
City: Sandwick, BC, CA
Bob;
Those black stains are likely iron stains, rather then ink, they seem to show up on walnut, solid or veneer, caused by water from a potted plant, vase, or who knows? I've heard of some using wood bleach to fade them but I found that phosphoric acid may also work, wood bleach is often oxalic acid anyhow. Regarding that split in the base near the edge of the speaker opening, would it be possible to put a dowel through it? I was going to also suggest using a wood biscuit but that board would have to be split apart to do that.
This style of "cabinet" must have been fairly popular among A.K models as they seem to come up more often then other alternative floor model cabinets, other then maybe a Philco 70/71 chairside, I don't know about the Brand Z models but they tend to be somewhat rare among most makes. There is a CGE one that seems to pop up in my area from time to time, but the chassis they chose for it was a bit of a letdown, one of those typical 1937-38 models pulling the 6H6 + 6F5/6J5 tube stiffing "scam" rather then using a triode-double diode, and it has the wrong knobs on it.
Regards
Arran
Posts: 5,584
Threads: 291
Joined: Nov 2012
City: Wilsonville
State, Province, Country: OR
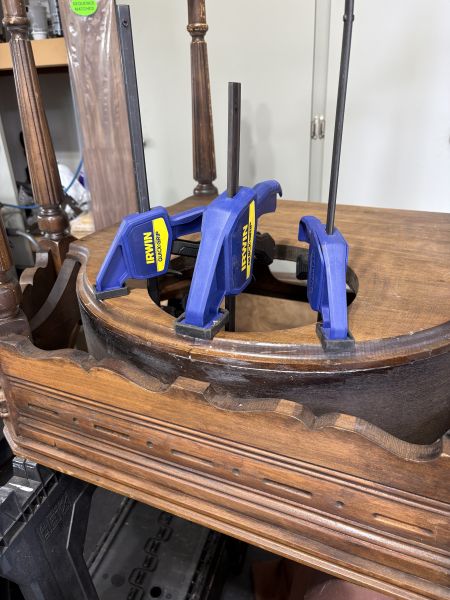
I think I got the split near the speaker back together pretty well with the clamps and glue. The missing screw I mentioned was, I believe, a significant problem that caused the base to sag under the weight of the chassis. Should be much better now. I may even add another screw just for added strength.
Posts: 5,584
Threads: 291
Joined: Nov 2012
City: Wilsonville
State, Province, Country: OR
Started working on the tabletop to try and eliminate those spots. I gave a slurry of baking soda with light brushing with a toothbrush a try to see if it would help. That's the recommended approach for ink stains. The backup is to try a bit of alcohol on a swab. Neither of those did much of anything. My tub of oxalic acid came out. A solution (the concentration of which varies depending on who you listen to, but I put about 4 tablespoons into about 200 mls. Worked the solution into the spots a little with a toothbrush and then wiped the entire top with the solution. You need to wear rubber gloves and avoid inhaling the crystal dust (wear a mask). I then let it all dry, neutralized it with a solution of baking soda, rinsed with water and let it all dry. For the most part the spots came out which means Arran was right, probably iron deposits.
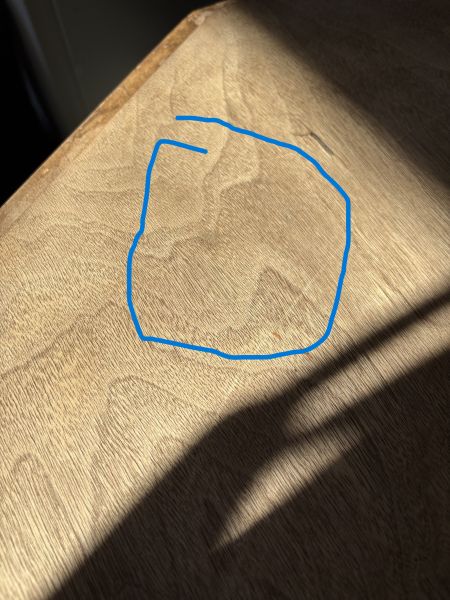
Next I tackled some of the lifting veneer around the edges of the table top.
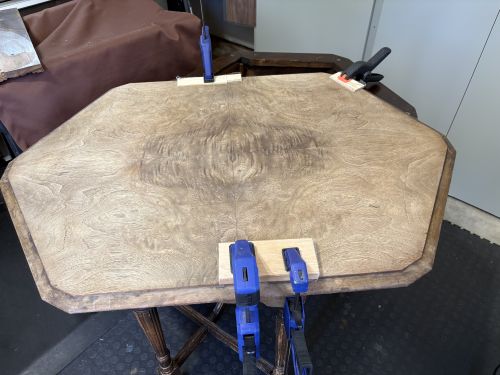
The top two glue ups worked just fine but for the bottom one...as Chuck Schwark was fond of saying...

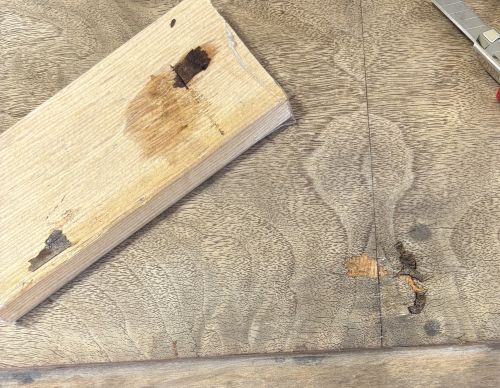
When I put the caul down for the glue up, I put the wood side down on the table rather than the side with the packing tape on it (packing tape will not stick to the glue). So I now have a piece of wood glued to my table top!
*&*(^%%%$!! darn it.
I heated up the caul and underside of the tabletop and tapped the side of the caul with a hammer. It did come off but it took some of the veneer with it. In this picture I've gotten some of the pieces unglued from the caul using water (I had thankfully used hide glue to do the glue up) and am starting to put them into position. Its very "fiddly" as they say in the UK as the small pieces move all over the place as you try to get them to fit. I've finally gotten them into place and put the caul back on ... correct side down this time... and we'll see how it looks tomorrow. You can also see two of the spots I was trying to bleach that did not respond as well as the others...
Posts: 711
Threads: 46
Joined: Sep 2009
City: Lapeer, MI
State, Province, Country: USA
Bill the cat!! My all-time favorite. Bob, A fine job thus far. Keep 'em coming. Joe
Courage will follow when Faith takes the lead.
Posts: 1,797
Threads: 55
Joined: Feb 2015
City: Roseville, MN
Posts: 5,584
Threads: 291
Joined: Nov 2012
City: Wilsonville
State, Province, Country: OR
yes...a real bone head mistake on my part!
Any way... it has gone back together pretty well. I'd say about 95% all back in place and glued down. After toning and clear coat I think it should look OK.
Posts: 5,654
Threads: 56
Joined: Sep 2008
City: Sandwick, BC, CA
Bob;
One trick I used to use whilst gluing down veneer was to wrap the wooden block with saran warp or a plastic bag, like an old bread bag, but I was also using yellow glue so I'm not sure if hide glue will stick to the plastic or not. The excess glue would come off with warm water and either a stiff brush, or one of those nylon scrubbing pads.
Regards
Arran
Users browsing this thread: 1 Guest(s)
|
|
Recent Posts
|
|
Stromberg Carlson 1500 Squeal
|
| And life just keeps getting more complicated. By dconant.
Dittos'Jimradio — 08:01 AM |
|
Plug Voltages Needed For A 1943 CRV-20130 Power Supply
|
| That looks a lot like an aircraft connector of some kind, even if it's a U.S.N power supply. I have a book somewhere abo...Arran — 02:56 AM |
|
Plug Voltages Needed For A 1943 CRV-20130 Power Supply
|
| hello david,
I have a similar generator in my collection that features a cast iron, single-cylinder Briggs & Stratt...radiorich — 01:00 AM |
|
under chassis parts locator diagram for 1938 Zenith 9s262
|
| Has anyone gone to the trouble of creating an under chassis parts locator image? Yes, I can identify components by foll...bobloney — 08:57 PM |
|
Plug Voltages Needed For A 1943 CRV-20130 Power Supply
|
| Try looking at this site the book mark is for a old generator that I was given. David https://radionerds.com/index.ph...David — 08:36 PM |
|
Plug Voltages Needed For A 1943 CRV-20130 Power Supply
|
| Hello Everyone,
I am looking for voltage identification for all the pin positions on the socket of a CRV-20130 power su...Tonym4704 — 08:16 PM |
|
Philco P45-6365 Universal Transformer Instruction Manual
|
| Can anyone guide me to where this may be found?GRG — 03:00 PM |
|
54C Complete Teardown/Rebuild
|
| I don't think that I have encountered a 12Z3 before, curious how it uses one of those but includes a #43, which is a 25 ...Arran — 02:17 PM |
|
HiFi (Chifi) tube amp build - but my own design.
|
| It's the other forum. I'm also in DIY, but mostly read there. Honestly, I kinda jumped into this without much thought to...TV MAN — 10:43 AM |
|
Philco 71 Code 125
|
| Hello,
I am in need of a schematic for this radio. Mine has the three separate circular tube shields and a shadow me...dconant — 08:06 AM |
|
Who's Online
|
There are currently 1815 online users. [Complete List]
» 1 Member(s) | 1814 Guest(s)
|
|
|

|
 
|