Restoring my 37-116. It plays now!
Posts: 13,776
Threads: 580
Joined: Sep 2005
City: Ferdinand
State, Province, Country: Indiana
I've never seen a 37-116 that had any sort of wood blocks on the side of the chassis...and I've had a few 37-116 sets pass through my hands.
These originally used four special "J" bolts to hold the chassis in place for shipment to the dealer, and ultimately to the original purchaser. These "J" bolts hooked over the studs which stick out on the sides of the chassis, and then passed through holes in the wooden supports under the chassis. The "J" bolts were supposed to be removed by the dealer when the radio was delivered to the original purchaser. Most were, and most were tossed afterwards. But I once owned a 37-116 that was in very poor shape...that still had the "J" bolts holding the chassis in place. I kept the bolts, they are around here someplace.
You now know, Morzh, that two of the control shafts do indeed take one (each) of those rubber spacers.
--
Ron Ramirez
Ferdinand IN
Posts: 1,470
Threads: 97
Joined: Jul 2012
City: Poughkeepsie, N.Y.
Morzh, Send us some pictures of your 37-116 radio. Keep us up to date on its progress that way...We are all looking foward to seeing the pictures. Especially as to all of us have the 38-116 console appose to the 37-116. Thanks!
Posts: 7,305
Threads: 270
Joined: Dec 2009
City: Roslyn Pa
Mike, Mike, Mike, Mike, Mike!
What day is it??
It's the day you will see how the chassis is mounted!!
(Sorry had to do it!) http://www.flickr.com/photos/53710524@N06/9680804517/
Here's some pics of a 37-116 /121 with the wooden braces on and the inside of the cabinet. Your set is a code 122 but they the same. This is where the extra pieces go. I couldn't put my hands on the long screws that go from the wooden side pieces down though the cabinet. As you can see there are some rubber washers mounted in the cabinet along the front and rear edges. The long screws also have these washers too.
I made up a pair of mounts for the other 37-116 I've got. It's easy just need a drill and hand saw.
Hope this brings it in to focus. As for the J bolts I've never seen them but I'm no expert and have only seen 4 or five of these sets. Some had no mounting but center rear screw and others had the wooden braces.
Terry
(This post was last modified: 09-05-2013, 09:04 PM by Radioroslyn.)
Posts: 16,562
Threads: 573
Joined: Oct 2011
City: Jackson
State, Province, Country: NJ
Ron, Terry, thanks for replies.
John, will post pics (I think I posted what I could so far).
Terry, before I look at the photos: I think Ron's theory is corroborated (no wooden blocks) because I have just finished speaking to a guy whose name is John Goller (he is in Indiana) and who was recommended to me by name by Ed Shultz, the owner of the "Renovated Radios". John has just finished restoring 37-116 and has done many of them, and he says that the wooden blocks are not used on 37-117 - they are used on those with tilted front panels (690 and such).
According to John the chassis is held by one single bolt in the center of the back of the chassis and the rest is the weight and the hub of the dial mechanism.
So at least I think I don't have to worry about the missing blocks.
And a question:
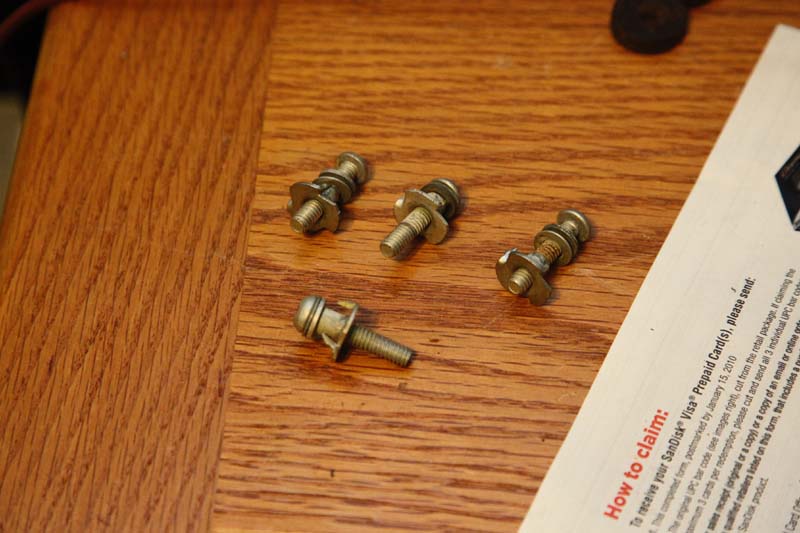
Ron, Are these by any chance the "J-bolts" you've mentioned?
I have these in the bag of goodies that came with the radio. Here's the photo.
Posts: 16,562
Threads: 573
Joined: Oct 2011
City: Jackson
State, Province, Country: NJ
Terry
Thanks for the pics, very helpful.
Now after I looked at them I have an impression that those are the shipping contraptions Ron referred to and the bolts I have are from them, but this is probably why most folks do not see them - they had been tossed.
So maybe even though those can be used to hold the chassis they would be discarded in most cases.
What do you think?
Posts: 16,562
Threads: 573
Joined: Oct 2011
City: Jackson
State, Province, Country: NJ
Posts: 7,305
Threads: 270
Joined: Dec 2009
City: Roslyn Pa
I think you are right. Also if chassis weight rest on the dial hub you wouldn't be able to use the auto part of the dial! Resting the chassis on wood and rubber would seem to be the better option than using small clamp to mount it in terms of microphonics
Terry.
Posts: 16,562
Threads: 573
Joined: Oct 2011
City: Jackson
State, Province, Country: NJ
Yes resting on the dial is not a good idea, with the dial not working, let alone the fact that the metal is pretty thin on both the hub and the escutcheon and considering a very heavy chassis they would bend each other - John probably meant the fact that if you tilt the radio side to side or backwards, the fact that the dial protrudes through the hole of a close diameter will not let the chassis fall out which it would do otherwise being heavy and held by a single (and not that thick) screw at the back (the leverage is hyoooooge!).
And yes - the wood does not help the microphonics and will in fact defeat any dampening action of the rubber washers, so those got to be shipping fixtures.
Posts: 1,470
Threads: 97
Joined: Jul 2012
City: Poughkeepsie, N.Y.
Morzh..Thaks for the pics and good luck with the radio it will be a great console when you get it finished. I love to listen to my 38-116 at night!
Posts: 16,562
Threads: 573
Joined: Oct 2011
City: Jackson
State, Province, Country: NJ
John
BTW speaking of "all of us having 38-116" - no, quite a few people here recent'y posted of working on 37-116.
This is why I was hoping to get many replies, but I guess many folks are on vacation now or something....
But I think at least 2 other people here have 37-116.
Posts: 7,305
Threads: 270
Joined: Dec 2009
City: Roslyn Pa
Those things you have a pic on post 124 are called T nuts. Most used in furniture construction. Never have seen any in radio cabinets.
Terry
I know of four 37-116's
(This post was last modified: 09-06-2013, 08:21 PM by Radioroslyn.)
Posts: 16,562
Threads: 573
Joined: Oct 2011
City: Jackson
State, Province, Country: NJ
Terry
Got'em with this one. Not sure what they are and why....but they were there in the bag.
Posts: 13,776
Threads: 580
Joined: Sep 2005
City: Ferdinand
State, Province, Country: Indiana
morzh Wrote:Ron, Are these by any chance the "J-bolts" you've mentioned?
Nope, not even close. Someone added those things later.
If I get some time soon, I'll look for a photo I have around here someplace of a J-bolt from a 37-116.
--
Ron Ramirez
Ferdinand IN
Posts: 16,562
Threads: 573
Joined: Oct 2011
City: Jackson
State, Province, Country: NJ
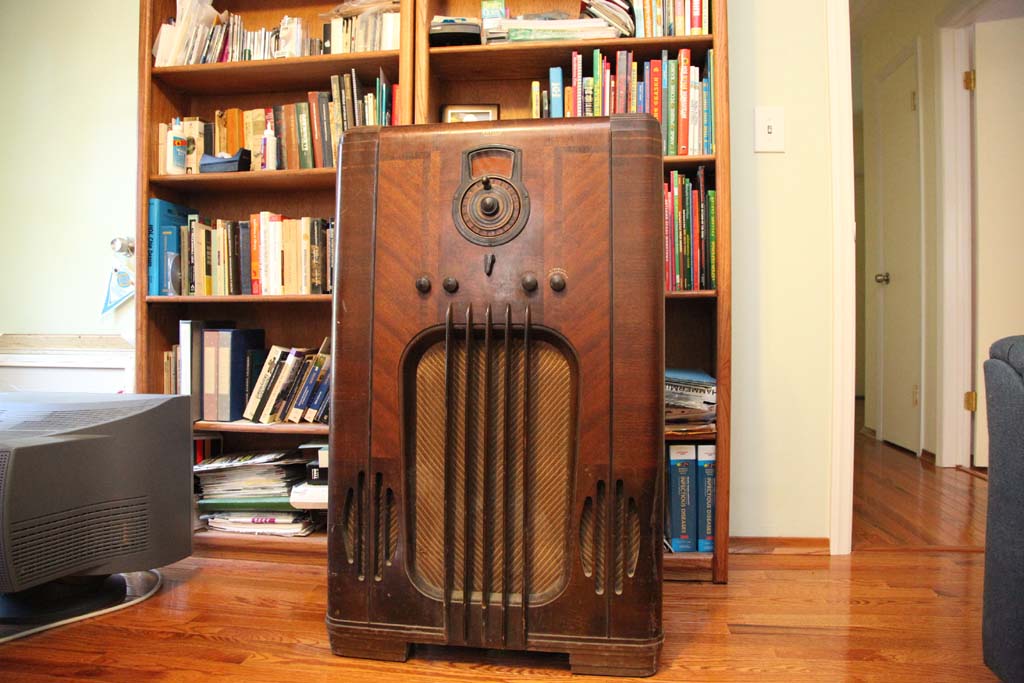
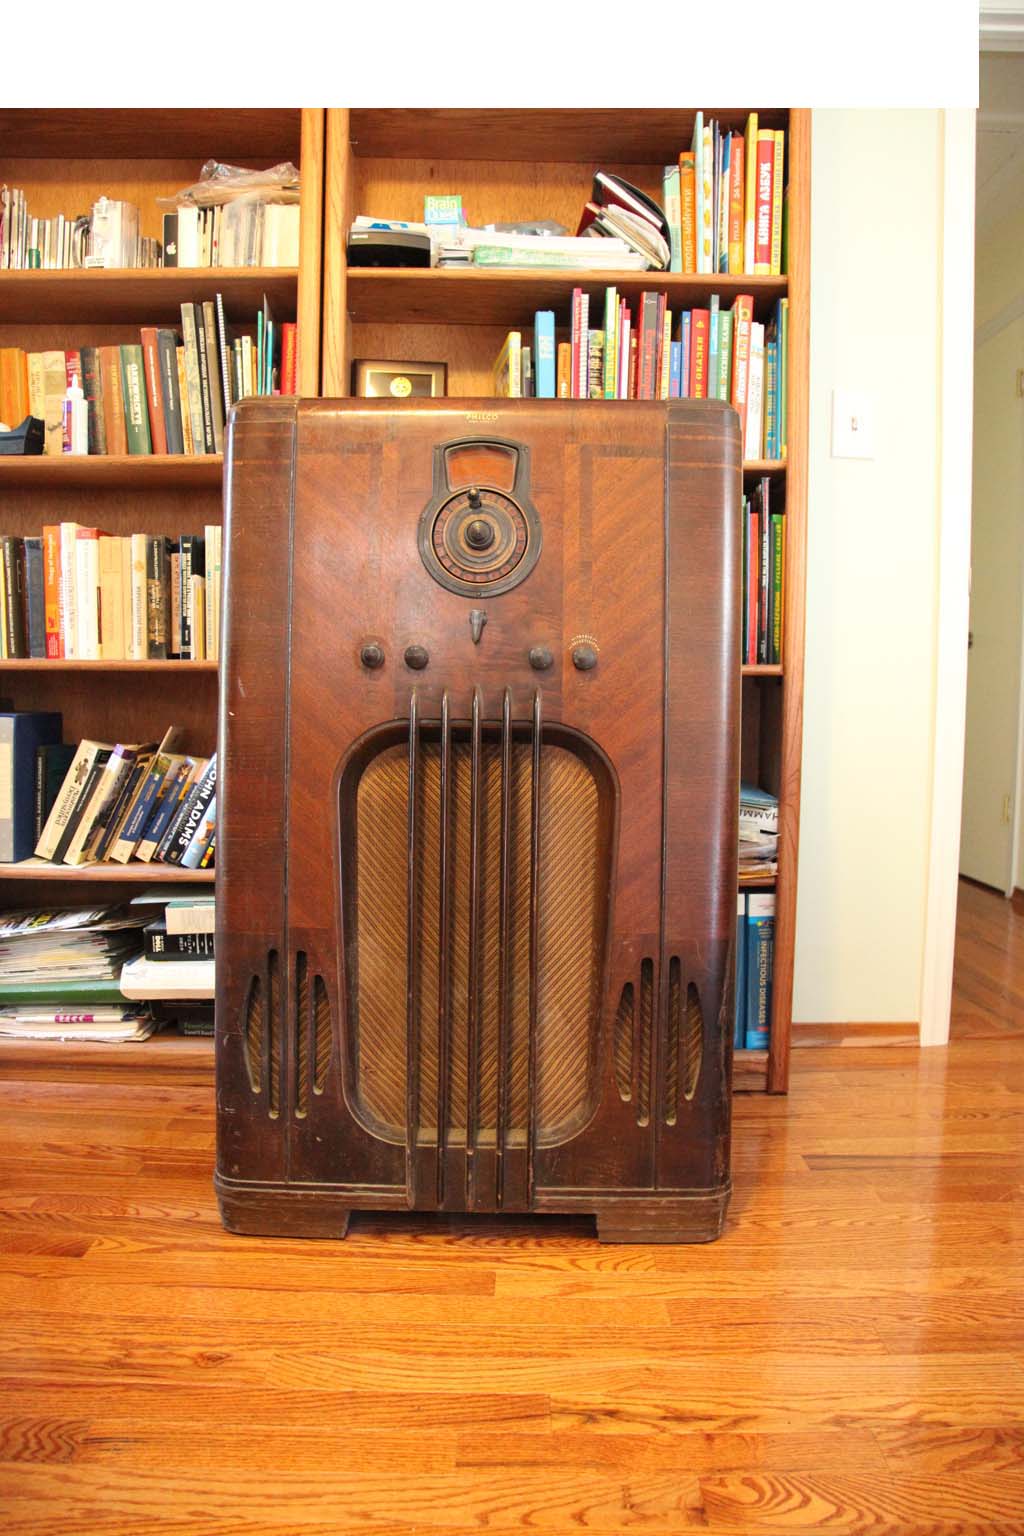
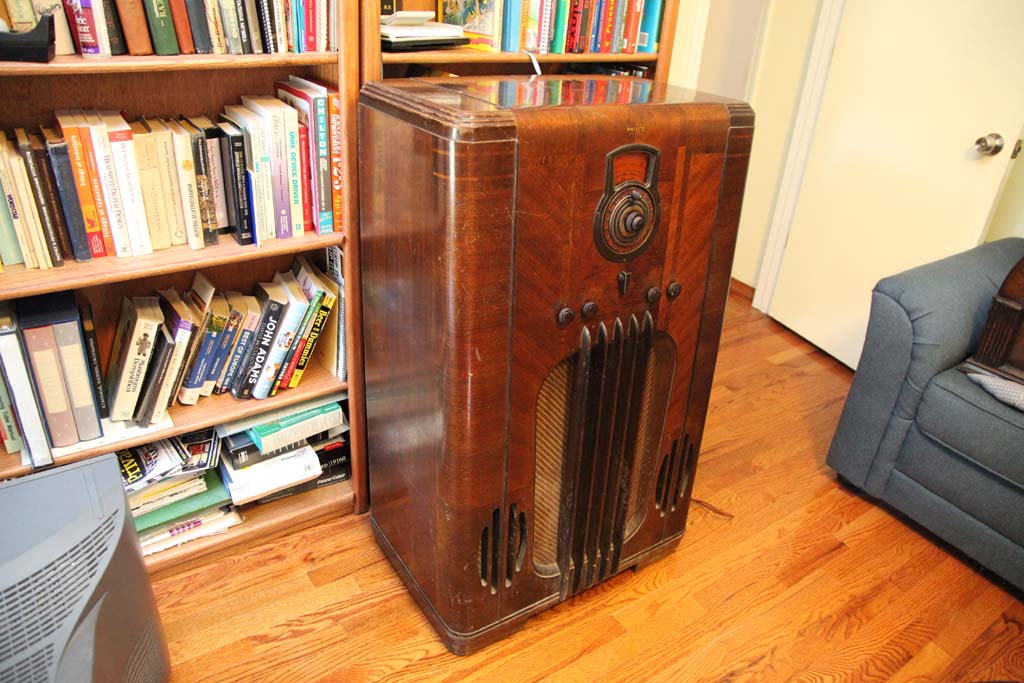
Well, I bought some felt furniture pads, stacked them in two and placed under the chassis.
Then using razor blade I trimmed the height of those so the hub of the autodial would go in the middle.
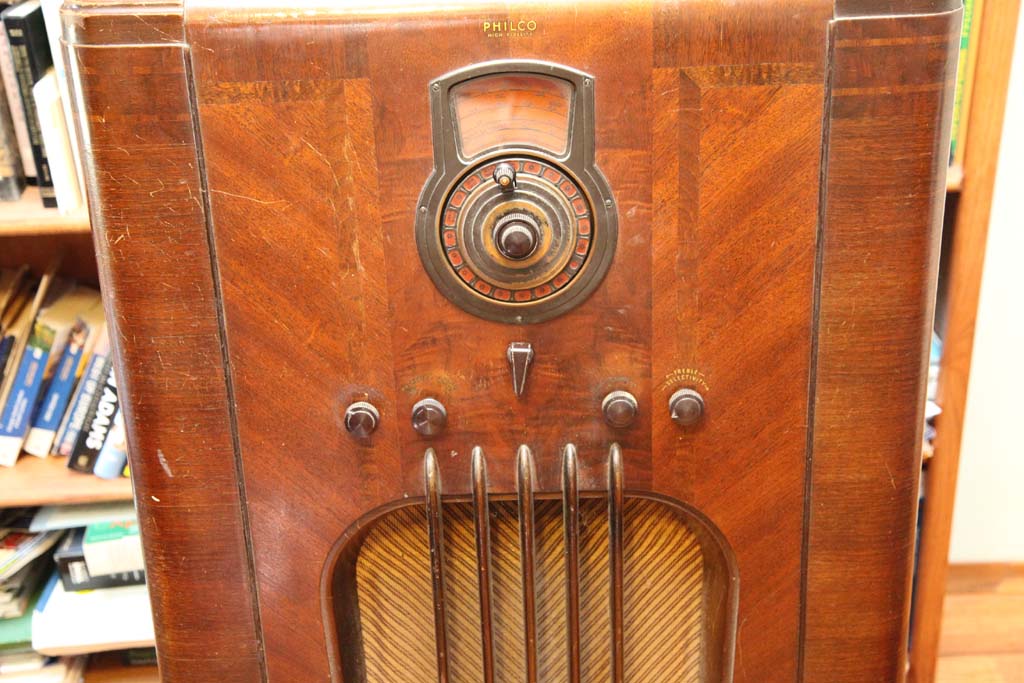
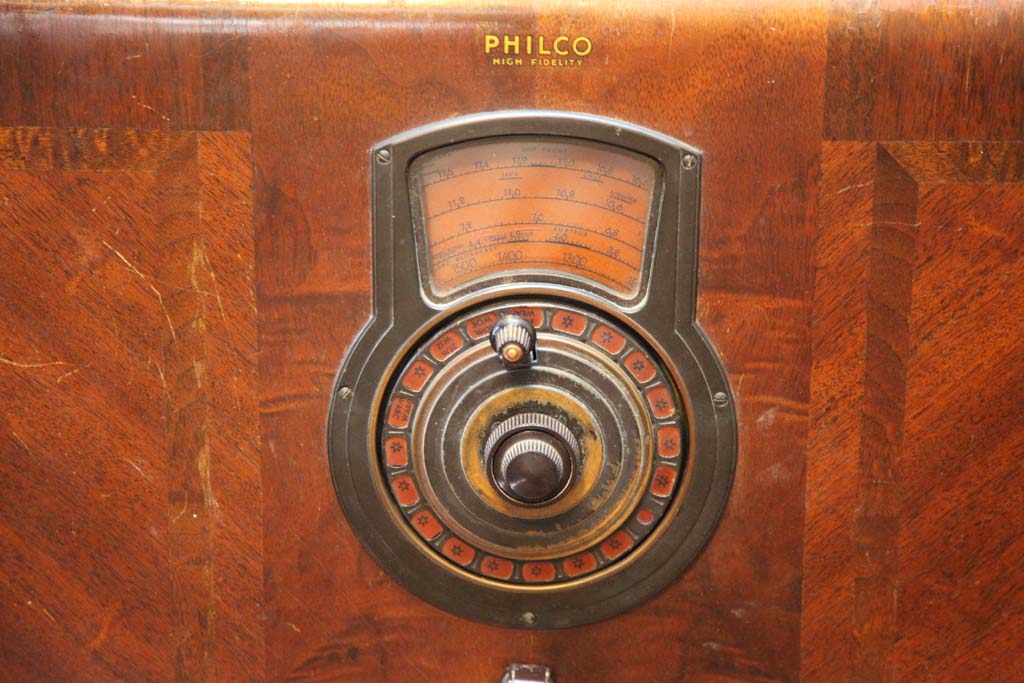
Anyway: wow. And I mean WOW! What a sound! That leaves my Zenith in the dust!
Here are some photos.
Posts: 7,305
Threads: 270
Joined: Dec 2009
City: Roslyn Pa
If you want to do something quick, easy, non destructive, and cheap to clean up the cabinet. Get some GO-GO (Non pumice/no grit) give it a good rubdown with the GO-JO and a soft rag like an old t shirt. It will clean up the old finish, remove years of dirt, and darken the scratches. All in all will make a big improvement on the looks. Don't know if you have already have but pop off the handles (knobs) and soak them in a bowl of warm water and a bit of shampoo for 15-20 mins. Scrub with an old tooth brush or finger nail brush till nice and clean.
I take it that you like the sound of it!!!
Terry
(This post was last modified: 09-07-2013, 04:04 PM by Radioroslyn.)
Users browsing this thread:
|
|
Recent Posts
|
|
HiFi (Chifi) tube amp build - but my own design.
|
| Well, maybe - maybe not :lol: It's been an interesting project so far! Something so simple, yet so cranky. The 1st one ...TV MAN — 05:12 PM |
|
1949 Motorola 5A9M
|
| Haven't thought of Burgess batteres in a while
https://www.radionostalgia.ca/lib/Images/battery/us/burgess1D.jpgi
...Vlad95 — 03:50 PM |
|
Philco Model 16 wiring question
|
| Measure the voltages first, just in case.morzh — 02:19 PM |
|
1949 Motorola 5A9M
|
| Haven't thought of Burgess batteries in a while Mr. Fixer. Boston Edison always used Burgess in their Bright Star yellow...Paul Philco322 — 02:17 PM |
|
1949 Motorola 5A9M
|
| Thanks Sam. I'll let you know. I can probably scare some up from the local radio club.klondike98 — 02:07 PM |
|
Philco 89 Code 123 Osc Coil
|
| Hello,
I thought I would post my findings on my bad oscillator tickler coil. There were 27 turns on the outer coil b...dconant — 12:38 PM |
|
Philco Model 16 wiring question
|
| Thanks Morzh. So it appears I did wire it incorrectly and I have to switch the wires between pins 2 and 4.bobclausen — 09:24 AM |
|
Philco 46-1209 strange behavior
|
| No, it's not a problem, just during certain condition it could show up.
Yes, an internal tube short could do that too.
...morzh — 09:13 AM |
|
HiFi (Chifi) tube amp build - but my own design.
|
| You sound guys are never satisfied. :crazy: :clap:RodB — 09:10 AM |
|
HiFi (Chifi) tube amp build - but my own design.
|
| I got some new ceramic octal tube sockets installed and also tried some different coupling caps.
The results:
The go...TV MAN — 08:42 AM |
|
Who's Online
|
There are currently 1354 online users. [Complete List]
» 2 Member(s) | 1352 Guest(s)
|
|
|

|
 
|


![[-] [-]](https://philcoradio.com/phorum/images/bootbb/collapse.png)


