Posts: 376
Threads: 105
Joined: Jul 2011
City: Calgary, AB, CA
(This post was last modified: 01-03-2014, 06:35 PM by Dan Walker.)
Posts: 262
Threads: 27
Joined: Jan 2010
City: Rochester, NY
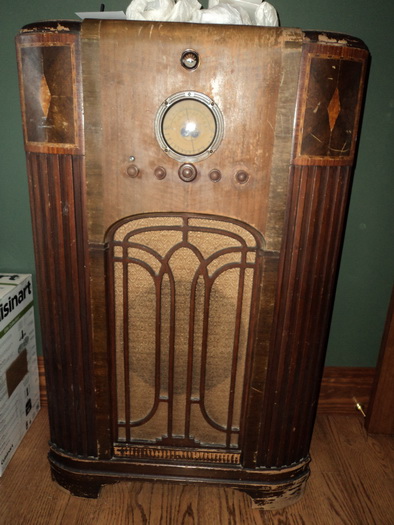
Looks good Dan. Looks like she'll clean up nice.
Regards,
Tim
Posts: 61
Threads: 2
Joined: Aug 2013
City: Renton, Wa
Yes looks good,I like that cabinet--
Posts: 2,353
Threads: 92
Joined: May 2010
City: Clayton, NC
I like it too! Great Job, Dan!  
Posts: 214
Threads: 16
Joined: May 2010
City: Kokomo, IN
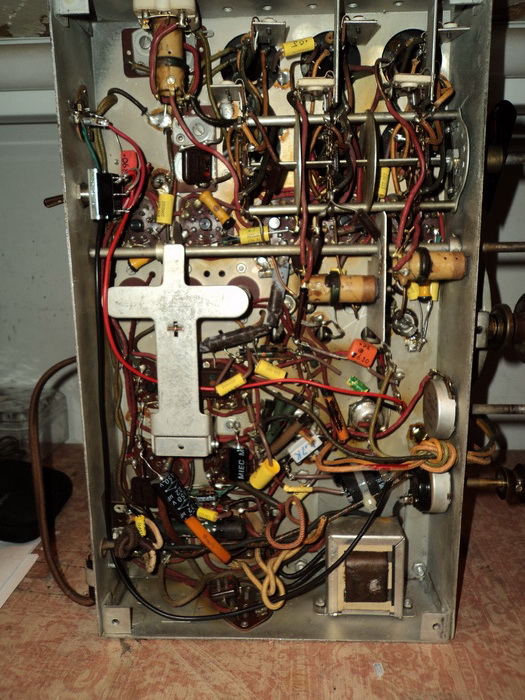
Nice set it has variable if band with just like my Sparton 1466.
Posts: 2,353
Threads: 92
Joined: May 2010
City: Clayton, NC
Interesting. All three IF cans are variable. Also has the 42s driven by two 6C5s. Wonder why they did not use the 6F6, which is octal like the rest of the set (minus the viso-glo) and electically the same as the 42.
Posts: 465
Threads: 31
Joined: Sep 2009
City: Lapeer
State, Province, Country: MI
Nice radio. The chassis is neat, clean and orderly. I hate when everything is crammed together. Is the switch for the MP3? Joe
Joe
Matthew 16:26 "For what does it profit a man if he gain the whole world, yet lose his own soul?"
Posts: 376
Threads: 105
Joined: Jul 2011
City: Calgary, AB, CA
I added the switch to the radio . It is a for the phono input and
of course you can play the MP3 through it [with the proper adapter]
There was a lot of room under there but the hard cap was the one under the band switch.
With the help of a member of another forum I got everything going and can't wait to do the cabinet
Posts: 1,469
Threads: 97
Joined: Jul 2012
City: Poughkeepsie, N.Y.
Wow that radio seems simalar to my Grunow console that I have.... Did both companies make the same radio?
Posts: 1,469
Threads: 97
Joined: Jul 2012
City: Poughkeepsie, N.Y.
Good luck restoring that radio, I very much like the style of the cabinet.
Posts: 376
Threads: 105
Joined: Jul 2011
City: Calgary, AB, CA
(This post was last modified: 02-27-2014, 02:16 AM by Dan Walker.)
Posts: 376
Threads: 105
Joined: Jul 2011
City: Calgary, AB, CA
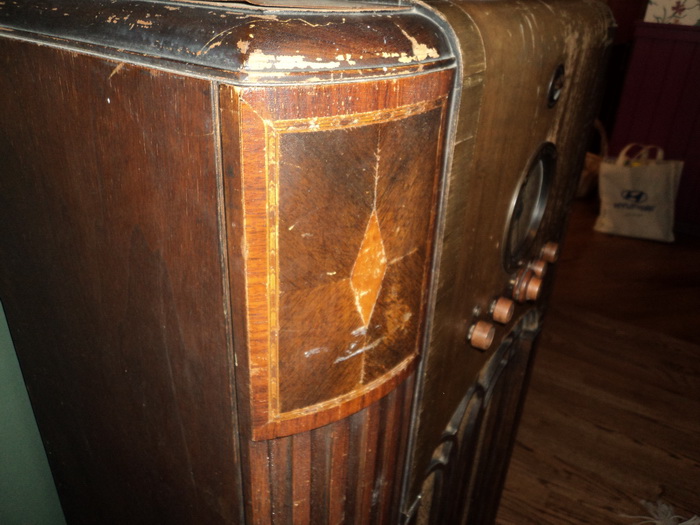
Here is what I have done so far.
Posts: 246
Threads: 27
Joined: Aug 2013
City: Petaluma, CA
Now that's a far cry from your original pictures! Your careful attention to this cabinet surely accentuates it's fine lines and varying wood shades. Keep the pictures coming!
Craig R.
Posts: 376
Threads: 105
Joined: Jul 2011
City: Calgary, AB, CA
Posts: 16,493
Threads: 573
Joined: Oct 2011
City: Jackson
State, Province, Country: NJ
This looks stunning. Yammie!
Users browsing this thread: 1 Guest(s)
|
|
Recent Posts
|
|
The list of my radio & TV collection!
|
| Yes, Michael. But strangely enough, I managed to keep the original veneer. I must admit that I don't really like it, so ...RadioSvit — 02:21 PM |
|
The list of my radio & TV collection!
|
| Good radio.
I bet there was a lot of veneer fixing.morzh — 02:16 PM |
|
Philco 46-480 Electronic Restoration
|
| >> it is because I am retired and a little demented.
You have just the right amount of it. No perfectly sane p...morzh — 02:14 PM |
|
The list of my radio & TV collection!
|
| Old Zenith 5S-29 tube radio. First turn-on after repair and reception quality testing. Demonstration of the operation of...RadioSvit — 01:27 PM |
|
Philco 42-345 Restoration/Repair
|
| Welcome to the Phorum, osanders0311! Regardless how far you intend to restore this set, first priority should be replac...GarySP — 11:51 AM |
|
Philco 46-480 Electronic Restoration
|
| Joseph, it is because I am retired and a little demented. My problem is that I wanted to own a collection that spans th...MrFixr55 — 11:29 AM |
|
Philco 46-480 Electronic Restoration
|
| Wow, here I am with only two restored radios. I’ve got to boost those numbers! If you can’t run with the big dogs, you m...jrblasde — 10:04 AM |
|
Philco 46-480 Electronic Restoration
|
| Hello MrFixr55,
That will for sure keep you out of trouble!
Last Sunday was spent mostly doing yard work anyway the we...radiorich — 09:50 AM |
|
Philco 46-480 Electronic Restoration
|
| Throw in all the Audio equipment that has to be kept in a bedroom (my office)L. 8 portable self contained PA speakers, ...MrFixr55 — 07:40 AM |
|
Philco 42-345 Restoration/Repair
|
| Looking at the pic supplied by Rod B, you can duplicate the missing loop antenna. 10 gauge copper wire can be used to m...MrFixr55 — 01:20 AM |
|
Who's Online
|
There are currently 381 online users. [Complete List]
» 1 Member(s) | 380 Guest(s)
|
|
|

|
 
|


 I have installed a phone jack so I can play


![[-] [-]](https://philcoradio.com/phorum/images/bootbb/collapse.png)


