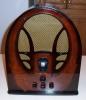
MODEL 43 - PROBLEMS WITH TUNING CAPACITOR
Posts: 47
Threads: 12
Joined: Nov 2014
City: Calimesa, CA
Hi,
I just finished re-capping the electrolytic and filter bank capacitors, and fired up the radio and was pleased to see a marked improvement (thanks for the assistance of my online mentor, John Goller!)
However, on the AM broadcast band, once I tune past 1050 kHz, I only get awful crackling. The problem seems to be with the rotor/stator plate spacing. I tweaked a couple, and the crackling changed to a consistent, well, sound like a fly passing gas, if a fly could do that.
I notice the plates are very close together. I can't seem to fix the problem.
I have two questions:
1) Are the rotor plates supposed to be centered with respect to the stator plates, or to one side, close to them?
2) If they are supposed to be centered, how can I do that?
Any and all suggestions are welcome!
Posts: 2,263
Threads: 164
Joined: Jan 2013
City: Westland, MI
Hi, First thing I would try is pulling the cap out of the chassis and giving it a good washing. I have had good results putting the unit in my dishwasher with the plates opened out and running it through a cycle. Then put it in a very warm oven, or in front of a space heater to completely dry it out. Once you're sure surface corrosion and dirt aren't the issue you can concentrate on plate spacing. Remember to lightly lubricate the pivot points before re-installing it. Good luck. Gary
"Don't pity the dead, pity the living, above all, those living without love."
Professor Albus Dumbledore
Gary - Westland Michigan
Posts: 1,544
Threads: 243
Joined: Sep 2012
City: West Bend, Wisconsin
I can't speak for your model 43, but I've had trouble with rotor & stator plates touching on tuning capacitors in the past, causing the same symptoms you're describing. I tried to get an even gap on each side once they are in the closed condition, using a set of narrow width feeler gauges to check the spacing. In one case, I used a set of tiny jewelers files or some fine grit, stiff backed sandpaper to open the stubborn gap when there was corrosion causing the crackling.
Greg V.
West Bend, WI
Member WARCI.org
Posts: 47
Threads: 12
Joined: Nov 2014
City: Calimesa, CA
This capacitor was cleaned carefully in an ultrasonic cleaner. Got off ALL the gunk! Looked almost like it just came from the factory.
I will be taking it out...looking for some kind of set screws on the front end.
Thanks!
(12-21-2014, 10:32 PM)GarySP Wrote: Hi, First thing I would try is pulling the cap out of the chassis and giving it a good washing. I have had good results putting the unit in my dishwasher with the plates opened out and running it through a cycle. Then put it in a very warm oven, or in front of a space heater to completely dry it out. Once you're sure surface corrosion and dirt aren't the issue you can concentrate on plate spacing. Remember to lightly lubricate the pivot points before re-installing it. Good luck. Gary
Posts: 47
Threads: 12
Joined: Nov 2014
City: Calimesa, CA
Hey,
Thanks for the tips! this one has been ultrasonically cleaned, but the blades were corrosion free to start with. The blades are just too close together, pushed towards the front, and almost (and probably) touching the stator plates.
(12-21-2014, 11:00 PM)NostalgiaRadioTime Wrote: I can't speak for your model 43, but I've had trouble with rotor & stator plates touching on tuning capacitors in the past, causing the same symptoms you're describing. I tried to get an even gap on each side once they are in the closed condition, using a set of narrow width feeler gauges to check the spacing. In one case, I used a set of tiny jewelers files or some fine grit, stiff backed sandpaper to open the stubborn gap when there was corrosion causing the crackling.
Posts: 47
Threads: 12
Joined: Nov 2014
City: Calimesa, CA
Gee, I wish I knew more about radio!
You won't believe this (or maybe you will). It wasn't the tuning capacitor at all! There was oscillation coming from the wire going from the oscillator coil to the grid cap of a 39/44 tube. I noticed if I put my hand in a certain position, the oscillation went away. To cut to the chase, I turned a screw on an ugly trimmer assembly on top of the coil, and the oscillation went away-- I guess turning the tuning capacitor to a certain capacitance set off the oscillation, and I misinterpreted what was going on! Live and learn? After taking out that capacitor 3 times, and spending a day messing with it, do I feel stupid now! Thanks for your kind attention!
Posts: 5,584
Threads: 291
Joined: Nov 2012
City: Wilsonville
State, Province, Country: OR
Don't feel stupid...we all have to scratch around some to find troublesome problems...although some of us scratch more a lot than others who know what they are doing  I've been known to wire up a bakelite block cap incorrectly and then have to back track to find out what the darn problem was 
Posts: 47
Threads: 12
Joined: Nov 2014
City: Calimesa, CA
Thanks, Bob! I'm just so relieved to have solved the problem so easily.
(12-22-2014, 08:38 PM)klondike98 Wrote: Don't feel stupid...we all have to scratch around some to find troublesome problems...although some of us scratch more a lot than others who know what they are doing I've been known to wire up a bakelite block cap incorrectly and then have to back track to find out what the darn problem was
Posts: 344
Threads: 38
Joined: Jun 2011
City: Tustin
State, Province, Country: California
Glad you got it repaired. It really sounded like the stator plates were rubbing. There are so many strange things you run into with these old sets. Some can be very difficult to locate so you did very well.
Posts: 47
Threads: 12
Joined: Nov 2014
City: Calimesa, CA
Thanks for your reply! Yeah, it feels good to be able to move on to my first experience with re-capping "tar babies"!
(12-23-2014, 04:15 AM)thirtiesradio Wrote: Glad you got it repaired. It really sounded like the stator plates were rubbing. There are so many strange things you run into with these old sets. Some can be very difficult to locate so you did very well.
Users browsing this thread: 1 Guest(s)
|
|
Recent Posts
|
|
Philco 71 Code 125
|
| Hello,
I am in need of a schematic for this radio. Mine has the three separate circular tube shields and a shadow me...dconant — 08:06 AM |
|
Stromberg Carlson 1500 Squeal
|
| And life just keeps getting more complicated.dconant — 07:57 AM |
|
54C Complete Teardown/Rebuild
|
| Hello Roy,
here is this one
sincerely Richardradiorich — 12:45 AM |
|
54C Complete Teardown/Rebuild
|
| Richard,
Had grabbed it already but thank you just the same. I find myself wanting to find some way to block out the...glyphmon — 12:03 AM |
|
54C Complete Teardown/Rebuild
|
| Hello roy,
here is a link to the schematic .
Sincerely Richardradiorich — 11:54 PM |
|
54C Complete Teardown/Rebuild
|
| Richard,
The Silvertone 2014 also is a transformerless set, so I am incorporating a 1:1 600 ohm audio isolation transfo...glyphmon — 11:37 PM |
|
Preliminary work on wife's Silvertone 2014
|
| Did an alignment today which was interesting. IF alignment went great, almost all was already spot-on. Adjusting on th...glyphmon — 11:35 PM |
|
54C Complete Teardown/Rebuild
|
| The main problem with adding a Bluetooth input is that this set lacks a traditional power transformer to isolate it from...radiorich — 11:19 PM |
|
54C Cabinet Refinish
|
|
I started stripping this cabinet before it got super chilly out because I knew I wasn't going to be able to work on ...glyphmon — 11:18 PM |
|
54C Complete Teardown/Rebuild
|
| While I'm waiting to wrap up the final steps on my wife's Silvertone 2014, I started disassembly on the next project. O...glyphmon — 11:07 PM |
|
Who's Online
|
There are currently 1790 online users. [Complete List]
» 1 Member(s) | 1789 Guest(s)
|
|
|

|
 
|