



06-28-2026, 08:52 PM
The chassis now has replacement 500k ohm resistors although the performance of the radio did not change in any significant way. I also put in the new 2A5 tube. That produced a slight increase in volume over the weaker tube but also not so much that you would notice unless you were looking for it. I do also have to change out the volume/on-off pot. The schematic calls for a 10k pot but the one that is in the set is a 70k pot. You do not get any real volume out of the set until you get to the very end of the turn on the shaft when the ohms values reaches the smaller values.
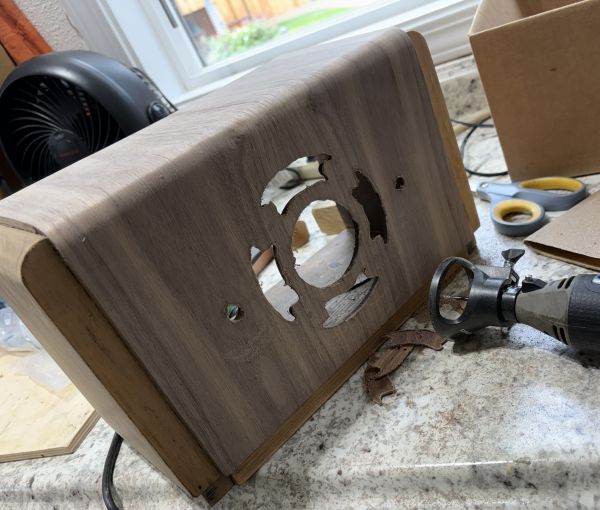
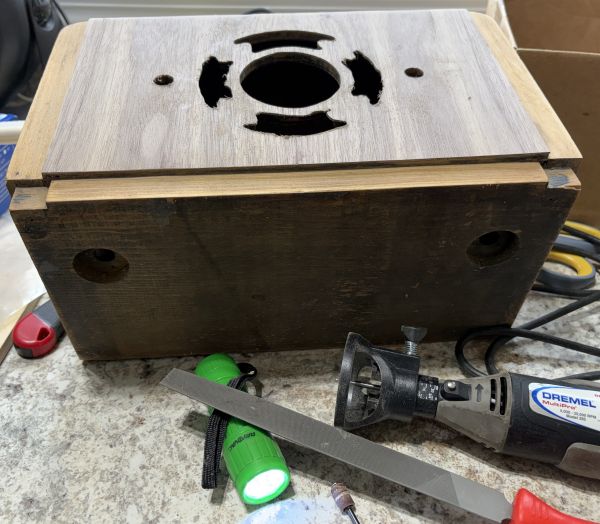
On the cabinet front, the final layer of veneer went on using the same method as the first layer. Trimming of the outer edges was accomplished with a sharp razor box cutter. Going with the grain was easy, just need to be careful not to split the wood into the section you are keeping. Against the grain, I laid a ruler along the edge line and scored the veneer and then carefully broke it off. A final trim with the razor knife and sand paper was all that was needed. Cutting out the grill opening was a different story. I first tried drilling a small hole from the inside of the cabinet where I could see the cutout. I did this in the center of the largest opening and was glad I did because the surface of the veneer on the show side split with the grain in ways that you would not want if you were near a place where it mattered. I switched to the Dremel tool with a very small cutting tool, about a millimeter wide, and the router attachement. This allowed the Dremel to be placed on the face of the cabinet keeping the tool perpendicular to the cut. I used it to rough cut a major portion of the cutouts and then using a bright flashlight, magnifying glasses and slow careful cuts I took the cutting tool right up the the edge of the existing cutout on the under layment wood. Yes, I grazed the wood occasionally but by going slow and taking small cut out you can get it very close. A file and some sandpaper finished it off. In the bottom photo the center hole and the top cutout are finished, the rest are still in rough cut form. I also tried a drum sanding bit on the Dremel. That worked OK but because of the size of it I had a hard time actually seeing how close I was to the original cutout so I opted to use the small cutting bit.
On the cabinet front, the final layer of veneer went on using the same method as the first layer. Trimming of the outer edges was accomplished with a sharp razor box cutter. Going with the grain was easy, just need to be careful not to split the wood into the section you are keeping. Against the grain, I laid a ruler along the edge line and scored the veneer and then carefully broke it off. A final trim with the razor knife and sand paper was all that was needed. Cutting out the grill opening was a different story. I first tried drilling a small hole from the inside of the cabinet where I could see the cutout. I did this in the center of the largest opening and was glad I did because the surface of the veneer on the show side split with the grain in ways that you would not want if you were near a place where it mattered. I switched to the Dremel tool with a very small cutting tool, about a millimeter wide, and the router attachement. This allowed the Dremel to be placed on the face of the cabinet keeping the tool perpendicular to the cut. I used it to rough cut a major portion of the cutouts and then using a bright flashlight, magnifying glasses and slow careful cuts I took the cutting tool right up the the edge of the existing cutout on the under layment wood. Yes, I grazed the wood occasionally but by going slow and taking small cut out you can get it very close. A file and some sandpaper finished it off. In the bottom photo the center hole and the top cutout are finished, the rest are still in rough cut form. I also tried a drum sanding bit on the Dremel. That worked OK but because of the size of it I had a hard time actually seeing how close I was to the original cutout so I opted to use the small cutting bit.





