12-19-2013, 11:25 AM
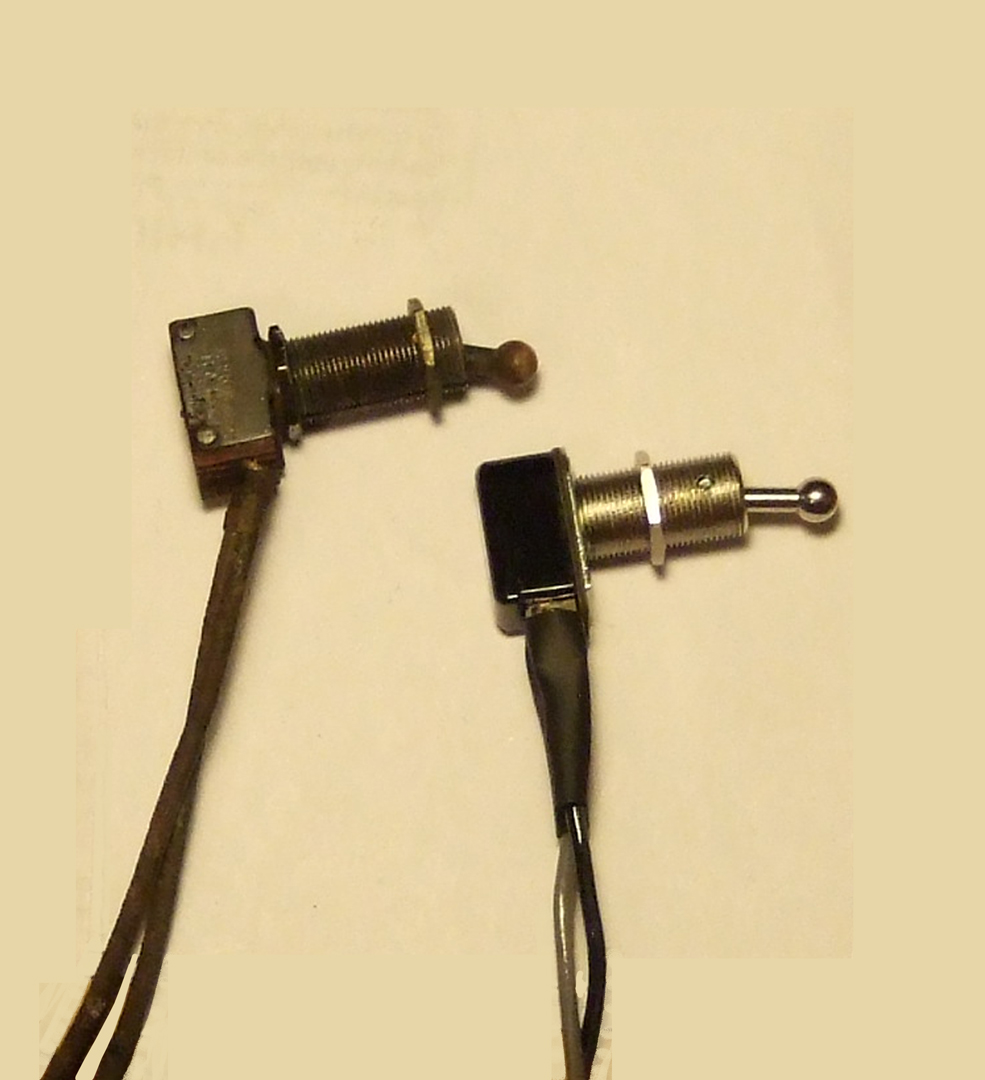
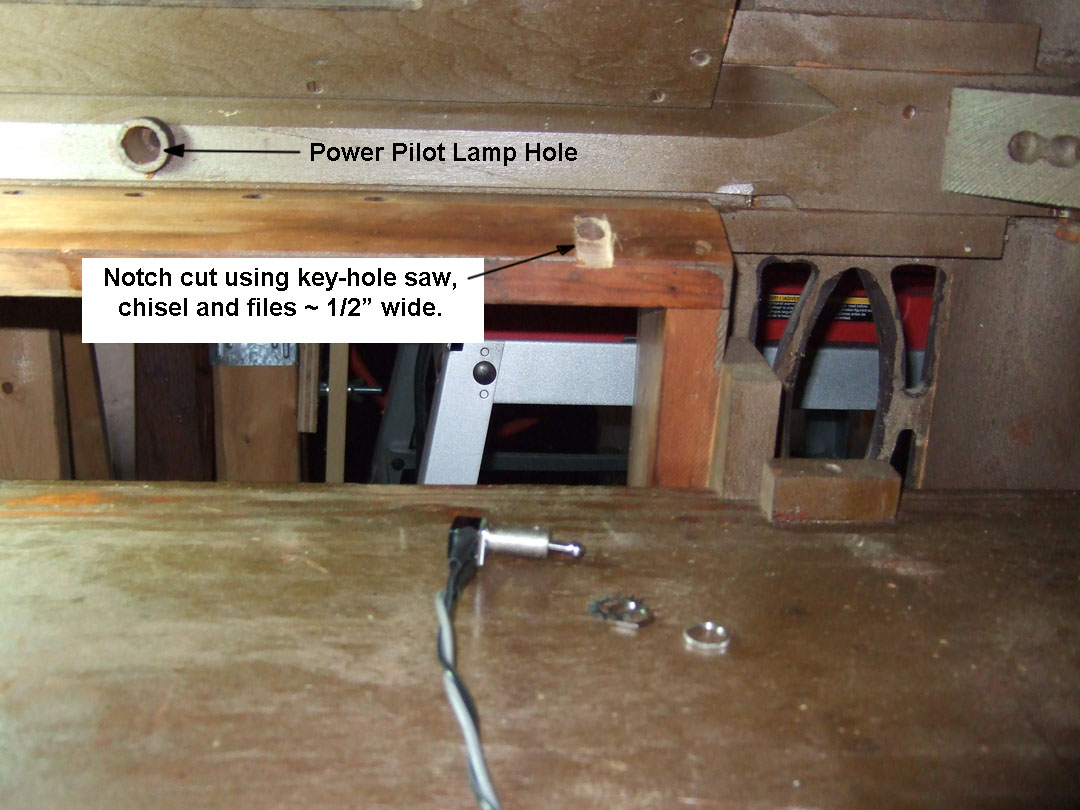
I showed the old AC switch in an earlier post. I finally received the new AC toggle switch from Ace Hardware, their item no. 3135746. It turned out that it was only 7/8" long in the shank area while the OEM Philco part was a full 1 inch long shank. However, I managed to get this one to work. I used a small keyhole saw and cut notches about 1/8" deep on either side of the hole it is to pass through. I used a 1/2 inch wide wood chisel to carefully remove the excess wood, then smoothed the resulting notch using a small rasp and flat file. When I finished I managed to seat the new switch and fasten it using no back-nut, just the front knurled nut that is the finishing item for fastening.


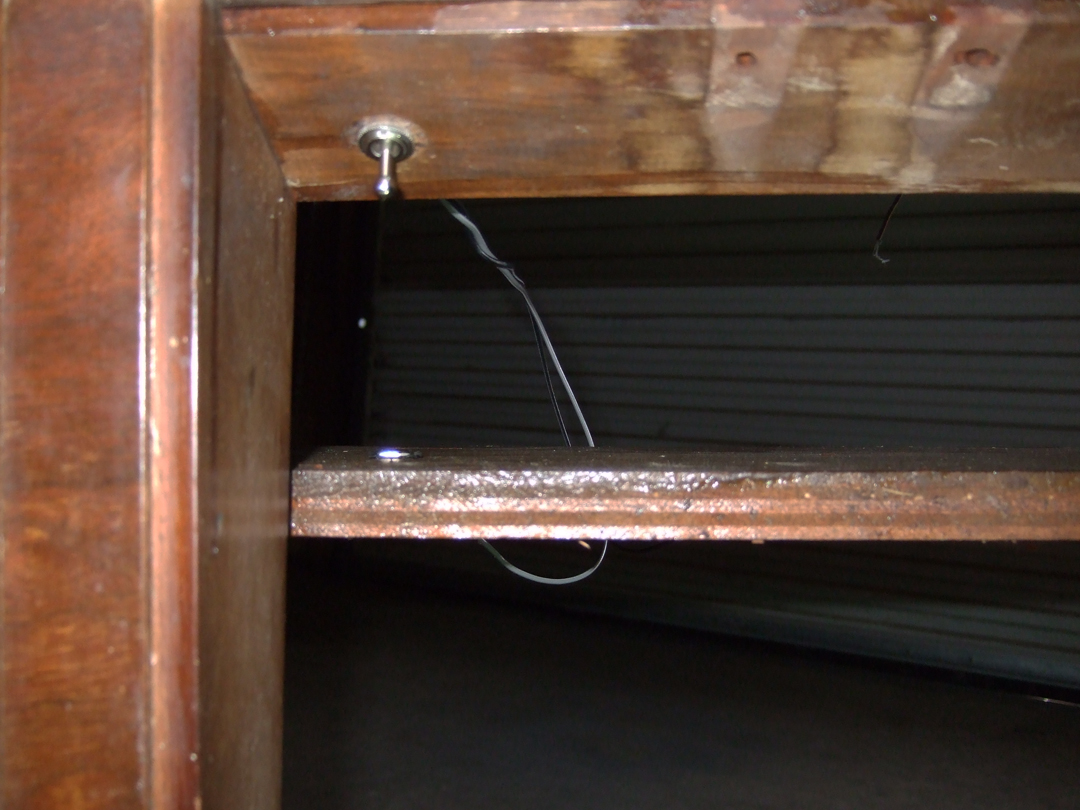
I used a gray wire and a black wire to wire up the switch using the same length wires as originally done by Philco manufacturing. The screws were removed from the terminals and the wires soldered to the lugs and heat shrink tubing added. The wires pass through the same chassis hole as the left hand dial lamp and pilot lamp wiring. Now to attach the pendant AC switch to the under chassis wiring. Its mounting spot is now ready to receive it when the chassis is reinstalled in the cabinet. The end result will work in the same position just like the original switch did.

I used a gray wire and a black wire to wire up the switch using the same length wires as originally done by Philco manufacturing. The screws were removed from the terminals and the wires soldered to the lugs and heat shrink tubing added. The wires pass through the same chassis hole as the left hand dial lamp and pilot lamp wiring. Now to attach the pendant AC switch to the under chassis wiring. Its mounting spot is now ready to receive it when the chassis is reinstalled in the cabinet. The end result will work in the same position just like the original switch did.


![[-] [-]](https://philcoradio.com/phorum/images/bootbb/collapse.png)


