03-27-2014, 10:14 AM
I am near completion of the recap. I lack the 16mf and micas - in the mail. I had read a post by Gregb
http://philcoradio.com/phorum/showthread.php?tid=8852
where he had restuffed his wax capacitors. Since I didnt think those new yellow replacements would look right in this old radio, I decided to give it a shot myself.
Here are the results:
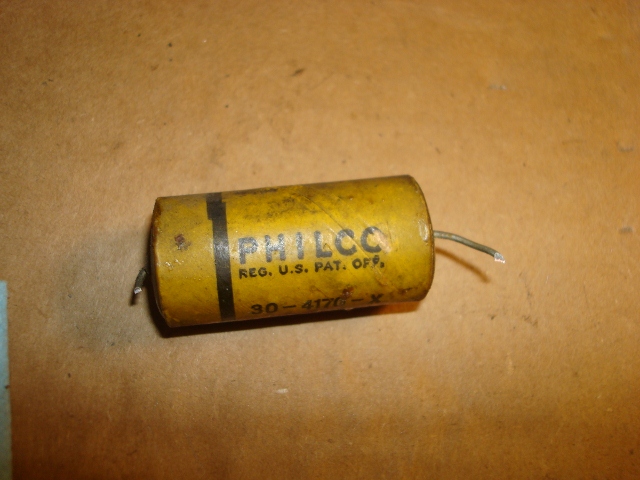
This is the big .1 mf cap you see first thing when you flip the chassis over.

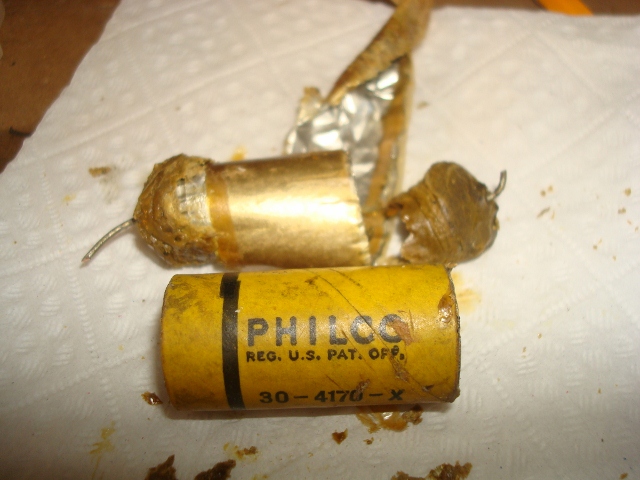
I warmed it in the oven for about 10 minutes. Using old gloves, I pulled one wire with pliers and got part of it out. Then, ofter re-heating, used a nutdriver to push the rest out. Be careful not to crush the cardboard shell. The wax cools quickly and sets up.

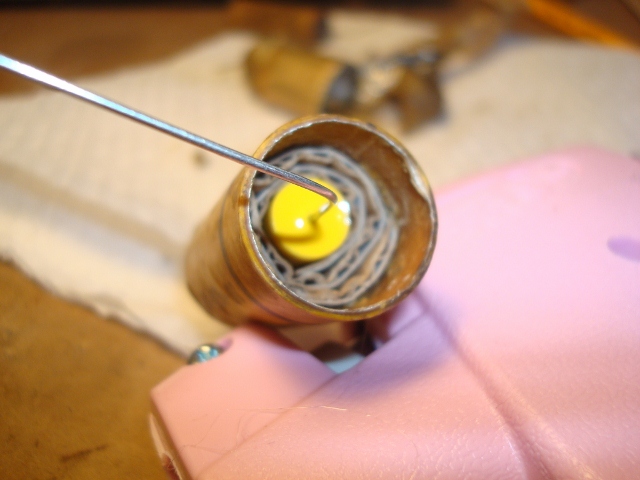
I wrapped the new cap with some cardboard to help center, then began potting with hot glue. I started with a thin layer to hold things in place, let cool, then flipped over and repeated. When that set, I finished filling.

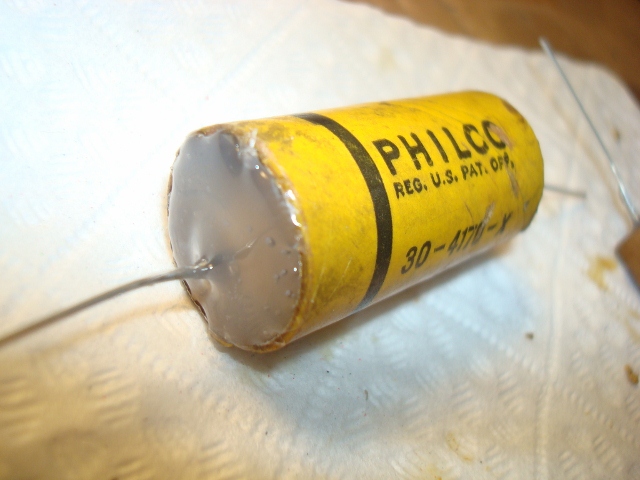
Here is the finished cap, ready for installation. It is difficult to tell it is not original. You can, however, look in the end and still see it has been replaced if you ever need to prove the point.

Notes:
1. Use an old metal pan or something 'cause wax will melt and it stinks. Wife dont like stinky things in her oven
2. Patience. You may have to re-heat a time or two in order to finish. Wax resets quickly.
3. Reccomend not to pot the whole end at once. It takes longer for the glue to set, tends to run and puts more heat on the new cap. Do it in a couple of layers and it works much better. The 1st thin layer cools quickly, the insulates the cap from the big fill.
4. Rebuilding these does take a litte more time, but not a lot, and makes things look more correct.
http://philcoradio.com/phorum/showthread.php?tid=8852
where he had restuffed his wax capacitors. Since I didnt think those new yellow replacements would look right in this old radio, I decided to give it a shot myself.
Here are the results:
This is the big .1 mf cap you see first thing when you flip the chassis over.
I warmed it in the oven for about 10 minutes. Using old gloves, I pulled one wire with pliers and got part of it out. Then, ofter re-heating, used a nutdriver to push the rest out. Be careful not to crush the cardboard shell. The wax cools quickly and sets up.
I wrapped the new cap with some cardboard to help center, then began potting with hot glue. I started with a thin layer to hold things in place, let cool, then flipped over and repeated. When that set, I finished filling.
Here is the finished cap, ready for installation. It is difficult to tell it is not original. You can, however, look in the end and still see it has been replaced if you ever need to prove the point.
Notes:
1. Use an old metal pan or something 'cause wax will melt and it stinks. Wife dont like stinky things in her oven
2. Patience. You may have to re-heat a time or two in order to finish. Wax resets quickly.
3. Reccomend not to pot the whole end at once. It takes longer for the glue to set, tends to run and puts more heat on the new cap. Do it in a couple of layers and it works much better. The 1st thin layer cools quickly, the insulates the cap from the big fill.
4. Rebuilding these does take a litte more time, but not a lot, and makes things look more correct.
If I could find the place called "Somewhere", I could find "Anything"
Tim
Jesus cried out and said, "Whoever believes in me , believes not in me but in him who sent me" John 12:44


![[-] [-]](https://philcoradio.com/phorum/images/bootbb/collapse.png)


