



10-05-2014, 06:01 PM
Well, I haven't done much with this so far, other than trying to figure out all the parts I'm going to need. So far I ordered all my caps from Dave, bulked up my supply of resistors, and got some rubber parts from Ed.
Last night I decided to see why the flood lamps weren't working. Looking at the schematic, i saw they were swiched with the magnetic tuning. I naively thought that it must have had the mag tuning off when it was last powered up. All the tubes were pulled so I powered it up just to get power on the filament circuits. The pilot bulb came to life, but turning the mag switch either way didn't work for the floods.
So I traced out the wires and found the wires coming off the front of it that ground out the mag tuning when off and the filament wires on the back. I grabbed my DMM, and found that there was no continuity between the filament string one one lug on the back of the switch and the other lug that connects to one leg of the of the flood lamps. So I desoldered the wires and pulled the switch out.
Here is one view of the switch that makes/breaks continuity to the flood lamps:
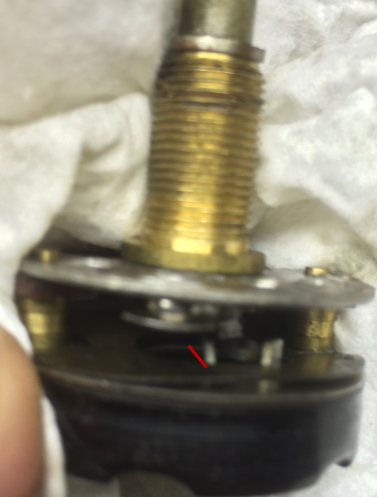
This picture is after I fixed it. When you rotate the switch, a wafer style switch on the frond grounds out the mag system. Then there is a plastic switch mounted to the back. There is a "foot" on the end of the shaft that is supposed to flip the switch. But instead I found a bent piece of metal that the foot was just riding up on top of. The red line was how that side of the switch looked originally. I stuck my needle nose pliers in and was able to straighten it. It now properly flips the connection back and forth. I shot some Deoxit D5 in for good measure, worked it back and forth. Then I sprayed some F100 Faderlube around the foot and inside the plastic switch to hopefully decrease any resistance that made it bend in the first place. Put it in, connected everything back up, and now I have working flood lamps!
Speaking of, does anyone know what bulb they should be? The parts list just lists the floods as an assembly. Who ever worked on it last put in an assortment, apparently of whatever they had on hand. I know the pilot is 55, and it has a big round deflector. This has a narrow deflector, So I suspect they used a "tube" style bulb, like maybe a 44 or a 47 instead of a globe like the 55. I think the 38-116 used 44's. But it also only used two of them instead of 4.
Last night I decided to see why the flood lamps weren't working. Looking at the schematic, i saw they were swiched with the magnetic tuning. I naively thought that it must have had the mag tuning off when it was last powered up. All the tubes were pulled so I powered it up just to get power on the filament circuits. The pilot bulb came to life, but turning the mag switch either way didn't work for the floods.
So I traced out the wires and found the wires coming off the front of it that ground out the mag tuning when off and the filament wires on the back. I grabbed my DMM, and found that there was no continuity between the filament string one one lug on the back of the switch and the other lug that connects to one leg of the of the flood lamps. So I desoldered the wires and pulled the switch out.
Here is one view of the switch that makes/breaks continuity to the flood lamps:
This picture is after I fixed it. When you rotate the switch, a wafer style switch on the frond grounds out the mag system. Then there is a plastic switch mounted to the back. There is a "foot" on the end of the shaft that is supposed to flip the switch. But instead I found a bent piece of metal that the foot was just riding up on top of. The red line was how that side of the switch looked originally. I stuck my needle nose pliers in and was able to straighten it. It now properly flips the connection back and forth. I shot some Deoxit D5 in for good measure, worked it back and forth. Then I sprayed some F100 Faderlube around the foot and inside the plastic switch to hopefully decrease any resistance that made it bend in the first place. Put it in, connected everything back up, and now I have working flood lamps!
Speaking of, does anyone know what bulb they should be? The parts list just lists the floods as an assembly. Who ever worked on it last put in an assortment, apparently of whatever they had on hand. I know the pilot is 55, and it has a big round deflector. This has a narrow deflector, So I suspect they used a "tube" style bulb, like maybe a 44 or a 47 instead of a globe like the 55. I think the 38-116 used 44's. But it also only used two of them instead of 4.


