Knight KG-670 R/C tester restoration attempt
Posts: 1,212
Threads: 85
Joined: Jan 2014
City: Annapolis, IL
State, Province, Country: USA
Moving on to the next subject. I have a Knight Capacitor tester that I want to restore and calibrate. I started the project a couple of years ago, but it went into the box when the "Remodel" project started. I have found some instructions on the internet about calibrating these. Seems I got stalled out trying to get a precision 2mf reference cap. Sure stinks when you have to stop in the middle of a project like this, then try to resume a couple of years later 
I have had this tester from a youth. My bad was drilling the front panel for a power switch! I may just put in a pilot lamp instead.
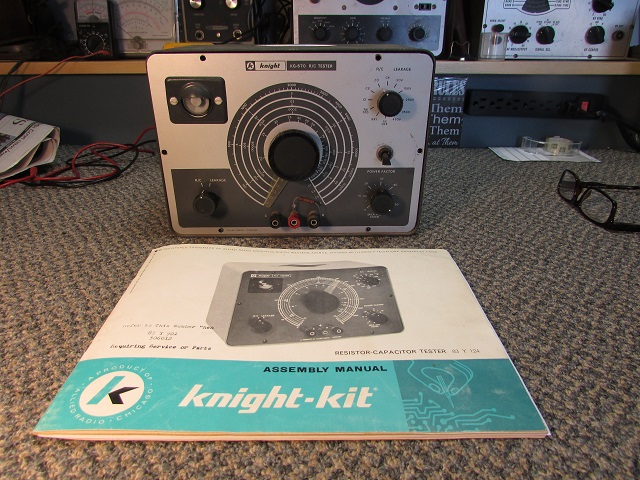
My uncle built this in 1964, and I have all the original books. He played a hand in sparking my interest in electronics with his books and test equipment. I restored a Knight KG-690 signal tracer, also built by my uncle, right before the madness of our remodel started.
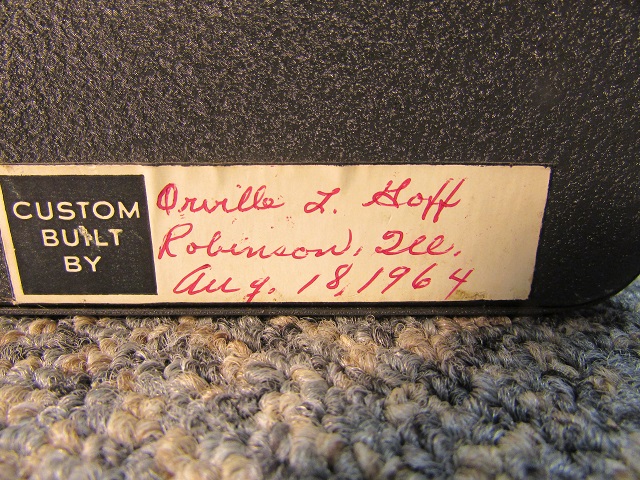
Neat thing, this has been in the family since new.
If I could find the place called "Somewhere", I could find "Anything" 
Tim
Jesus cried out and said, "Whoever believes in me , believes not in me but in him who sent me" John 12:44
Posts: 1,212
Threads: 85
Joined: Jan 2014
City: Annapolis, IL
State, Province, Country: USA
I am at the point of needing the reference caps for this tester. I need a 2mf 200v and a .02mf 400v paper capacitor. These are precision caps, so I don't know if "making" one would be a good option. I tried Ebay and mouser (in which I usually give up in frustration over trying to search). Know of any reasonable source for these? I did find an option on TubeSound.com, although a little expensive.
If I could find the place called "Somewhere", I could find "Anything" 
Tim
Jesus cried out and said, "Whoever believes in me , believes not in me but in him who sent me" John 12:44
Posts: 1,212
Threads: 85
Joined: Jan 2014
City: Annapolis, IL
State, Province, Country: USA
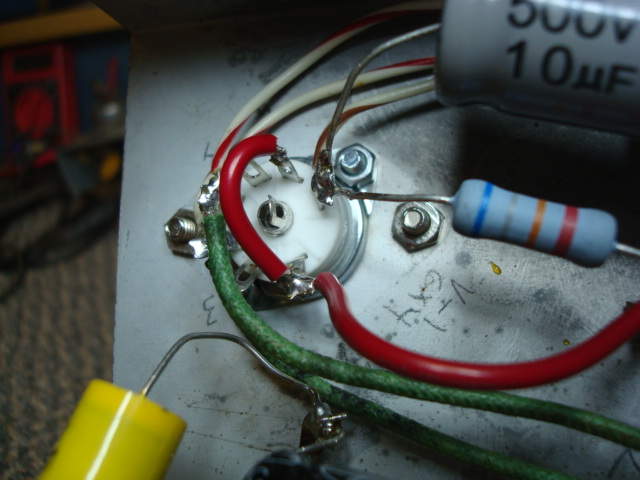
Work got crazy for the last month, so nothing got accomplished. I finally got back into the cap checker. I replaced the precision reference caps. Got them from Mouser. I had to parallel to get both my .02 and 2mf. Went ahead and replaced the mica so I would be sure it was good. In the picture below, note the small resistor to the right of the caps in series connected to the terminal strip. I used an empty lug to add the extra resistor into the voltage divider string.
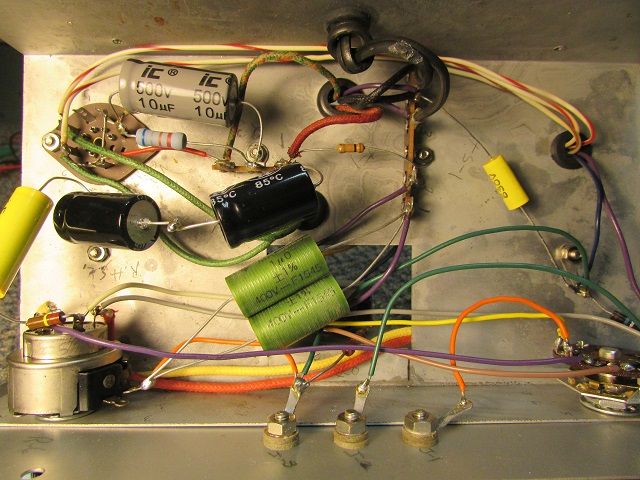
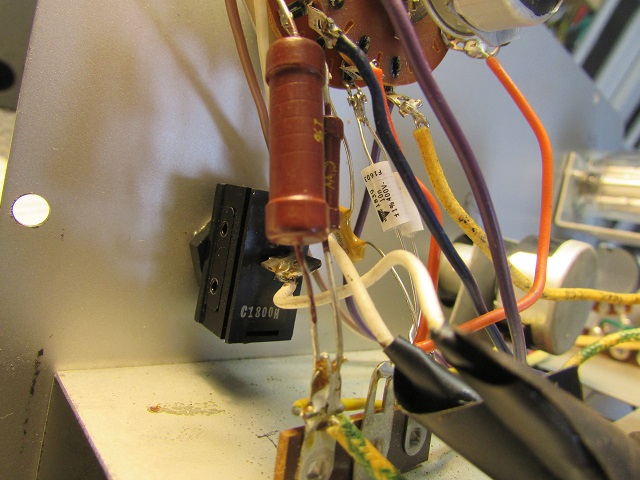
I have been following the write up I found at: http://tubesound.com/2008/08/23/rc-testers/ by Bob Putnak. I have been following his advice to set the voltage and current in the divider string. He said as wired, the voltages and currents were wrong (too high).
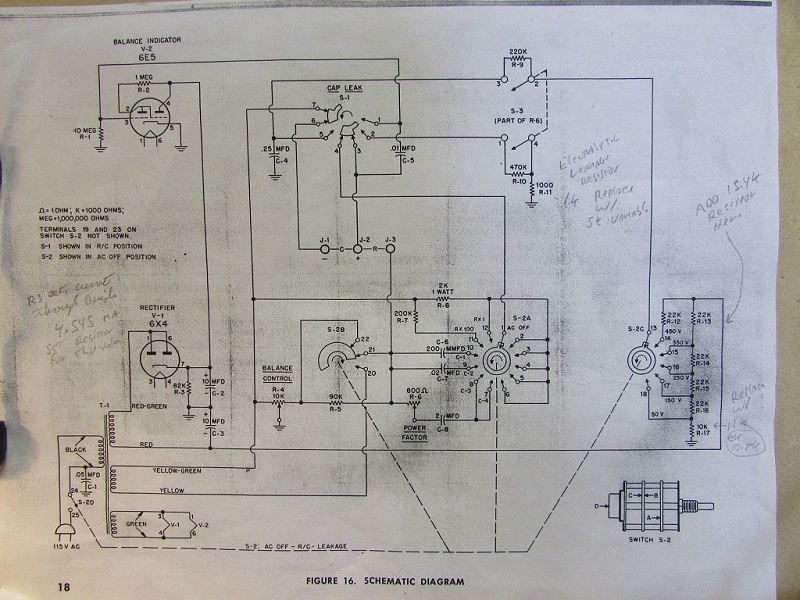
Mine checked high also, so I have been trying different values of resistors, mainly adding some resistance in the divider string. He recommended a 15.4k. I put in a 15k. He also said to adjust R3, the 82k. Mine was 92k. And, to replaced the R17 with 11k, from 10k. However, here is what I am discovering on mine. I had to set R3 to 56k to get the 4.5 Ma and put my my eye tube down around 180v. I left the R17 alone since it was 10.8k, and changing it didn't make much difference. I have my Ma meter between the new resistor (off C3 -) and where it goes to the voltage divider. Bob wasn't real clear where to connect. So far, I can get my current to around 4.48 and 4.55. My voltage is around 450 on the test terminals with leakage switch engaged. Also my Ma current increases when I switch this on. This seems very sensitive to line voltage variations, so I am setting it at 120v. From reading the write up, Bob says the current is pretty important. If I check the voltage right off the added resistor on the divider, then I get around -470v. Not super happy with this, so I am going to do some more experimenting.
If I could find the place called "Somewhere", I could find "Anything" 
Tim
Jesus cried out and said, "Whoever believes in me , believes not in me but in him who sent me" John 12:44
Posts: 1,212
Threads: 85
Joined: Jan 2014
City: Annapolis, IL
State, Province, Country: USA
Well, I was about to post the wrap up and final results on this resto and pronounce it fixed. I had moved on to restore a small Eico signal tracer, and powered up to test an unknown capacitor, and it happened. Buuuuuzzzz, crackle and that wonderful burnt smell, while at the same time my eye tube went dim - Alwright whut happened???  At first I thought R3 opened up, but when I clipped it, it checked ok. I checked some other resistors and sniffed around. It was at night, and I had my bench lights almost all off. I brought it up on the variac while I watched voltages and such, and then I saw sparks and arcing, and found this:
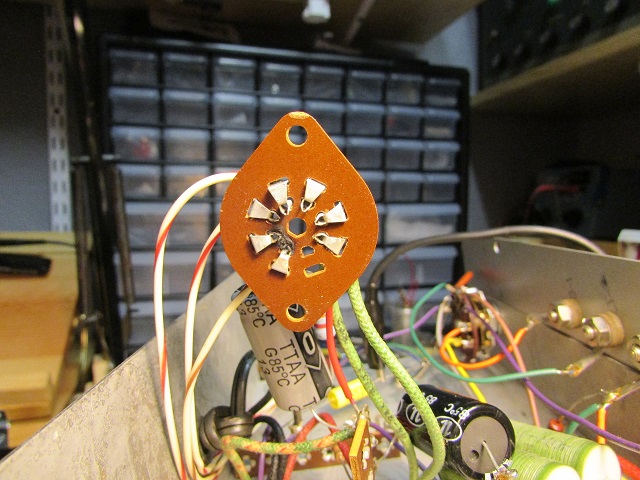
Is this a common problem on a wafer type socket? It is between pin 6 and 7 (cathode and plate) on the 6X4. There is about 700+v potential there. I separated the socket by drilling the rivet, and found carbon tracking. I don't know it this happened all at once or if this has been coming on for some time. Couple Q's.
If this happened once, this may be a problem in our humid climate, and may happen again. Would I be gaining if I used only the plate on pin 1, think that would overload the 6X4 tube? They have both plates tied together, and are using as 1/2 wave rectifier. This doesn't strike me as a high current draw circuit. I would have an open plate tho, and that may not be good. Any thoughts?
If I could find the place called "Somewhere", I could find "Anything" 
Tim
Jesus cried out and said, "Whoever believes in me , believes not in me but in him who sent me" John 12:44
Posts: 1,212
Threads: 85
Joined: Jan 2014
City: Annapolis, IL
State, Province, Country: USA
After some searching for a same size tube socket for the 6X4, I gave up and ordered some ceramic sockets from China. Had to drill new holes to mount, but I already hacked this when I was a youth. So, better hacked and in use than sitting in a box somewhere waiting for the junk pile. I have used this every chance I had, and let it 'idle' while sitting at the bench working on other items. So far, so good.
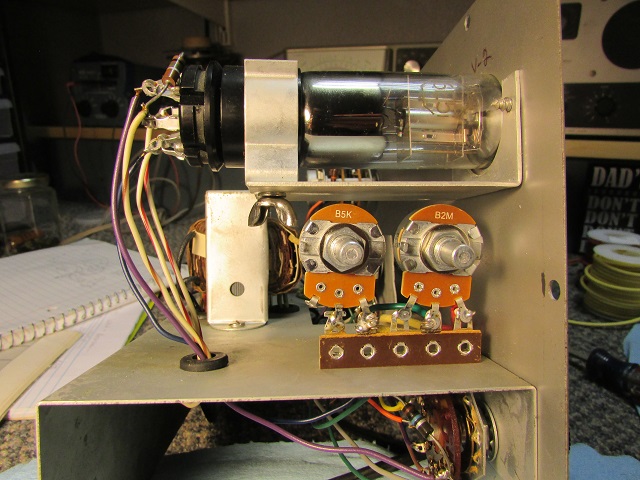
Below are the controls I added to adjust the sensitivity of the eye tube for leakage measurements. I could have used smaller controls, but I had room for these and I can turn these with my fingers. I put them on a terminal strip, and used an existing screw to attach it. No new holes. Can be removed without scars later if needed.
Notes: I did some trial and error, and finally settled on making R3 68k, left the R17 alone, and put a 10k resistor in series with the divider string. (15k dropped the current too much) This gave me right around 200v on the eye tube, -525 on the 6X4 plates, and 470v on the test terminals. It set my current right at 4.5 - 4.7 ma. I set with the line voltage at 120v. This combination made the voltages more stable. The leakage voltage is a little higher than I would like, but better than original. The cap pulls the voltage down during the leakage test anyway, so I don't see any problem.
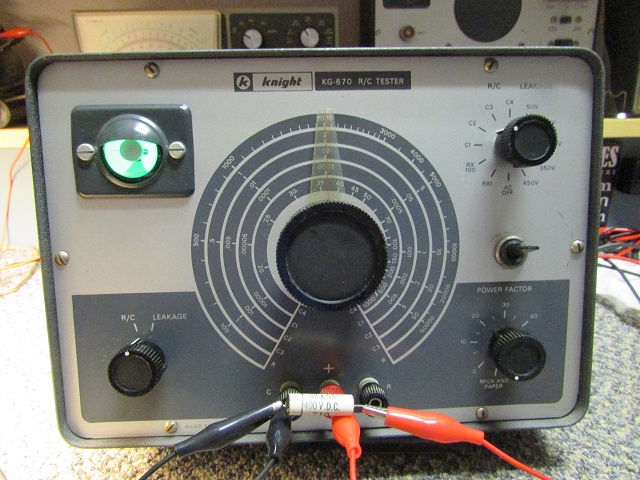
The Knight in action. It seems pretty accurate, and I like to be able to test new caps with voltage. It does take a little longer to charge the cap on the 450v setting. Since the leakage sensitivity is more sensitive than original, it takes a little longer for the eye to open. I find that if I check initially on a lower setting, then switch up, it takes less time (seconds). The bigger the cap, the longer the charge time. So, I pronounce it fixed.
If I could find the place called "Somewhere", I could find "Anything" 
Tim
Jesus cried out and said, "Whoever believes in me , believes not in me but in him who sent me" John 12:44
(This post was last modified: 12-09-2016, 01:55 PM by TV MAN.)
Users browsing this thread: 1 Guest(s)
|
|
Recent Posts
|
|
Philco newbie with P-1891-WA console questions
|
| Hello Jeff ,
Far as the Electrolytic capacitors go here is a list of parts.
that will work . I like using Nichicon and...radiorich — 09:50 PM |
|
Philco newbie with P-1891-WA console questions
|
| Well, I've been stumped at trying to get the first of 11 electrolytic capacitors. I got a schematic and have a list of t...Jeffcon — 07:54 PM |
|
Model 80 Antenna Issue?
|
| Thanks Gary and Rod.
I also found an article in the Philco Repair Bench under Service Hints and Tips, about installi...Hamilton — 12:32 PM |
|
Model 80 Antenna Issue?
|
| Hello Hamilton, here is a little information found in our Philco Radio Library at the bottom of the Home page. Hope it ...GarySP — 11:28 AM |
|
Model 80 Antenna Issue?
|
| I did as you suggested and touching the middle of the volume control did nothing so the coil has to be rewound. Any idea...Hamilton — 10:19 AM |
|
1949 Motorola 5A9M
|
| This would be the second portable in the "other radios" forum where I have a similar one in my collection. I h...Arran — 12:41 AM |
|
Looking for any info: 1977 Ford-Philco Console Hi-Fi Turntable and Radio
|
| Hi PittsburgTost.
The record changer looks like a Garrard or BSR (Likely Garrard). The spindles just pull out and pu...MrFixr55 — 11:57 PM |
|
Looking for any info: 1977 Ford-Philco Console Hi-Fi Turntable and Radio
|
| Hello PittsburghToast ,
Welcome aboard and it looks like gary may have something for you !
now if I dig through my se...radiorich — 11:35 PM |
|
Model 80 Antenna Issue?
|
| You are kind of on the right path. You can touch the grid cap of the Detector/Oscillator 36 tube. I'm expecting a respon...RodB — 08:48 PM |
|
Looking for any info: 1977 Ford-Philco Console Hi-Fi Turntable and Radio
|
| Welcome to the Phorum, PittsburghToast! I found an old thread that my interest you regarding the quality and worth of P...GarySP — 08:48 PM |
|
Who's Online
|
| There are currently no members online. |

|
 
|


![[-] [-]](https://philcoradio.com/phorum/images/bootbb/collapse.png)


