Mike Osc AM radio transmitter?
Posts: 1,212
Threads: 85
Joined: Jan 2014
City: Annapolis, IL
State, Province, Country: USA
If I could find the place called "Somewhere", I could find "Anything" 
Tim
Jesus cried out and said, "Whoever believes in me , believes not in me but in him who sent me" John 12:44
Posts: 4,908
Threads: 54
Joined: Sep 2008
City: Sandwick, BC, CA
No you don't want to run it with a higher B+ voltage coming out of the rectifier, remember that these are battery tubes so the filaments will be running off that same higher B+ voltage. It will take some figuring to come up with a resistor value but the drop across the silicon diode will be quite a bit less less, like under a volt, just to make sure the replacement doesn't fail I would use a 3 amp diode. In fact you could use a few of those, or some Zener diodes, across the filament string to bring the A+ voltage down rather then adding a resistor, again more figuring.
Regards
Arran
Posts: 3,160
Threads: 59
Joined: Apr 2011
City: Lexington, KY
Rich Bonkowski (W3HWJ) has written a pretty informative article on replacing Selenium rectifiers that was published in the AWA Journal:
http://w3hwj.com/index_files/RBSelenium2.pdf
Be sure to look at the last two pages he added titled ".......Further Thoughts Six Years Later."
John KK4ZLF
Lexington, KY
"illegitimis non carborundum"
Posts: 1,266
Threads: 32
Joined: Jan 2014
City: Wellborn Florida
The sel rect will drop line voltage app 7 volts, the silicon diodes drop voltage 7/10 of a volt big difference. You can either use about 10 silicon diodes in series or a diode and a resistor. With the higher line voltages today I would use a couple of diodes and a resistor. Have done this on several Z sets and been happy with the out come. The reason for using more than one diode so if one fails the set still receives only dc.
Posts: 1,212
Threads: 85
Joined: Jan 2014
City: Annapolis, IL
State, Province, Country: USA
That's a good write up. I will probably use a couple or 3 diodes in series and a resistor, plus add a fuse. I will probably start with a 100 ohm and sneak up the voltage with a variac. If the B+ and/or A voltage get too high I can stop and add more resistance.
If I could find the place called "Somewhere", I could find "Anything" 
Tim
Jesus cried out and said, "Whoever believes in me , believes not in me but in him who sent me" John 12:44
Posts: 4,908
Threads: 54
Joined: Sep 2008
City: Sandwick, BC, CA
Stacking the silicon diodes roughly duplicates the drop across the selenium rectifier, which is basically a stack of diodes in itself. I like the idea of using at least two diodes in series if you are using 1 amp diodes for a safety measure against shorts, this is probably overkill with the 3 amp ones but even those are cheap enough. Some people like using a Zener diode across the filament string rather then adding the dropping resistor in series, I haven't tried this but can see how it would work. With regular silicon diodes connected this way there is less to figure out as the forward drop is fairly consistent, I did this with one of those Electro battery eliminators after the dry metal rectifier failed in the A+ supply, shunt regulation is what it's called I think. One other thing, by using silicon diodes you will need a terminal strip to mount them, which means that you may as well get rid of the hot chassis hookup whilst you are at it.
Regards
Arran
Posts: 1,212
Threads: 85
Joined: Jan 2014
City: Annapolis, IL
State, Province, Country: USA
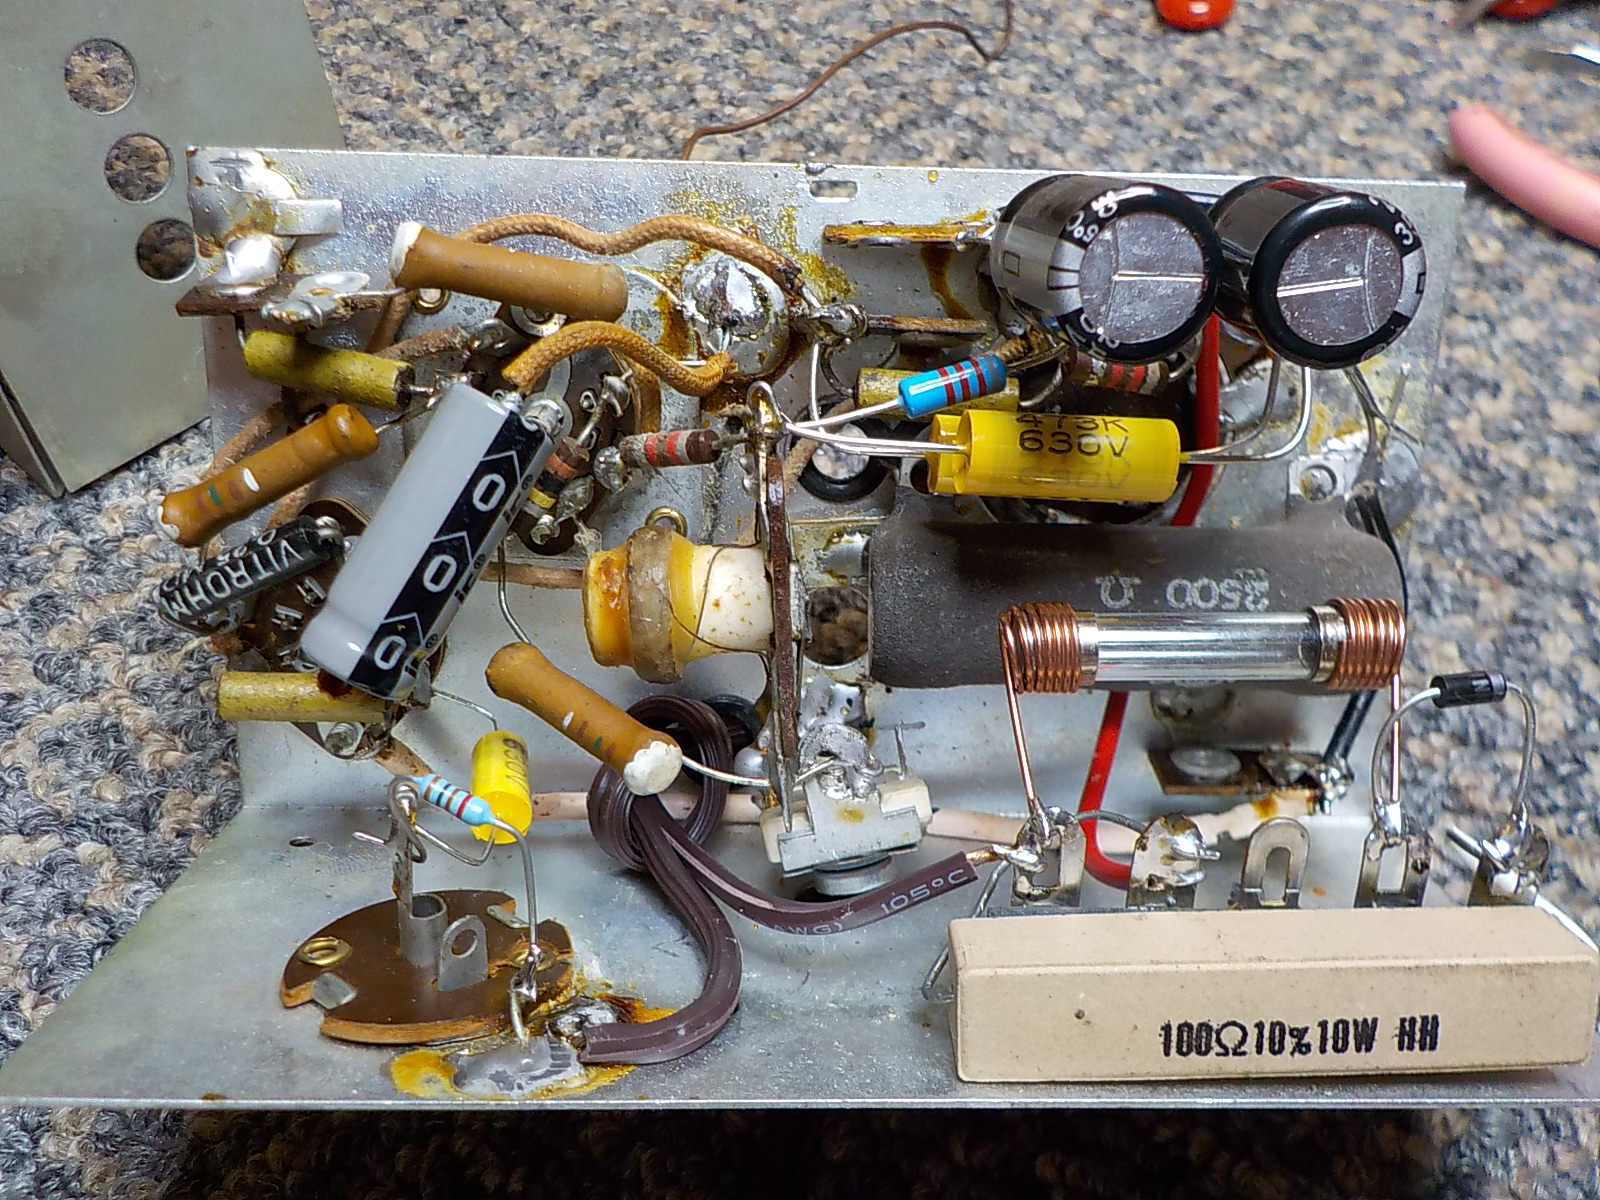
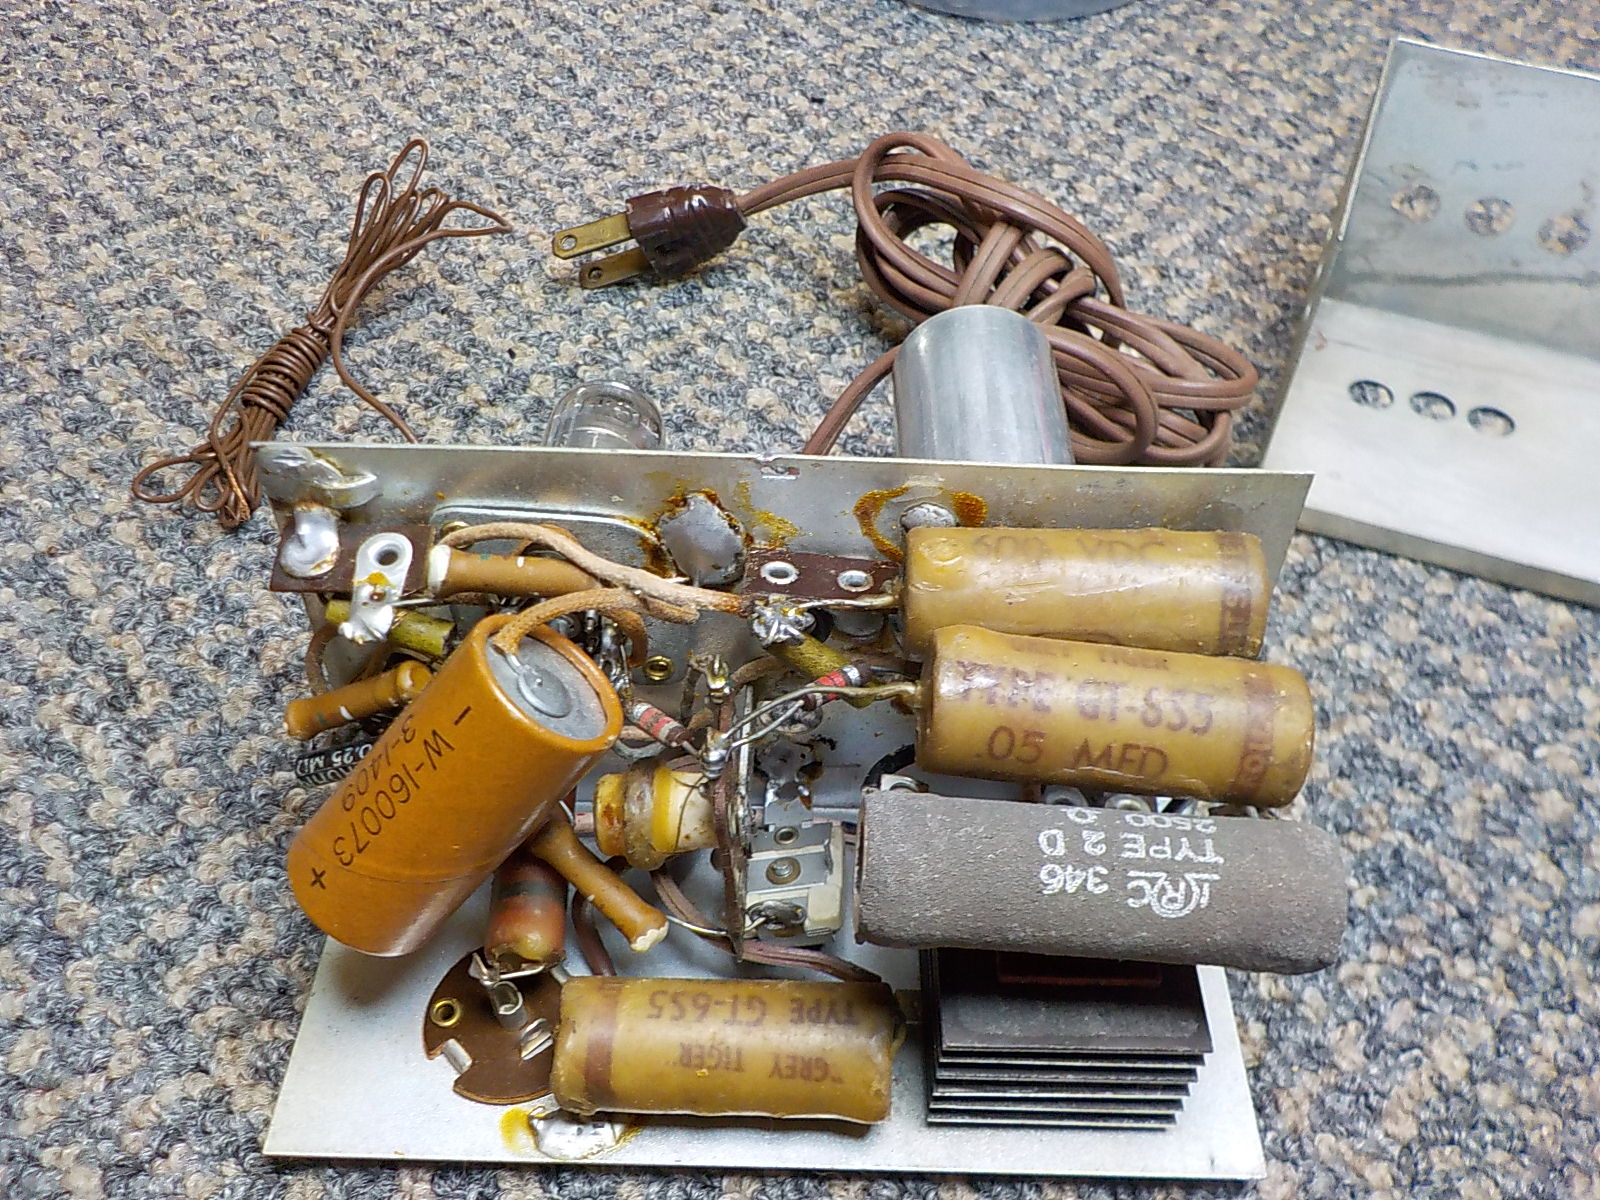
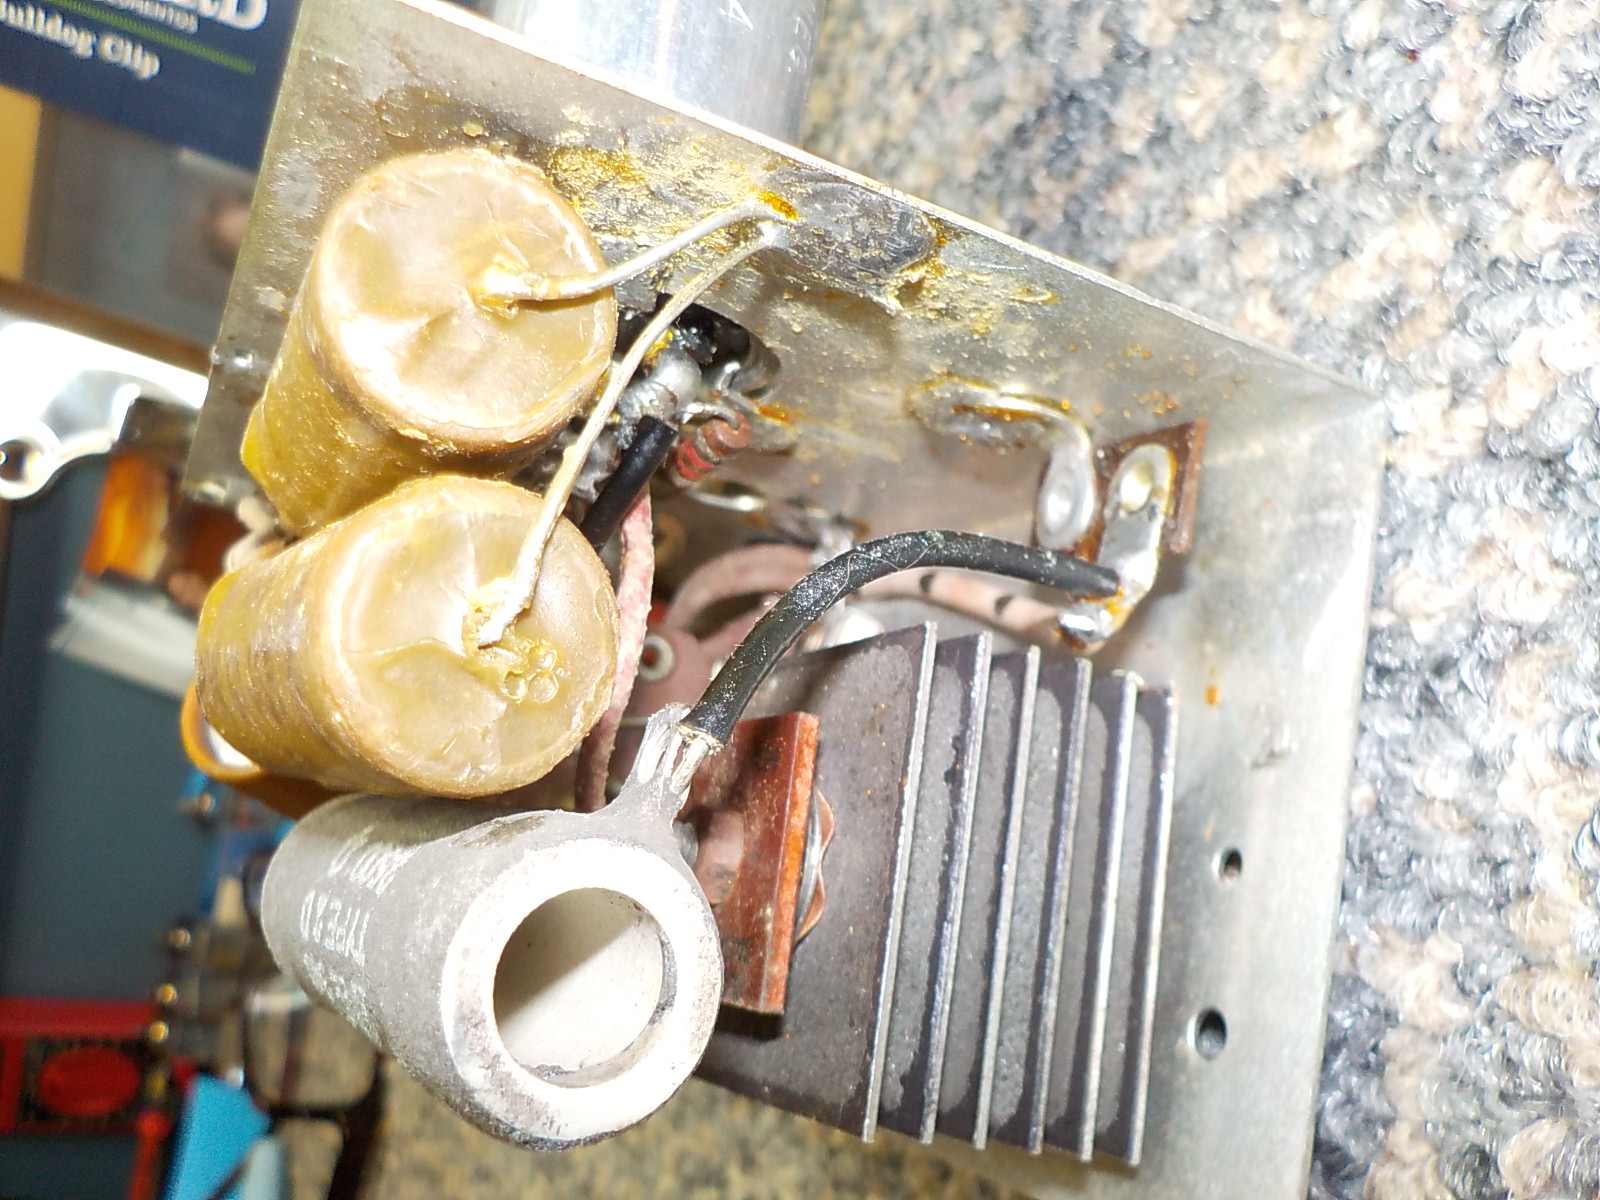
I started the recap by getting a lot of stuff out of the way and checking the fittament if a couple of terminal strips. The can was bad and had some fluid that had bubbled out. I am sure that the previous owner had 'tested' it.
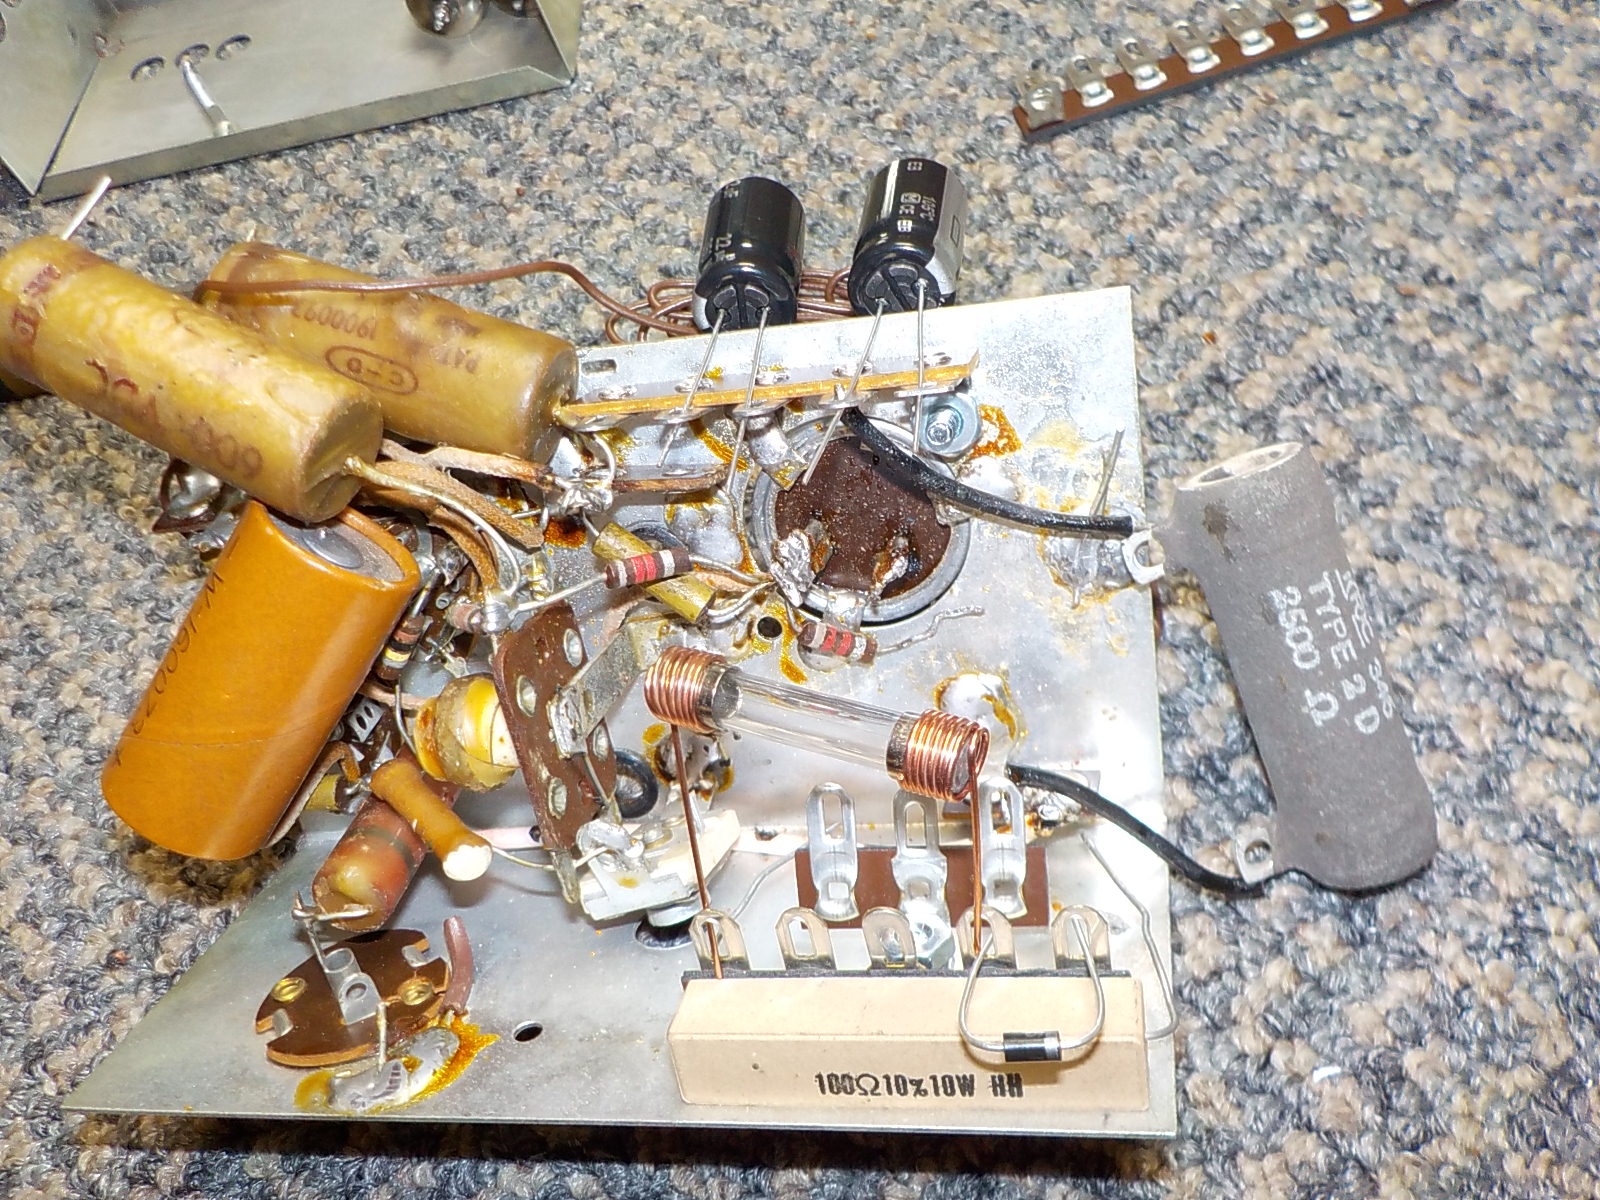
Here I set the new capacitors in place, trying to follow the original layout. I found one 8.2 k resistor up to over 9k, so I replaced it.
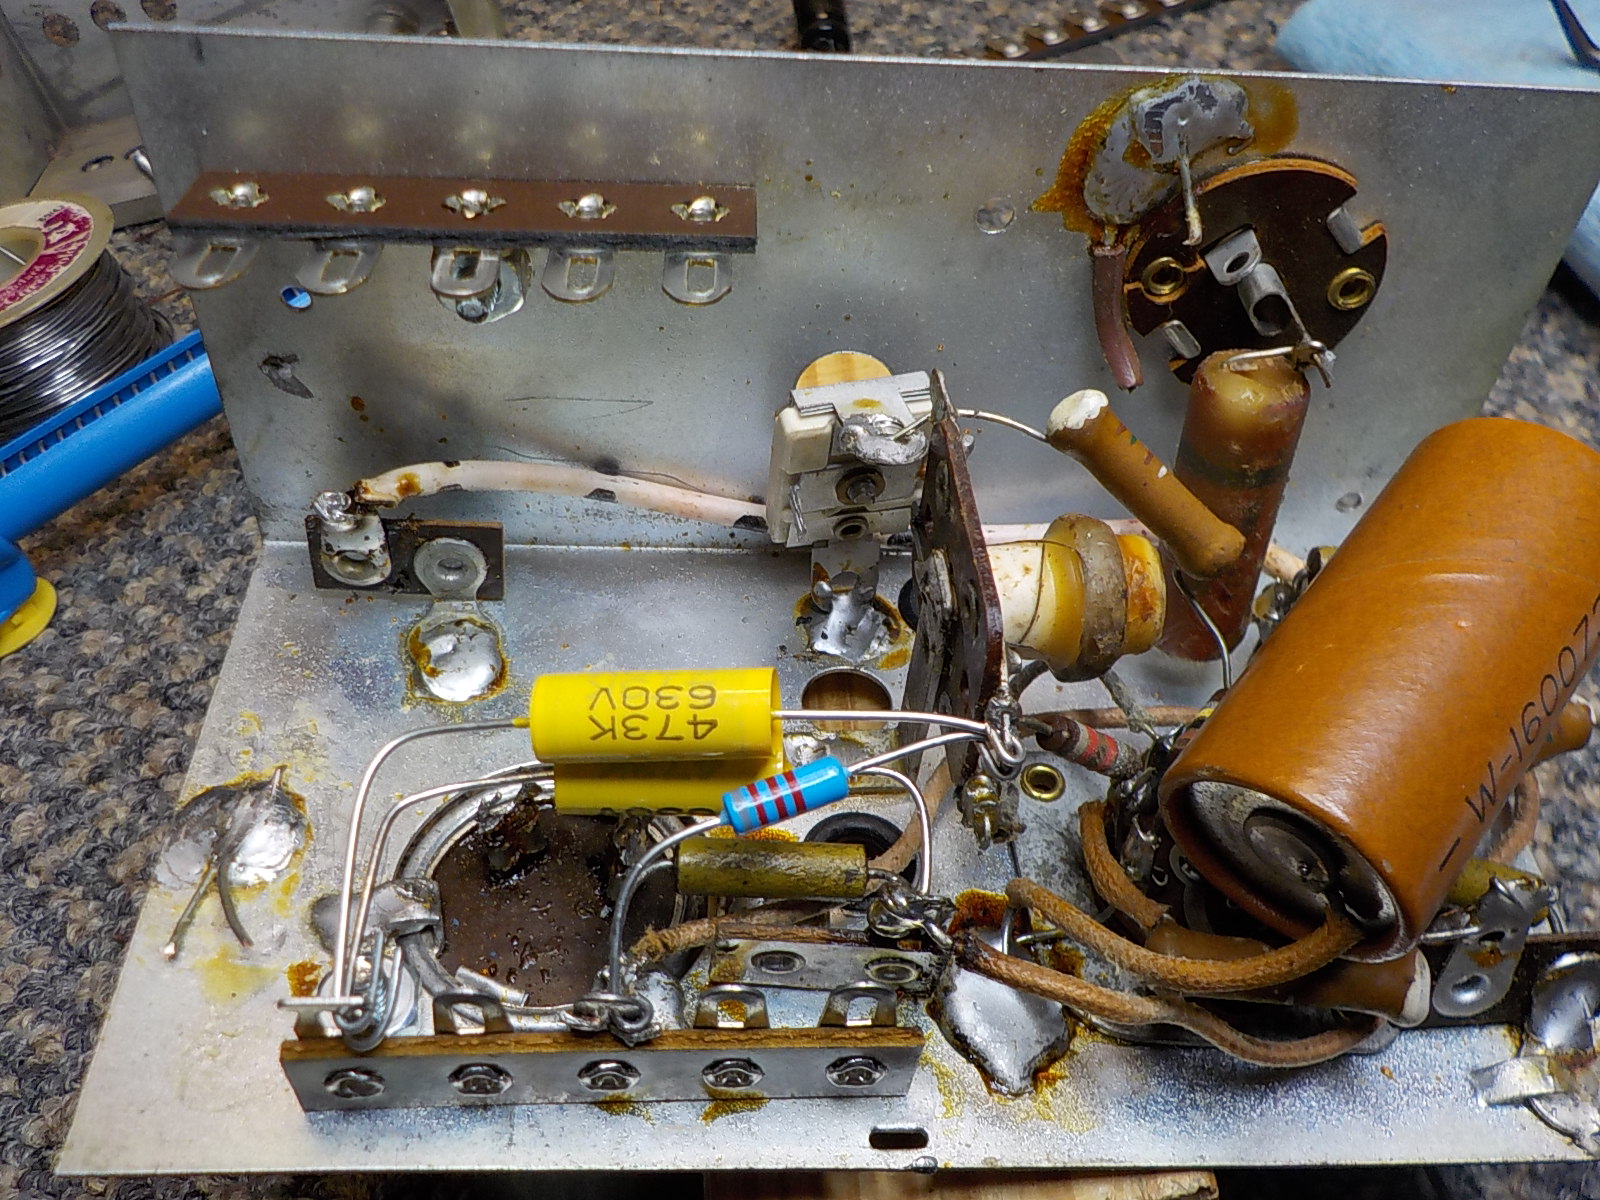
Soldered everything in place. That big resistor is in the filament string coming of the raw B+.
If I could find the place called "Somewhere", I could find "Anything" 
Tim
Jesus cried out and said, "Whoever believes in me , believes not in me but in him who sent me" John 12:44
Posts: 1,212
Threads: 85
Joined: Jan 2014
City: Annapolis, IL
State, Province, Country: USA
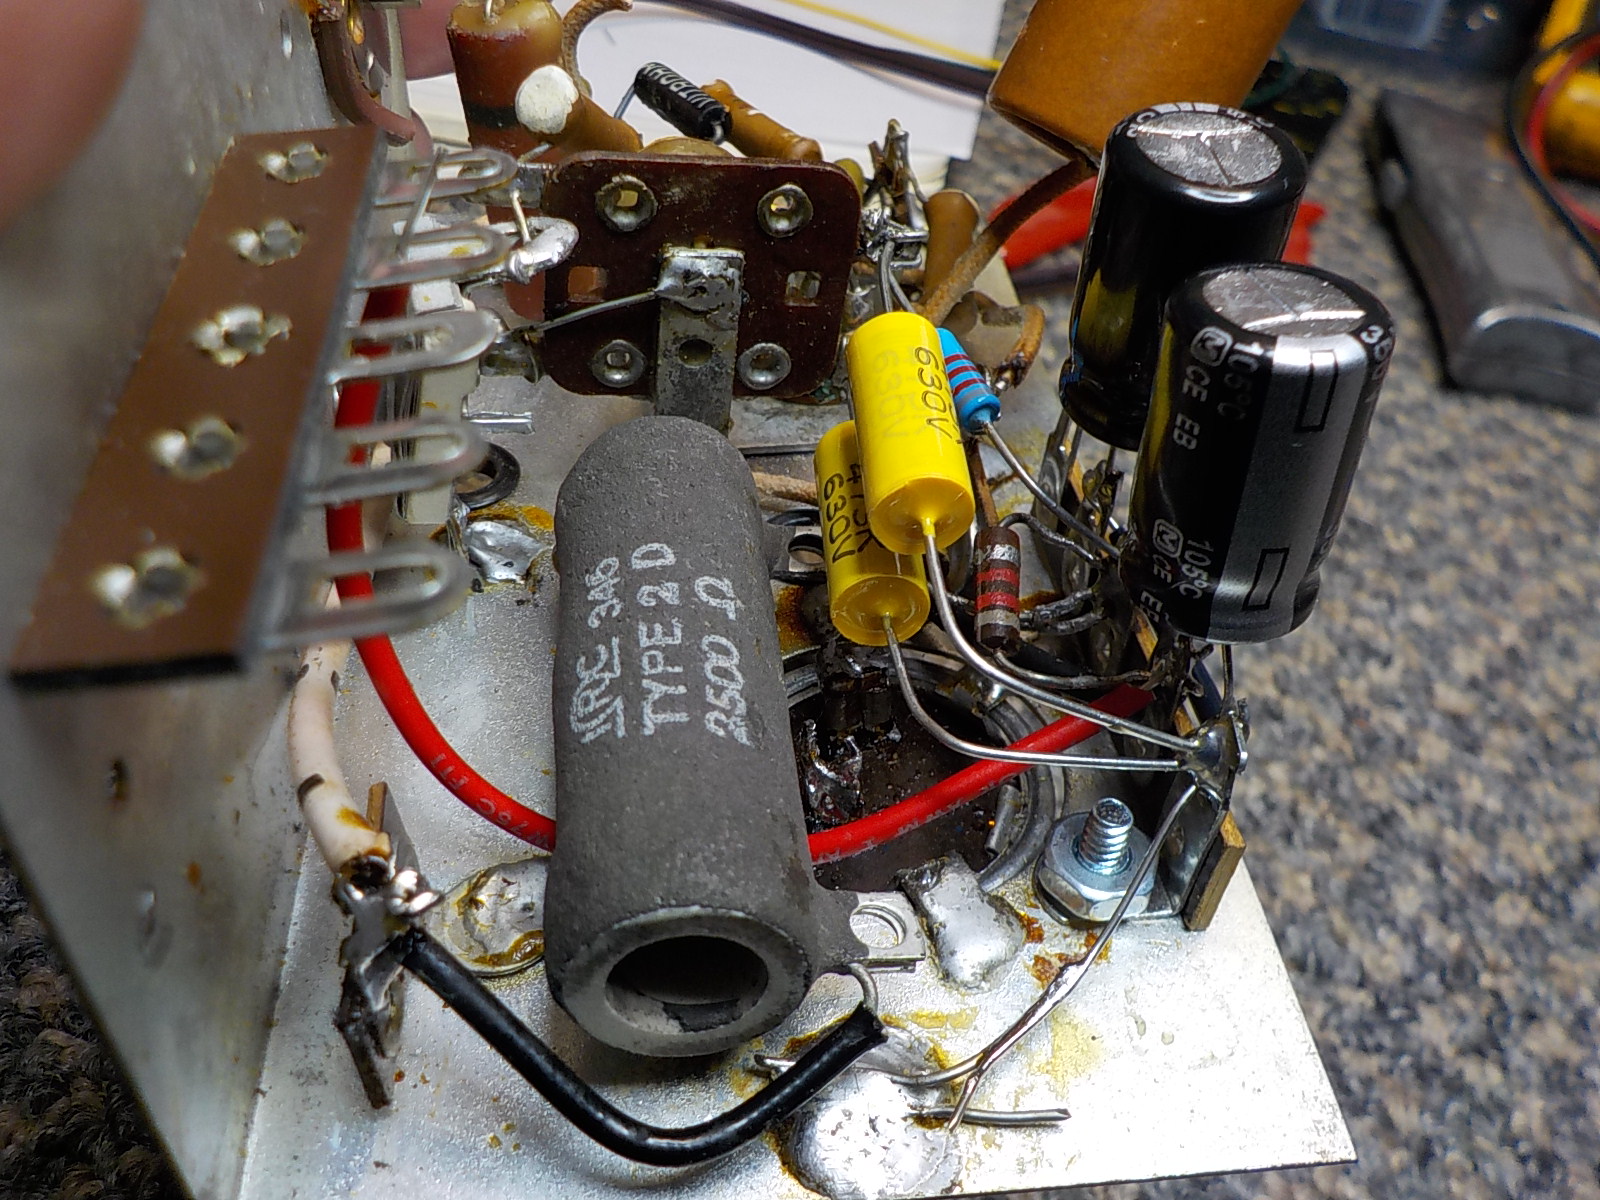
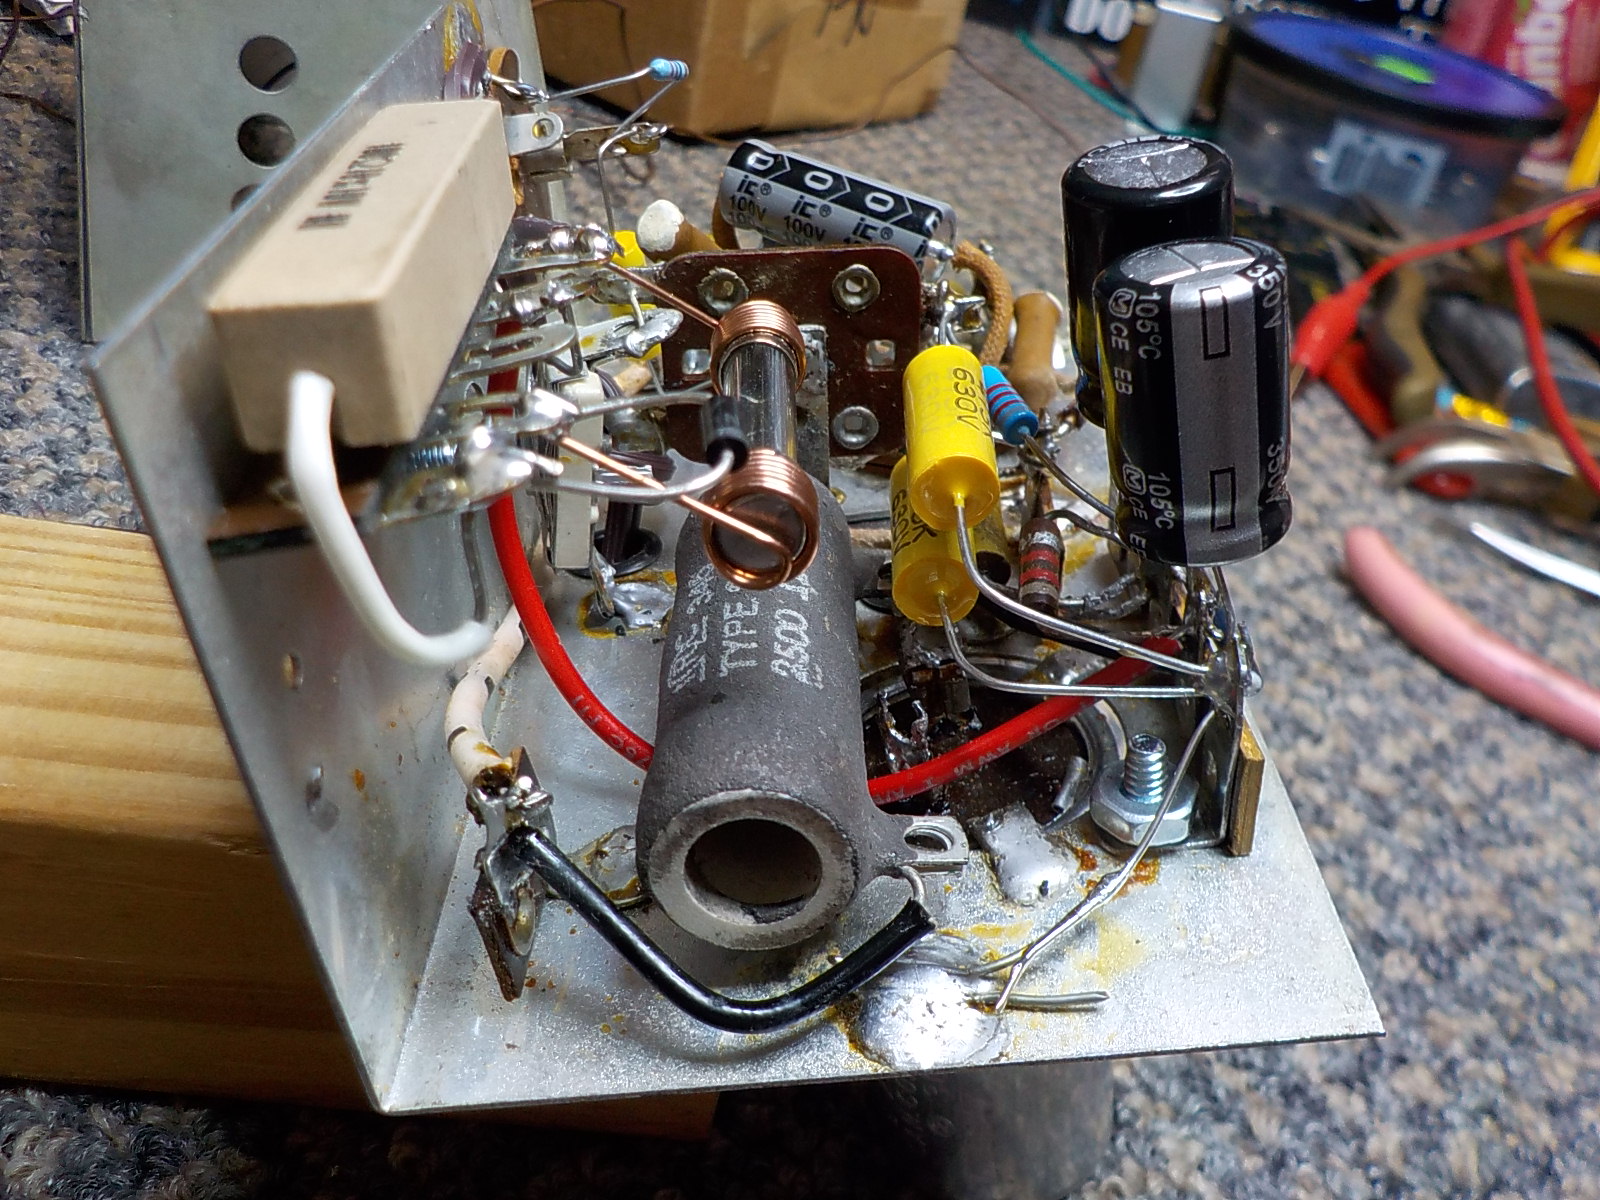
Here are a couple shots of the finished recap. I added a 1a fuse in case the diode shorts. After a couple of tries with different dropping resistors, I settled on a 100 ohm 10w. Runs barely warm. This put my B+ at 95v and the voltage across both tubes filament at 2.8v at 120v line. The tube filaments are connected in series.
Test 1: I found it set right around 1600 kc. The input was too sensitive for a line input and was over modulating. I put a 100 ohm resistor to cut down the signal. I may have to adjust some. Sound is clear, but very tinny. I am going to play around some with the input coupling cap and see if a different value will up the quality. As far as range, it doesn't go much past the radio room. Need to clean some dirty tube socket contacts and tighten up the input jack.
If anyone can read the color code on those brown ceramic capacitors, it would be great. My cap tester has them at 150pf. I am about half color blind.
If I could find the place called "Somewhere", I could find "Anything" 
Tim
Jesus cried out and said, "Whoever believes in me , believes not in me but in him who sent me" John 12:44
Posts: 7,303
Threads: 269
Joined: Dec 2009
City: Roslyn Pa
Looks like brown green brown = 150mmf.
When my pals were reading comic books
I was down in the basement in my dad's
workshop. Perusing his Sam's Photofoacts
Vol 1-50 admiring the old set and trying to
figure out what all those squiggly meant.
Circa 1966
Now I think I've got!
Terry
Posts: 1,212
Threads: 85
Joined: Jan 2014
City: Annapolis, IL
State, Province, Country: USA
Thanks Terry. Darned eyes ... been kinda burning this in some today. I think I was still overmodulating, so I redid the input on a control and I can really back it down now. I need to get a mini control to set in there and leave. Got a 5k about the size of a truck tire. I am trying to work out some kind of fading problem. I haven't decided if it is drifting in frequency or just losing some volume. I am going to have to have to start it cold and watch the counter. I did get it to go through the entire house signal wise. Just extended the antenna lol! B+ is steady. Still experimenting...
If I could find the place called "Somewhere", I could find "Anything" 
Tim
Jesus cried out and said, "Whoever believes in me , believes not in me but in him who sent me" John 12:44
Posts: 1,212
Threads: 85
Joined: Jan 2014
City: Annapolis, IL
State, Province, Country: USA
Been experimenting with this some. I don't really note any change in sound quality by changing the value of the input cap. I am getting some kind of drift tho. I think that 2.5k resistor is heating things under the chassis and causing something to change, so I connected a sub outside of the chassis. This is keeping things much cooler inside, but now I have this really hot resistor hanging off the chassis somewhere. Any thoughts of subbing a zener or series of those to drop the B+ from 130v down to around 3v? Need to find something workable, but with some kind of protection for those tubes filaments.
If I could find the place called "Somewhere", I could find "Anything" 
Tim
Jesus cried out and said, "Whoever believes in me , believes not in me but in him who sent me" John 12:44
Posts: 184
Threads: 3
Joined: Feb 2018
City: Chesapeake VA
Adding a resistor to lower B+ likely causes additional over modulation... Yet to see a instance that it did not...
Modulation linearity with a pentagrid mixer/osc type will be poor at best... Not so bad for a kid yelling into a mike that his buddy next door is trying to receive, usually unsatisfactory for music... Max usable modulation level for music probably 30% at best...
Add a 50K-100k pot to input to set gain level...
For drift, those old wax osc coils are famous... Removing and baking at 170-180* for a few hours will help, but ultimately it needs to be in a stable temp environment when in operation...
I'd switch to transformer operation... The LP-427 could be configured to provide B+ and supply for tube filaments... Use one primary as B+ supply and half of secondary to supply filament voltage... Would still require a resistor but can be far less value and wattage, probably become only slightly warm...
http://www.mpja.com/12V-1A-Center-Tapped.../27838+TR/
Posts: 1,212
Threads: 85
Joined: Jan 2014
City: Annapolis, IL
State, Province, Country: USA
That would solve a bunch of problems, including the 'live chassis'. It would be a lot easier to drop down from 6.3v to 1.4. Probably could find a zener that would do it. I found that transformer but I wasn't sure if the 2nd primary would work for a secondary. I do have to drop the modulation back pretty far to get clean sound. BTW, are you the same 35Z5 from ARF?
If I could find the place called "Somewhere", I could find "Anything" 
Tim
Jesus cried out and said, "Whoever believes in me , believes not in me but in him who sent me" John 12:44
Posts: 184
Threads: 3
Joined: Feb 2018
City: Chesapeake VA
(02-23-2018, 08:37 PM)TV MAN Wrote: BTW, are you the same 35Z5 from ARF?
One in the same.
If only using one primary winding the available current on secondary is going to be half, less what's drawn by the primary now supplying B+ voltage... BUT the tubes draw such a small amount of current it's a non-issue... The secondary is center tapped so you'd only need half, rectify & filtering that 3v would give approx 4.2v DC... Will only require a small amount of resistance added... You could start out on variac, then increase voltage to see what input is necessary to give proper filament voltage... Rather than risk tubes, use something like a #47 dial bulb for load... Also possible to use resistor in primary circuit of transformer, that would limit B+ & filament voltage...
I may seem cautious but those frail little battery tubes give me the willies... I stay away from them as much as possible...
Posts: 1,212
Threads: 85
Joined: Jan 2014
City: Annapolis, IL
State, Province, Country: USA
This project has kinda been odd. I don't want to totally rework it, but is being a challenge. I have it working fairly stable now with that big resistor outside. I may order one of those transformers and see how it works and if I can find a place to mount it where it looks right. I am not too impressed with the sound quality, but it would be good to test radios on lower frequencies since I can set it anywhere I want. I don't want to spend much more time or money on it for that reason. I may try to find a suitable cabinet it and use it for testing purposes. I think it is time to start a fresh build.
If I could find the place called "Somewhere", I could find "Anything" 
Tim
Jesus cried out and said, "Whoever believes in me , believes not in me but in him who sent me" John 12:44
Users browsing this thread: 1 Guest(s)
|
|
Recent Posts
|
|
Philco newbie with P-1891-WA console questions
|
| Hello Jeff ,
Far as the Electrolytic capacitors go here is a list of parts.
that will work . I like using Nichicon and...radiorich — 09:50 PM |
|
Philco newbie with P-1891-WA console questions
|
| Well, I've been stumped at trying to get the first of 11 electrolytic capacitors. I got a schematic and have a list of t...Jeffcon — 07:54 PM |
|
Model 80 Antenna Issue?
|
| Thanks Gary and Rod.
I also found an article in the Philco Repair Bench under Service Hints and Tips, about installi...Hamilton — 12:32 PM |
|
Model 80 Antenna Issue?
|
| Hello Hamilton, here is a little information found in our Philco Radio Library at the bottom of the Home page. Hope it ...GarySP — 11:28 AM |
|
Model 80 Antenna Issue?
|
| I did as you suggested and touching the middle of the volume control did nothing so the coil has to be rewound. Any idea...Hamilton — 10:19 AM |
|
1949 Motorola 5A9M
|
| This would be the second portable in the "other radios" forum where I have a similar one in my collection. I h...Arran — 12:41 AM |
|
Looking for any info: 1977 Ford-Philco Console Hi-Fi Turntable and Radio
|
| Hi PittsburgTost.
The record changer looks like a Garrard or BSR (Likely Garrard). The spindles just pull out and pu...MrFixr55 — 11:57 PM |
|
Looking for any info: 1977 Ford-Philco Console Hi-Fi Turntable and Radio
|
| Hello PittsburghToast ,
Welcome aboard and it looks like gary may have something for you !
now if I dig through my se...radiorich — 11:35 PM |
|
Model 80 Antenna Issue?
|
| You are kind of on the right path. You can touch the grid cap of the Detector/Oscillator 36 tube. I'm expecting a respon...RodB — 08:48 PM |
|
Looking for any info: 1977 Ford-Philco Console Hi-Fi Turntable and Radio
|
| Welcome to the Phorum, PittsburghToast! I found an old thread that my interest you regarding the quality and worth of P...GarySP — 08:48 PM |
|
Who's Online
|
| There are currently no members online. |

|
 
|
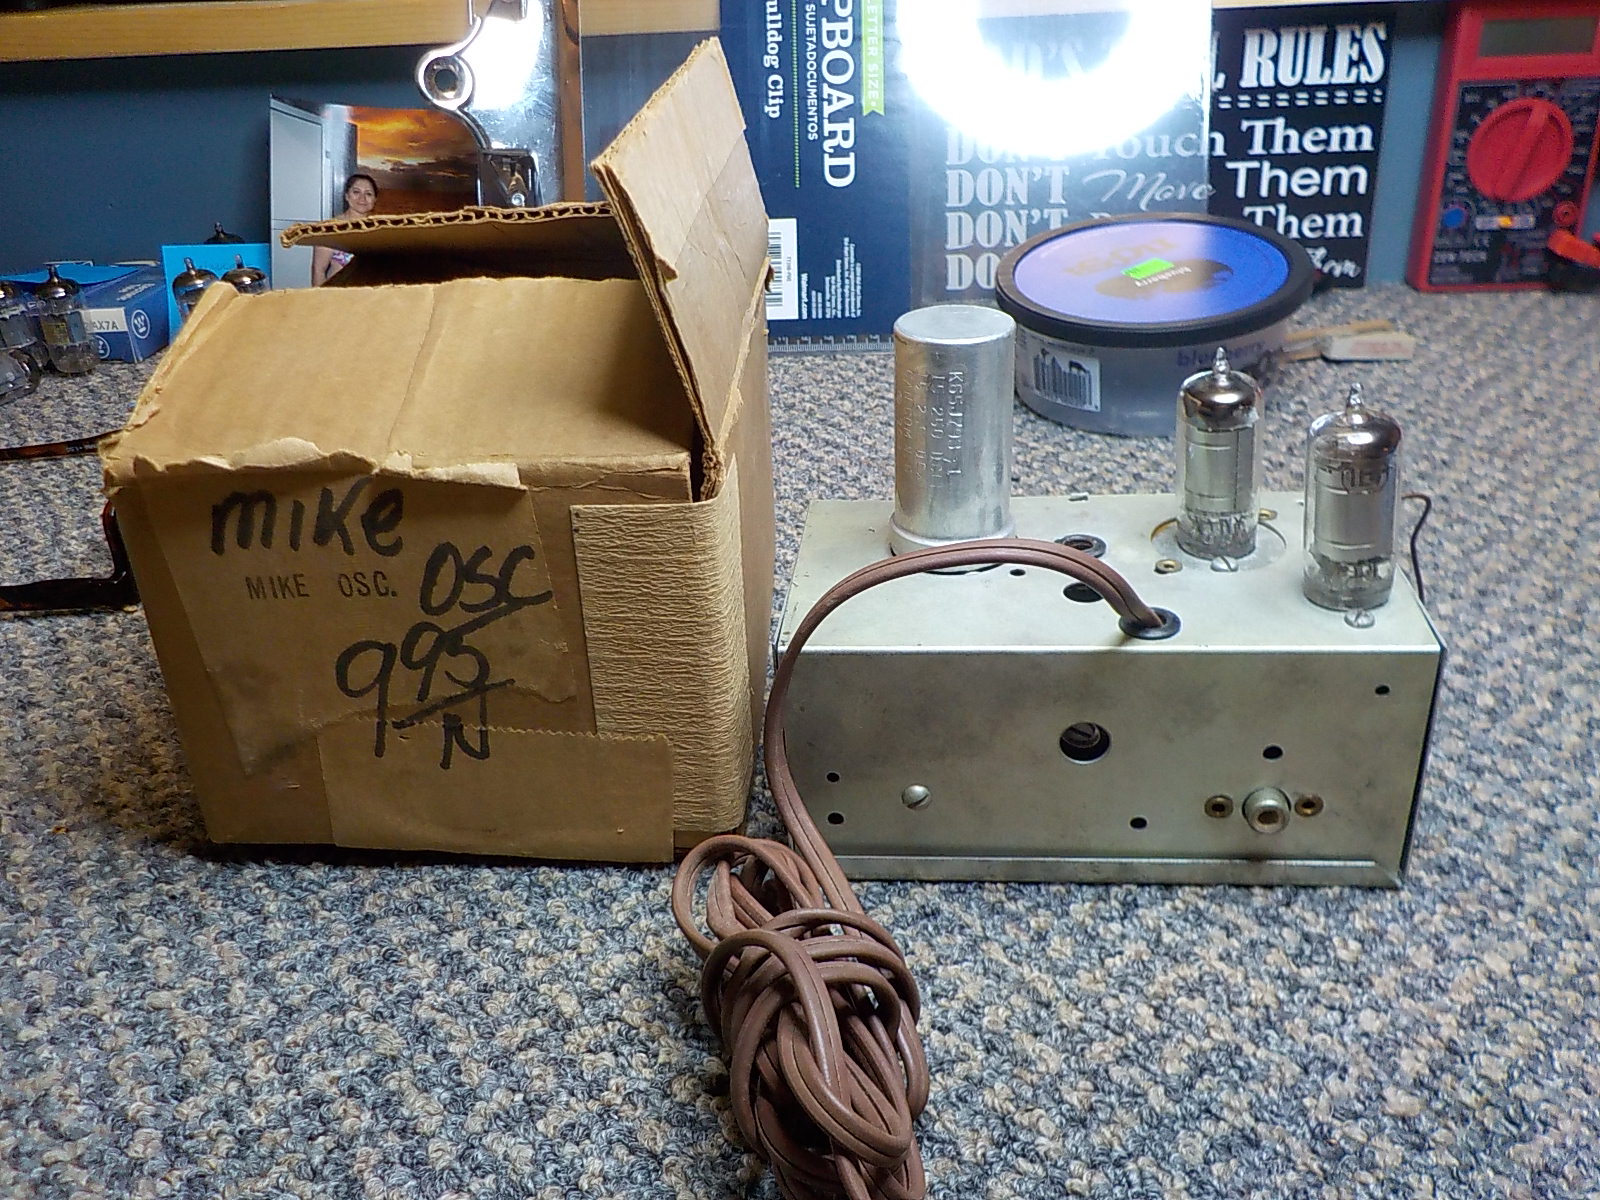
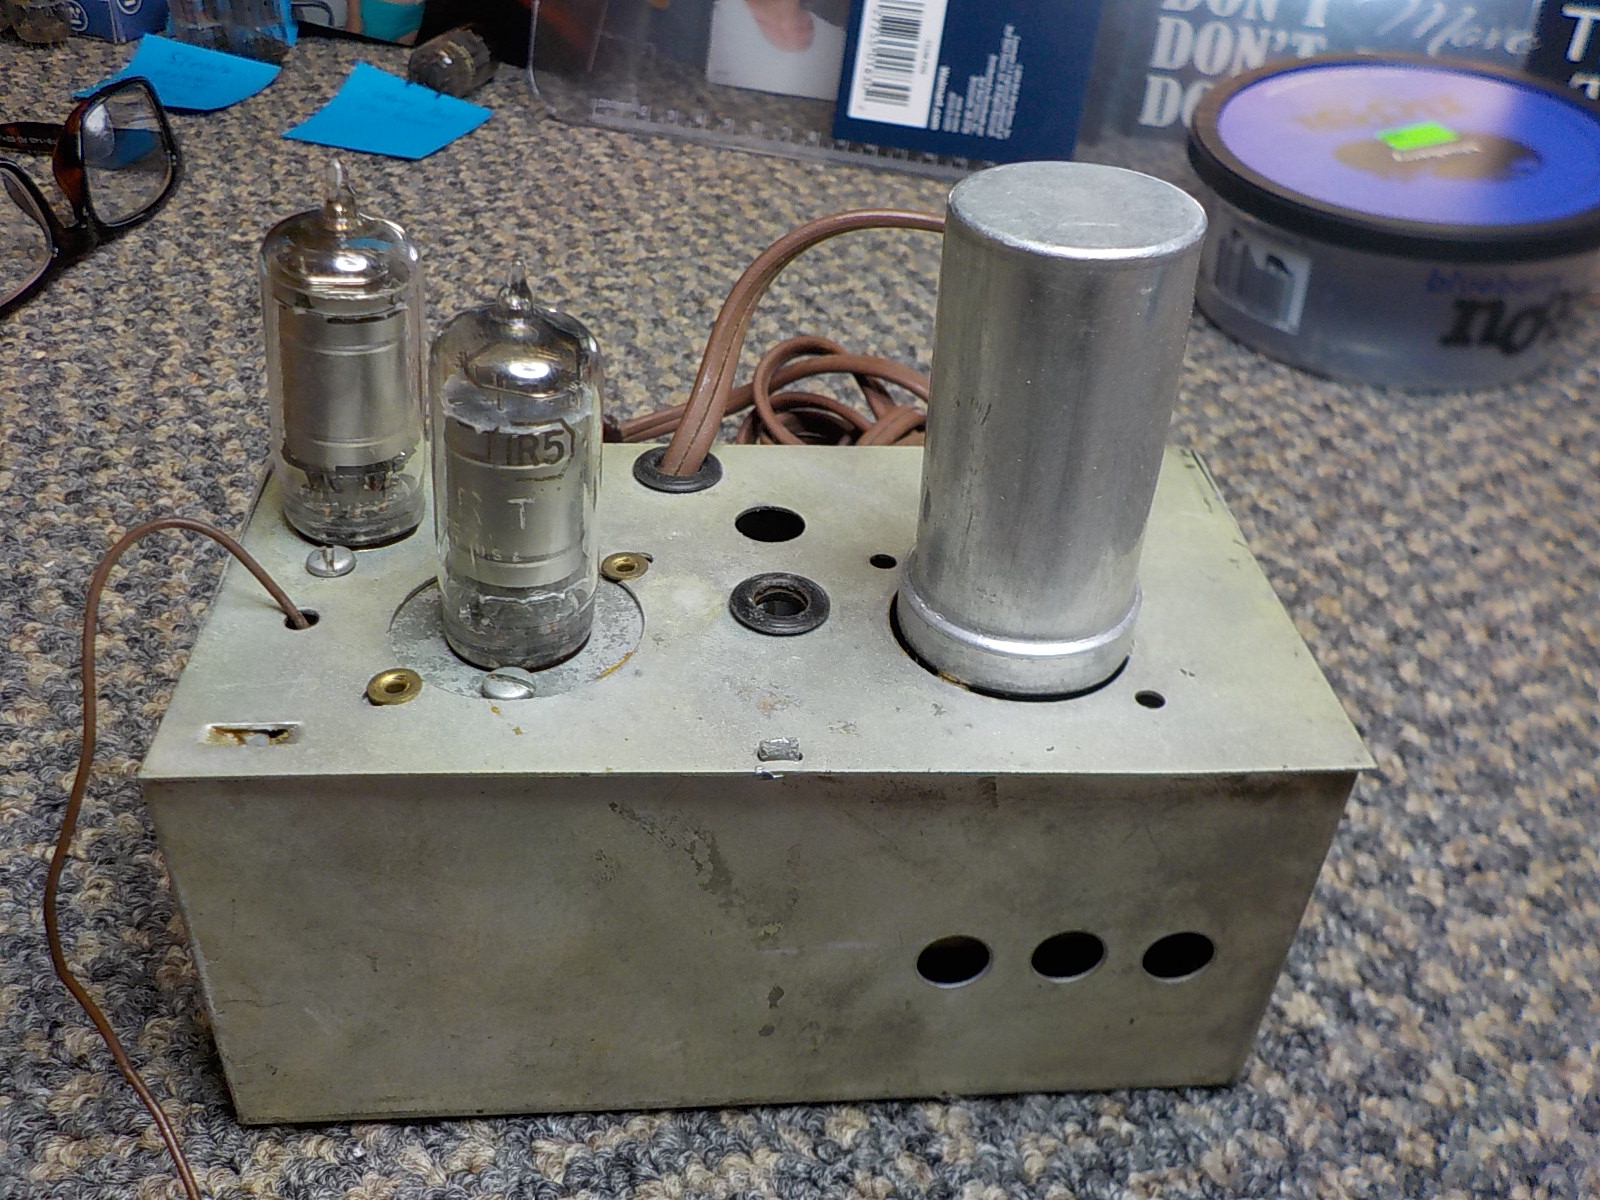
 ) on a Heathkit AM transmitter. This one was a lot less $$$. I am guessing made in 1953, judging from the markings on the box. It has 2 tubes, 1L4 and 1R5. Both test good. I am sure this is not a powerhouse, but something to play with. What I don't like is that this is a live chassis set. I will put a polarized plug on it to help. I make a cabinet for it if I like the way it works. If not, I may use it for parts to make something else.


![[-] [-]](https://philcoradio.com/phorum/images/bootbb/collapse.png)


