Posts: 13,776
Threads: 580
Joined: Sep 2005
City: Ferdinand
State, Province, Country: Indiana
Last weekend I picked up this neat Zenith tombstone.
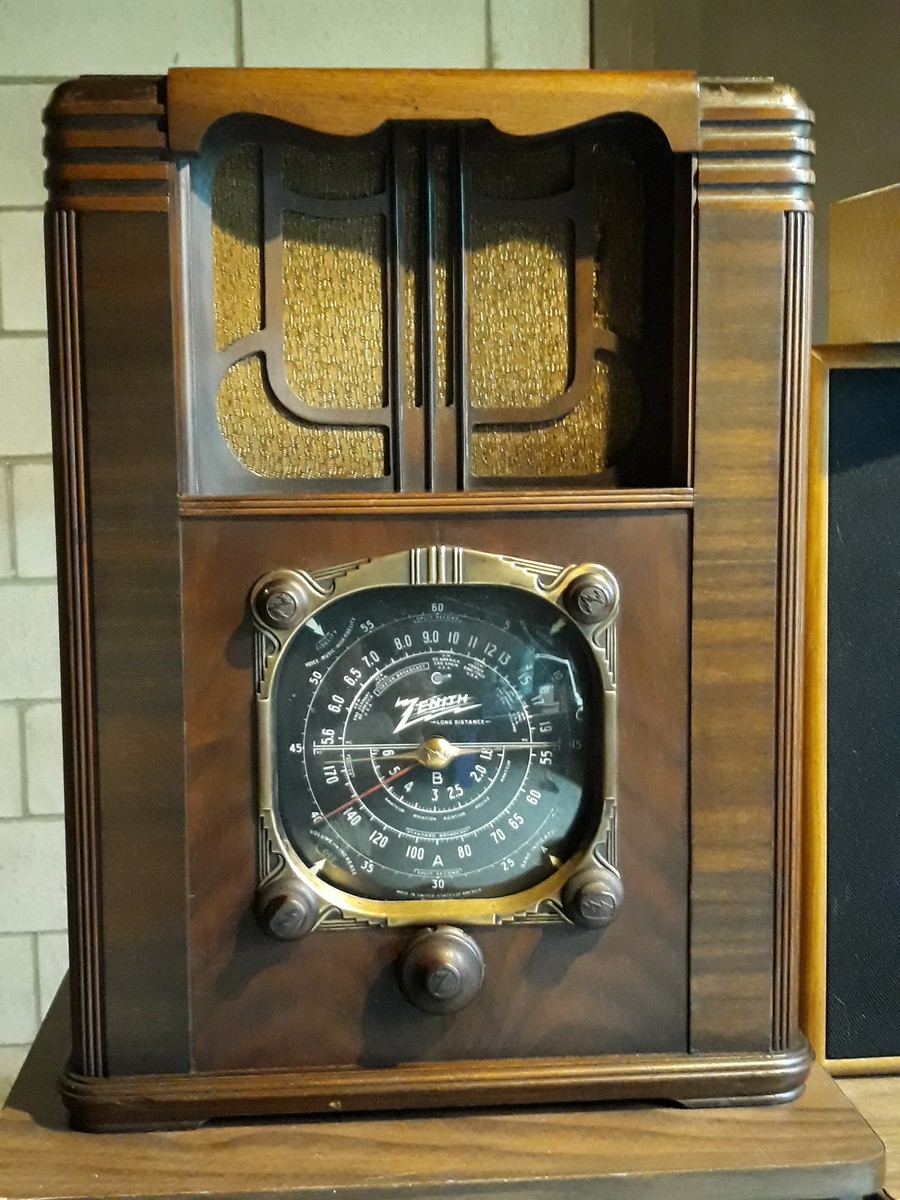
The cabinet is a 6-B-129. The chassis is AC powered and is either a 6-S-128 or 6-S-137. Zenith chassis 6-S-147, 6-S-152, and 6-S-157 are identical.
Only the 6-S-128 and 6-S-137 use 8 inch speakers, the others use 10 inch speakers.
The 6-S-128 and 6-S-137 were originally in (different) tombstone cabinets. The 6-S-147 is a chairside. And the 6-S-152 and 6-S-157 are consoles.
I am therefore going to call this chassis a 6-S-128 since its rubber-stamped model number is not visible.
So let's get going on its rebuild. 
--
Ron Ramirez
Ferdinand IN
Posts: 13,776
Threads: 580
Joined: Sep 2005
City: Ferdinand
State, Province, Country: Indiana
I needed to replace the dial belt since a dial belt was missing from this set. I ordered it the day after I bought the radio, and it arrived a few days ago. Installation necessitated my removing the dial assembly to get it started around the upper pulley, and then undoing the tuning shaft enough to get the belt around the lower pulley.
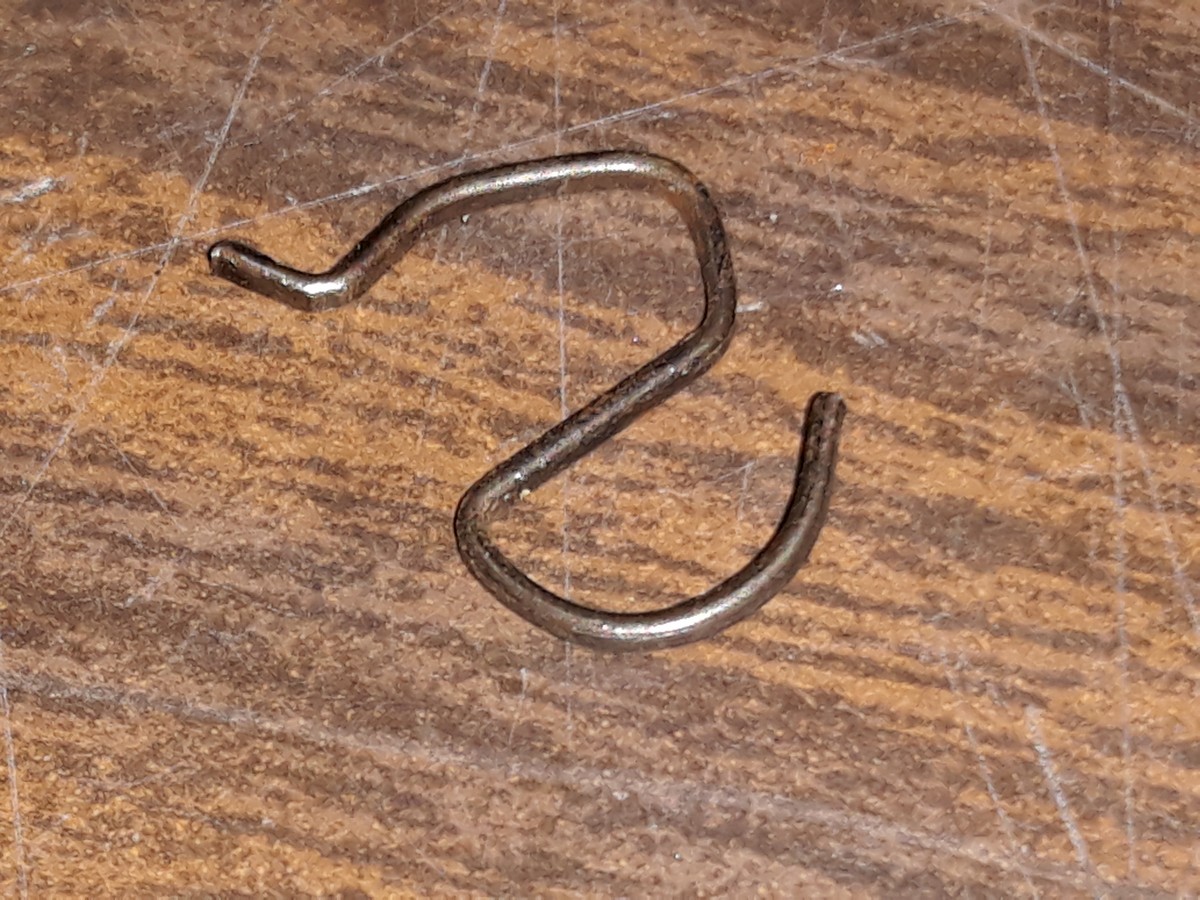
I took the following photos so I would remember how the clips attach which hold the dial glass in place.
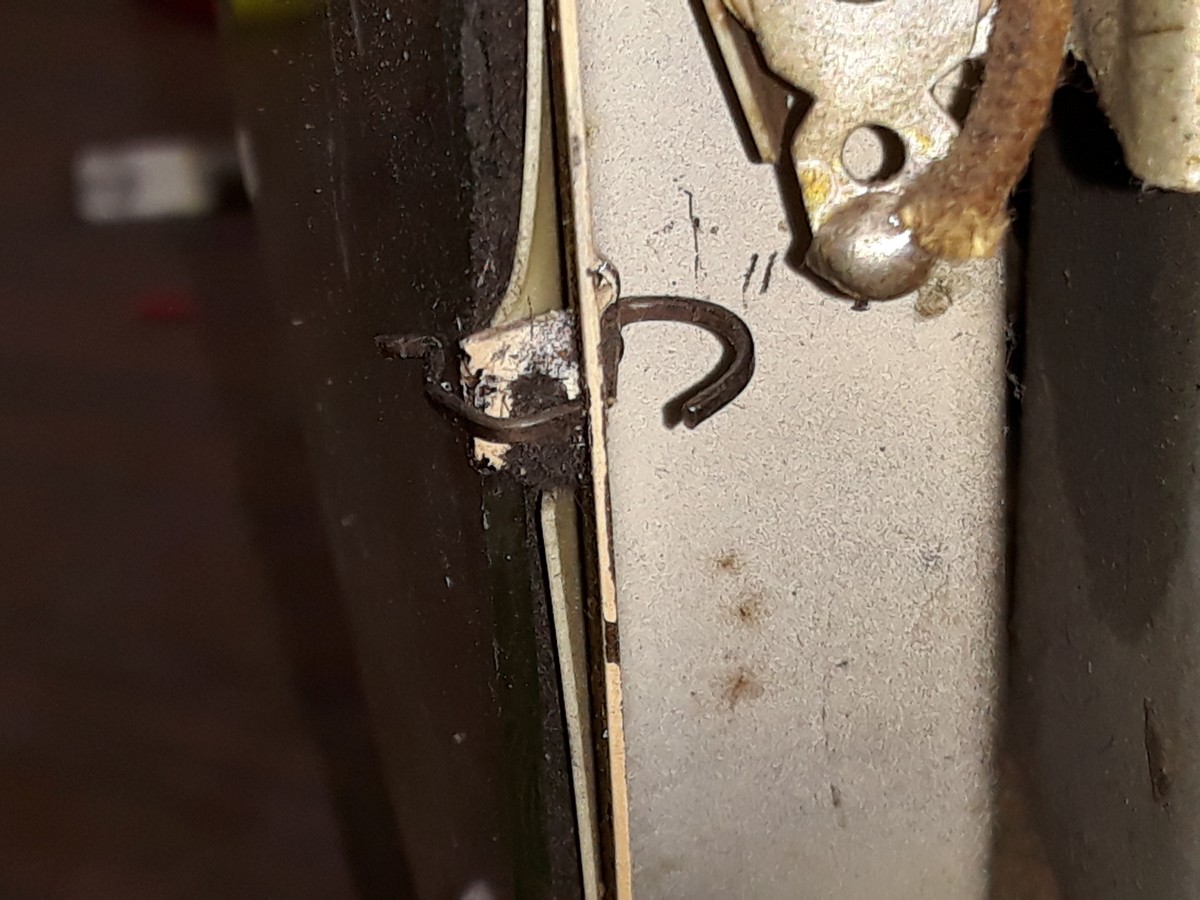
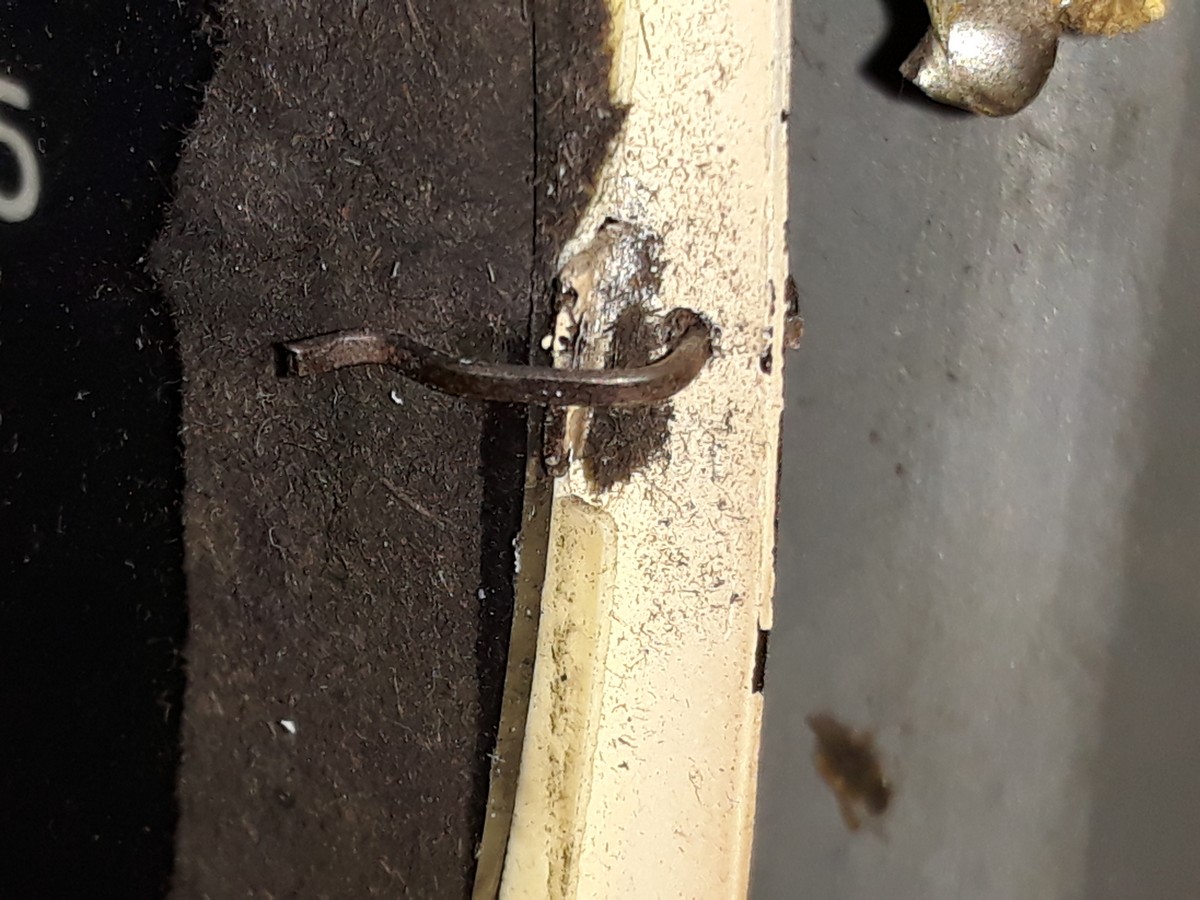
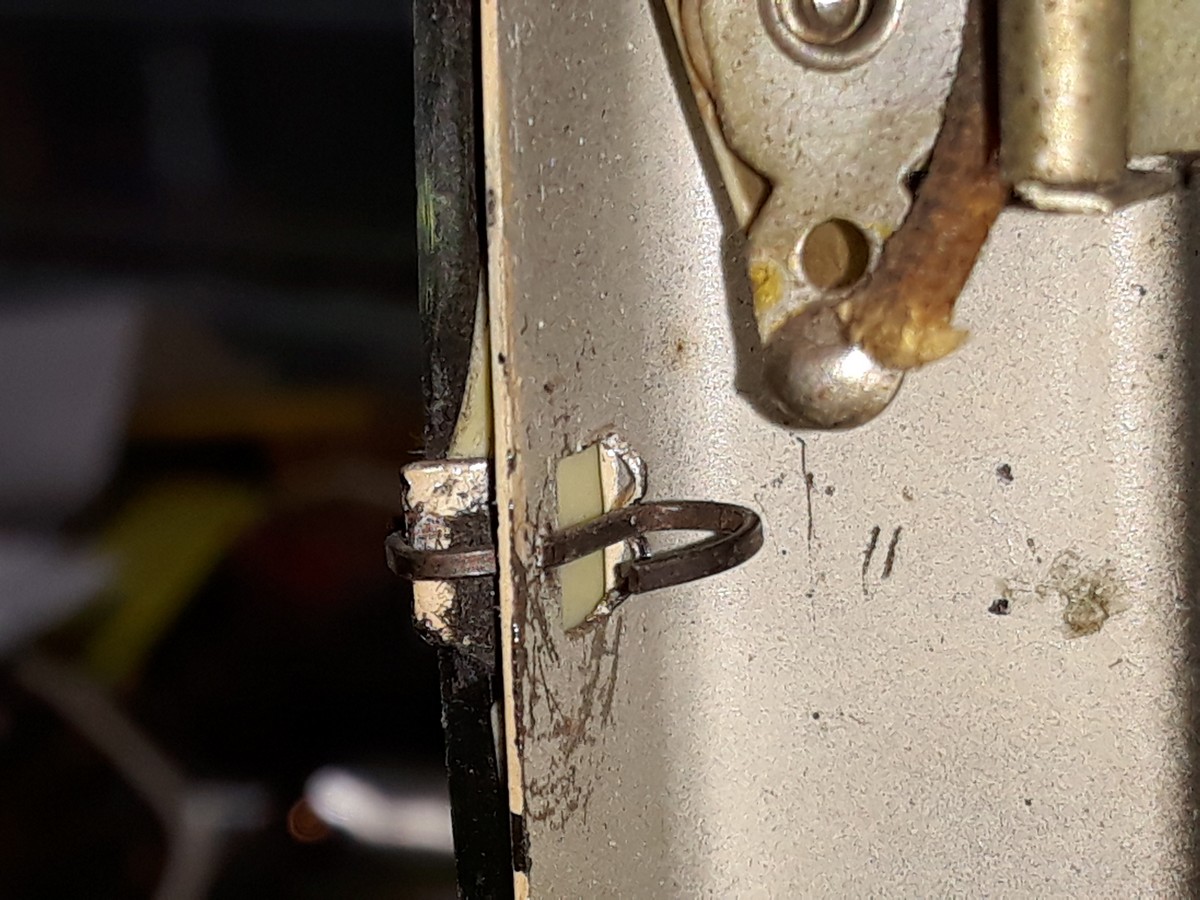
Now a close-up of one of the clips:
--
Ron Ramirez
Ferdinand IN
Posts: 13,776
Threads: 580
Joined: Sep 2005
City: Ferdinand
State, Province, Country: Indiana
I started to reassemble the dial assembly...
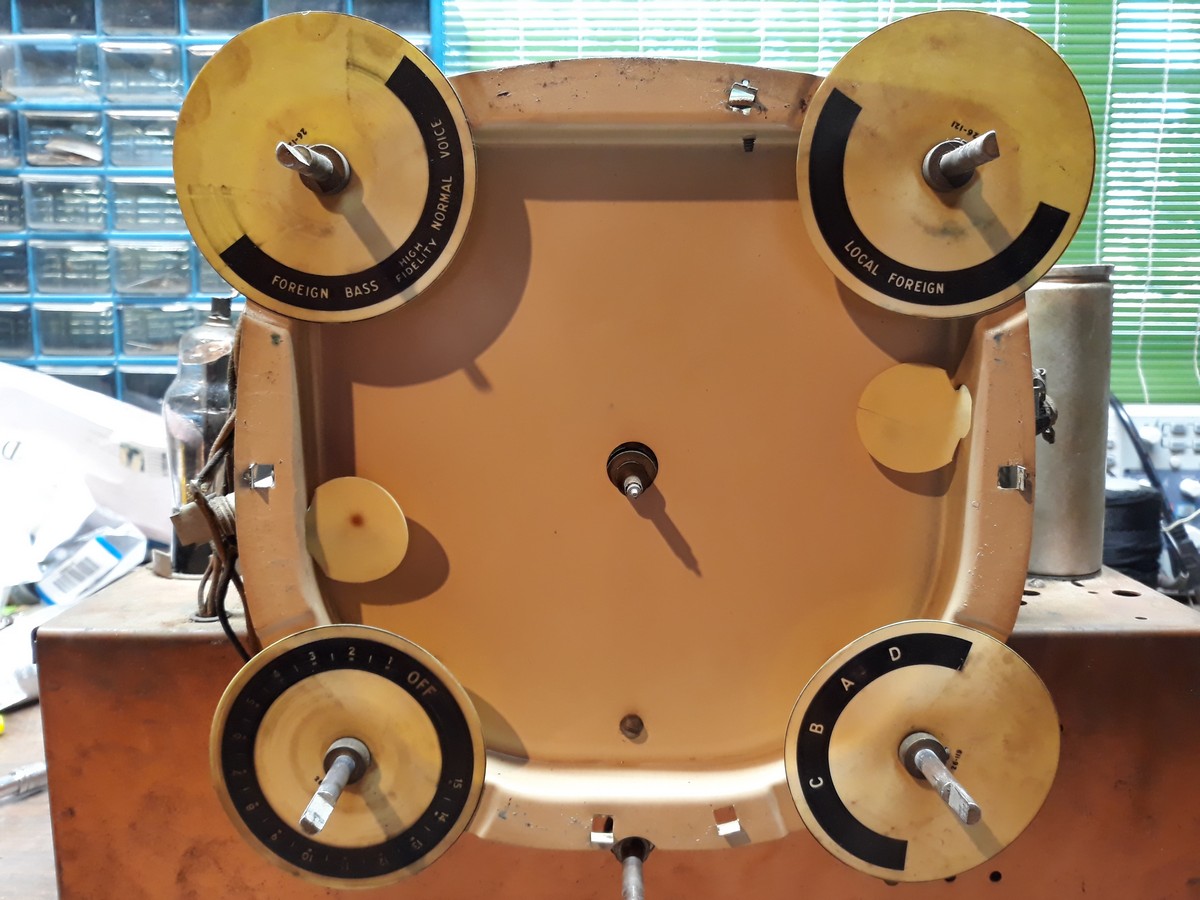
...and then realized I would need to turn the chassis upside down to work on it.
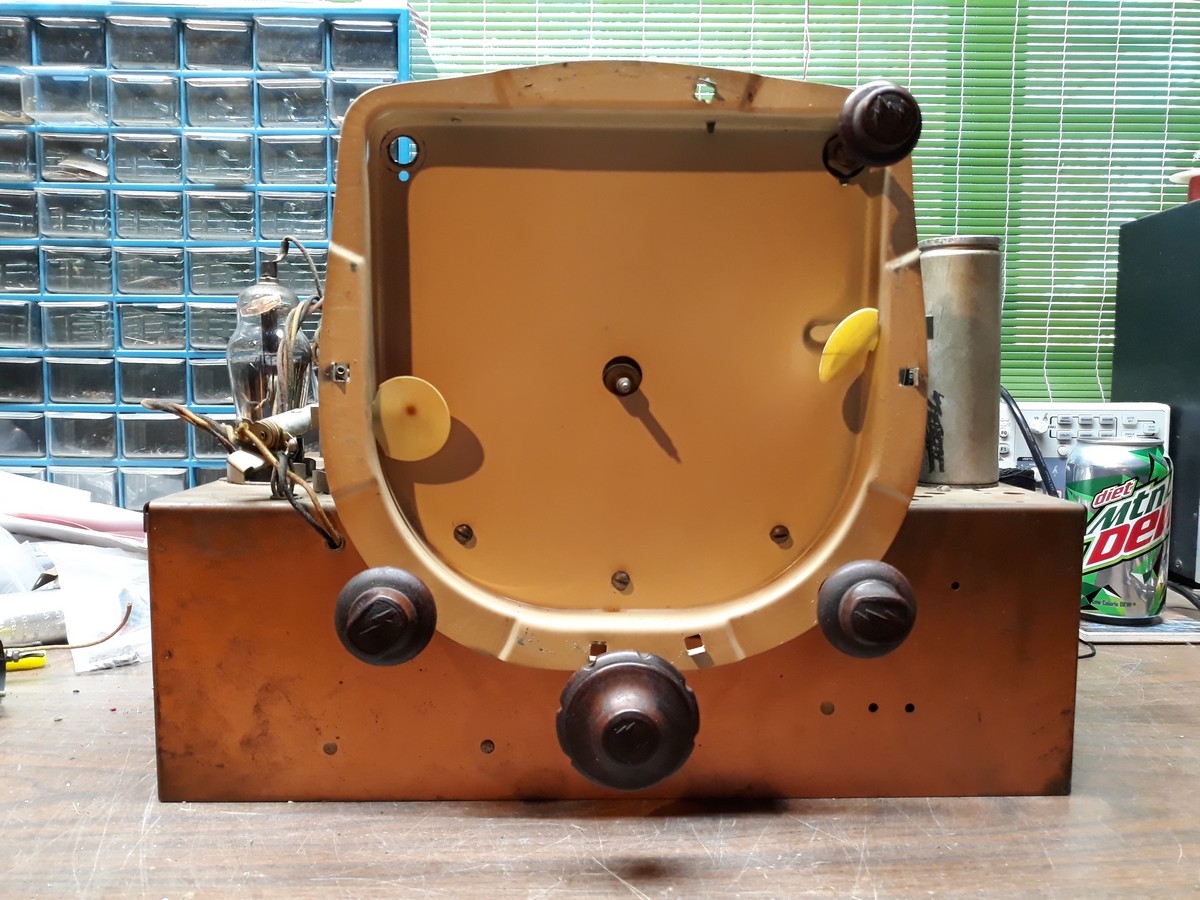
So the four indicators were removed and put in a safe place with the dial, dial glass, gasket, and the two small bags which hold the pointers and the dial glass clips.
I also removed the tone control from the dial assembly so it would not get broken.
The front then looked like this:
--
Ron Ramirez
Ferdinand IN
Posts: 13,776
Threads: 580
Joined: Sep 2005
City: Ferdinand
State, Province, Country: Indiana
Let's take a look at this chassis.
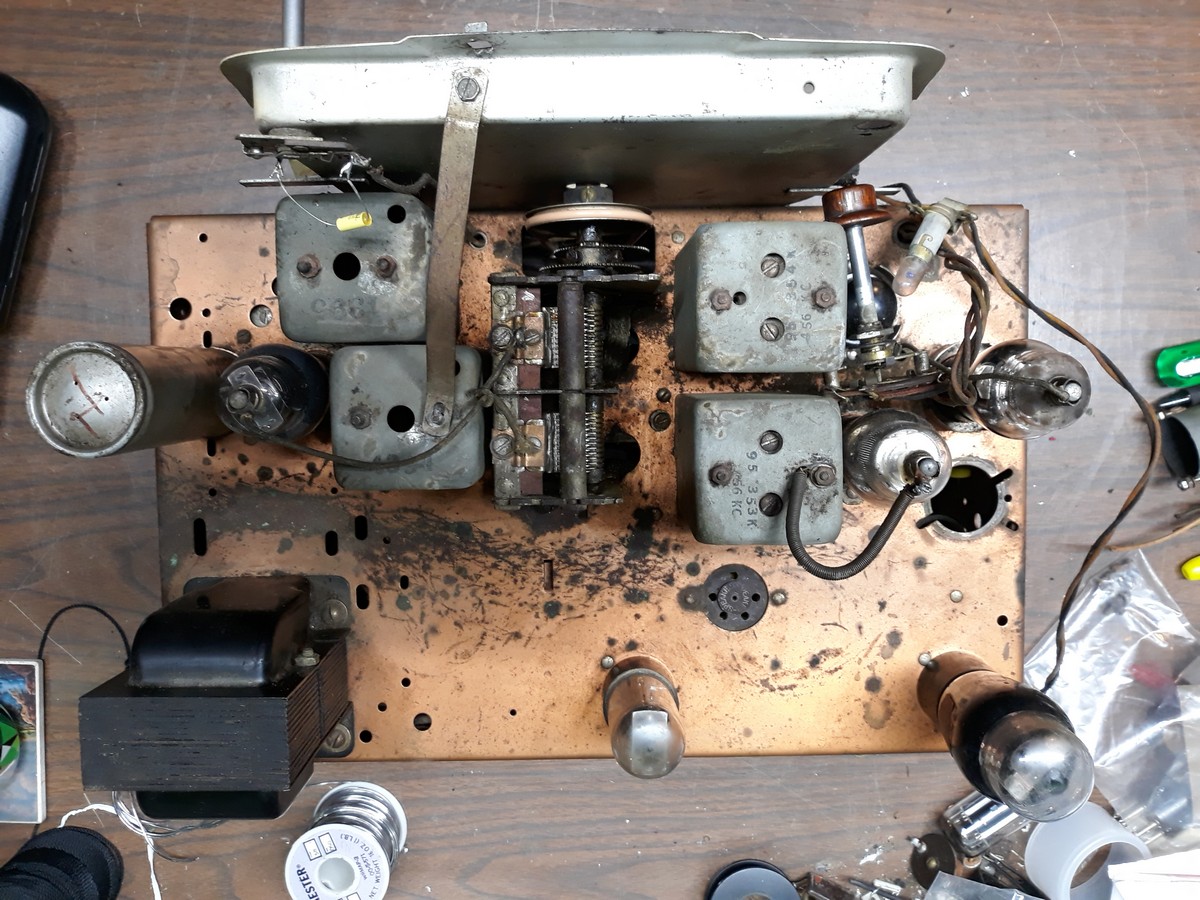
Kind of grungy on top. Hopefully I can clean it up somewhat.
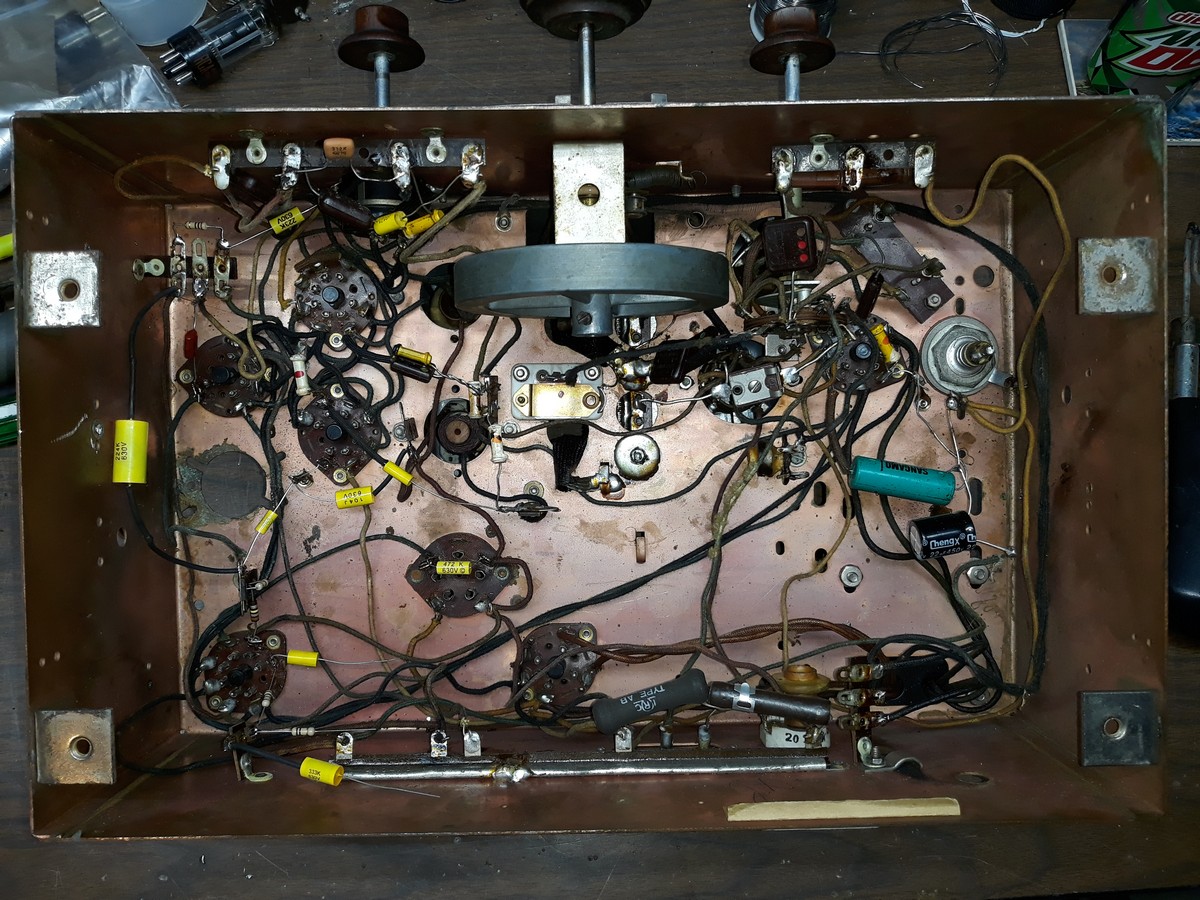
Underneath...it has been worked on before but the work was sloppy. When I took this picture I had already started working on it, replacing many of the components on the left side of the chassis and removing the replacement electrolytics which were dangling in the chassis on the left and right.
Fortunately, the original electrolytic cans were still on the chassis.
Here's one of them, which mounts to the chassis with two studs, nuts and lockwashers:
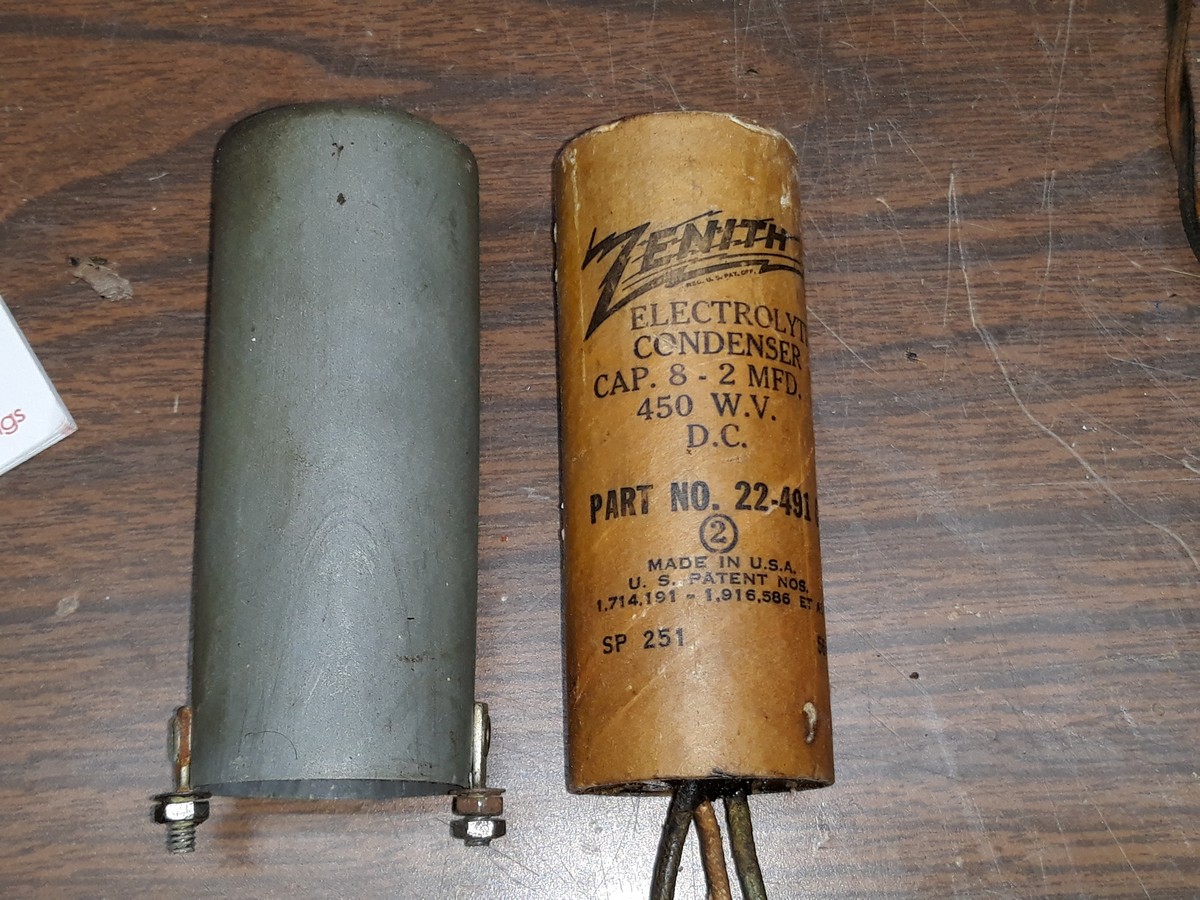
After removal of the can, with the nuts and lockwashers removed from the studs, the actual dual section electrolytic simply slid out of the can. Easy.
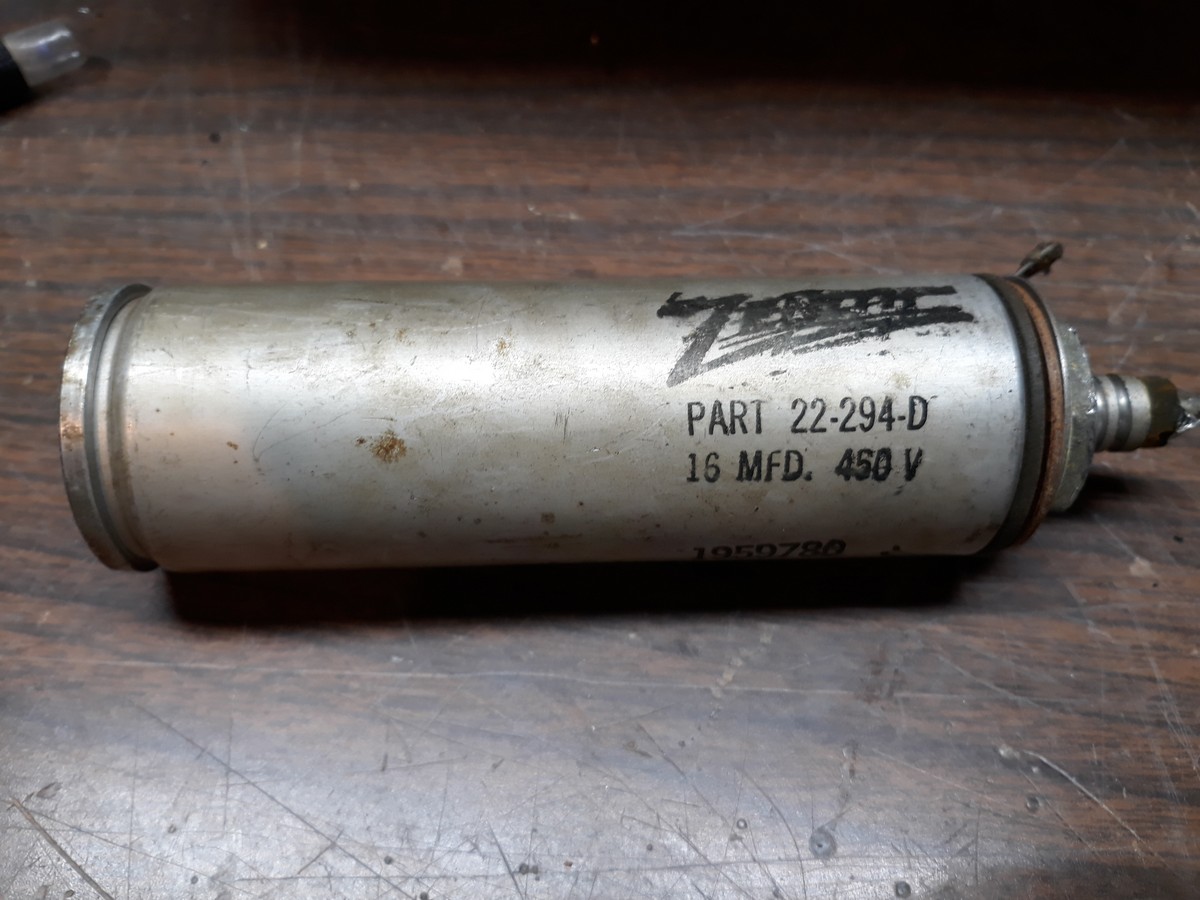
Here's the other electrolytic can, 16 uF. I really wish people wouldn't cut off the positive solder lug at the electrode - I like to reuse those lugs as it makes soldering wires to the positive end much easier.
I had a very difficult time getting its mounting nut loosened up to remove the can. Perseverance finally paid off, however.
I won't be polishing this can as I usually do, for to do so would make the Zenith logo disappear.
Both cans will be restuffed - the single section with two Solen 8 uF film caps to equal 16 uF; the other with new electrolytics.
--
Ron Ramirez
Ferdinand IN
Posts: 1,470
Threads: 97
Joined: Jul 2012
City: Poughkeepsie, N.Y.
Ron ...Nice catch. It will be a good one when restored. 
Posts: 1,531
Threads: 242
Joined: Sep 2012
City: West Bend, Wisconsin
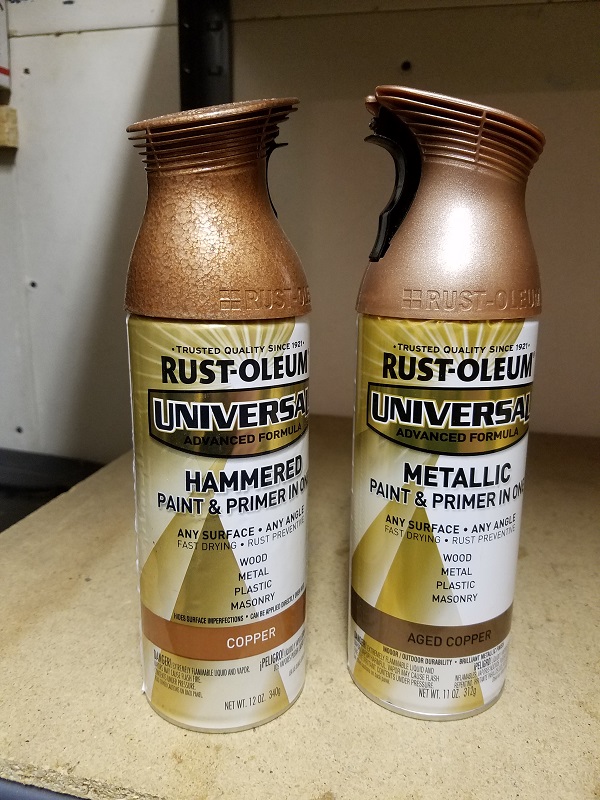
Excellent work, Ron. Having just went through my 6S152 back in August, the "drill" looks very familiar. Regarding the chassis, originally they were copper flashed I think, and later on they were painted, so there's not much that can be done other than stripping it down and have it re-flashed, or mask it off and paint it. I opted for the latter on most of the Zenith's I've done. I've used both of these paints....some of the Zenith's had a more "hammered" appearance to the paint, while others were just plain copper. You can find this paint at Menards, Home Depot, even some auto parts store chains carry it.
Good idea taking photos of how those dial glass clips go in. They take some finagling to get out...even more so to get back in! Thankfully the following year they stopped using those easily lost clips.
Greg V.
West Bend, WI
Member WARCI.org
Posts: 13,776
Threads: 580
Joined: Sep 2005
City: Ferdinand
State, Province, Country: Indiana
Greg
Thanks. (Thank you too, PhilcoJohn.) As I recall the 1938 models have the "hammered" appearance. This chassis is simply copper plated steel (plated both sides). I have a 9-S-262 chassis I hope to get to eventually. That chassis has a lot of corrosion on one side and will need serious cleanup and then painting with the "hammered" copper paint.
Good idea on the paint...but it's too cold here to do any painting now.
--
Ron Ramirez
Ferdinand IN
Posts: 1,531
Threads: 242
Joined: Sep 2012
City: West Bend, Wisconsin
Yes, old man winter has reared its ugly head a bit early this year! Never had 6 inches of snow on Halloween before, even here in Wisconsin! Painting and toning will have to wait until, oh say mid May. Maybe by then it will reach 60 again outside! 
Greg V.
West Bend, WI
Member WARCI.org
Posts: 1,475
Threads: 69
Joined: Nov 2012
City: Kansas city, MO.
Posts: 13,776
Threads: 580
Joined: Sep 2005
City: Ferdinand
State, Province, Country: Indiana
I now have both electrolytic cans ready to restuff. If I have time tomorrow evening, I will do that chore then.
I also need to order resistors to replace the long multi-section Candohm.
--
Ron Ramirez
Ferdinand IN
Posts: 16,533
Threads: 573
Joined: Oct 2011
City: Jackson
State, Province, Country: NJ
Very much the same things I dealt with in my Zeniths. Even the cap with side screws.
People who do not drink, do not smoke, do not eat red meat will one day feel really stupid lying there and dying from nothing.
Posts: 13,776
Threads: 580
Joined: Sep 2005
City: Ferdinand
State, Province, Country: Indiana
Both electrolytics have been restuffed and reinstalled. Photos later.
New resistors are on order from Mouser to replace the old Candohm.
The Candohm will get rebuilt sometime after the next (hopefully, final) chemo session which is tomorrow. So with God's will I shall return to work on this set in a week and a half or so.
--
Ron Ramirez
Ferdinand IN
Posts: 1,199
Threads: 49
Joined: Oct 2017
City: Allendale, MI
Best of luck to you tomorrow and the days following. Actually, I don't believe in luck so just know you're in my thoughts and prayers!
Posts: 2,178
Threads: 158
Joined: Jan 2013
City: Westland, MI
+1 Ron! Keep us posted, and know we all have your back! Take care, Gary
"Don't pity the dead, pity the living, above all, those living without love."
Professor Albus Dumbledore
Gary - Westland Michigan
Posts: 1,824
Threads: 114
Joined: Jul 2014
City: Sneedville, TN
Interesting thread. I'll look forward to the next installment. You'll be in my thoughts and prayers, Ron. Get yourself well. You've become a real friend over the years I have been on this site.
Users browsing this thread: 1 Guest(s)
|
|
Recent Posts
|
|
1949 Motorola 5A9M
|
| This would be the second portable in the "other radios" forum where I have a similar one in my collection. I h...Arran — 12:41 AM |
|
Looking for any info: 1977 Ford-Philco Console Hi-Fi Turntable and Radio
|
| Hi PittsburgTost.
The record changer looks like a Garrard or BSR (Likely Garrard). The spindles just pull out and pu...MrFixr55 — 11:57 PM |
|
Looking for any info: 1977 Ford-Philco Console Hi-Fi Turntable and Radio
|
| Hello PittsburghToast ,
Welcome aboard and it looks like gary may have something for you !
now if I dig through my se...radiorich — 11:35 PM |
|
Model 80 Antenna Issue?
|
| You are kind of on the right path. You can touch the grid cap of the Detector/Oscillator 36 tube. I'm expecting a respon...RodB — 08:48 PM |
|
Looking for any info: 1977 Ford-Philco Console Hi-Fi Turntable and Radio
|
| Welcome to the Phorum, PittsburghToast! I found an old thread that my interest you regarding the quality and worth of P...GarySP — 08:48 PM |
|
Looking for any info: 1977 Ford-Philco Console Hi-Fi Turntable and Radio
|
| Welcome to the Phorum!
:wave:
We do not have anything on that unit in our digital library. There is a Sam's Photof...klondike98 — 08:47 PM |
|
Model 80 Antenna Issue?
|
|
I’ve replaced all the caps and resistors and the radio is working but minimal volume unless I put my hand near the re...Hamilton — 08:24 PM |
|
Looking for any info: 1977 Ford-Philco Console Hi-Fi Turntable and Radio
|
| Hi there! this is my first time posting. I recently picked up this Ford-Philco Console record player and radio at a yard...PittsburghToast — 07:28 PM |
|
philco predicta
|
| I found that where I have the 140v B+ there is 50v and the tuner receives 235v through the orange cablecgl18 — 04:14 PM |
|
Philco 91 code 221
|
| Chassis grounds thru rivets is another good place to look. Oh and the stator screws on the tuning cap where the leads at...Radioroslyn — 08:11 AM |
|
Who's Online
|
There are currently 582 online users. [Complete List]
» 1 Member(s) | 581 Guest(s)
|
|
|

|
 
|


![[-] [-]](https://philcoradio.com/phorum/images/bootbb/collapse.png)


