1942 Zenith 10S690 belt and pulley issues
Posts: 325
Threads: 34
Joined: Dec 2019
City: Elkhart
State, Province, Country: Indiana
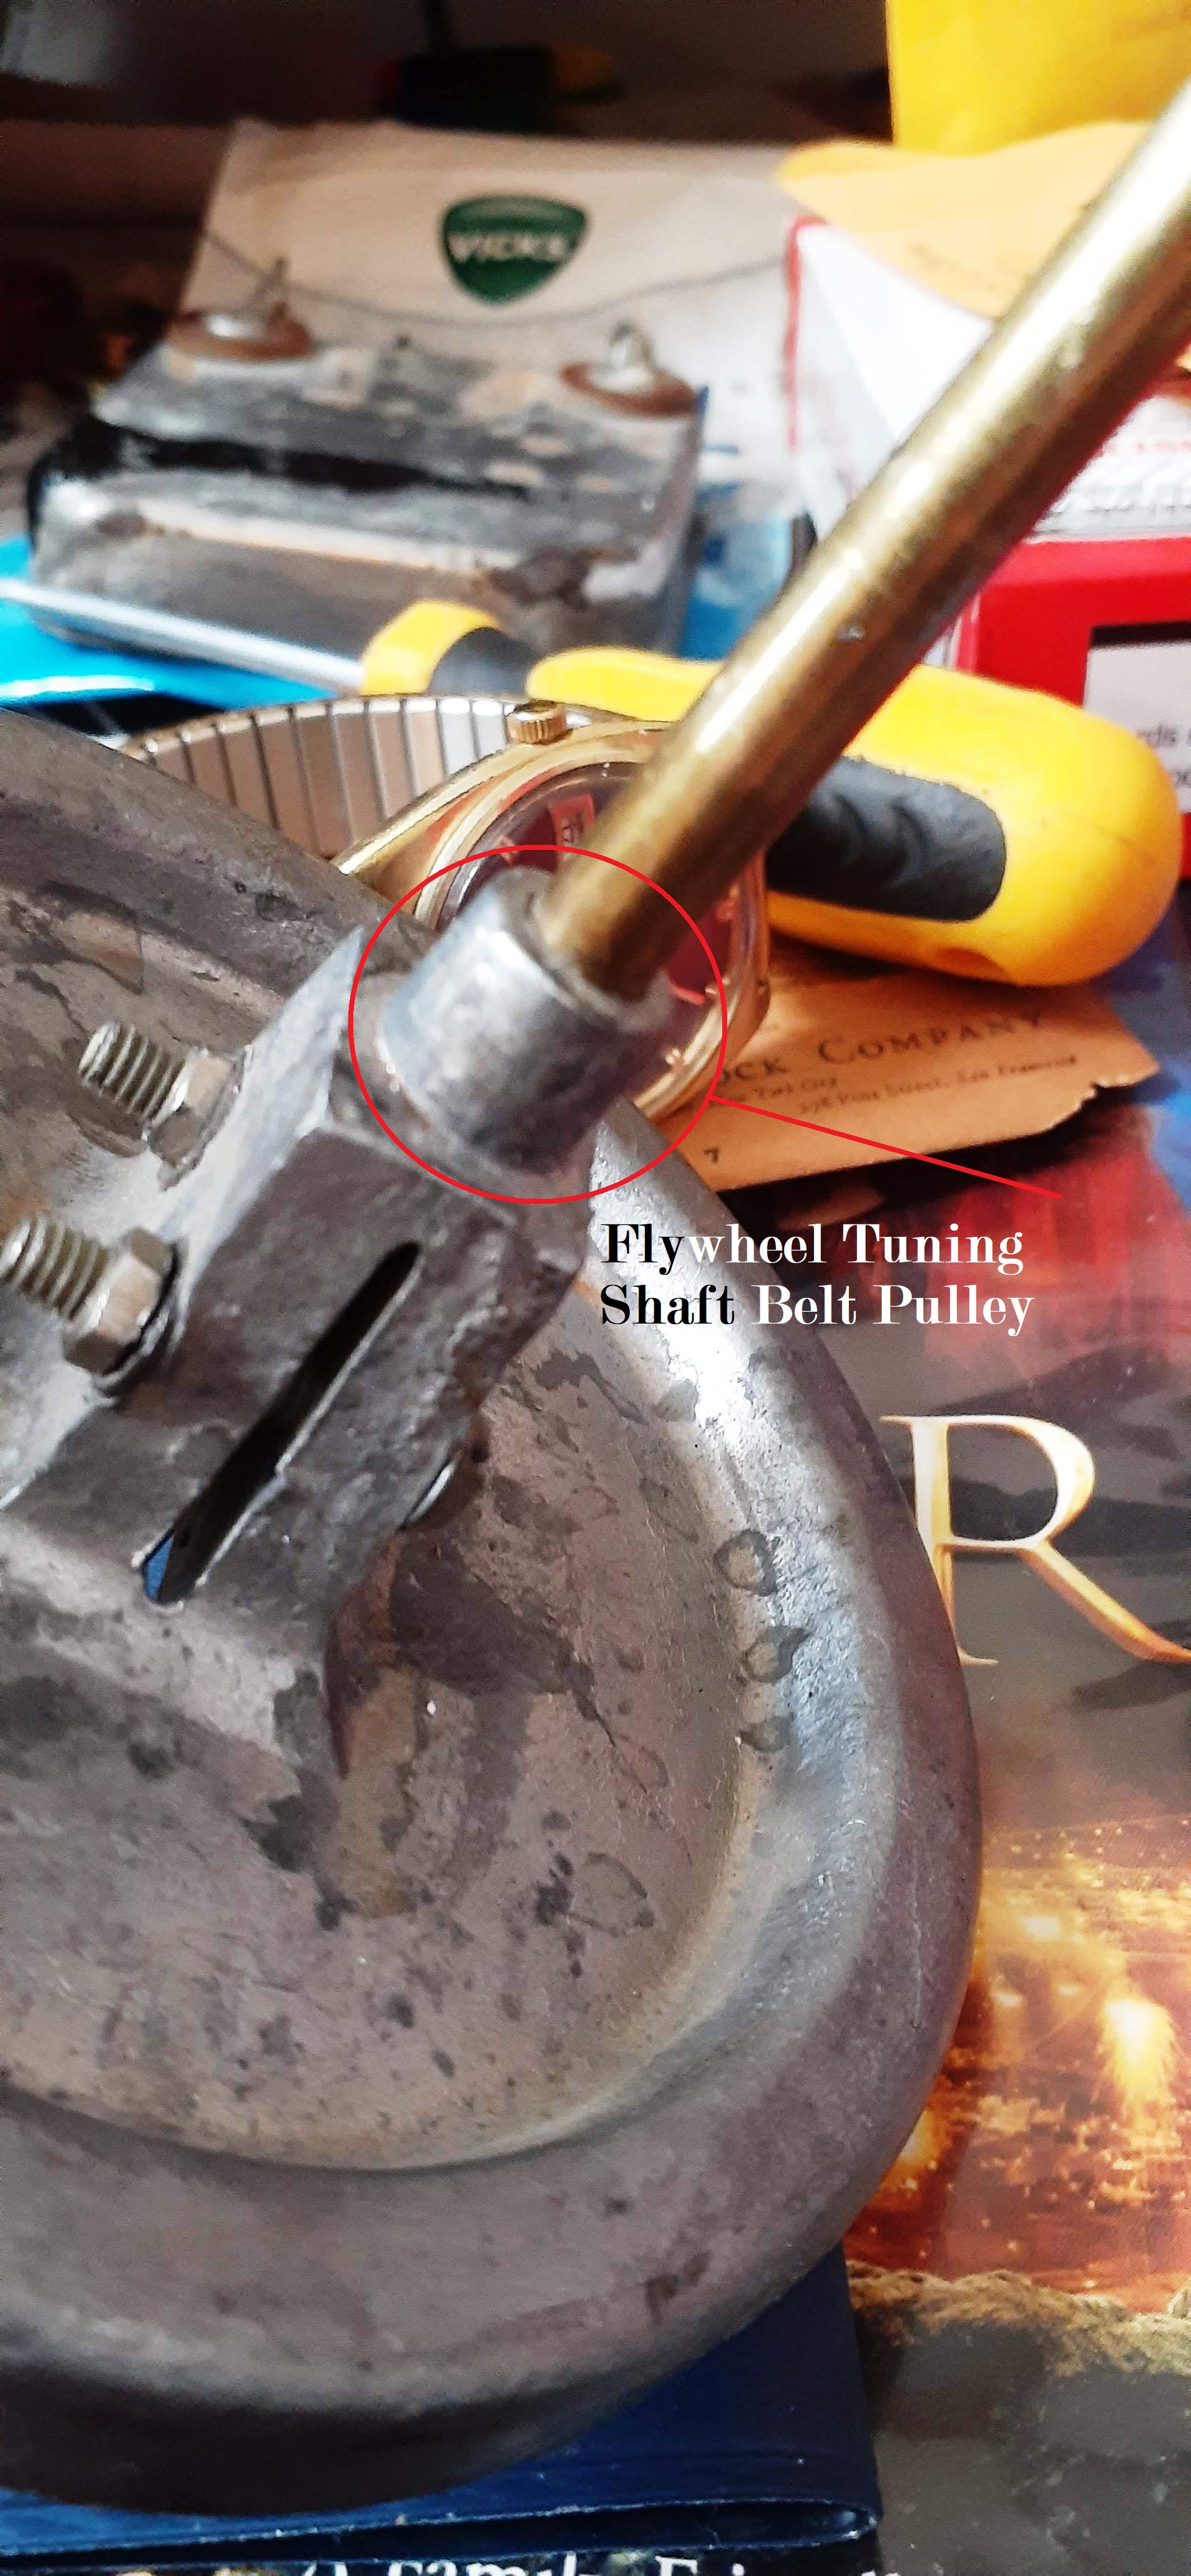
Hello everyone late last year I had bought a 1942 Zenith 10S690 Zenith Console Radio that when I got it the belt that was on it had broke (someone had rigged it up with an old O-Ring style belt that ended up breaking) and so I had temporarily rigged it up with some old VCR Square Belts which it worked fine that way for a little bit but then the belt slipped off the flywheel tuning knob shaft and so then the tuner didn't tune as easily (it had two VCR Square Belts rigged up to it), but then I finally found another O-Ring Style belt like what was on there before but then unfortunately when I tried installing it the plastic pulley shaft cover that was on the shaft of the flywheel tuning shaft broke into several pieces and I tried to glue it back together and it wouldn't go back together.
So now I need to figure out a way to fix the Flywheel Tuning Shaft so that I can install a belt back onto it again, and the way the pulleys were designed on this radio I have a feeling this was designed to work with a flat belt originally, which I think I have some flat belts from some old VCRs that might work on this if I can get the flywheel tuning shaft pulley repaired.
Any one have any ideas of how to go about repairing the pulley on the flywheel tuning shaft on this radio?
Any help with this would be appreciated.
See picture below.

Posts: 3,160
Threads: 59
Joined: Apr 2011
City: Lexington, KY
Unless the part that broke is not shown in the picture it looks like Pot Metal to me. If so you might be able to use J-B Weld (regular, NOT Kwik) to get it back together.
As far as belts this guy has what you need:
https://www.qualityradiobelts.com/order-here.html
I have used flat belt material that you super glue together that works pretty well, but I can remember if I got it from Mark Oppat or Alan Jespesperson.
John KK4ZLF
Lexington, KY
"illegitimis non carborundum"
Posts: 325
Threads: 34
Joined: Dec 2019
City: Elkhart
State, Province, Country: Indiana
Quote:Unless the part that broke is not shown in the picture it looks like Pot Metal to me. If so you might be able to use J-B Weld (regular, NOT Kwik) to get it back together.
As far as belts this guy has what you need:
https://www.qualityradiobelts.com/order-here.html
I have used flat belt material that you super glue together that works pretty well, but I can remember if I got it from Mark Oppat or Alan Jespesperson.
Hi Eliot, the part I'm referring to was a plastic sleeve that went over the area circled in the picture, so no the part is not in the picture, it was a piece of knurled plastic that went over the area circled in the picture, but it broke when I was trying to put a belt onto it.
Also the flywheel on this thing is cast aluminum not pot metal.
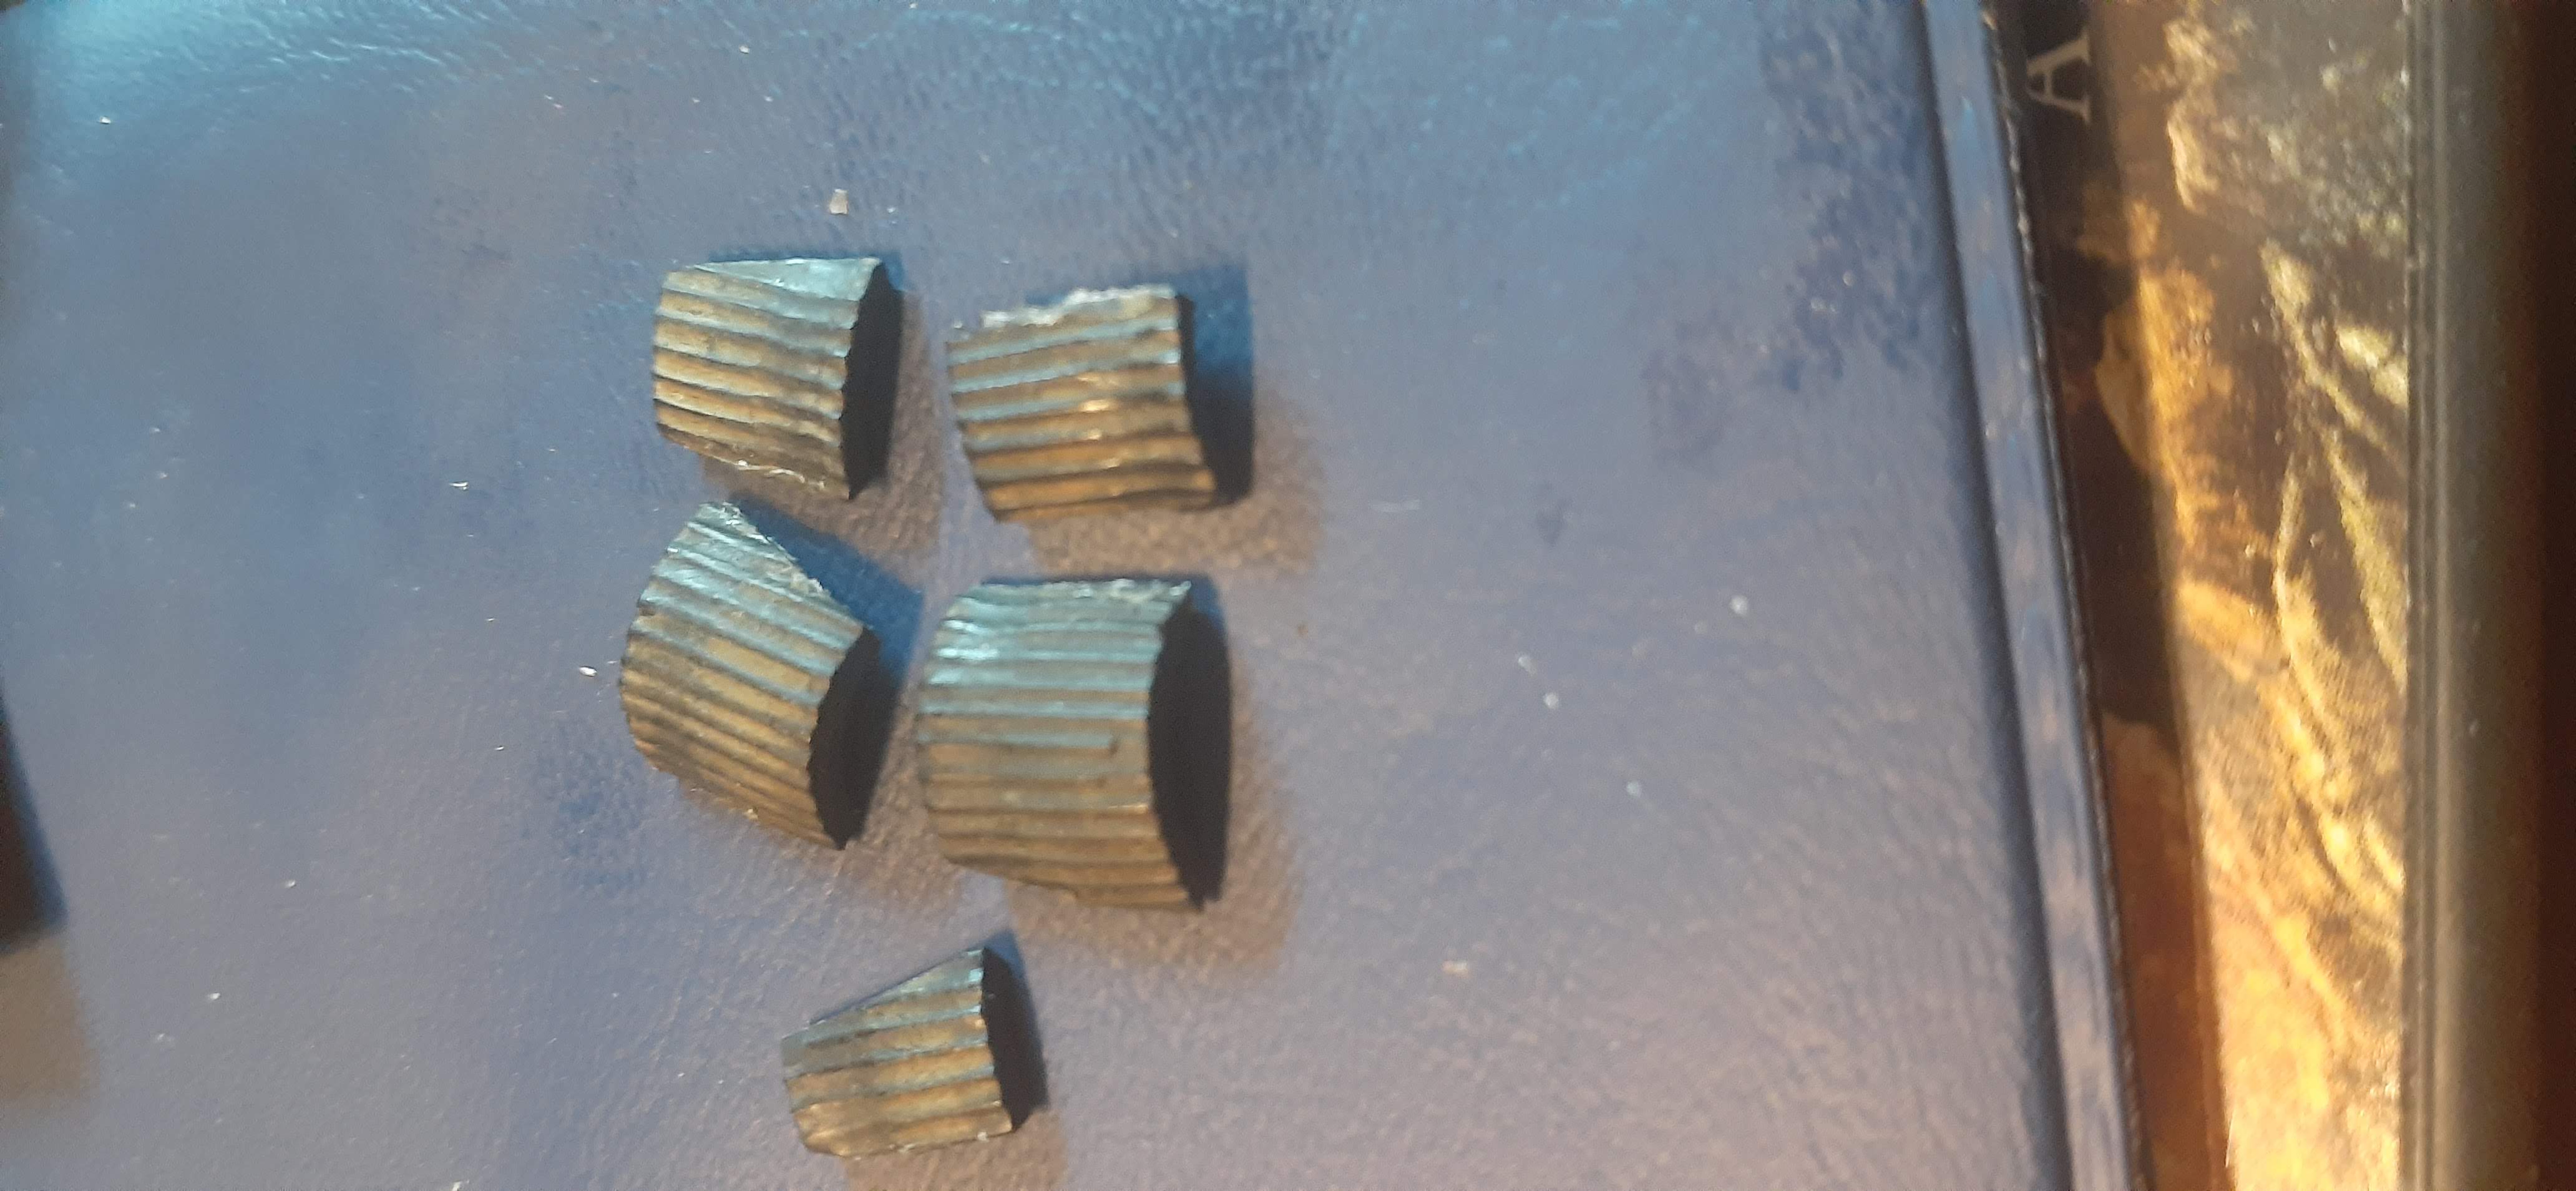
The picture posted below is the part that was on the area circled in the picture, as you can see it broke into several pieces, it looks like some sort of plastic material, like bakelite or something like that.

Posts: 1,199
Threads: 49
Joined: Oct 2017
City: Allendale, MI
Can't help with the pully but here is a link to flat belts:
https://www.elliottelectronicsupply.com/...belts.html
Posts: 3,160
Threads: 59
Joined: Apr 2011
City: Lexington, KY
Does that plastic part serve any useful function other than cosmetic? Most of my Zeniths are '38 and earlier and they don't use a plastic piece like that. I do have one that is early 40's so tomorrow I'll try to find the chassis and see if it uses that piece.
John KK4ZLF
Lexington, KY
"illegitimis non carborundum"
Posts: 325
Threads: 34
Joined: Dec 2019
City: Elkhart
State, Province, Country: Indiana
Quote:Does that plastic part serve any useful function other than cosmetic? Most of my Zeniths are '38 and earlier and they don't use a plastic piece like that. I do have one that is early 40's so tomorrow I'll try to find the chassis and see if it uses that piece.
Eliot, it does serve a purpose, it helps the belt get traction on the flywheel shaft so that it can turn the tuning capacitor shaft without slipping.
Posts: 2,118
Threads: 112
Joined: Jun 2010
City: Medford OR (OR what?)
If you can figure out how to put the pieces back together for long enough to make a mold, then you could cast the part. The mold putty is pretty easy to work with. Then use a 2-part plastic mix. It does not look much more complicated than a knob. Lots of people make knobs for themselves.
"I just might turn into smoke, but I feel fine"
http://www.russoldradios.com/
Posts: 325
Threads: 34
Joined: Dec 2019
City: Elkhart
State, Province, Country: Indiana
Quote:If you can figure out how to put the pieces back together for long enough to make a mold, then you could cast the part. The mold putty is pretty easy to work with. Then use a 2-part plastic mix. It does not look much more complicated than a knob. Lots of people make knobs for themselves.
I did try to glue it back together, but then it broke apart in other spots, unfortunately the bakelite, (or whatever kind of plastic it is) is too brittle to try and make a mold out of it.
Posts: 674
Threads: 146
Joined: Jun 2011
City: Elko,MN.
Have any old fashioned friction tape?
Posts: 3,160
Threads: 59
Joined: Apr 2011
City: Lexington, KY
I'm just going to toss out a couple of things and maybe one will work or it might give you another idea.
I'm not sure how well this would work, but you could try something like Milliput or Plumber's Epoxy and make a new one. This stuff is a two part putty that when mixed makes a substance that can be molded and sculpted like clay. You might only have 6-8 minutes before it starts to set. There are YouTube videos on Milliput you can watch and get a feel for how it works.
The other idea is to find some plastic, epoxy, or PVC tubing (hobby shop, eBay, or plumbing section) with the right inside diameter and mold some of the above putty inside and shove it on the flywheel. Then cut some shallow slits on the surface for the belt to grip. Or mold some putty on the outside like the surface of the broken piece.
And a bonus third idea (and probably the best). Place a classified ad for one on here and the other radio forum. Include both pictures and I'll bet someone has a parts chassis they can get that piece off of. I had a ratty '42 Z console I drug around for years picking parts off for myself and others. Veneer, dial glass, band switch, tuning knob, & power transformer, it was a shell when I eventually have it away.
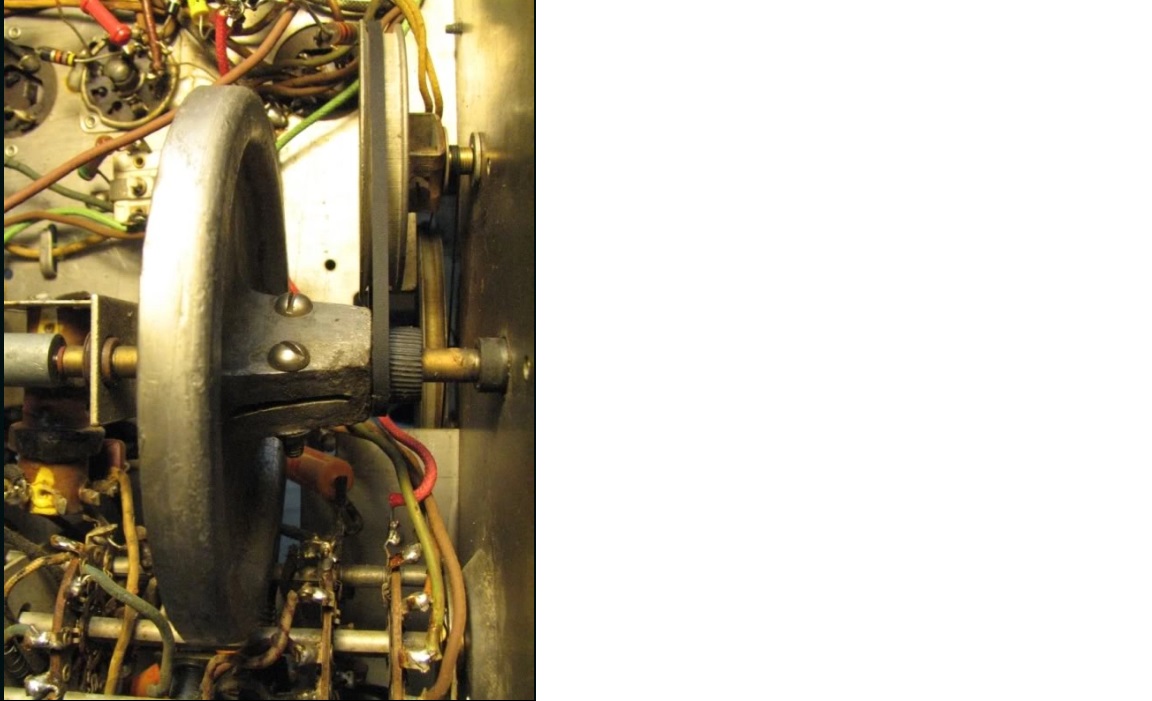
Edit: after doing a search and seeing where that piece goes I think Murf's idea of wrapping some friction tape around the shaft has merit at least as a temporary fix.

John KK4ZLF
Lexington, KY
"illegitimis non carborundum"
(This post was last modified: 06-10-2020, 09:29 AM by Eliot Ness.
Edit Reason: added picture
)
Posts: 2,118
Threads: 112
Joined: Jun 2010
City: Medford OR (OR what?)
Find a rubber automotive hose with the right size inside diameter, the outside diameter won't matter as much. This method is used for similar assemblies in AK radios and works well.
"I just might turn into smoke, but I feel fine"
http://www.russoldradios.com/
Posts: 325
Threads: 34
Joined: Dec 2019
City: Elkhart
State, Province, Country: Indiana
Quote:Have any old fashioned friction tape?
I do have some friction tape, I'll try that.
Posts: 325
Threads: 34
Joined: Dec 2019
City: Elkhart
State, Province, Country: Indiana
Quote:I'm just going to toss out a couple of things and maybe one will work or it might give you another idea.
I'm not sure how well this would work, but you could try something like Milliput or Plumber's Epoxy and make a new one. This stuff is a two part putty that when mixed makes a substance that can be molded and sculpted like clay. You might only have 6-8 minutes before it starts to set. There are YouTube videos on Milliput you can watch and get a feel for how it works.
The other idea is to find some plastic, epoxy, or PVC tubing (hobby shop, eBay, or plumbing section) with the right inside diameter and mold some of the above putty inside and shove it on the flywheel. Then cut some shallow slits on the surface for the belt to grip. Or mold some putty on the outside like the surface of the broken piece.
And a bonus third idea (and probably the best). Place a classified ad for one on here and the other radio forum. Include both pictures and I'll bet someone has a parts chassis they can get that piece off of. I had a ratty '42 Z console I drug around for years picking parts off for myself and others. Veneer, dial glass, band switch, tuning knob, & power transformer, it was a shell when I eventually have it away.
Edit: after doing a search and seeing where that piece goes I think Murf's idea of wrapping some friction tape around the shaft has merit at least as a temporary fix.
[Image: https://philcoradio.com/phorum/attachment.php?aid=22590]
I think that the plumbing putty would work as well, how hard would it be to cut some slits into the plumbing putty?
Posts: 1,151
Threads: 47
Joined: Feb 2015
City: Roseville, MN
Or you could use one of the broken pieces to mold the grooves in the putty before it sets.
Posts: 1,199
Threads: 49
Joined: Oct 2017
City: Allendale, MI
I like the hose idea. No groves necessary.
Users browsing this thread: 1 Guest(s)
|
|
Recent Posts
|
|
Philco newbie with P-1891-WA console questions
|
| Hello Jeff ,
Far as the Electrolytic capacitors go here is a list of parts.
that will work . I like using Nichicon and...radiorich — 09:50 PM |
|
Philco newbie with P-1891-WA console questions
|
| Well, I've been stumped at trying to get the first of 11 electrolytic capacitors. I got a schematic and have a list of t...Jeffcon — 07:54 PM |
|
Model 80 Antenna Issue?
|
| Thanks Gary and Rod.
I also found an article in the Philco Repair Bench under Service Hints and Tips, about installi...Hamilton — 12:32 PM |
|
Model 80 Antenna Issue?
|
| Hello Hamilton, here is a little information found in our Philco Radio Library at the bottom of the Home page. Hope it ...GarySP — 11:28 AM |
|
Model 80 Antenna Issue?
|
| I did as you suggested and touching the middle of the volume control did nothing so the coil has to be rewound. Any idea...Hamilton — 10:19 AM |
|
1949 Motorola 5A9M
|
| This would be the second portable in the "other radios" forum where I have a similar one in my collection. I h...Arran — 12:41 AM |
|
Looking for any info: 1977 Ford-Philco Console Hi-Fi Turntable and Radio
|
| Hi PittsburgTost.
The record changer looks like a Garrard or BSR (Likely Garrard). The spindles just pull out and pu...MrFixr55 — 11:57 PM |
|
Looking for any info: 1977 Ford-Philco Console Hi-Fi Turntable and Radio
|
| Hello PittsburghToast ,
Welcome aboard and it looks like gary may have something for you !
now if I dig through my se...radiorich — 11:35 PM |
|
Model 80 Antenna Issue?
|
| You are kind of on the right path. You can touch the grid cap of the Detector/Oscillator 36 tube. I'm expecting a respon...RodB — 08:48 PM |
|
Looking for any info: 1977 Ford-Philco Console Hi-Fi Turntable and Radio
|
| Welcome to the Phorum, PittsburghToast! I found an old thread that my interest you regarding the quality and worth of P...GarySP — 08:48 PM |
|
Who's Online
|
| There are currently no members online. |

|
 
|


![[-] [-]](https://philcoradio.com/phorum/images/bootbb/collapse.png)


