Posts: 1,199
Threads: 49
Joined: Oct 2017
City: Allendale, MI
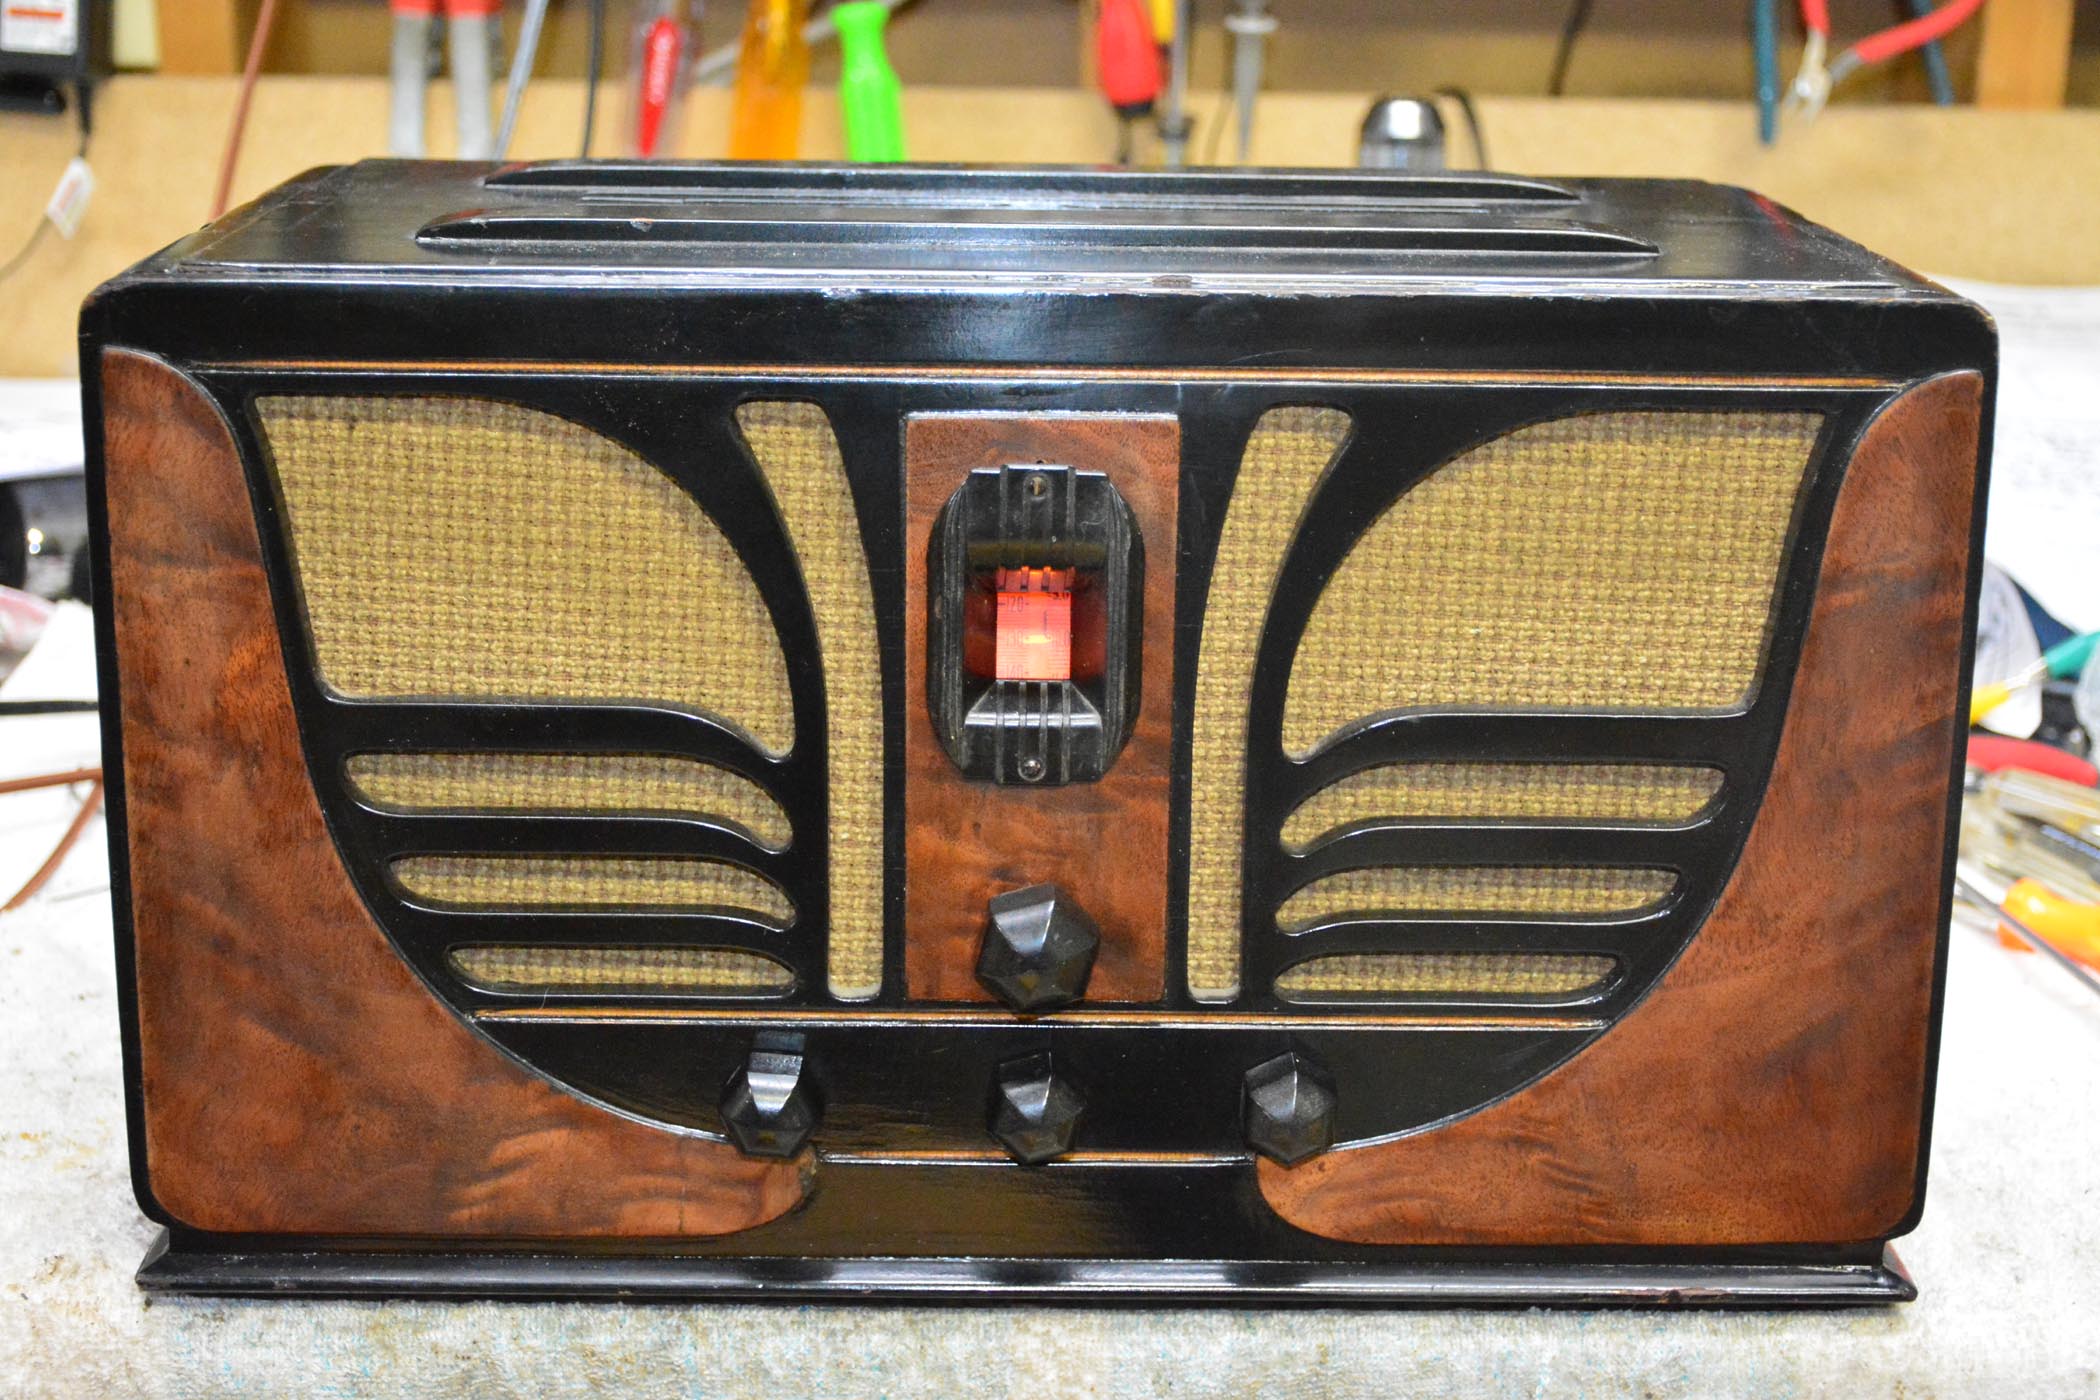
I decided to refinish my previously refinished in black Butterfly 45. The veneer on the front pieces is messed up and I want to replace it. Does anyone know what it is? it looks like burled walnut, but not sure. And, does that look like the original grille cloth?
Posts: 16,533
Threads: 573
Joined: Oct 2011
City: Jackson
State, Province, Country: NJ
Rob
It's not that obvious it's messed up.
Maybe up close.....but on the photo it looks fine.
It does resemble walnut, but I think natural cherry would look as good.
People who do not drink, do not smoke, do not eat red meat will one day feel really stupid lying there and dying from nothing.
Posts: 1,199
Threads: 49
Joined: Oct 2017
City: Allendale, MI
Yes, the photo looks better than the real thing. it has been sanded through in a couple of places and a piece was broken off and re-glued. And the panels are delaminating from the radio. So I'll have to do regluing anyway. With a little heat, I've already removed the panels since they were half off. I will try my hand at making new and veneering. I think it will be an interesting project. If it turns out lousy, I can always replace the original pieces. I have a piece of .8 mm ply that I used on my airplane. I'll use that as the backing for the veneer, use a shape following router to shape the pieces just like the original. I'll look at some cherry to see if I like it. The burled walnut I've looked at is a little too "figured".
Posts: 1,199
Threads: 49
Joined: Oct 2017
City: Allendale, MI
Posts: 16,533
Threads: 573
Joined: Oct 2011
City: Jackson
State, Province, Country: NJ
I never ventured in this realm........if you see me near a wooden structure that is taken apart - it is likely I fell on it.
People who do not drink, do not smoke, do not eat red meat will one day feel really stupid lying there and dying from nothing.
Posts: 1,199
Threads: 49
Joined: Oct 2017
City: Allendale, MI
Posts: 1,199
Threads: 49
Joined: Oct 2017
City: Allendale, MI
So did what little grain there is in the "white" wood and the plywood show through the Dark brown toner? Or, did they use an opaque toner that hid all of the characteristics of the wood?
Posts: 1,199
Threads: 49
Joined: Oct 2017
City: Allendale, MI
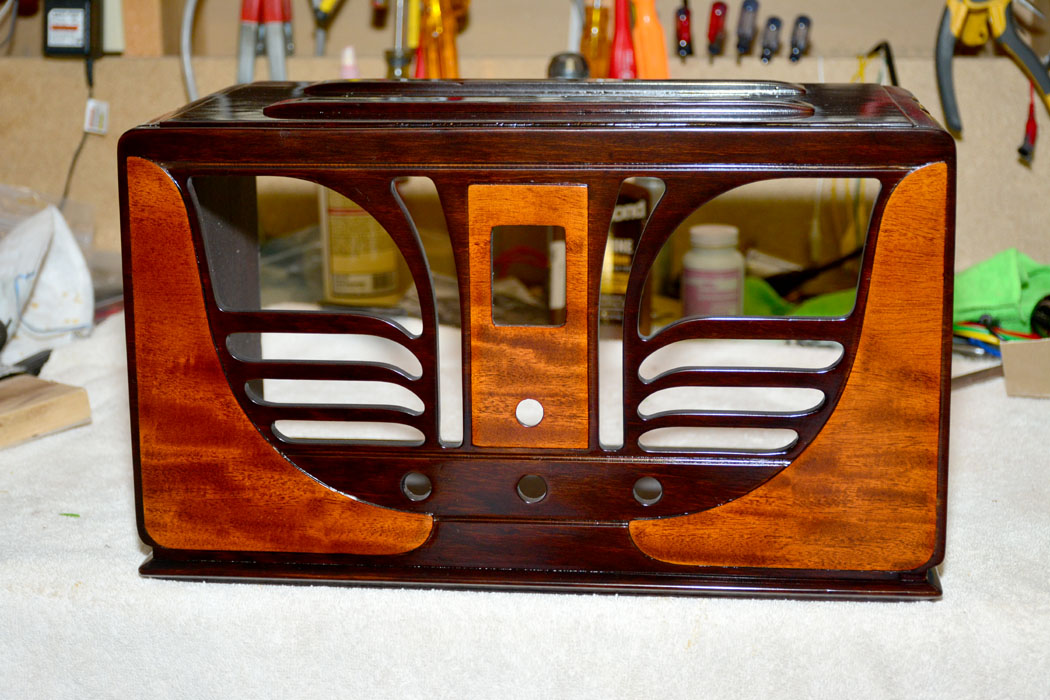
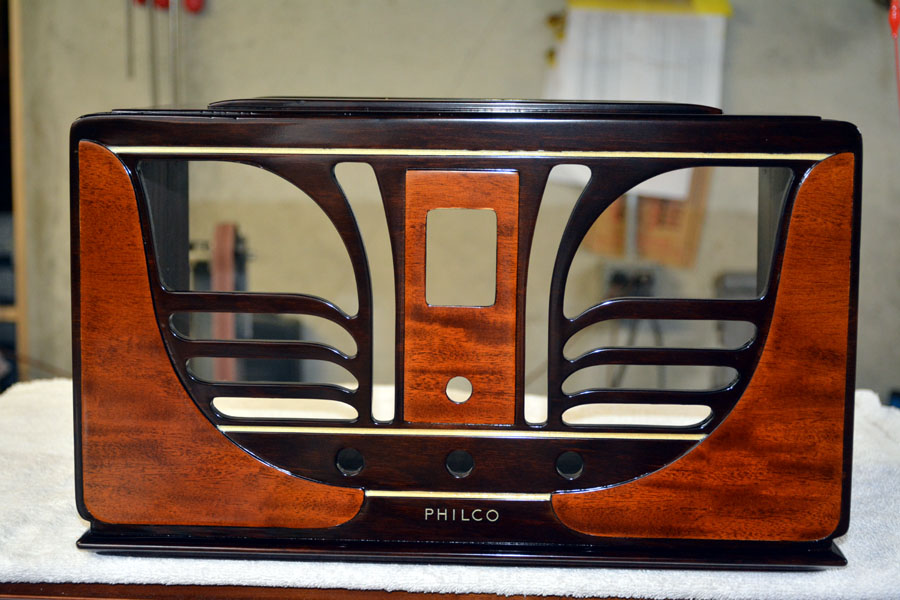
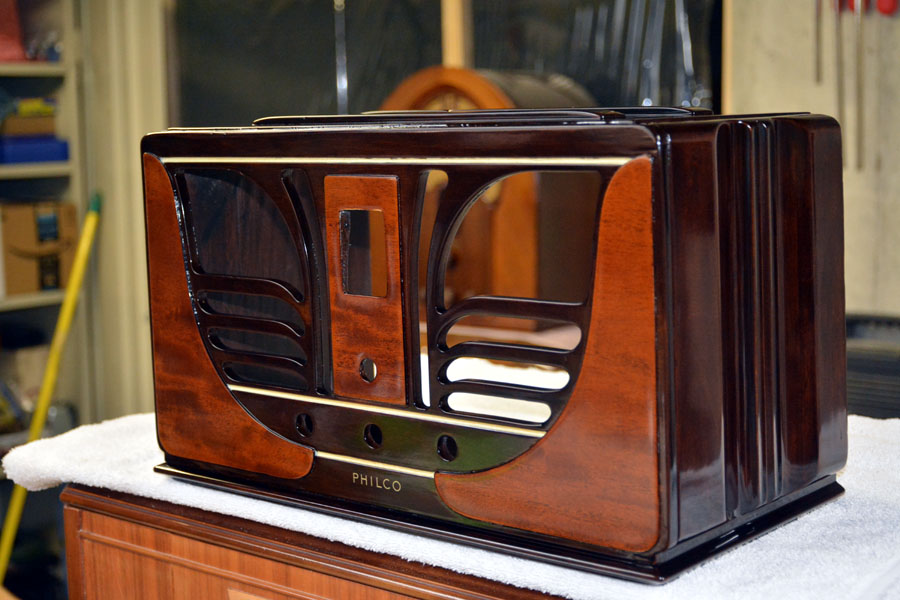
So, after stripping all of the black from the cabinet, replacing the decorative pieces, toning the cabinet with dark brown walnut toner and medium brown on the decorative pieces, here is the result so far. I had to use an air brush with the dark walnut toner to even out the finish before the final coats of toner. The cabinet turned out deep red-brown (red because the cabinet was quite red after the stripping process plus walnut brown toner tends to be a bit red). Medium brown walnut also turns out a bit red and the camera accentuates that, but on the whole it's ok. I hope it's not too far from original. I have to believe it is closer than the black paint that was on it previously!
(This post was last modified: 11-03-2020, 12:29 AM by rfeenstra.)
Posts: 1,199
Threads: 49
Joined: Oct 2017
City: Allendale, MI
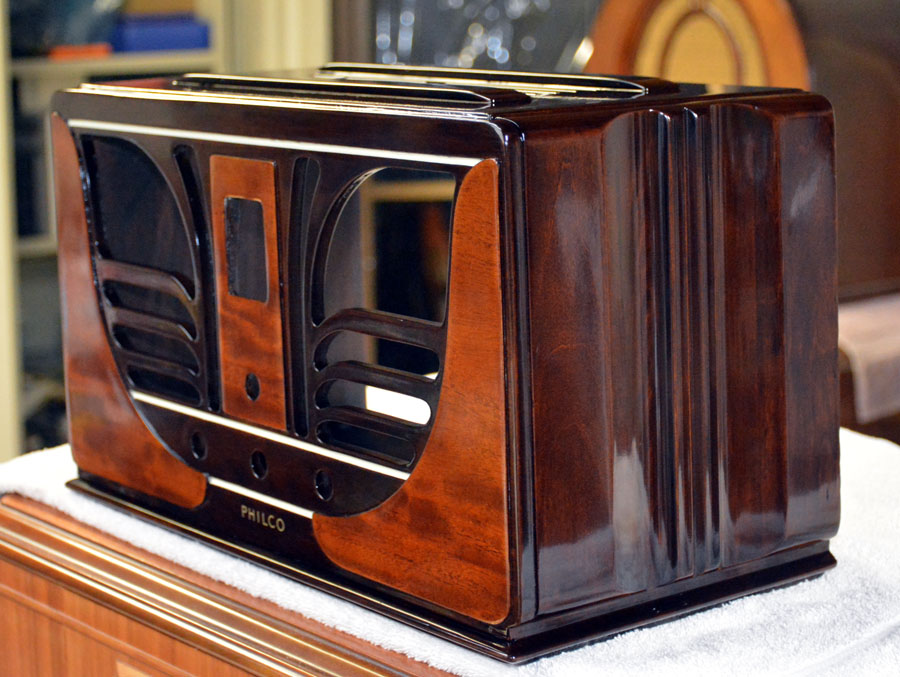
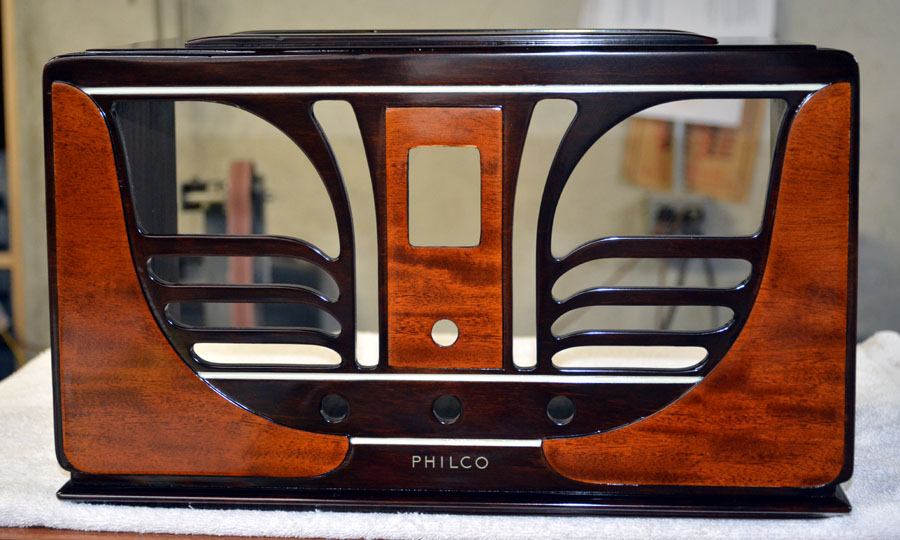
Hmmm. Mixed up some white, yellow and black fingernail polish. It looked good in mixing container but after on the radio, it is way to white to suit me. More sanding, mixing and spraying!
Posts: 4,460
Threads: 423
Joined: Jun 2011
City: Boston
State, Province, Country: Massachusetts
I recently saw one of these on a Perry Mason episode. In somebody's apartment. Your's is sharper too look at  .
Paul
Tubetalk1
Posts: 1,199
Threads: 49
Joined: Oct 2017
City: Allendale, MI
Thank you, Paul! I have redone the off white to a bit more yellow then "sprinkled" a bit of light walnut toner on it. Lacquer is drying now. I like it better but still may be a little too dominant. The original finish 45's I've seen on line have it more subdued. But, I can't keep putting lacquer on it! I think I'll live with it now. Pic will be coming.
Posts: 1,199
Threads: 49
Joined: Oct 2017
City: Allendale, MI
Lacquer has dried a bit. Here is the "toned down" trim color. This will be the final result.
Posts: 1,199
Threads: 49
Joined: Oct 2017
City: Allendale, MI
Posts: 120
Threads: 15
Joined: Aug 2017
City: Fort Worth
State, Province, Country: TX
That's a beauty! I have one with black paint and missing wire insulation caused by mice. I've been hesitant to start working on it; but, yours inspires me.
Posts: 4,460
Threads: 423
Joined: Jun 2011
City: Boston
State, Province, Country: Massachusetts
https://radioattic.com/item.htm?radio=1650432
Not anywhere near as nice as the one here in the Phorum.
Paul
Tubetalk1
Users browsing this thread: 1 Guest(s)
|
|
Recent Posts
|
|
46-1213 Schematic Question
|
| You have to examine the connections to A and B to see which one matches the schematic. It appears there are two white wi...RodB — 07:39 PM |
|
46-1213 Schematic Question
|
| In the photo of my Chassis, I now have two wires marked "A" and "B", these are my power cord wires. ...MissouriLarry — 02:46 PM |
|
46-1213 Schematic Question
|
| Gary,
Thanks for the reply! I have no intention of introducing any electric to my radio until I recap it. I just want...MissouriLarry — 02:14 PM |
|
46-1213 Schematic Question
|
| Hi Larry,
Usually you'll want to attach the hot side of the power line cord to the power switch. That way when the s...RodB — 02:06 PM |
|
1934 American Bosch 440T restore on YouTube
|
| That's an interesting radio Buzz! Great first video also...Eliot Ness — 01:59 PM |
|
46-1213 Schematic Question
|
| Hello Larry. Replacement of the power cord is a priority, but not the first. All paper and electrolytic capacitors nee...GarySP — 01:36 PM |
|
46-1213 Schematic Question
|
| Ok, now is time to post my first question. I have a Philco 46-1213 that I am going to start working on here real shortl...MissouriLarry — 12:48 PM |
|
Another amp build - here I go again!
|
| Well, never enough yet how much is too much? I ordered some spare parts from a couple vendors in China and now have ship...TV MAN — 10:49 AM |
|
A Marconi model 86
|
| This Marconi was a bit of a challenge. It was totally missing one electrolytic capacitor, and the photos show a couple ...Dan Walker — 10:48 AM |
|
Philco 42-345 Restoration/Repair
|
| With regard to the speaker, unless the cone is so brittle that it crumbles as soon as you touch it I would try to repair...Arran — 04:07 AM |
|
Who's Online
|
There are currently 531 online users. [Complete List]
» 3 Member(s) | 528 Guest(s)
|
|
|

|
 
|


![[-] [-]](https://philcoradio.com/phorum/images/bootbb/collapse.png)


