Zenith H500 Trans-Oceanic
Posts: 1,199
Threads: 49
Joined: Oct 2017
City: Allendale, MI
I previously posted pics of this radio that was given to me in November Finds, post 16 ( https://philcoradio.com/phorum/showthread.php?tid=21776). I decided to have a go at it. The radio had had the Selenium rectifier bypassed with a silicone diode without an additional dropping resistor. A couple of caps had been replaced and the radio actually worked quite well. Regardless, I decided to fully recap it and replace a few out of spec resistors. Several of the "Black Beauty" caps were split. Another Chinese yellow radio! I read in Russ's tread on the 1L6 that the filament resistors are rather critical so I replaced all of them as well. The radio came to life with a 50 ohm dropping resistor but that was too much. 25 ohms brought the filament voltage to just over 1.4 volts and the B+ right at spec. All bands work all across the the band. There are a lot of alignment controls to adjust and alignment went well with the tracking quite close. Sensitivity and selectivity seem very good. This is my first experience with these 1 volt tubes and I'm quite surprised at how well they are working even though they produce almost no heat. Only the output tube gets very slightly warm. Sound is, perhaps, as good as can be expected from a 4" speaker outside of its cabinet. Volume is good.
The volume control was worthless as most of the carbon track was gone. probably cleaned too many times with the wrong cleaner. It's a 1 meg control with a DPST power switch. I didn't have patience to order one, so I decided to try my hand at a repair. I had a 500K pot (new) that I took the resistive element out of. With some judicious re-shaping, sanding, drilling and riveting, I was able to transplant the element, hoping that the 500K would work in place of the 1 meg. It does and the control is now quiet and smooth.
Now to see what I can do with the portable cabinet. I heard black shoe polish works quite well.
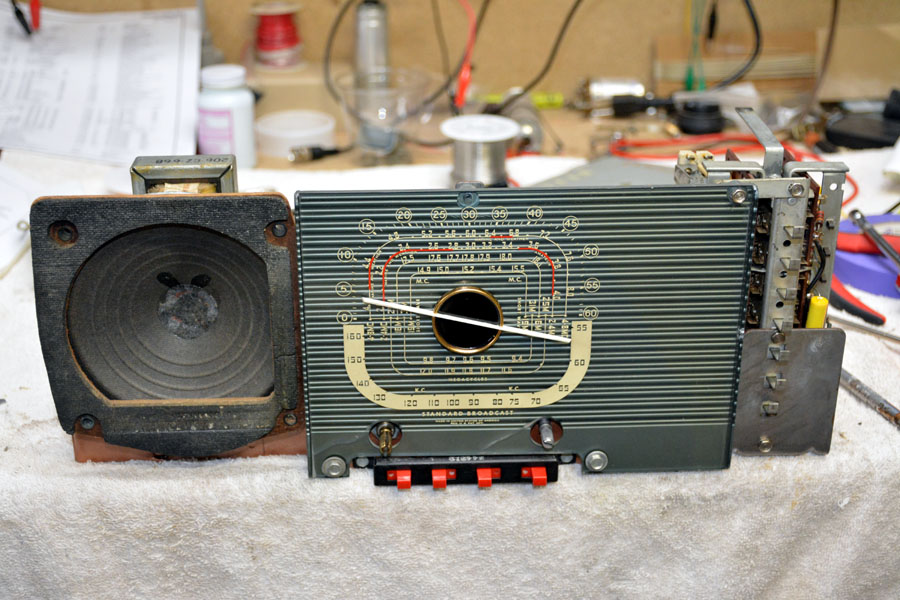
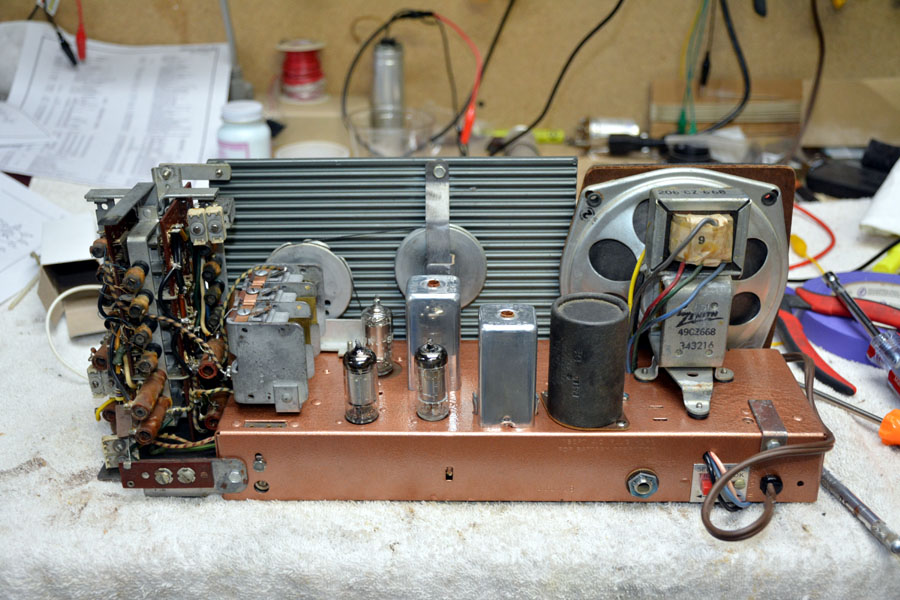
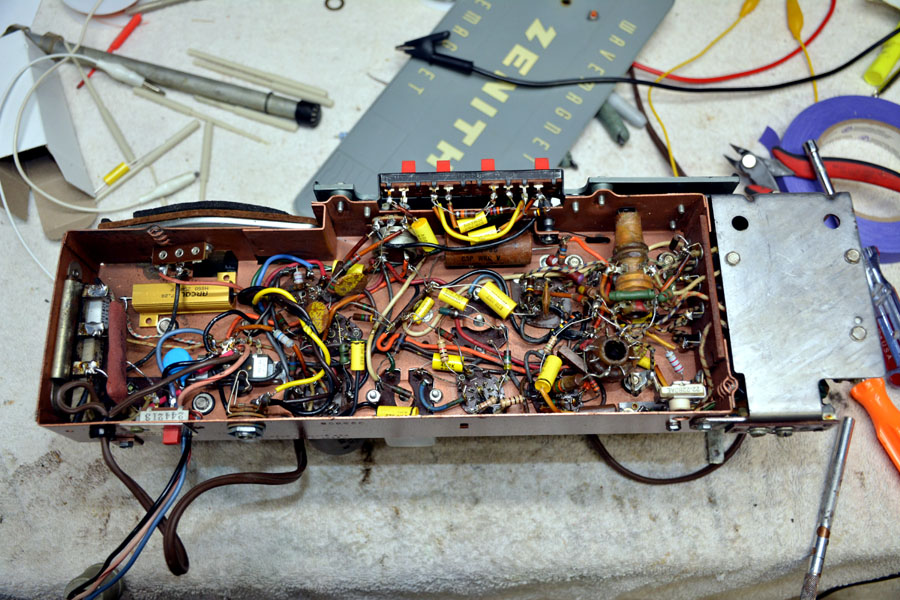
Posts: 4,908
Threads: 54
Joined: Sep 2008
City: Sandwick, BC, CA
I also have an H-500, I bought it as a parts set since I have a later 600 series T.O with a missing catch. The worst part of it is that the plastic fascia over the dial got melted somehow, the rest isn't really that bad. I remember restoring an older brand Z portable, one of the ones with the crescent shaped dial, and I touched up the leatherette/oil cloth cover with flat black stray pain, though semi gloss would have been a better choice. In spite of what some claim it is NOT Tolex, it's a cotton cloth with a coating applied to it, though it was probably more flexible when new. I also have a G-500, which I have read is one of the rarer post war models, I intend to restuff the bumble bee caps in part because of this, I already worked out the method by restuffing Sangamo caps, which are very similar in construction. By the way, if that's a sand resistor I would replace it, those are as bad as bumble bees for failing.
Regards
Arran
(This post was last modified: 12-02-2020, 04:07 AM by Arran.)
Posts: 1,199
Threads: 49
Joined: Oct 2017
City: Allendale, MI
it is a sand resistor and working fine so far. The candohm was half open. I disabled both sections and hid resistors underneath. I'll run it for a while and see how it holds up. Thanks for the info!
Posts: 16,533
Threads: 573
Joined: Oct 2011
City: Jackson
State, Province, Country: NJ
My sand resistor was just fine.
I guess it has the good sand. 
People who do not drink, do not smoke, do not eat red meat will one day feel really stupid lying there and dying from nothing.
Posts: 1,199
Threads: 49
Joined: Oct 2017
City: Allendale, MI
I would assume the construction of the "sand" resistor is very similar to the candohm. They probably fail at the terminal crimp.
I'm just happy I'm not having any 1L6 problems - yet.
(This post was last modified: 12-02-2020, 05:30 PM by rfeenstra.)
Posts: 19
Threads: 3
Joined: Jul 2017
City: West Chester, PA
Hi, I have used black shoe leather dye (Kiwi) with good results. It comes in a sponge top applicator bottle, dries quickly, doesn’t wipe off and can be applied in multiple coats to help cover imperfections. I must have used it on over 20 black Transoceanics.
Bob.
Posts: 2,118
Threads: 112
Joined: Jun 2010
City: Medford OR (OR what?)
Use the old, black, Kiwi shoe polish in the little can. It will even fill small holes.
"I just might turn into smoke, but I feel fine"
http://www.russoldradios.com/
Posts: 1,199
Threads: 49
Joined: Oct 2017
City: Allendale, MI
Thanks, guys. I will go buy some!
Posts: 4,908
Threads: 54
Joined: Sep 2008
City: Sandwick, BC, CA
They have a habit of corroding, going up in value, and then becoming open circuit, I've had NOS ones do this that were never installed in anything. Now they are replace on site like a bumble bee cap, it's not if they will fail, but when, maybe in a dry area they hold up but not where I am. They would have been better with bare resistive wire on a form really.
Regards
Arran
Posts: 1,199
Threads: 49
Joined: Oct 2017
City: Allendale, MI
Now that you mention the corroding, the leads on this one were green. I bead blasted them and then tinned with solder. Maybe I should just go ahead and replace!
Posts: 1,199
Threads: 49
Joined: Oct 2017
City: Allendale, MI
Posts: 16,533
Threads: 573
Joined: Oct 2011
City: Jackson
State, Province, Country: NJ
>>>I used the black shoe polish. It does cover up a lot of sins.
Unless you are married and your wife cannot stand the turpentine smell 
People who do not drink, do not smoke, do not eat red meat will one day feel really stupid lying there and dying from nothing.
Posts: 1,199
Threads: 49
Joined: Oct 2017
City: Allendale, MI
You know, Mike, maybe I should try it on me. It might cover my many flaws and maybe she would like me better, in spite of the smell!! This radio is about the same age as me. I wish I worked as well.
Posts: 1,199
Threads: 49
Joined: Oct 2017
City: Allendale, MI
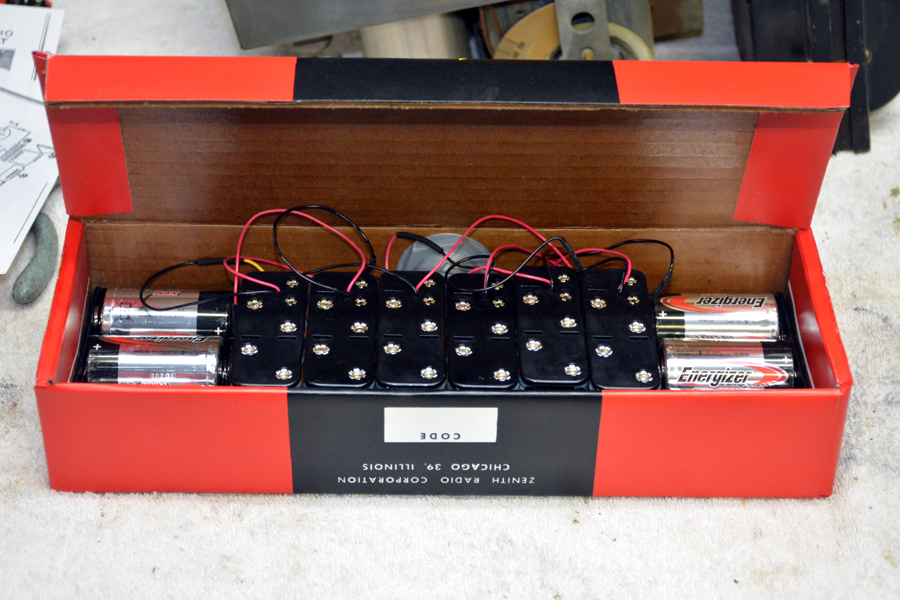
Couldn't resist making it fully complete as a portable. Works great! 90 volts worth of AA's! They say this thing will run for about 400 hours on one set of batteries. I have a hard time believing that , but....
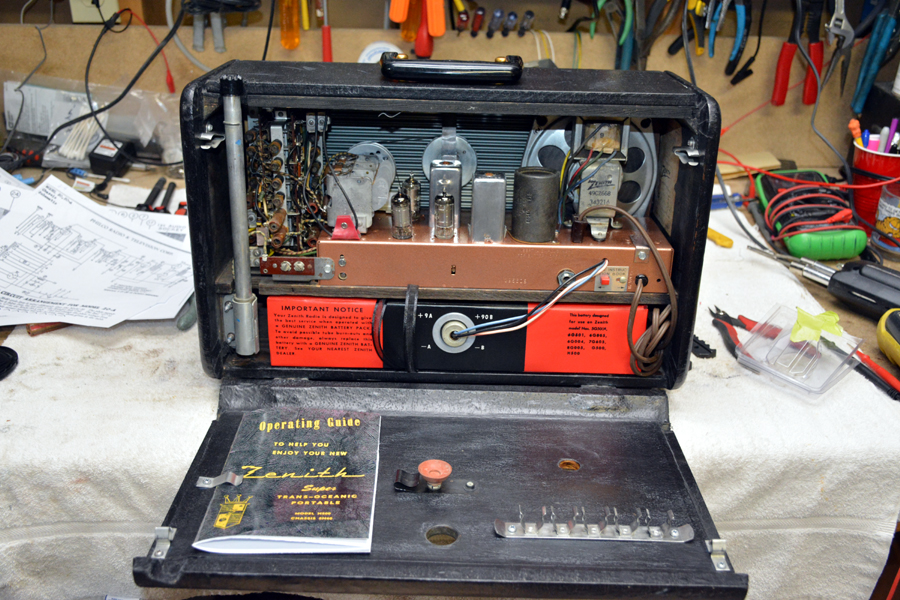
Posts: 1,199
Threads: 49
Joined: Oct 2017
City: Allendale, MI
Been using this thing quite a bit on battery. Works great. I tried plugging it in but then I get all of the line noise in the audio. No noise on battery.
Users browsing this thread: 1 Guest(s)
|
|
Recent Posts
|
|
Model 80 Antenna Issue?
|
| Thanks Gary and Rod.
I also found an article in the Philco Repair Bench under Service Hints and Tips, about installi...Hamilton — 12:32 PM |
|
Model 80 Antenna Issue?
|
| Hello Hamilton, here is a little information found in our Philco Radio Library at the bottom of the Home page. Hope it ...GarySP — 11:28 AM |
|
Model 80 Antenna Issue?
|
| I did as you suggested and touching the middle of the volume control did nothing so the coil has to be rewound. Any idea...Hamilton — 10:19 AM |
|
1949 Motorola 5A9M
|
| This would be the second portable in the "other radios" forum where I have a similar one in my collection. I h...Arran — 12:41 AM |
|
Looking for any info: 1977 Ford-Philco Console Hi-Fi Turntable and Radio
|
| Hi PittsburgTost.
The record changer looks like a Garrard or BSR (Likely Garrard). The spindles just pull out and pu...MrFixr55 — 11:57 PM |
|
Looking for any info: 1977 Ford-Philco Console Hi-Fi Turntable and Radio
|
| Hello PittsburghToast ,
Welcome aboard and it looks like gary may have something for you !
now if I dig through my se...radiorich — 11:35 PM |
|
Model 80 Antenna Issue?
|
| You are kind of on the right path. You can touch the grid cap of the Detector/Oscillator 36 tube. I'm expecting a respon...RodB — 08:48 PM |
|
Looking for any info: 1977 Ford-Philco Console Hi-Fi Turntable and Radio
|
| Welcome to the Phorum, PittsburghToast! I found an old thread that my interest you regarding the quality and worth of P...GarySP — 08:48 PM |
|
Looking for any info: 1977 Ford-Philco Console Hi-Fi Turntable and Radio
|
| Welcome to the Phorum!
:wave:
We do not have anything on that unit in our digital library. There is a Sam's Photof...klondike98 — 08:47 PM |
|
Model 80 Antenna Issue?
|
|
I’ve replaced all the caps and resistors and the radio is working but minimal volume unless I put my hand near the re...Hamilton — 08:24 PM |
|
Who's Online
|
There are currently 1314 online users. [Complete List]
» 1 Member(s) | 1313 Guest(s)
|
|
|

|
 
|


![[-] [-]](https://philcoradio.com/phorum/images/bootbb/collapse.png)


