12-27-2020, 08:52 AM
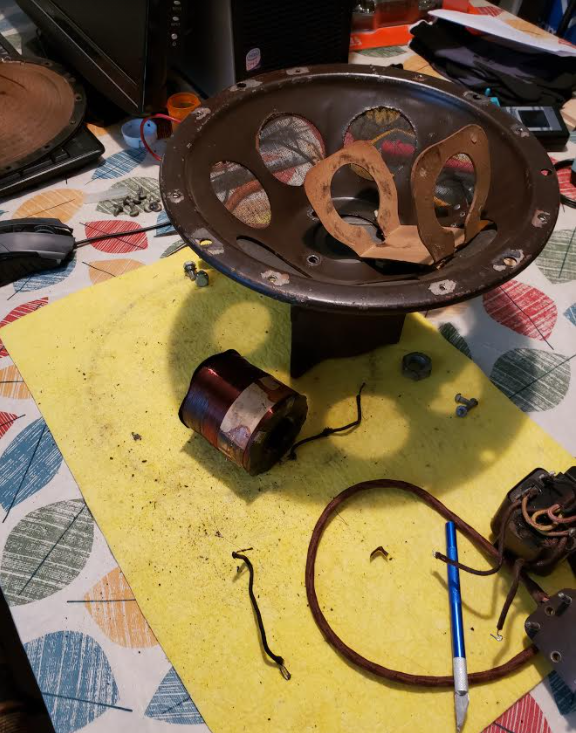
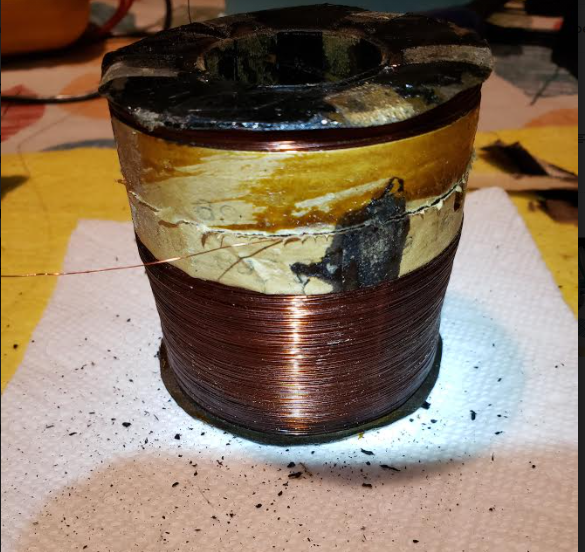
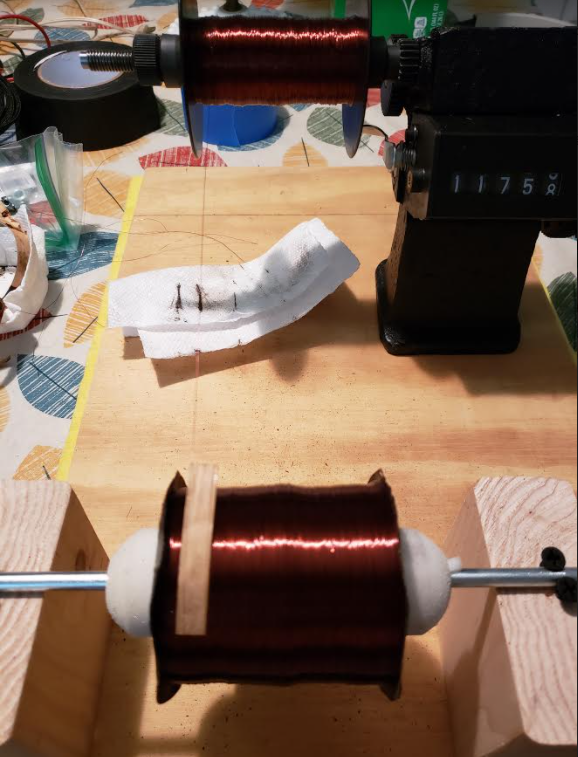
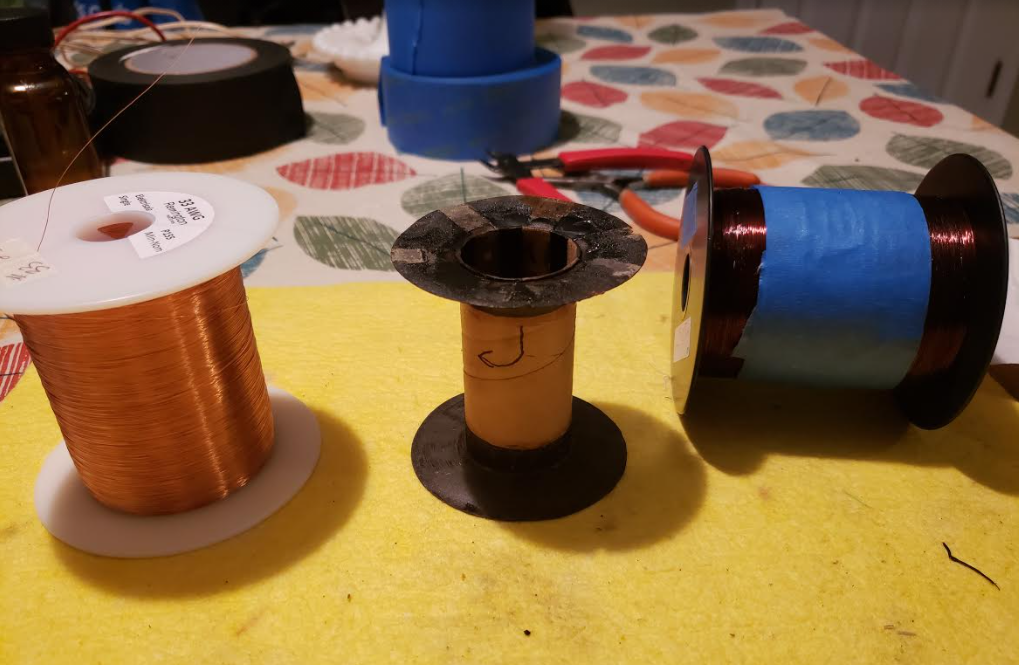
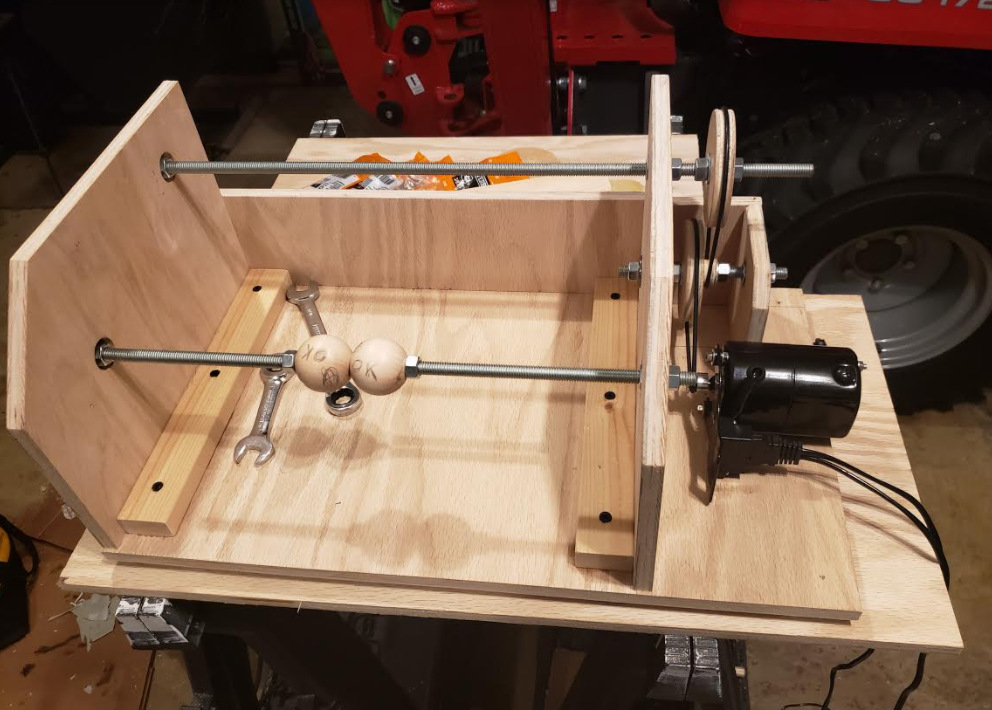
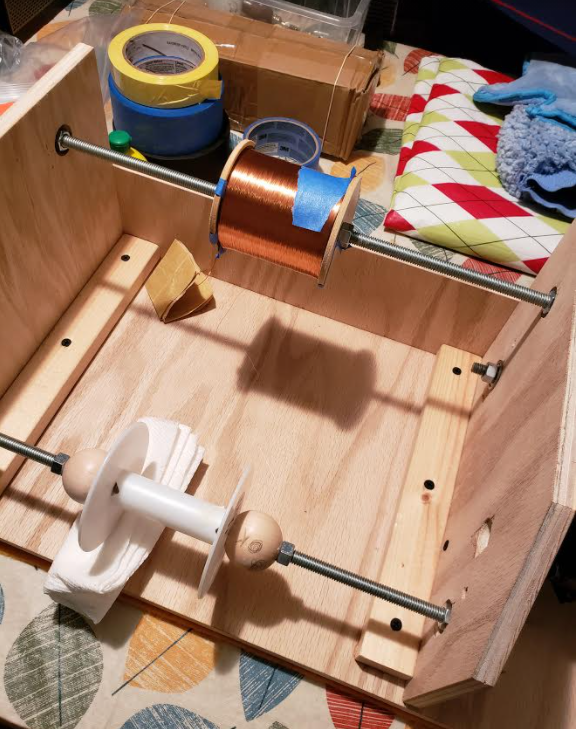
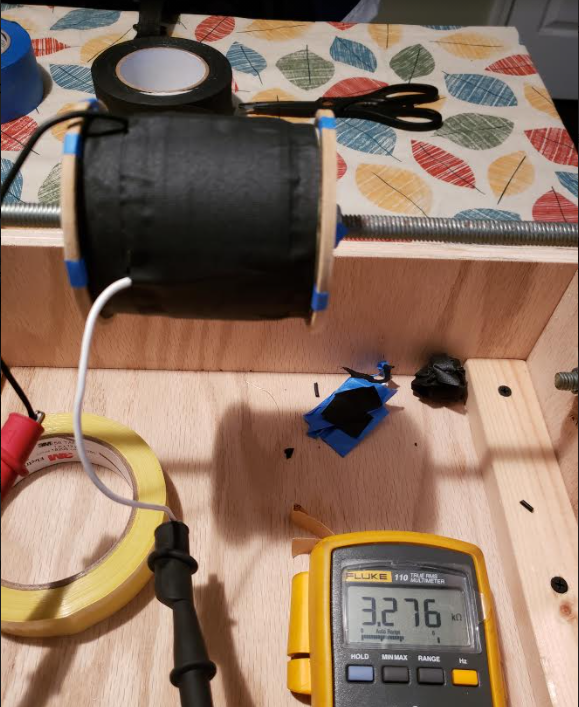
Its all back together now, and much to my surprise, IT WORKS! I had to build gadgets to accomplish the task, but I now have something to work with. Just thought I would post some pictures of my rewind.
|
A learning experience (field Coil)
12-27-2020, 08:52 AM
Its all back together now, and much to my surprise, IT WORKS! I had to build gadgets to accomplish the task, but I now have something to work with. Just thought I would post some pictures of my rewind.
12-27-2020, 09:11 AM
Nice work and .... from a guy who likes to build "jigs" .... nice work on the winder. Can you share what sort of rpm at the coil and how long it took to do the actual winding? The friction to keep the source wire from scrambling loose ... was that just those two wooden balls?
cheers !!
12-27-2020, 09:57 AM
Hi John, I looked at pictures online but most everything was just a guess. I knew what I wanted it to do, I just had to match parts without a lot of trouble or expense. I ordered a sewing machine motor complete with foot pedal from amazon. What a piece of junk. I had to fix the pedal before I could use it. And even then the motor would just stop sometimes. I had to make a pulley reduction to get the rpms down to something I could use, as the motor is listed for 6000rpm all out. I used the foot control to vary the speed so I don't know what to say about winding rpms. Winding 15,000ft of wire took me about three hours with breaks. This was my first field coil, so I started out trying to wind it as neat as possible. About a fourth of the way in I gave up on that and just filled the spool best I could. Trying not to build up too much wire in one spot. The two wooden balls were not my idea, but worked well at holding the plastic spool that the new wire was on. If you look close you will see folded paper towels under one edge of the new wire spool. That kept the new spool from unwinding. Even as I was winding the coil I was thinking of things I will do different on the next one. I need to come up with some sort of guide for the wire. Fingers just don't cut it.
Stan
12-27-2020, 10:08 AM
Thank you Stan,
For results from a "by guess and by gosh" approach, I'd say you get five gold stars !! That's a jig that almost anyone can follow along with your photos to copy.
12-27-2020, 11:03 AM
John, thank you for the kind words.
Stan
12-27-2020, 11:44 AM
Excellent result, Stan.
People who do not drink, do not smoke, do not eat red meat will one day feel really stupid lying there and dying from nothing.
12-28-2020, 07:23 PM
Stan, how do you take the varnish (or whatever it is) off the wire ends so that it can be tinned or soldered? I have a heck of a time with that.
Thanks, Simon
12-28-2020, 07:45 PM
Simon,
I used 400 grit sand paper. Very very carefully. Then checked for my resistance. Stan
12-28-2020, 09:43 PM
Ahhh, very good. I’ve tried flux, flame, hot solder, scraping, all with less than happy results!
Regards, Simon
12-28-2020, 09:56 PM
Simon. I tried scraping first. My 33ga wire didn't like that. I had some 400 grit dry paper handy so I laid the wire on a flat place in the bottom of my winder, and very gently wiped it with the sand paper. Flip it and get the other side. I cleaned off enough of the end to check for continuity, on just the end to make sure. Then I just wrapped it all on the lead wire. It took me a minute to get the result I wanted. Sitting here thinking about it, I wonder if a drop of brake cleaner or acetone would take the enamel off.
Stan
12-29-2020, 01:53 PM
yeah, there's got to be something that dissolves it- apparently modern 'magnet wire' has 1-4 coatings of 'polymer' according to wiki
https://en.wikipedia.org/wiki/Magnet_wire and here are all the different polymers... https://www.mwswire.com/pdf_files/mws_te...age2_3.pdf
I use a torch to burn off the enamel (dont burn off the ends
Peter
01-06-2021, 11:00 AM
Thanks November 1 Papa Sierra; will try that; I'm also gonna try some acetone when I get my hands on some- finger nail polish remover maybe.
01-06-2021, 11:20 AM
Currently trying to rewind an output transformer. 38ga wire will not take scrapping or open flame, although I did have some luck using hot solder. Acetone alone doesn't seem to work on it. Not for me anyway. Going to try Citri-Strip followed by acetone to clean it. I would like to know that I have clean bare wire.
Stan
« Next Oldest | Next Newest »
Users browsing this thread: 1 Guest(s) |
|

|