Thread Rating:
  • 0 Vote(s) - 0 Average
  • 1
  • 2
  • 3
  • 4
  • 5

37-60 Cathedral
#1

Hi  All,

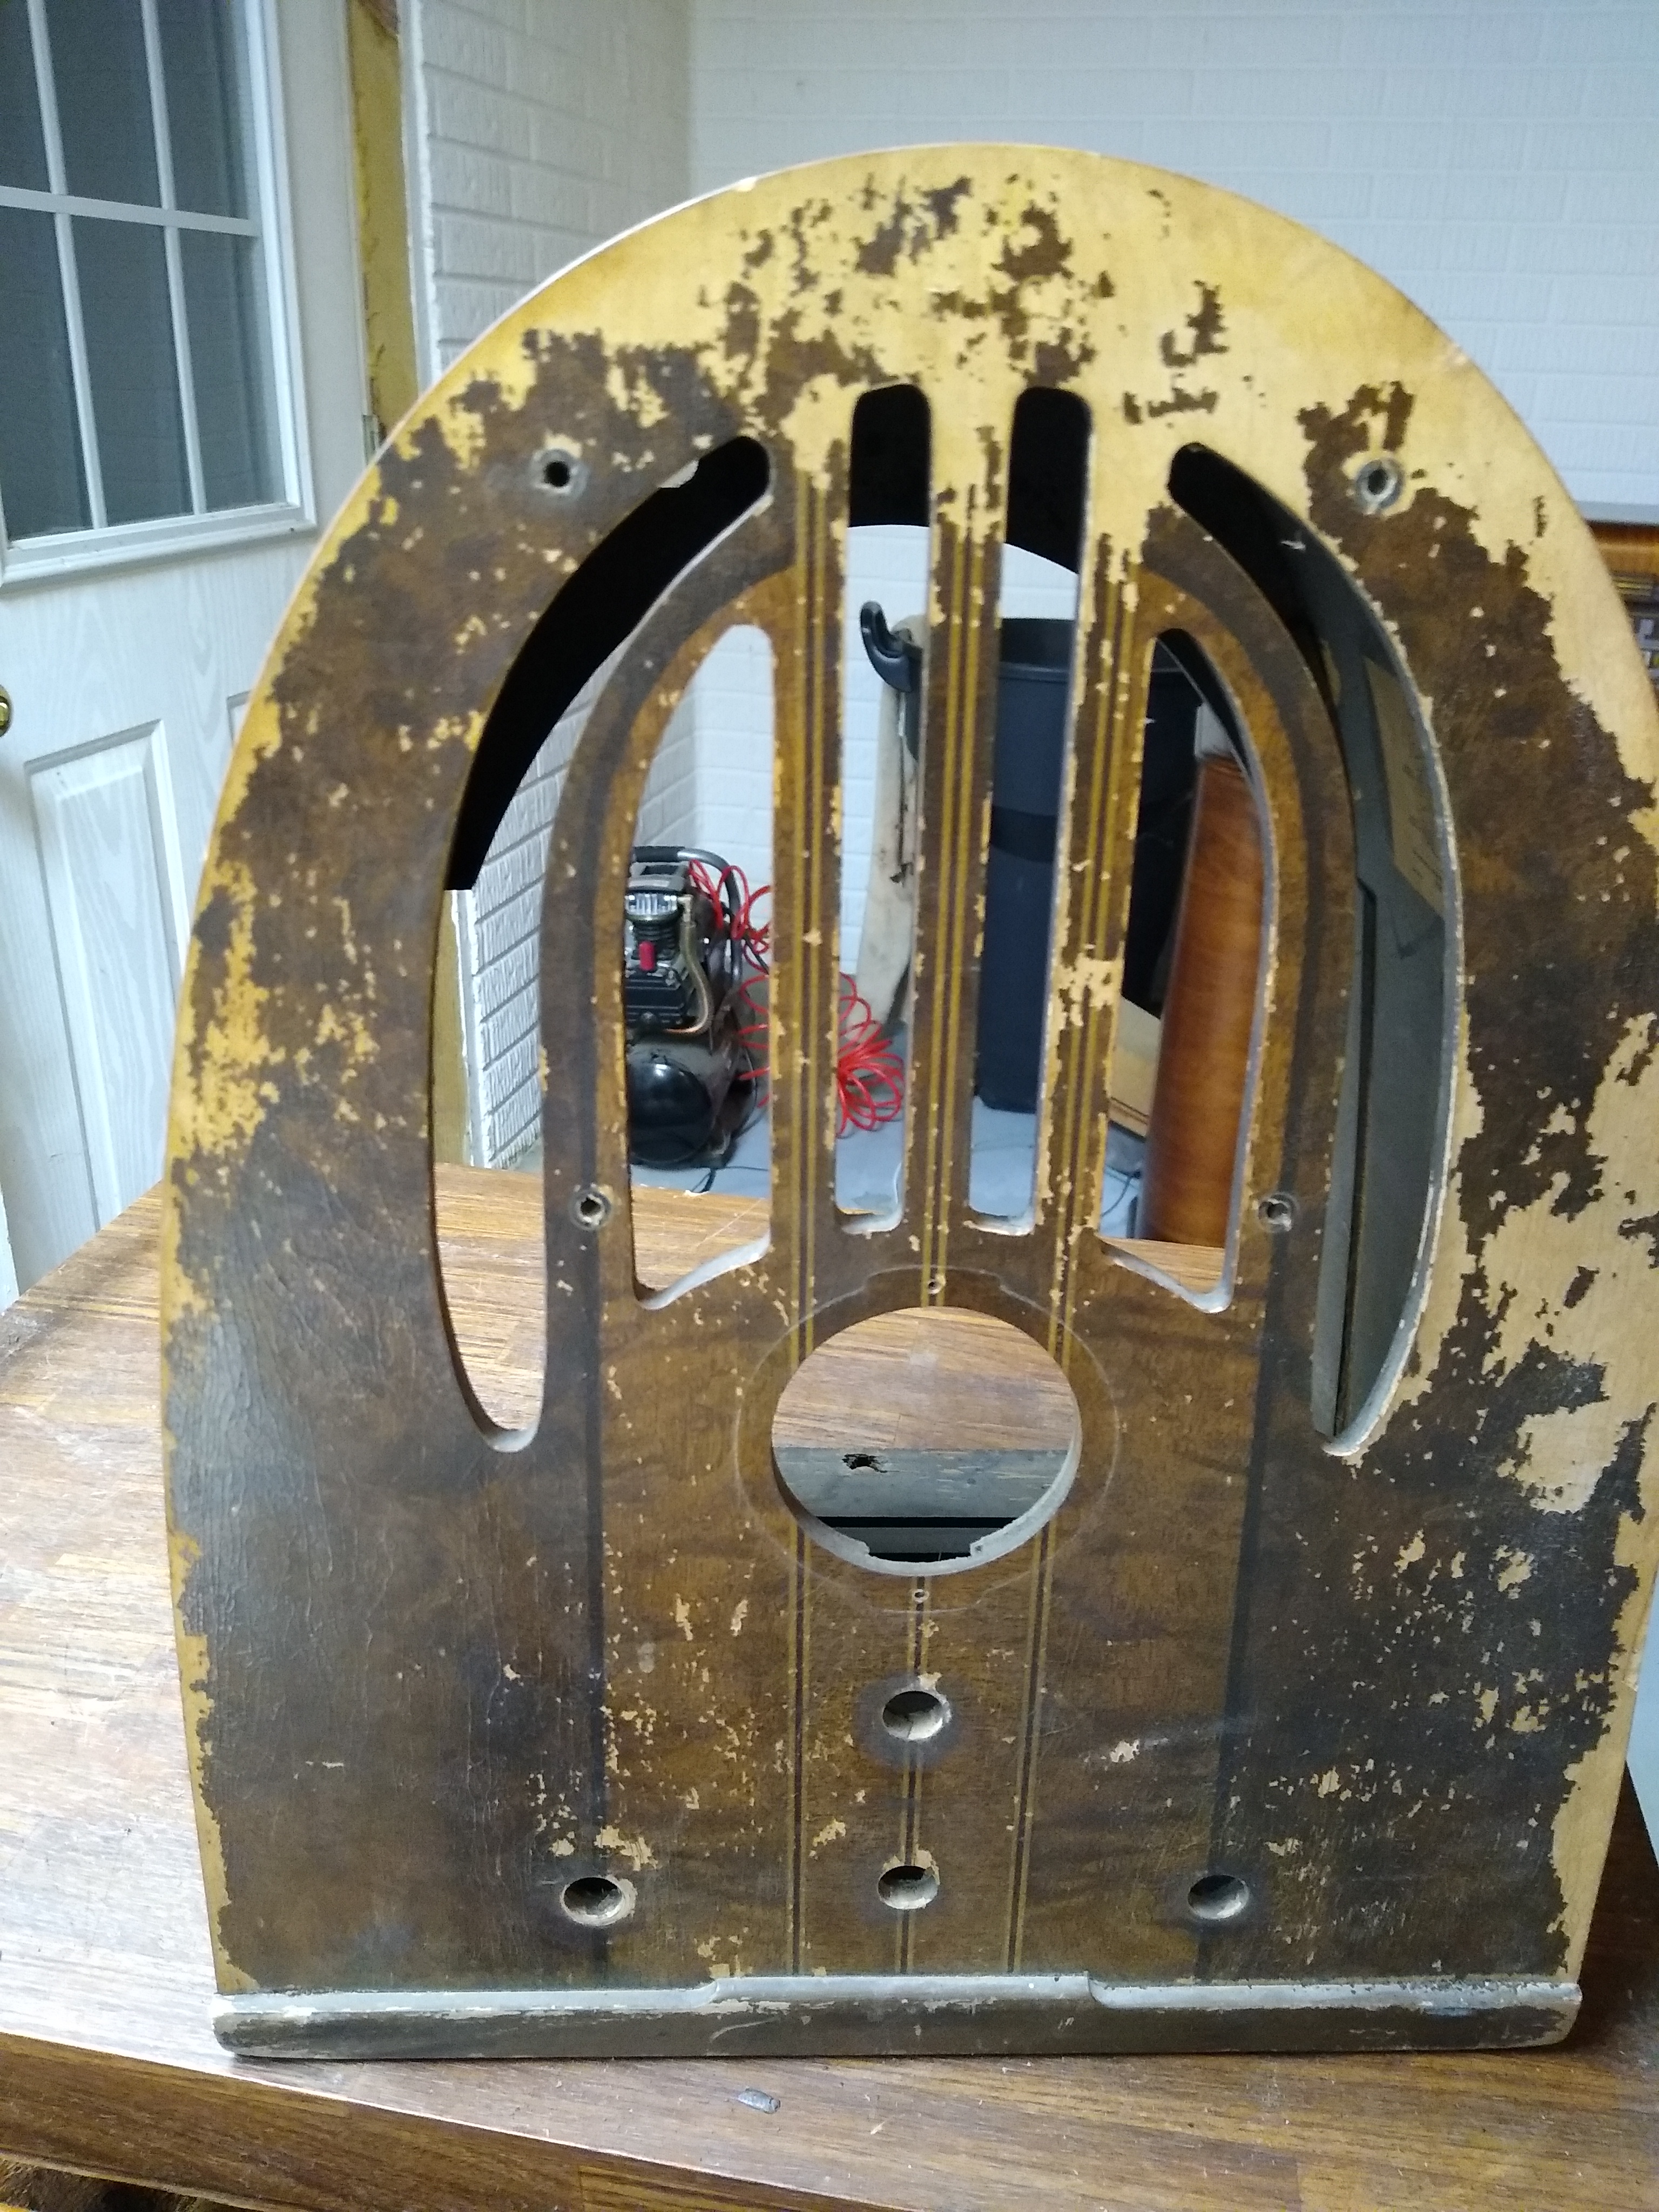
      My son got me this Philco 37-60 Cathedral for Christmas so I decided to strip the cabinet and try to reproduce the faux finish which was on the front panel.  Since no one makes the decals anymore one must do what one must do.  I got the chassis and speaker playing pretty good and they are in pretty good shape now.  Here's a peek at the chassis without the RF section.
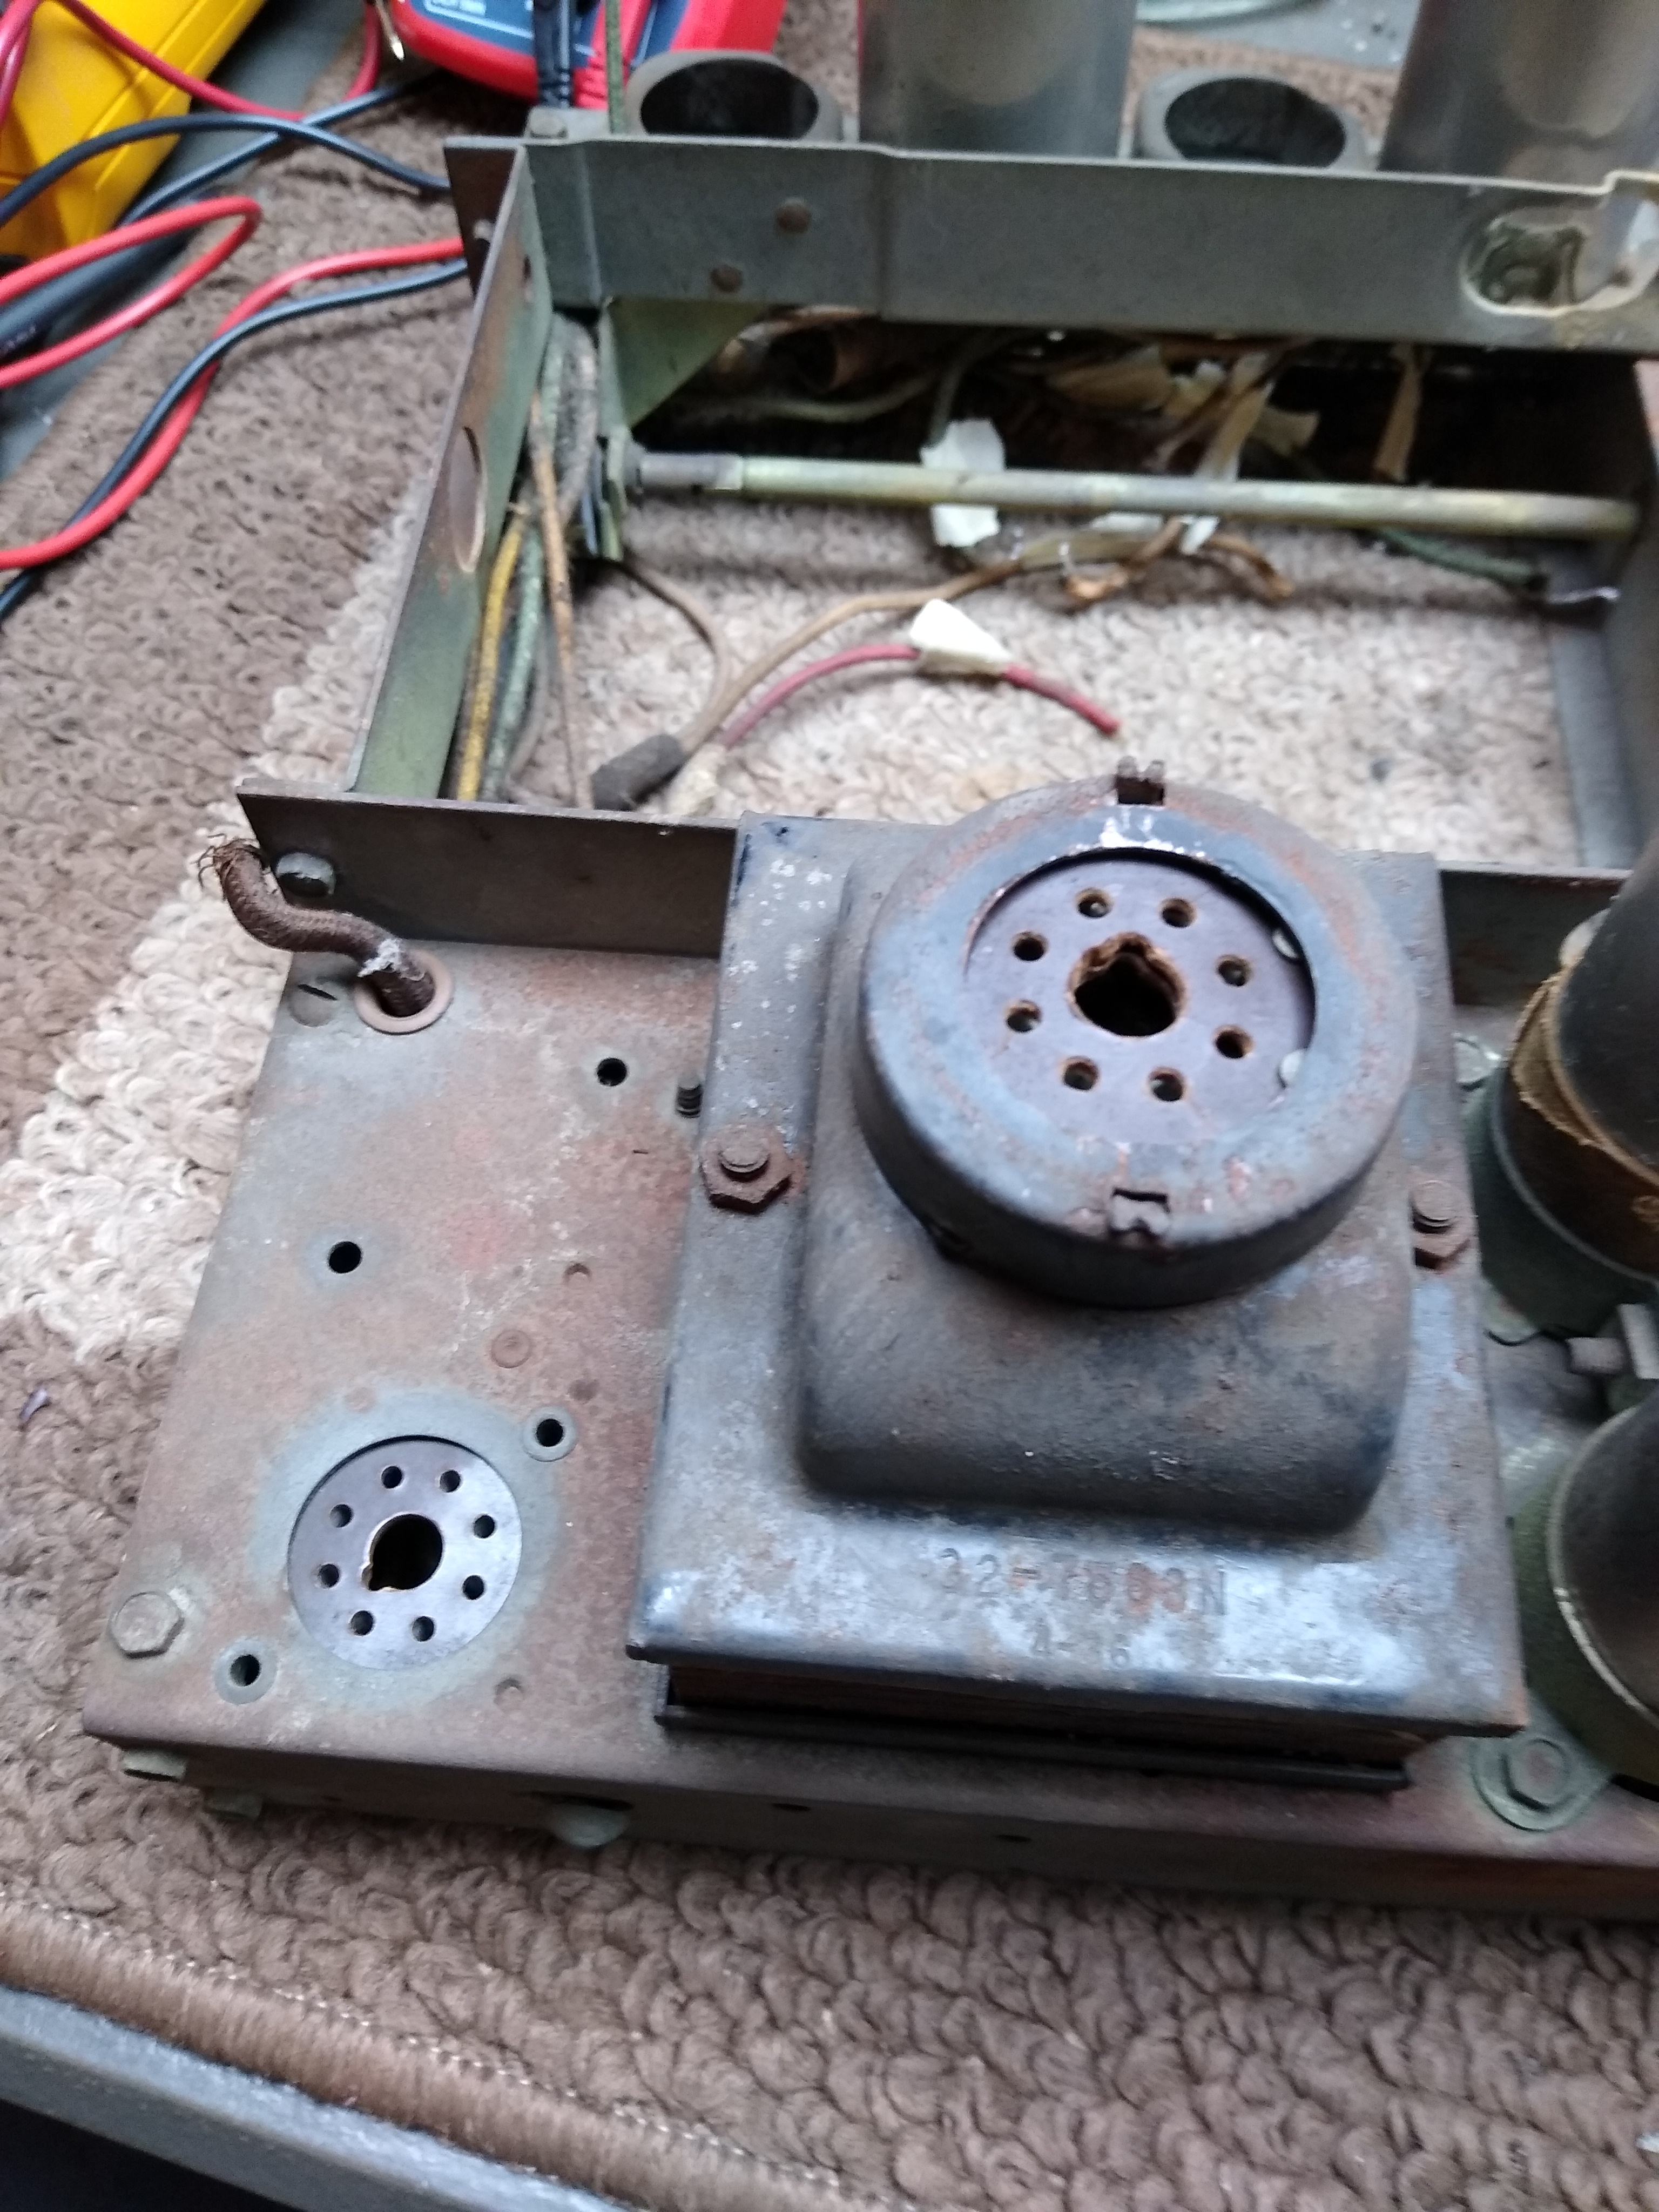
   

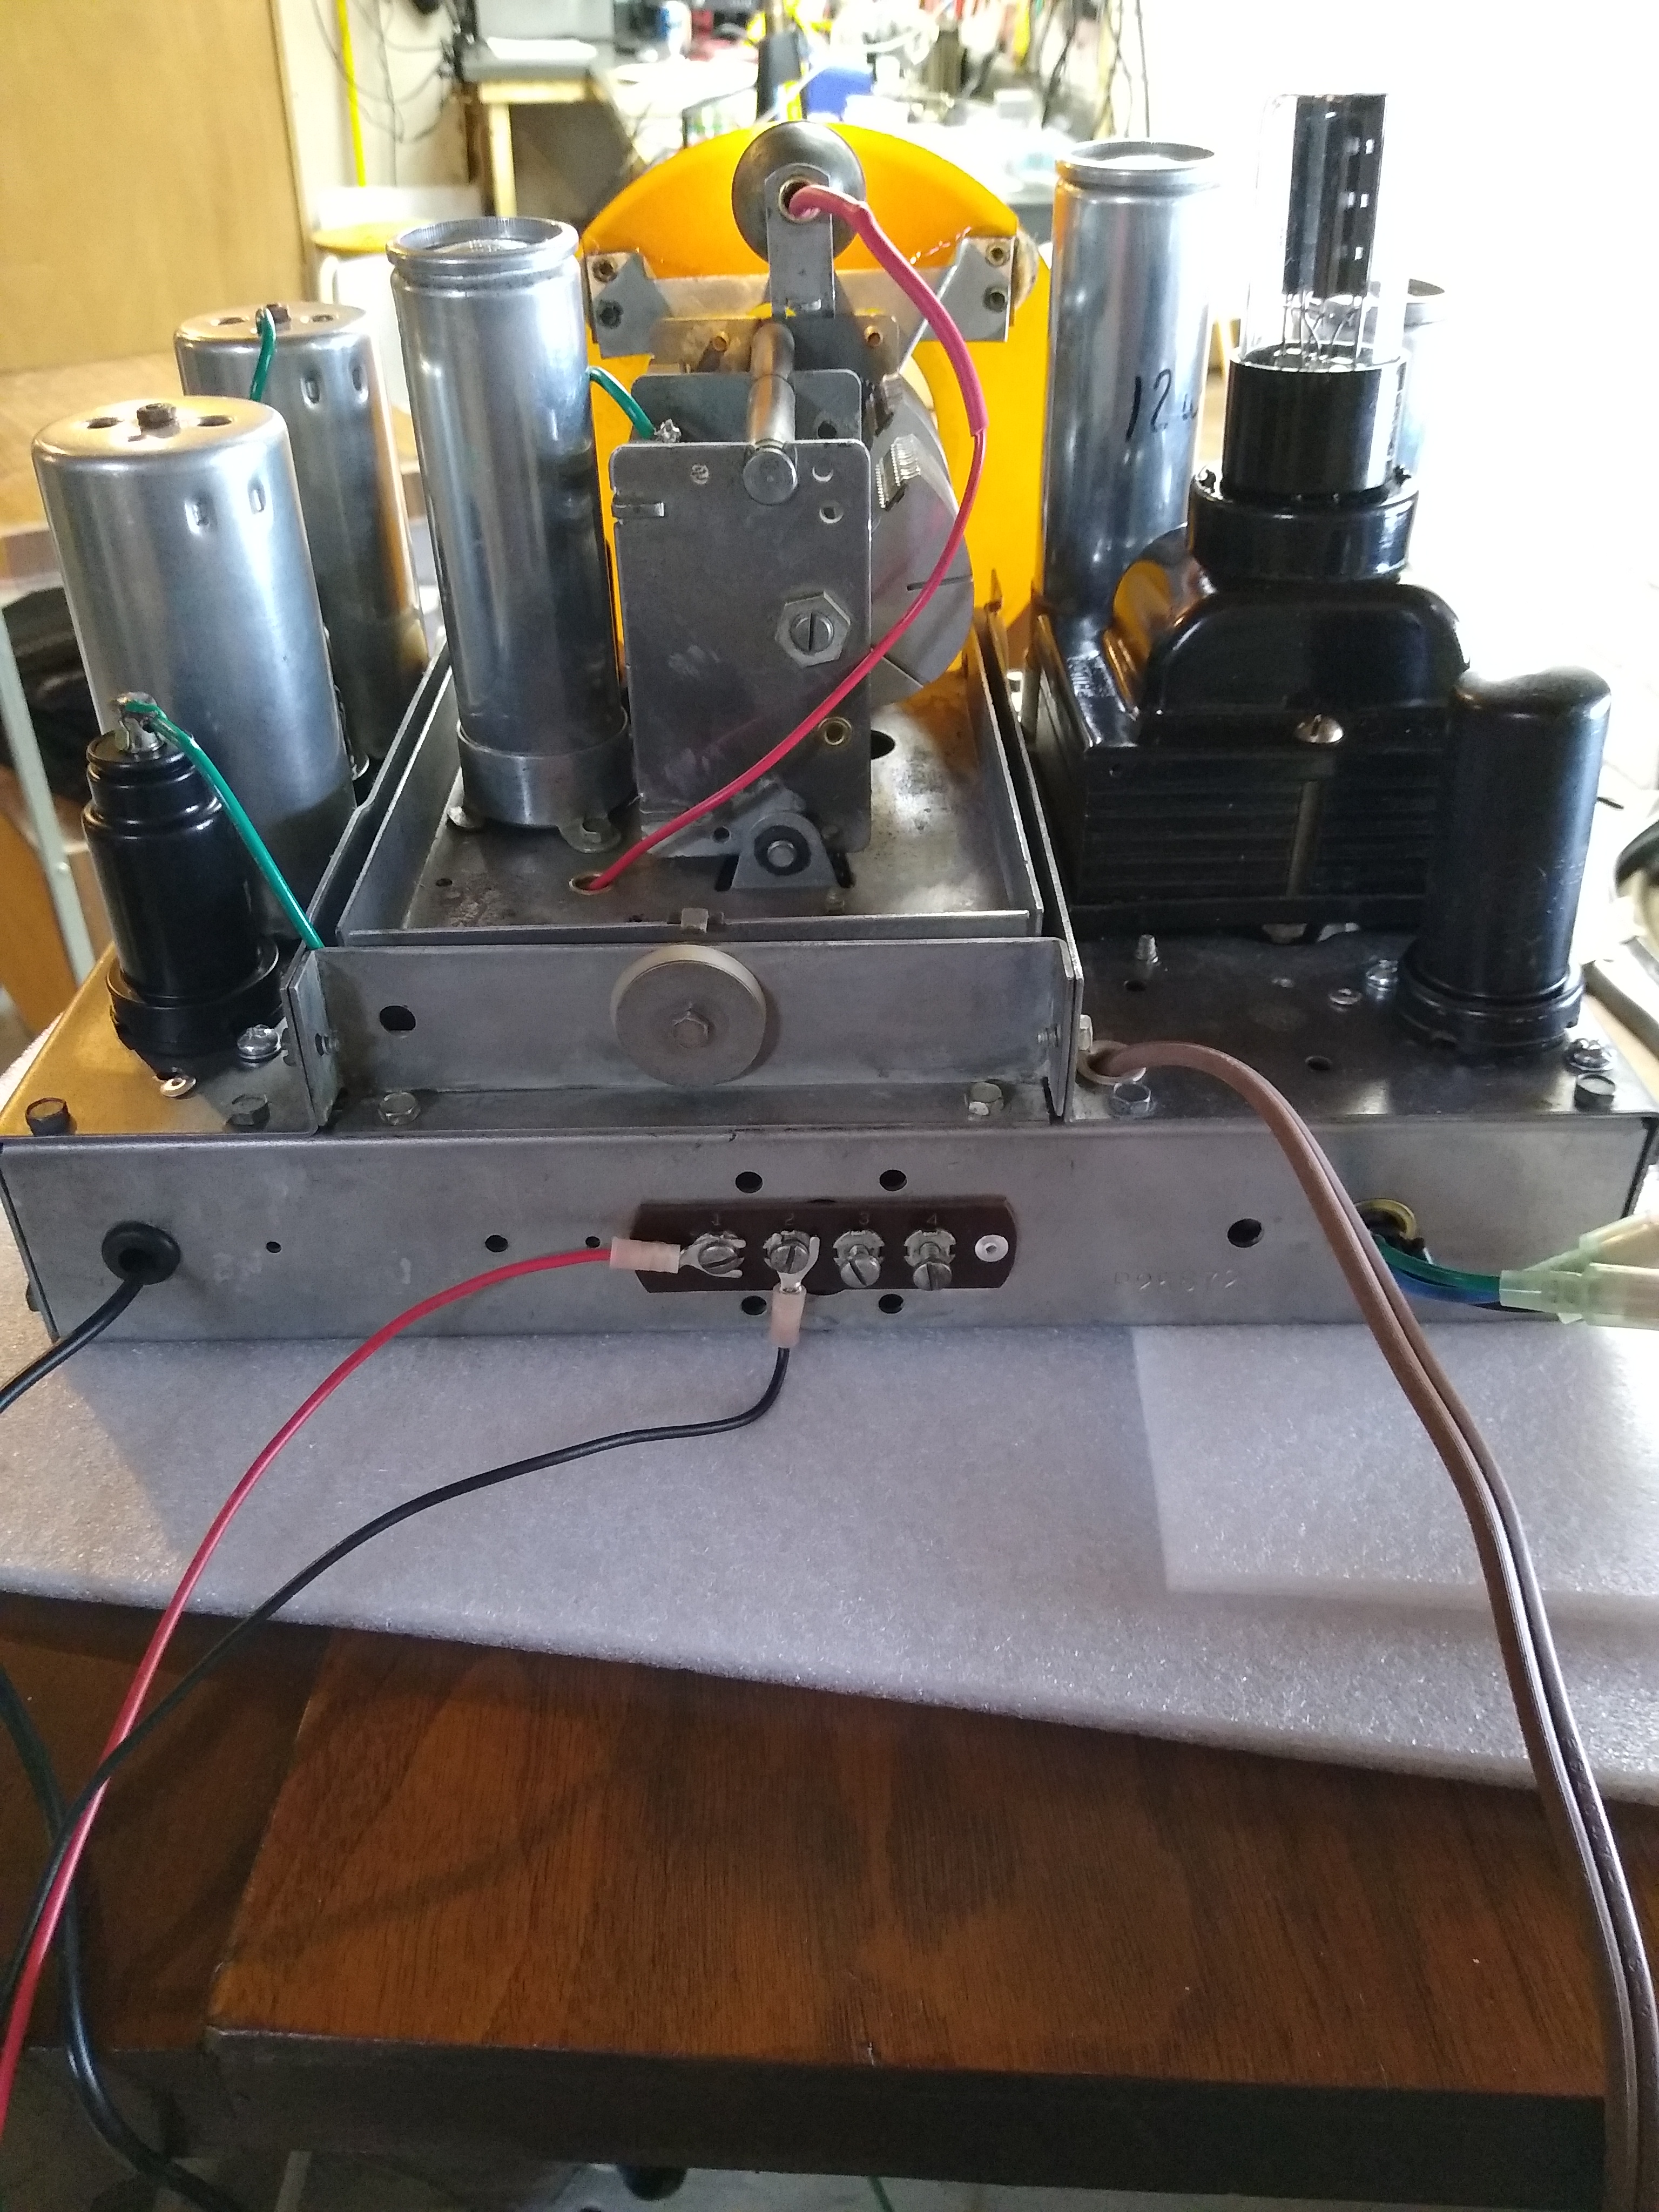
Here's a peek after clean up and restoration
   
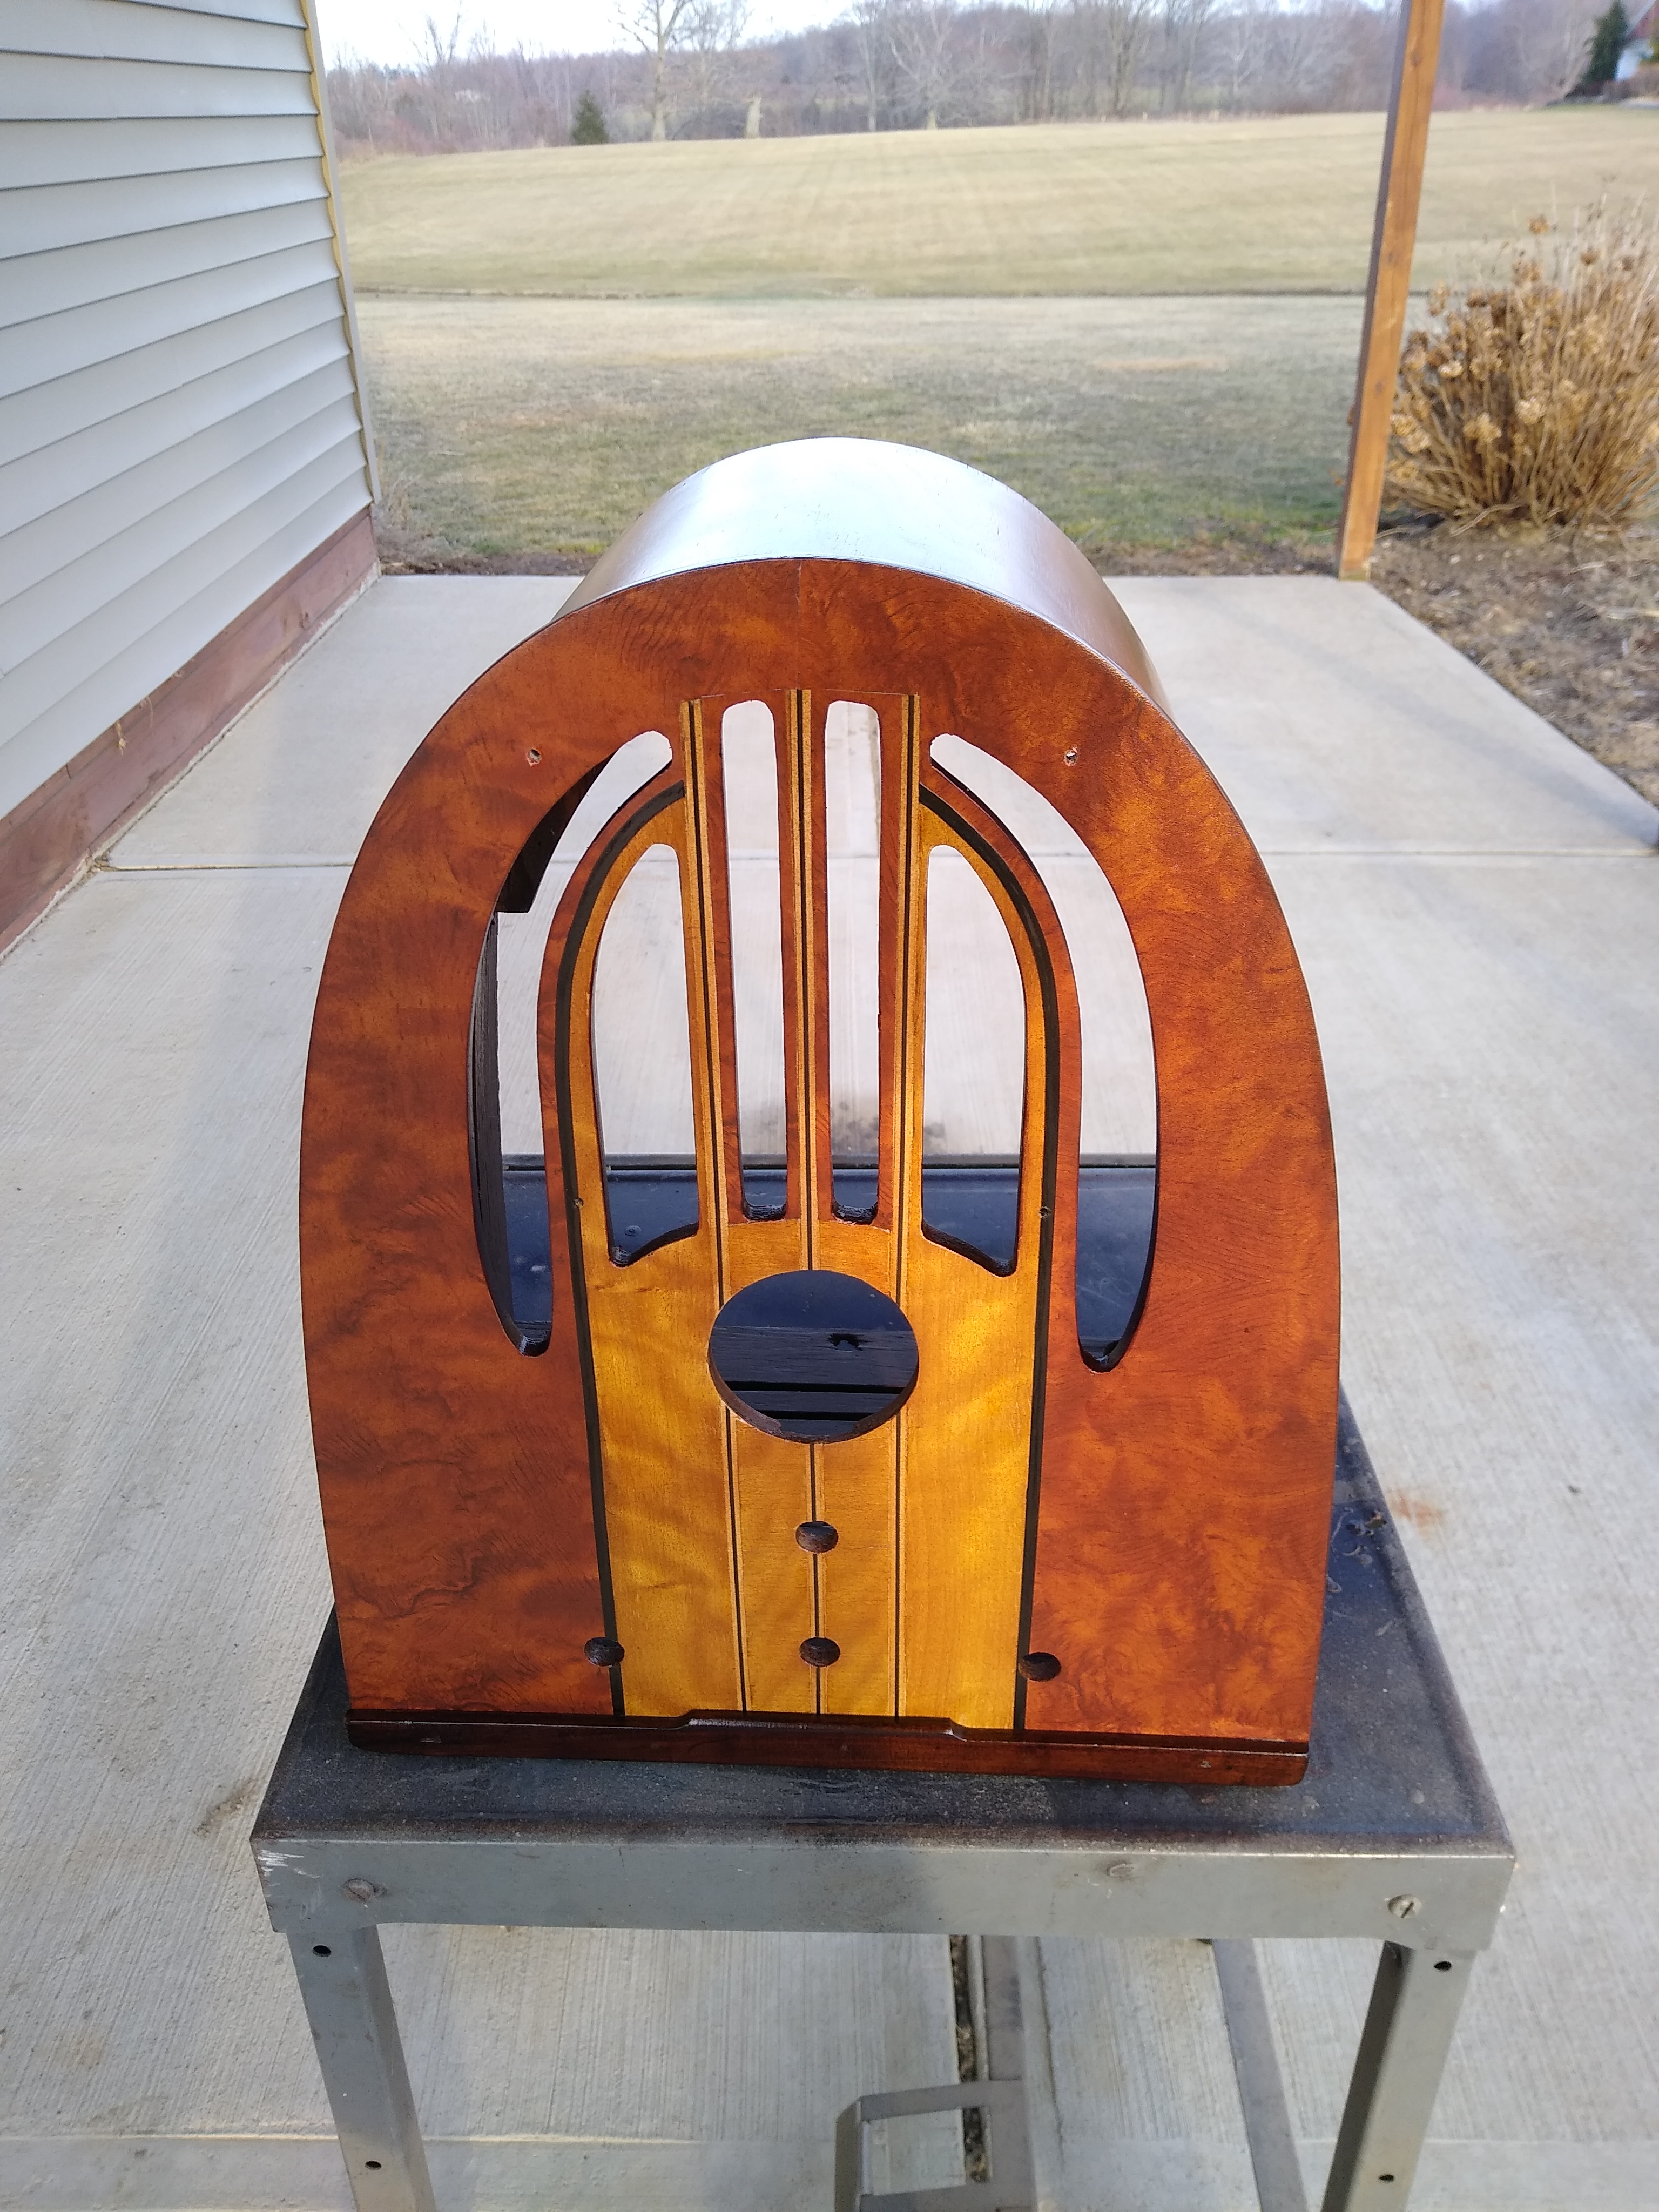
      So I used a combination of veneer and vinyl with some inlays from Rockler and I don't think it turned out too bad.  Here's what I started with
   
    This is how it turned out
   
     I would welcome your thoughts and critiques as I am always trying to improve.

      Thanks for looking

    Dick
#2

Great job, after is way better than before!

Paul

Tubetalk1
#3

Nice!!
#4

Excellent job !
#5

Very nice! I know what you were up against. I was faced with a similar problem last year on my 37-600 and used toners to recreate the faux finish


Greg V.
West Bend, WI
Member WARCI.org
#6

Thank you all.  I appreciate the statements.  Greg, I love the way your radio turned out.  Using toners is an interesting approach.  Did you spray the toner on, then use a brush to get the burl look?  You could teach a lot of guys how to fix their faux finish radios.

Dick
#7

Hello Dick,
Wow you did amazing job it looks great !
So far as the chassis what did you do to get to look that good ?
Greg ,I have the same radio and yours and I have been holding holding off on it's restoration because of that Photo finish .
Sincerely Richard
#8

Thanks Richard   As far as the chassis, I removed everything including the tube sockets.  I actually left the wiring intact for the sockets and drilled out the rivets and removed the 3 sockets and wiring in one piece.  Removed the RF section and coils and osc. tube socket in one piece and then the transformer, then took the chassis apart and soaked all the parts in Evaporust for 3 days.  Then with a little steel wool it cleaned up real nice.
 Thanks again

Dick
#9

Its a beauty!
I just did a 37-610 with the same cabinet.
Front was deeply scratched, so I decided to apply a new layer of veneer to cover all that mess up.
Then I decided to experiment with colors as I got the radio for free anyway.
Applied stain to the new front panel, and it looked kind of splotchy.
So, I decided to go with gel stain over the front which is pretty much an ebony color.
Refinished the body in an antique cherry stain and applied finish.
I have to say, it turned out pretty nice looking for an experimental free radio.
Did re-cap and put in new sub-chassis rubber mounts.
Working great on all bands, and looking great too!
Fun to play around with these old timers!
murf

Wish I could post a pic, but without photobucket, its hard!
murf[Image: https://philcoradio.com/phorum/dsc 019]
#10

Thanks, Dick. I sprayed some dark toner onto a piece of cardboard and used a piece of sponge cut to a point to get the burl look. Just lightly and quickly daubing it on.

Greg V.
West Bend, WI
Member WARCI.org
#11

Thanks Greg  I'm going to save this post so I can resort back and try your method next time I get a faux finish radio.  I really like that look too and that would be a new challenge.
#12

Here's a pic of Murf's 37-610.


Attached Files Image(s)
   

When my pals were reading comic books
I was down in the basement in my dad's
workshop. Perusing his Sam's Photofoacts
Vol 1-50 admiring the old set and trying to
figure out what all those squiggly meant.
Circa 1966
Now I think I've got!

Terry
#13

This is the result of my experimenting with colors.
Replaced the veneer on the front, and it would not take stain evenly. Ended up with light spots on the new veneer.
So I decided to go solid color gel stain on the new veneer on the front, and antique cherry on the original body.
Looks pretty good compared to the way it would have looked with the splotchy looking front panel.
Don,t know why it the new veneer stained the way it did.
murf


Users browsing this thread: 1 Guest(s)
[-]
Recent Posts
12' Philco
If it is 12', either Kareem or Andre would have to jump pretty high to look at the front panel. Kareem would have an e...morzh — 01:48 PM
12' Philco
And here's a story about the tires on the truck. Same "no-stoop" guy must have installed these! Take care a...GarySP — 01:17 PM
Hickok AC51 tube tester
I think they have only shown the secondaries of the transformer. Two of them feed the rectifiers' filaments.morzh — 12:58 PM
IF can wire size and Rubber mounts?
Arran If the wire inside cans is the gauges you mentioned, the sole reason for that would be mechanical, to stiffen t...morzh — 12:56 PM
12' Philco
Rod, Yes, I know, but the Giant Philco is not around anymore either, so I go by whoever was alive fairly recently. H...morzh — 12:54 PM
Hickok AC51 tube tester
Absolutely no one is going to reverse engineer that circuit. Even the iron core is missing.RodB — 10:37 AM
IF can wire size and Rubber mounts?
Thanks to both members for your help regarding wire and tuner mtg supports. regards--Johngeorgetownjohn — 09:33 AM
Hickok AC51 tube tester
Note that no power cord, power switch, or power transformer switch are shown. That (along with my experience with full s...DaleHCook — 07:09 AM
IF can wire size and Rubber mounts?
A pair of wire strippers can give you an idea of what the existing gauge of the wire leads are in the IF can, I think it...Arran — 06:07 AM
My last cabinet for this year
Hello Dan, That is really beautiful what great looking radio you have ! I have friends who live in Calgary and the wea...radiorich — 01:51 AM

[-]
Who's Online
There are currently 4436 online users. [Complete List]
» 2 Member(s) | 4434 Guest(s)
AvatarAvatar

>