38-9 bullet - how bad is too bad?
Posts: 134
Threads: 11
Joined: Jul 2015
City: Christchurch, New Zealand
Hi all, it's been a while since I posted - or even did anything Philco, despite having a few around that need attention. It's nice to be back into one.
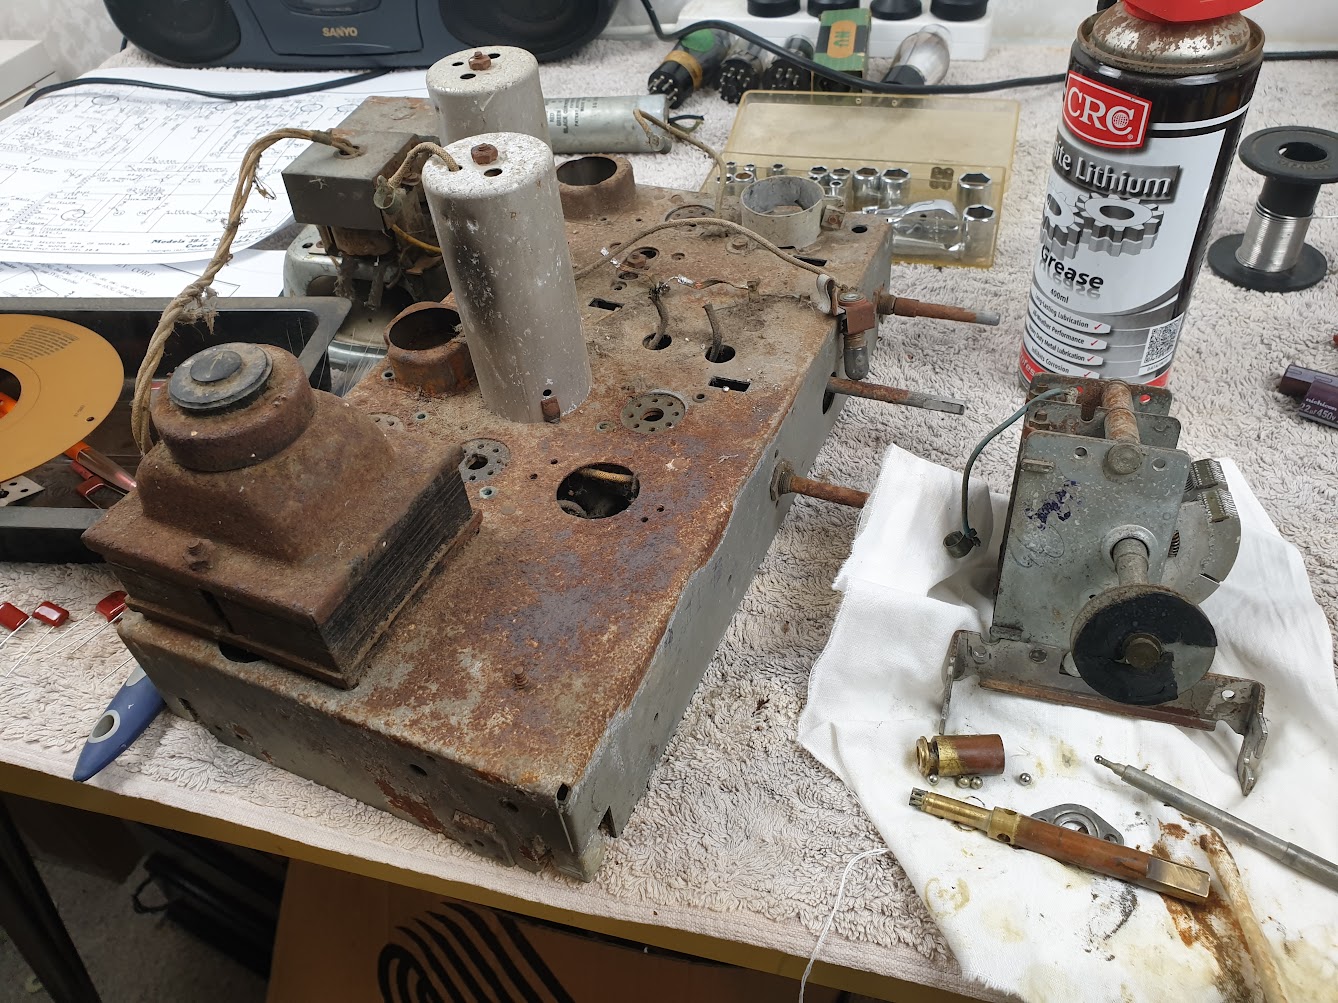
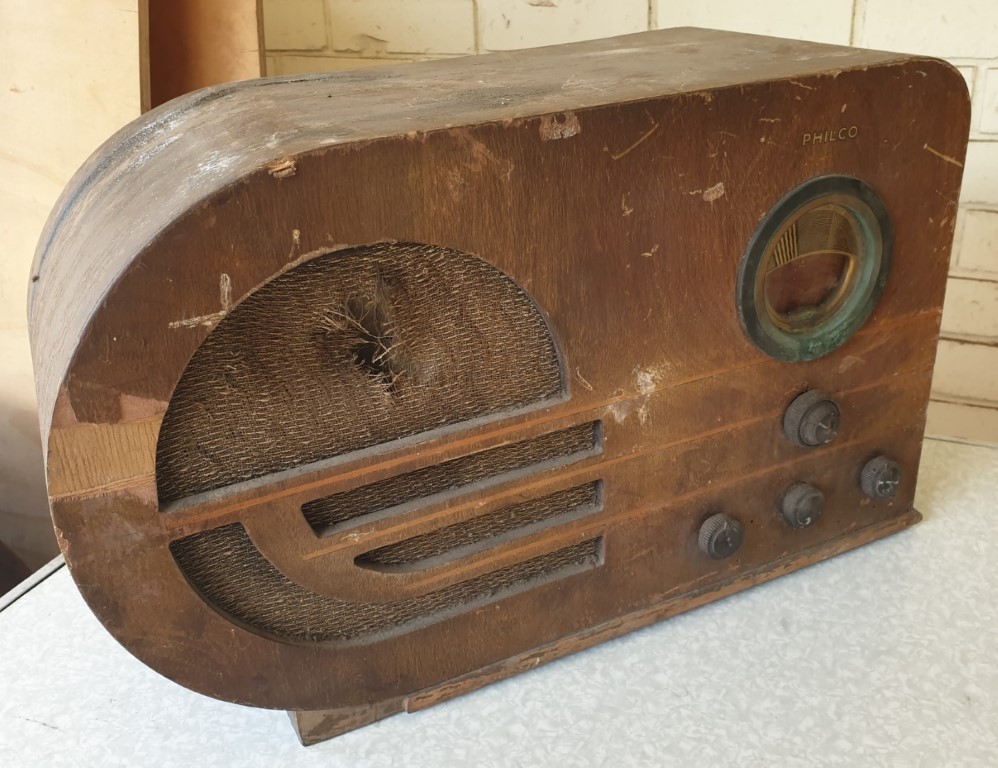
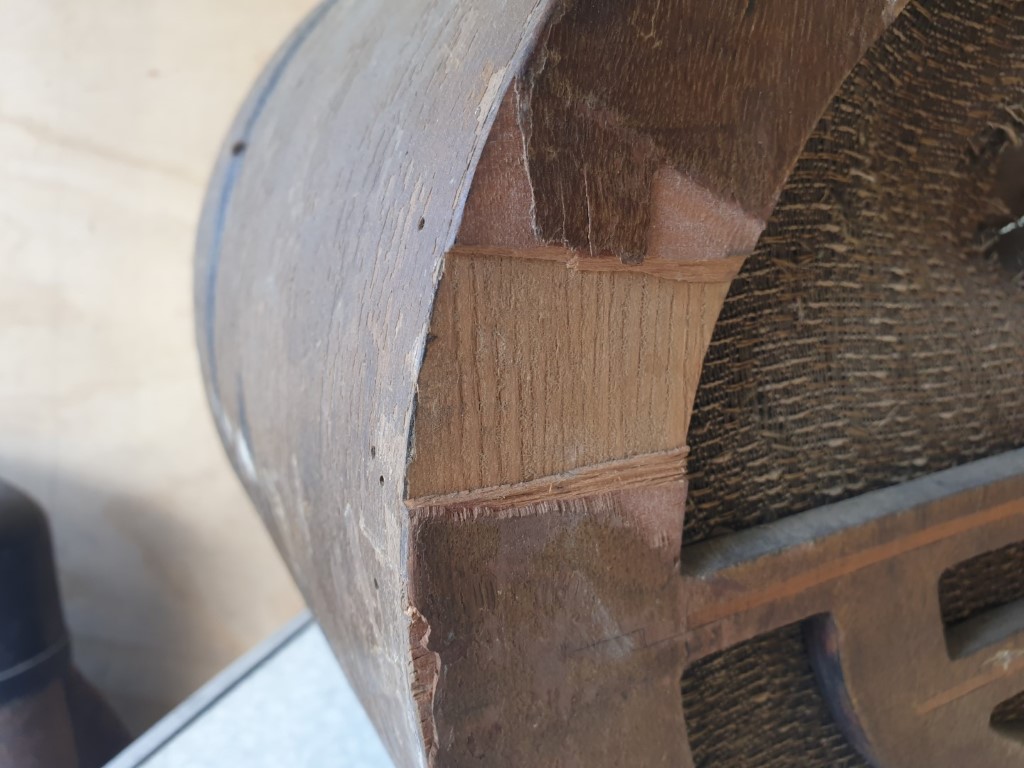
This one was in very poor condition - the cabinet has a big chunk out of it and black oily tar dripped all over the top, and the chassis is very rusty - I've got the dial guide metalwork sitting in evaporust at the moment, and have the rumbly vernier apart for cleaning. On the bright side, it cost me $2 at a swap meet late on the last day, as the owner didn't want to take it home. So I stand to lose a few hours and a couple of bucks at most.
I've scraped and sanded the cabinet, and I've started to layer-fill the chunk that is missing with some old veneer - and I have a spare bit of walnut veneer that looks like it might almost match if I can get it blended in ok - we'll see... I'm not super-good at cabinets but I'll give it a crack.
Electrically, the problems roll on... the speaker field is reading about 53k (should be 1.14k) - so I'm thinking maybe a green break and subsequent high resistance point? And the primary winding of the output TX is open, so it might end up with a non-Philco speaker in it, because the only other EM speakers I have are in other sets - so they would come at the cost of either a complete 60, 37-630 or a 37-640. I also have a PM one in a 38-39 battery set - but I don't know if I want to go down that route.
And the rust - so much rust. I don't know how far I'll go with the chassis. I've taken the tuning gang off to clean that up, so I can at least get that area clean, but I'm not too keen to strip this one too far - it was only supposed to be a quick 'git 'er going' job and the cabinet is already taking more work than I hoped... I only like it because of the cabinet shape... so I guess at least for that reason, I can throw a little more time in to see what I can get done.
I still have to test the mains TX, IF's and coils... I have a spare power transformer that I can use if I need to. I should have done those first, but I'll figure something out if any of them are U/S.
Anyway, I'm not really documenting this one too much - but I thought I'd use it as an excuse to get back to the forums.
Happy New Year everyone!
Cheers, Steve
There are no personal problems that can't be overcome with the liberal application of high explosives
Posts: 7,303
Threads: 269
Joined: Dec 2009
City: Roslyn Pa
Hi Steve,
What a great way to start the new year![Image: https://philcoradio.com/phorum/images/sm..._crazy.gif] I'm not sure if you can press the pole out of the speaker that you have to remove the fc. I've never tried it. It may be welded at the rear (bad) or press in (good). All that is if you wanted to rewind it. That rear assembly does come off but the cone has to come out beforehand.
Now if you are a real glutton for punishment some have rewound the opt using a homemade jig to keep the turns in place. If not I found abt 20 suitable Philco speaker part number/models that at a glance should be a good match. All se 42 output stage and fc fairly close, resistance/current rating. Most popular is the S-7. The 89/19 and model 71's that use a single 8" (K-7) are probably a good choice, they are a pretty popular sets.
I use the speaker zip file to check speakers. I know there's a form of it in the library but I just find this one easier to read.
https://www.philcoradio.com/phorum/showt...hp?tid=215
I've got a couple of rusty 4 tube trf midget cathedral sets from the early '30s. They look a lot like your Philco. I got one working but I wanted to derust it and reassemble. Too many projects not enough time.
Happy New Year!
When my pals were reading comic books
I was down in the basement in my dad's
workshop. Perusing his Sam's Photofoacts
Vol 1-50 admiring the old set and trying to
figure out what all those squiggly meant.
Circa 1966
Now I think I've got!
Terry
(This post was last modified: 12-31-2023, 12:20 PM by Radioroslyn.)
Posts: 16,533
Threads: 573
Joined: Oct 2011
City: Jackson
State, Province, Country: NJ
Wow Steve,
You are a glutton for it, ain't ya....this is almost as bad as they come; in Kutztown those are left on tables for free pickup.
So, if you succesfully resurrect this one, you can feel really proud of yourself.
Do make sure you keep all the "Before/after" pictures.
That could be a good tutorial for those not faint of heart.
People who do not drink, do not smoke, do not eat red meat will one day feel really stupid lying there and dying from nothing.
Posts: 4,906
Threads: 54
Joined: Sep 2008
City: Sandwick, BC, CA
I would suggest washing the chassis first so you can see how much rust there is. It looks to me like a rodent got into the back and used the chassis as a toilet, believe it or not I've had success using paper towel soaked in vinegar to get the heavy rust off, I tried it on a Stewart Warner farm radio chassis and it got it down to bare steel, then I treated the areas with phosphoric acid based rust remover to stop them from rusting again, if I can get it clean enough I may not have to paint the chassis. Depending on how motivated you are it may make sense to strip the chassis down, if the power transformer is still good. Any pictures of the cabinet?
Regards
Arran
Posts: 134
Threads: 11
Joined: Jul 2015
City: Christchurch, New Zealand
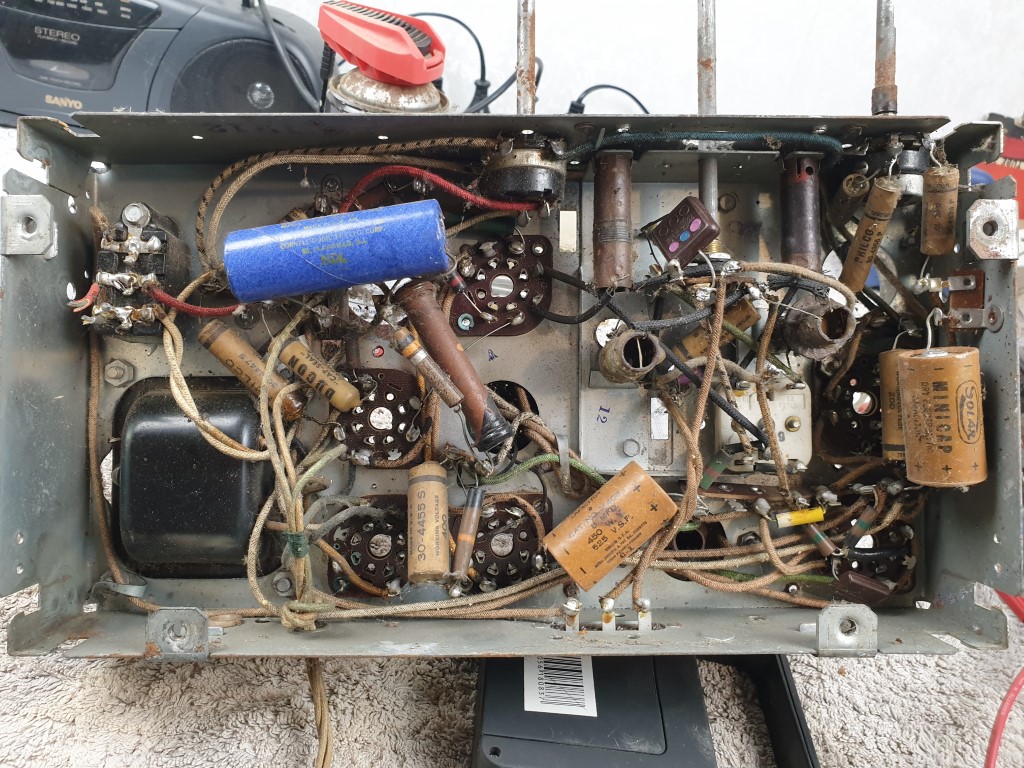
Cheers guys, I don't have a lot of photos, and I'm lucky I even have any before shots. I have a youtube channel and try to document everything when working on sets, but in this case I just wanted to do it without the camera or the added time and stress that adds - and hooked straight into it without even taking a photo... I just wanted the peace of working without thinking about it... I might have gone too far in the wrong direction, but at least I have a couple of shots - and I'll take more as I go on.
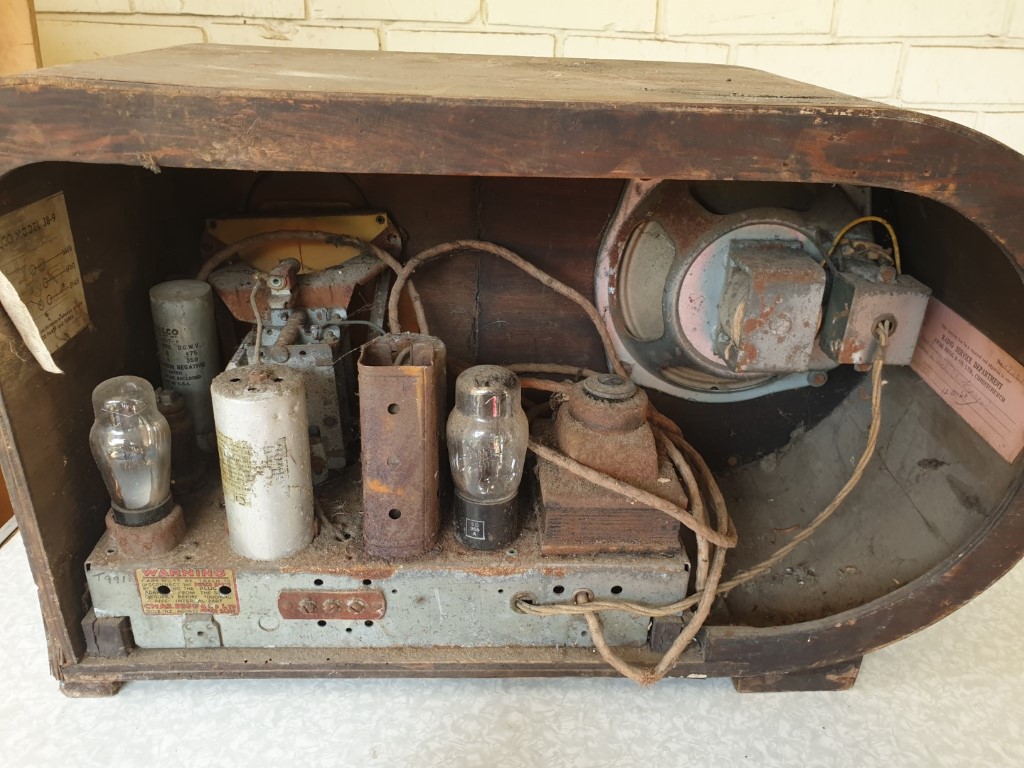
That tube shield was rusted solid to the base and almost got destroyed in the removal... the rust is very bad in spots. Regarding the vinegar, that is a trick I have used successfully before and may look at it here too - although I have some rust killer that I might use just because I have it. It's definitely been a 'whizz palace' for mice for a long time (does anyone get that reference?  ) Luckily the inside of the chassis is clean, just full of spiders, which I don't mind. So I might try a cleanup with a small wire brush and rust killer without disassembly. I'm trying hard to avoid a full-scale restoration here.
And regarding the speaker - I am not going to pull it apart, the unserviceability of them is a disappointing thing with Philco speakers. Rola, or nearer to my heart - Radio Corporation of New Zealand, speakers are 4 screws away from a simple disassembly for repair or realignment... having to grind welds or use a shop press to get into one is a step too far for right now - but I won't throw the speaker out - maybe one day when I'm retired and have more time... maybe... And thanks for the speaker list, I think I have a copy of that from years ago, but I don't have a lot of Philco speakers laying about to choose from - and they're not so common here in New Zealand as they are in the US - so it's going to be a case of just making something work I think.
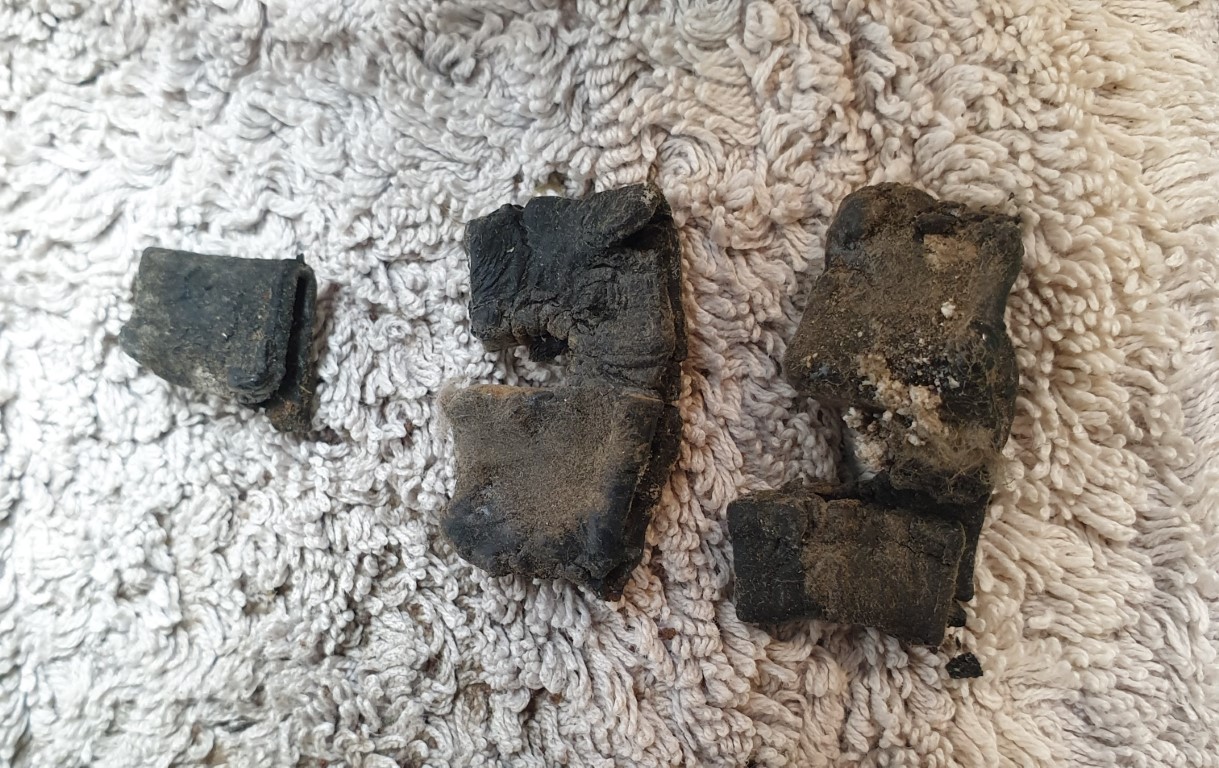
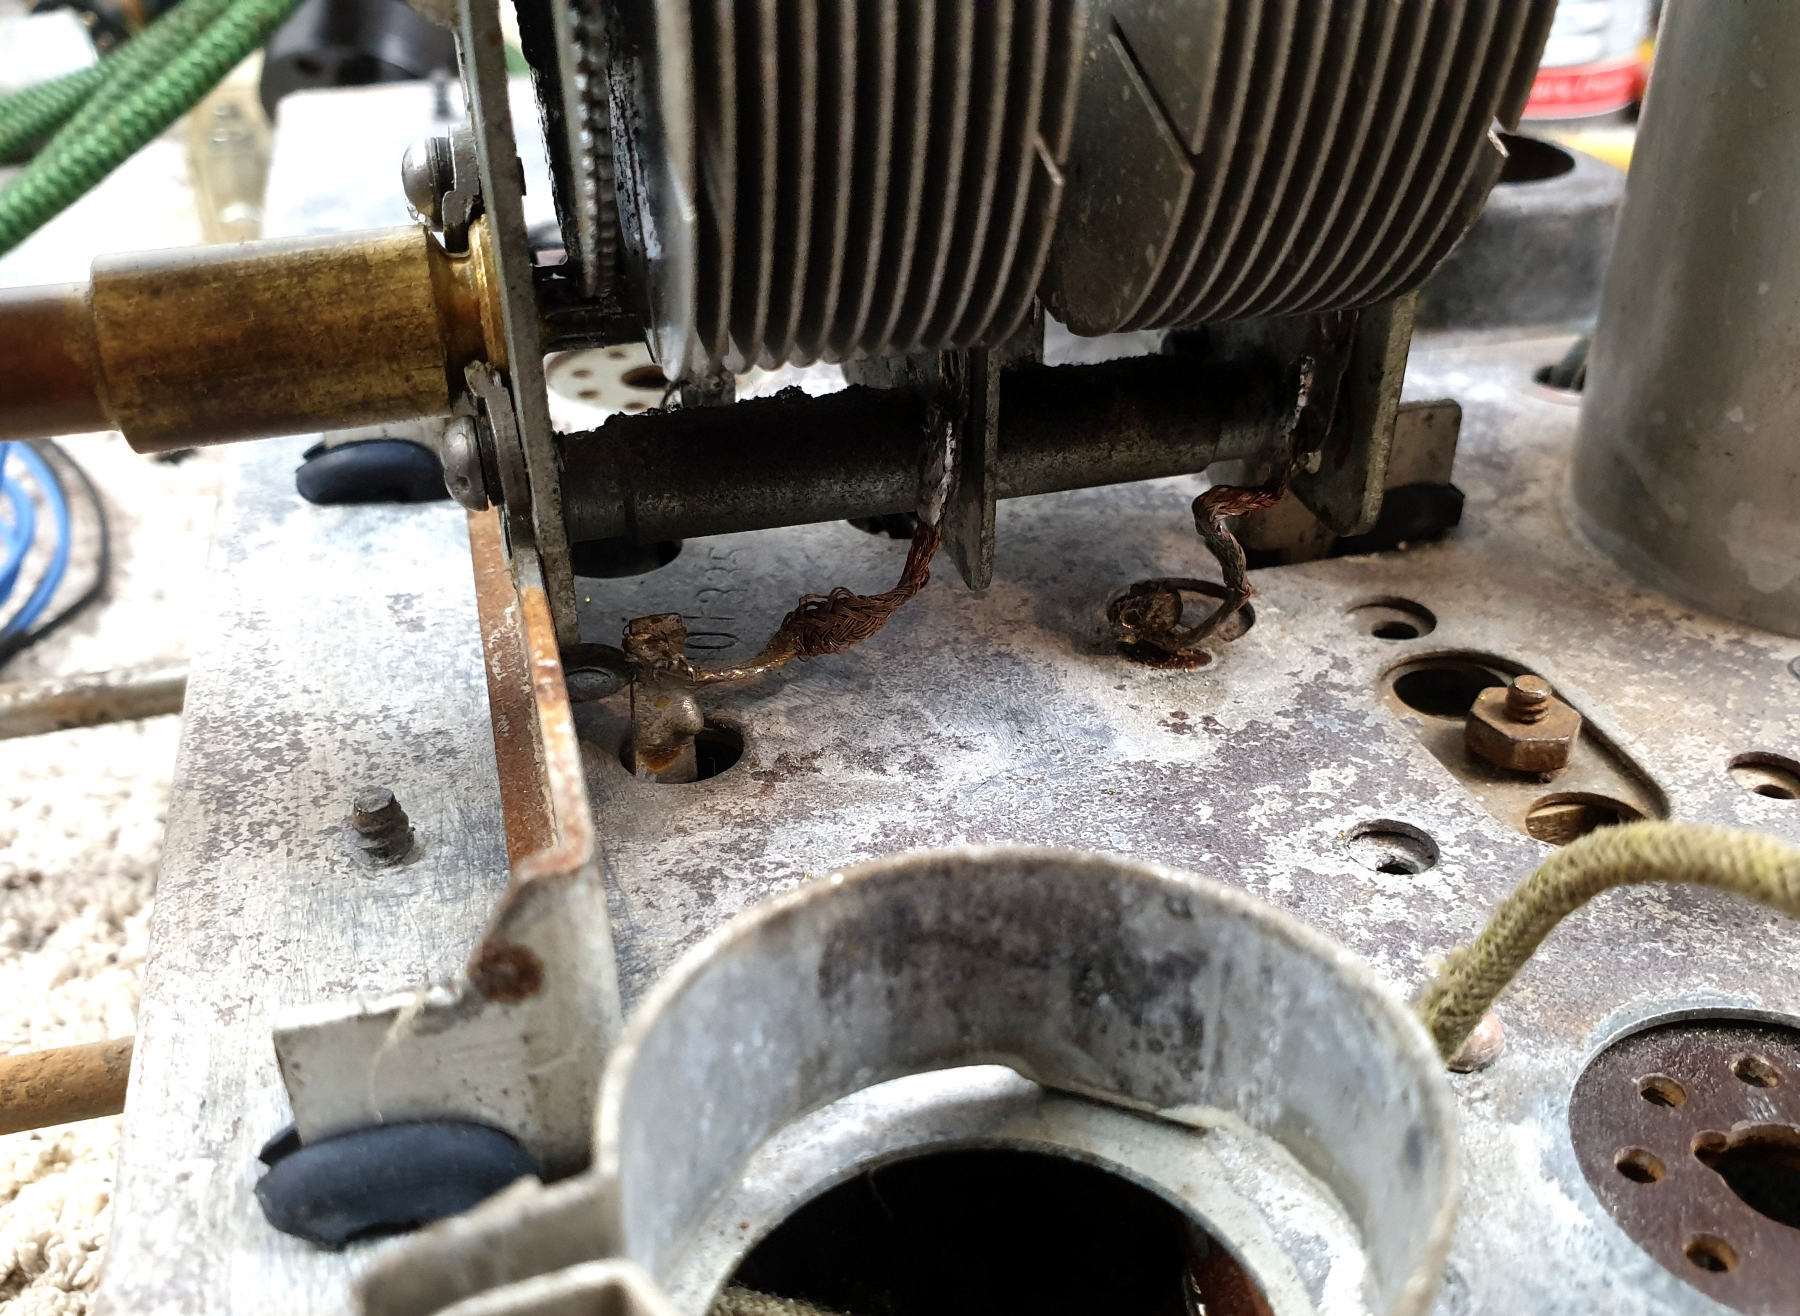
I'll also need to come up with a solution to the rubber tuning gang mounts - I know I can buy repro ones from the U.S. but the shipping is a killer, so I will see if I can come up with something from what I have, some modified grommets or something.
Cheers, Steve
There are no personal problems that can't be overcome with the liberal application of high explosives
Posts: 134
Threads: 11
Joined: Jul 2015
City: Christchurch, New Zealand
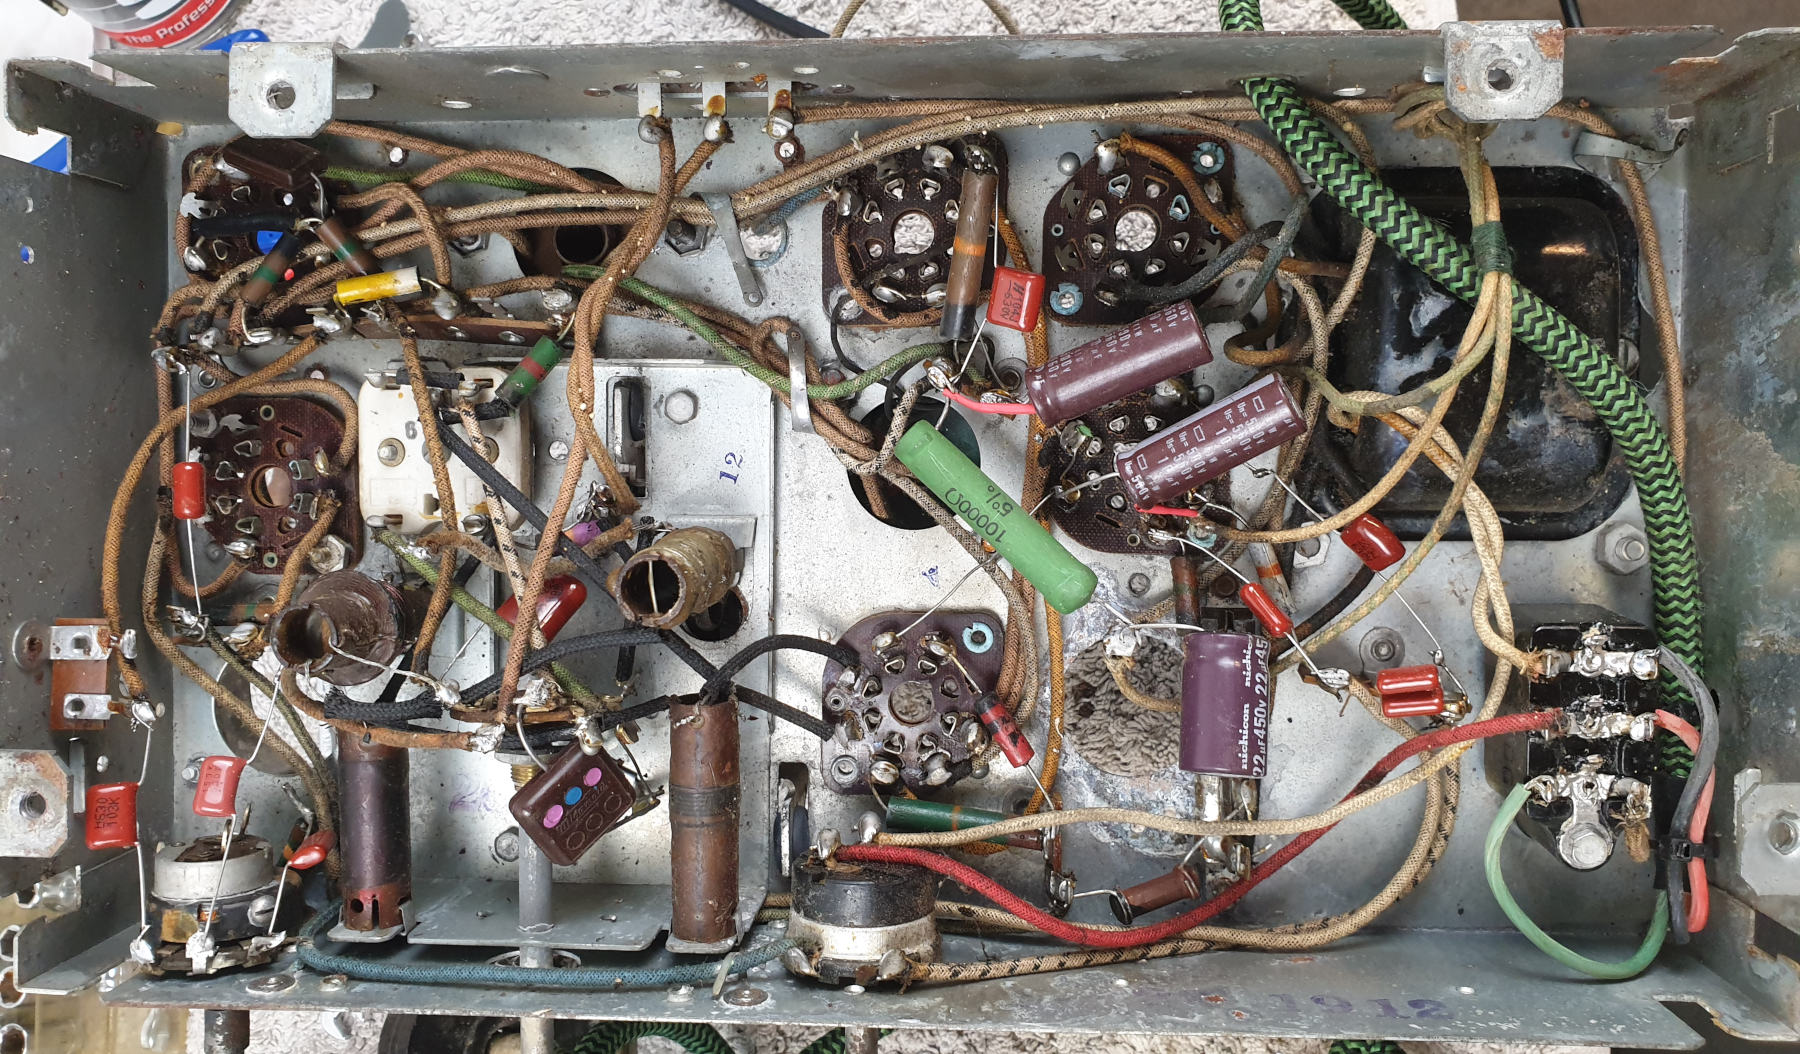
Progress update... recapped and one resistor changed (the big 3W 10k beast which was well out)... I may have to change a couple of others as well but I'll see how the voltages look when I bring it up.
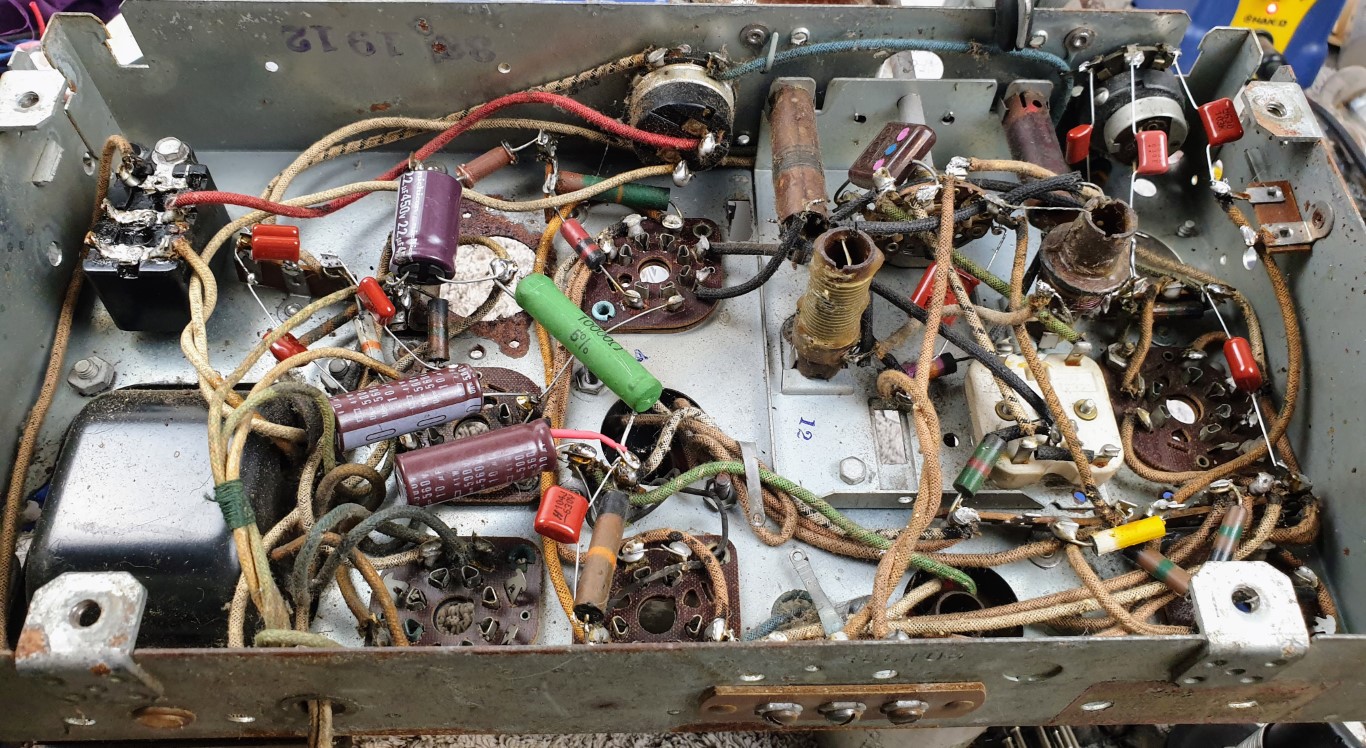
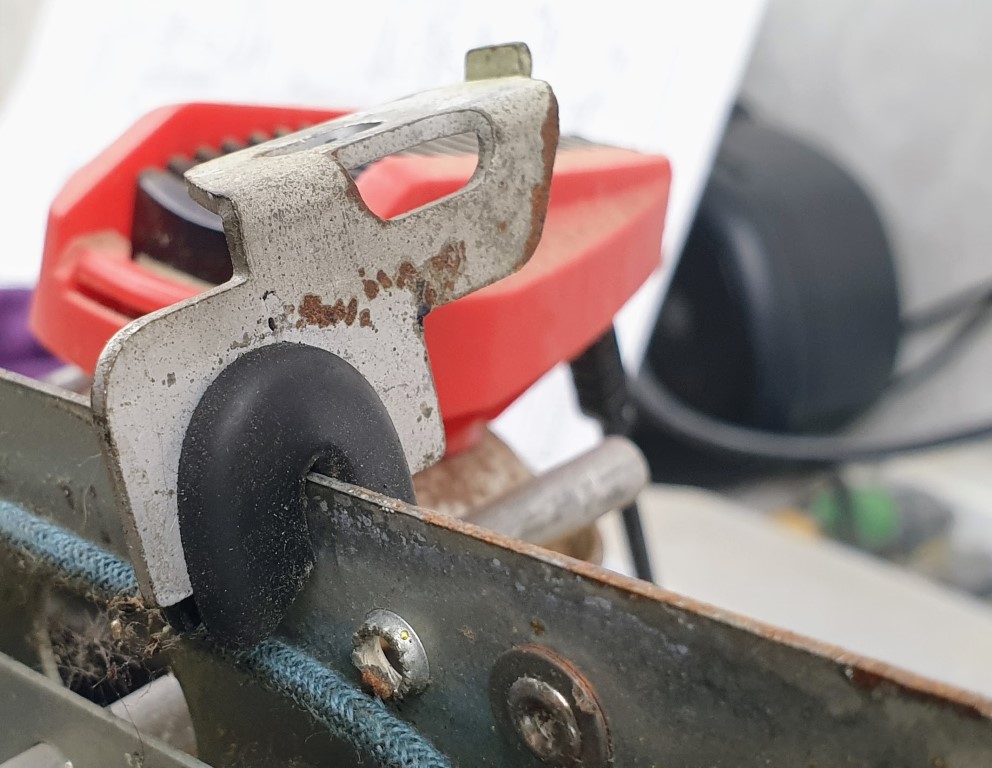
I've also found a grommet that when cut in half seems to hold things quite nicely... so while not pretty, it's probably what I'll go with, at least for now.
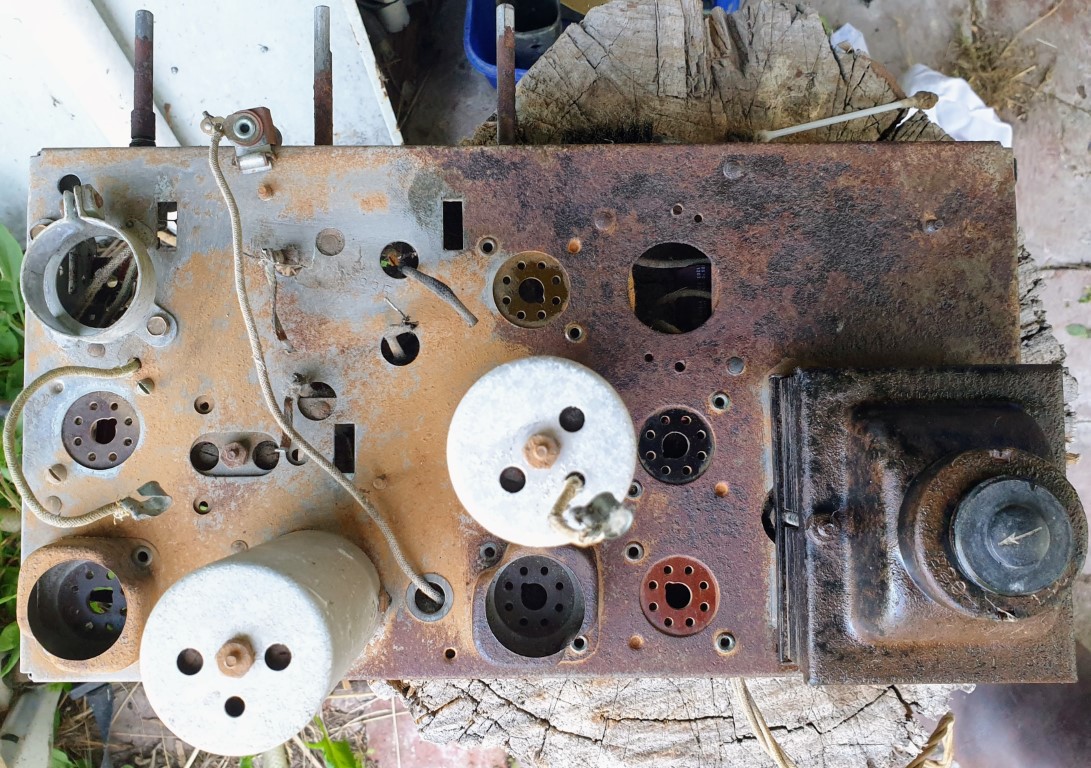
And I'm now bathing the topside in rust remover after giving it a vigorous rub-down with a small wire brush...
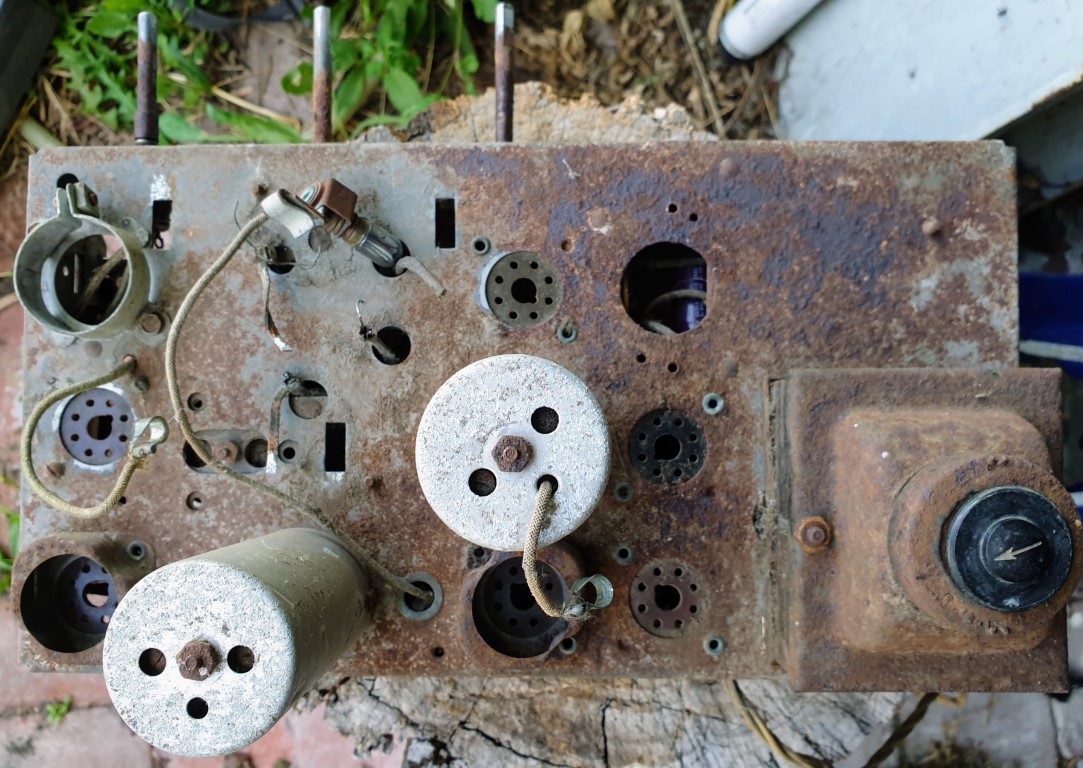
I'll probably need to repeat that process several times at least... hopefully it will come up to the point where I can live with it... it's not going to win any beauty contests thats for sure.
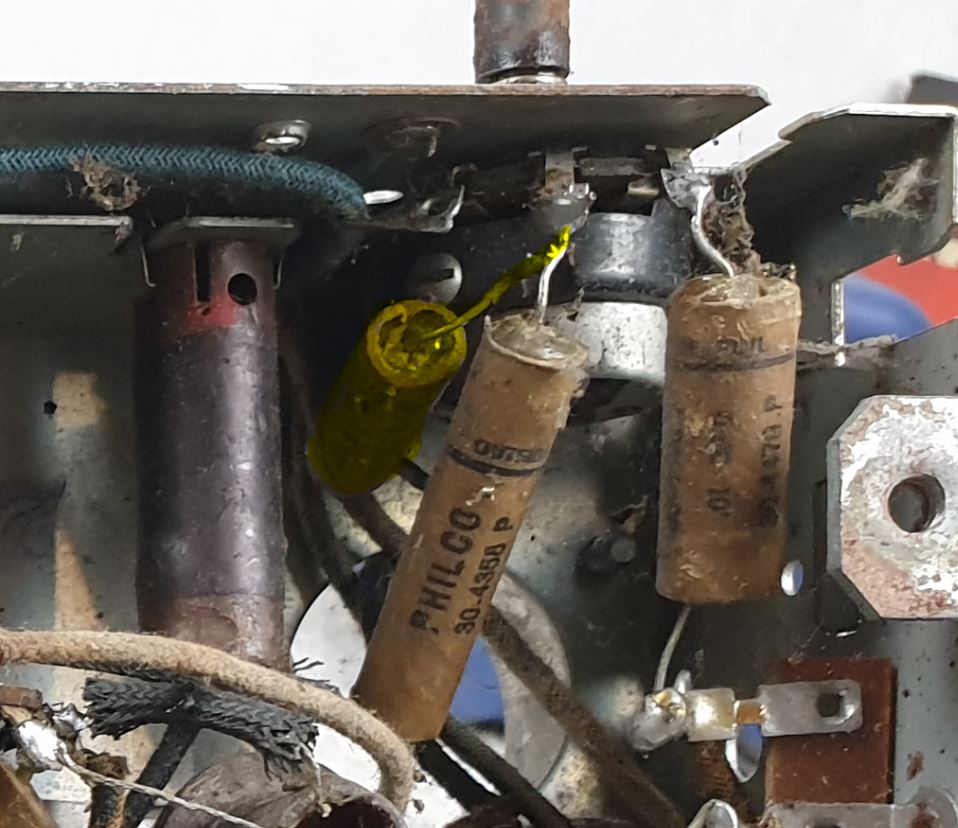
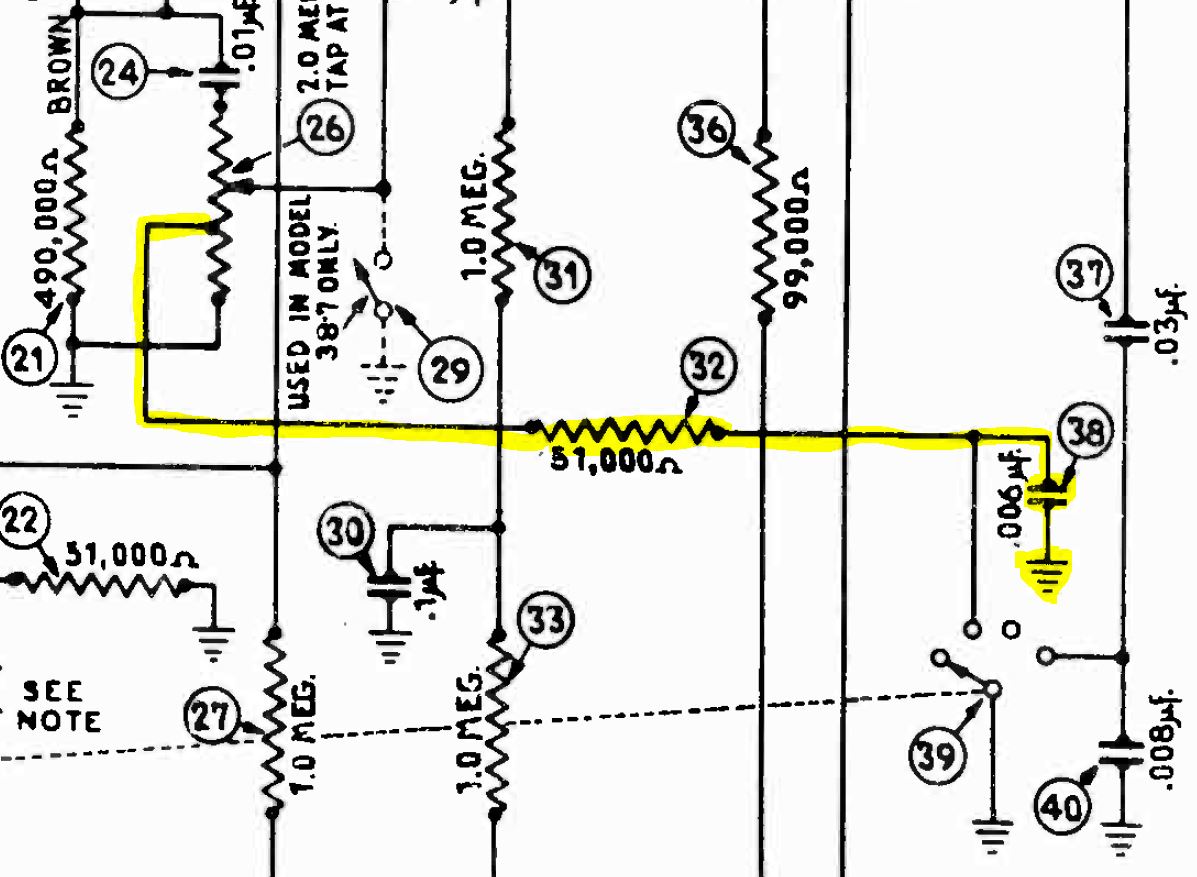
The only question I have at this point is the tone tap on the volume control. In the original layout (using Philco caps, so I don't think it's ever been changed), the tap connects to the wiper via a 51k resistor and a 0.006uF cap
But the circuit shows it from the tap to ground - which is where I have wired it. Any thoughts on the difference?
Cheers, Steve
There are no personal problems that can't be overcome with the liberal application of high explosives
Posts: 16,533
Threads: 573
Joined: Oct 2011
City: Jackson
State, Province, Country: NJ
It always a stark contrast between whatever the top of teh chassis is (whether clean, dusty, or plain awful like in your case) and the inside which is most of the time is sparkling clean, sans an occasional dead 90 y.o. spider.
People who do not drink, do not smoke, do not eat red meat will one day feel really stupid lying there and dying from nothing.
Posts: 5,182
Threads: 276
Joined: Nov 2012
City: Wilsonville
State, Province, Country: OR
I like a challenging set but...wow...

Posts: 16,533
Threads: 573
Joined: Oct 2011
City: Jackson
State, Province, Country: NJ
"Challenging" means different things for different people.
For me that one is not challenging.
It is "chuck it".
People who do not drink, do not smoke, do not eat red meat will one day feel really stupid lying there and dying from nothing.
Posts: 1,264
Threads: 32
Joined: Jan 2014
City: Wellborn Florida
I was going to say what a winter project, oops summer project! David
Posts: 134
Threads: 11
Joined: Jul 2015
City: Christchurch, New Zealand
T'is the height of summer here - so yep, summer project. But it wasn't supposed to be a project - it was meant to be a day job to get it running again... sigh 
Anyway, I have got the chassis to the point I am ok with it. I'm sure that will offend the real restorers - but this isn't a restoration... I'm just tidying it up. Even so, it took a couple of days to get it to that point. I was considering spraying the chassis in appliance satin silver, which I've used on Philco chassis' before - but I'd lose the original Beggs label on the back (Chas. Begg Ltd were the NZ distributors for Philco in New Zealand). I did paint the transformer... I considered doing a Buzz on it, but bright red transformers just don't do it for me...
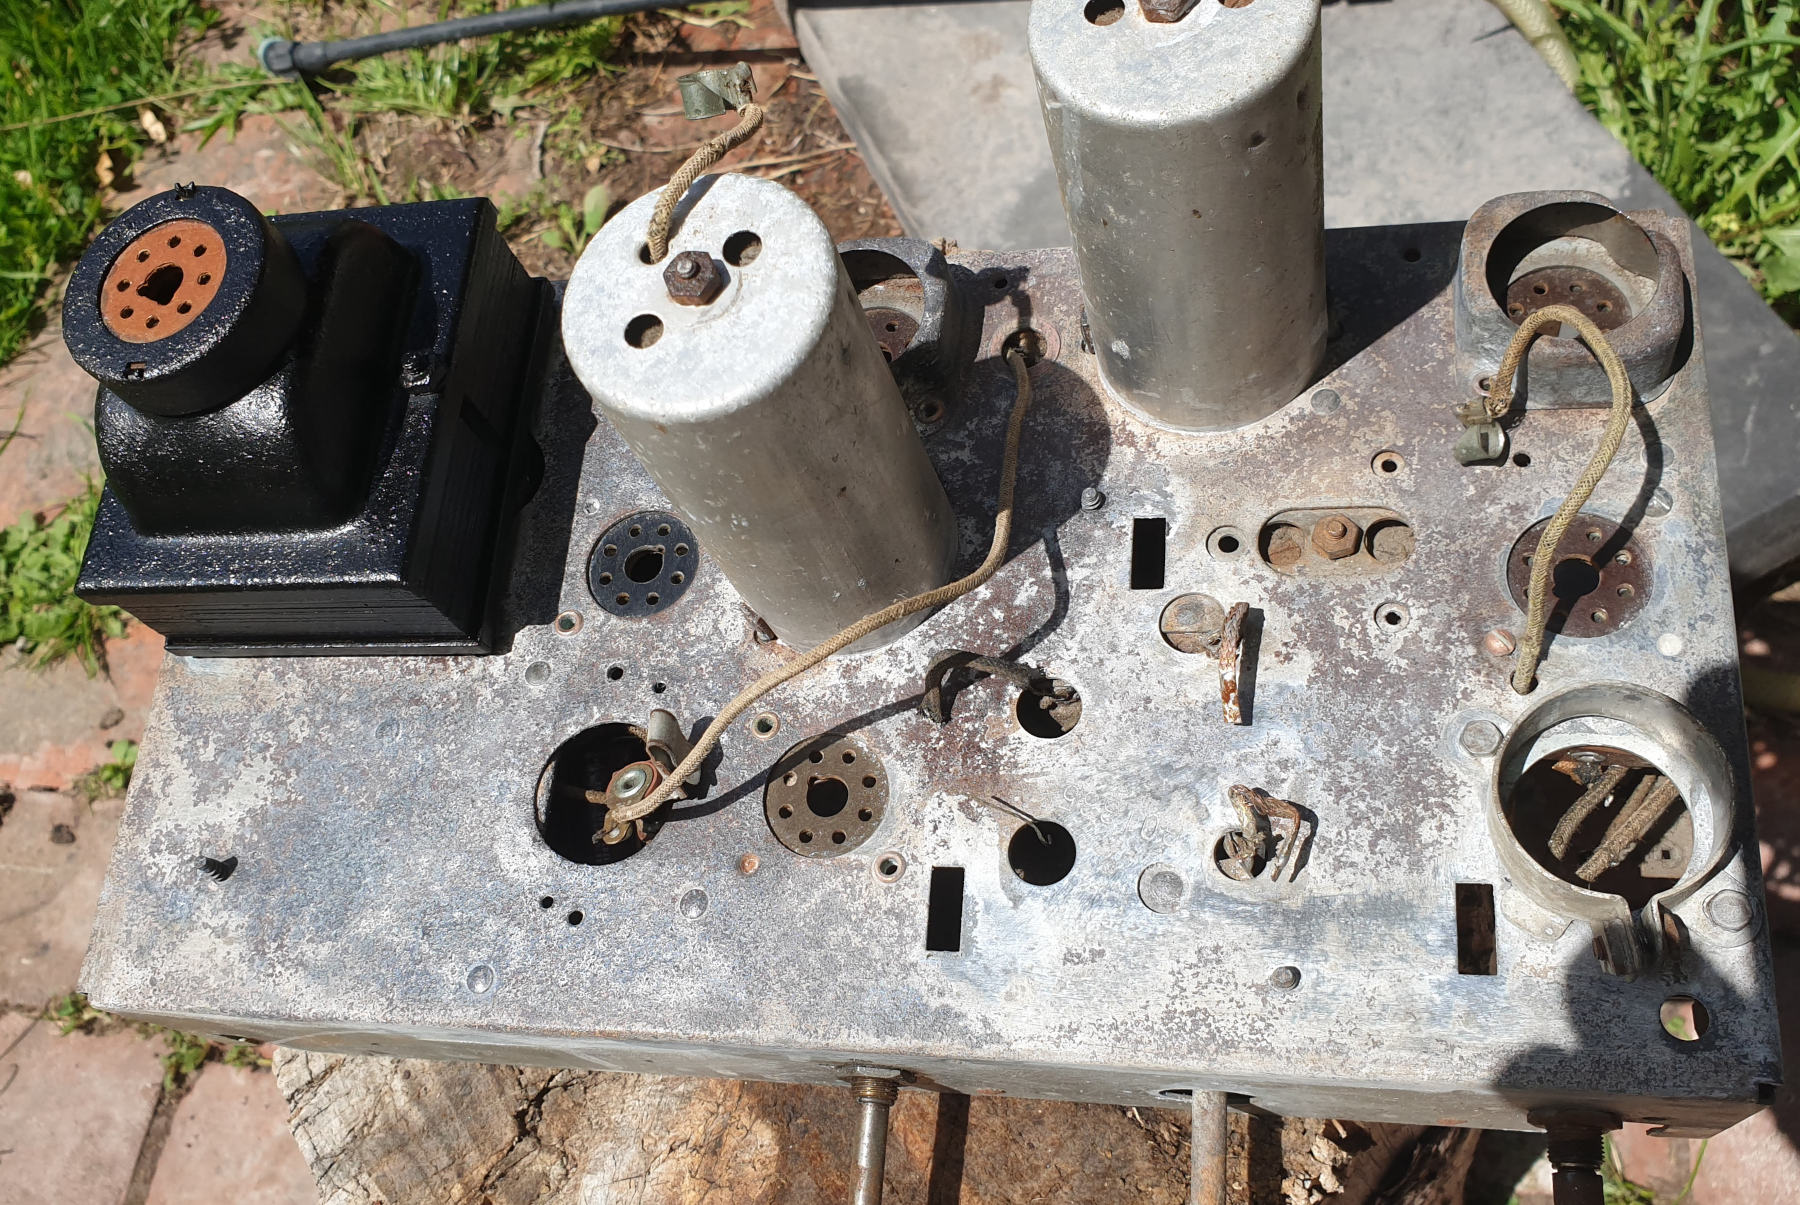
And I found a (K7?) speaker in my stash (I tend to hoard EM speakers)... probably from my Philco 89B, which I'll need to pull out of storage and check... if it is the 89B's then I'll need it back, but for now it's tacked in to test...
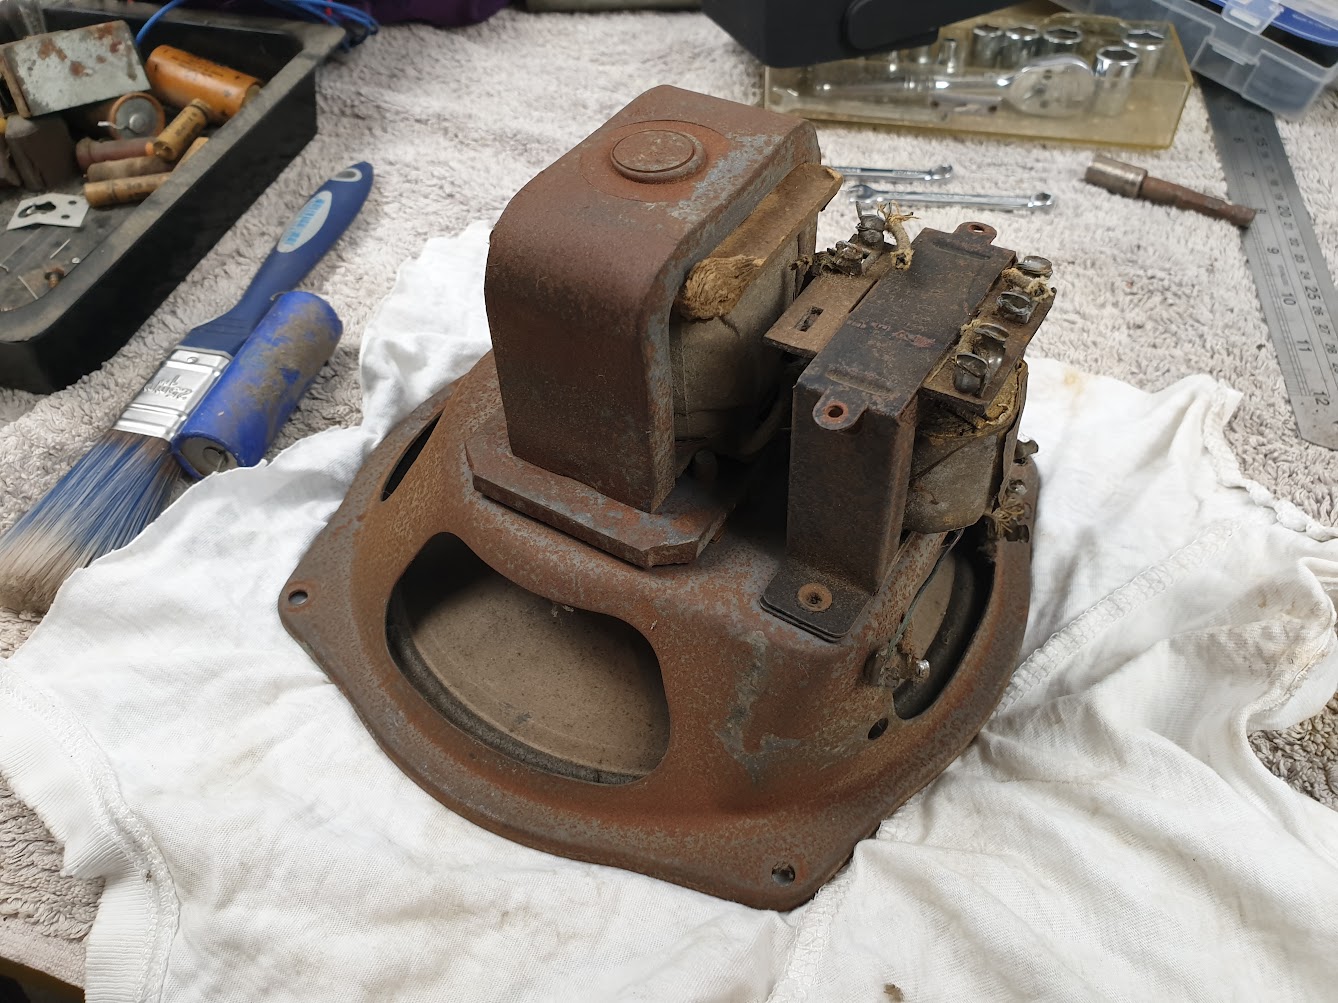
Then I fitted a new power cord. Well, an old power cord. I had to swap the speaker wires and the power cord as the ferrule for the original power cord is too small for a 3-core cord. I've also cleaned out the death cap, so it's just a junction block now - I was going to remove it, but it's actually a handy way to attach the power cord.
So it's all back together. It's got a 6F5 instead of a 6K5 and had a 6V6 instead of a 6F6... I have a good VT66 so I fitted that.
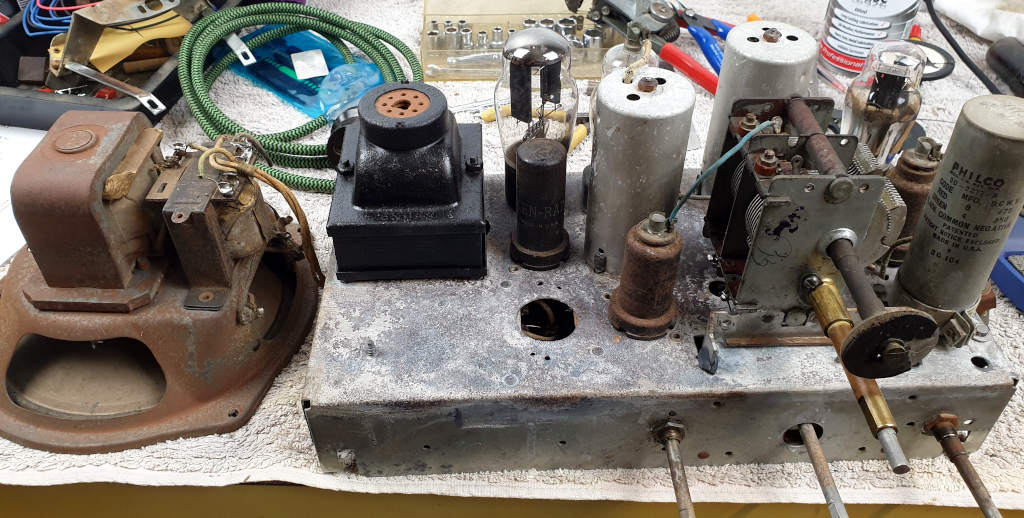
On power up I got filaments everywhere except the 5Y4, which was stone cold - so I fitted a spare and it powered up and crackled, but nothing else. Wiggling the 6A8 got it to intermittently burst into song - so I replaced that with a 6A8G from my stash, and it goes. Not well, but it goes. We're rural though, and older sets without an RF stage tend to be pretty hopeless here.
Next step - I'll actually test all the valves I have in it now and see how they stack up. I'll replace any marginal ones - then I'll align it...
So, progress 
There are no personal problems that can't be overcome with the liberal application of high explosives
Posts: 134
Threads: 11
Joined: Jul 2015
City: Christchurch, New Zealand
Also, I found some grommets that fitted nicely when split, and they seem to be working well - a little compliant and nicely damped. Pretty? No. Functional? Yep 
There are no personal problems that can't be overcome with the liberal application of high explosives
(This post was last modified: 01-03-2024, 12:21 AM by kiwi_steve.)
Posts: 4,906
Threads: 54
Joined: Sep 2008
City: Sandwick, BC, CA
Steve;
O think that you can rebuild a Philco speaker by pressing the pole piece out, that part in the center of the voice coil, and the field coil will come out afterward. If the speaker has a dead field coil you really have nothing to lose by trying, of course you will have to remove the cone first but acetone will take care of melting the glue holding it around the outside edge.
Regards
Arran
Posts: 1,883
Threads: 120
Joined: May 2008
City: Omak
State, Province, Country: WA
hello Steve,
Wow, I have a Zenith in almost as bad as shape I am sure glad my Philco model 38-10T bullet is in good shape !
Sincerely Richard
Posts: 1,264
Threads: 32
Joined: Jan 2014
City: Wellborn Florida
Glad to see you are making progress. Looks good to me. David
Users browsing this thread: 1 Guest(s)
|
|
Recent Posts
|
|
1949 Motorola 5A9M
|
| This would be the second portable in the "other radios" forum where I have a similar one in my collection. I h...Arran — 12:41 AM |
|
Looking for any info: 1977 Ford-Philco Console Hi-Fi Turntable and Radio
|
| Hi PittsburgTost.
The record changer looks like a Garrard or BSR (Likely Garrard). The spindles just pull out and pu...MrFixr55 — 11:57 PM |
|
Looking for any info: 1977 Ford-Philco Console Hi-Fi Turntable and Radio
|
| Hello PittsburghToast ,
Welcome aboard and it looks like gary may have something for you !
now if I dig through my se...radiorich — 11:35 PM |
|
Model 80 Antenna Issue?
|
| You are kind of on the right path. You can touch the grid cap of the Detector/Oscillator 36 tube. I'm expecting a respon...RodB — 08:48 PM |
|
Looking for any info: 1977 Ford-Philco Console Hi-Fi Turntable and Radio
|
| Welcome to the Phorum, PittsburghToast! I found an old thread that my interest you regarding the quality and worth of P...GarySP — 08:48 PM |
|
Looking for any info: 1977 Ford-Philco Console Hi-Fi Turntable and Radio
|
| Welcome to the Phorum!
:wave:
We do not have anything on that unit in our digital library. There is a Sam's Photof...klondike98 — 08:47 PM |
|
Model 80 Antenna Issue?
|
|
I’ve replaced all the caps and resistors and the radio is working but minimal volume unless I put my hand near the re...Hamilton — 08:24 PM |
|
Looking for any info: 1977 Ford-Philco Console Hi-Fi Turntable and Radio
|
| Hi there! this is my first time posting. I recently picked up this Ford-Philco Console record player and radio at a yard...PittsburghToast — 07:28 PM |
|
philco predicta
|
| I found that where I have the 140v B+ there is 50v and the tuner receives 235v through the orange cablecgl18 — 04:14 PM |
|
Philco 91 code 221
|
| Chassis grounds thru rivets is another good place to look. Oh and the stator screws on the tuning cap where the leads at...Radioroslyn — 08:11 AM |
|
Who's Online
|
There are currently 323 online users. [Complete List]
» 1 Member(s) | 322 Guest(s)
|
|
|

|
 
|


![[-] [-]](https://philcoradio.com/phorum/images/bootbb/collapse.png)


