Philco 46-480 Cabinet Restoration
Posts: 287
Threads: 16
Joined: Jan 2024
City: Tulsa
State, Province, Country: Oklahoma
Good evening, folks!
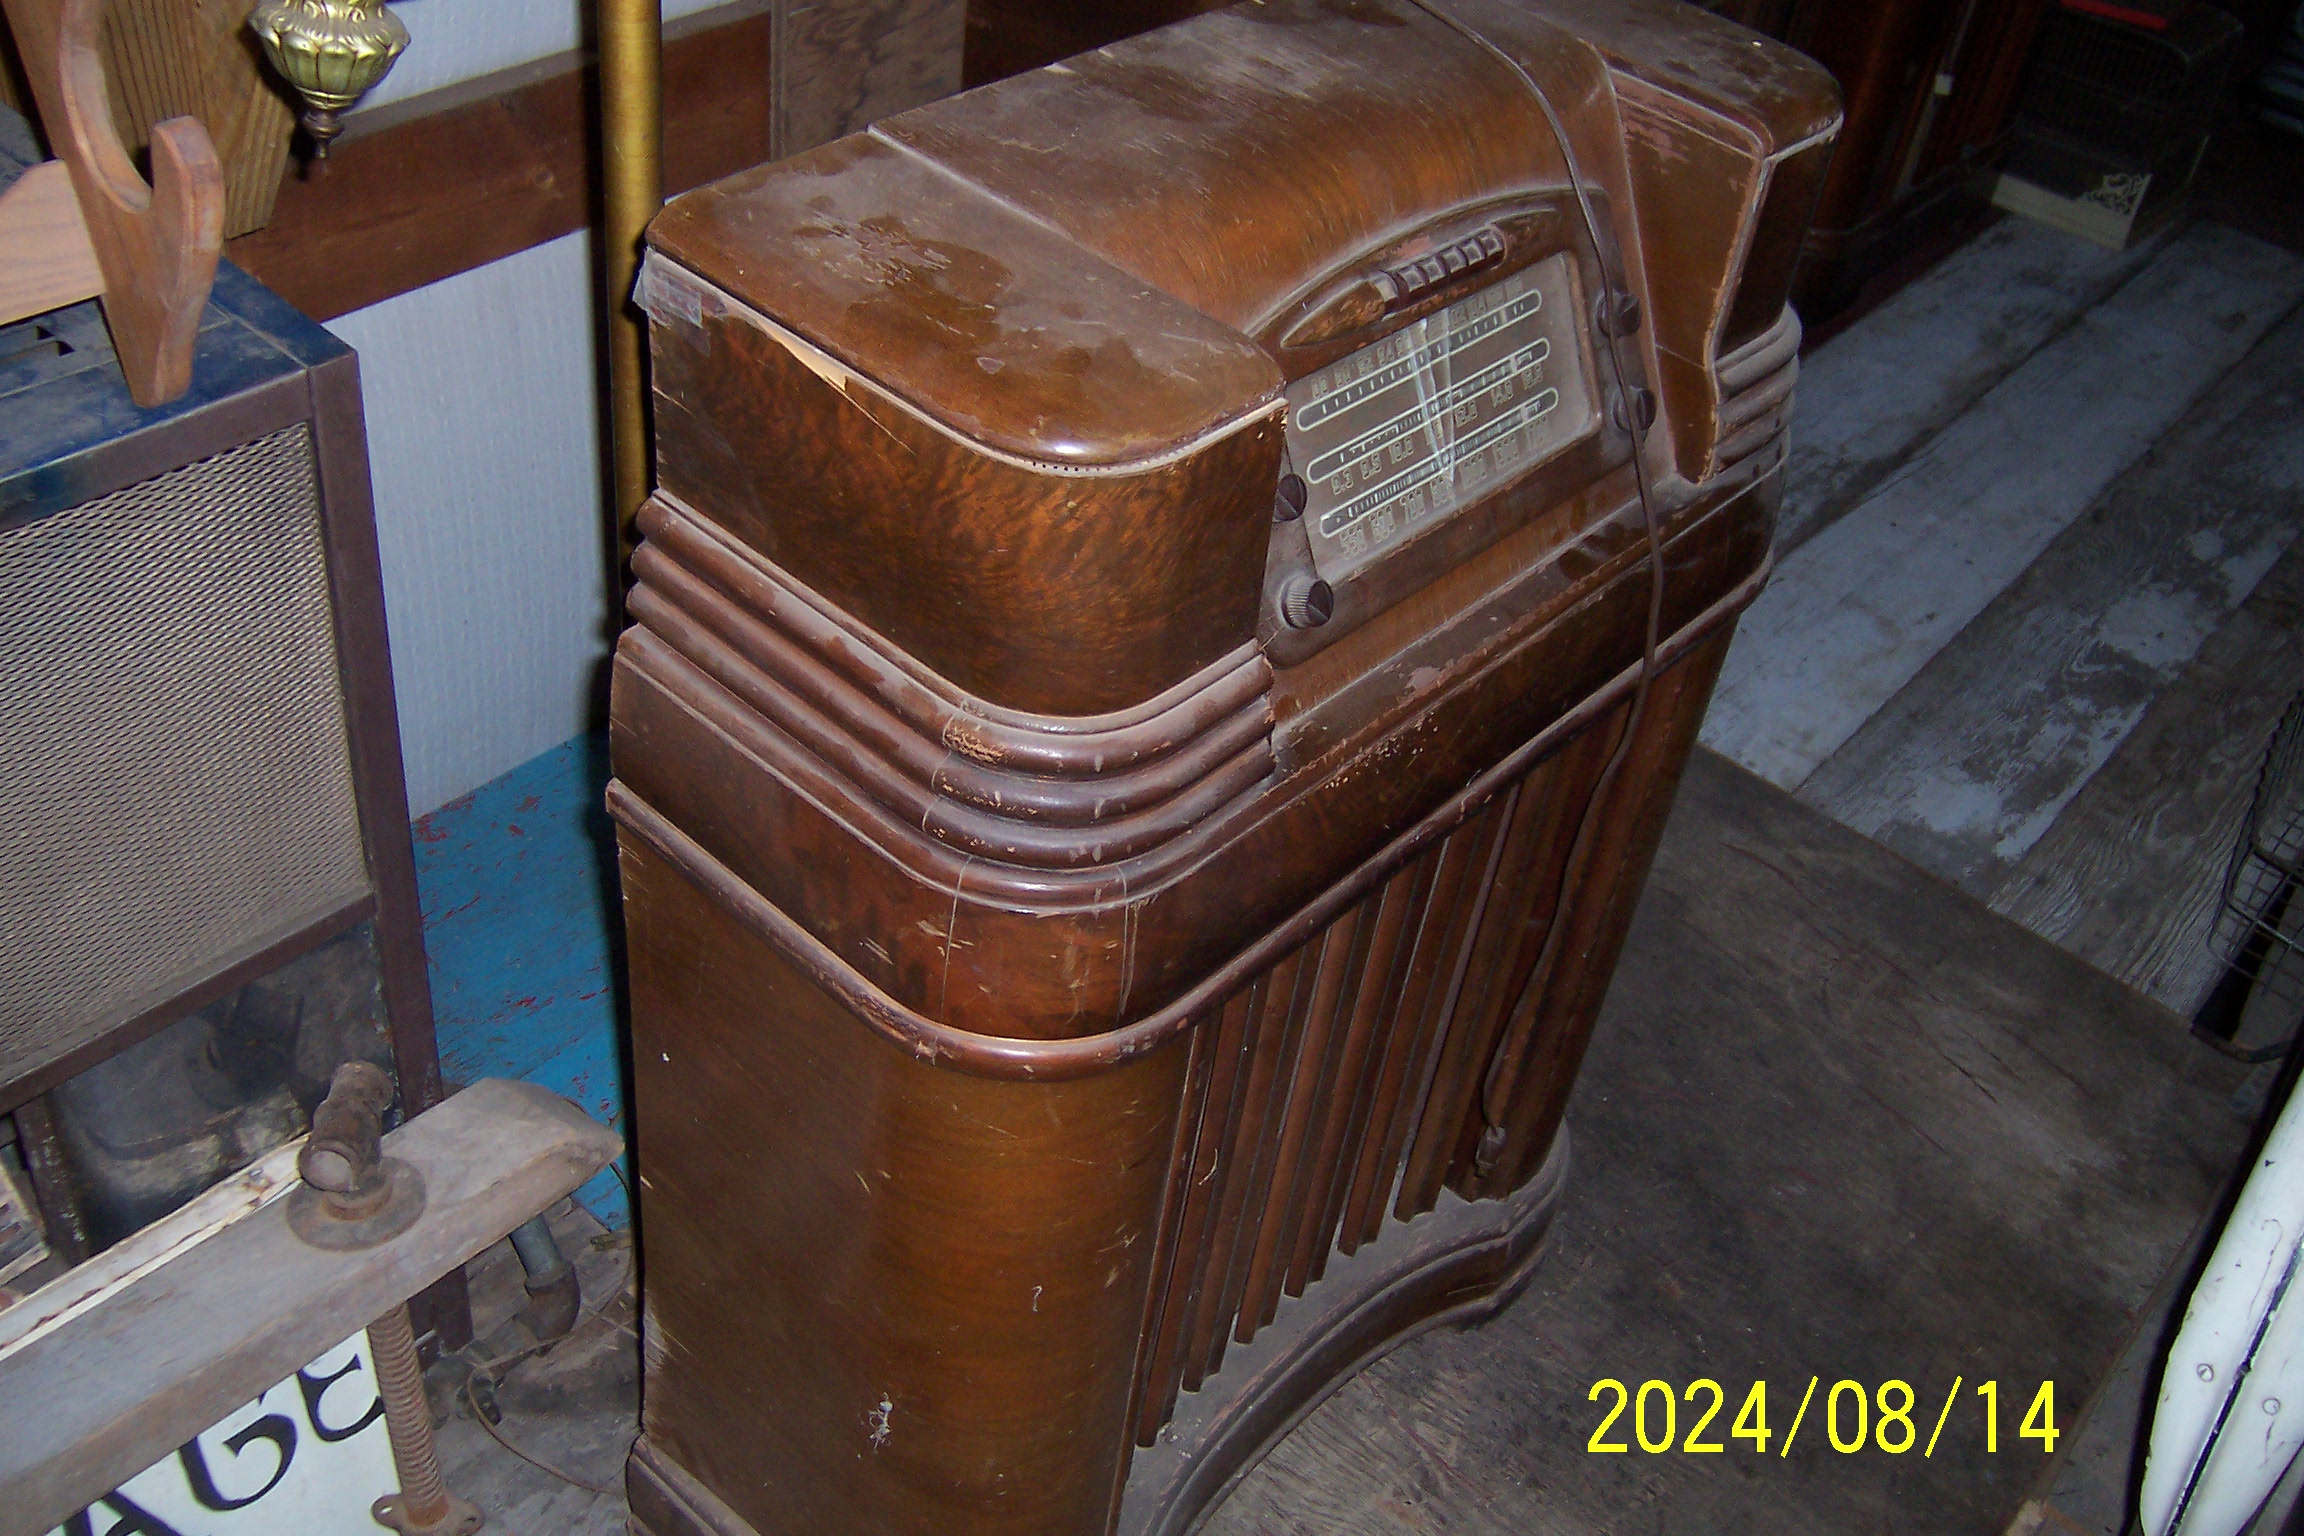
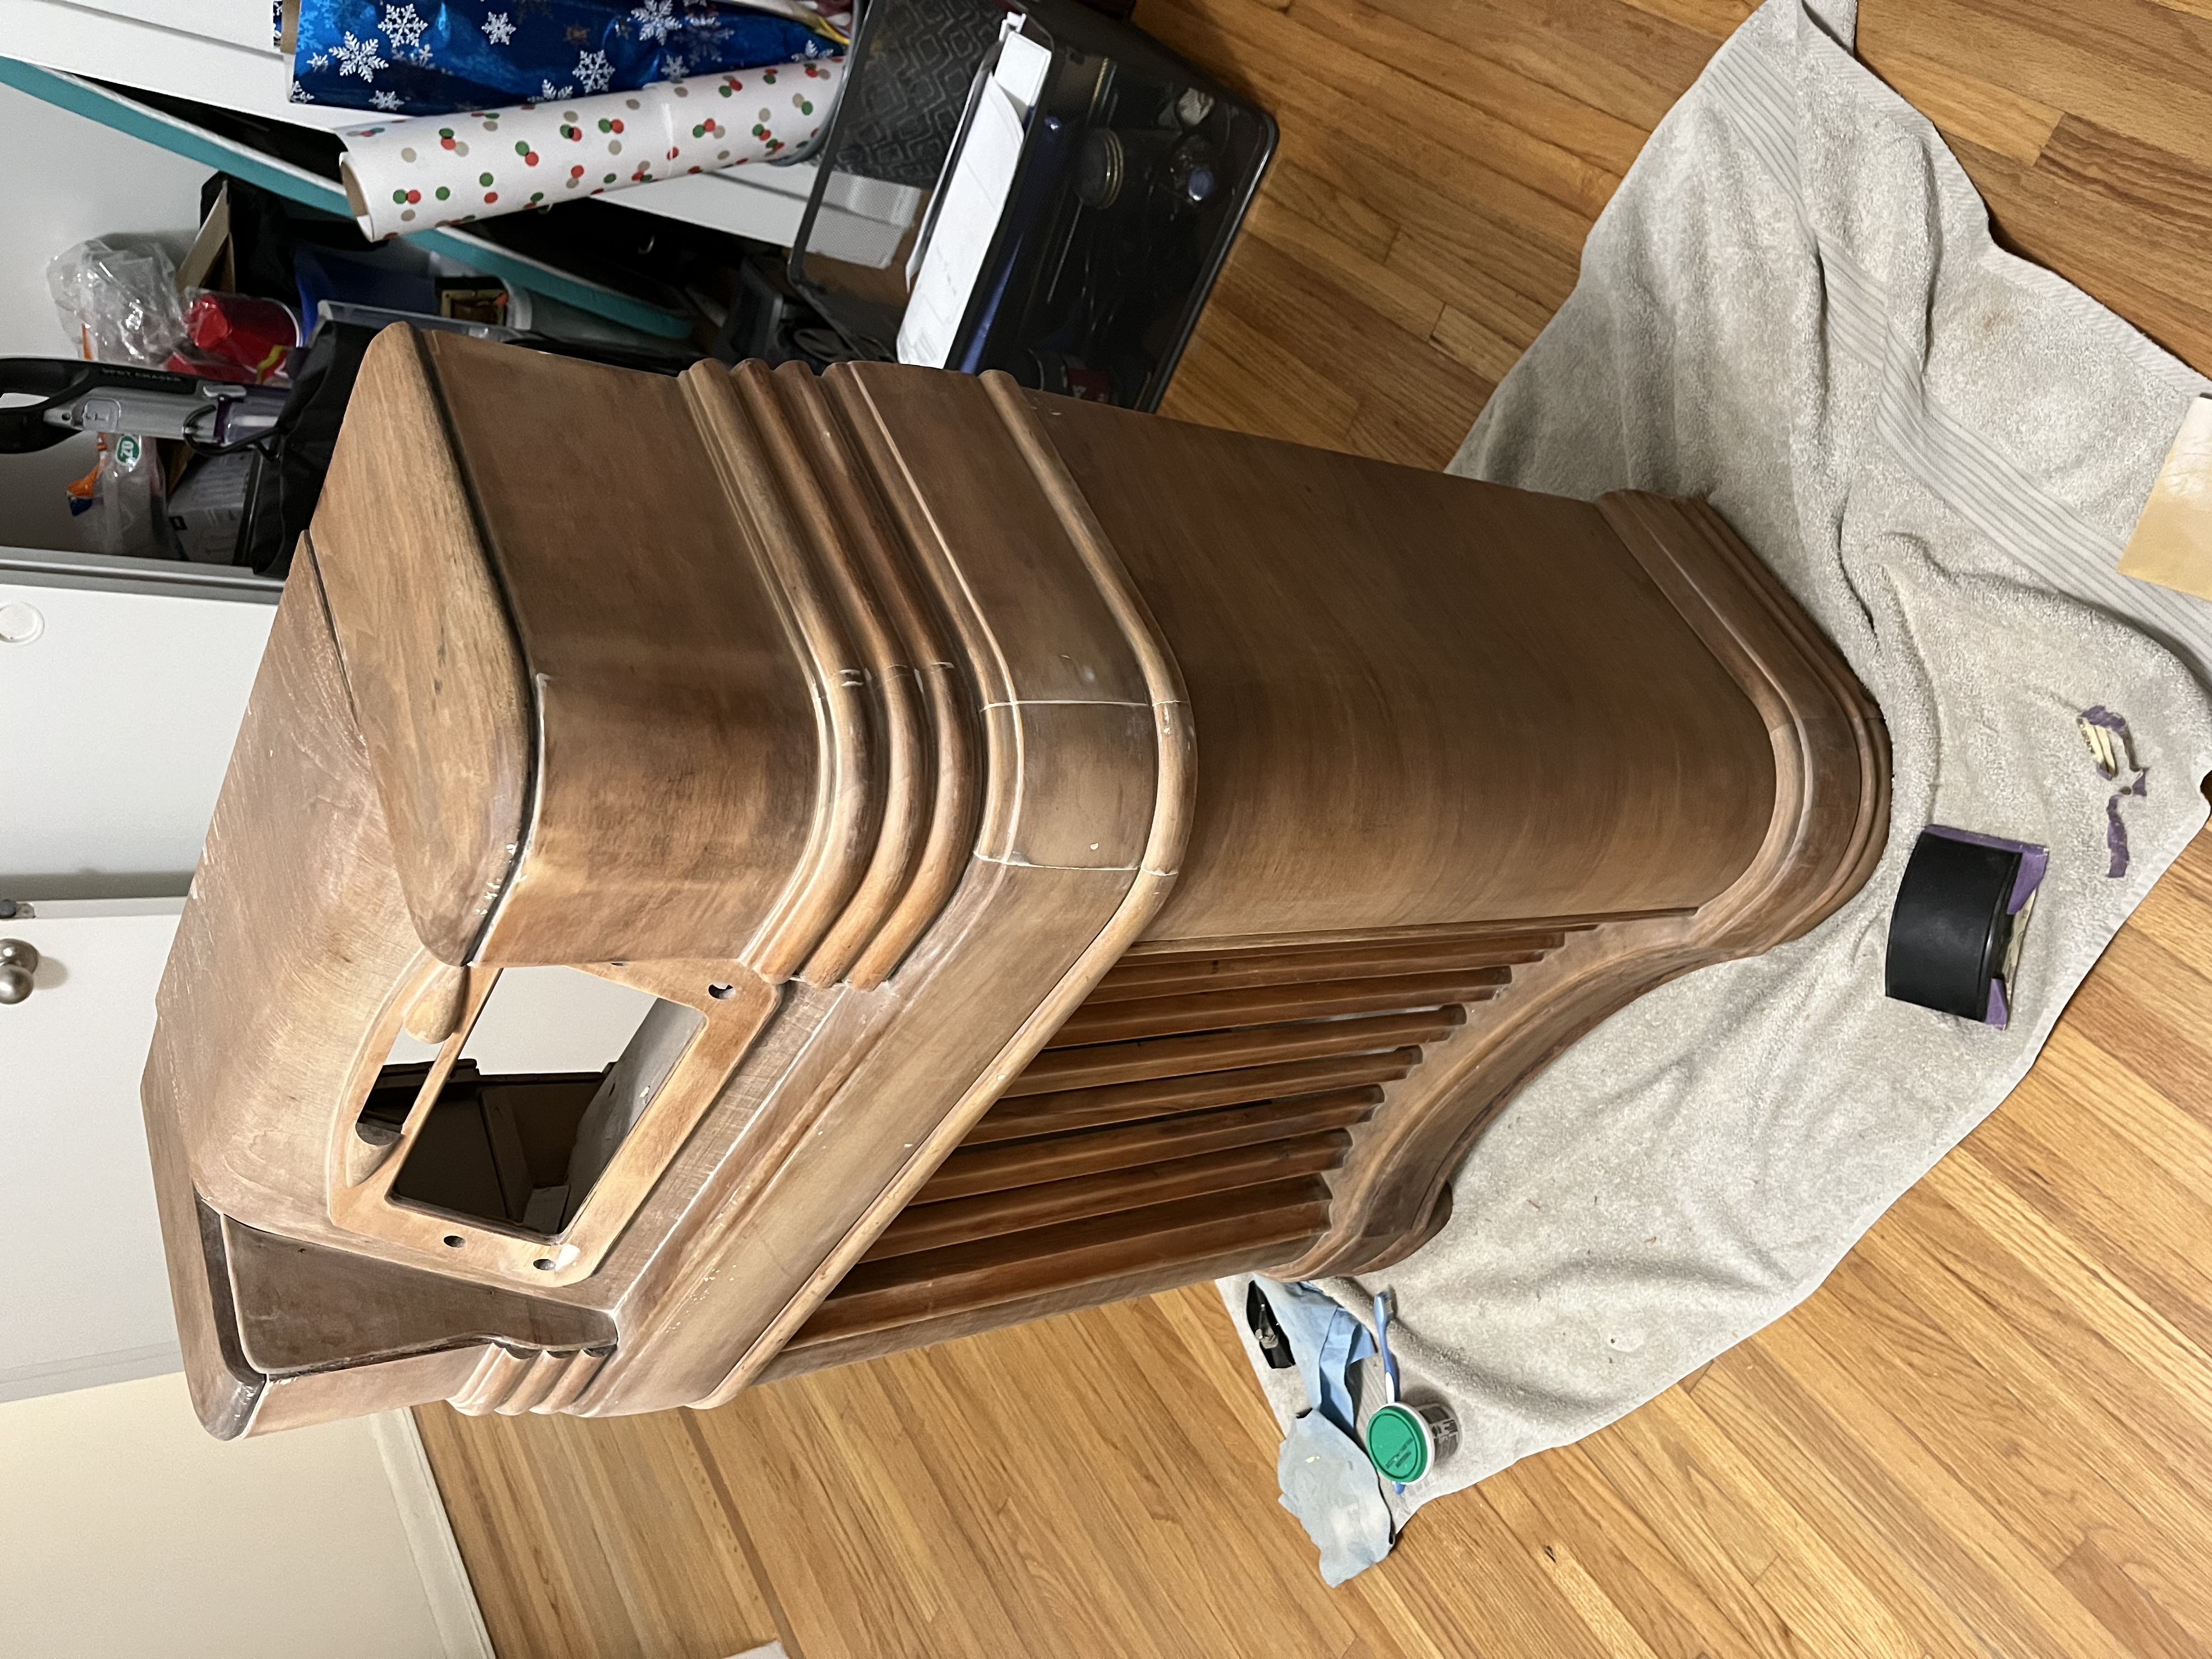
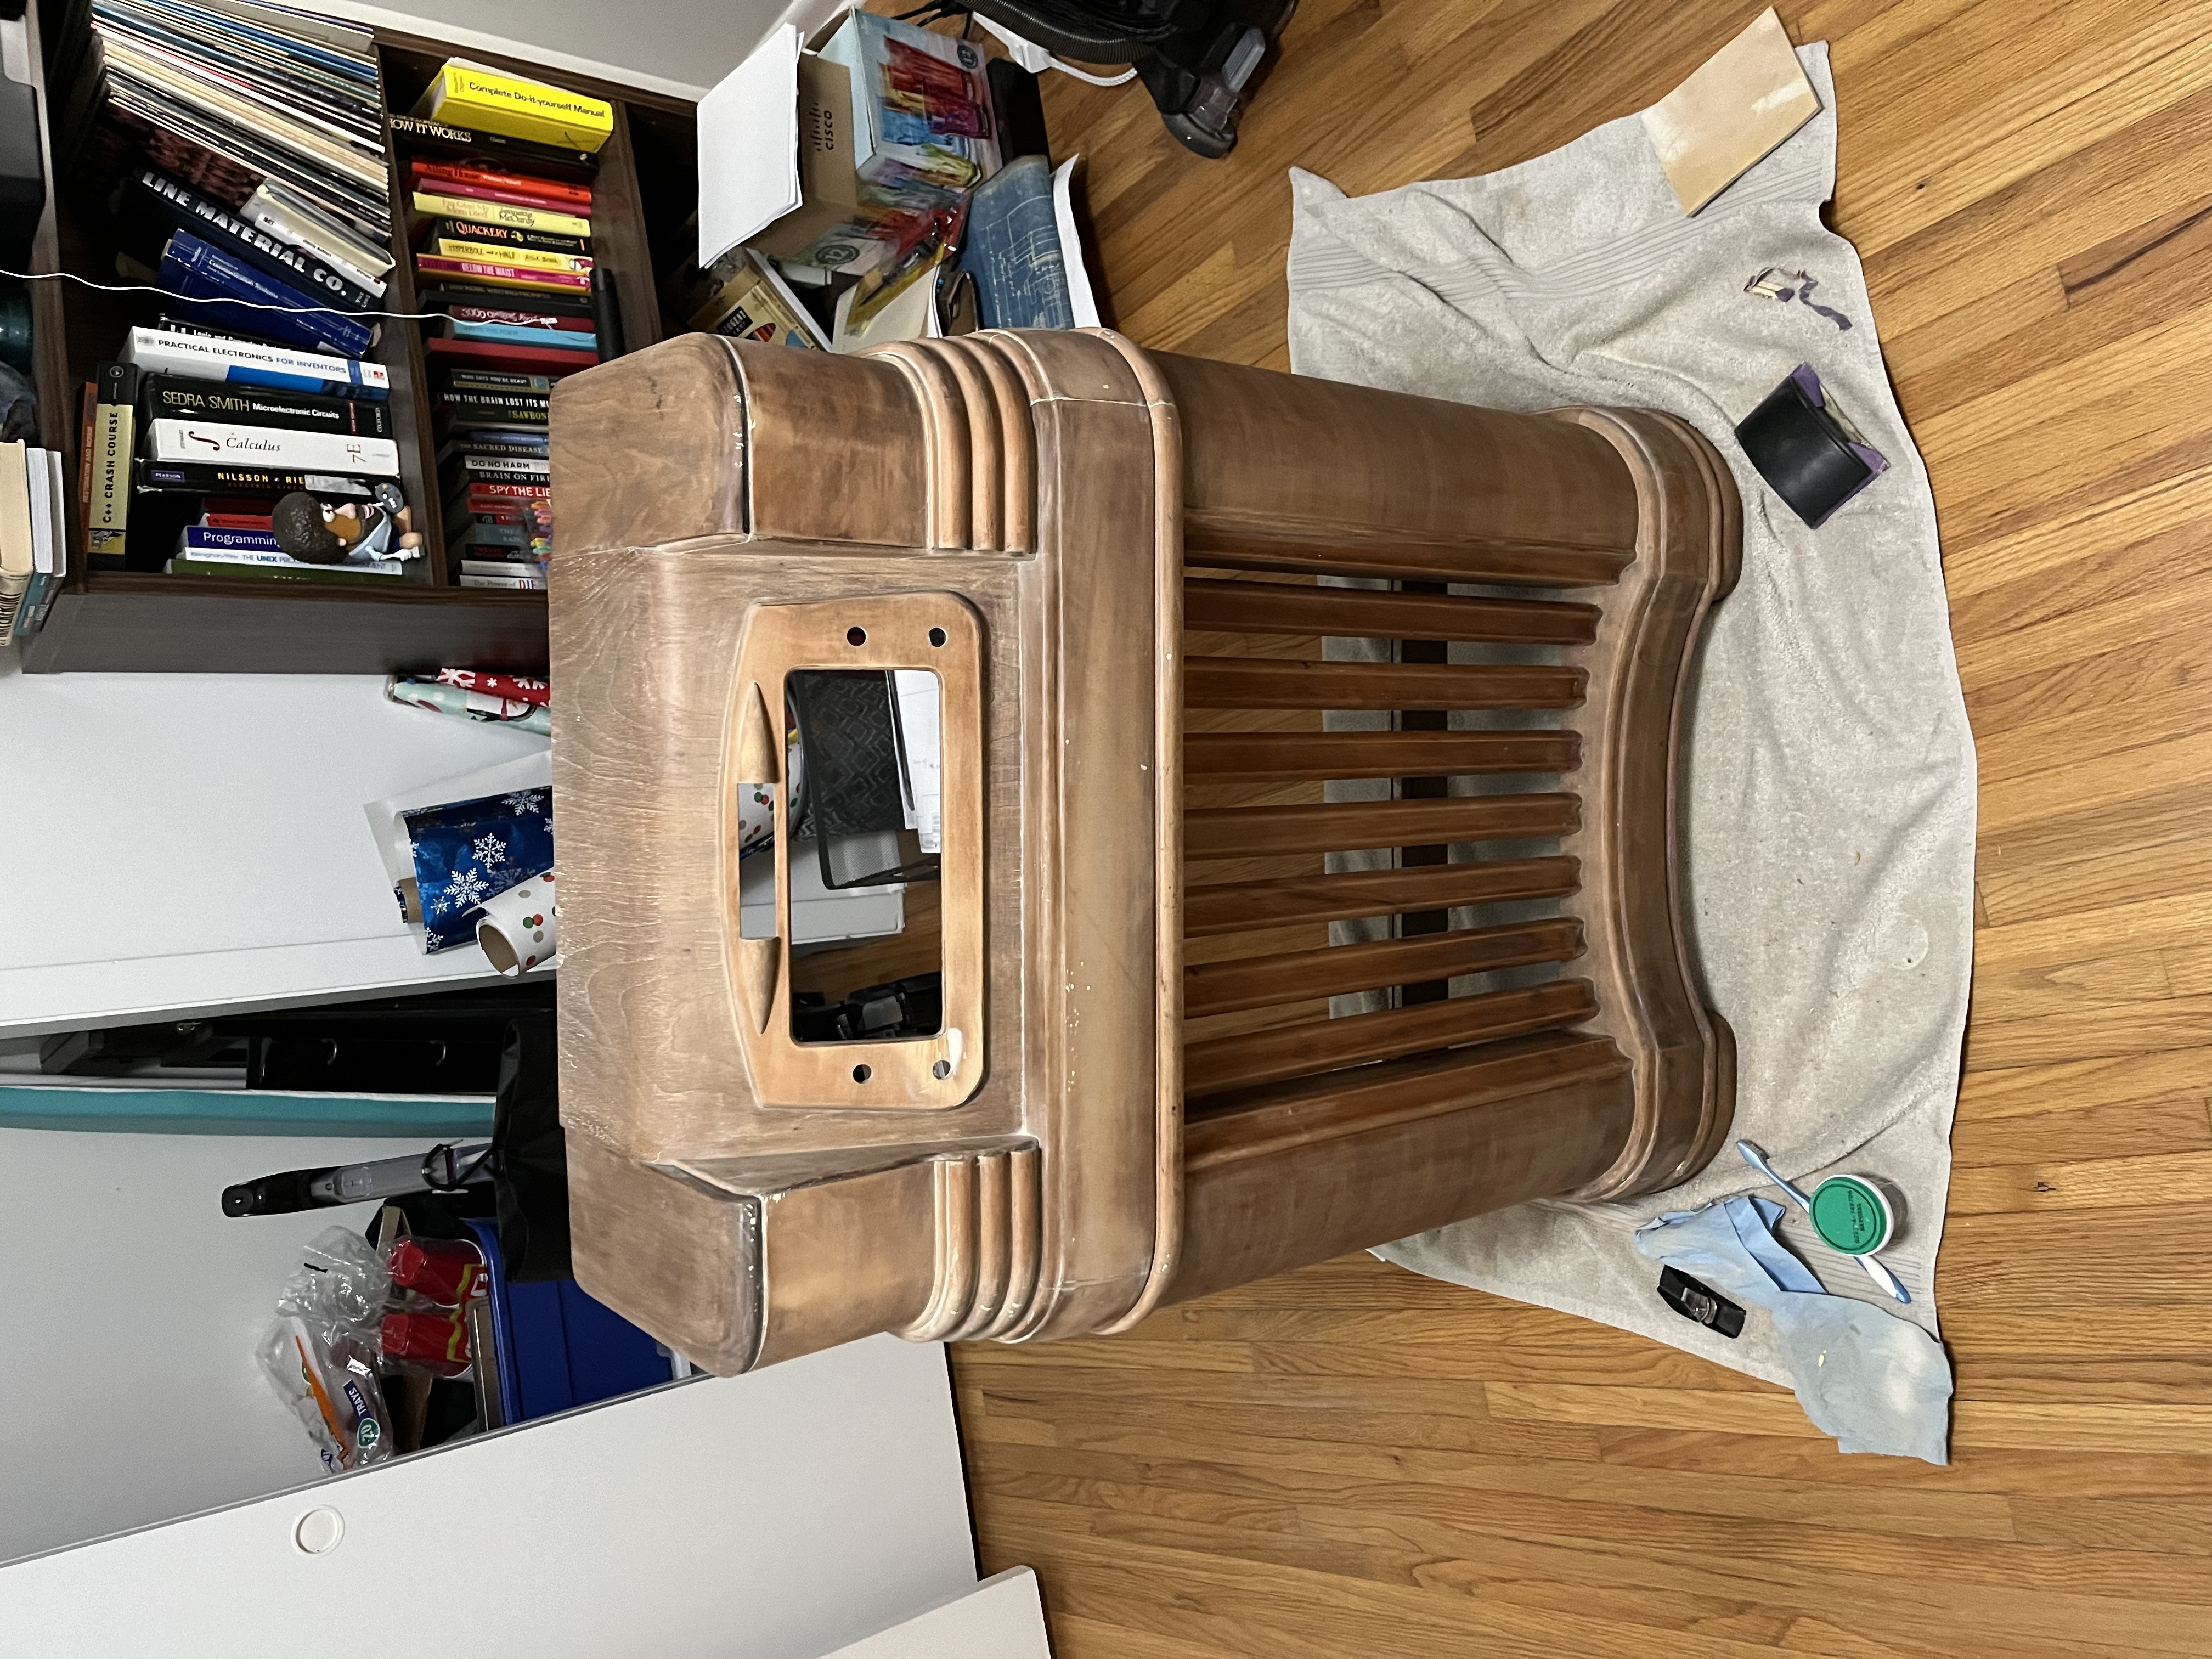
I spent a large chunk of my Labor Day weekend starting out with the cabinet restoration on my recently purchased 46-480. I stripped the varnish off, and the wood is in surprisingly fair condition underneath! Here’s a before and after.
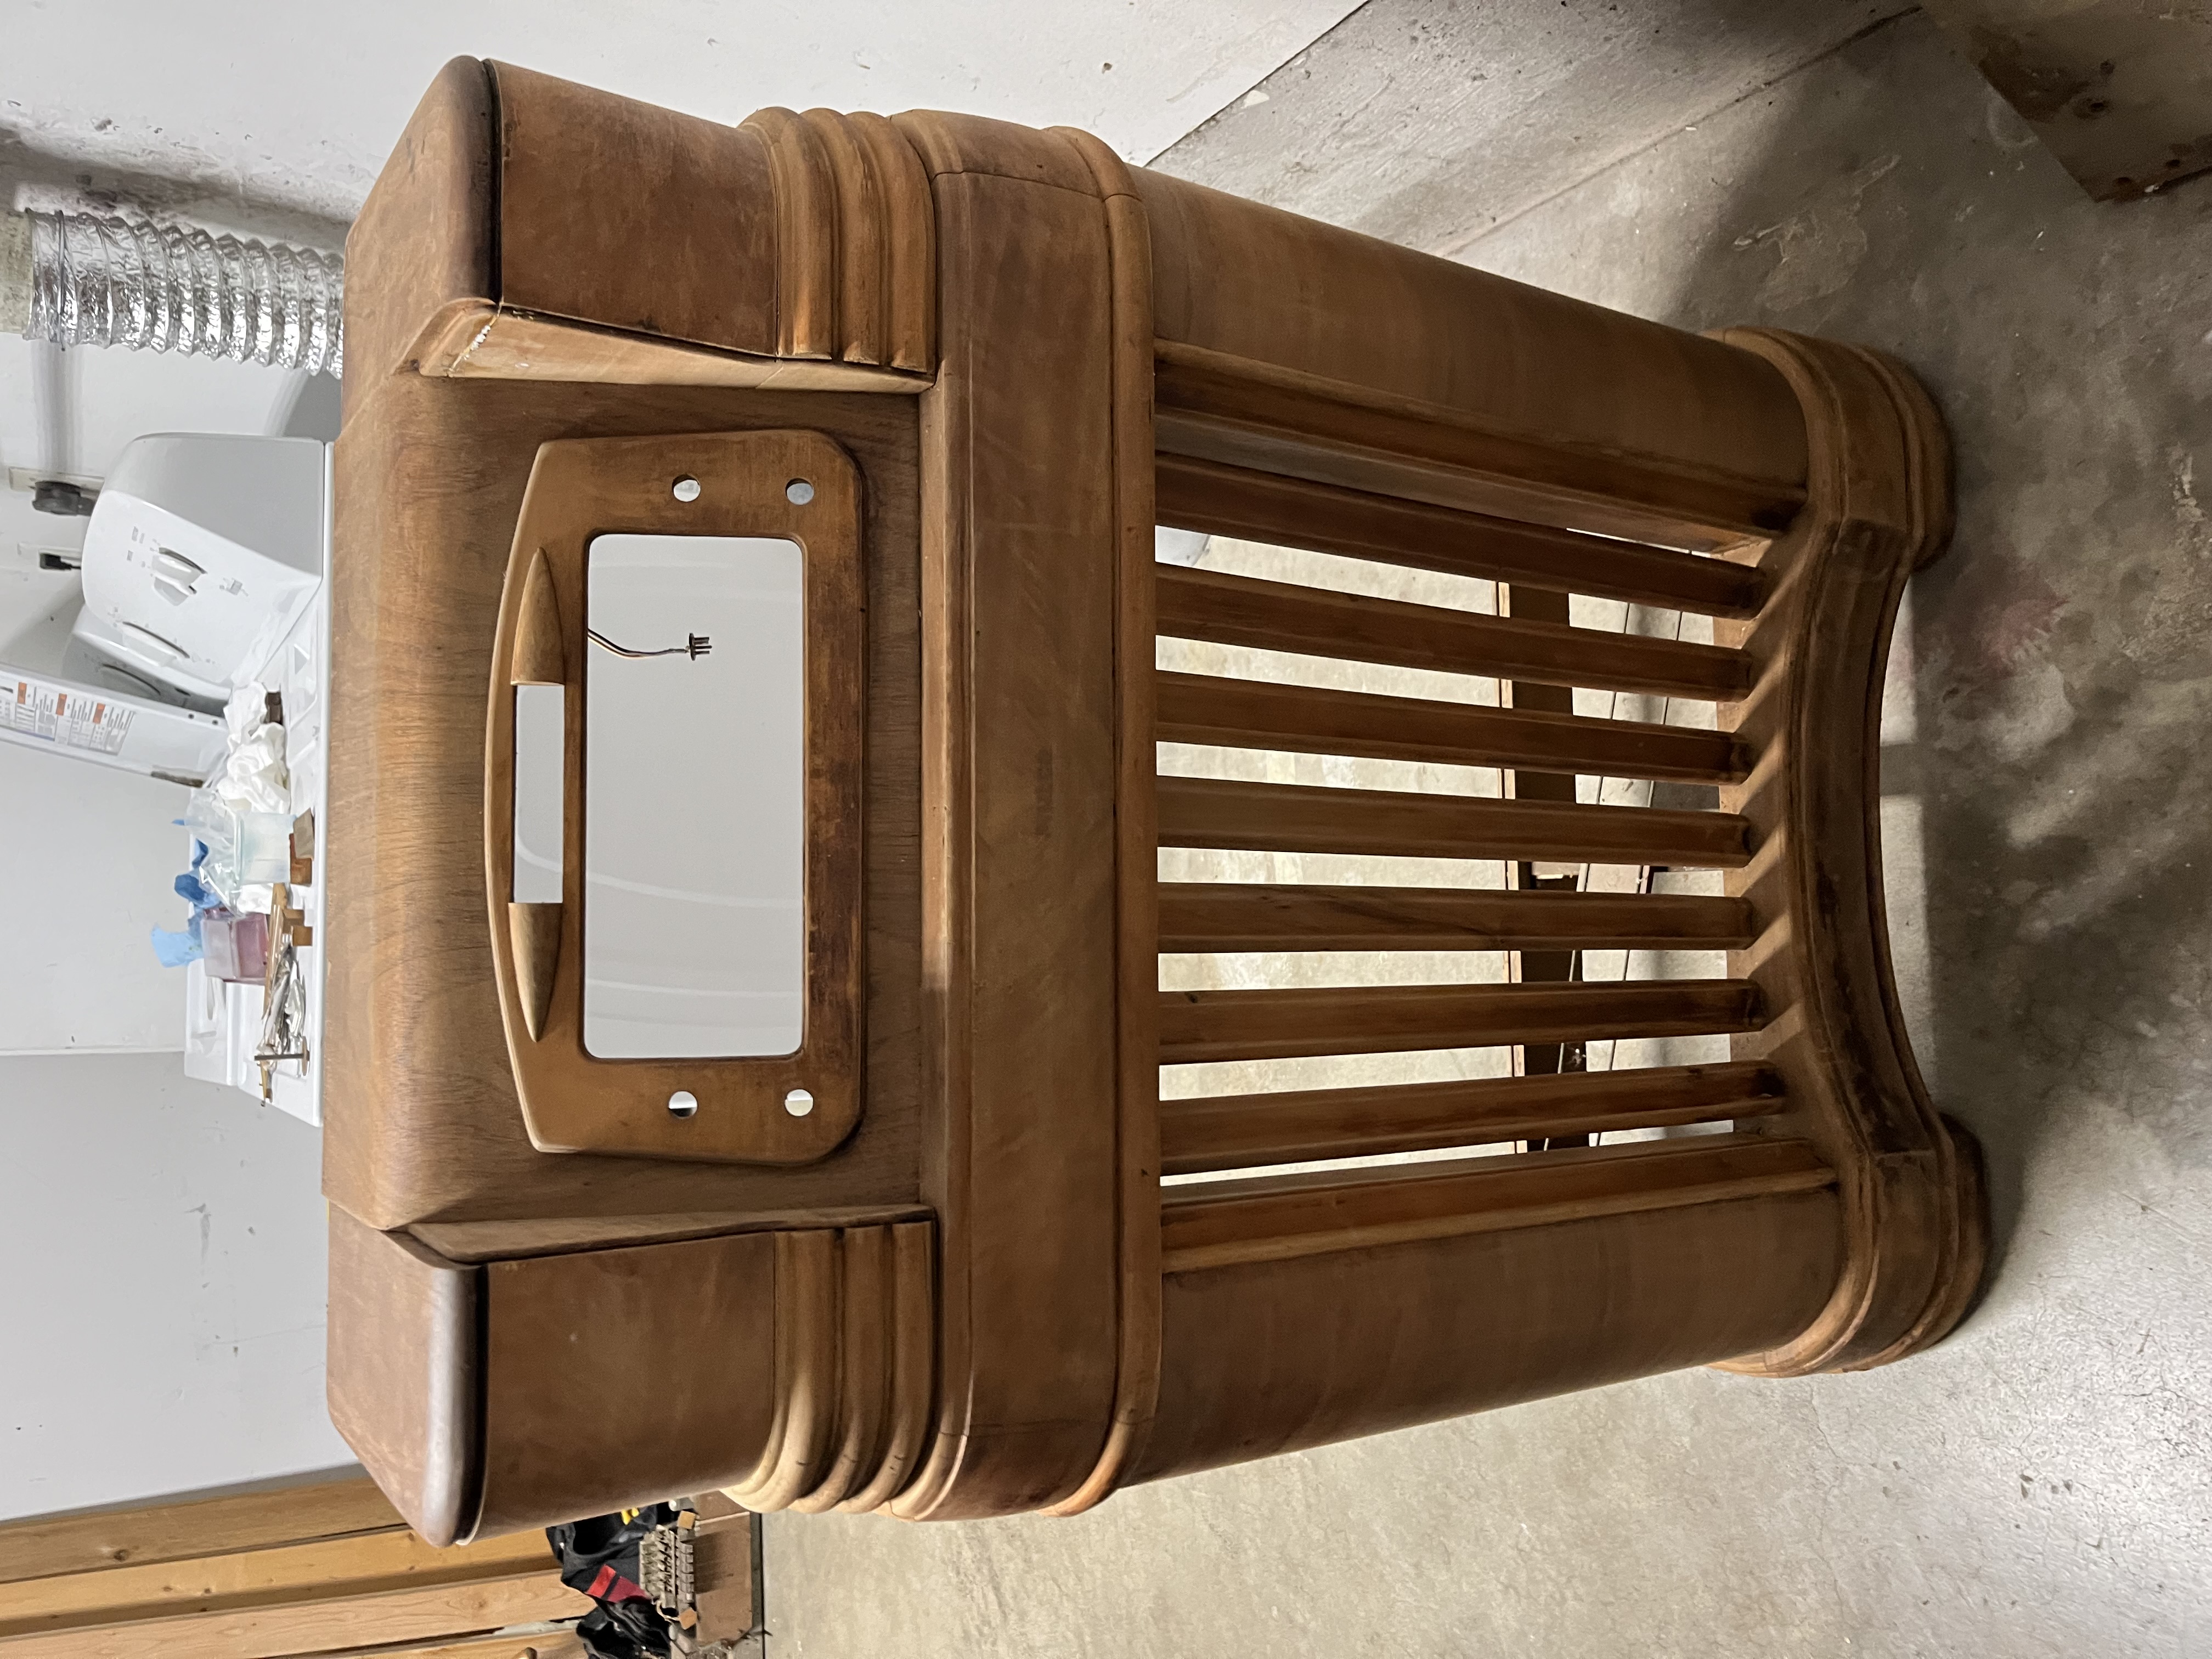
Though it looked much better, there certainly are some issues to be addressed. From best I could tell, mice had taken residence under the chassis. Once I removed it I discovered that there’s some damage to the wiring from chewing. There was also quite the bit of “fluff” strewn underneath the chassis. Not to fear, because I was already planning a full rewire. The shelf for the chassis was pretty nasty, though, so I replaced it with a new one.
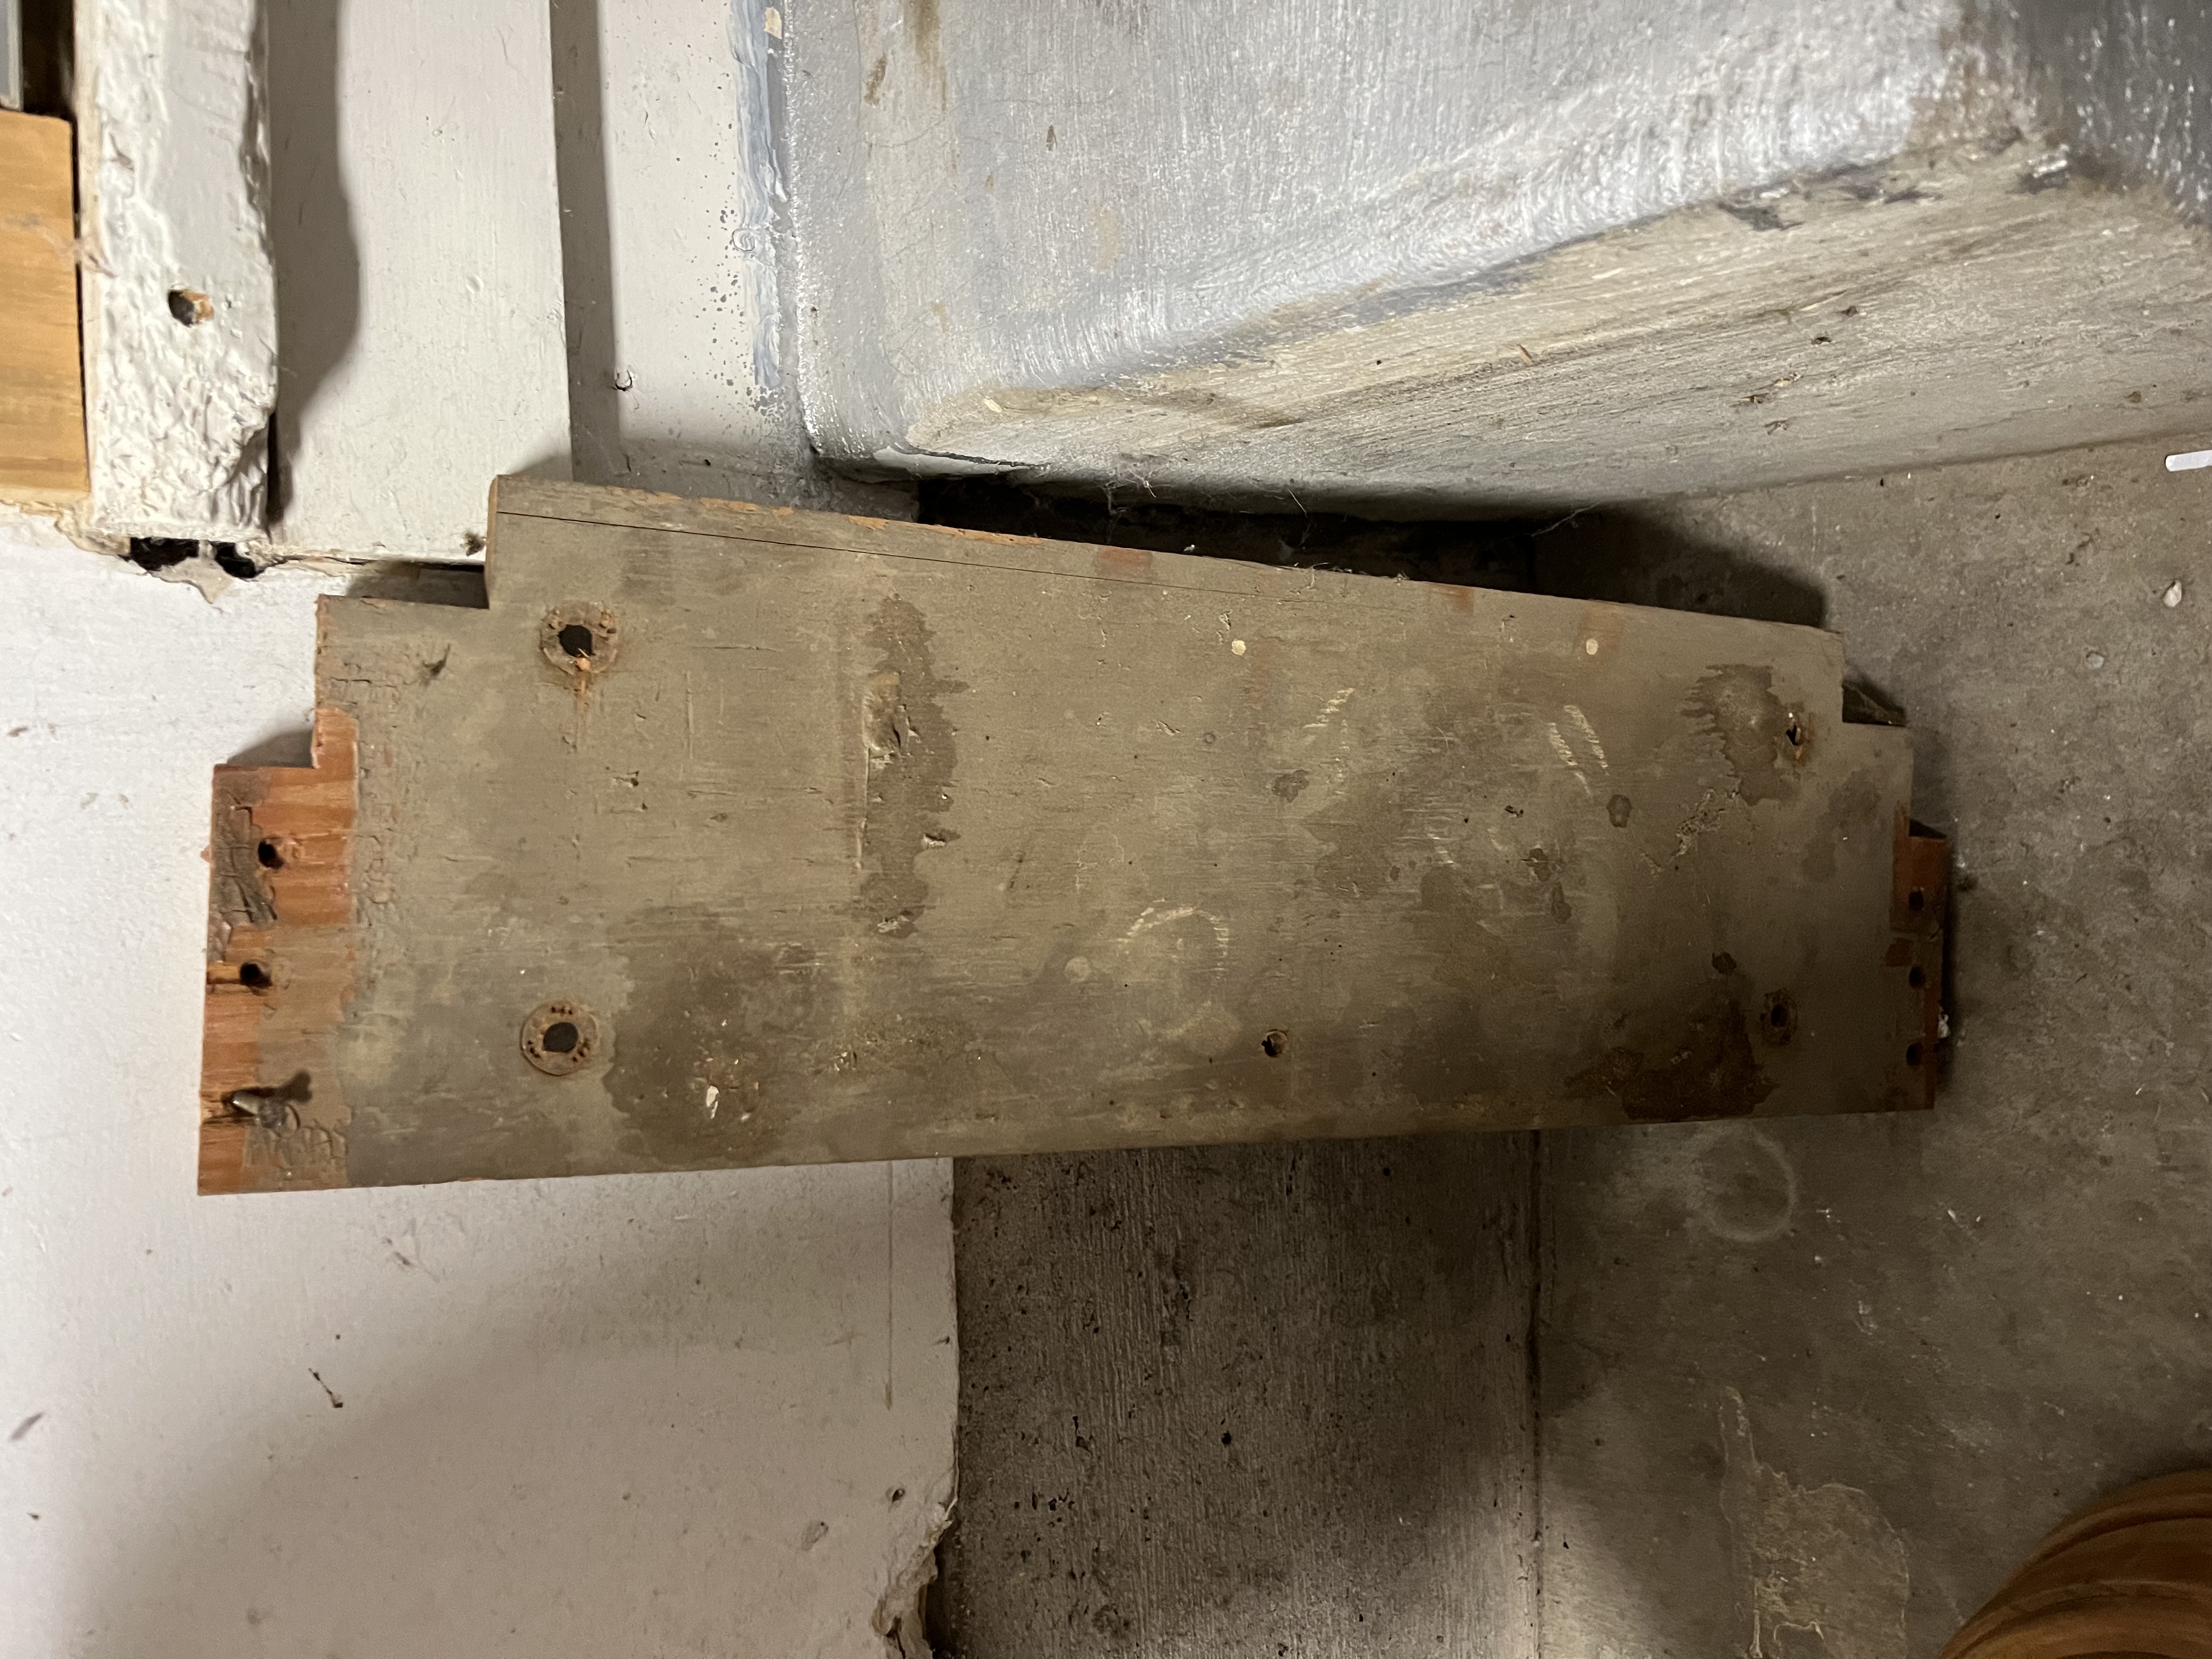
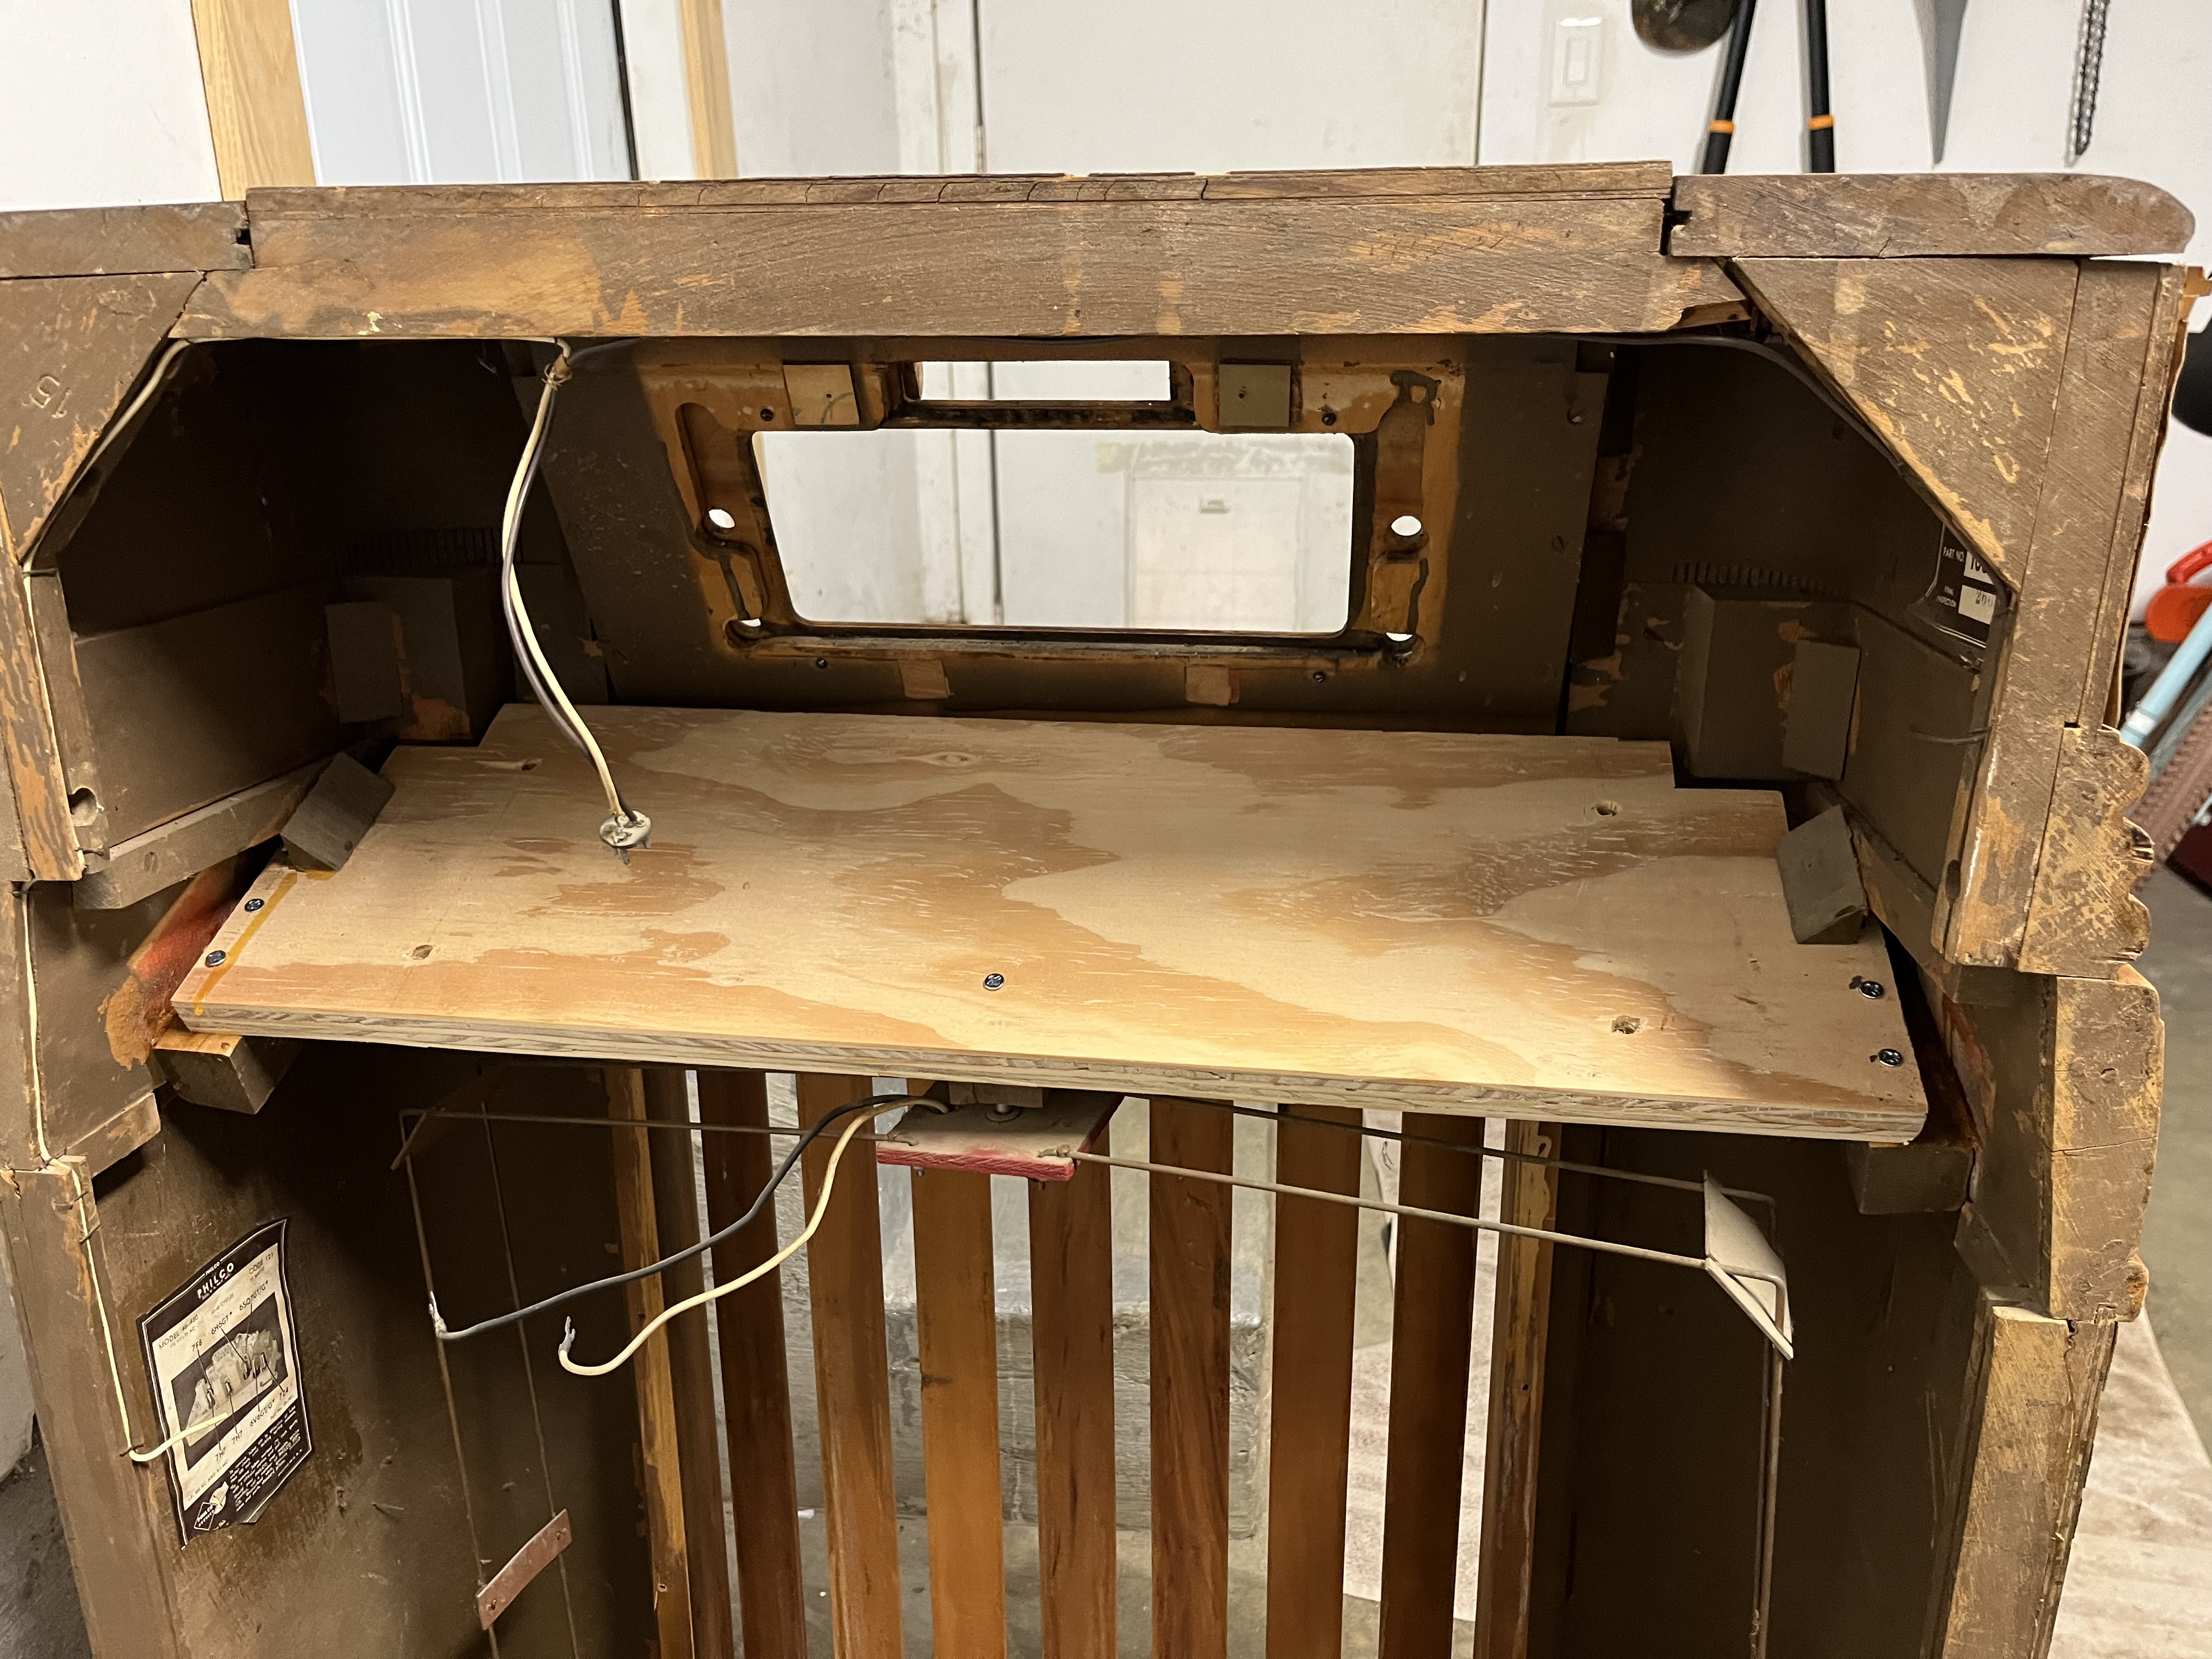
There were a couple of mud dobber nests in the radio as well, but fortunately they were empty! I got those removed, and doused the cabinet with disinfectant to get it all cleaned out. I scrubbed it with uncut Pine Sol and a brush, and finished up with some Lysol. I let it sit overnight.
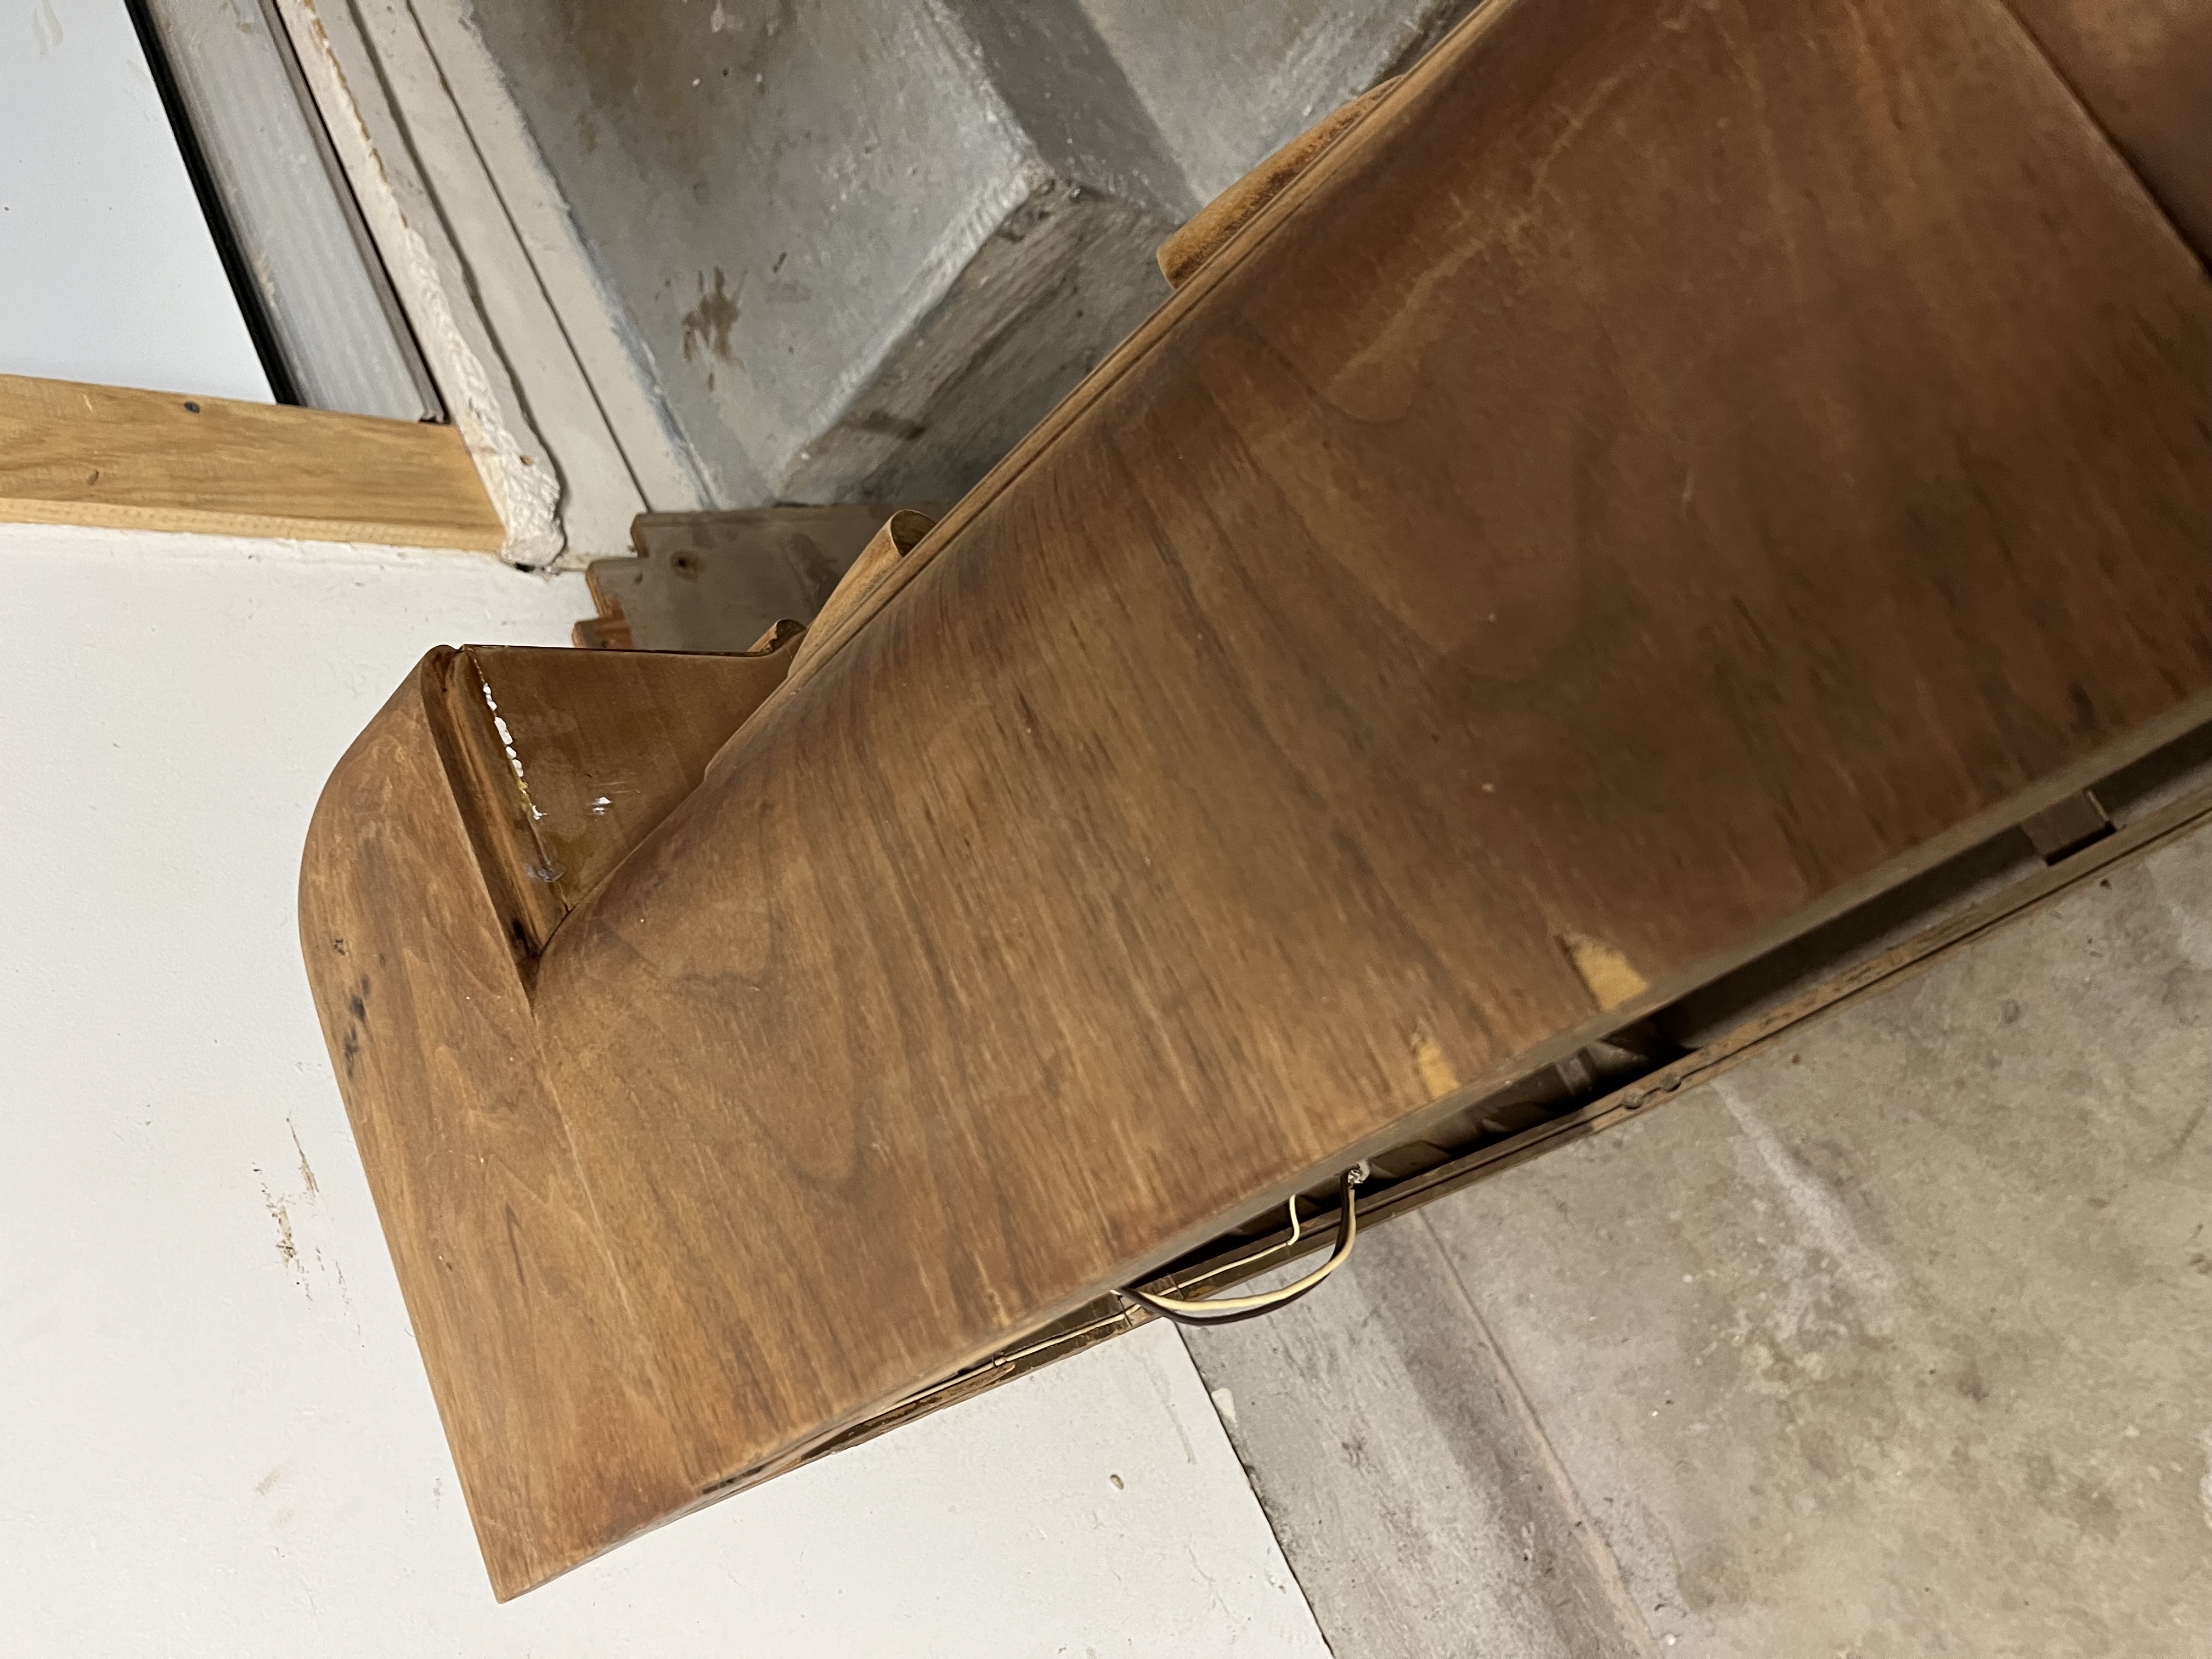
The next day, I spent about five hours stripping the varnish off of it. As I said, I’m happy with the results. But there’s some work ahead of me yet. I repaired the corner to the right of the dial plate, where the two sides and top pieces of wood had been coming apart. I just need to do a bit of sanding to remove the excess glue.
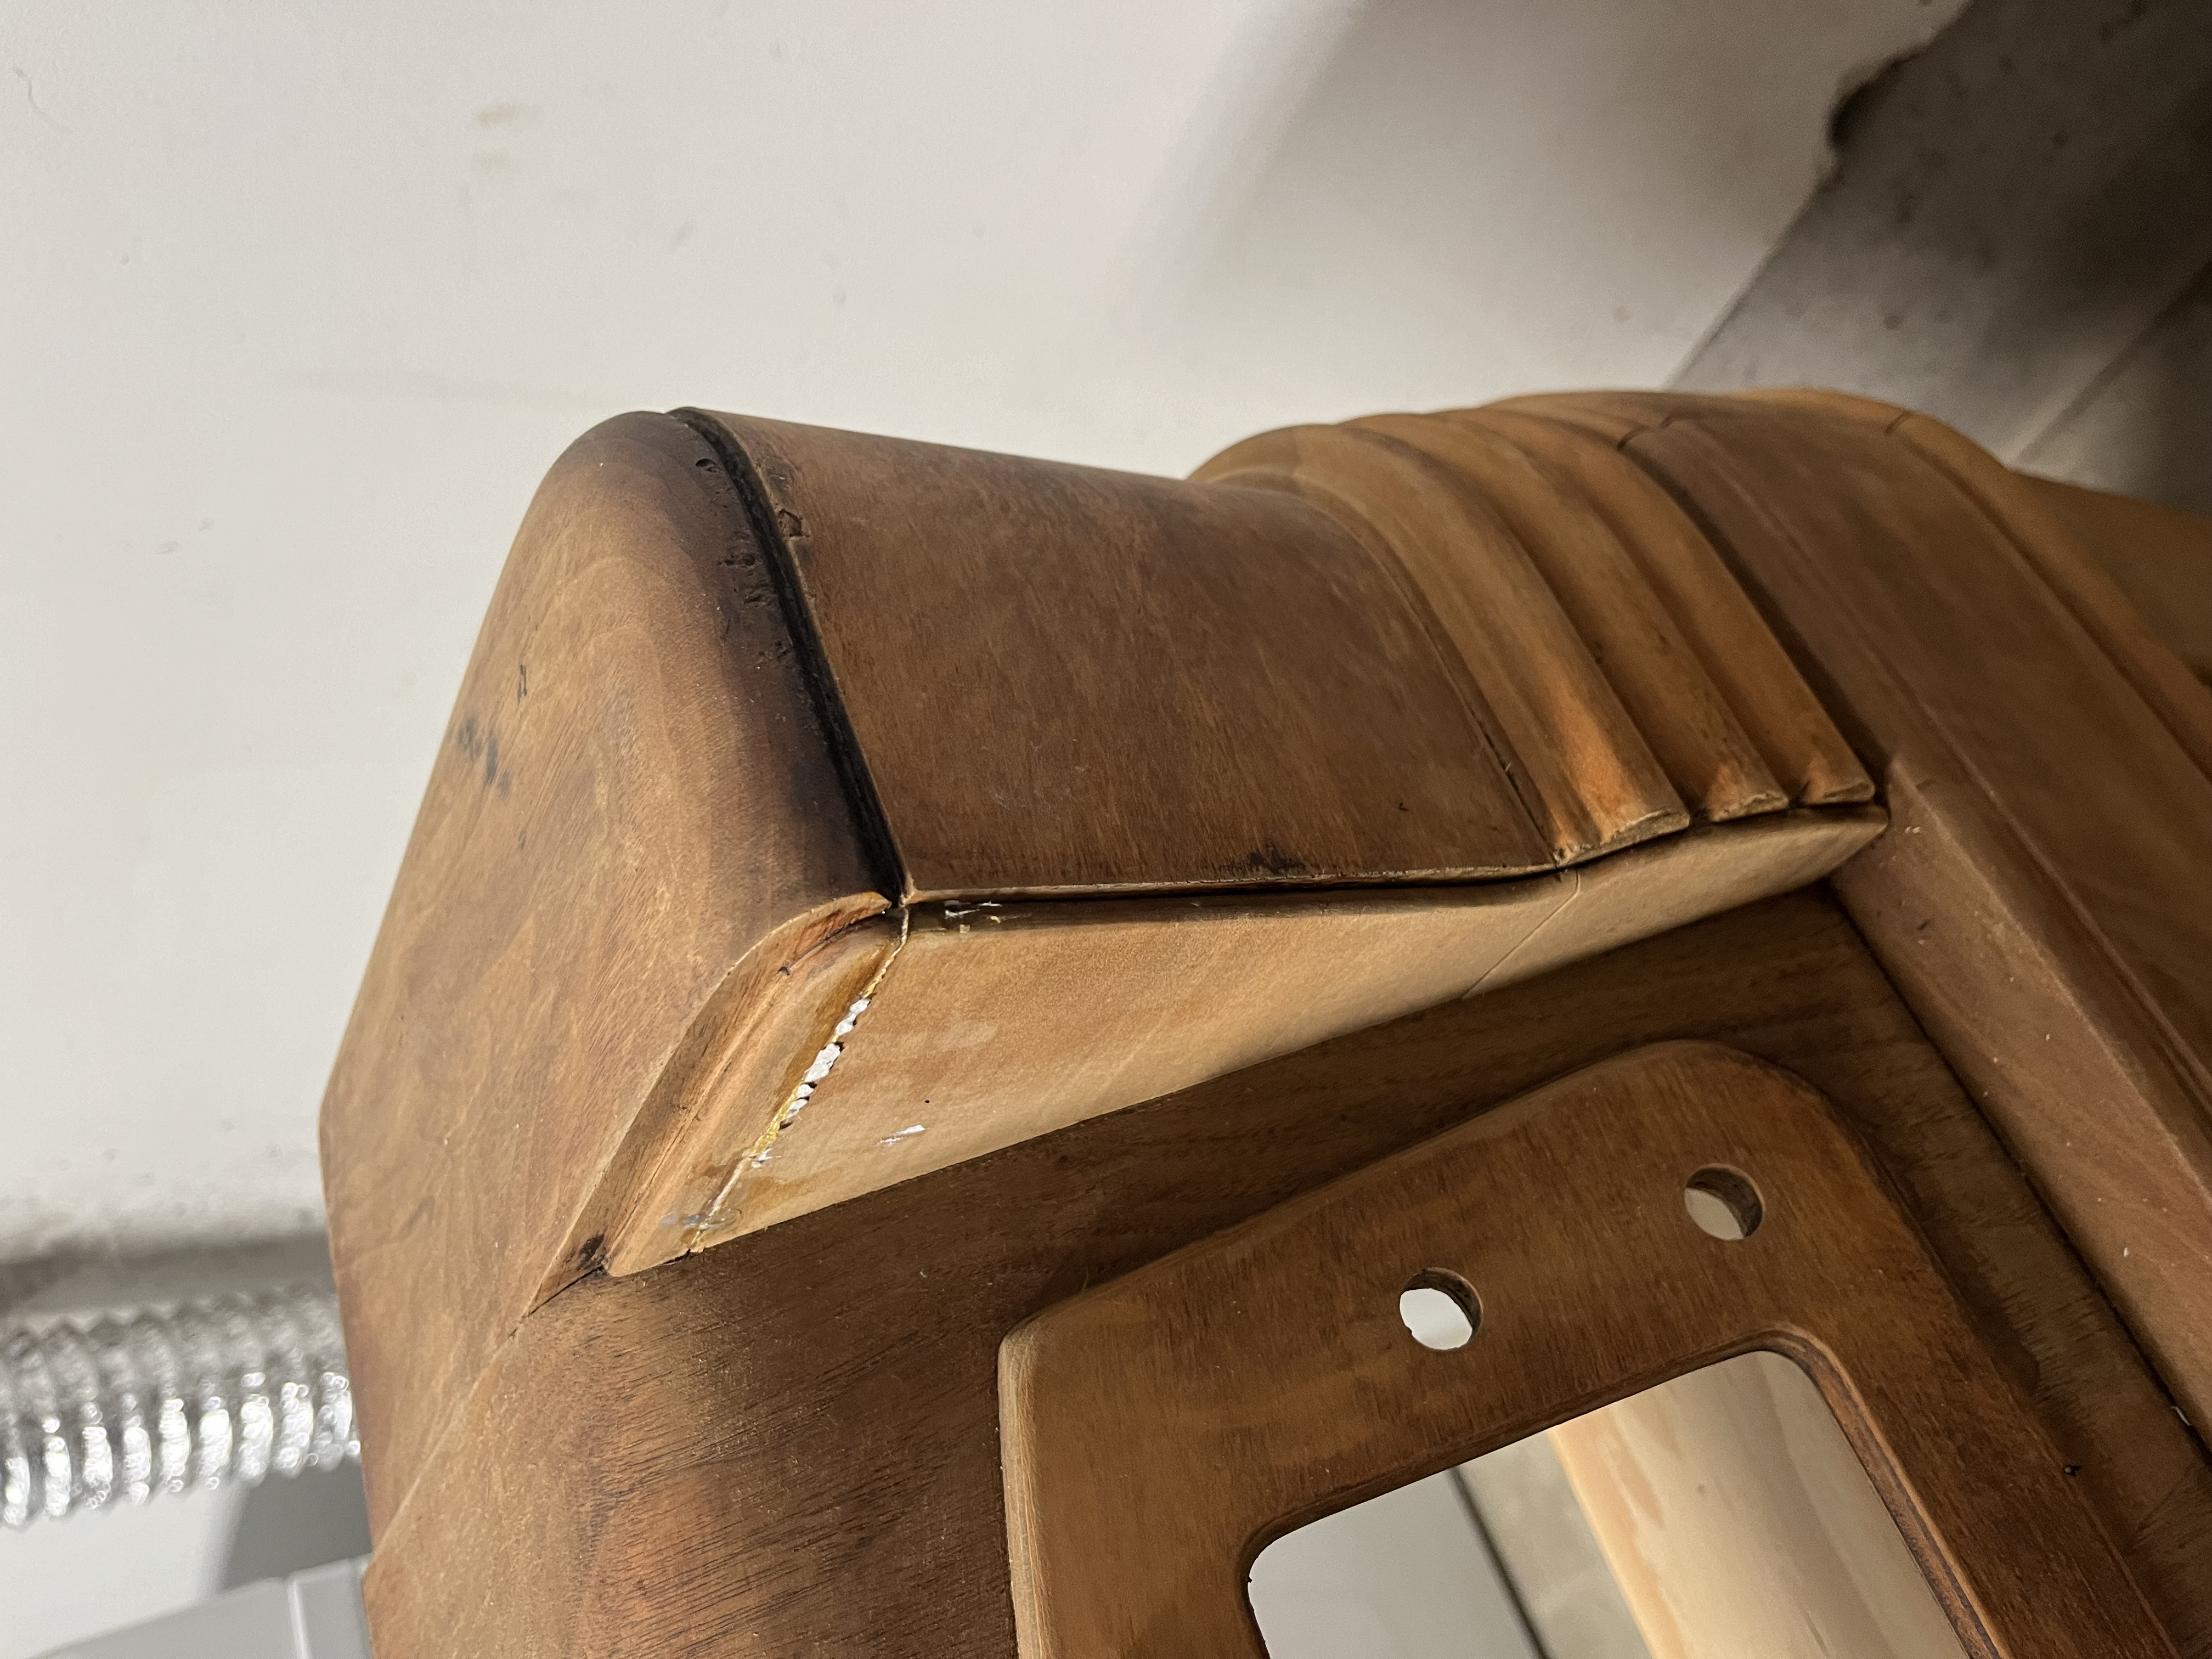
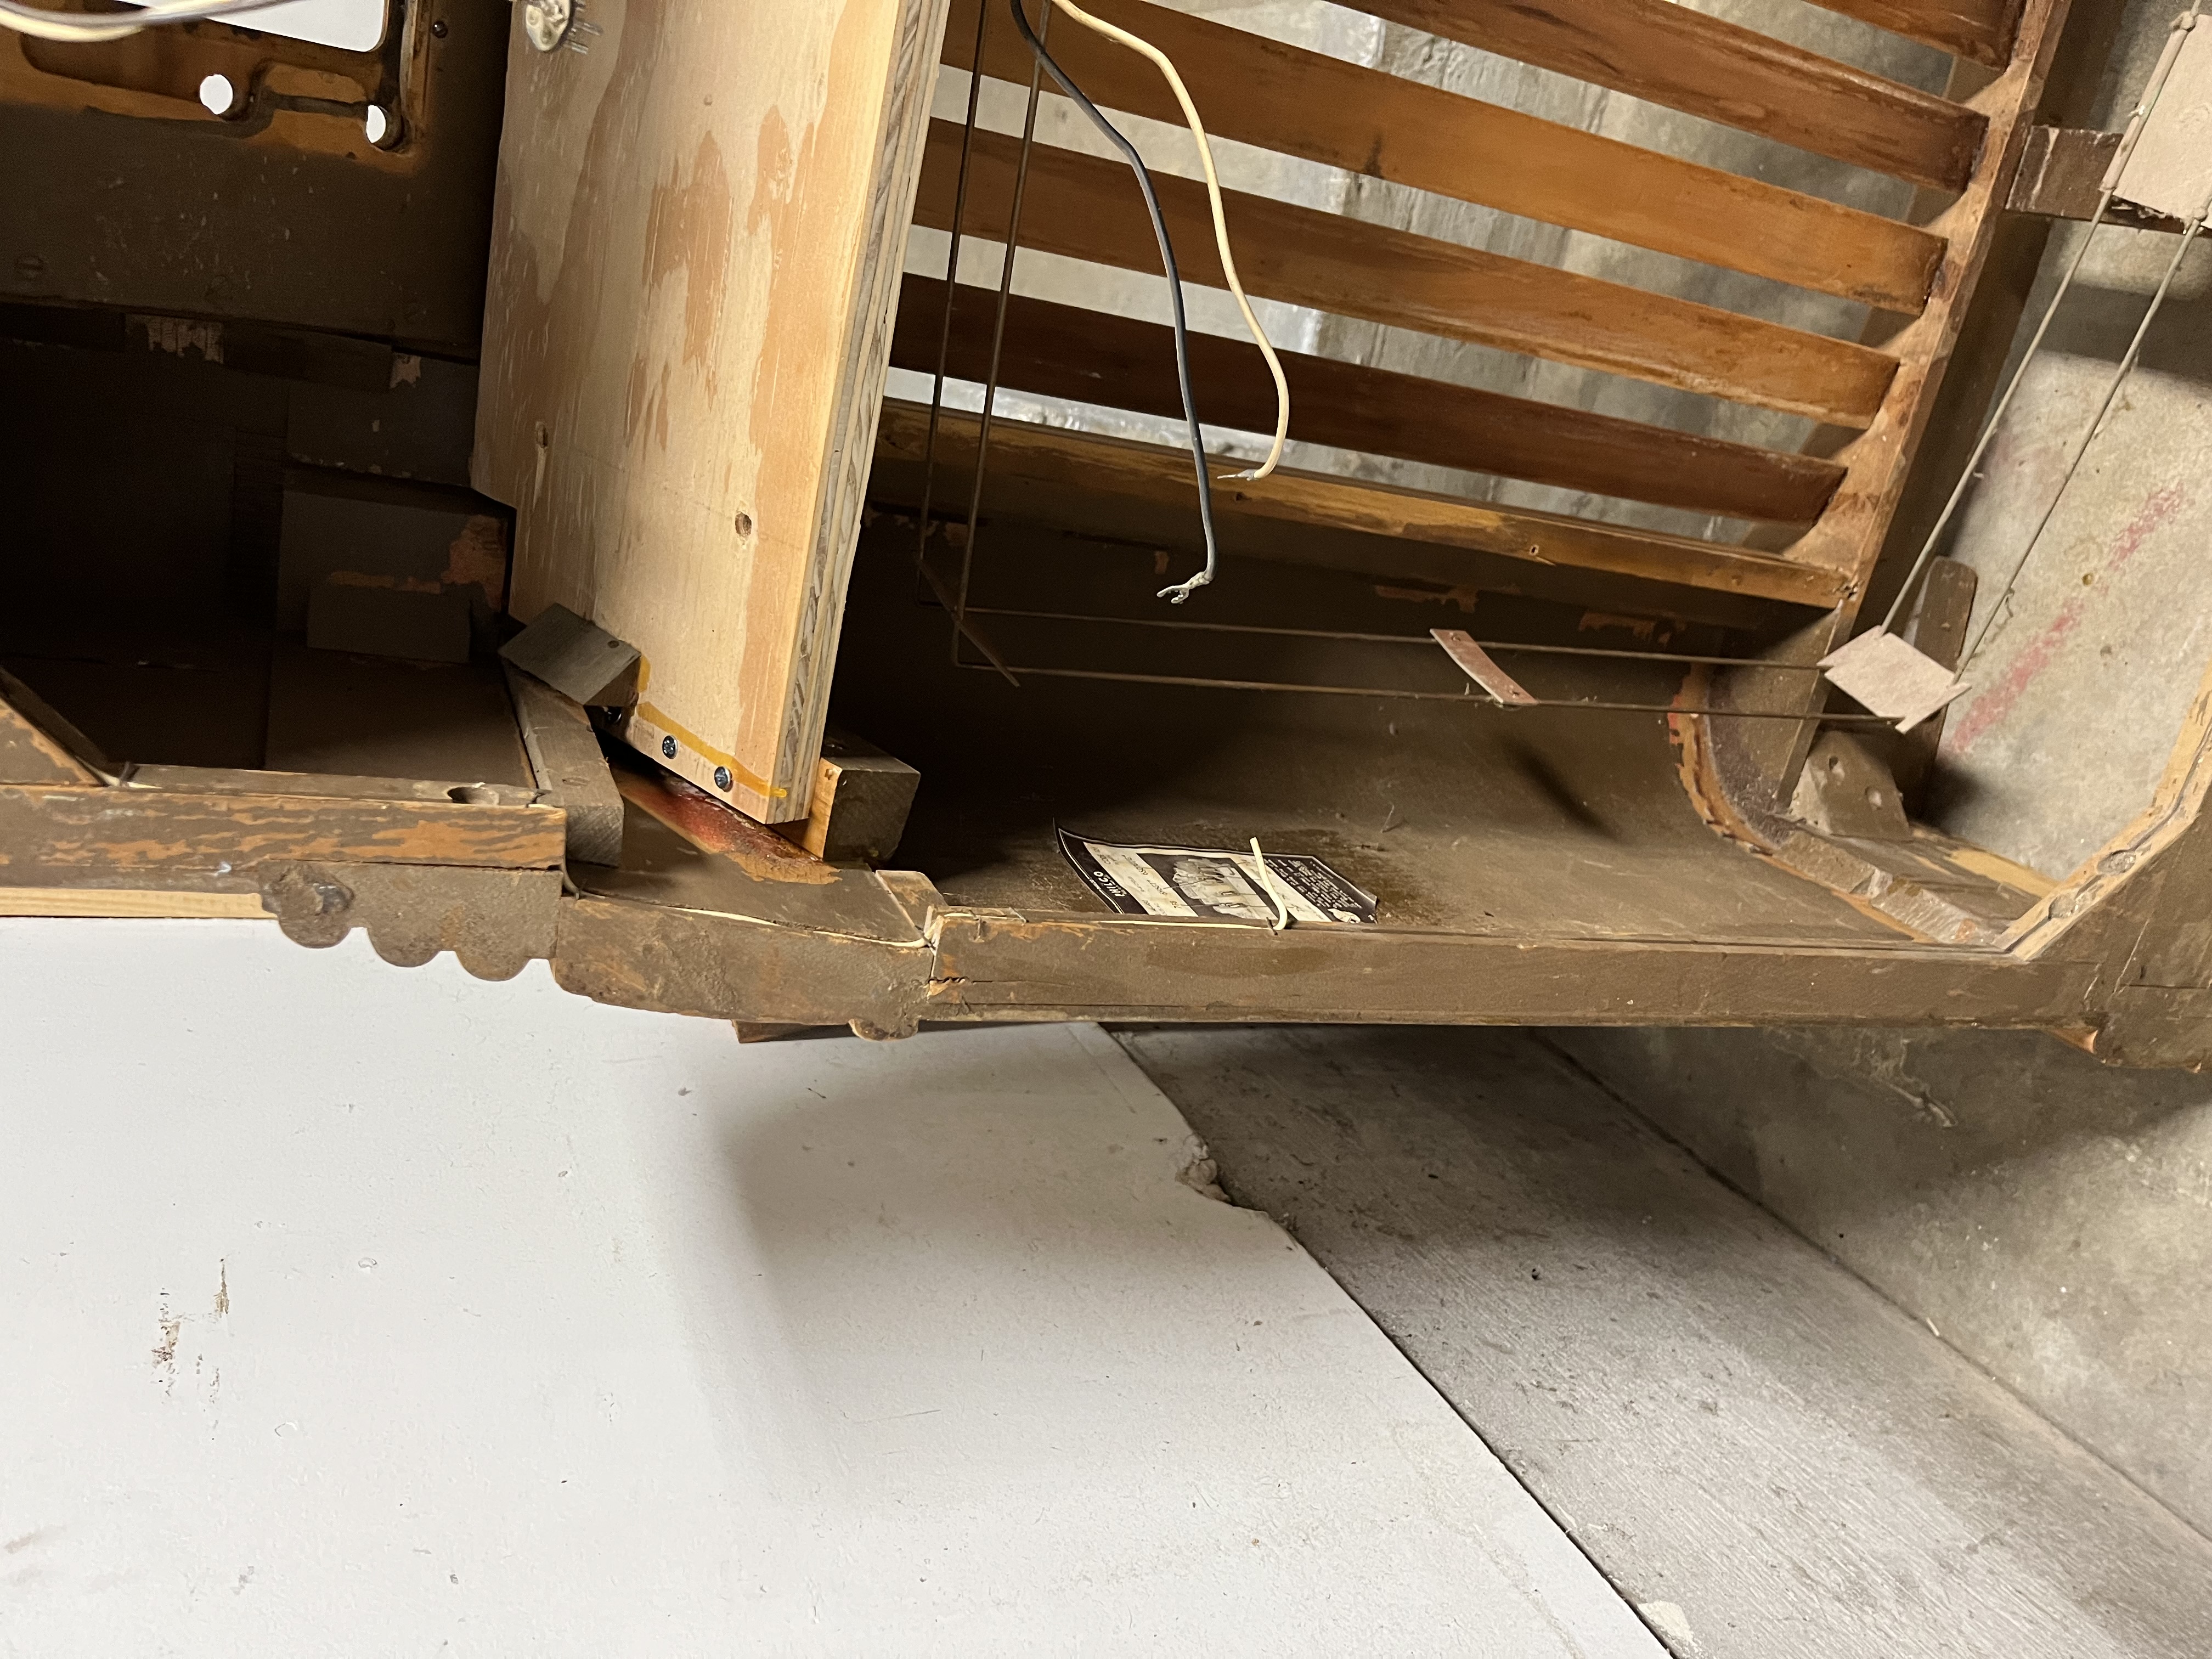
I also repaired the framing on the back side.

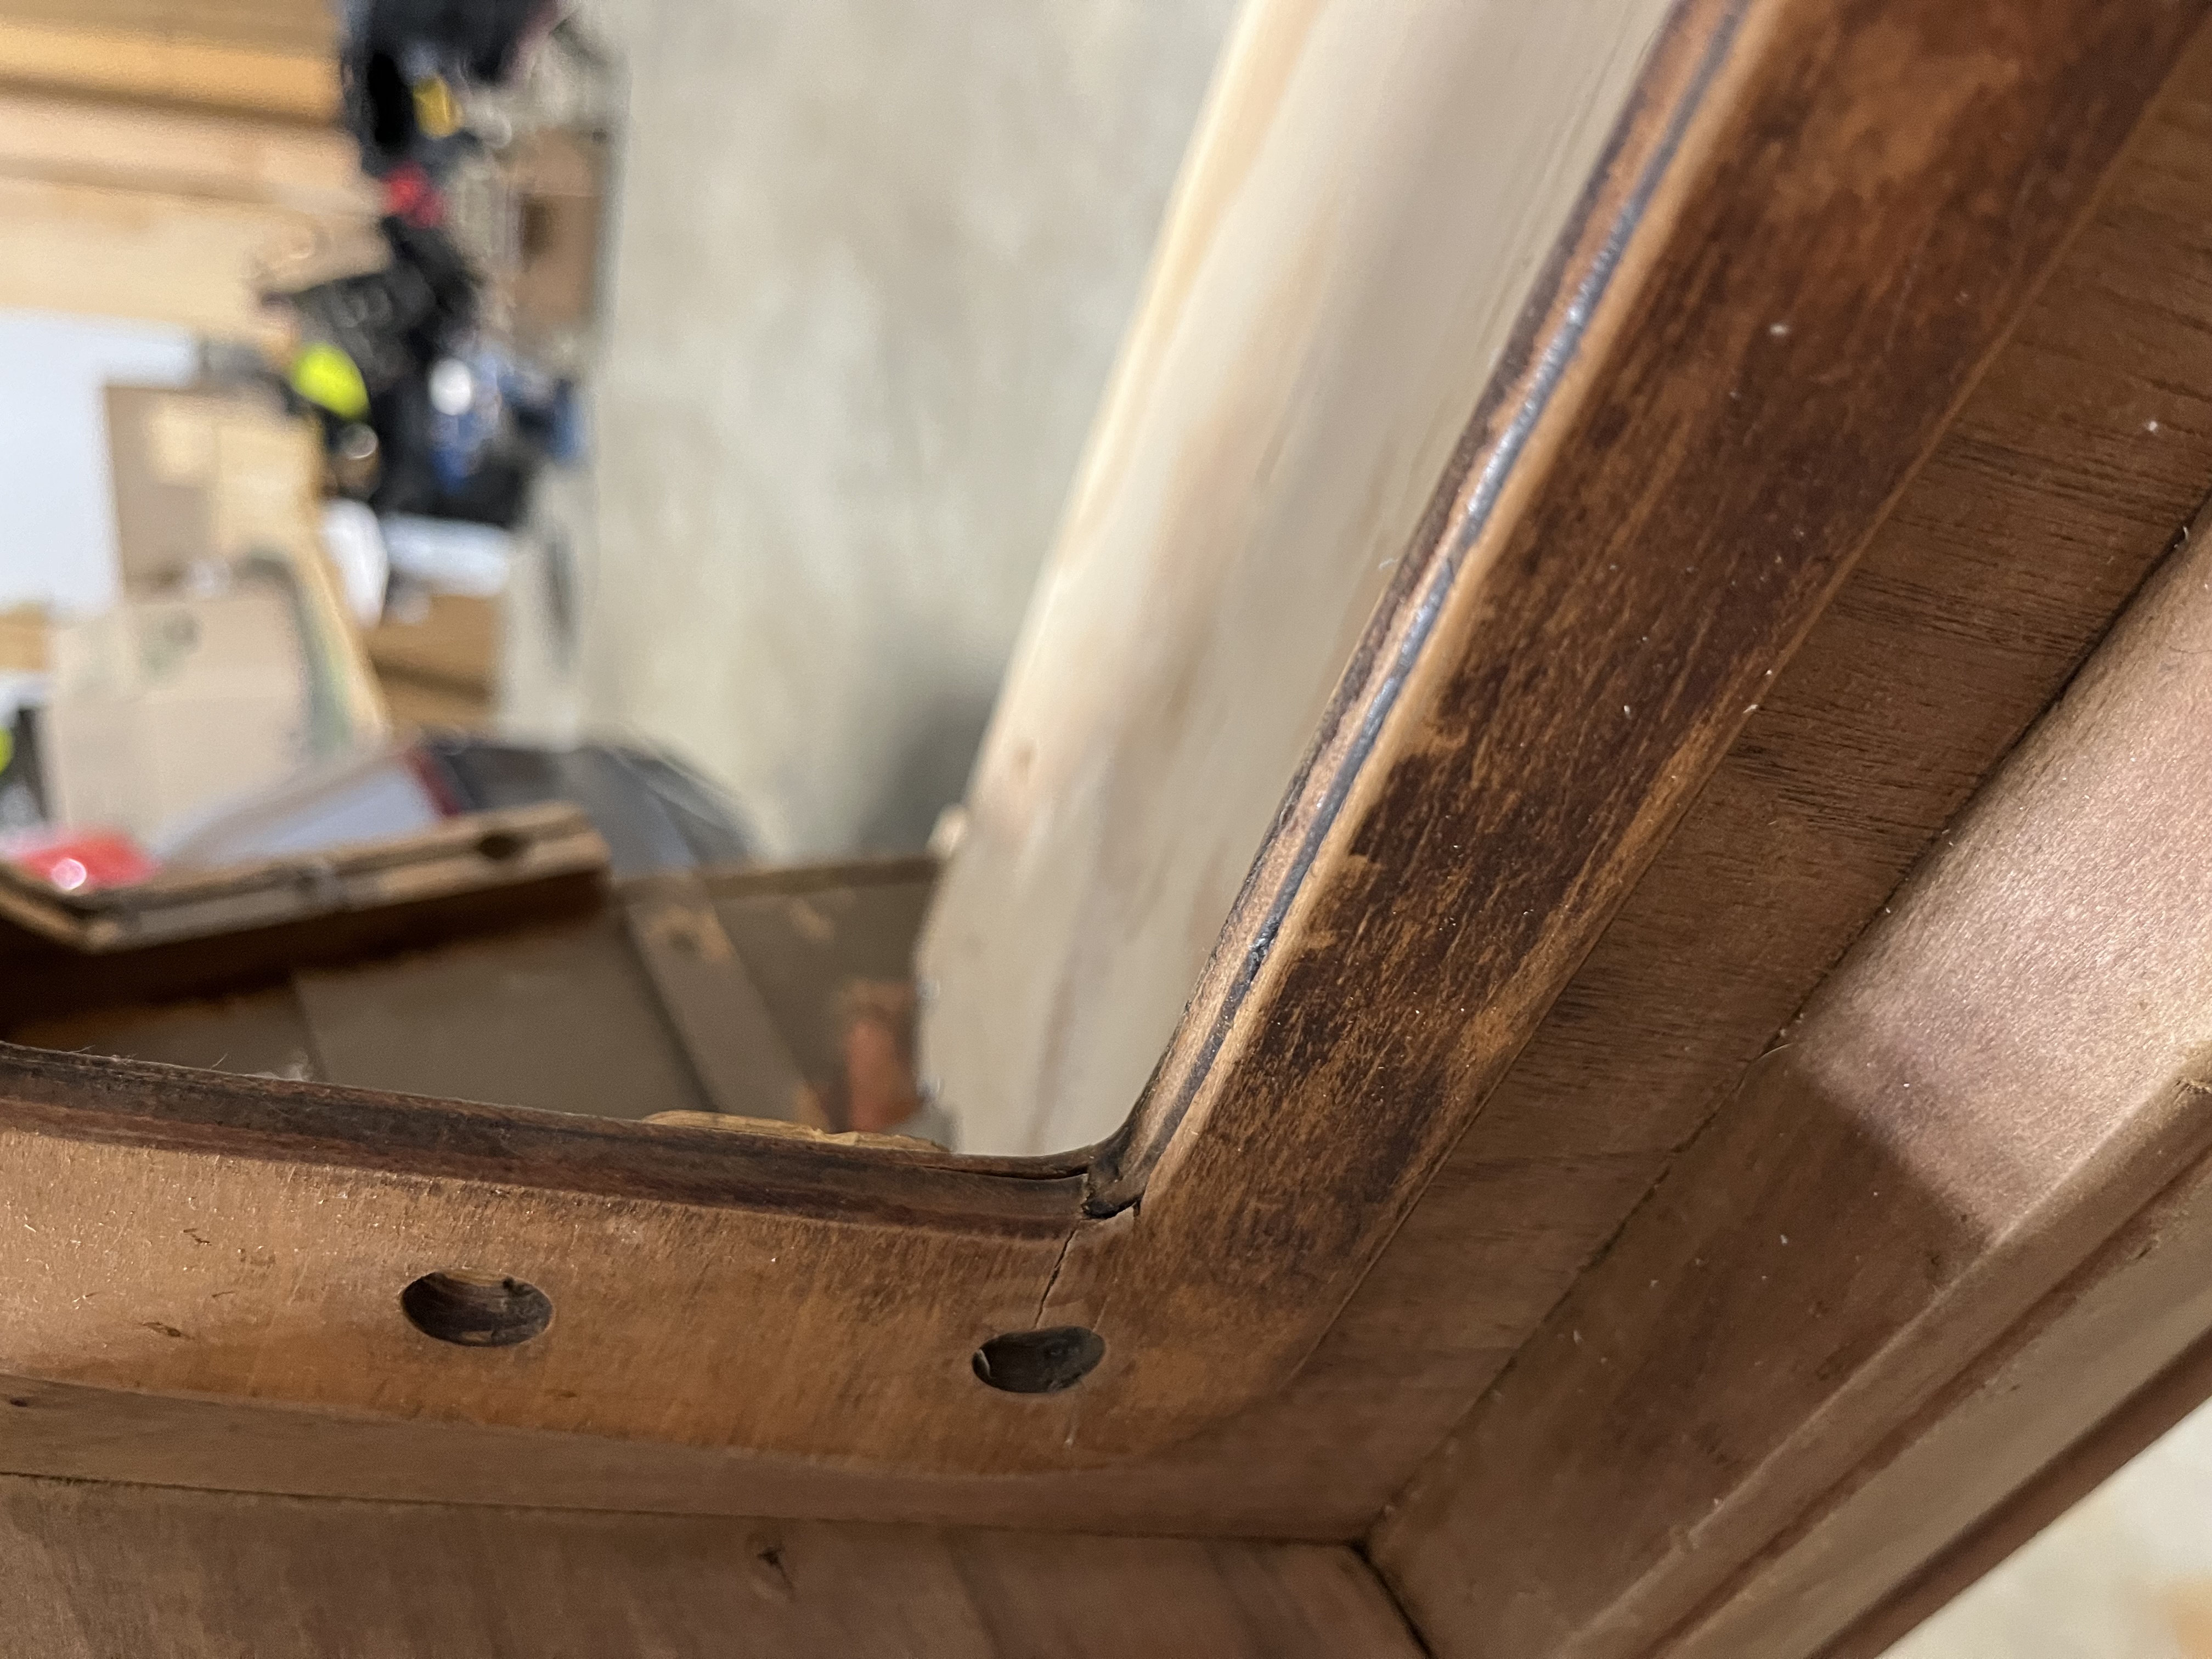
I’m getting down to the more cosmetic repairs. There is a crack on the wood surrounding the glass dial, but I plan to fix that tonight.
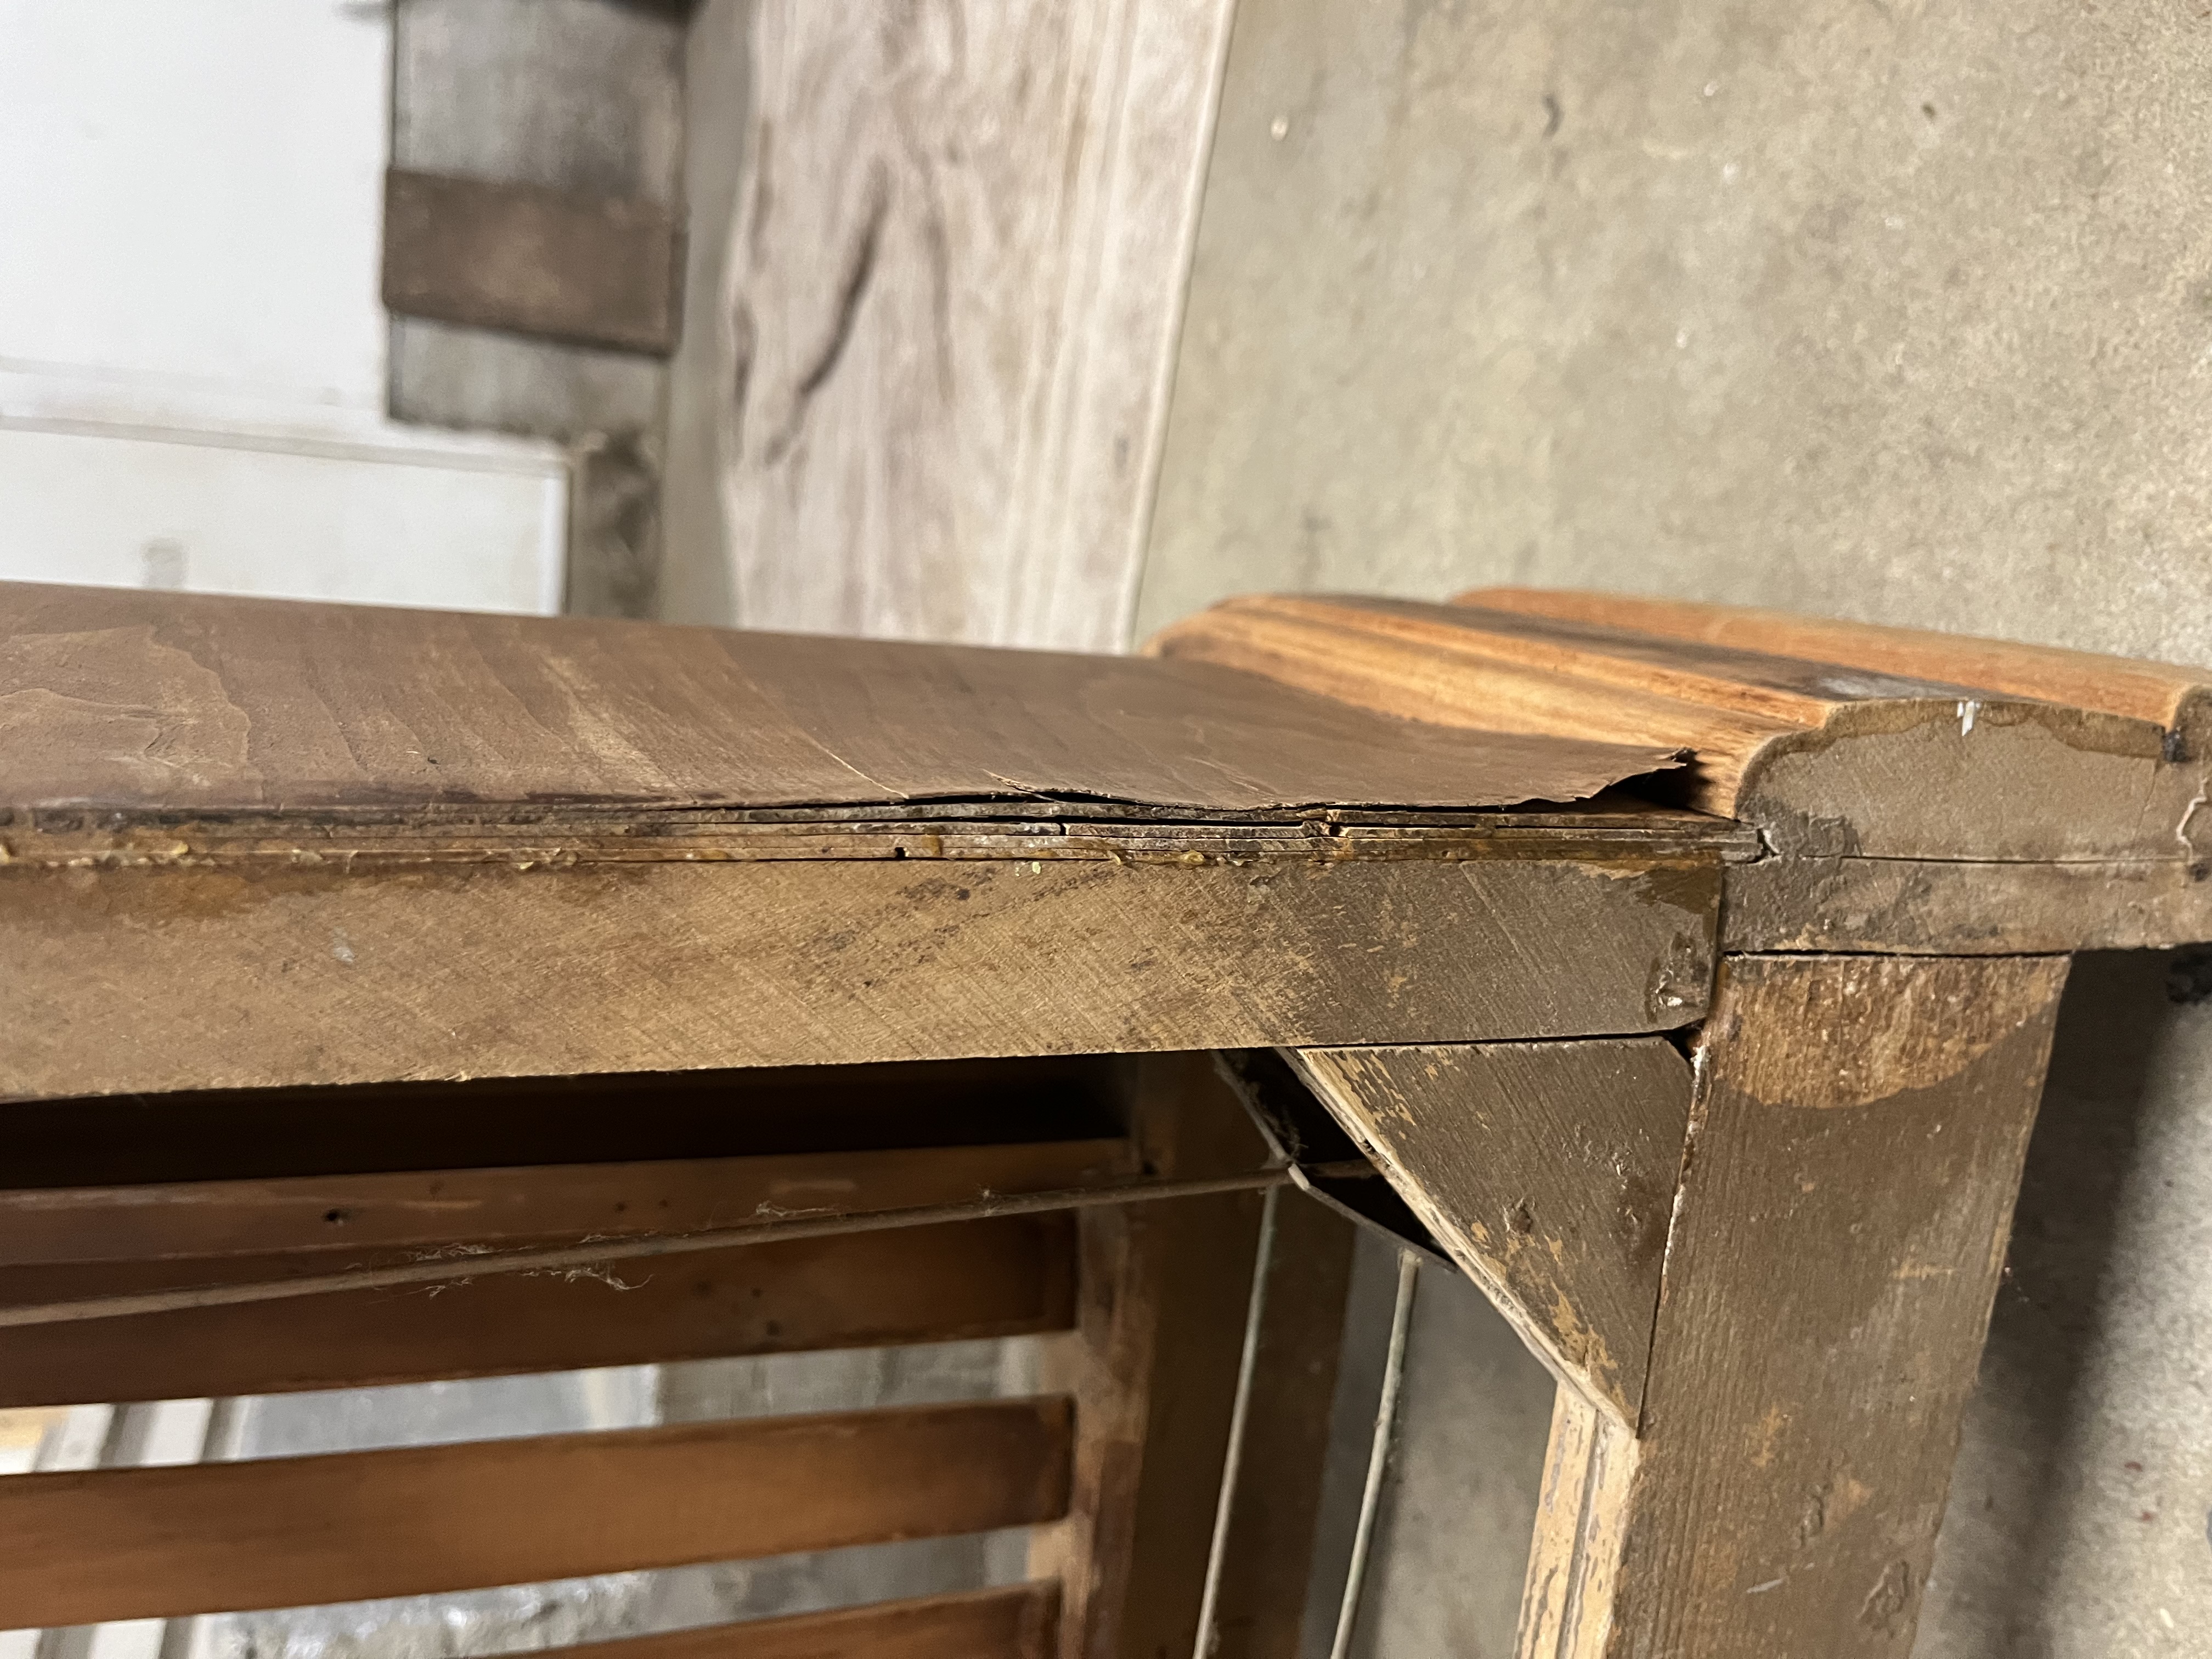
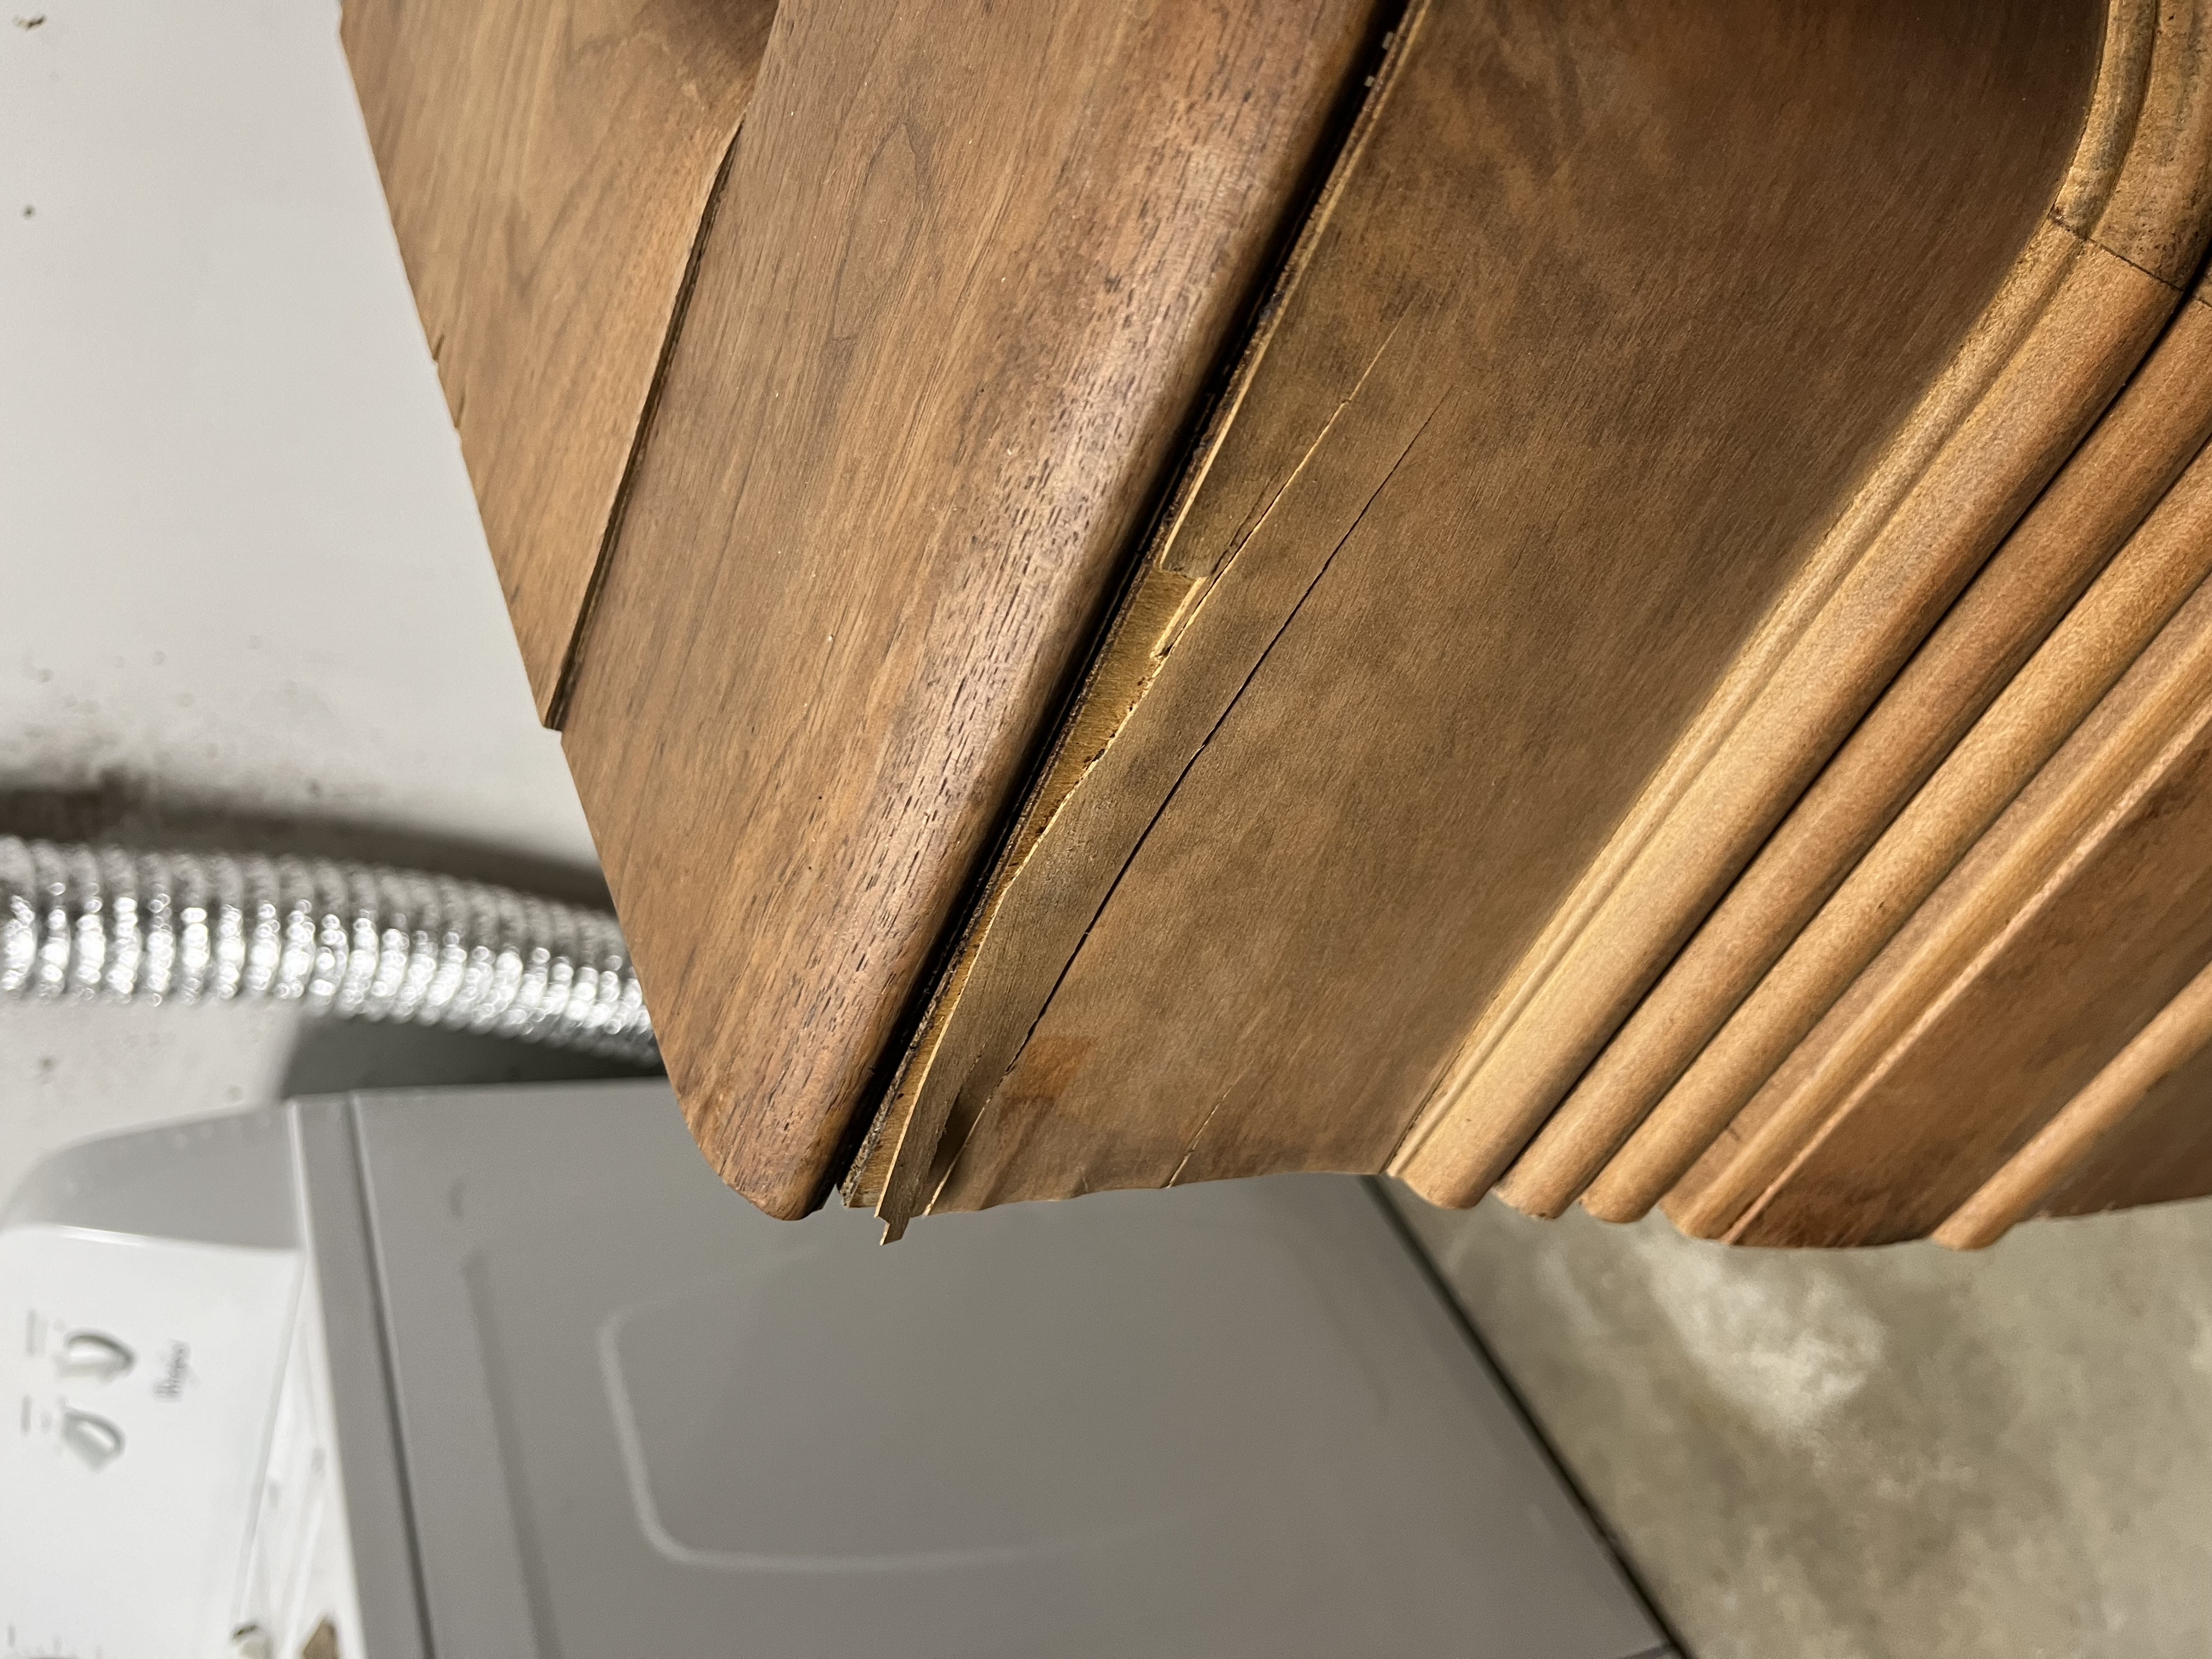
There’s also a bit of separation in the plywood on the back left (if you are facing the radio from its front) which will need repaired as well.
There was a water ring mark on the top right corner before I stripped it; the ring has come off, but there is still a black stain in the wood. I can recall from refinishing a coffee table that repeated coats of vinegar will lighten these types of water damage.
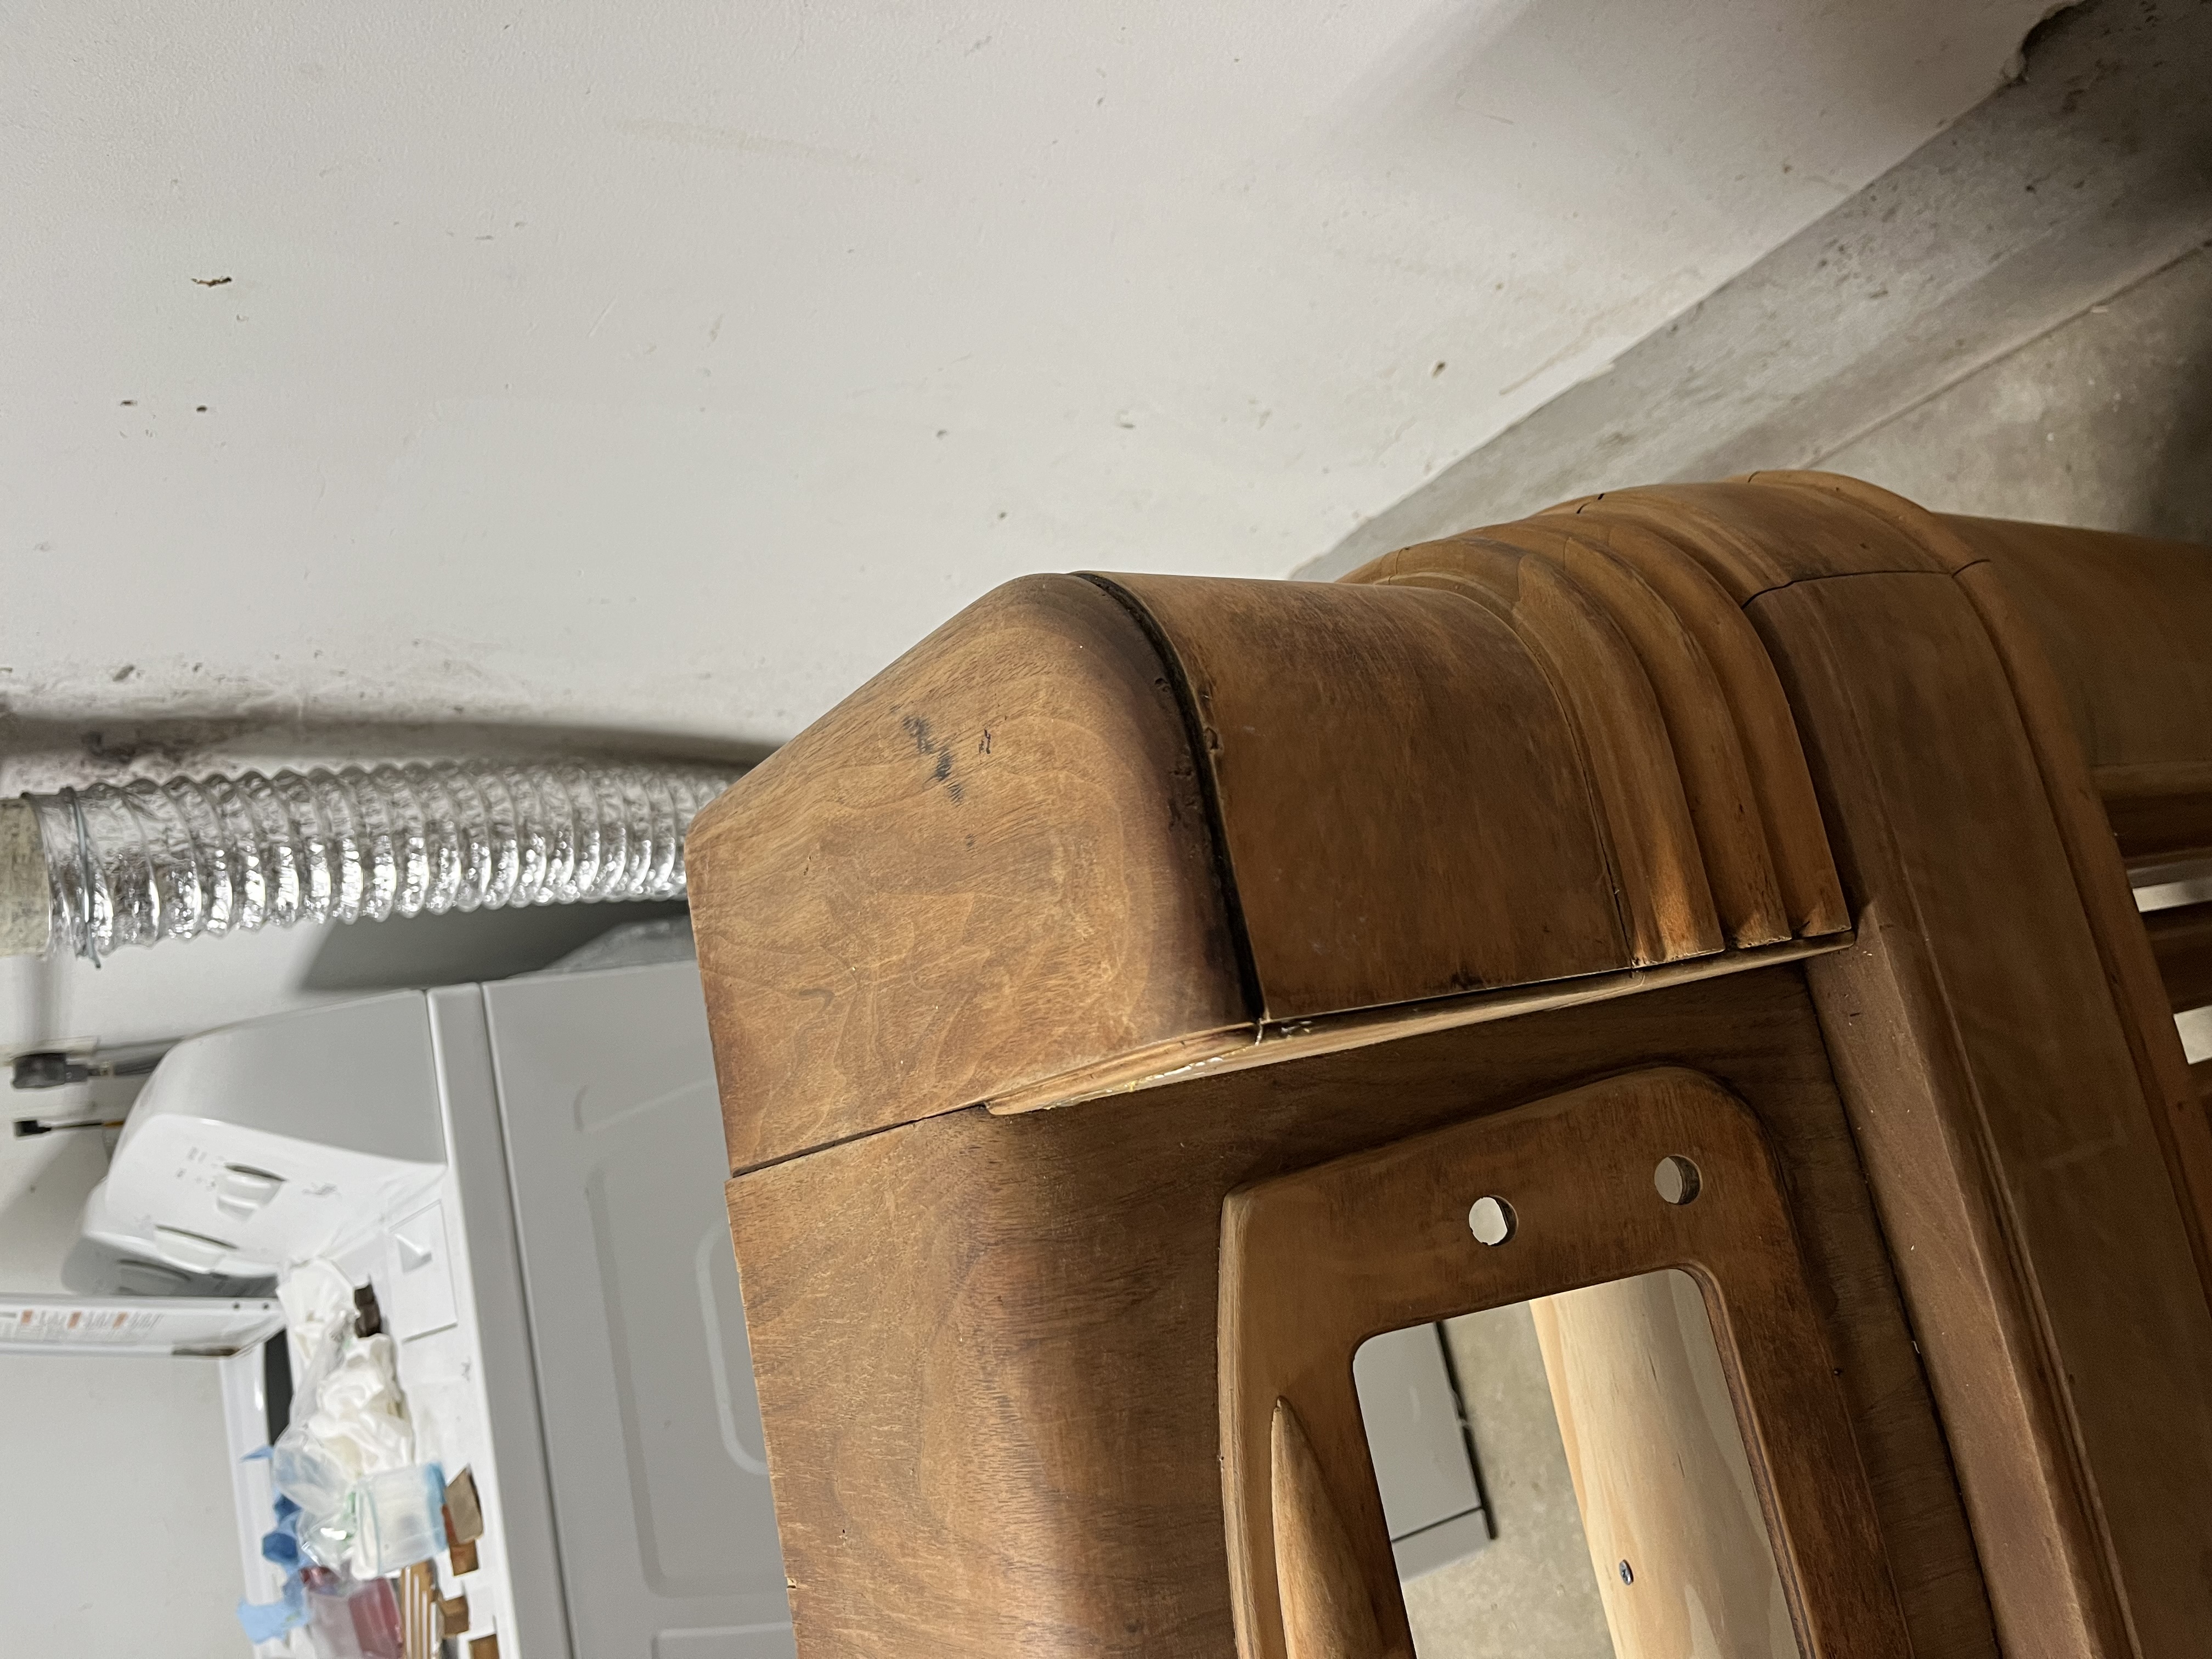
My main question to the group here is, what kind of veneer was commonly used off these cabinets? I can see in the service manual that the cabinet was walnut, but is that an indication of the stain or the veneer? I will need to repair a few spots where the veneer has peeled.
Joseph
Philco 46-480
Philco 49-906
Posts: 287
Threads: 16
Joined: Jan 2024
City: Tulsa
State, Province, Country: Oklahoma
Good afternoon, folks!
It's been a couple of weeks since I've posted any update on the 46-480 cabinet, so I have got quite a lot to catch up on! I will try to keep this all in chronological order. After the last post, I fixed the crack in the trim around the dial. I had recently stripped the exterior of the cabinet, and thought it was smelling much better; however, I noticed after the smell of paint stripper faded that the cabinet still smelled pretty musty and like cigarette smoke. Thus, I decided to strip the interior as well. I'm not sure if the interior paint was original, but it had been painted brown. I liked the idea of repainting the interior as a means of sealing the wood, so I decided to repaint it a light brown or tan color. I covered the original detail stickers with newspaper so that they would still be visible after repainting. And, at long last, the bad smell was gone!
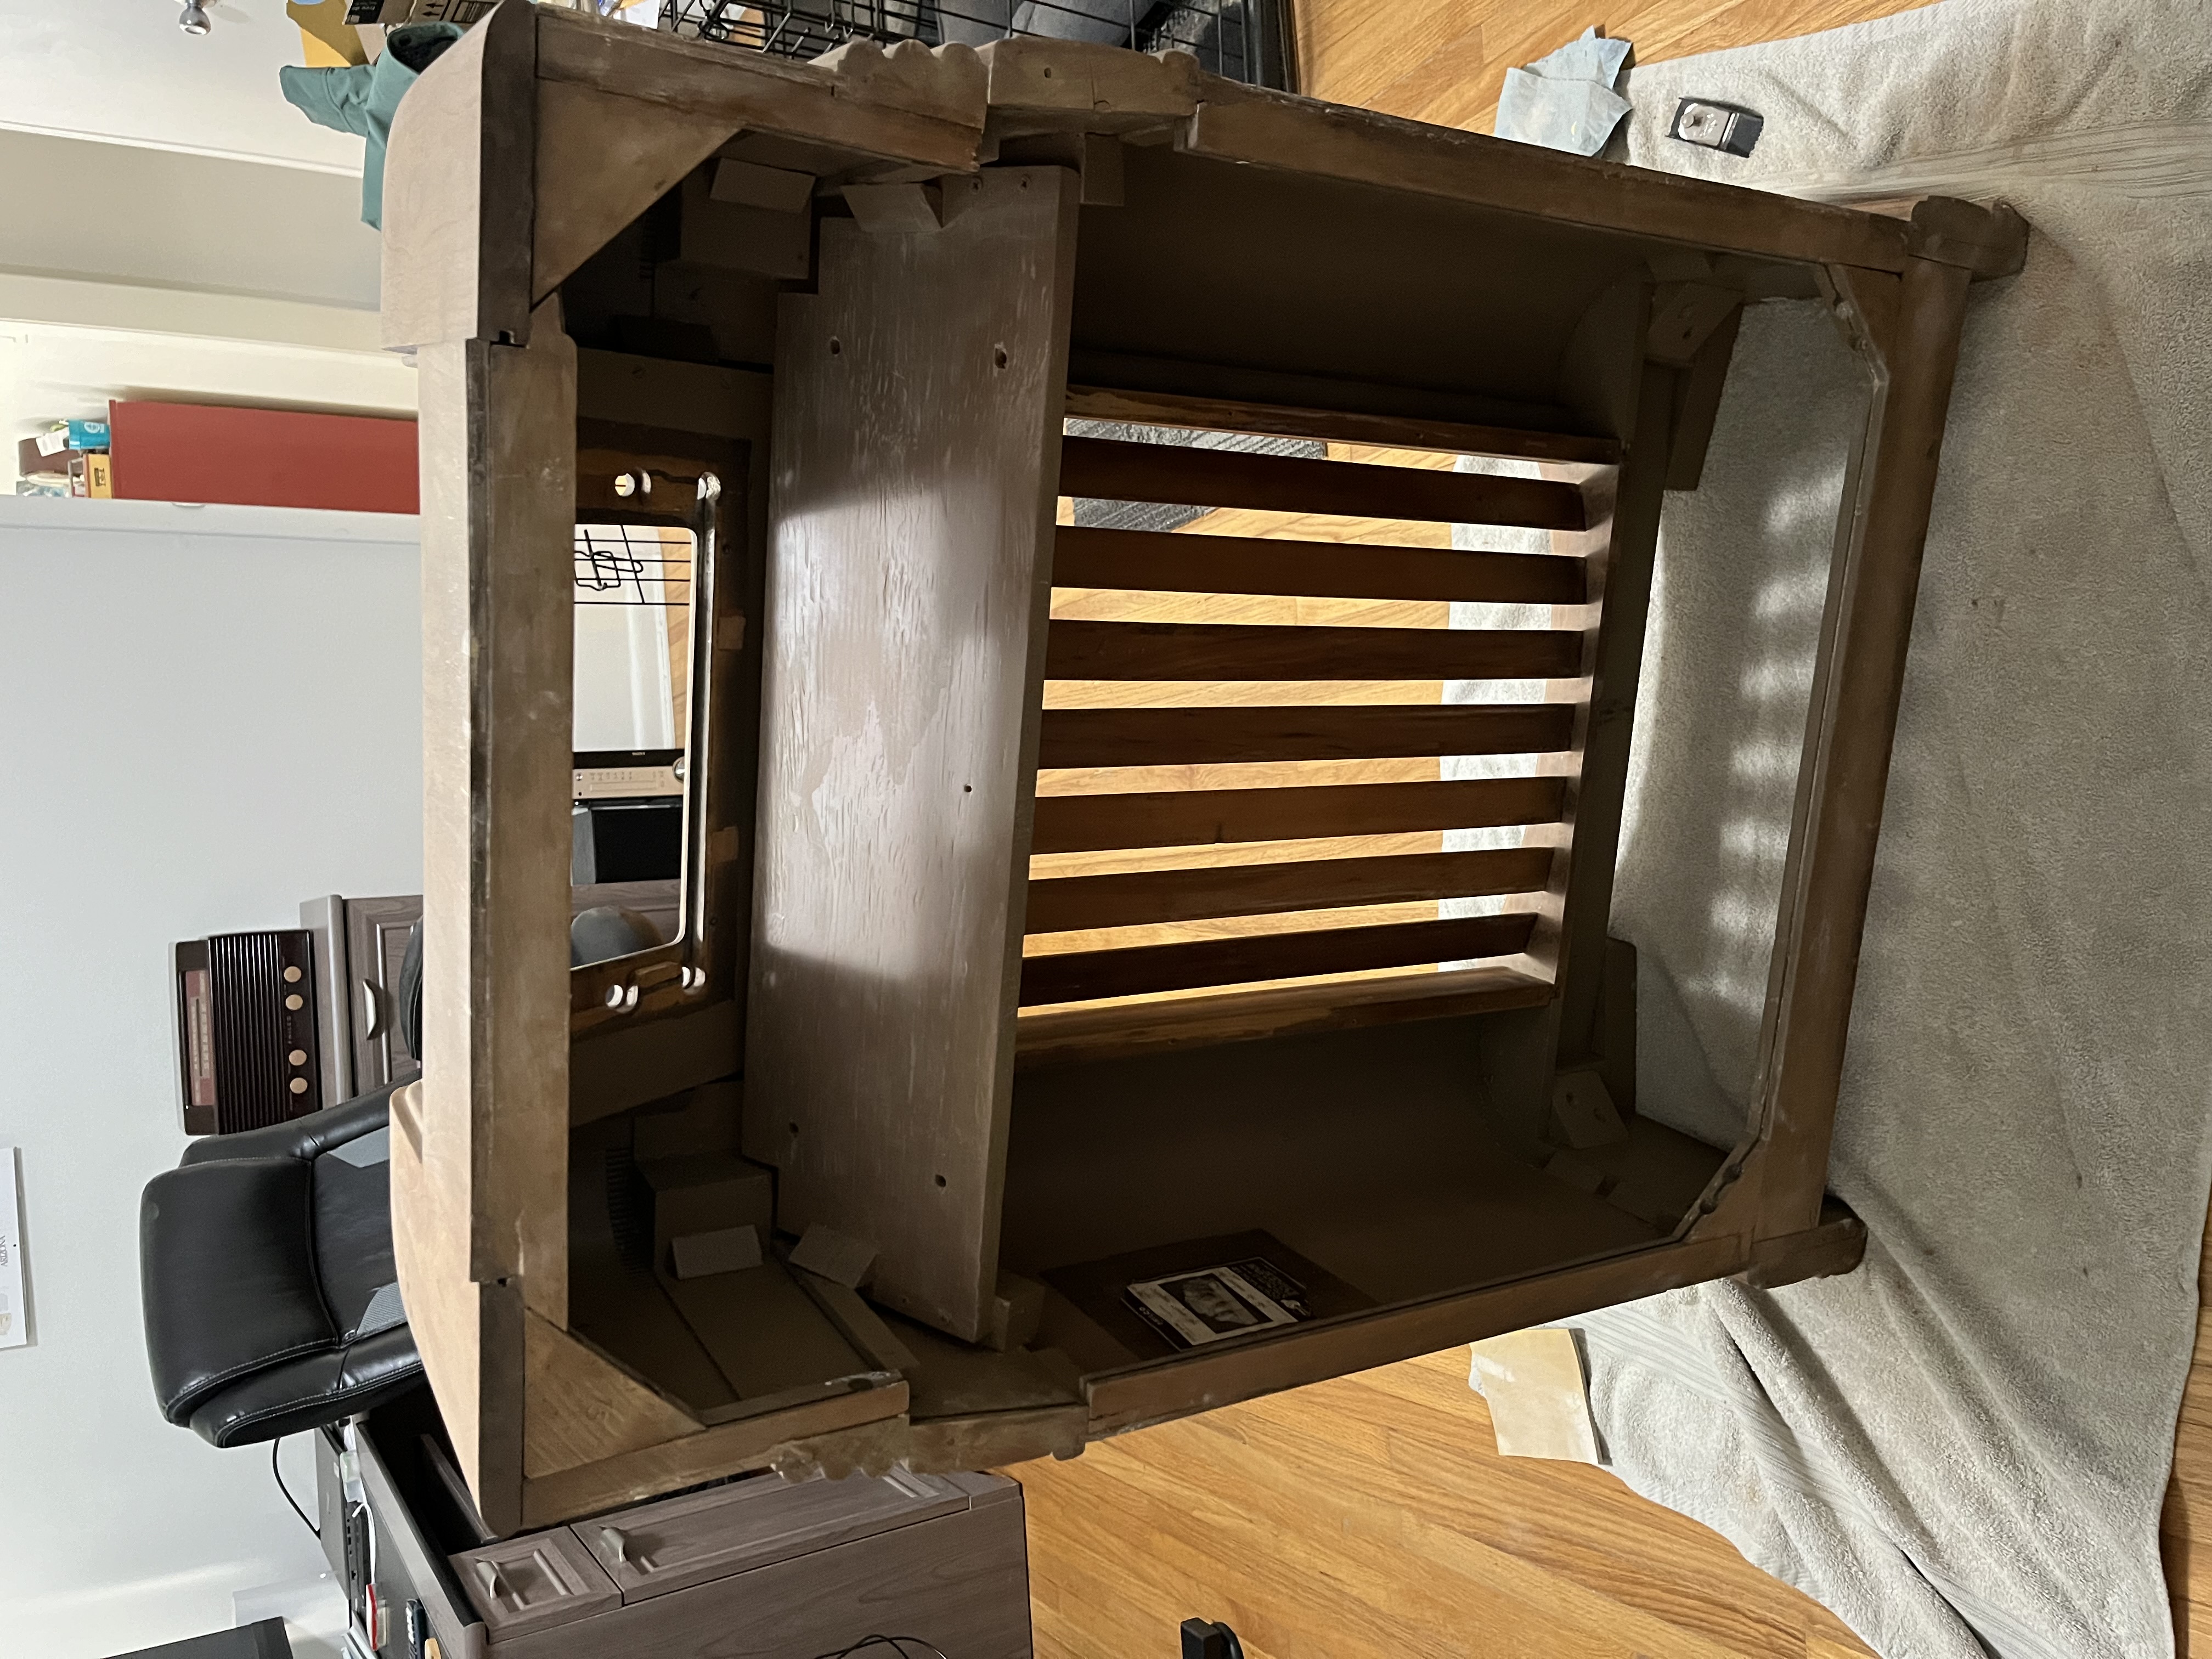
After that, I continued on with some structural repairs. I repaired the corners in back of the cabinet which connect the top of the radio to the sides. I have also replaced roughly half of the wood screws due to excessive rust and existing stripped heads. I repaired one of the sides of the base trim, as it had separated from the inner wood (had to get creative with one of my clamps!).
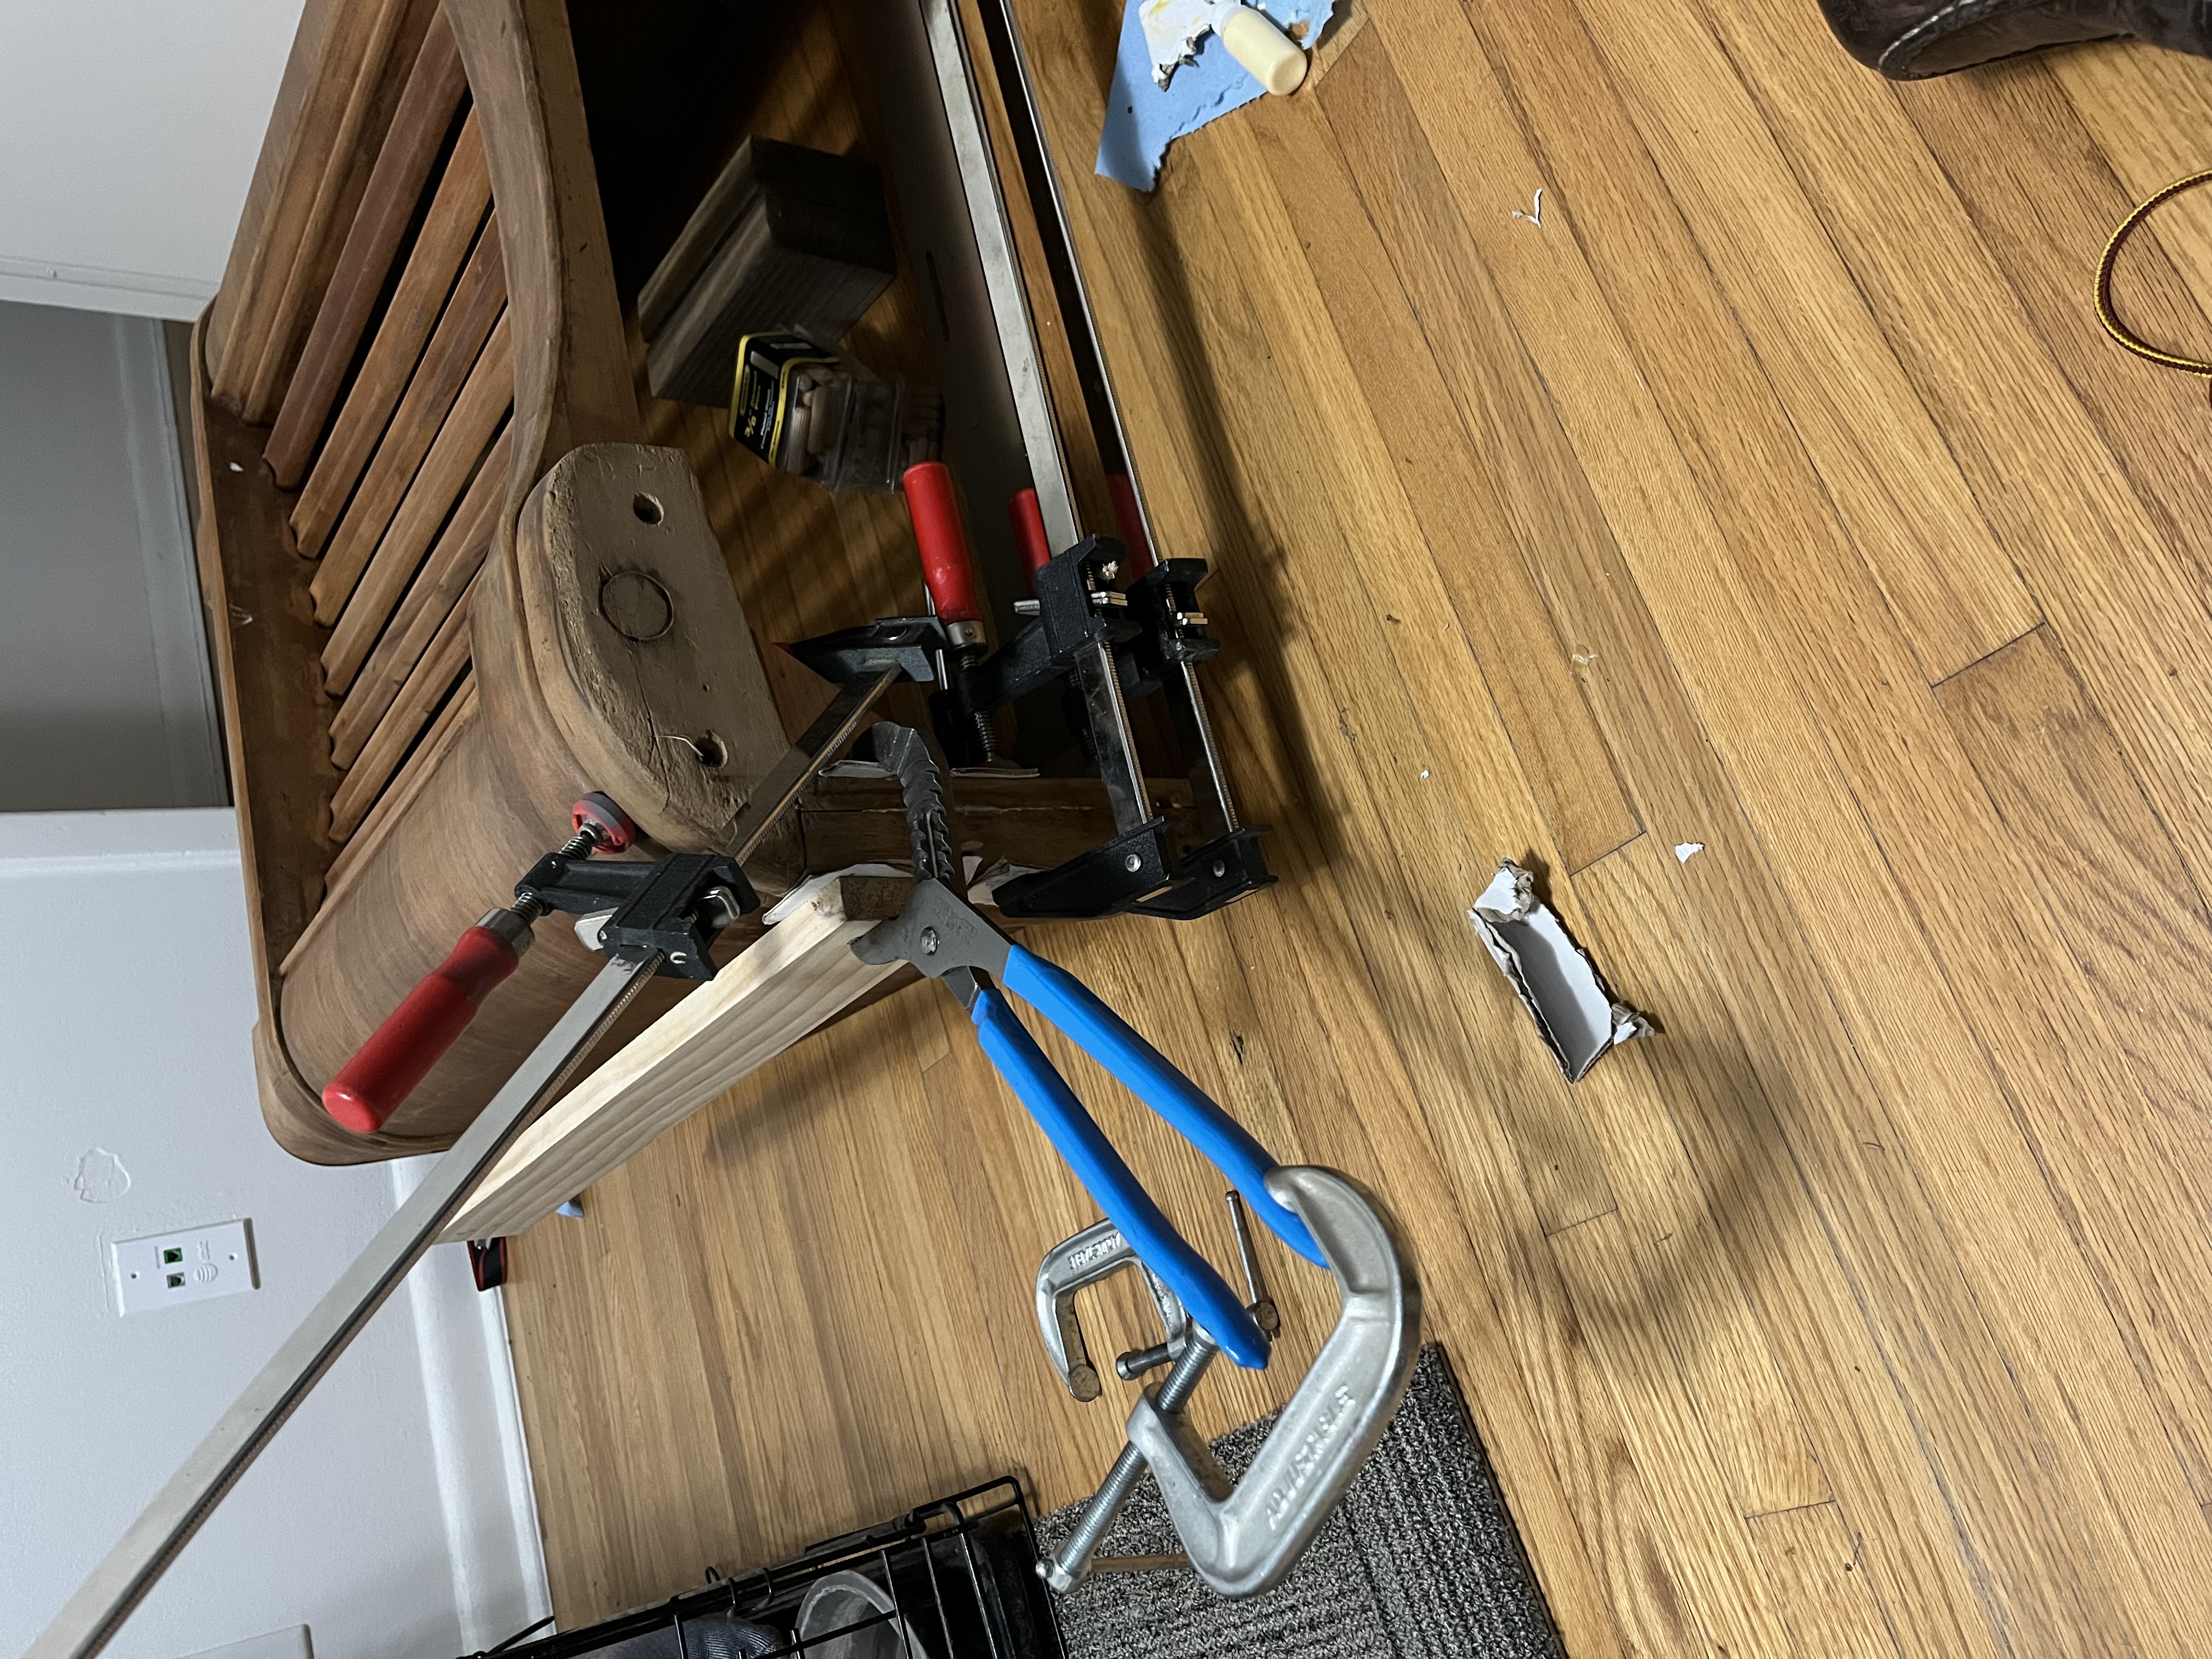
I have repaired a lot of loose veneer. Fortunately I was able to save almost all of the original, but there were a few spots which had chipped away. Here's a sample of the top of the radio, where I have repaired a few small chips.
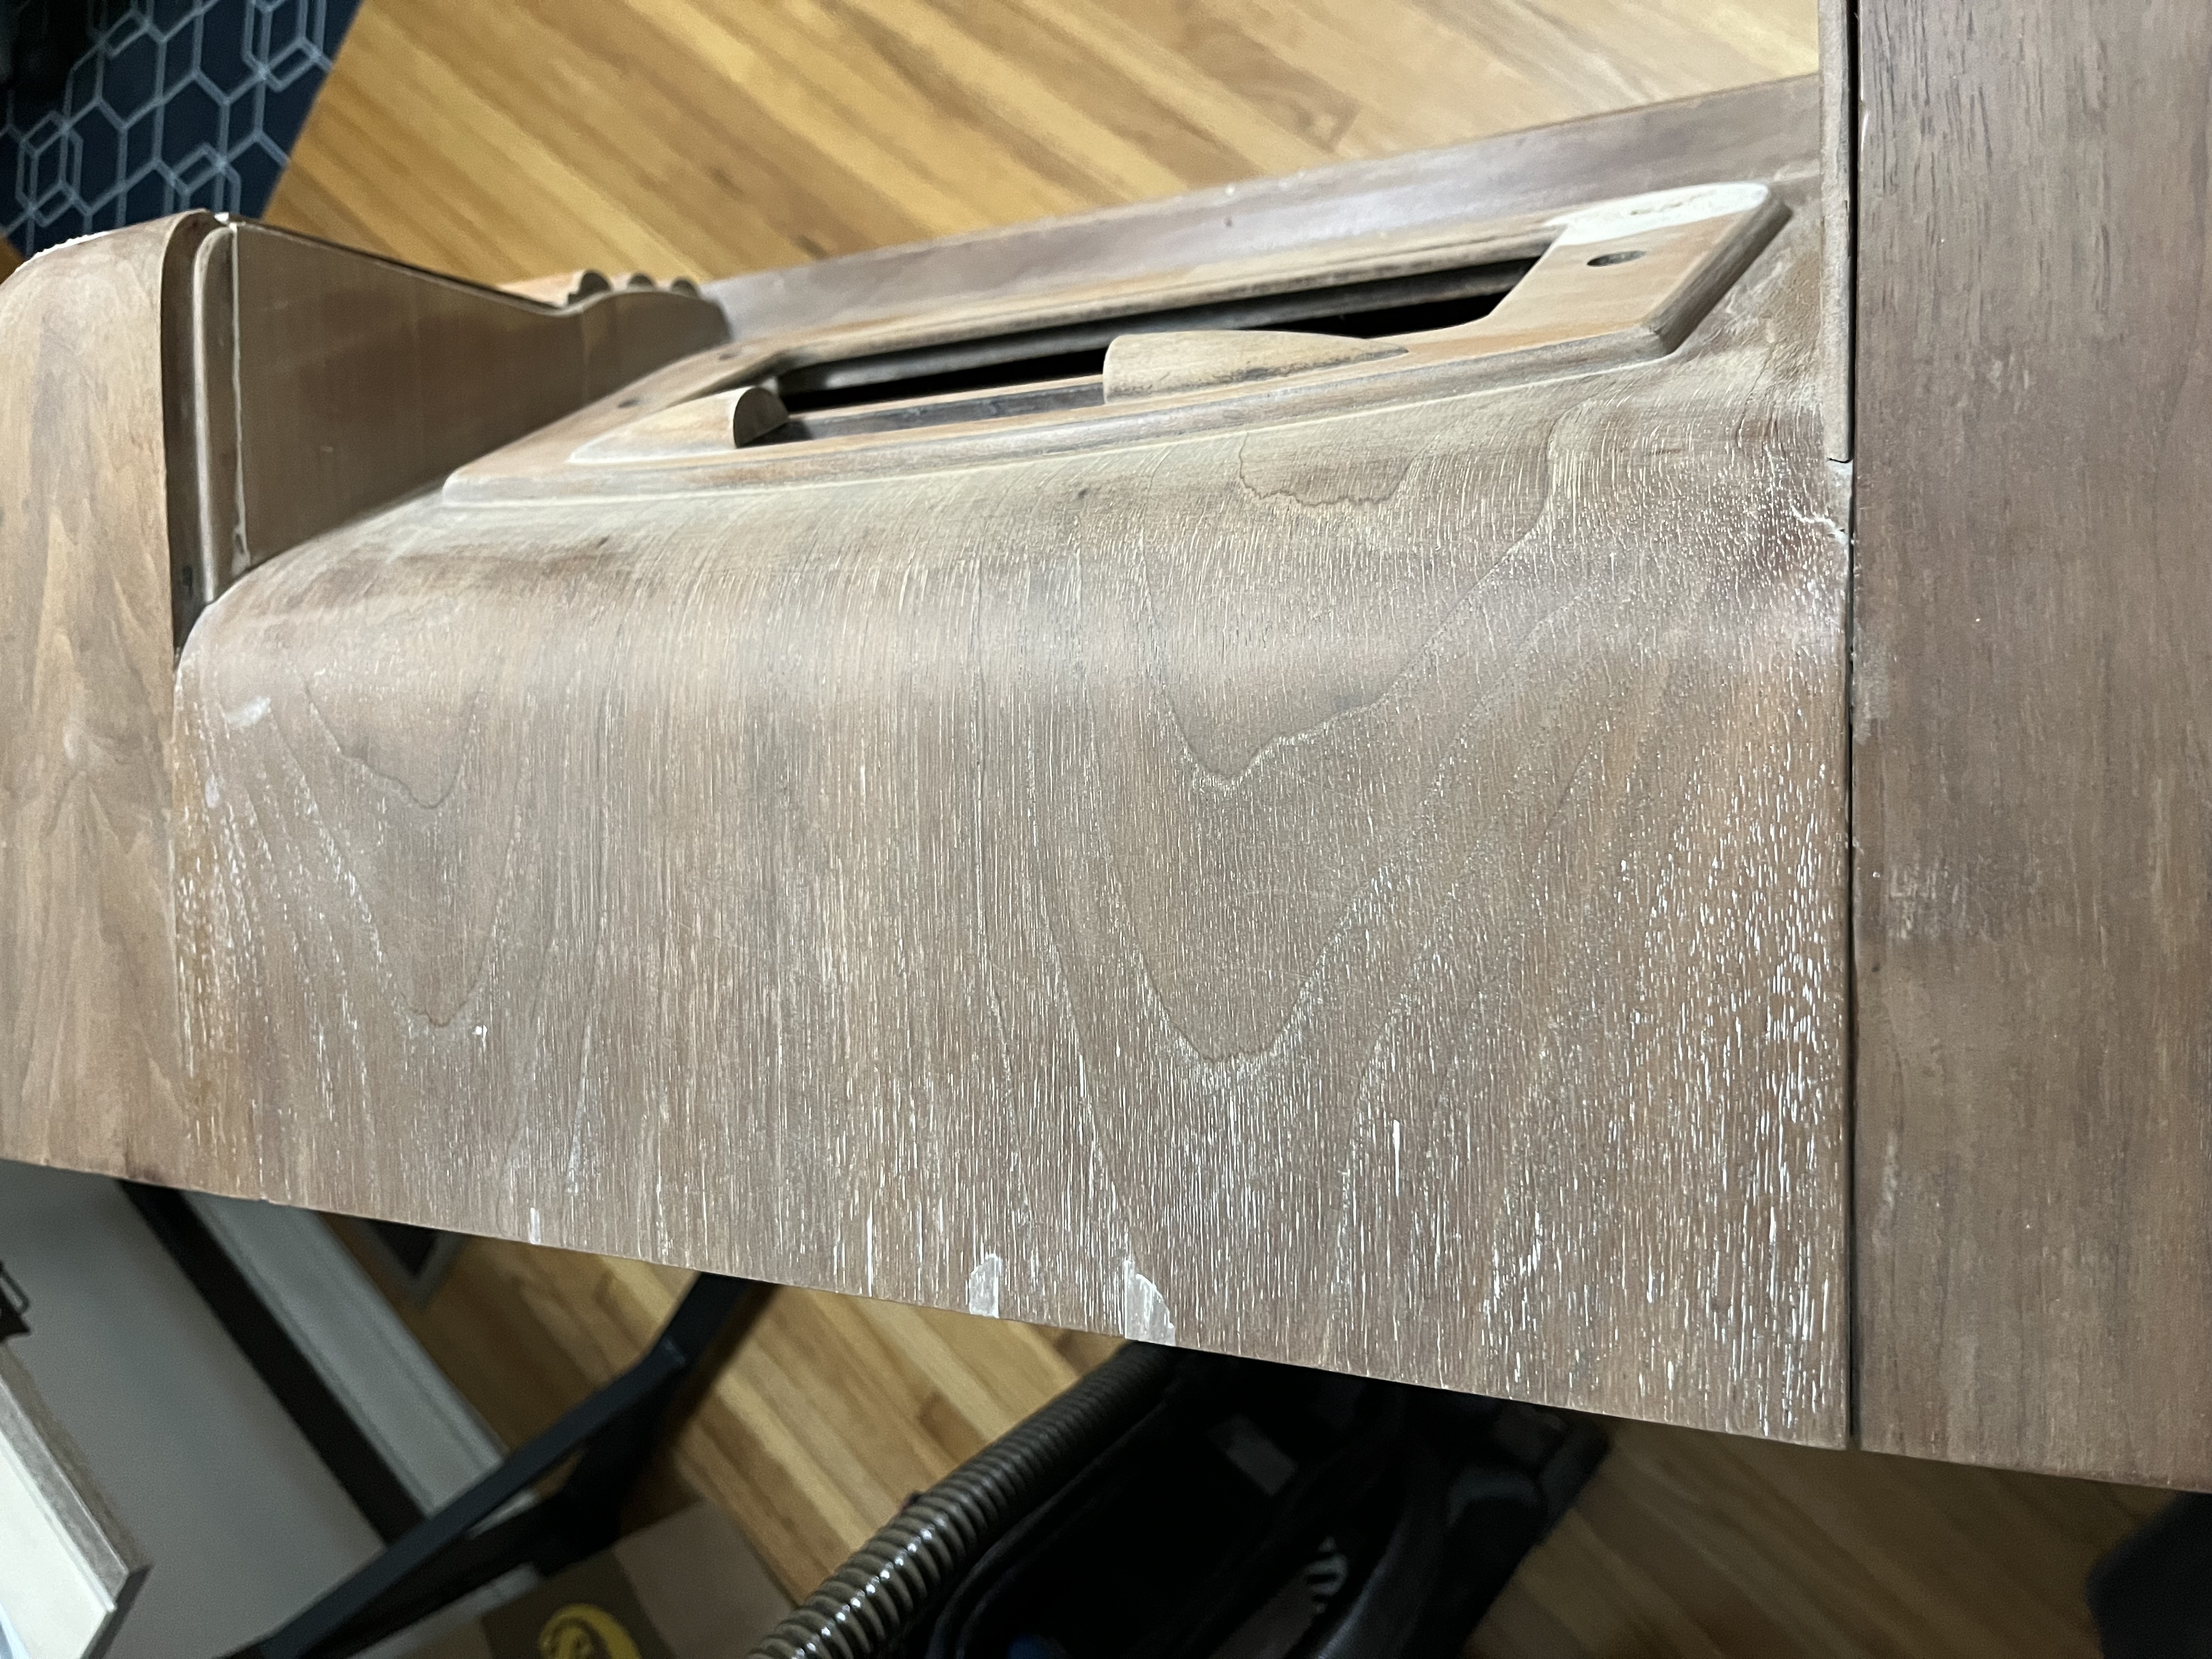
And here is a view of the left side of the cabinet (left when viewed from the front), where the veneer had been loose. I noticed that this piece was very brittle, and didn't fit back into place without some pretty noticeable gaps. So I ended up cutting off this loose piece at its base, and spliced in a patch of the same walnut veneer I had used on the top.
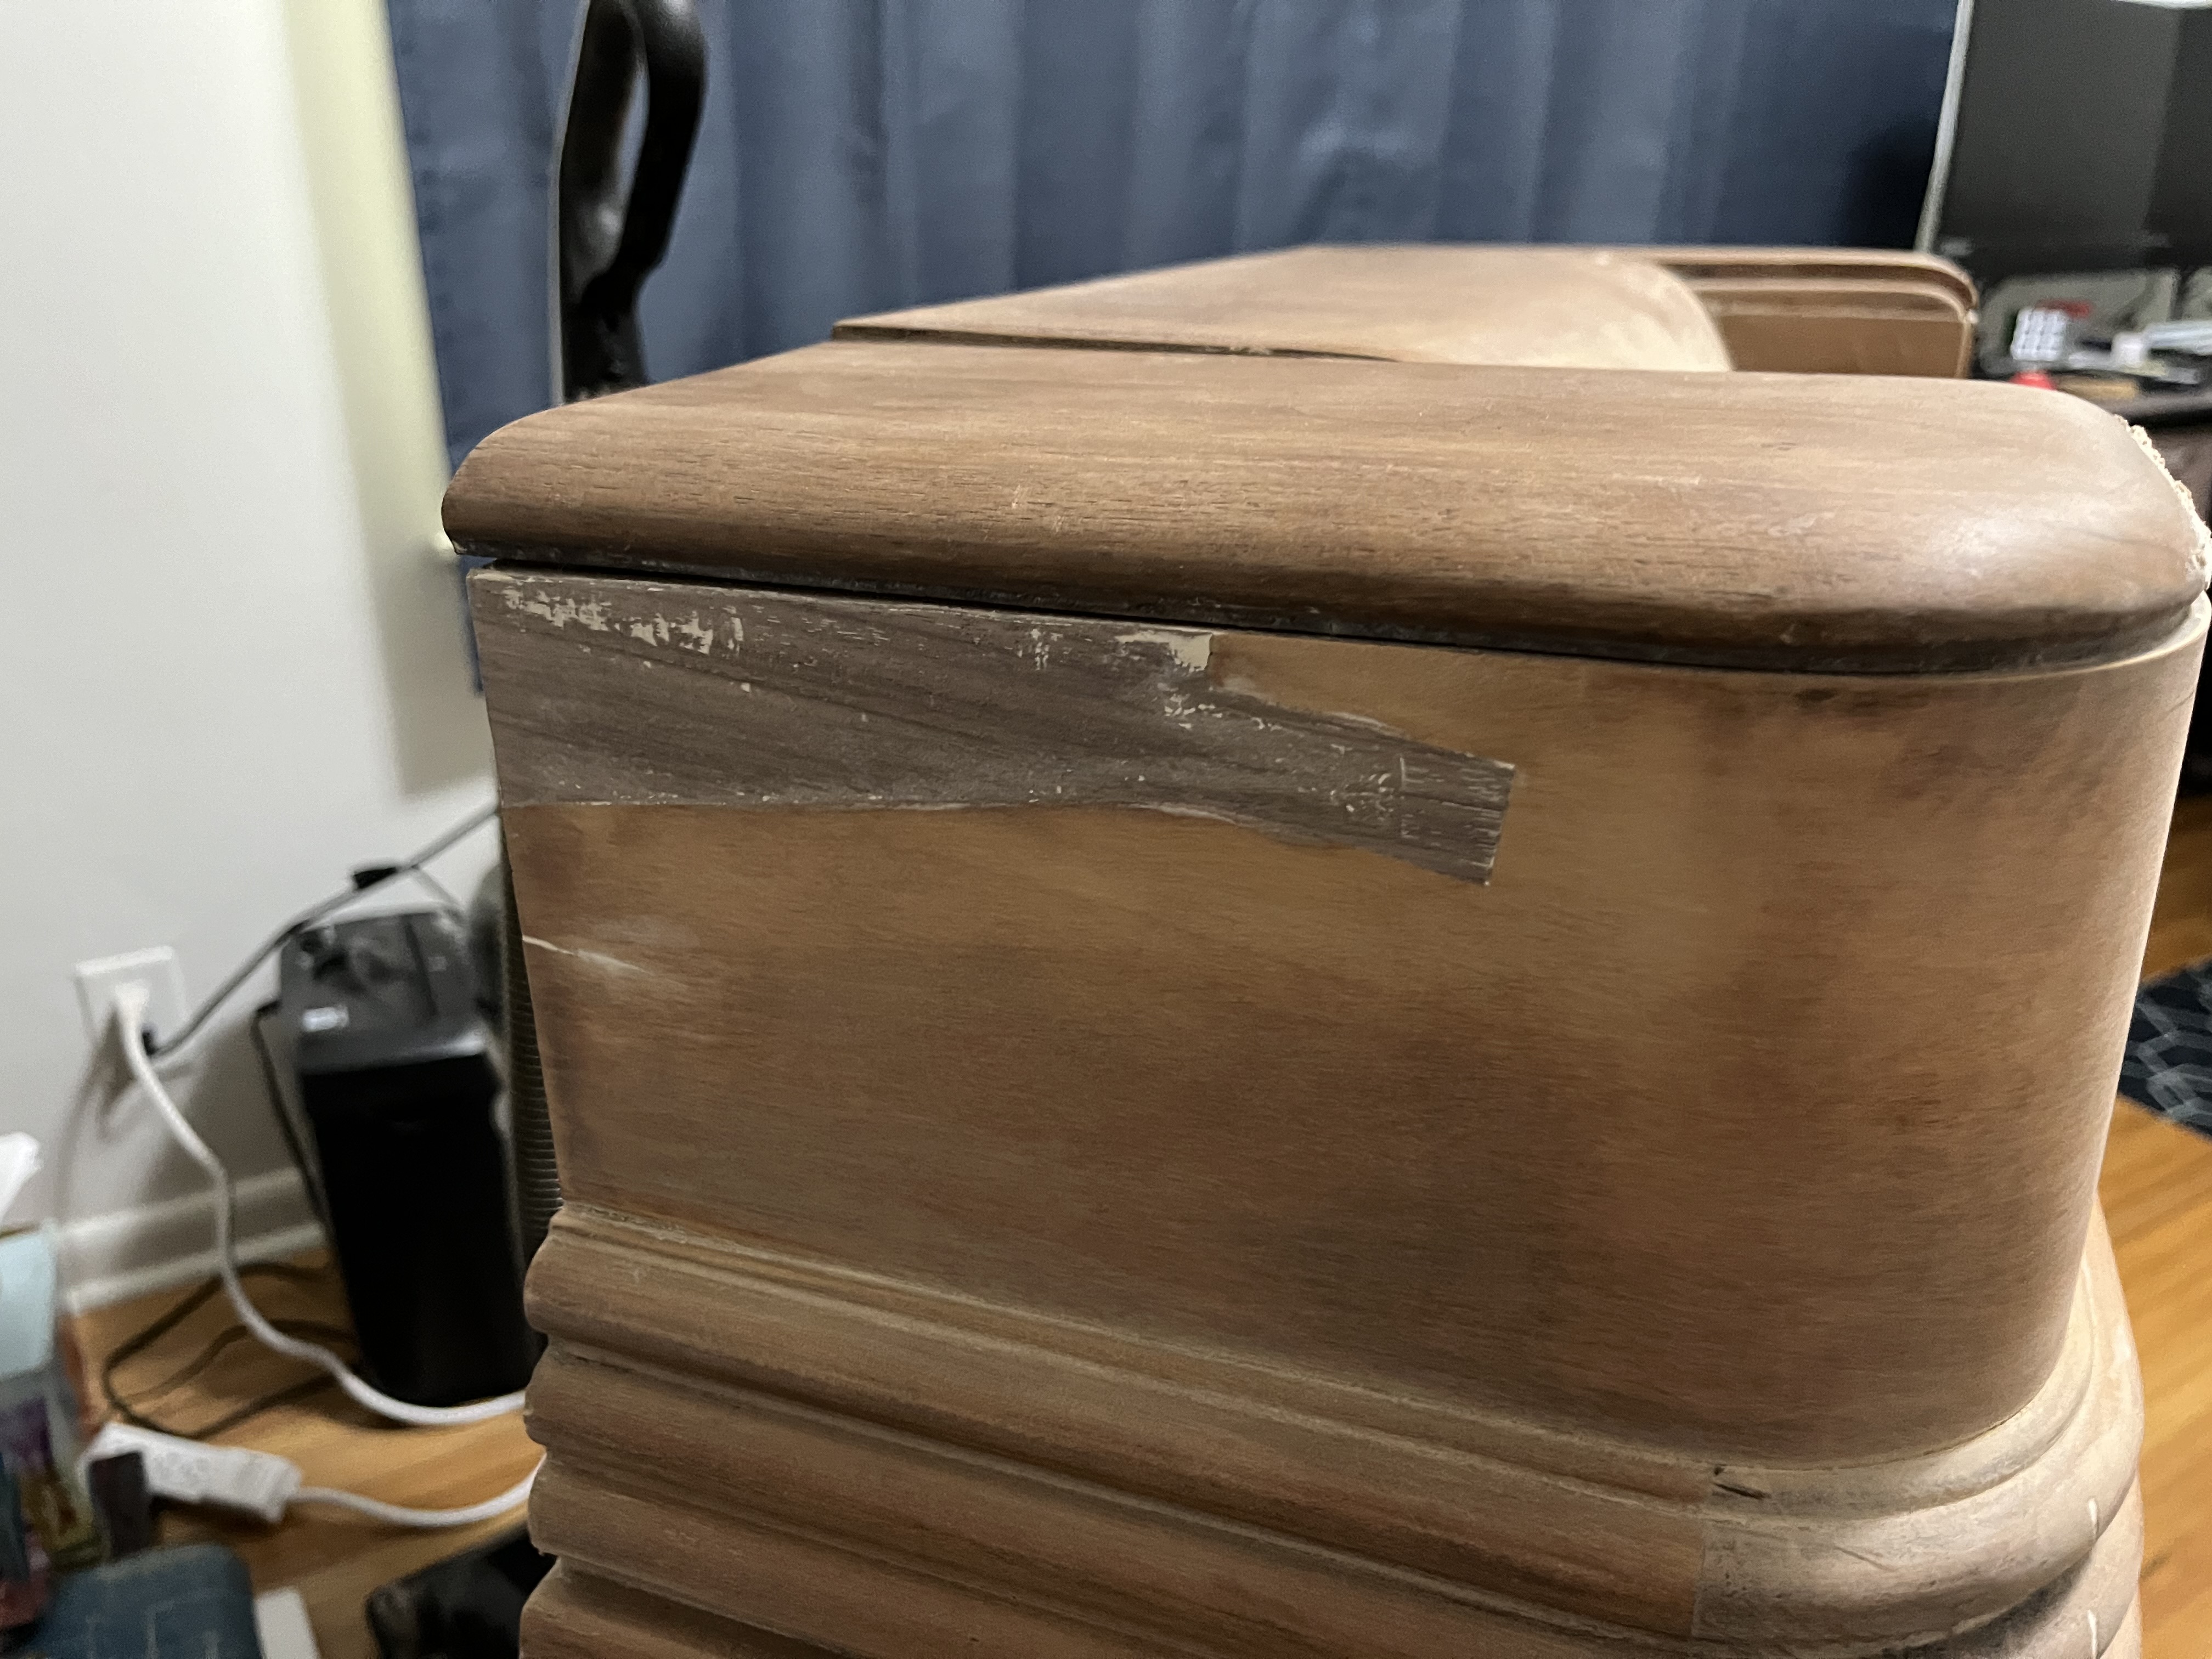
In hindsight, I wish I would have ordered a larger piece of veneer to use for patching. I bought a 2" tall reel of 100 inches, intended for edging. The only disadvantage in this situation was that I needed to angle it a bit for the grain to point upward toward the back of the cabinet (to match the direction of the grain on the rest of the original veneer), meaning that I ran out of height on the veneer to taper it where you can see that cut straight across the grain. It fits beautifully, but I don't like that cut. I feel like it will be more visible that way. But I will see what magic I can pull off on the color blending. Maybe it won't be so bad; then again, maybe I will reattempt the patch. I'd like for the splice line to look less obvious.
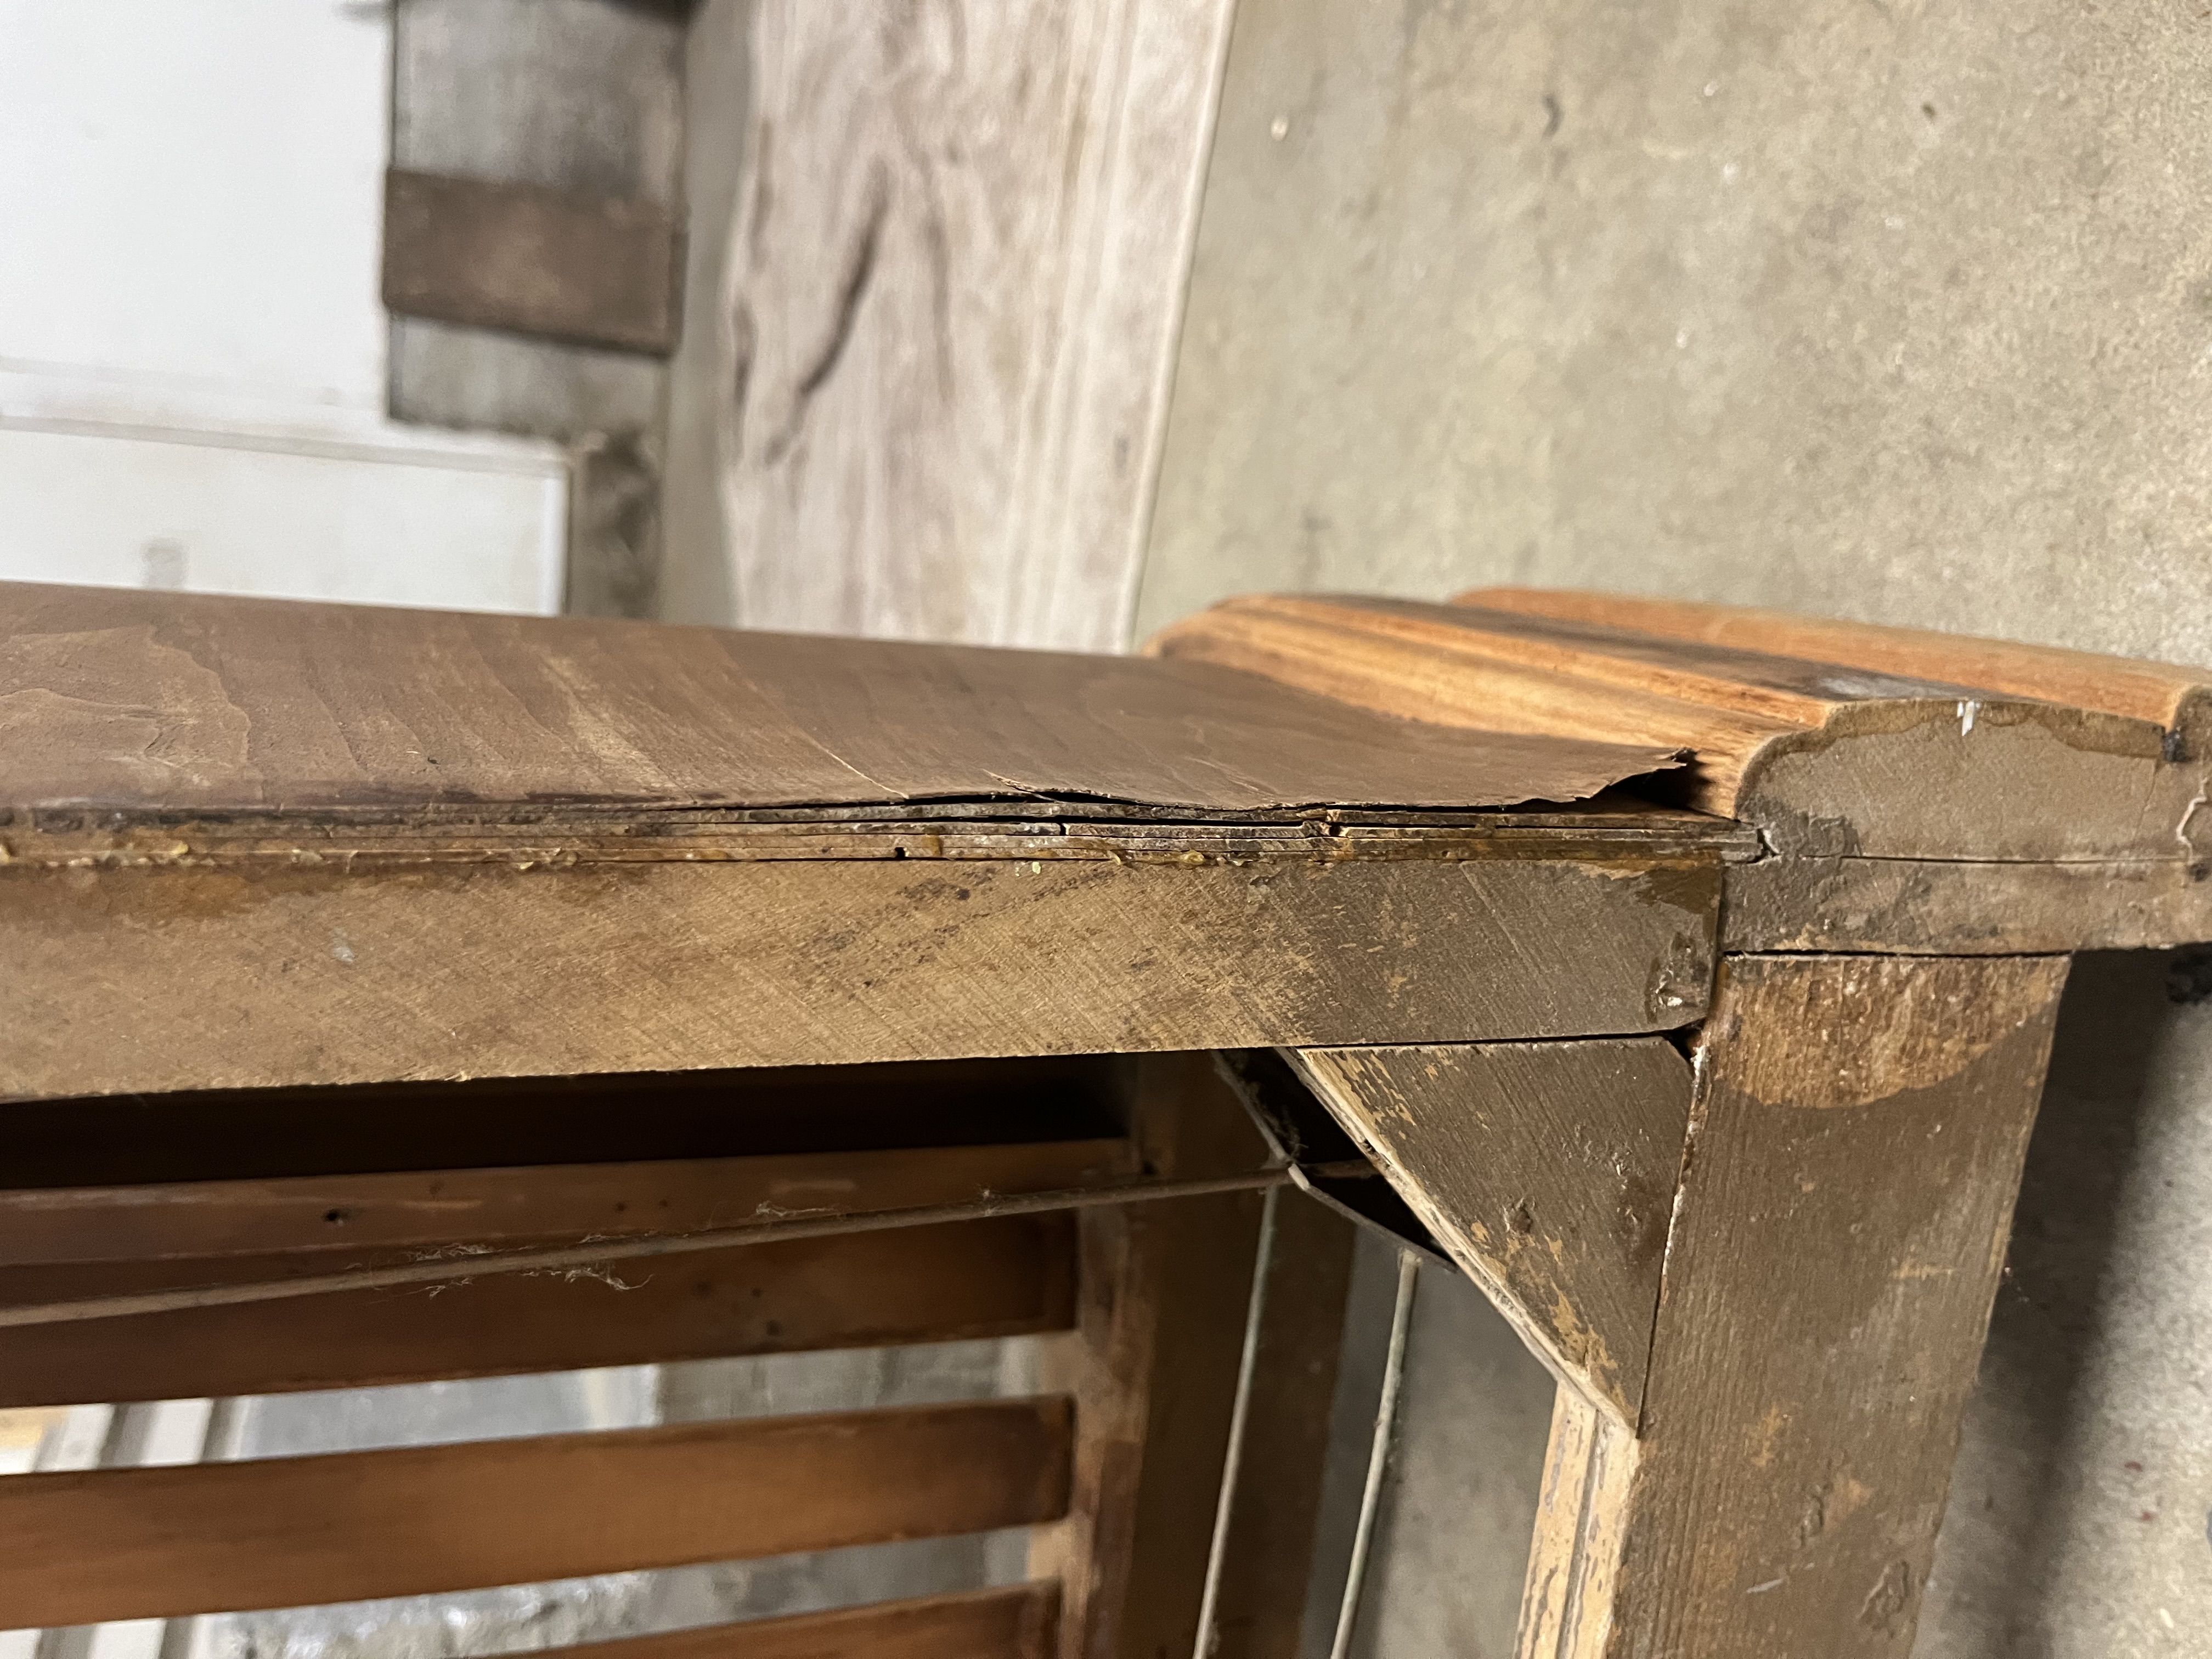
I also reglued all of the veneer which was loose on the lower part of that side. Here's a before and after.
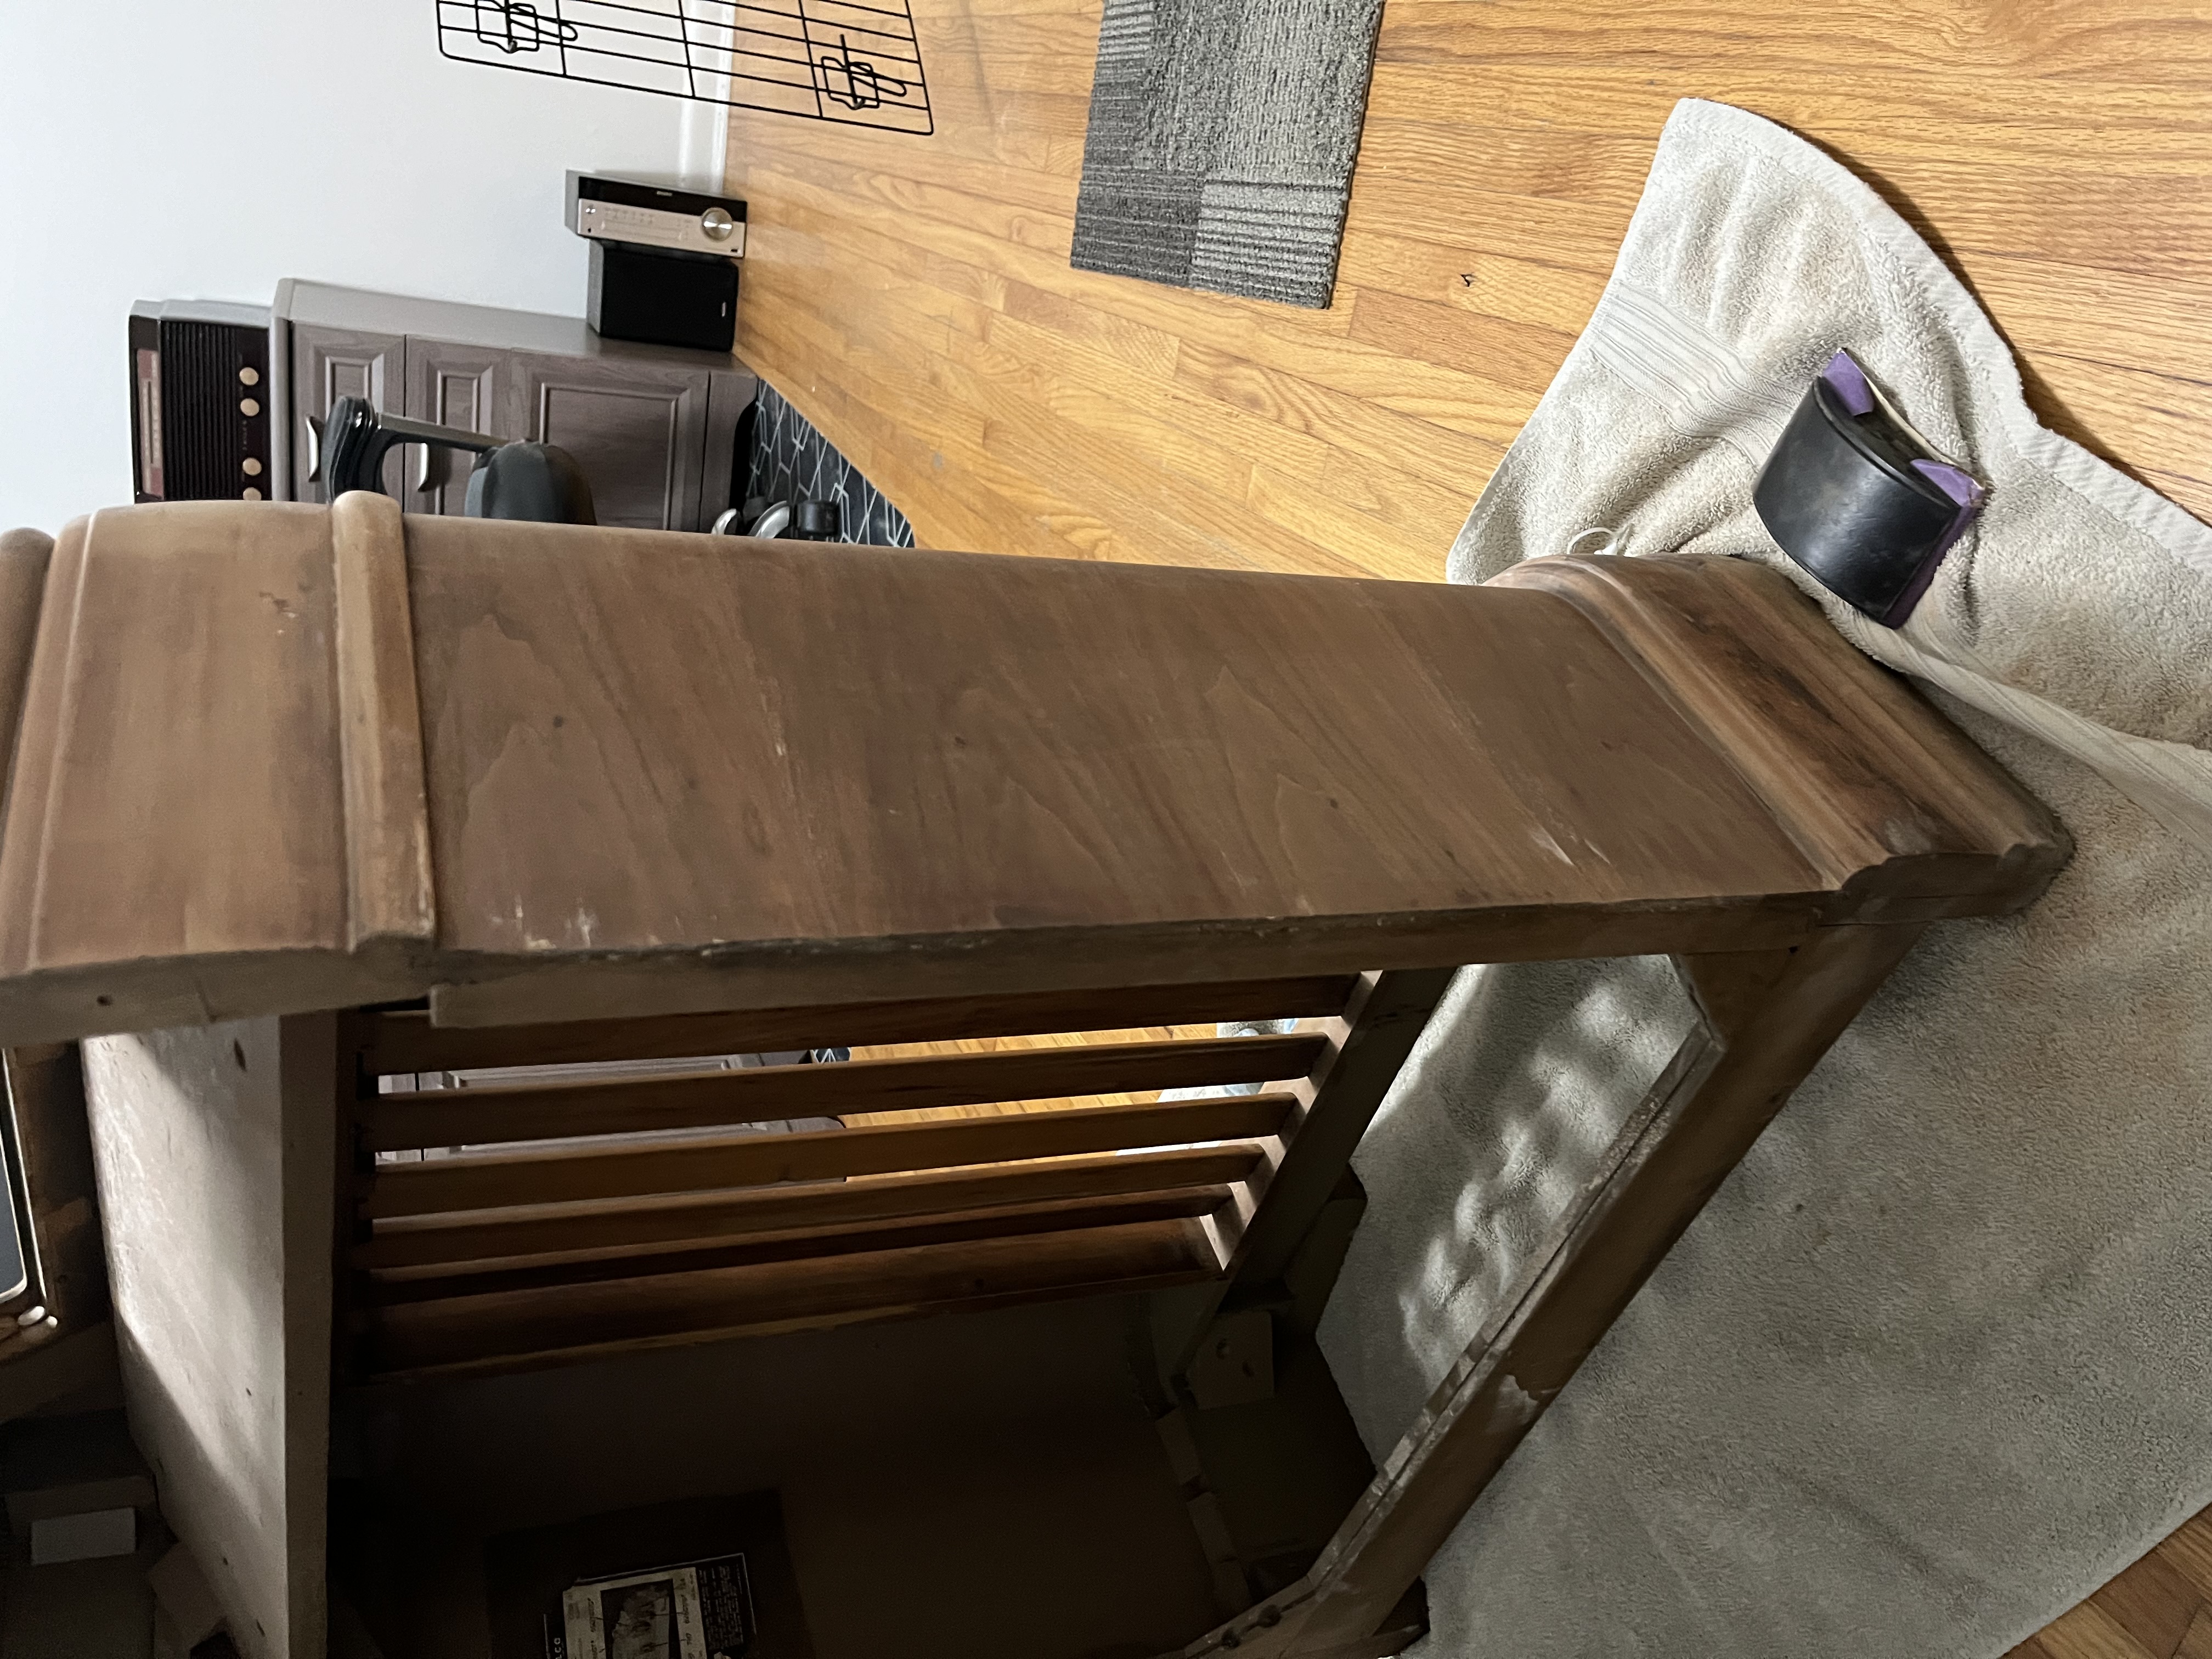
Here's a close-up of the black stain on top which was under the water ring mark. I have applied about 15 to 20 coats of vinegar, and I am starting to notice it fading. I will keep at it.
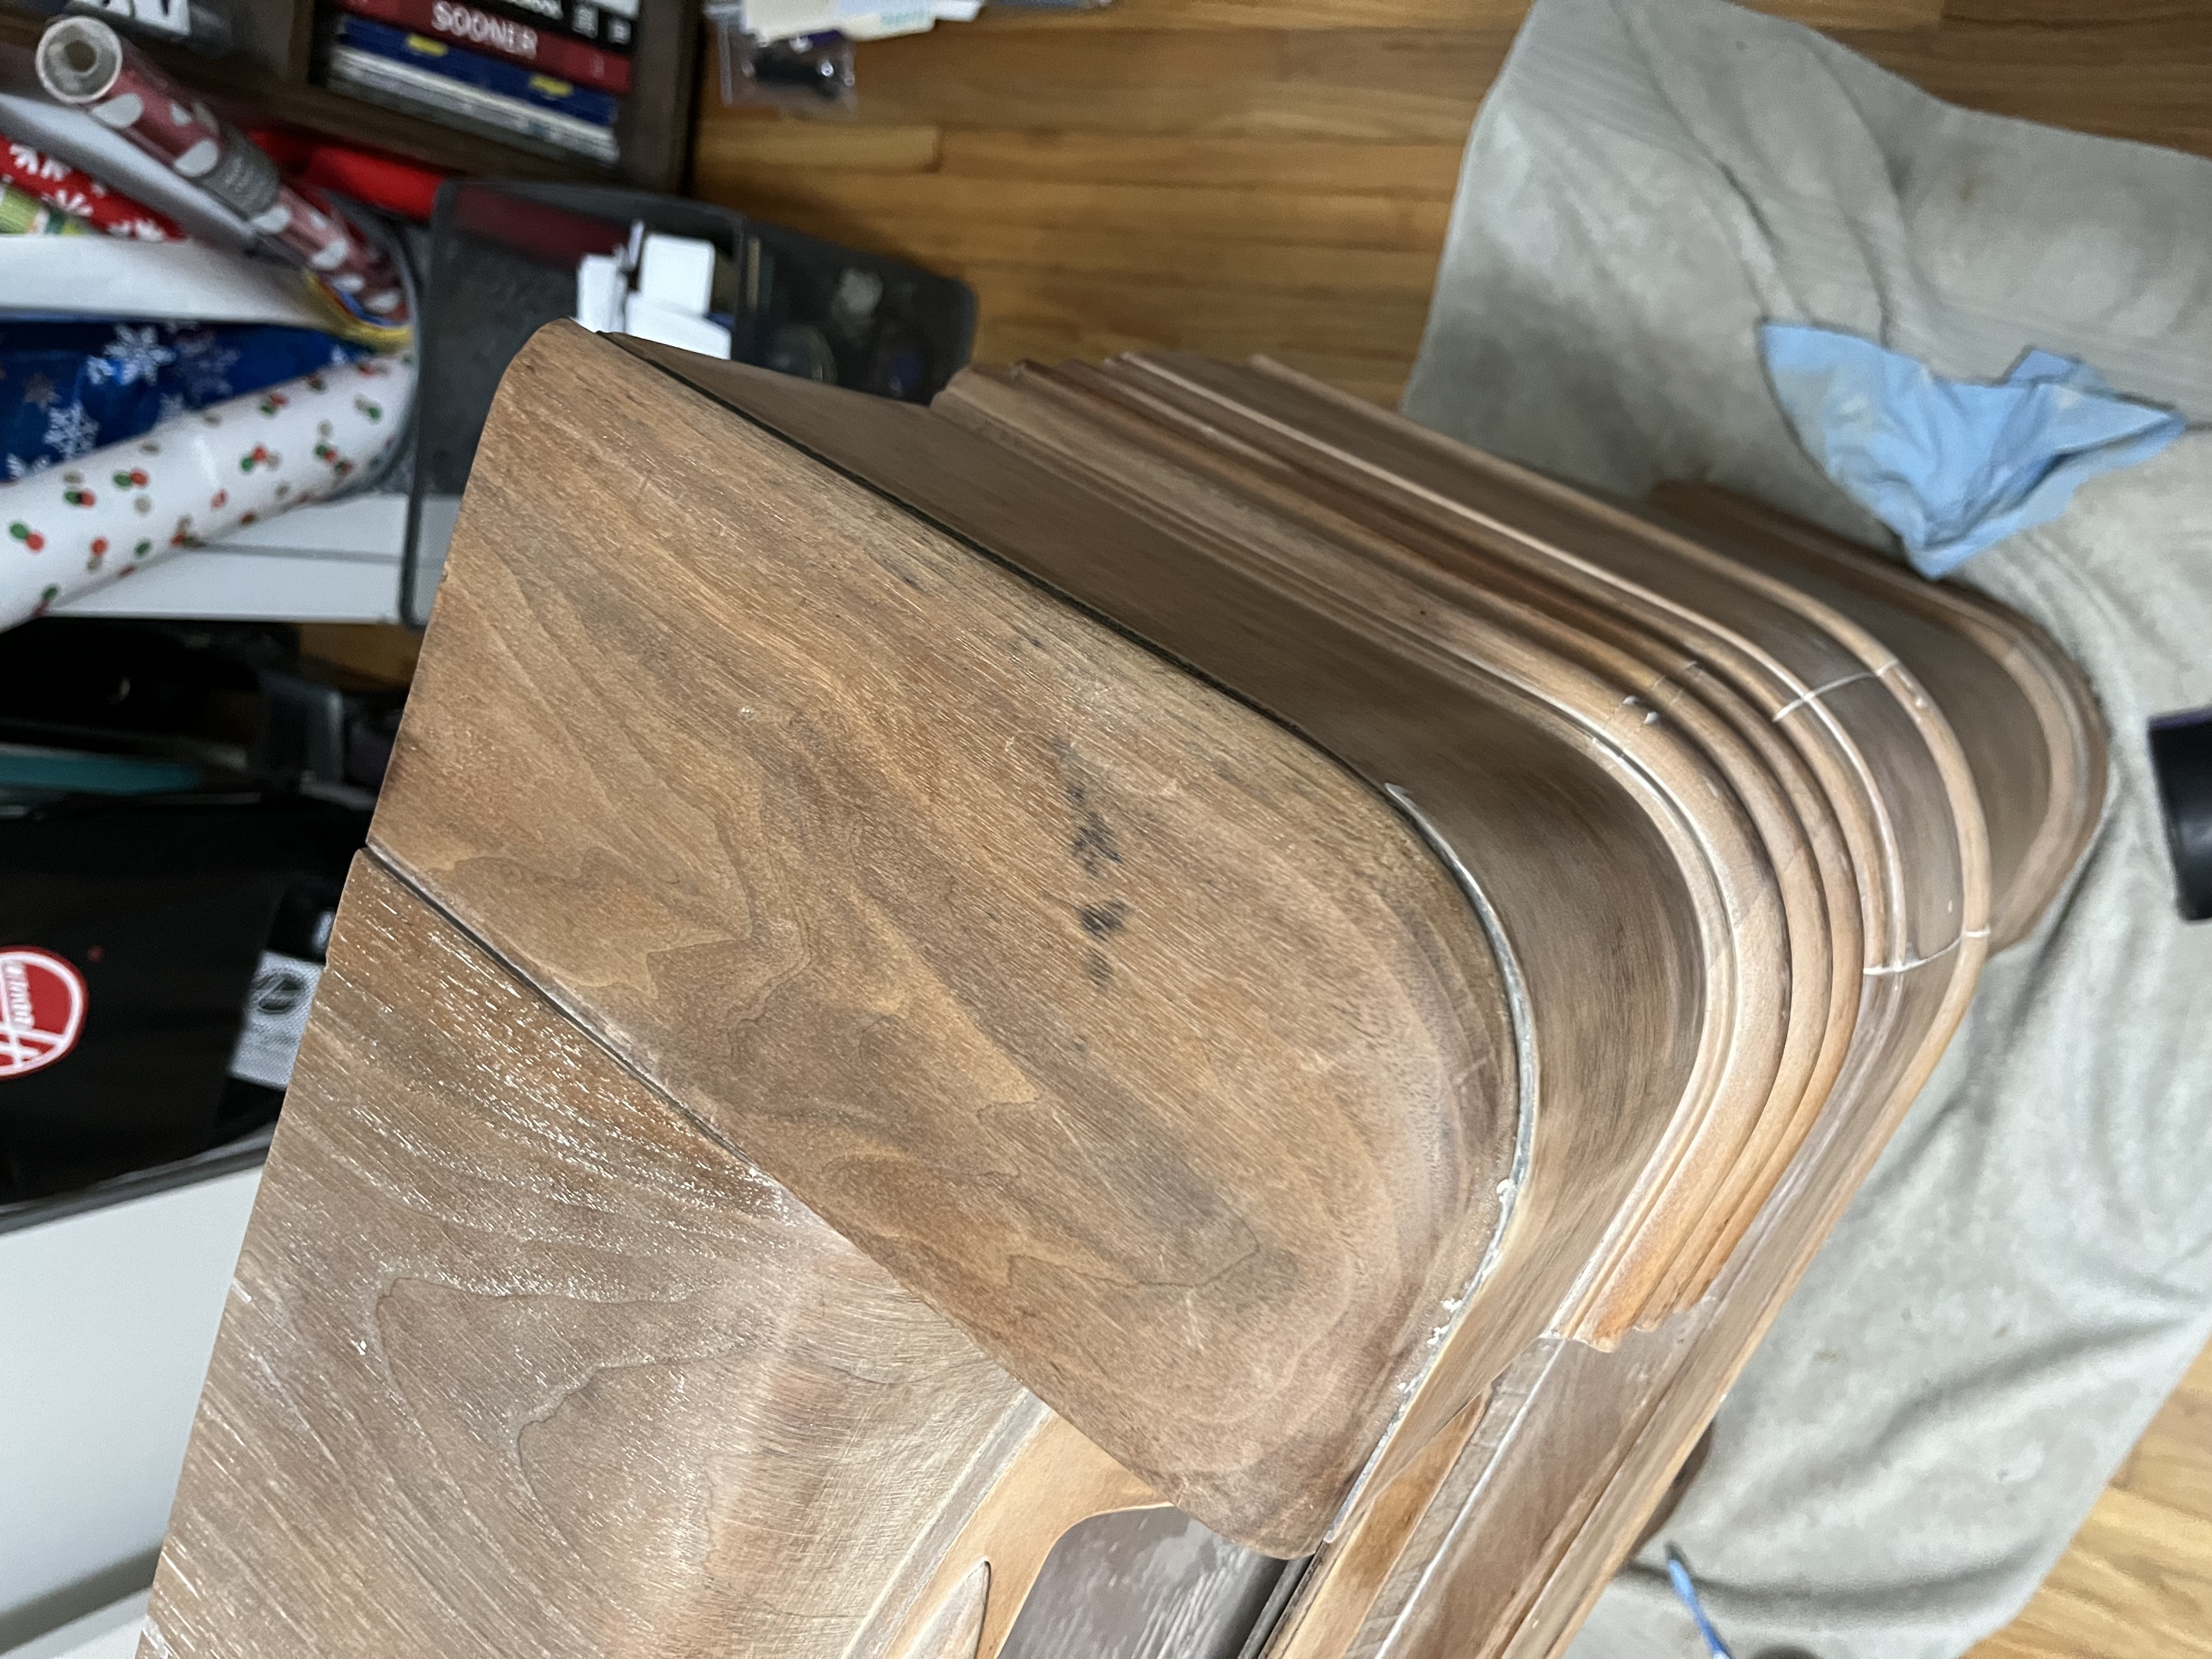
I have also ordered and received the replacement speaker fabric, purchased from Michael Katz. I ordered a 20" x 24" piece of the type 11A cloth, and it's beautiful!
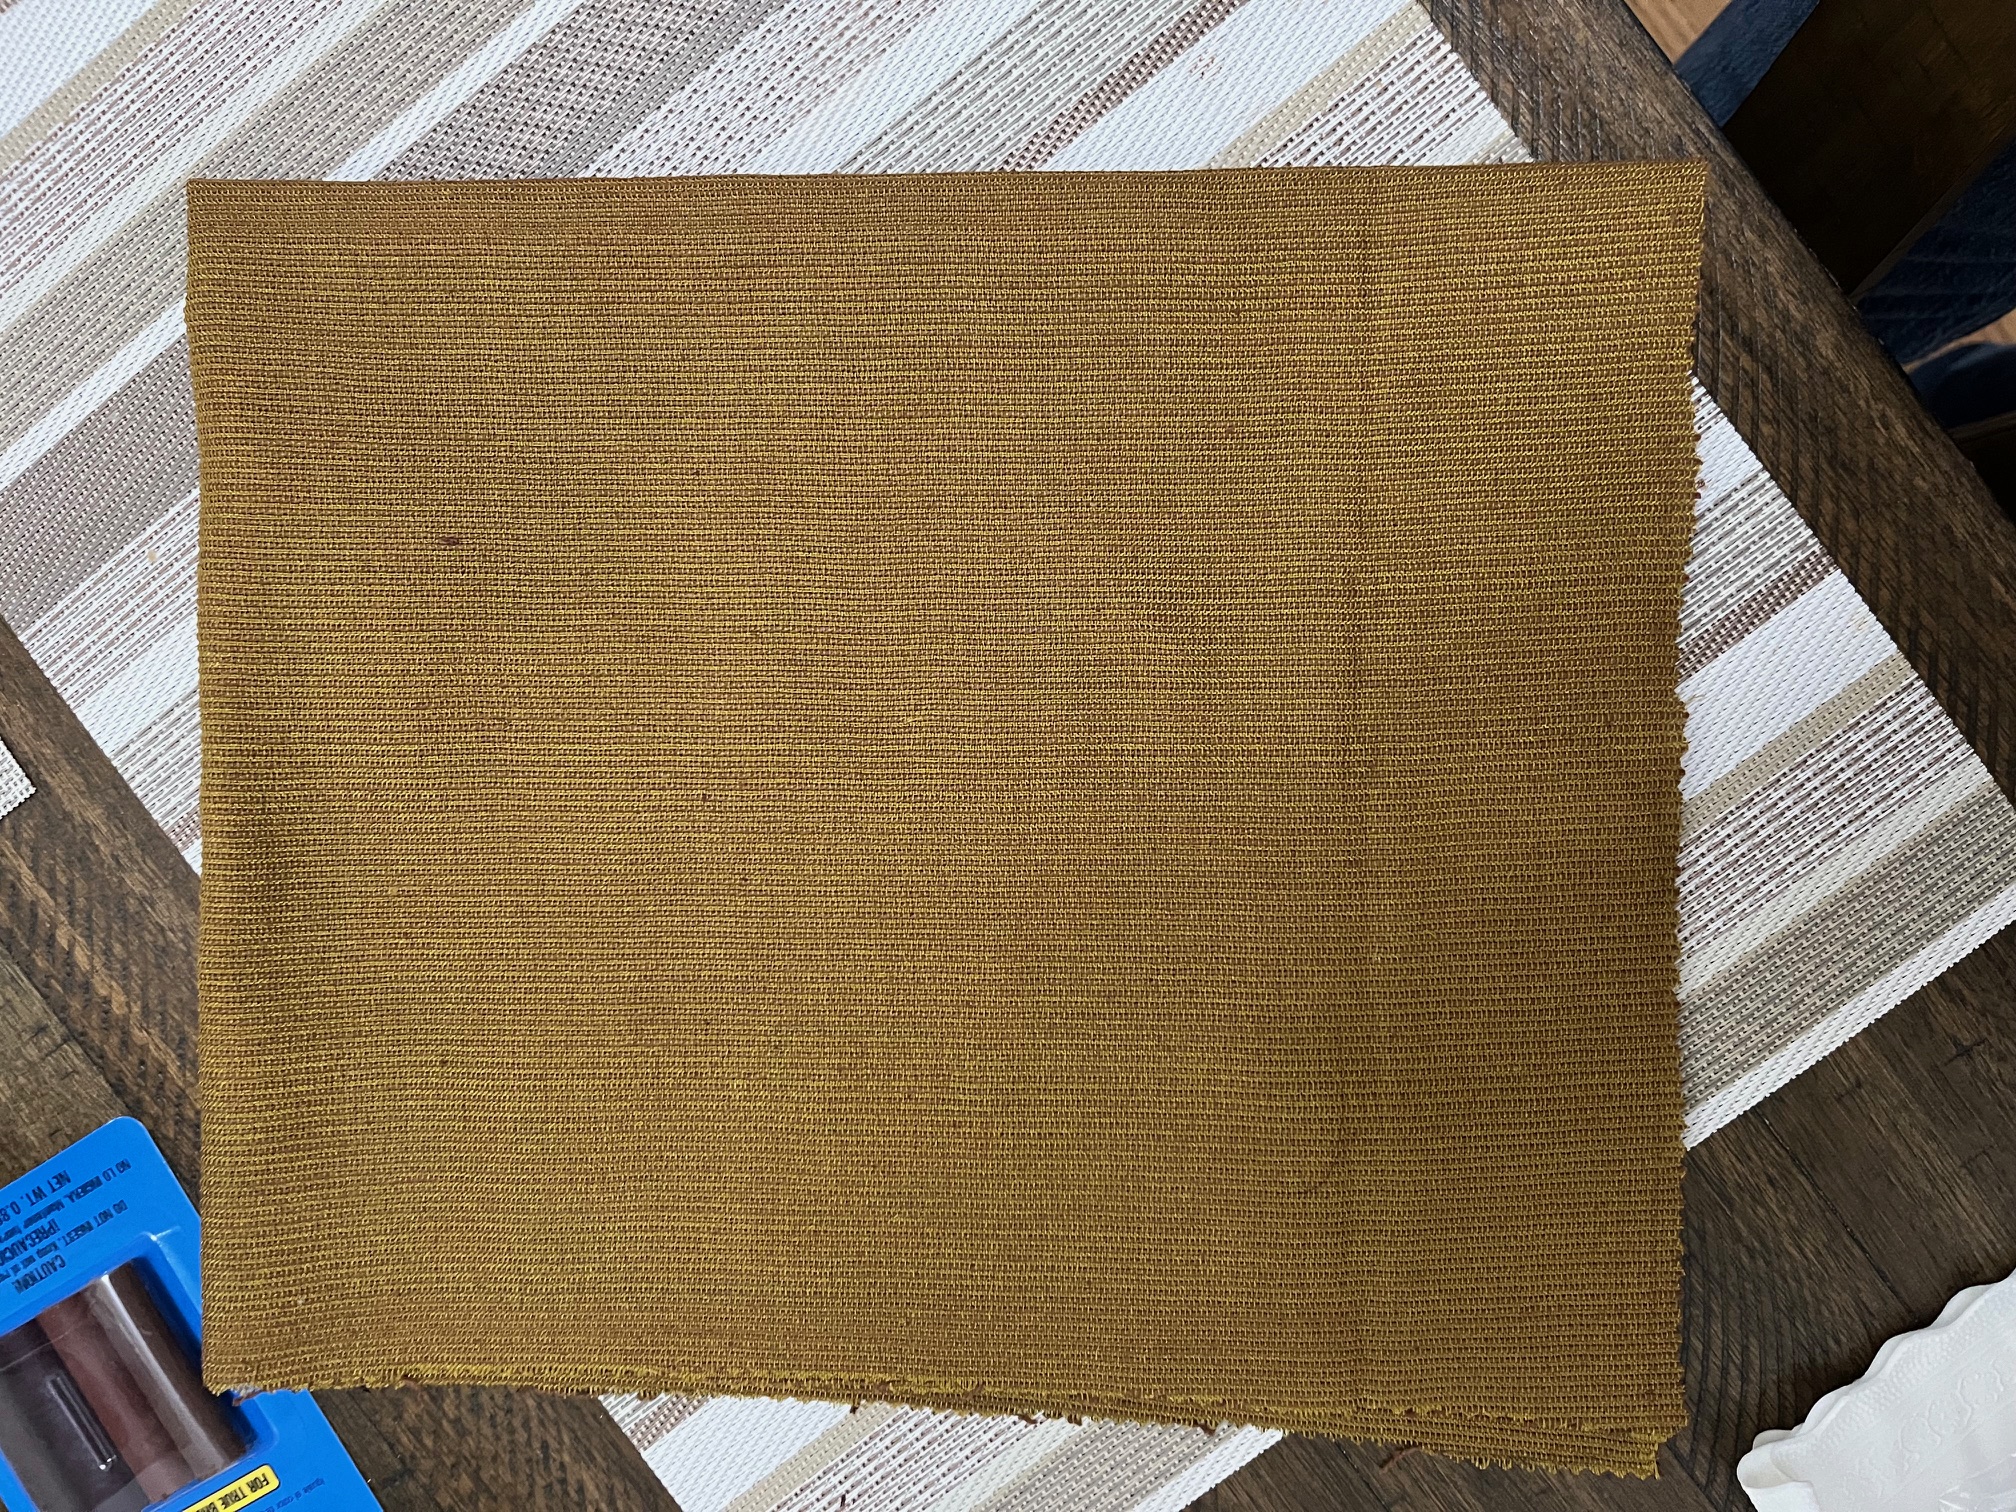
I've spent a couple of full days also working on filling cracks with filler. It's been slow--applying putty, letting it dry, and sanding back down. Yet, slowly I am starting to see a very nice radio!
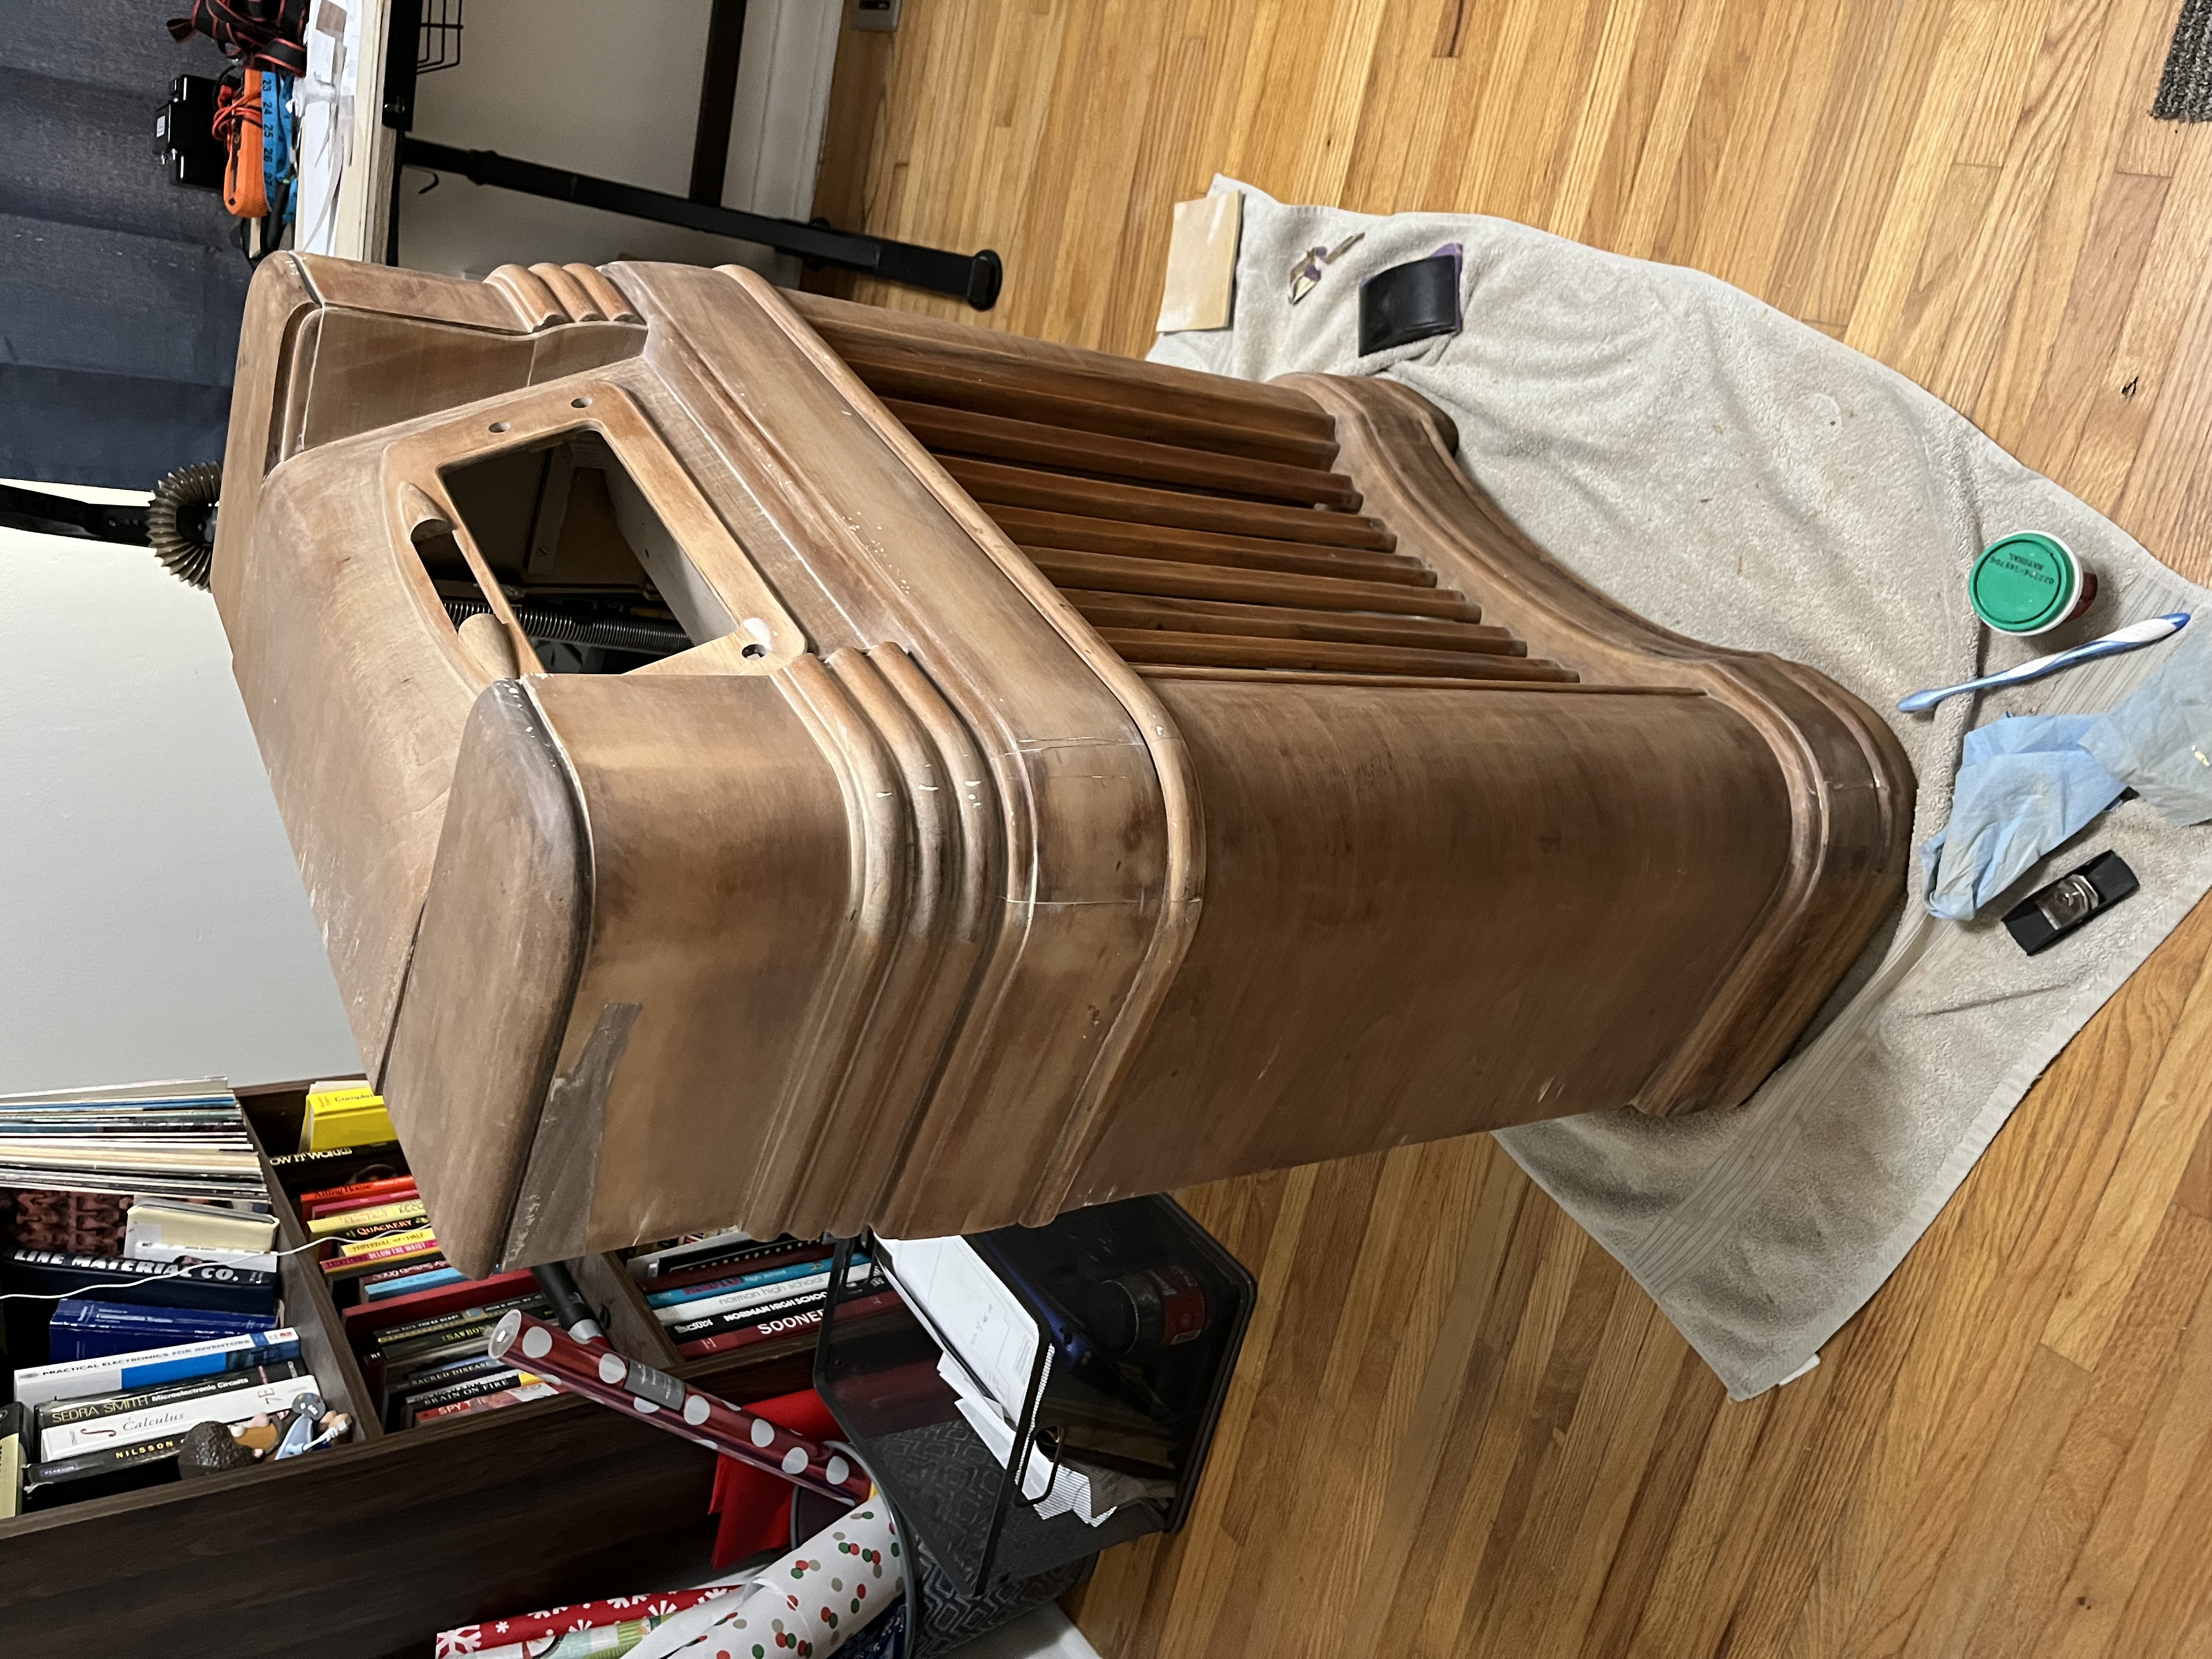
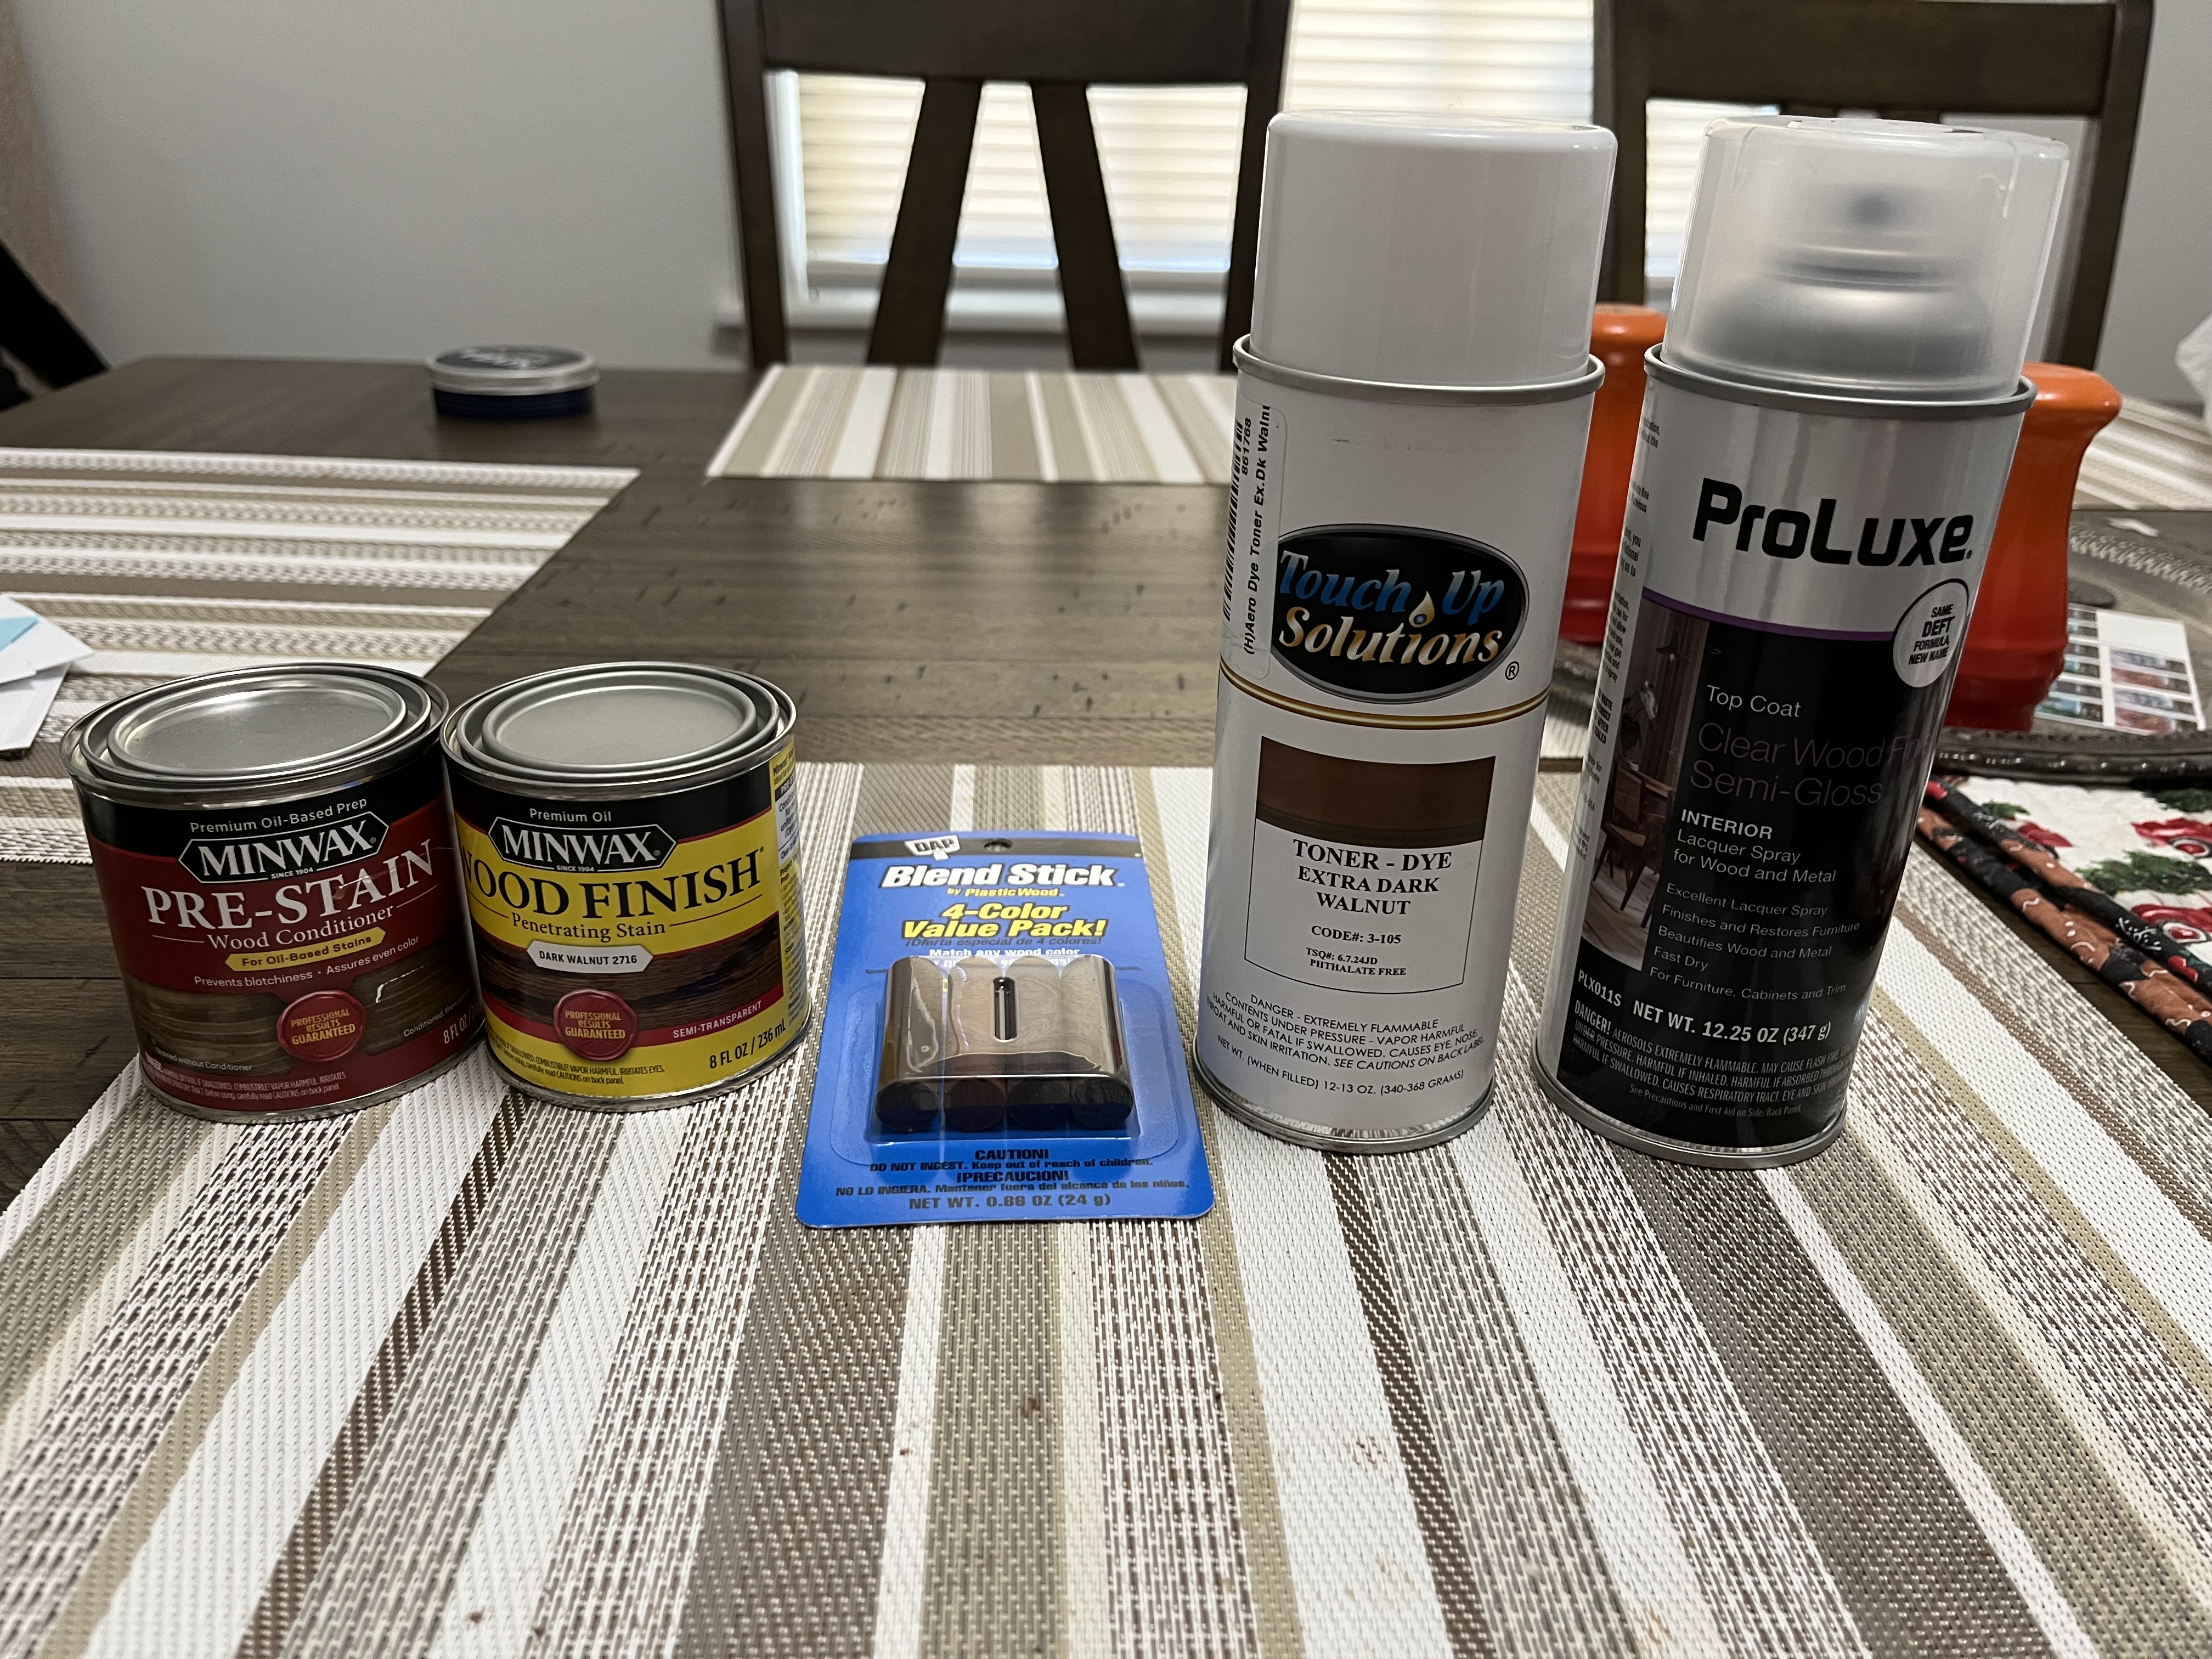
I think that I am on track to stain the cabinet next weekend. Here's the colors I have picked out. I plan to stain the entire cabinet, add the toner to the trim for added contrast, use the color matching crayons to blend any light spots, and then lacquer the entire cabinet. I will apply one coat of lacquer, and then hold off for the decals I have on order before applying the rest of the coats. I'd like to protect those under the lacquer.
Joseph
Philco 46-480
Philco 49-906
Posts: 287
Threads: 16
Joined: Jan 2024
City: Tulsa
State, Province, Country: Oklahoma
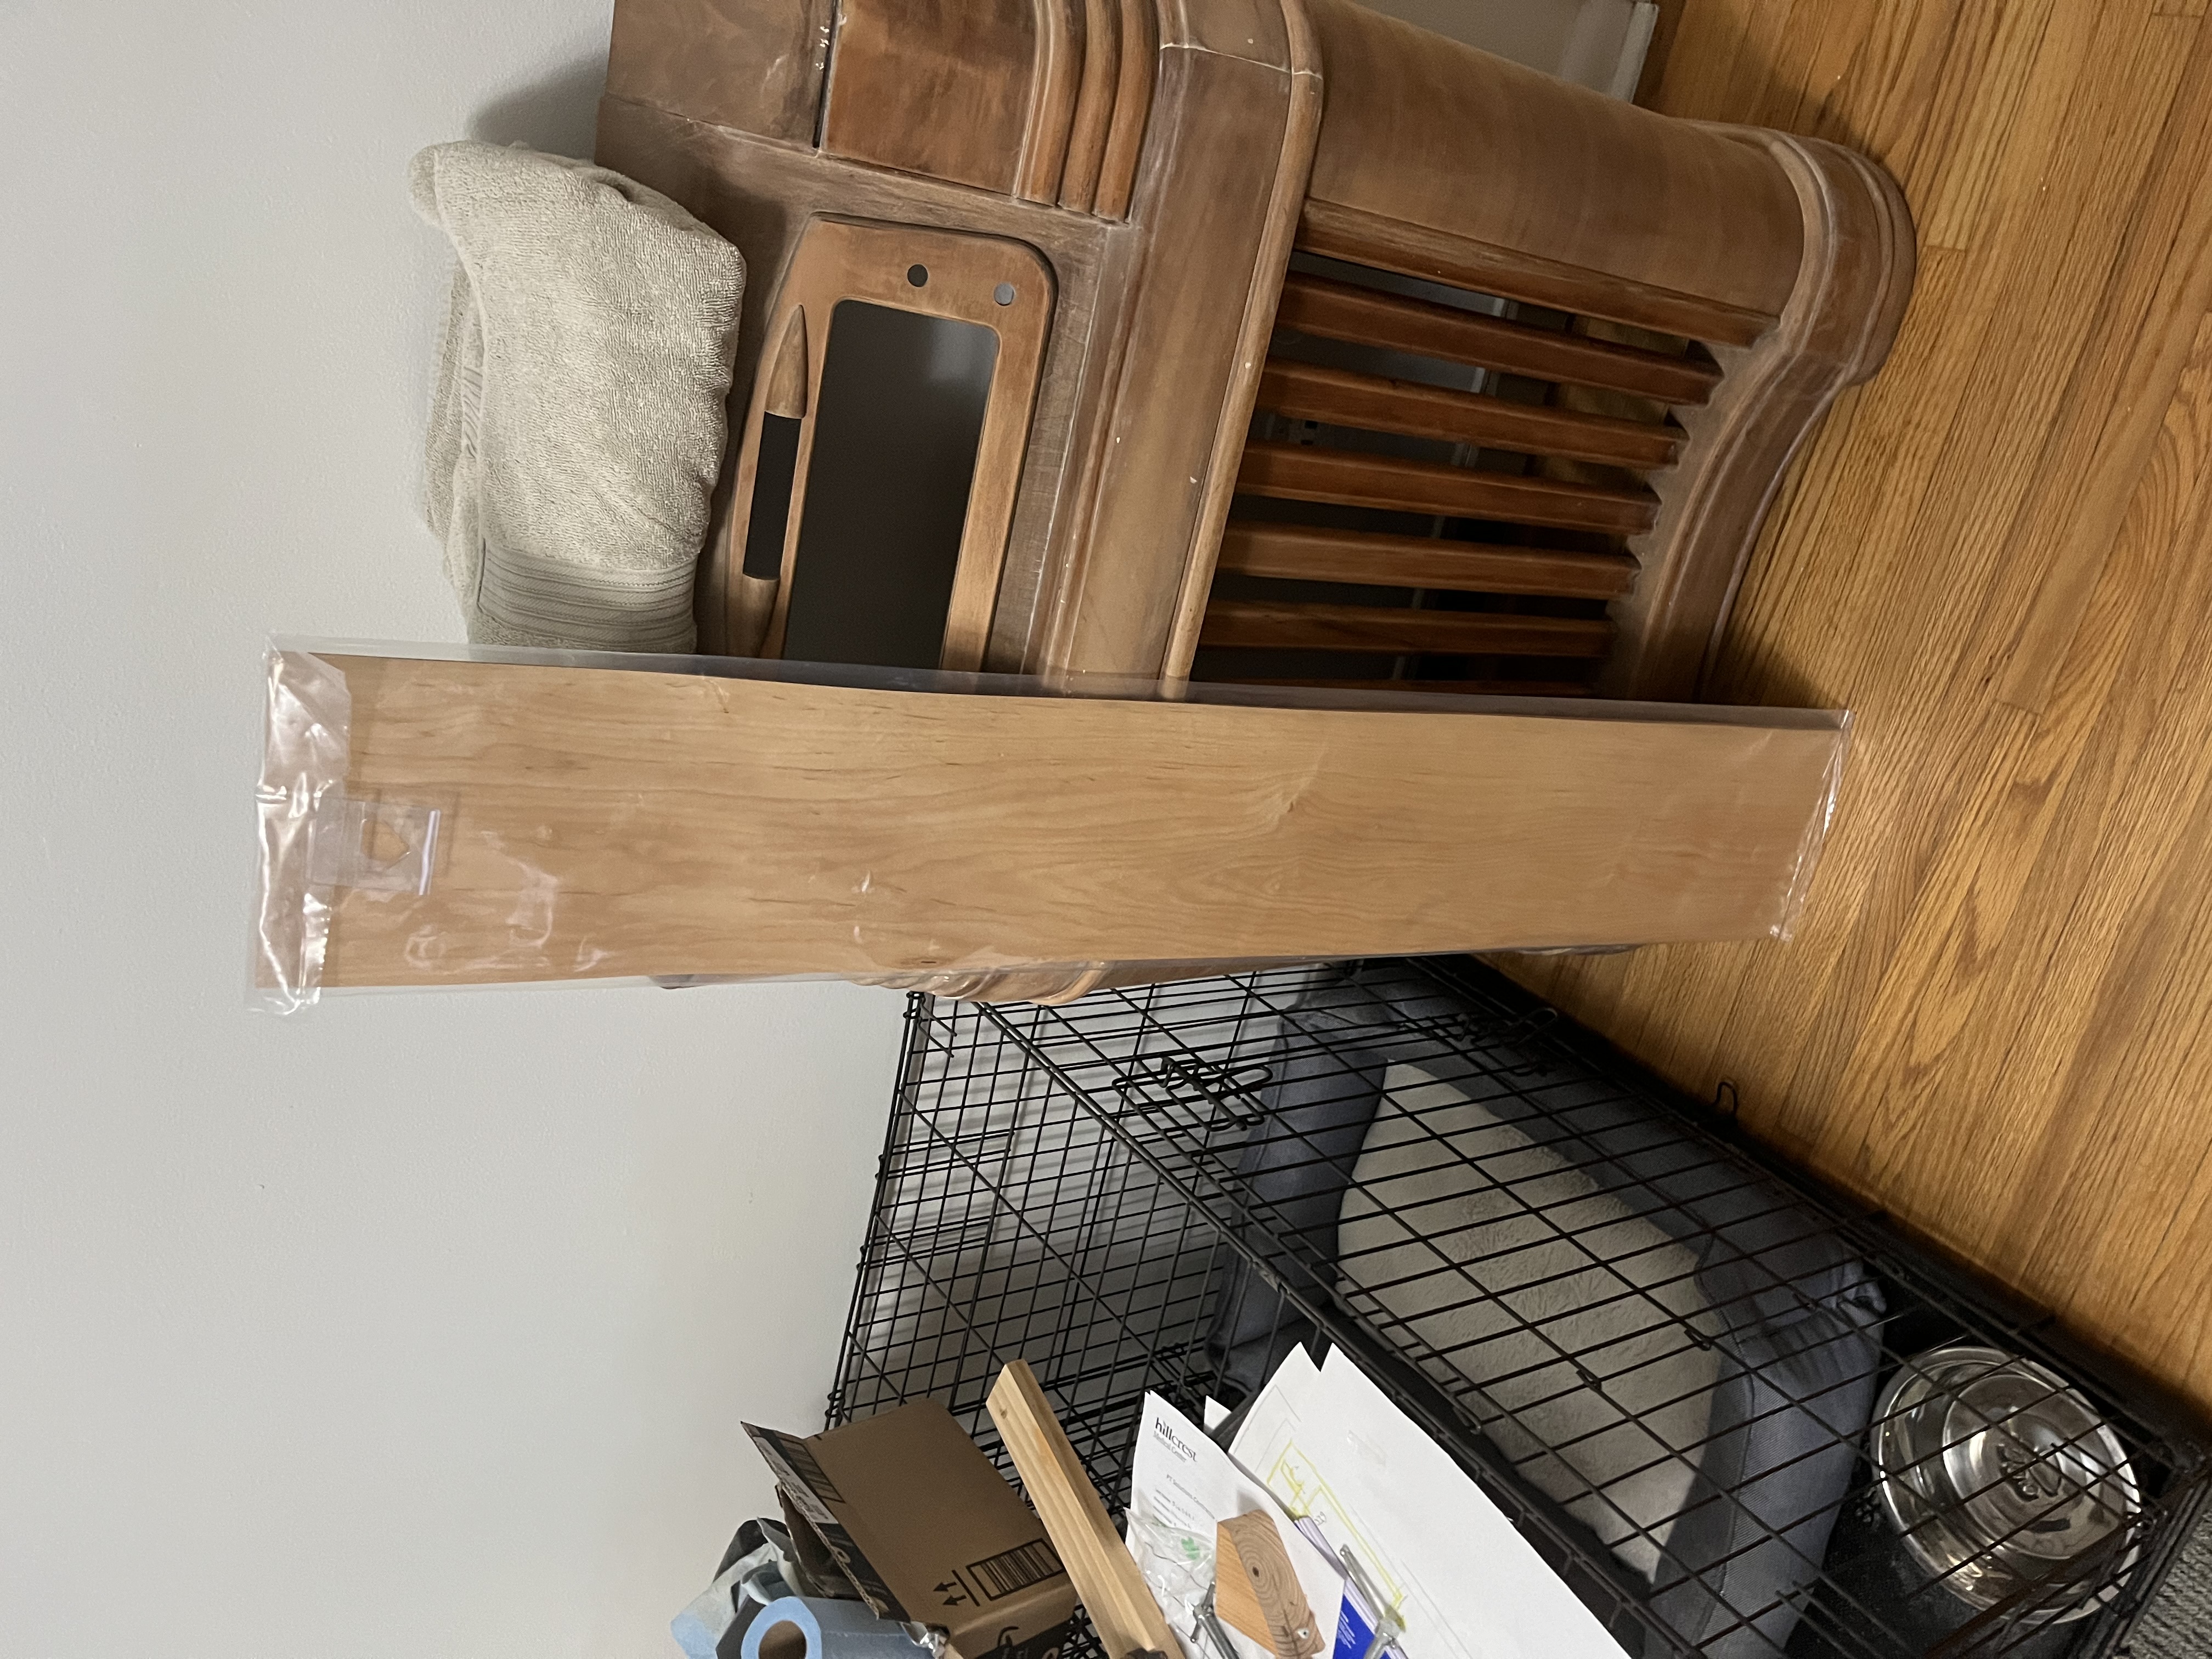
I got to thinking after my post yesterday, but that larger veneer patch just wasn’t looking right. Not only was there the issue of the splice line looking obvious, but the original veneer on that panel is obviously not walnut. I had matched the top veneer when I ordered the walnut, but these upper side panels are different. My next thought was that it might be red oak. Anyway, I took a sample into the store during my lunch break today, and found out that it’s maple. So I got some maple veneer (a much larger piece this time). Fortunately, maple is much cheaper than walnut.
Joseph
Philco 46-480
Philco 49-906
Posts: 287
Threads: 16
Joined: Jan 2024
City: Tulsa
State, Province, Country: Oklahoma
I have since gotten the cabinet stained and toned. I saw a video online of another guy renovating a 46-480, and he used the toner similarly to the way I have with this cabinet. I’ll admit that it turned out darker than I envisioned, but the result is a very rich and unique stain. What do you all think? It’s obviously much darker than the original, but is it too dark?
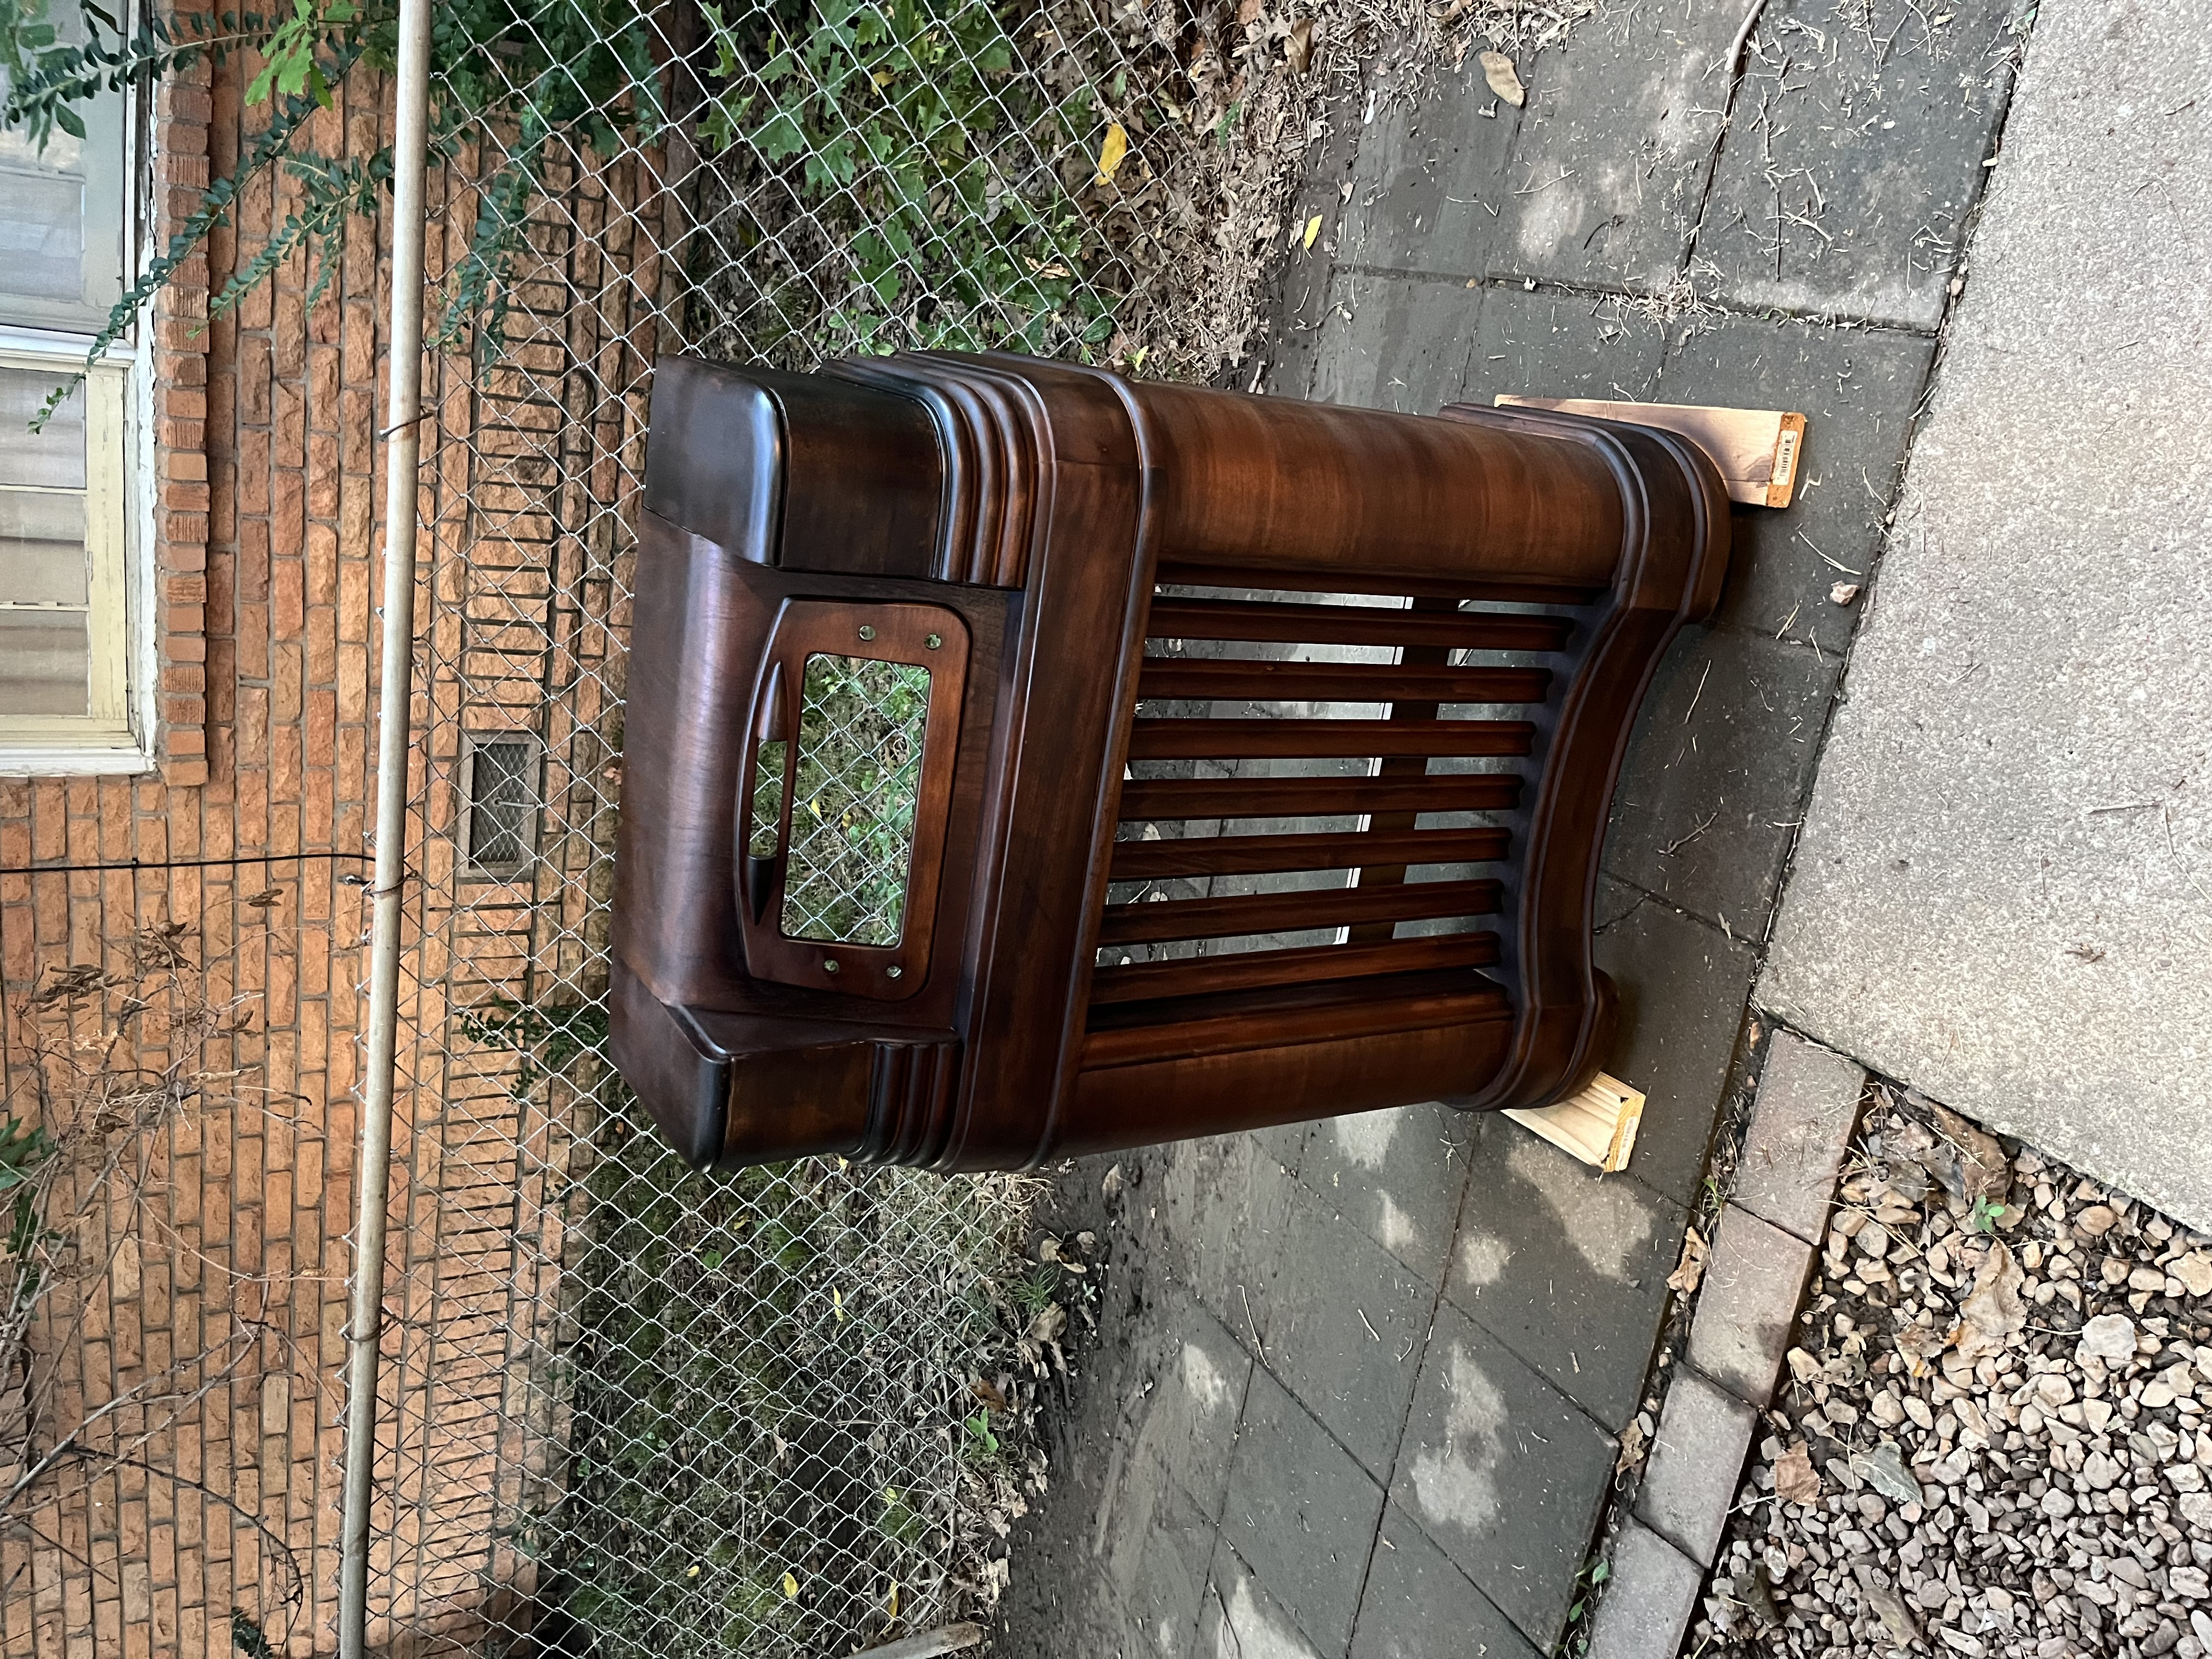
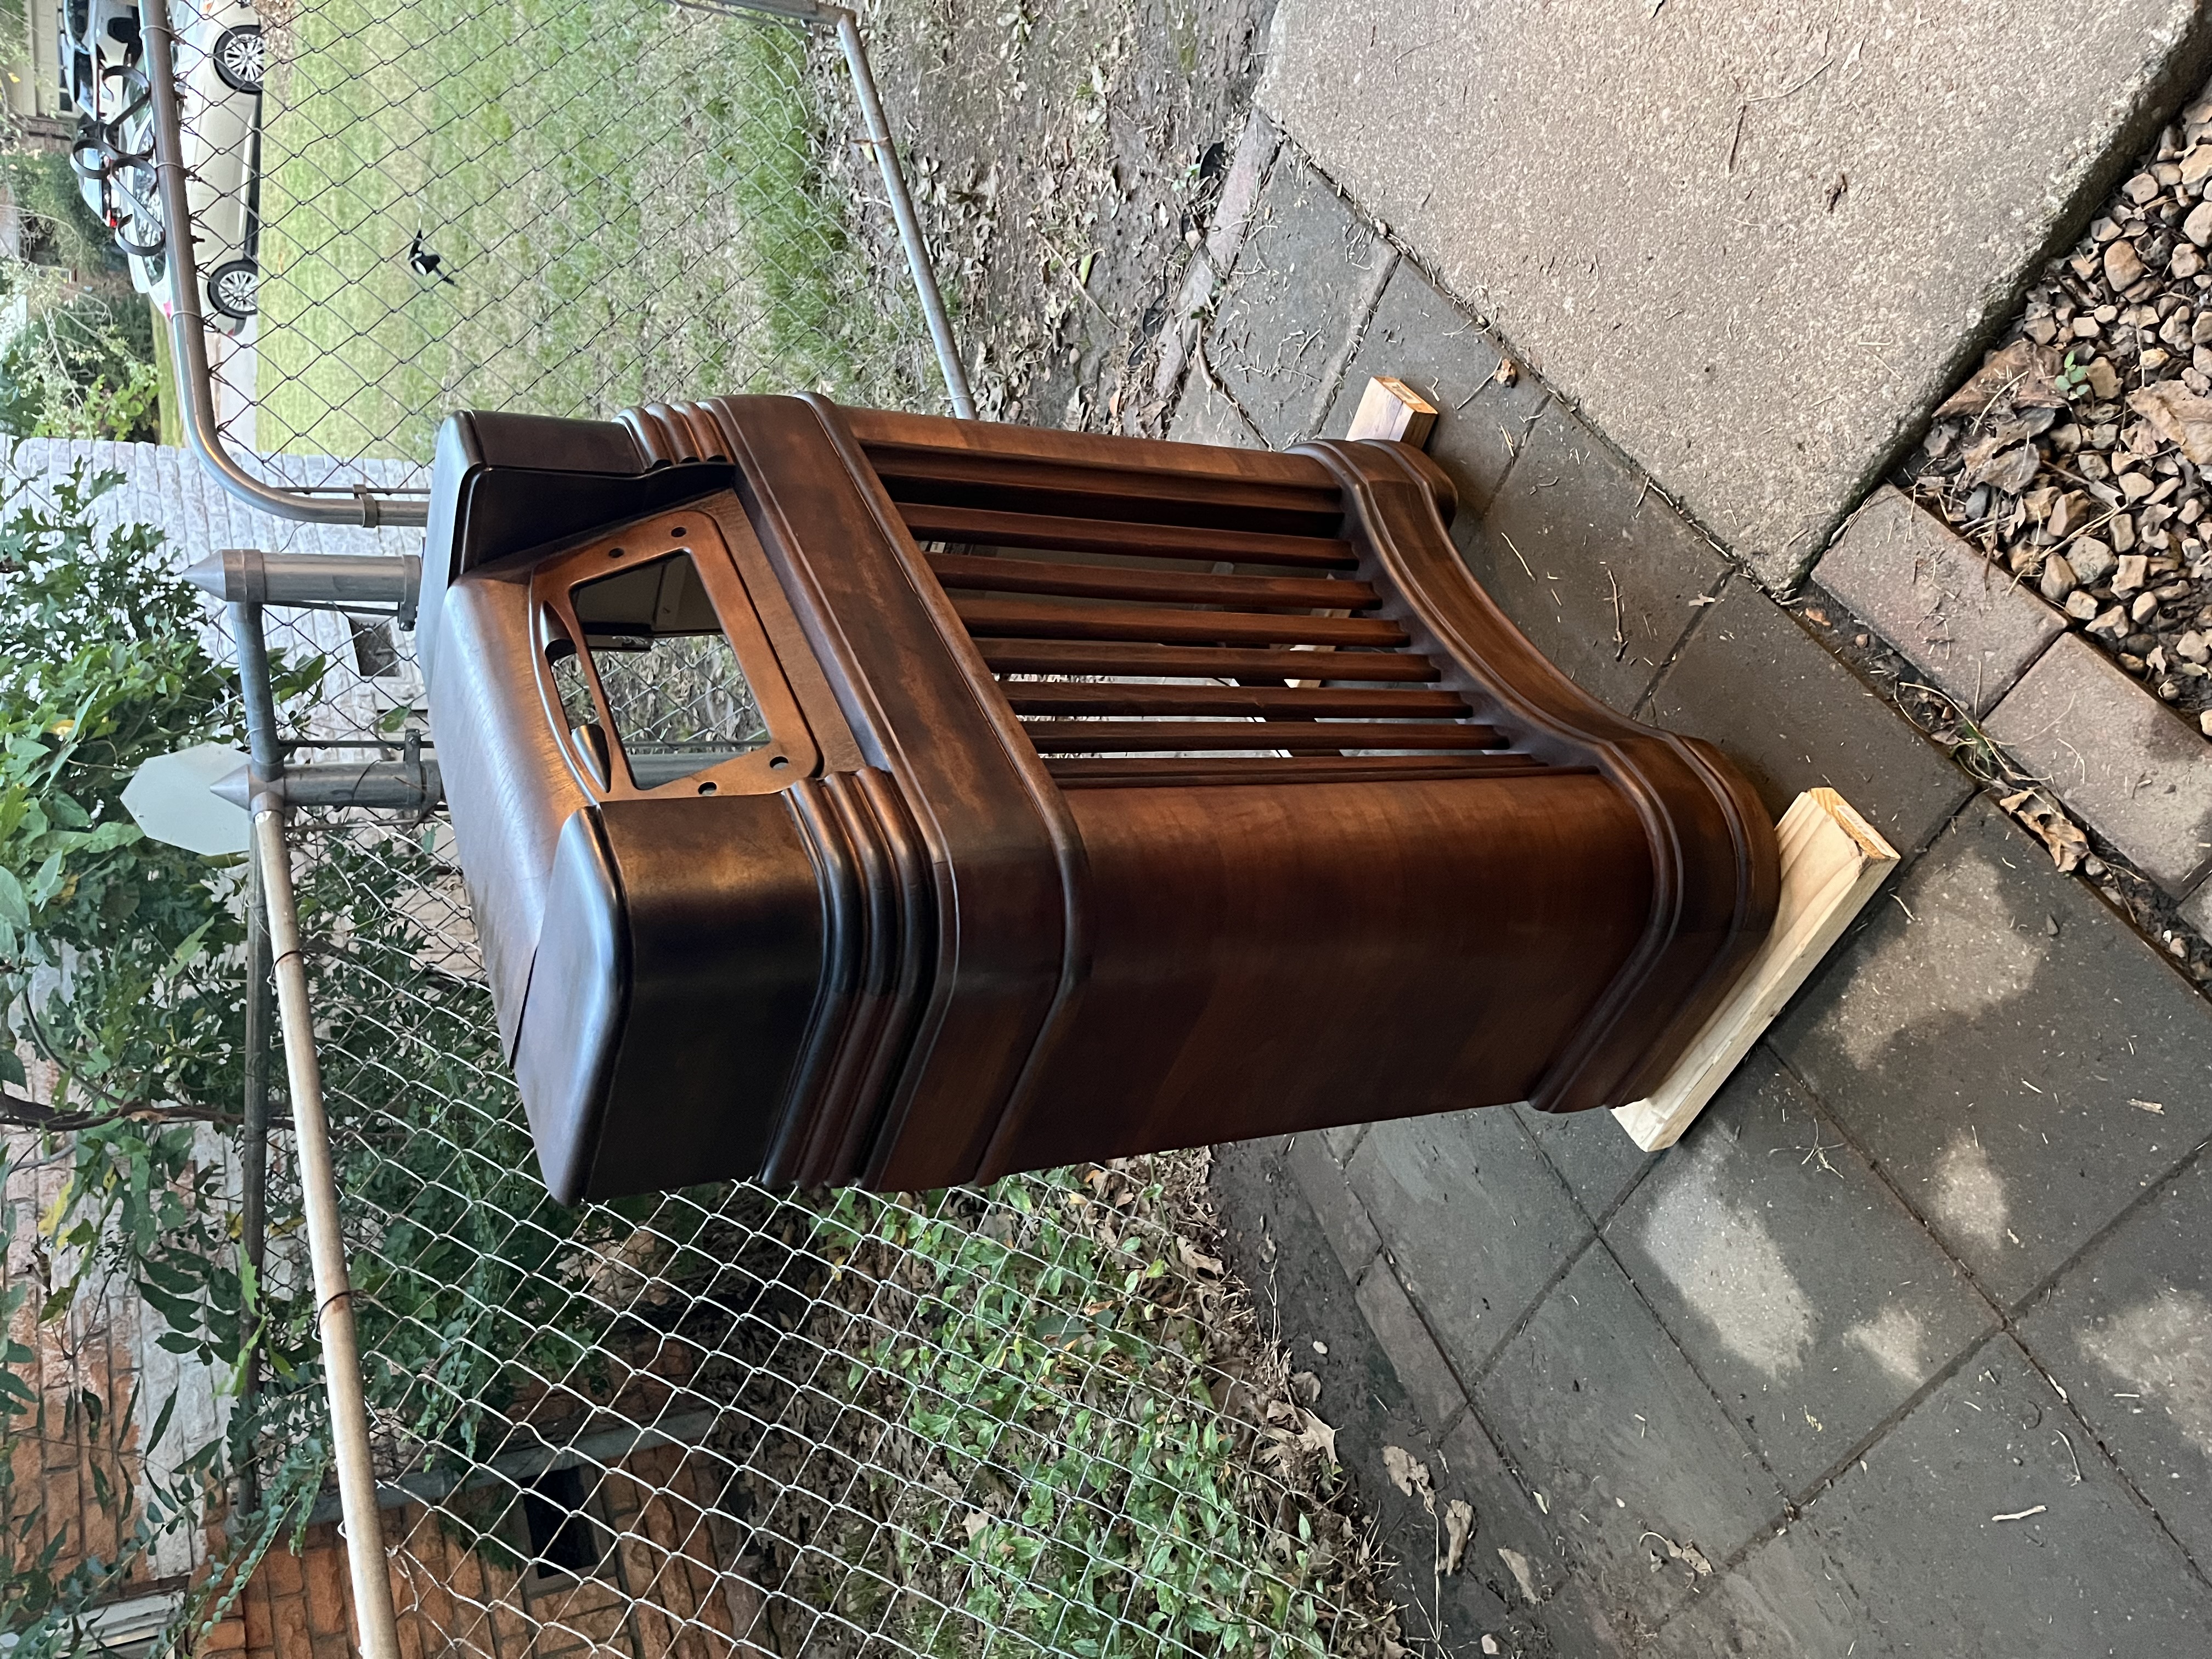
Joseph
Philco 46-480
Philco 49-906
Posts: 287
Threads: 16
Joined: Jan 2024
City: Tulsa
State, Province, Country: Oklahoma
I knew when I asked the question here, that I just wasn’t satisfied with the darkness of the stain. Today I took some mineral spirits and grade 0 steel wool, and went to work lightening the color. Here’s the result, and it looks much closer to what I had in mind. I believe I’m finally satisfied with it. Though it’s still darker than the original stain, it’s a great choice.
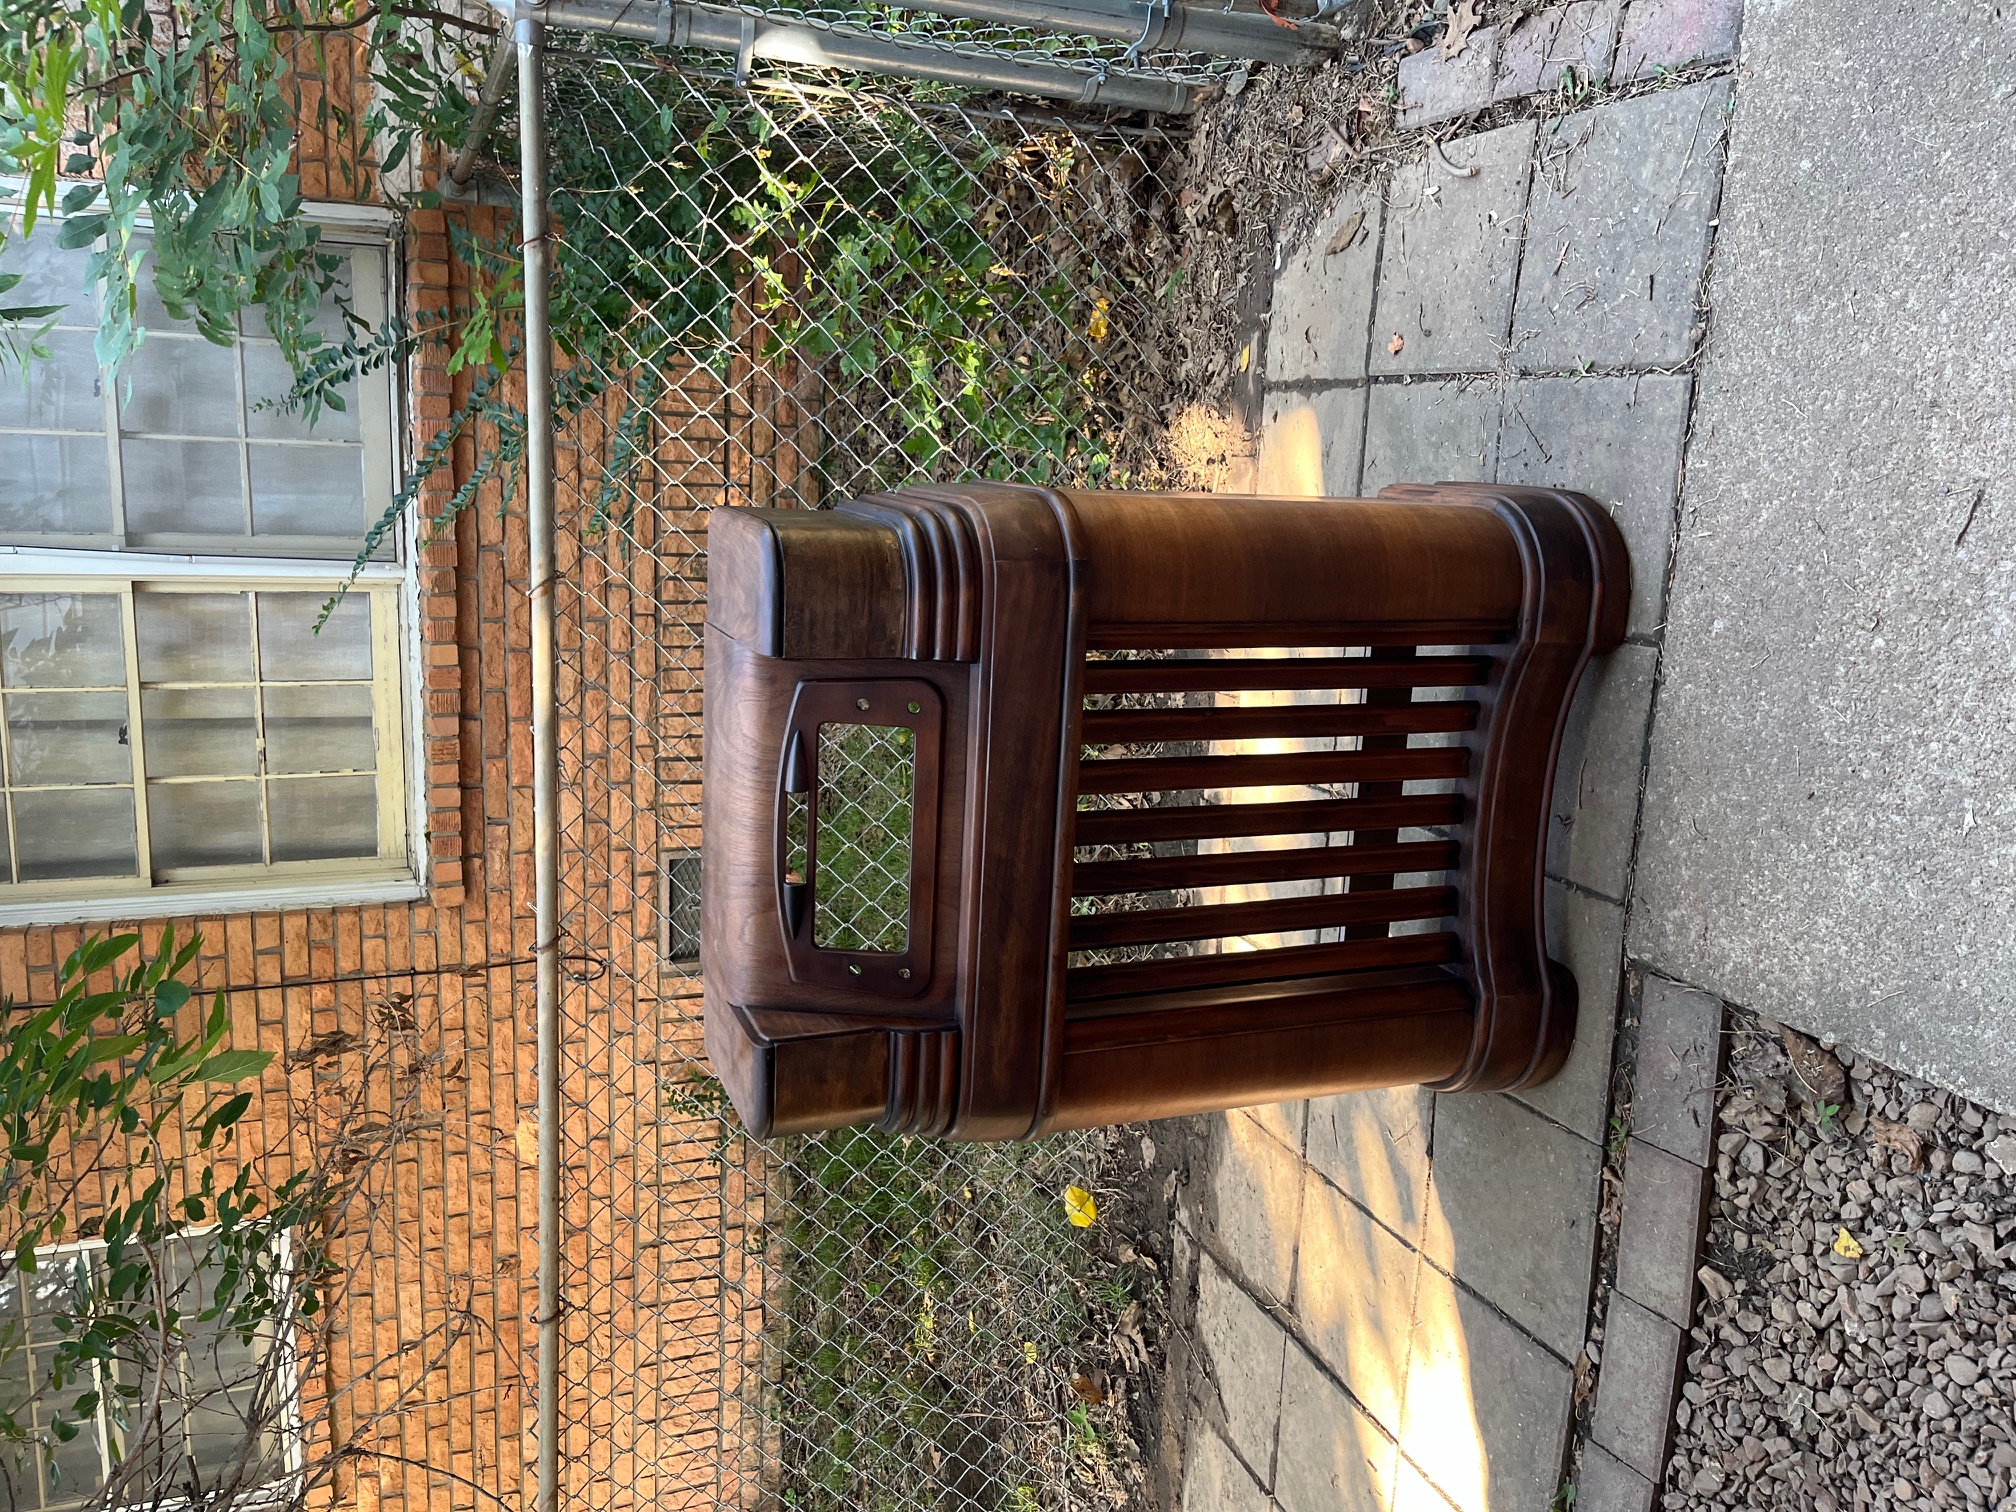
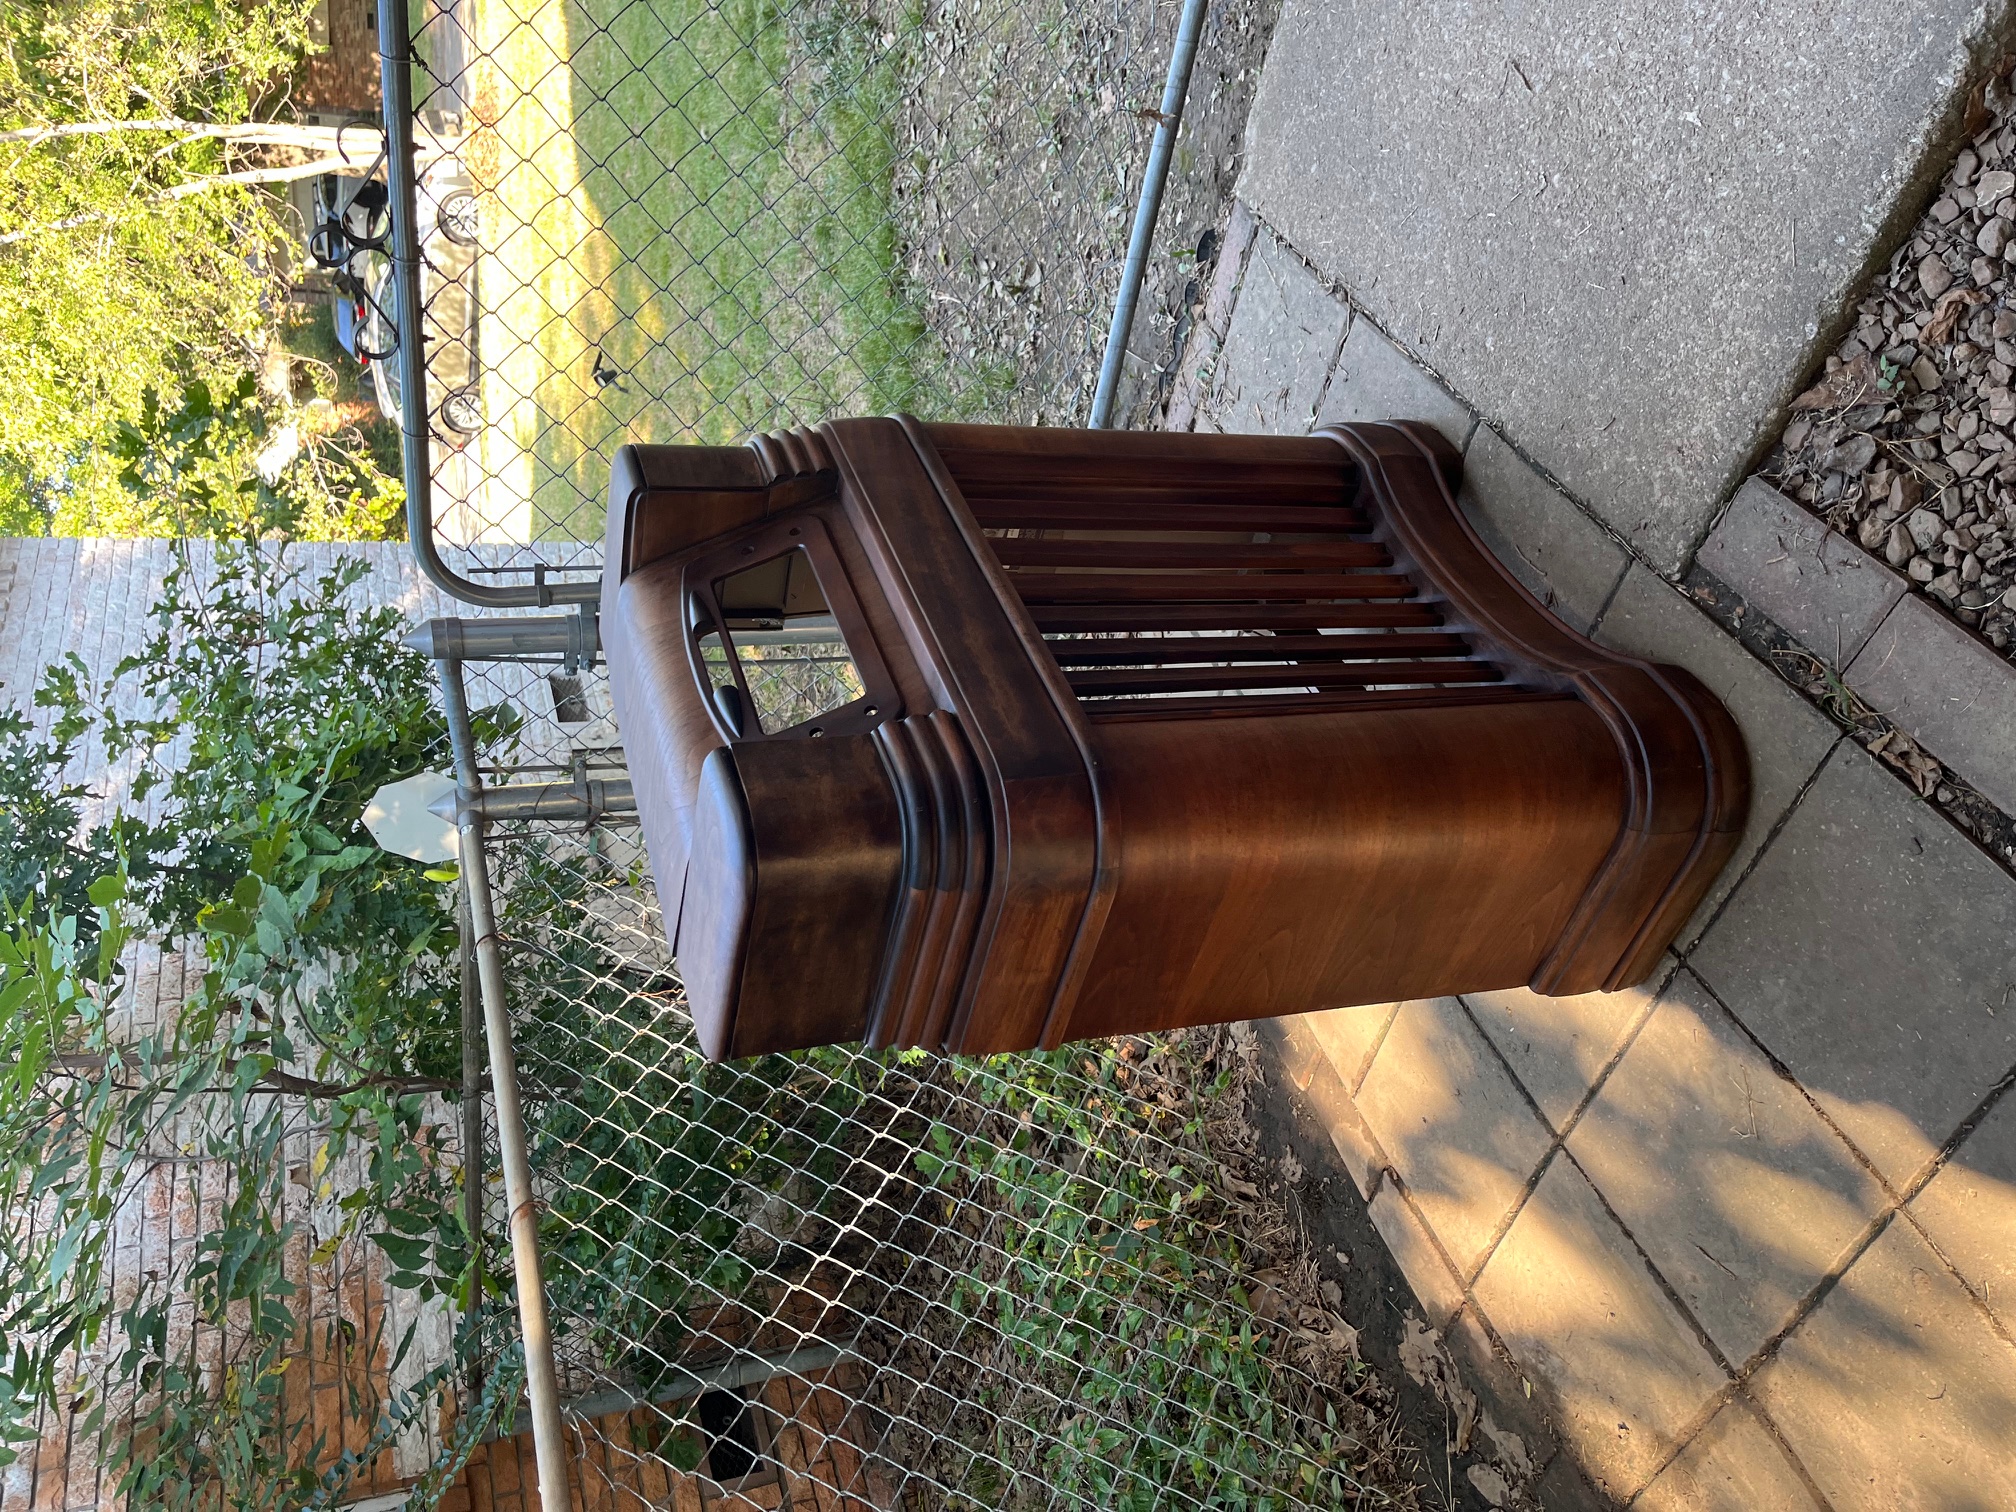
Joseph
Philco 46-480
Philco 49-906
Posts: 25
Threads: 3
Joined: Sep 2019
City: Kasson
State, Province, Country: Minnesota
Posts: 287
Threads: 16
Joined: Jan 2024
City: Tulsa
State, Province, Country: Oklahoma
Thank you!
Joseph
Philco 46-480
Philco 49-906
Posts: 2,198
Threads: 159
Joined: Jan 2013
City: Westland, MI
Nice work! Take care and BE HEALTHY! Gary
"Don't pity the dead, pity the living, above all, those living without love."
Professor Albus Dumbledore
Gary - Westland Michigan
Posts: 287
Threads: 16
Joined: Jan 2024
City: Tulsa
State, Province, Country: Oklahoma
Thank you, Gary! I appreciate it.
Joseph
Philco 46-480
Philco 49-906
Posts: 287
Threads: 16
Joined: Jan 2024
City: Tulsa
State, Province, Country: Oklahoma
I haven’t posted an update in a little while, but finally my replacement glass dial and new knob decals are shipping from Radio Daze. They have a seven-week lead time on graphics, but they shipped yesterday morning and should arrive on Friday! Then I’ll be able to wrap up the cabinet restoration and start on the electronics.
Joseph
Philco 46-480
Philco 49-906
Posts: 287
Threads: 16
Joined: Jan 2024
City: Tulsa
State, Province, Country: Oklahoma
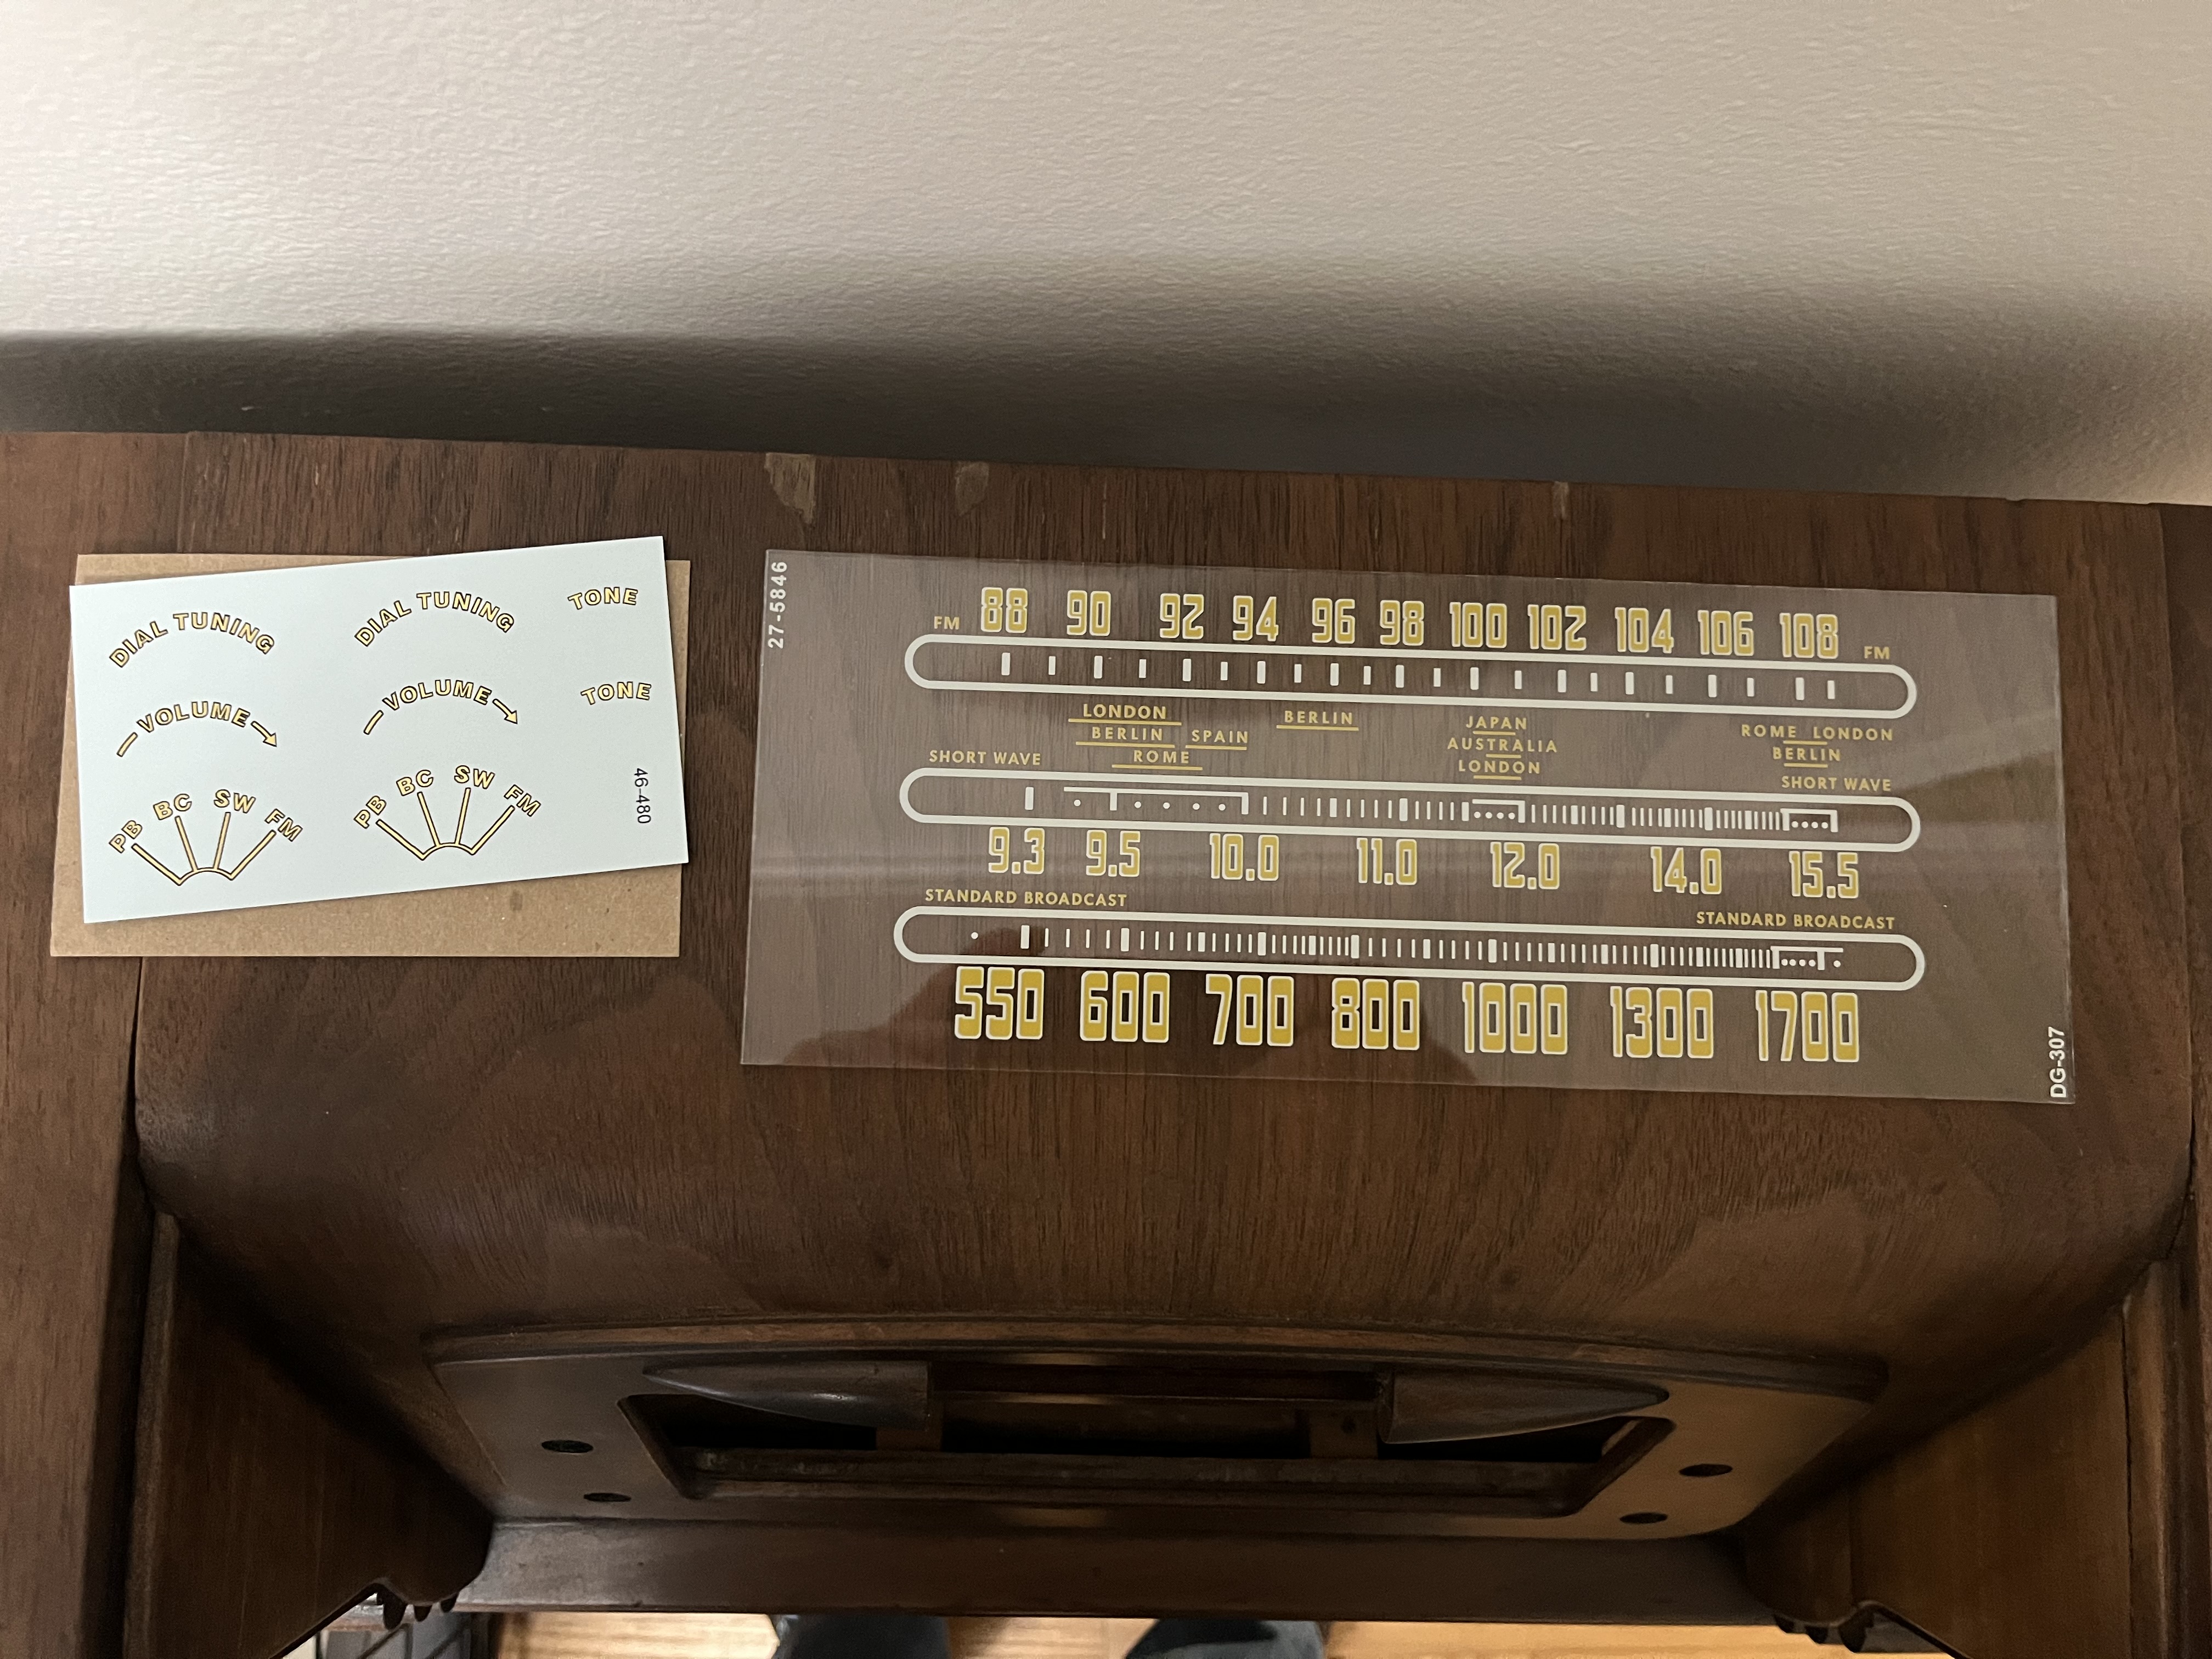
The replacement glass dial and control decals are here! I’ve still got to re-flock the backing for the glass, and I realize that I need to get the replacement rubber to hold the glass. Luckily Radio Daze also sells the rubber.
The other thing I noticed is that the 46-480 decals do not come with the “Philco” decal. I’ll need to order that. Does anyone happen to know which template I should order for this model? I see that Radio Daze has several sizes available. I believe I need to get the one-and-one-half-inch height, but I’m not exactly sure.
I will also take a moment to commend them on their packaging. Absolutely phenomenal!
Joseph
Philco 46-480
Philco 49-906
(This post was last modified: 10-11-2024, 03:07 PM by jrblasde.)
Posts: 287
Threads: 16
Joined: Jan 2024
City: Tulsa
State, Province, Country: Oklahoma
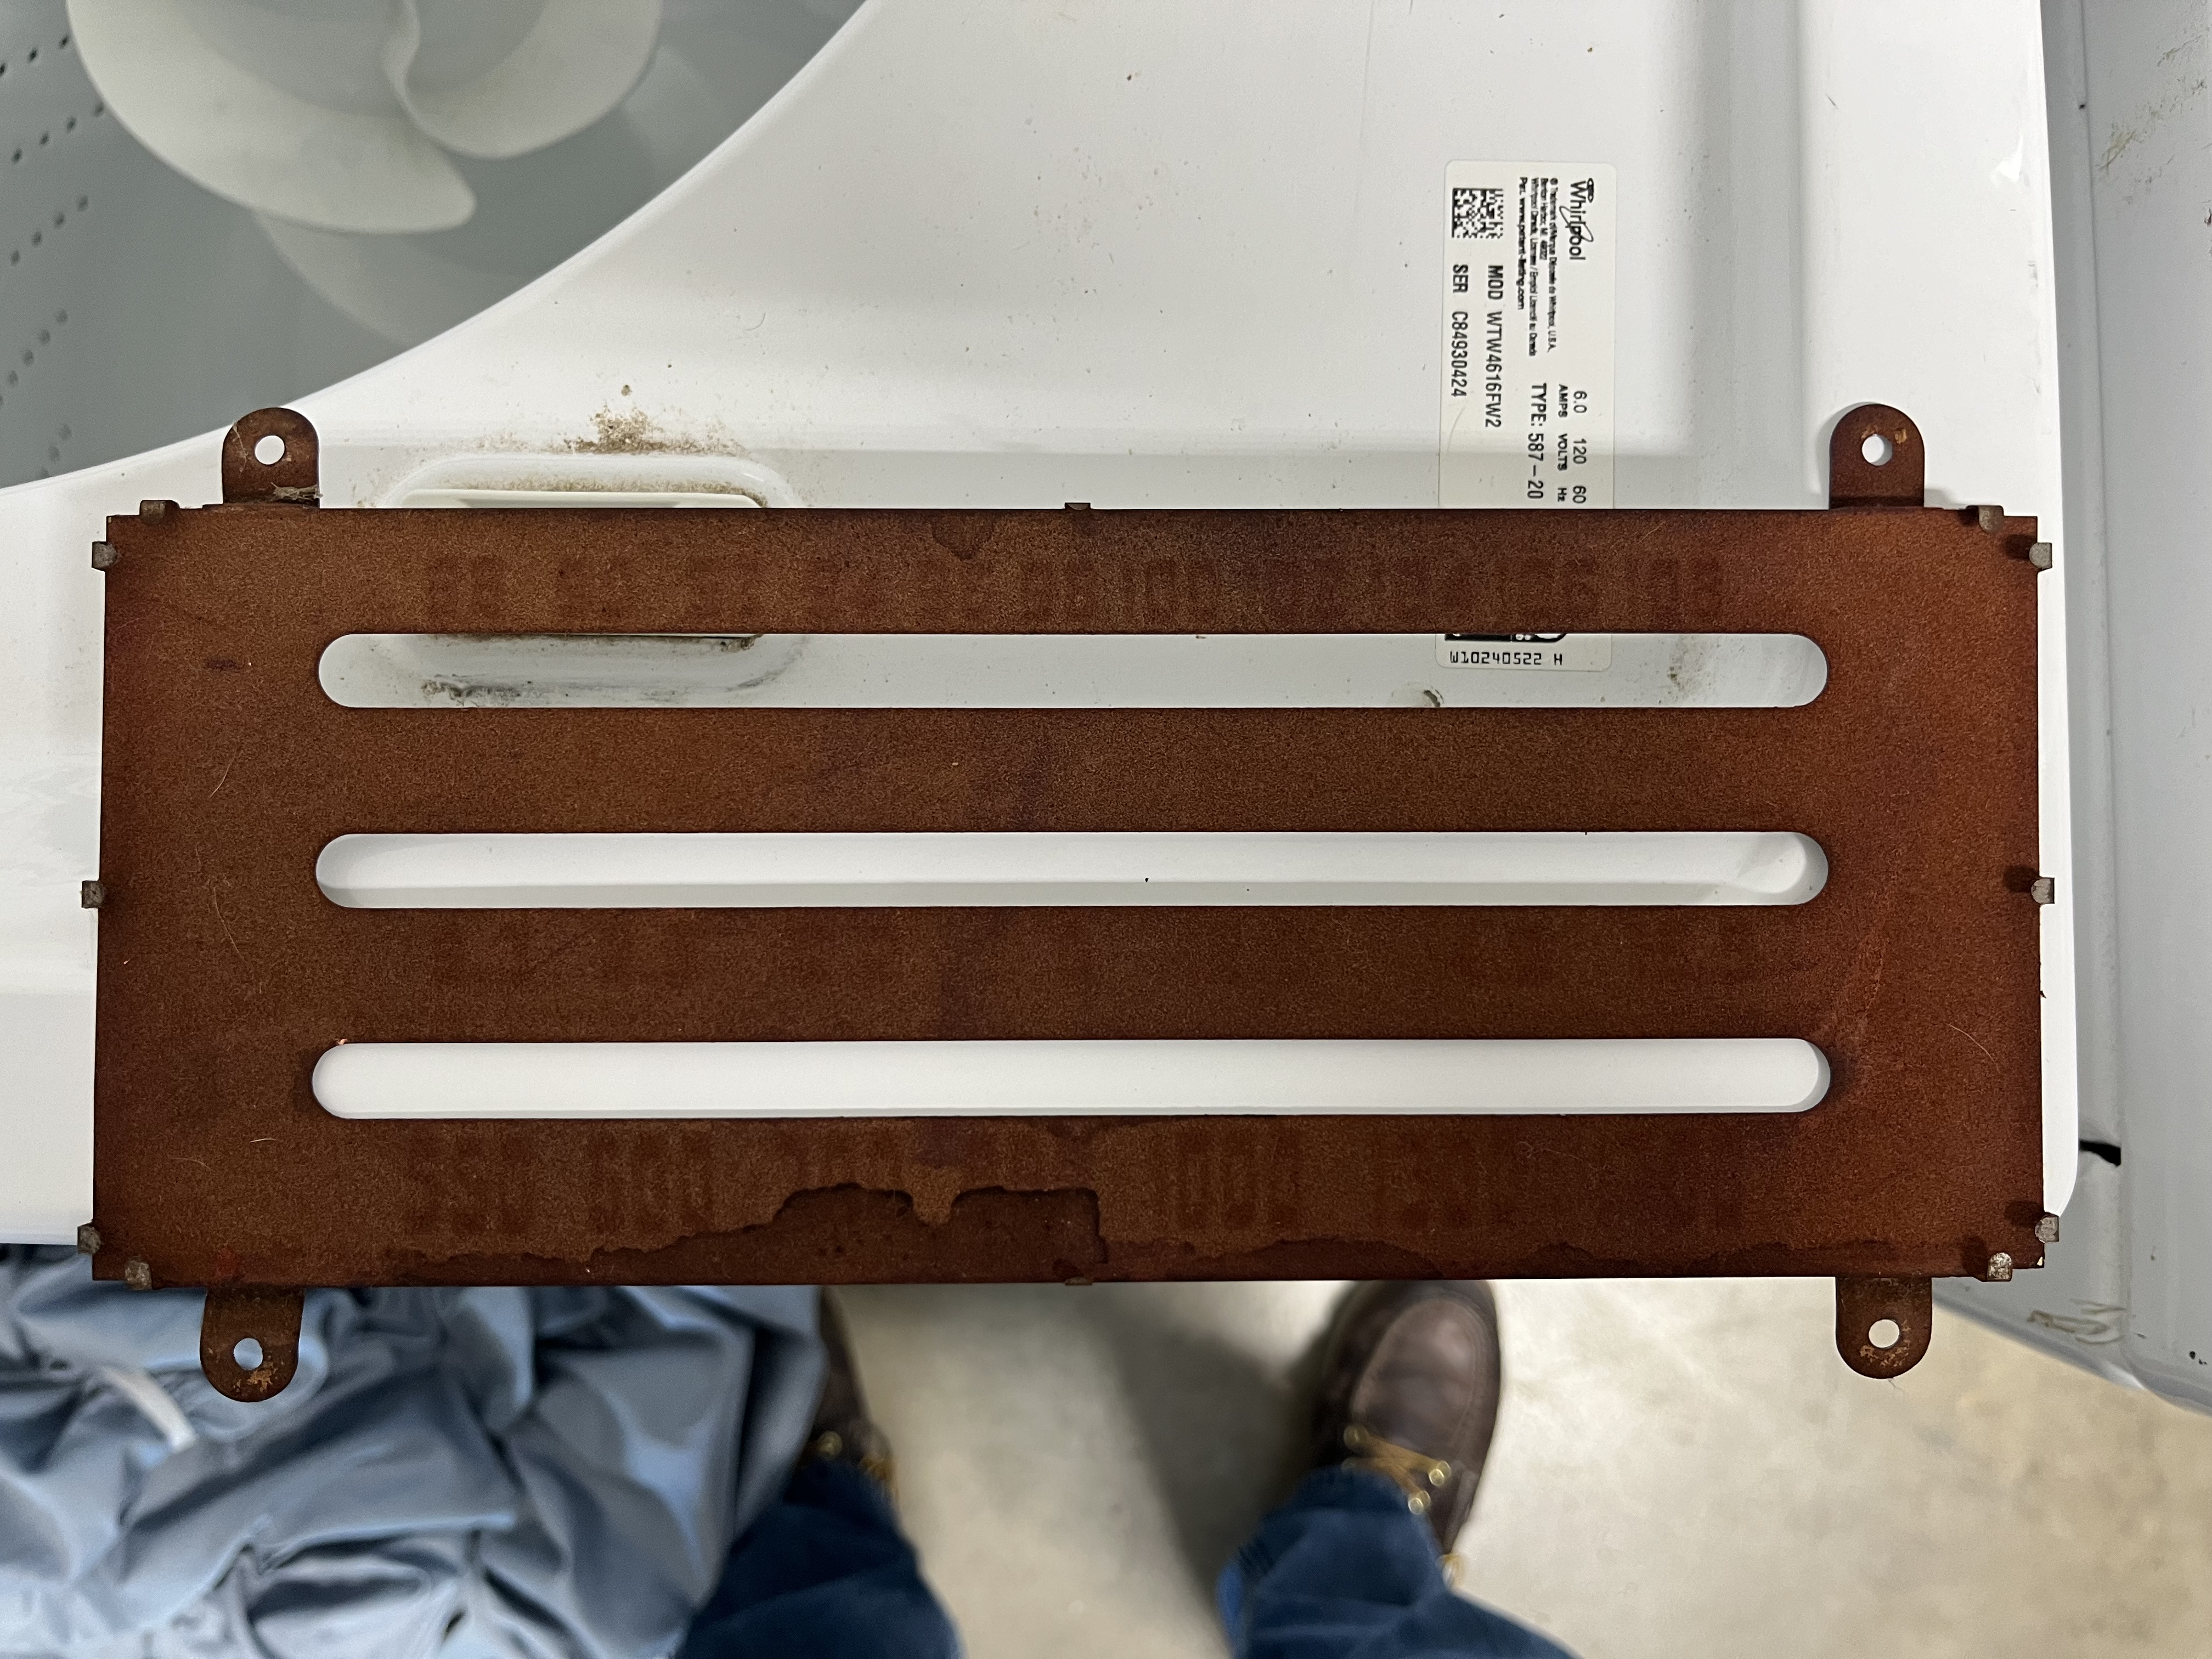
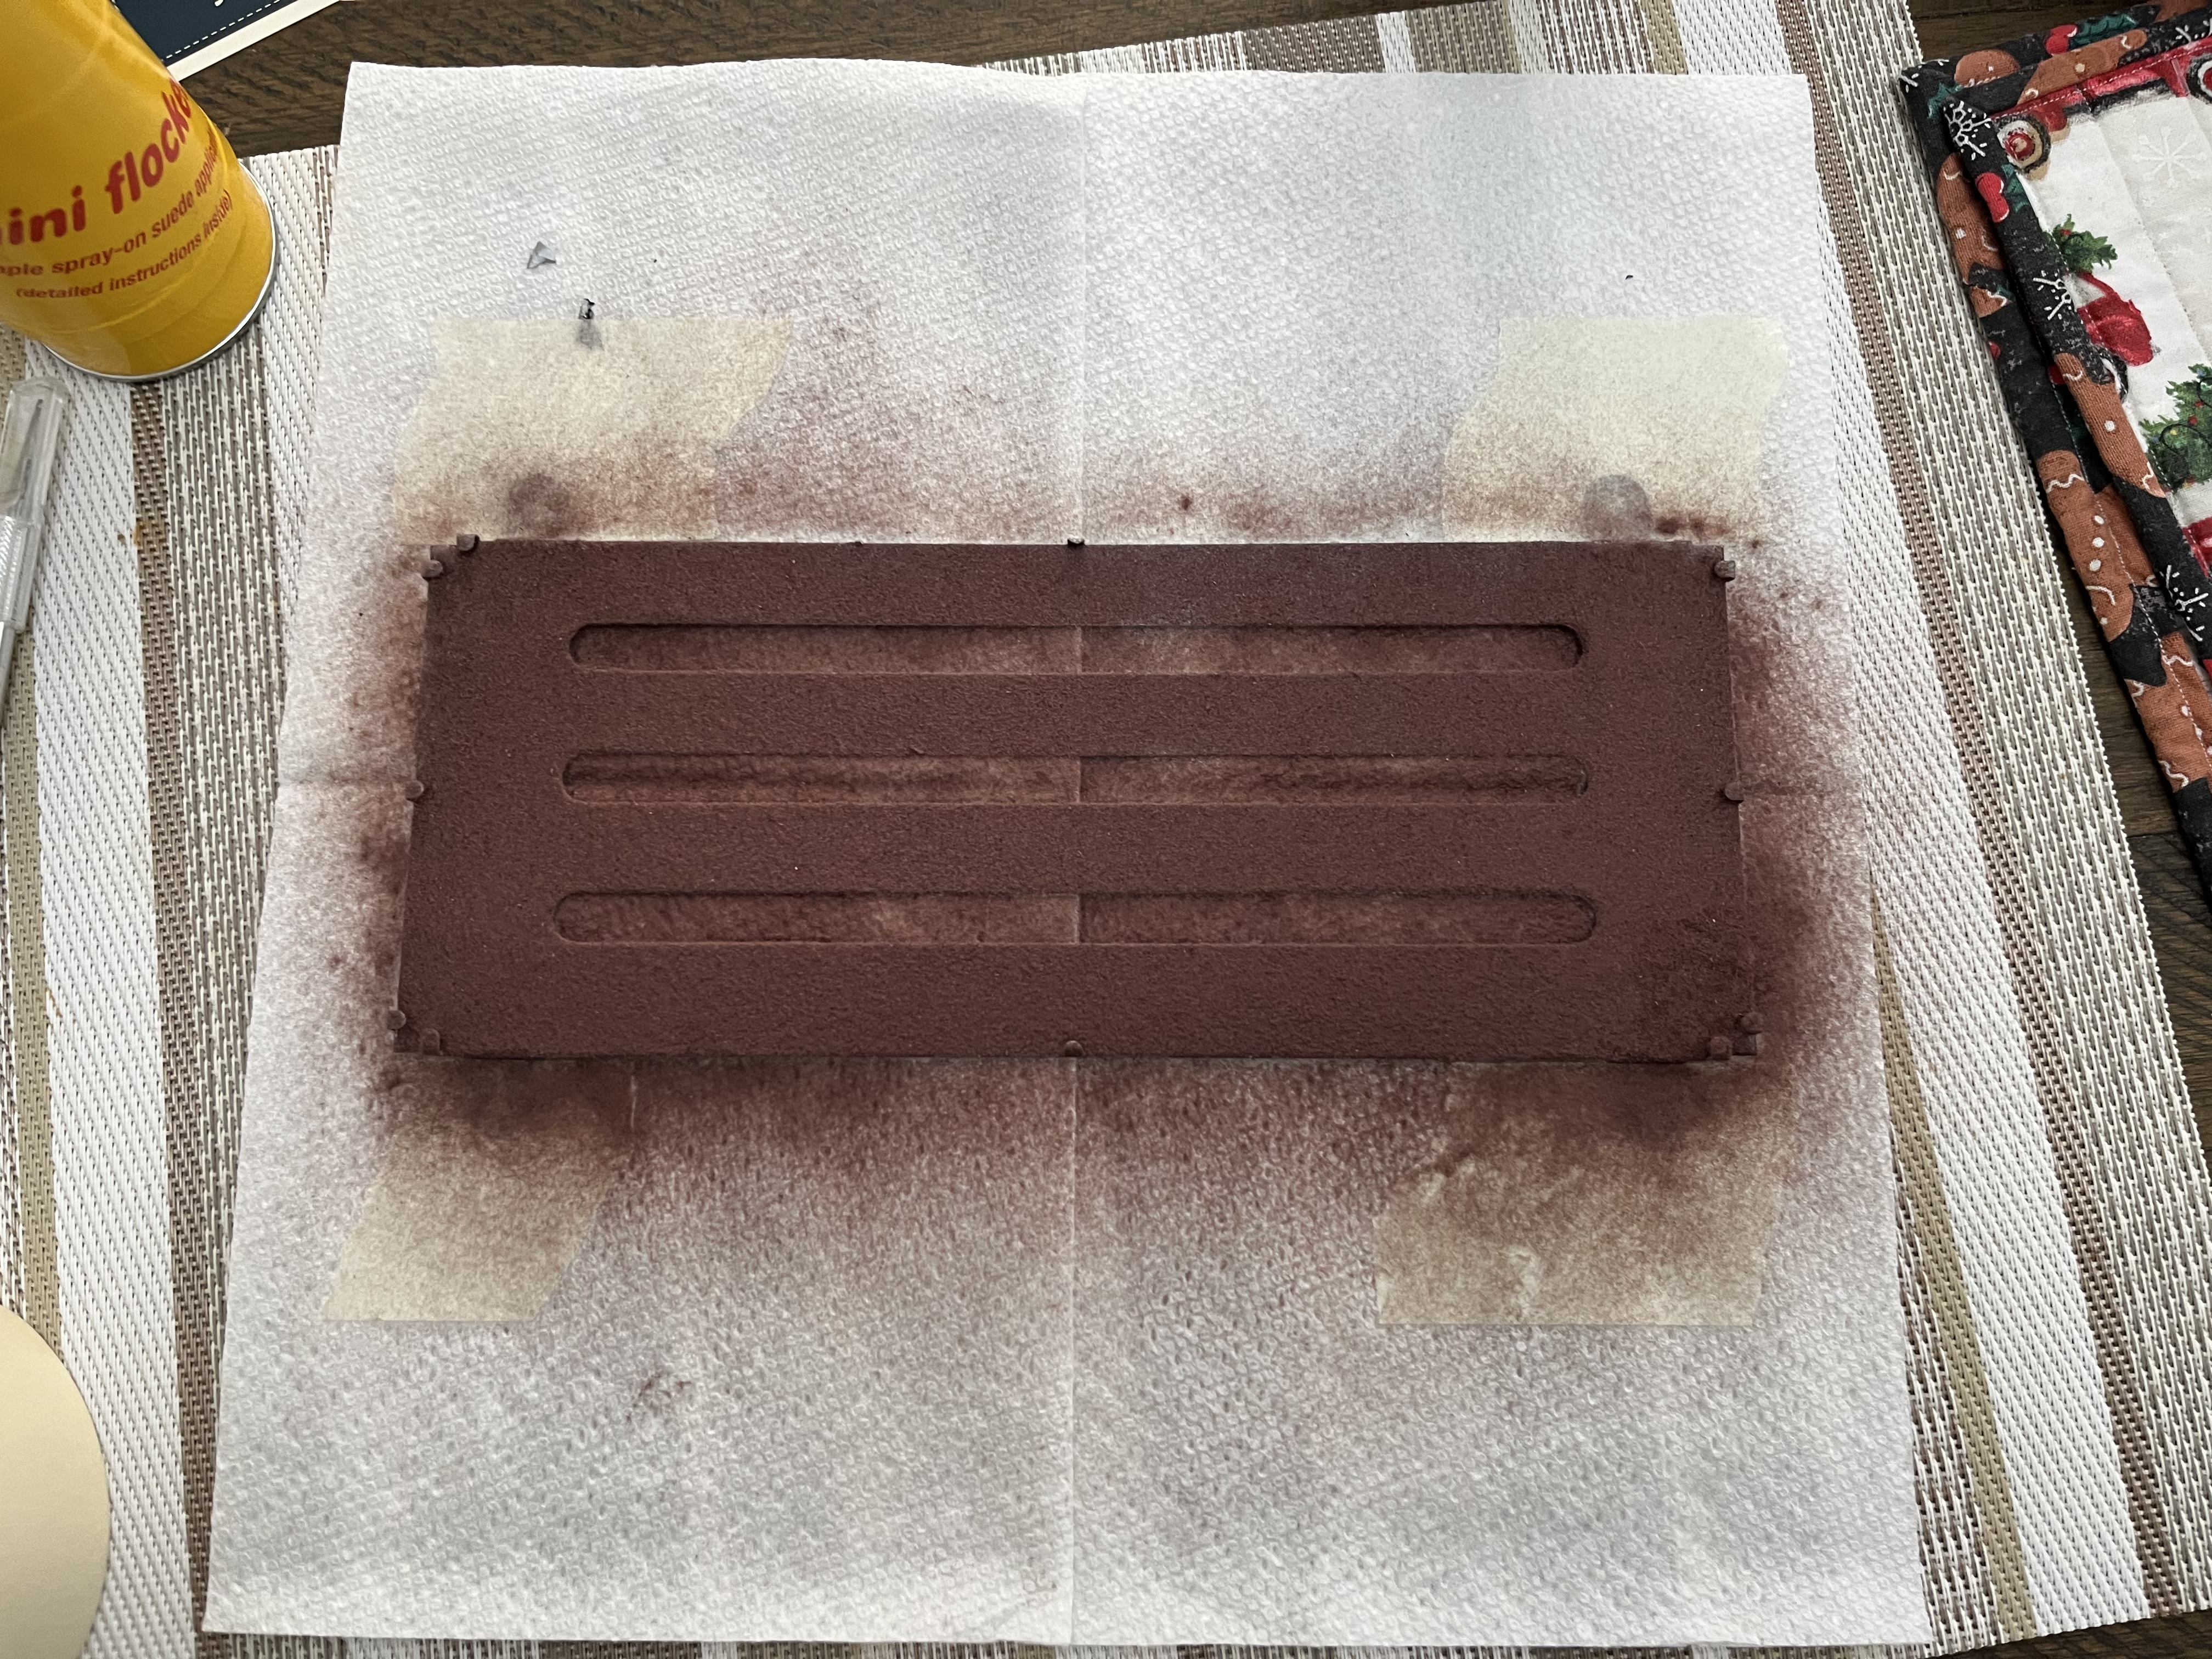
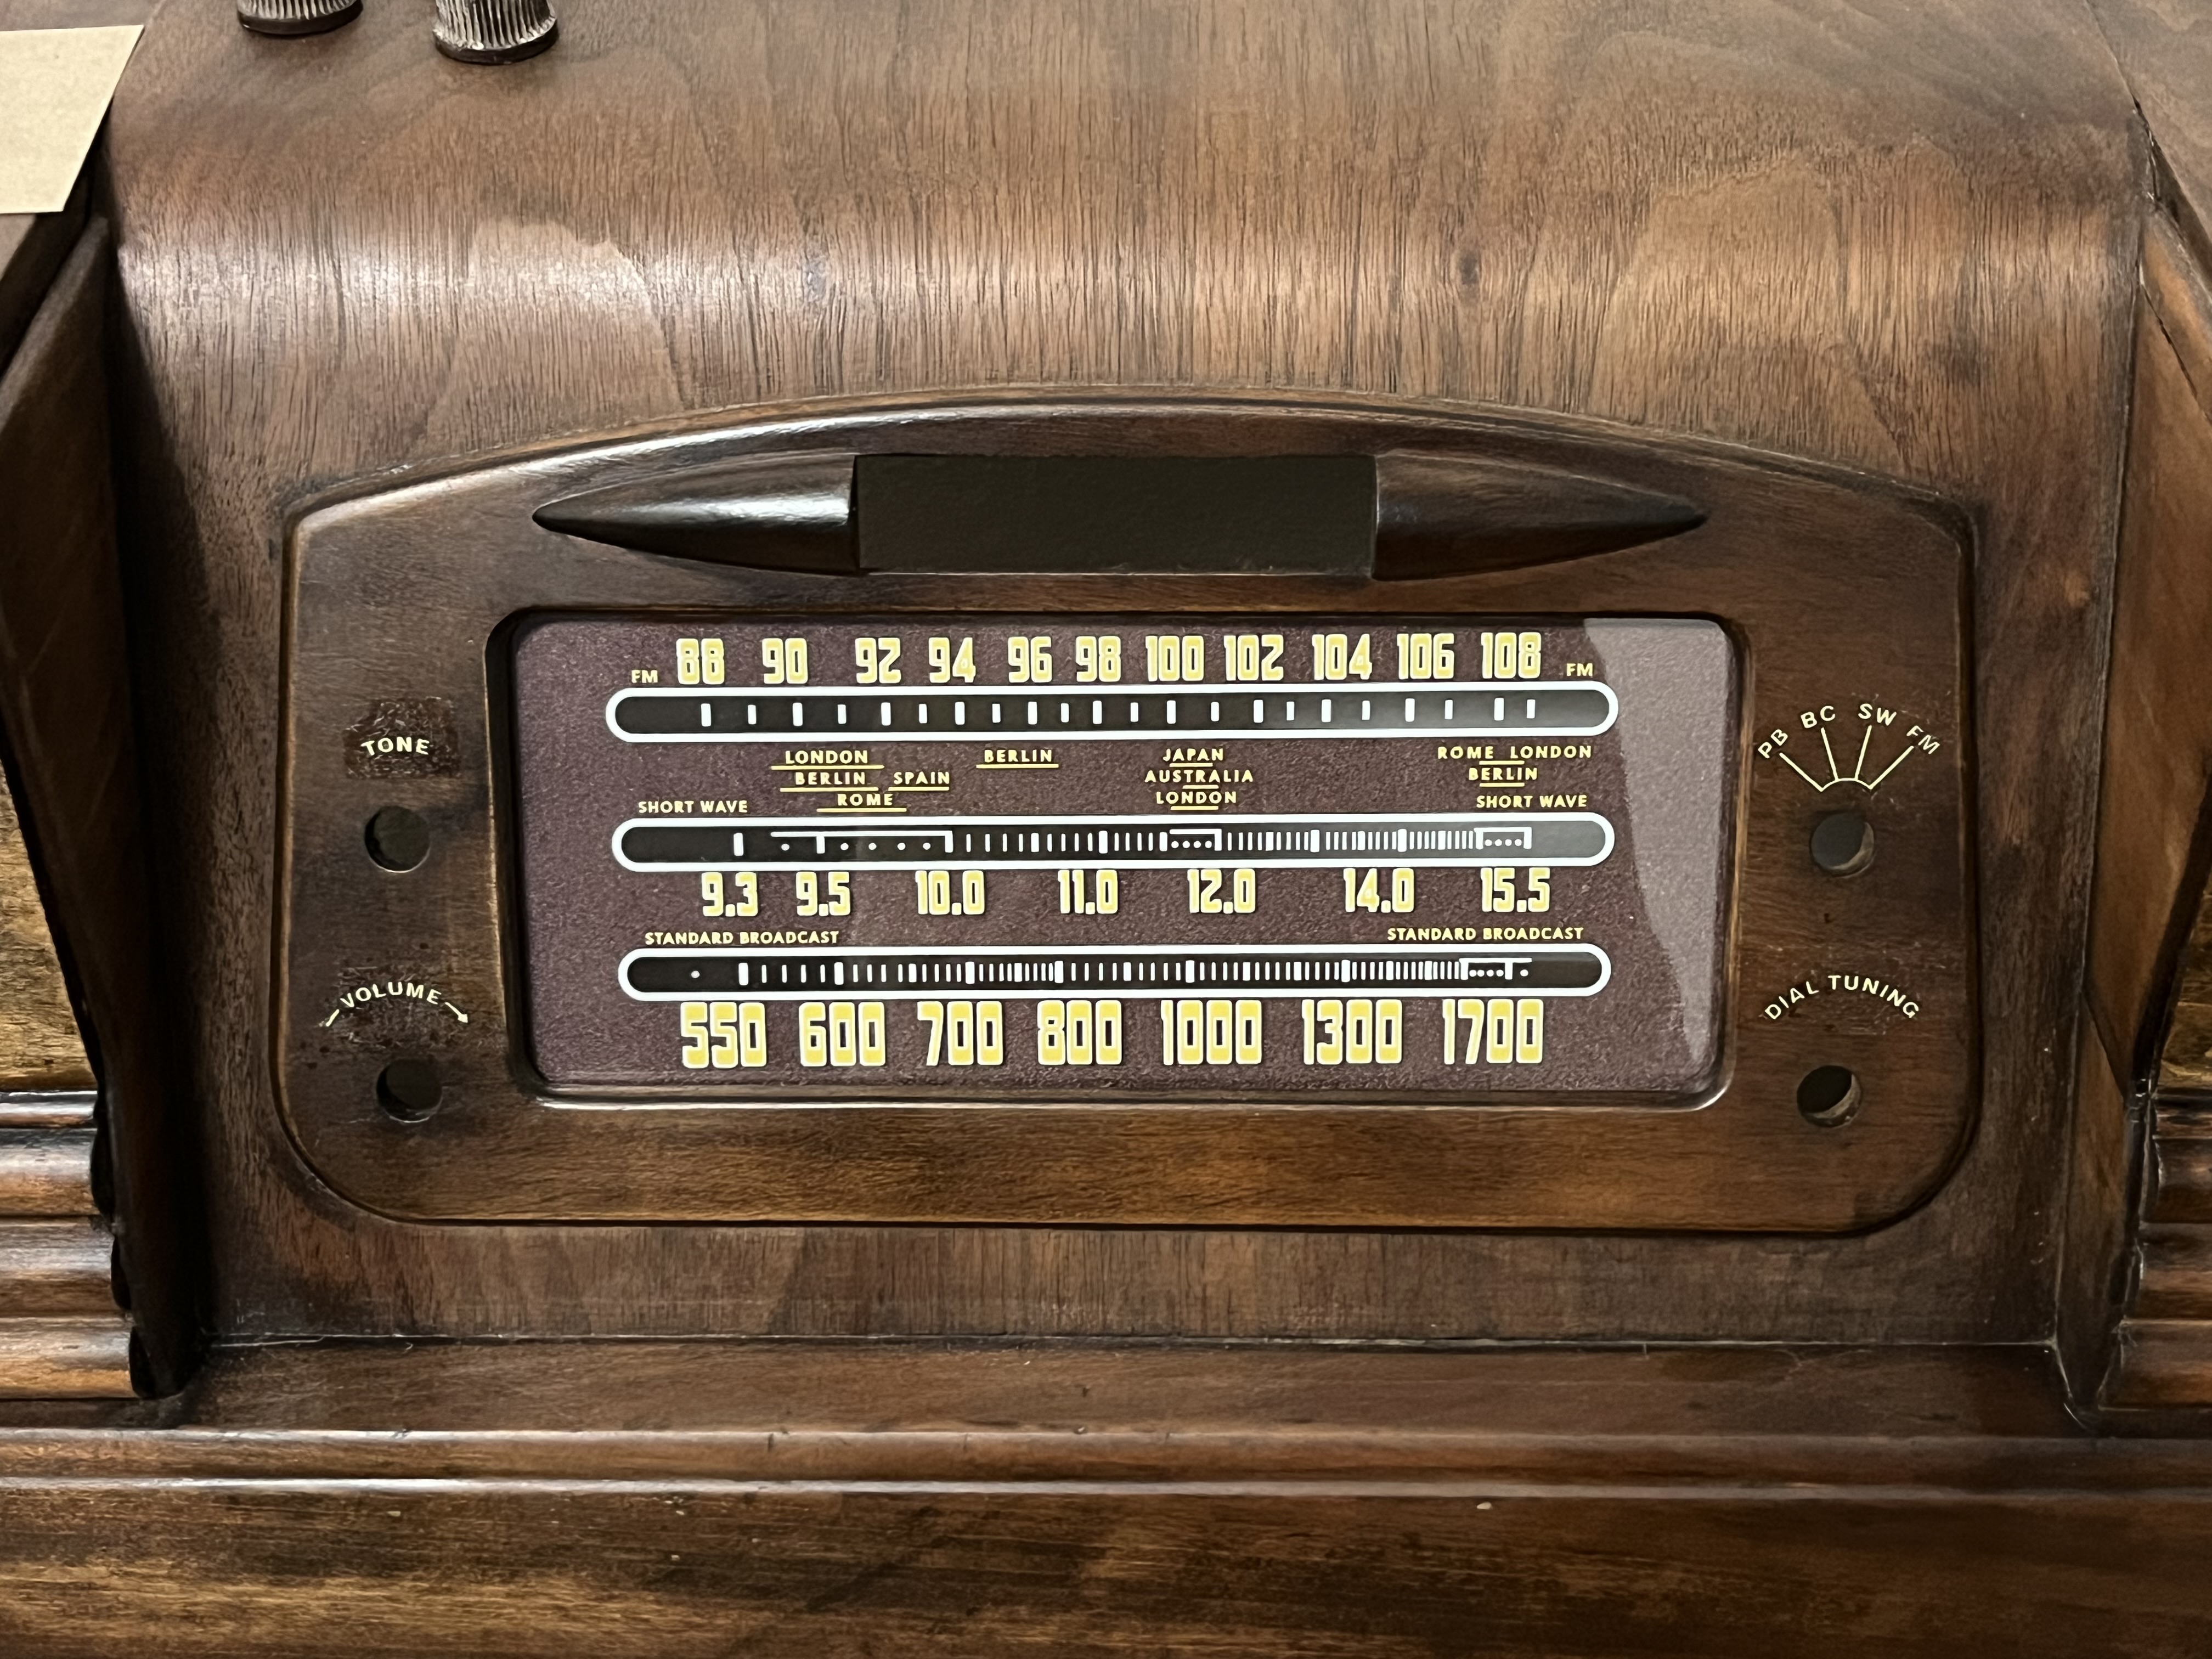
I’ve finished reflocking the backplate for the glass, and have it all installed. I really wasn’t certain as to what kind of adhesive to use, but 3M spray-on adhesive worked just fine! Now all that’s missing is the “Philco” decal. My question about which size of decal to use is probably buried too deep into this thread for everyone to see, so I’ll create a new thread to ask that question. The decals for the control knobs still need to dry a bit, but I couldn’t resist sharing!
Anyhow, it’s really starting to look amazing! I’m excited by the progress.
Here's a before and after of the glass backing plate, as well as a photo with it all put together.
Joseph
Philco 46-480
Philco 49-906
(This post was last modified: 10-13-2024, 11:01 PM by jrblasde.)
Posts: 287
Threads: 16
Joined: Jan 2024
City: Tulsa
State, Province, Country: Oklahoma
Joseph
Philco 46-480
Philco 49-906
Posts: 1,411
Threads: 71
Joined: Oct 2007
City: Linn Creek, MO
Your cabinet is beautiful, great job!
Steve
M R Radios C M Tubes
Posts: 287
Threads: 16
Joined: Jan 2024
City: Tulsa
State, Province, Country: Oklahoma
Thank you very much!
Joseph
Philco 46-480
Philco 49-906
Users browsing this thread: 1 Guest(s)
|
|
Recent Posts
|
|
Philco 42-345 Restoration/Repair
|
| Hi OSanders,
Look carefully at the band switch. Turn it slowly and "wiggle" it around the desired band. ...MrFixr55 — 12:33 AM |
|
5U4 vs 5Z4 tubes
|
| I think that RCA and GE introduced metal tubes in the USA in 1936. I don't know if they were being made by RCA, GE or b...MrFixr55 — 11:20 PM |
|
Philco 42-345 Restoration/Repair
|
| Vlad95,
Thank you for the stringing guides and wow there are so manyosanders0311 — 06:01 PM |
|
5U4 vs 5Z4 tubes
|
| A pre war Hallicrafters, and an early one too, very nice! 1936 is pretty early for metal tubes too, which would explain ...Arran — 05:58 PM |
|
Philco 42-345 Restoration/Repair
|
| Thanks Rod,
"When you hear the background hiss and no station it usually indicates that the oscillator quit" ...osanders0311 — 05:52 PM |
|
Philco 42-345 Restoration/Repair
|
| RodB
:beerchug:Vlad95 — 10:22 AM |
|
Philco 42-345 Restoration/Repair
|
| Vlad, you nailed it. Swiss and German roots.RodB — 09:54 AM |
|
5U4 vs 5Z4 tubes
|
| Well this is a Hallicrafters SX/9 circa 1936.
No real issues so far although I dodged a real bullet with a cap that was...bridkarl — 07:59 AM |
|
5U4 vs 5Z4 tubes
|
| The pinout is the same but the 5U4 has a 3 amp filament, verses 2 amps or less on the 5Z4. I think that the pinout of a ...Arran — 12:04 AM |
|
Philco 42-345 Restoration/Repair
|
| By the way.
osanders0311
Take a look here: Dial cord stringing Guides
May be here you can fount correct string settin...Vlad95 — 11:15 PM |
|
Who's Online
|
| There are currently no members online. |

|
 
|


![[-] [-]](https://philcoradio.com/phorum/images/bootbb/collapse.png)


