Crack In Philco 50-920 Plastic Cabinet
Posts: 1,797
Threads: 55
Joined: Feb 2015
City: Roseville, MN
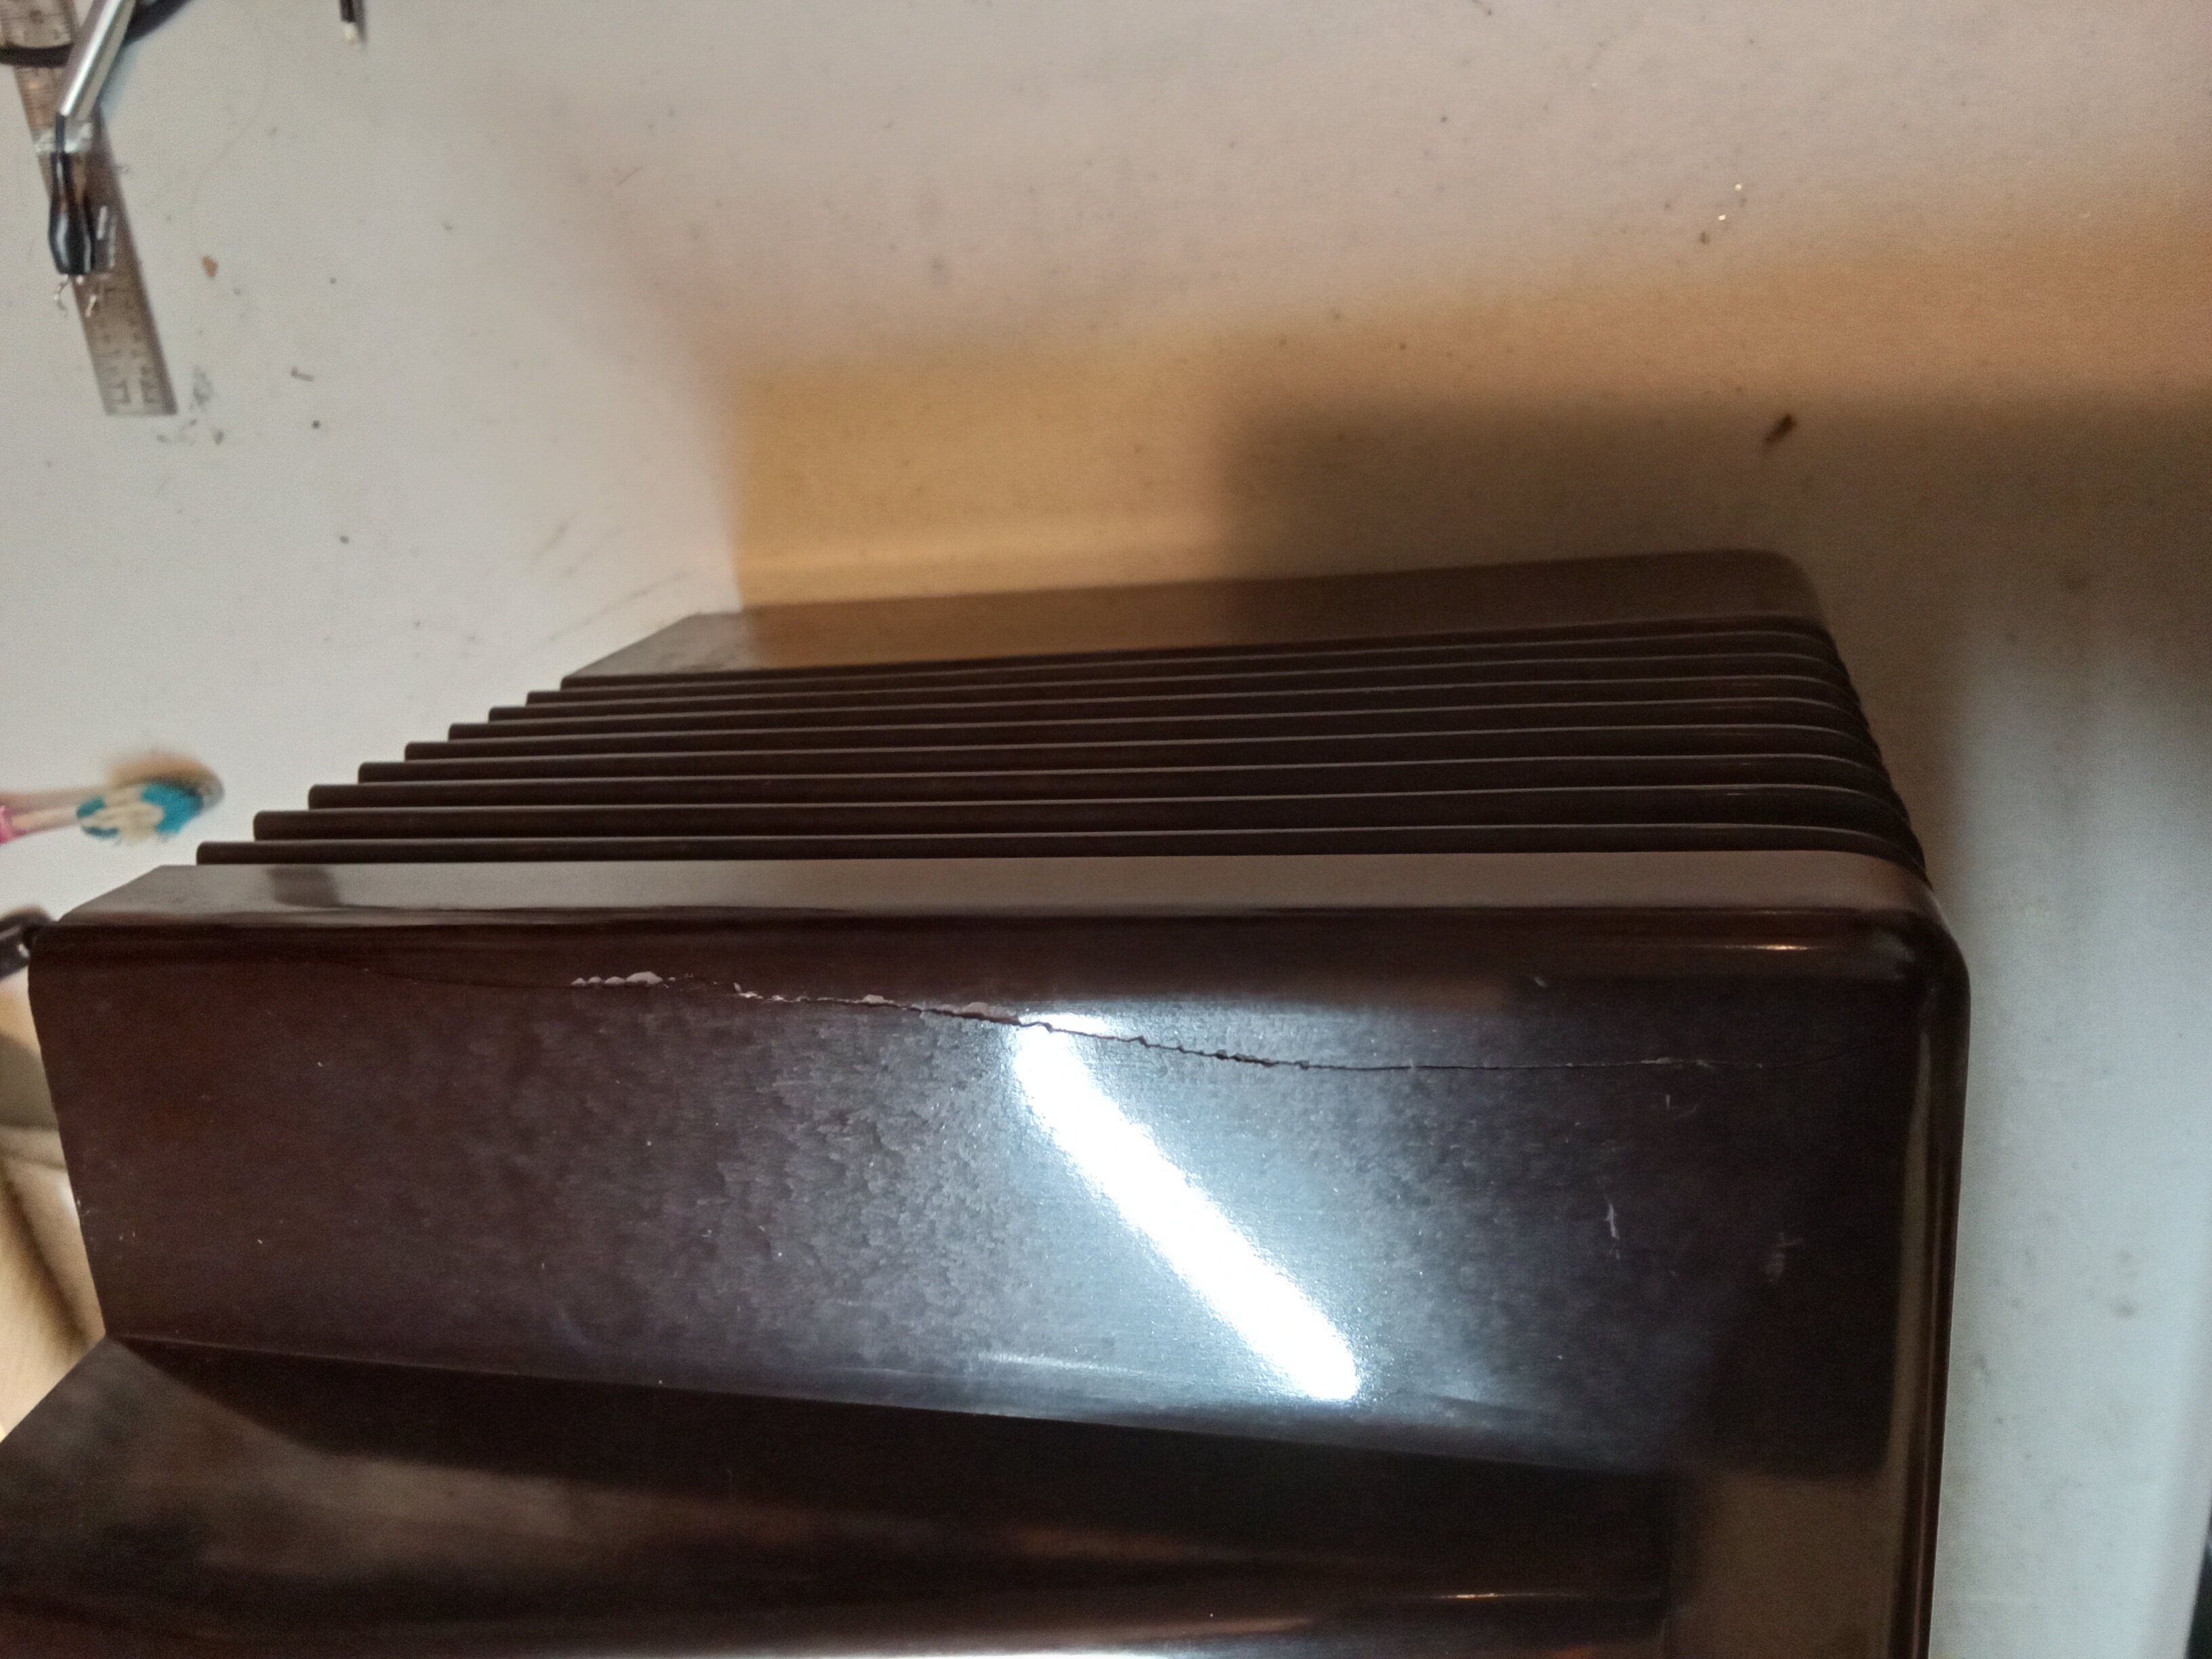
I'm working on restoring this 50-920 and would appreciate some help deciding how to repair this 7-1/2 inch crack that runs front to back on a corner. My thought is to secure the crack with super glue, fill the crack with JB Weld PlasticWeld, sand smooth then stain or paint. Maybe run a line of JB along the inside of the crack. By then the cabinet should weigh another pound heavier.
Posts: 2,327
Threads: 23
Joined: Jul 2020
City: Greenlawn
State, Province, Country: NY
Hi Rod,
Search the Phorum for the following thread by Ron Ramirez (God rest his soul):
The Story of the Broken 38-12CB
this was a plaskon radio but I suppose that the techniques for repair would be similar for bakelite.
For this case here, I am in full agreement with trying to spread the crack a little and wick some Krazy Glue into the crack. I also agree with JB Weld on the inside of the set to further reinforce. \\The outside surface is a big question mark. I don't know if JB Weld is the best for the visible surface. I wonder if Bondo or some other auto body filler would be easier to work. The final issue is finishing the cabinet. This set has a natural bakelite finish. The set that Ron had repaired was painted white. The Bondo repair job could be sanded smooth by stepping from a 200 grit paper through 400, 600 and up to 1000 grit wet sandpaper, similar to dent repair on a car, but then one has to paint the cabinet, losing the original finish.
"Do Justly, love Mercy and walk humbly with your God"- Micah 6:8
"Let us begin to do good"- St. Francis
Best Regards,
MrFixr55
Posts: 5,654
Threads: 56
Joined: Sep 2008
City: Sandwick, BC, CA
I would use some two part epoxy, the clear stuff that takes 24 hours to harden, and work it's way into the crack from the backside, if you can spread the crack before you do this it would help. I don't like C.A based glue because it tends to break down with age, and J.B Weld is metal filled, which is not really what you need here. This will make the crack as close to invisible as possible to start with, you don't really need to plaster the inside of the cabinet with anything, I never have with a straight crack, and have never had a bond fail.
Regards
Arran
(This post was last modified: 07-01-2025, 11:34 PM by Arran.)
Posts: 3,188
Threads: 226
Joined: May 2008
City: Omak
State, Province, Country: WA
Hello Rod,
I too agree with Arran,
Sincerely Richard
Posts: 2,263
Threads: 164
Joined: Jan 2013
City: Westland, MI
One suggestion I would offer is to get a brown Sharpie permanent marker and color in the cracks to help hide after the epoxy is applied. I would get a shade or three of different brown markers to see which blend best. Use a pliable small putty knife to apply the epoxy from the inside-out. A credit card is a close second choice. Do your best to push as much glue through to the outside. You might consider wrapping a Bungie cord around it 4-5 times to put some compression on the crack. Use stand-offs on each side of the crack under the cord to keep it from gluing to the cabinet. Two dowel rods, one on each side of the crack will keep the cord out of the glue. Good luck! Take care, - Gary
"Don't pity the dead, pity the living, above all, those living without love."
Professor Albus Dumbledore
Gary - Westland Michigan
Posts: 2,327
Threads: 23
Joined: Jul 2020
City: Greenlawn
State, Province, Country: NY
Great ideas, Garry!
"Do Justly, love Mercy and walk humbly with your God"- Micah 6:8
"Let us begin to do good"- St. Francis
Best Regards,
MrFixr55
Posts: 1,797
Threads: 55
Joined: Feb 2015
City: Roseville, MN
Yes, thanks everyone. I'll be putting together a plan and when I have it done I'll report the results.
Posts: 1,797
Threads: 55
Joined: Feb 2015
City: Roseville, MN
Here is my process.
I decided to use the idea of a couple bungee cords with wood spacers to keep the cords away from the crack and adhesive.
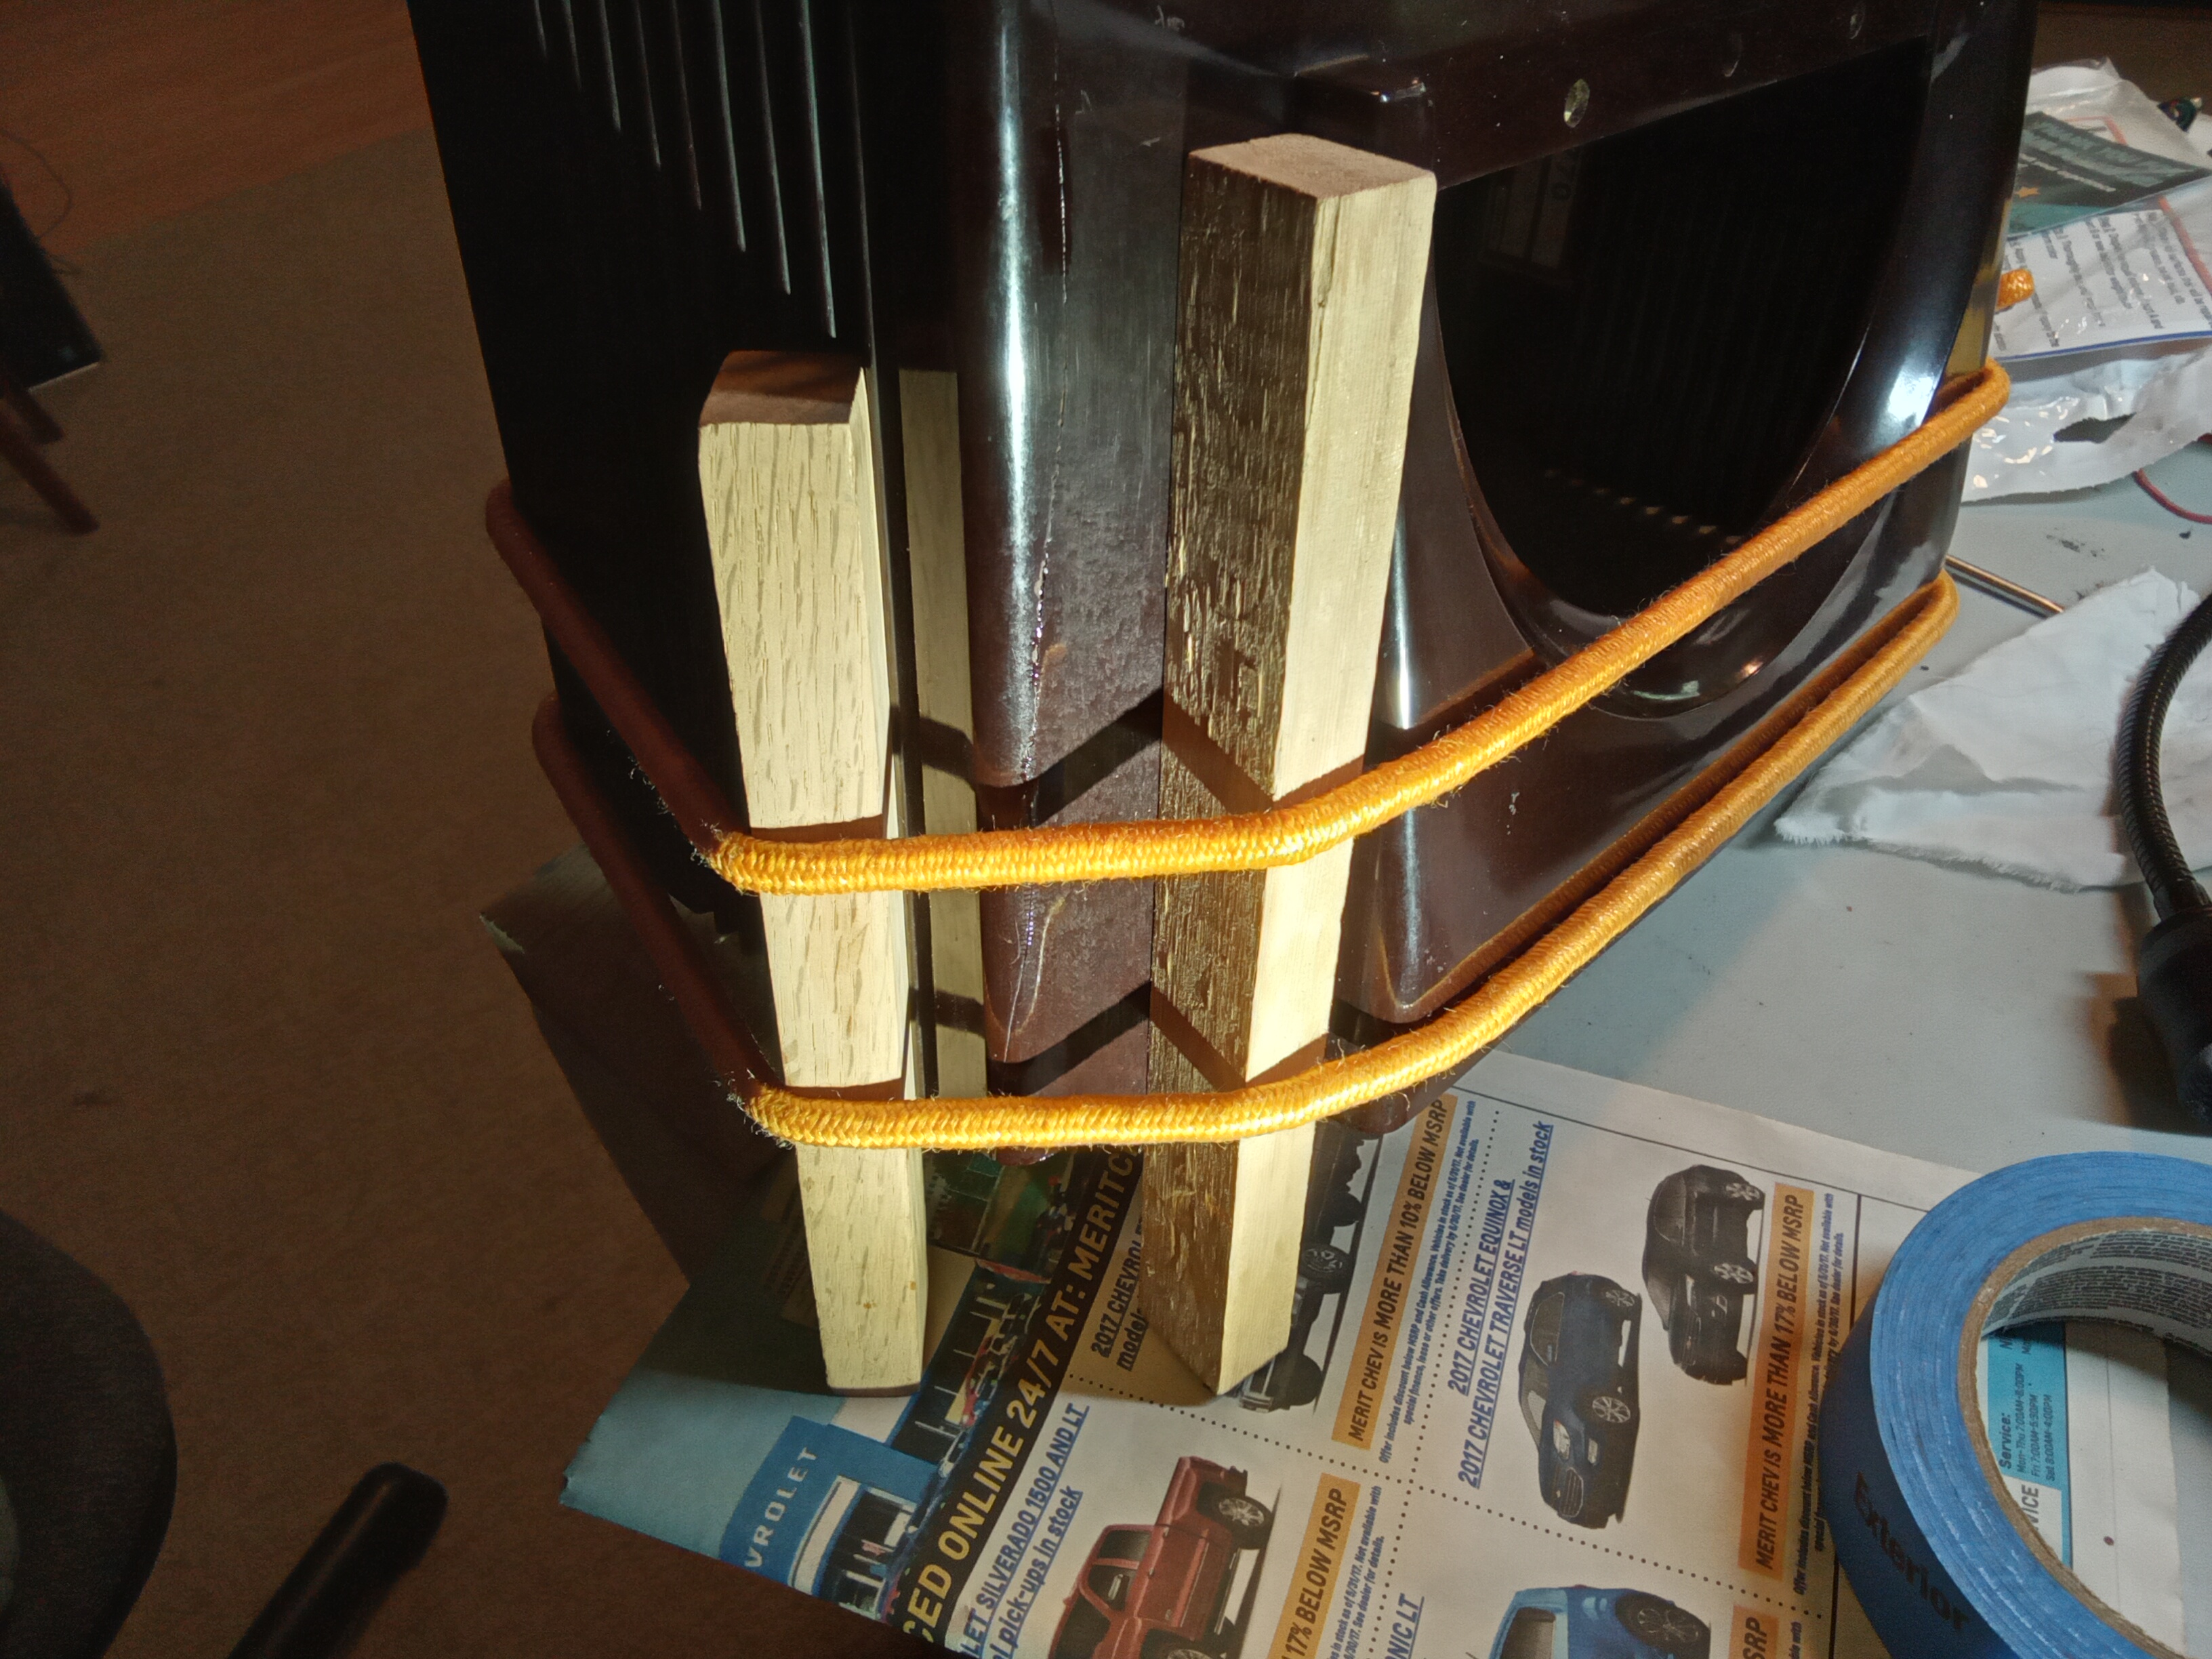
I had purchased slow set, clear epoxy and mixed a batch, cleaned the inside and outside of the crack with alcohol, secured the crack with the bungee cords then laid a line of epoxy along the inside of the crack. Next, I used the blade of a screwdriver and forced epoxy into the crack. A day later the cabinet is now solid. I mixed a small batch of epoxy and with a toothpick filled in the open sections of the crack. I could keep filling but it probably won't look much better than it is now. Certainly a scar but what's wrong with some character?
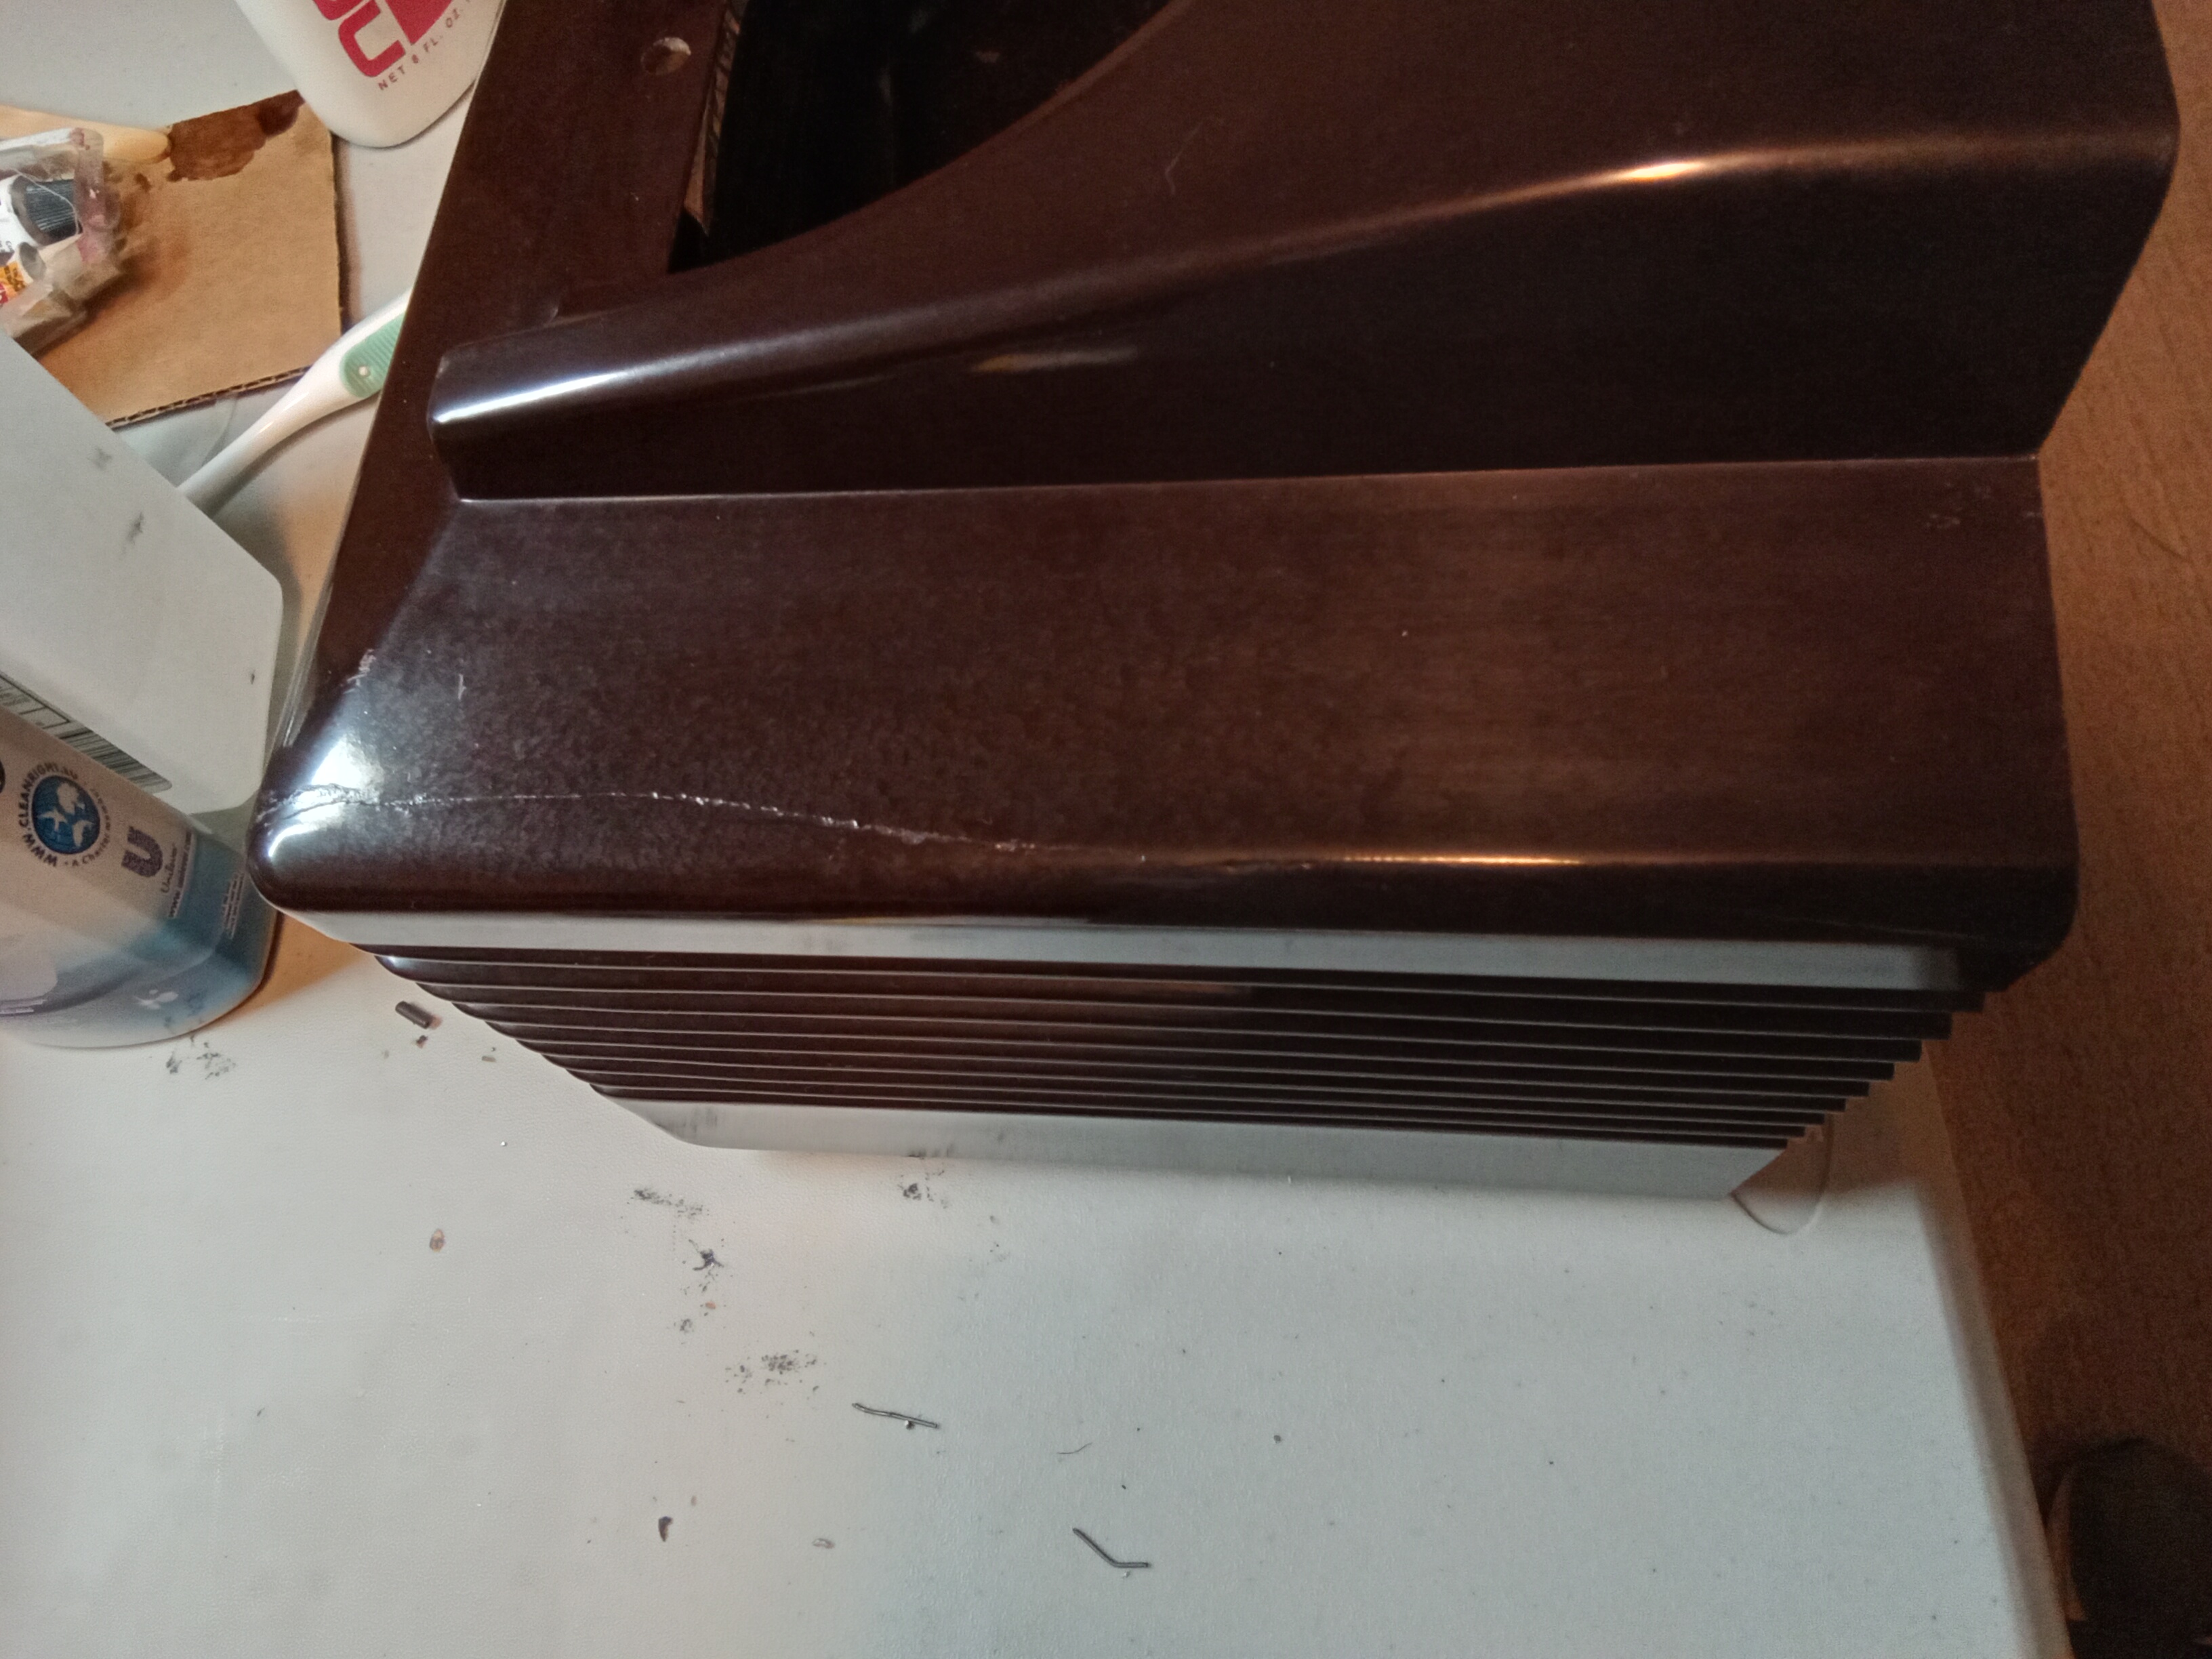
I'll post a final photo when all is assembled.
Posts: 181
Threads: 7
Joined: Apr 2025
City: SPRUCE GROVE
State, Province, Country: Alberta
Good result. I think that if you now grind the crack #400 -> #600 -> #1000 and then polish it, the crack will almost disappear.
If you want to work, lie down and sleep, and everything will pass.
Posts: 1,797
Threads: 55
Joined: Feb 2015
City: Roseville, MN
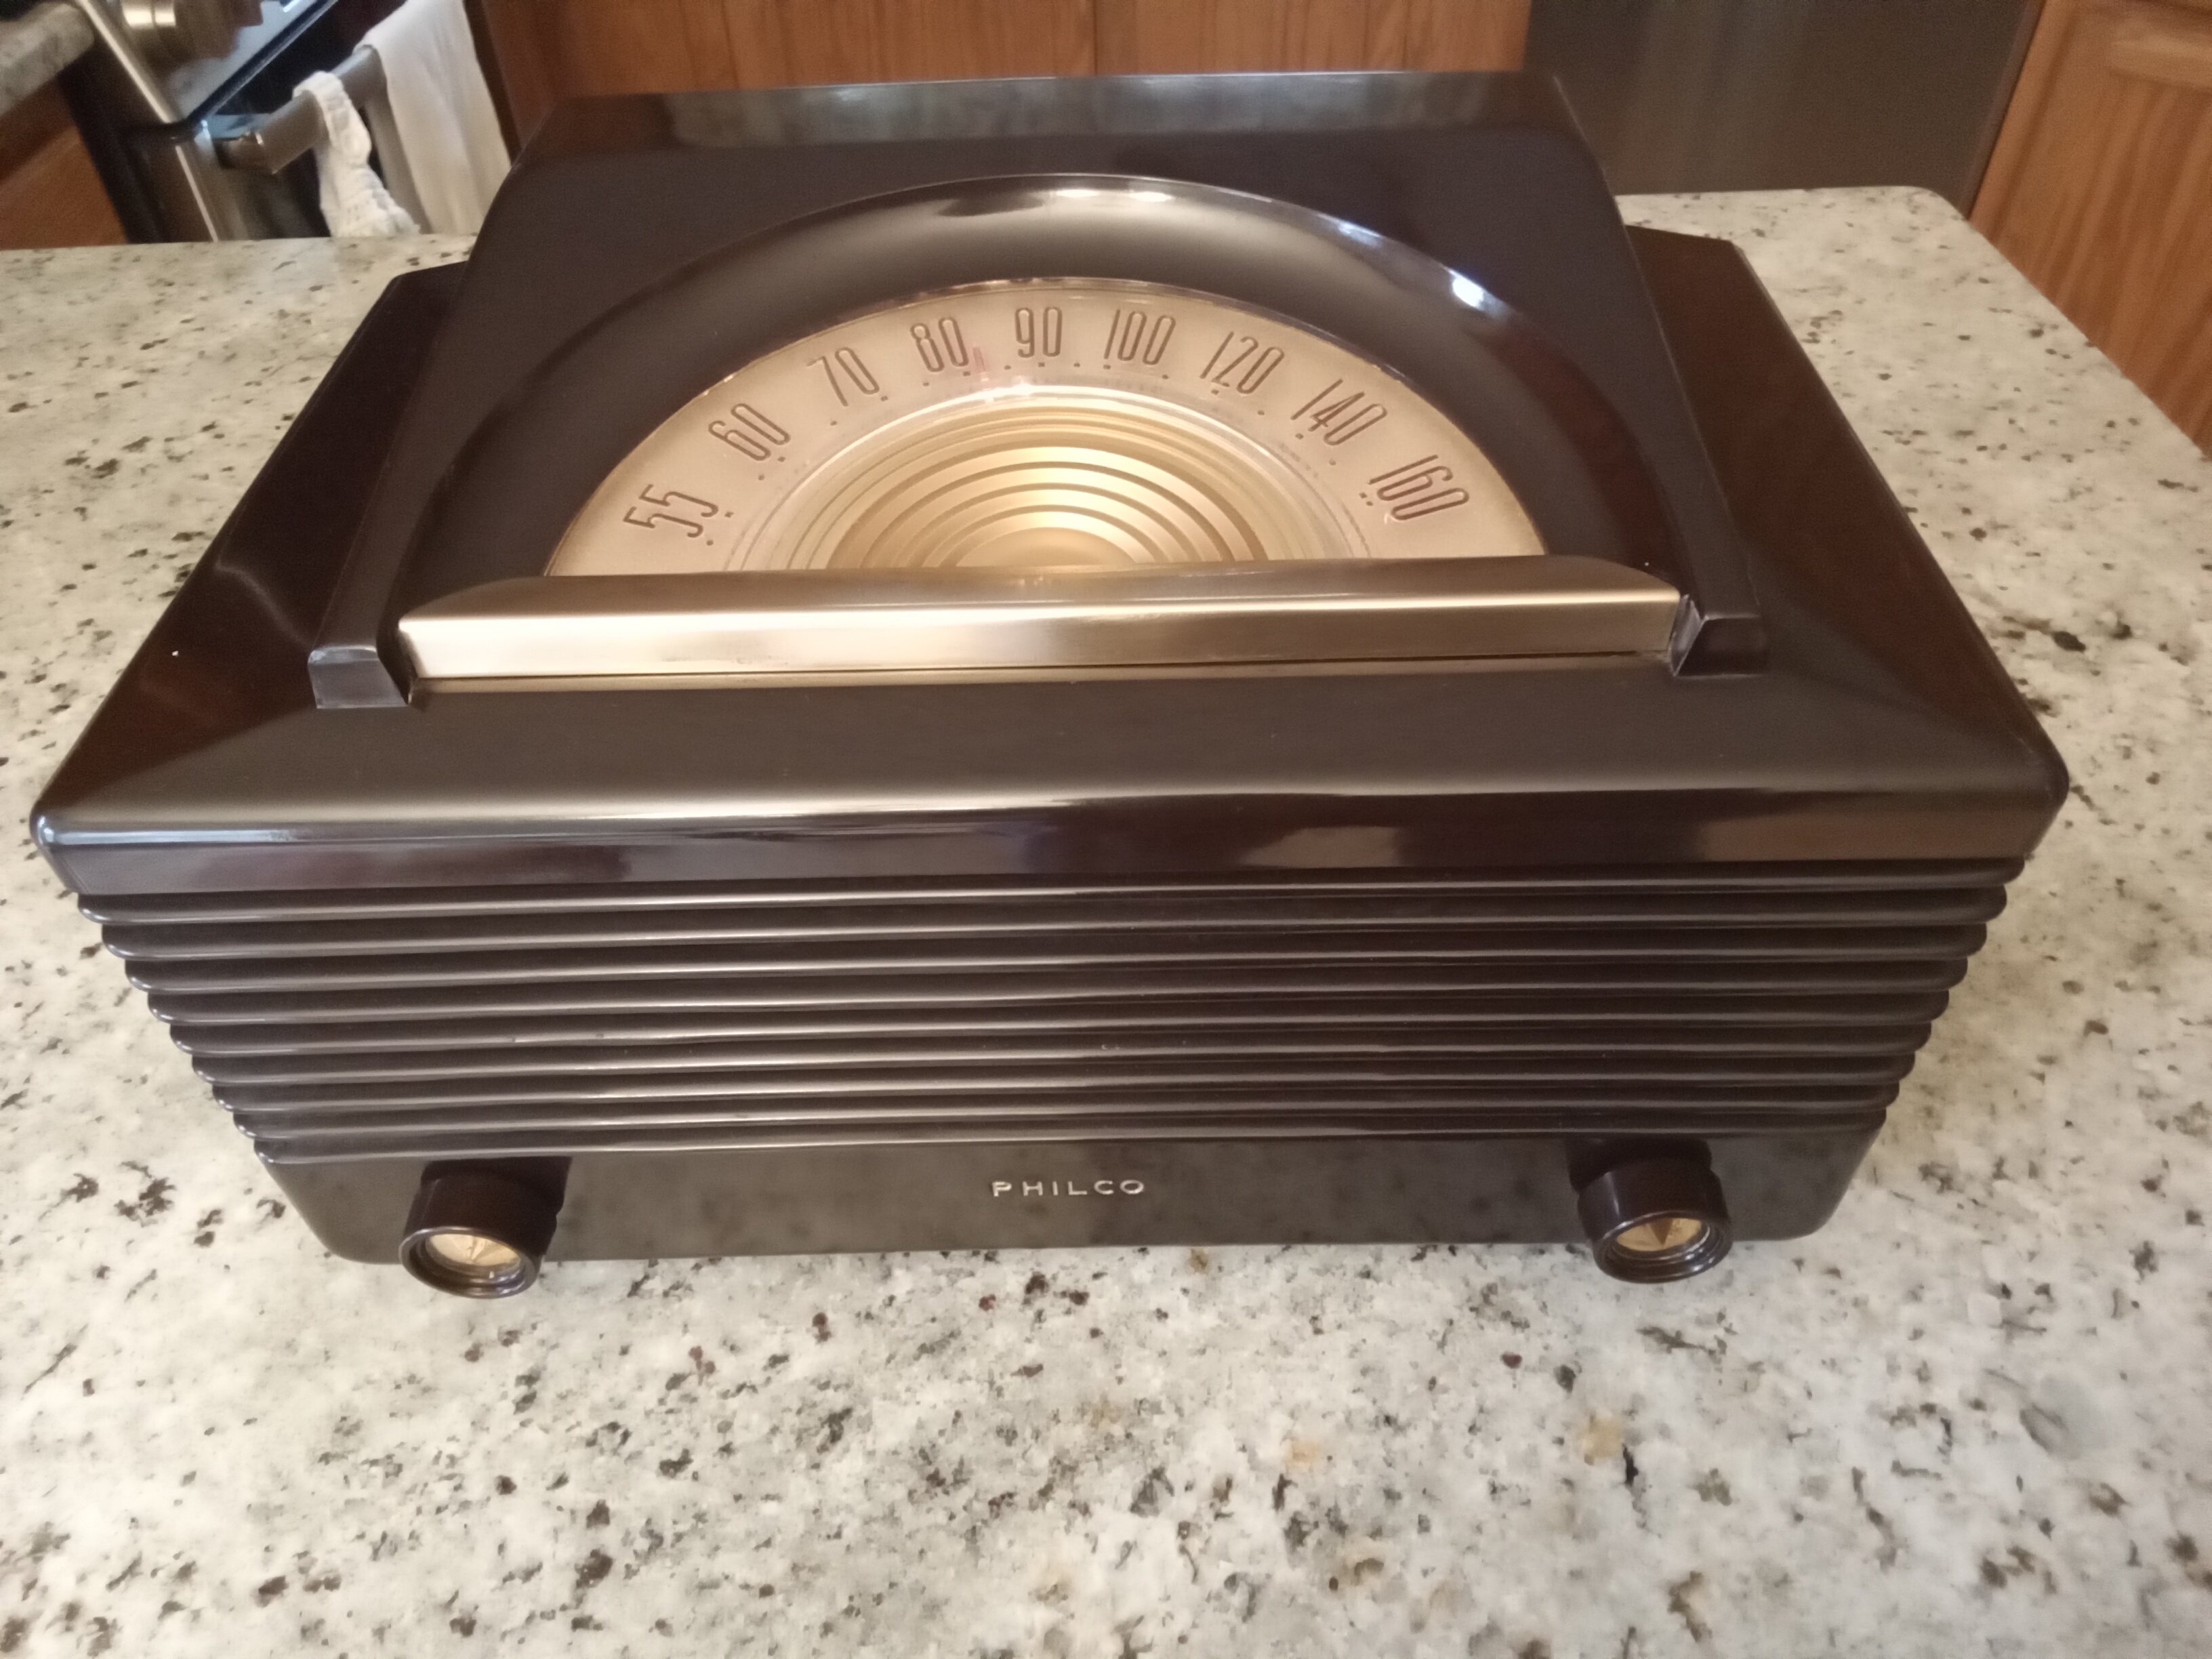
Finished up this project yesterday. Six tube AA6, plays nice, looks nice. Didn't go any further with the crack. Had a tough time remembering how it went back together, turned out I was making it more complicated than it was.
(This post was last modified: 09-11-2025, 09:54 AM by RodB.)
Posts: 4,832
Threads: 437
Joined: Jun 2011
City: Boston
State, Province, Country: Massachusetts
I have done the bungi routine before, it can work pretty good. I kinda like those Sunburst type dial on top. 6 tubes good enough for use around the house. Paul
Tubetalk1
Users browsing this thread: 2 Guest(s)
|
|
Recent Posts
|
|
Stromberg Carlson 1500 Squeal
|
| And life just keeps getting more complicated. By dconant.
Dittos'Jimradio — 08:01 AM |
|
Plug Voltages Needed For A 1943 CRV-20130 Power Supply
|
| That looks a lot like an aircraft connector of some kind, even if it's a U.S.N power supply. I have a book somewhere abo...Arran — 02:56 AM |
|
Plug Voltages Needed For A 1943 CRV-20130 Power Supply
|
| hello david,
I have a similar generator in my collection that features a cast iron, single-cylinder Briggs & Stratt...radiorich — 01:00 AM |
|
under chassis parts locator diagram for 1938 Zenith 9s262
|
| Has anyone gone to the trouble of creating an under chassis parts locator image? Yes, I can identify components by foll...bobloney — 08:57 PM |
|
Plug Voltages Needed For A 1943 CRV-20130 Power Supply
|
| Try looking at this site the book mark is for a old generator that I was given. David https://radionerds.com/index.ph...David — 08:36 PM |
|
Plug Voltages Needed For A 1943 CRV-20130 Power Supply
|
| Hello Everyone,
I am looking for voltage identification for all the pin positions on the socket of a CRV-20130 power su...Tonym4704 — 08:16 PM |
|
Philco P45-6365 Universal Transformer Instruction Manual
|
| Can anyone guide me to where this may be found?GRG — 03:00 PM |
|
54C Complete Teardown/Rebuild
|
| I don't think that I have encountered a 12Z3 before, curious how it uses one of those but includes a #43, which is a 25 ...Arran — 02:17 PM |
|
HiFi (Chifi) tube amp build - but my own design.
|
| It's the other forum. I'm also in DIY, but mostly read there. Honestly, I kinda jumped into this without much thought to...TV MAN — 10:43 AM |
|
Philco 71 Code 125
|
| Hello,
I am in need of a schematic for this radio. Mine has the three separate circular tube shields and a shadow me...dconant — 08:06 AM |
|
Who's Online
|
There are currently 1710 online users. [Complete List]
» 1 Member(s) | 1709 Guest(s)
|
|
|

|
 
|








