Refinish help needed - model 45 Butterfly
Posts: 109
Threads: 15
Joined: Mar 2024
City: BERTHOUD
State, Province, Country: CO
Hey all,
First off, I am not great at cabinet restoration, I’m still learning with each radio.
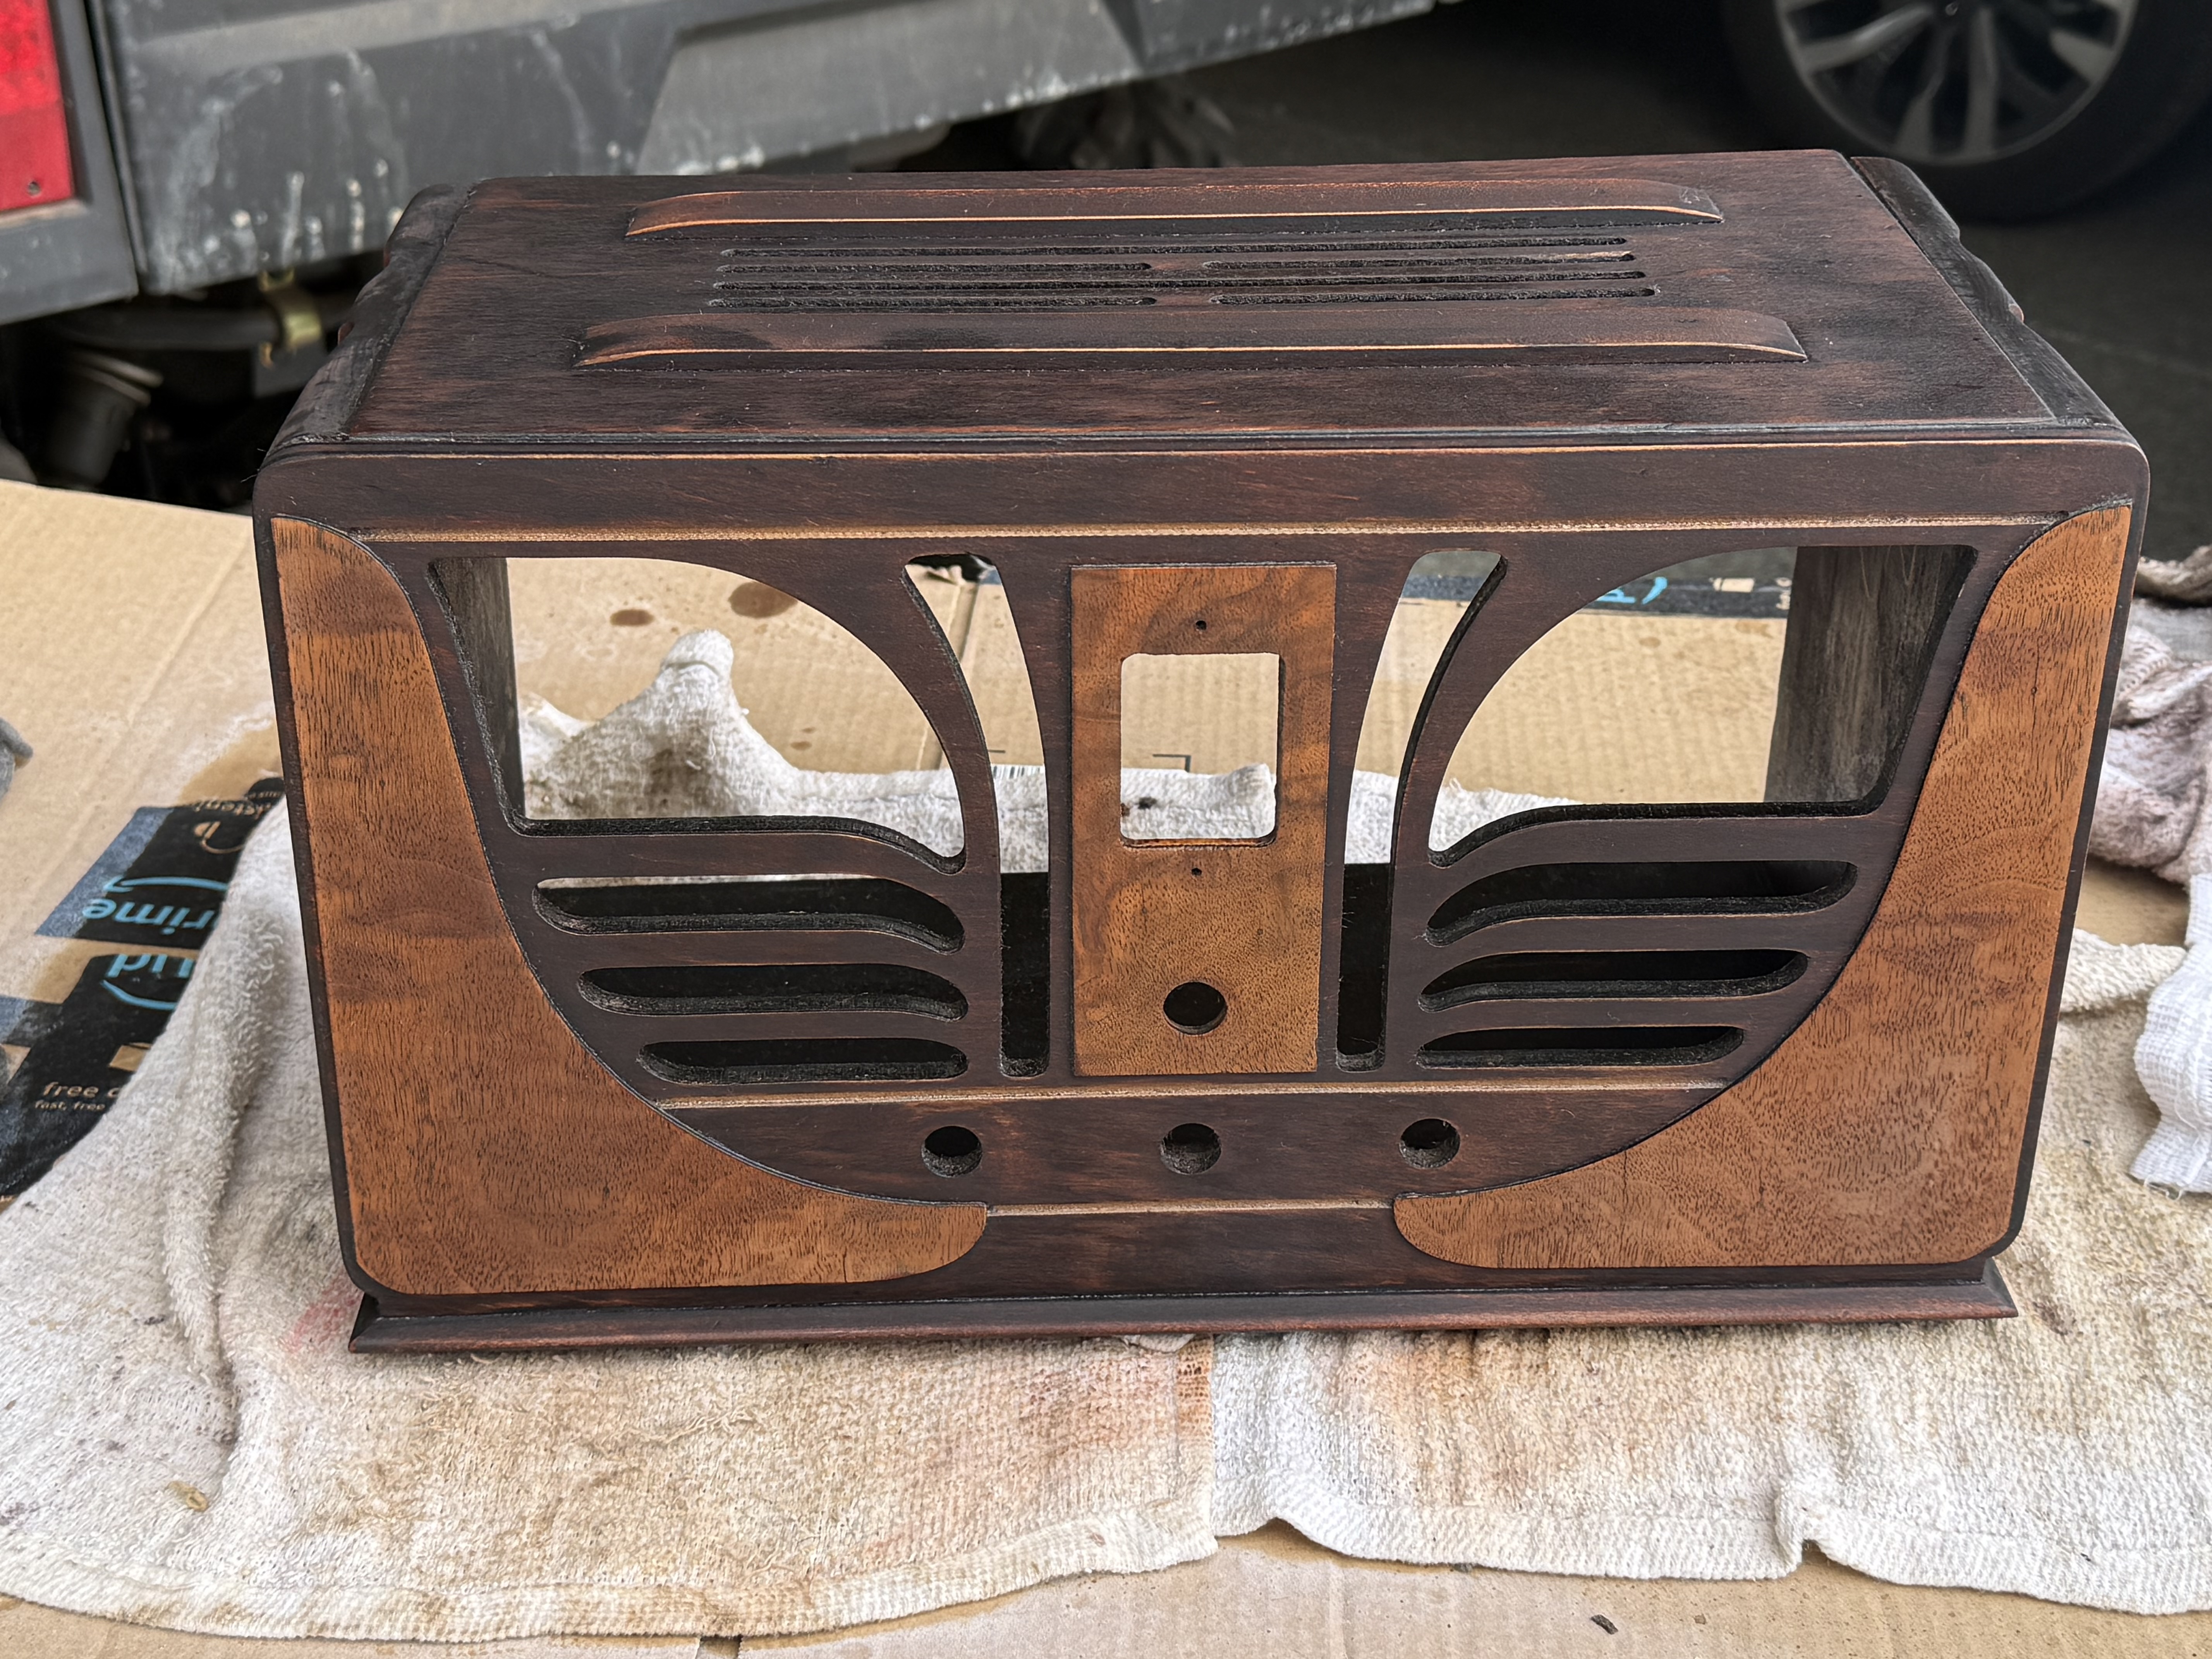
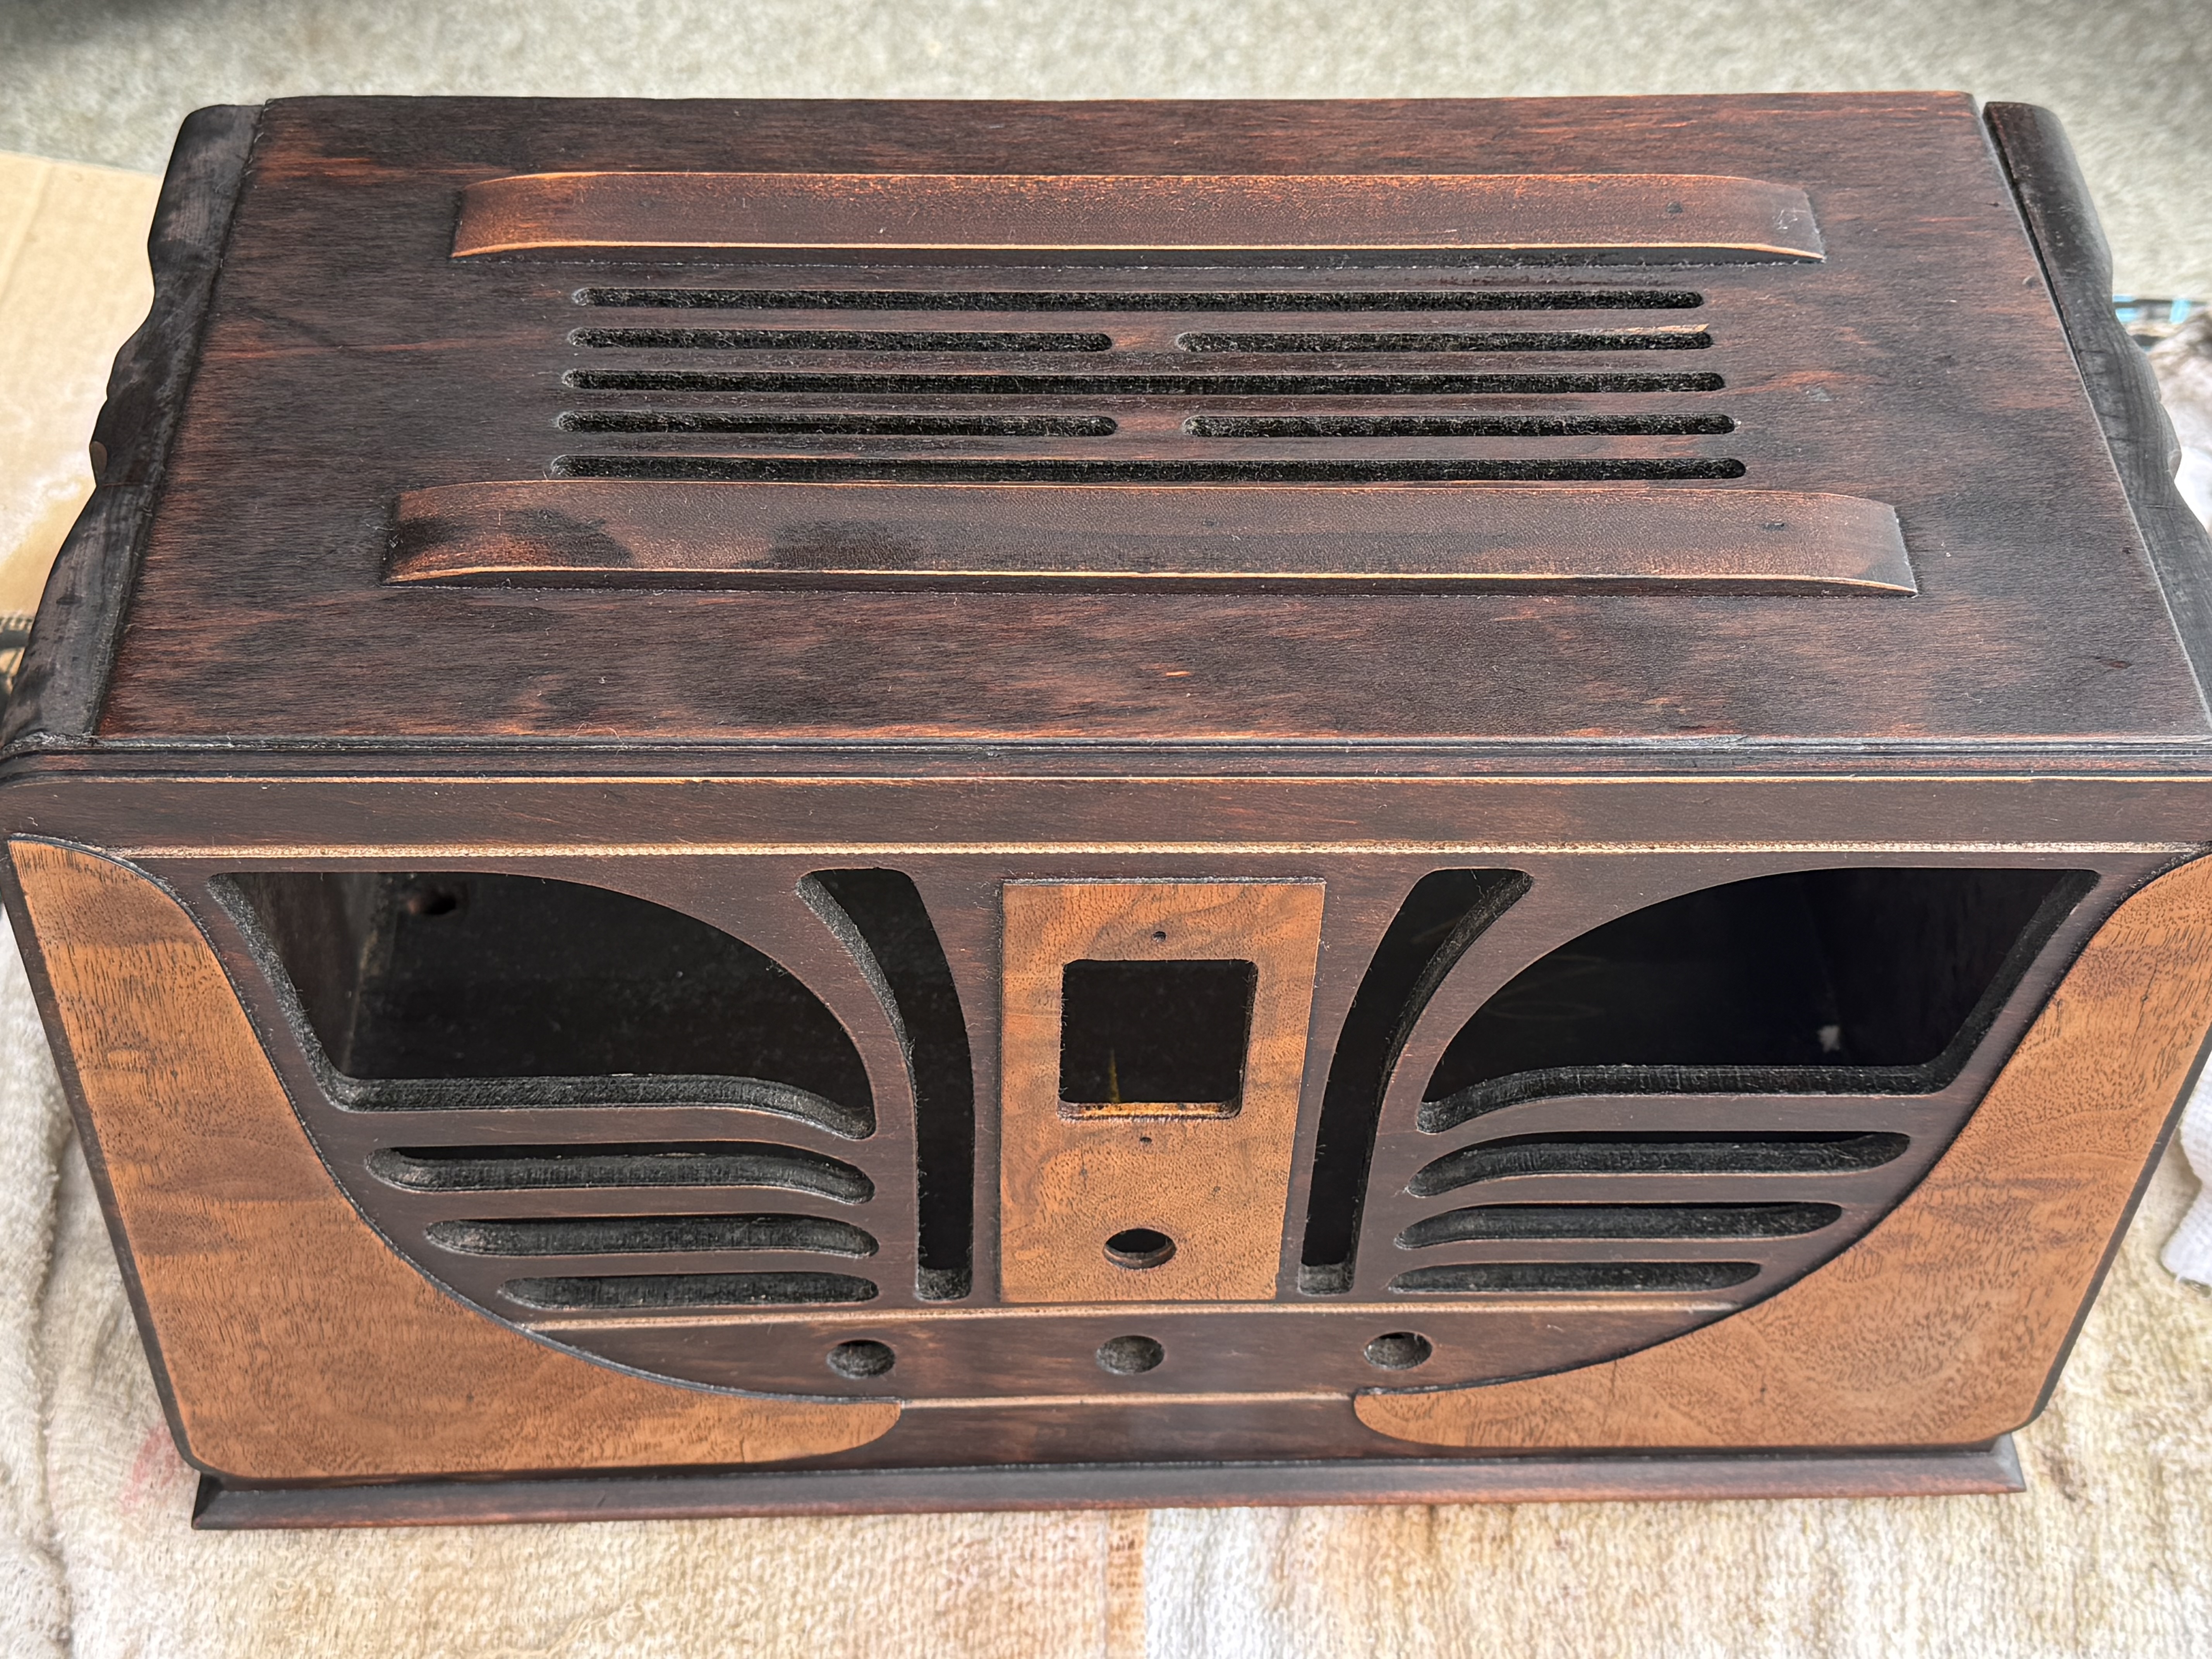
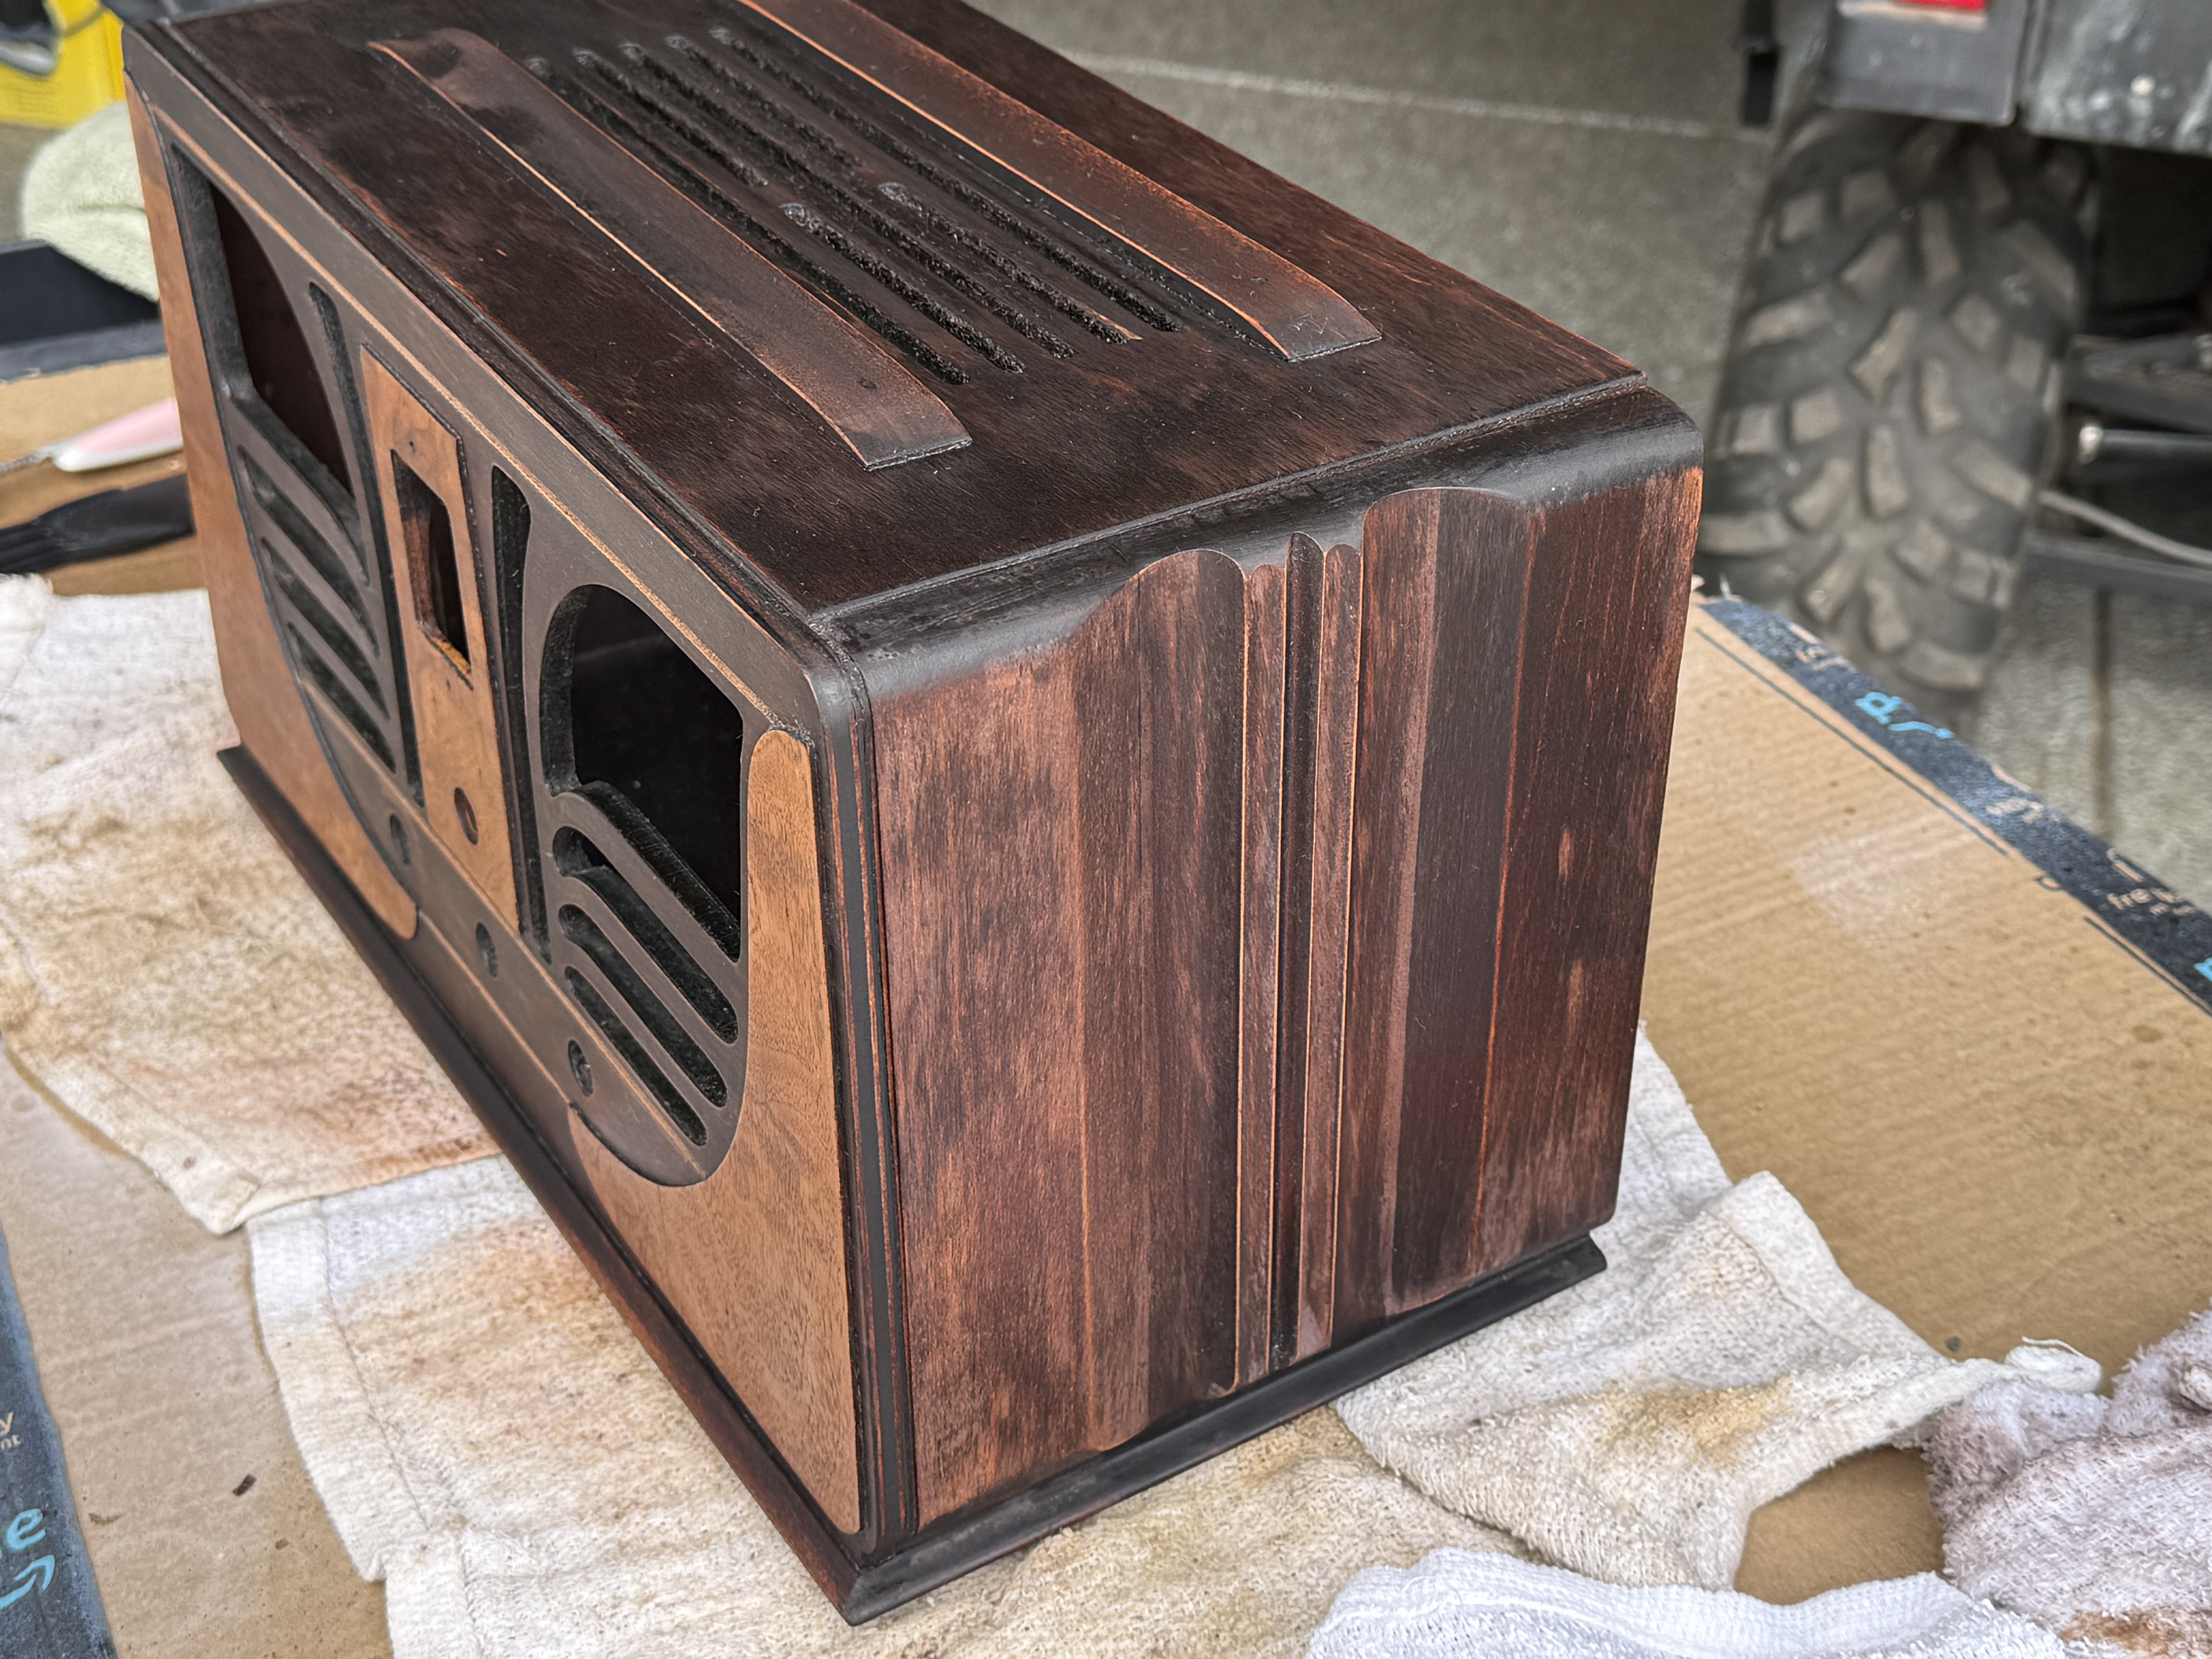
I need some input. For the model 45 butterfly I am working on, I have it stripped and cleaned (might need a couple more passes in some of the groove areas). At this stage, I can’t ever determine if I should do grain filler and toner - or - stick with the coloring the way it is and go to lacquer stage. I haven’t done grain filler on any cabinet. I have done toner for sure. I read Ron’s post about what he did on his butterfly and he did the full grain filler and toner, so leaning that way. I just looks pretty decent after fully stripping the old lacquer and I always pause not knowing which route to go next. Thoughts?
From Ron’s post:
“ I only applied grain filler to the three panels where Philco had used the fancy walnut veneer, as the remainder of the cabinet used the cheap “white wood” which normally has a very tight grain which does not require filling.”
Craftsmanship is an ongoing cycle of learning fueled by patience, persistence, and care, where every project refines our judgment and challenges our skills, in the steady pursuit of the Path to Mastery.
(This post was last modified: 04-09-2026, 04:34 PM by SRv2.)
Posts: 5,584
Threads: 291
Joined: Nov 2012
City: Wilsonville
State, Province, Country: OR
Walnut has open pores and will benefit from grain filler while, as Ron mentioned, the other wood does not have open pores so no need to fill. There are a number of grain filler products out there and numerous posts on the Phorum about how people have gone about filling. It does take a bit of practice. Lately I've used Timbermate to grain fill. Its water soluble, easy to work with and easy to sand. For me it takes a couple of passes to get the grain filled completely. It comes in multiple colors so you should be able to match the wood pretty closely. People often lightly sand the veneer and apply a sanding sealer before doing the grain filling. This helps keep the filler from staining the wood surrounding the pores if its a staining type of filler. some fillers are oil based and different people have their favorite way of doing the filling.
Posts: 109
Threads: 15
Joined: Mar 2024
City: BERTHOUD
State, Province, Country: CO
Thanks, Bob, that’s helpful. I have some Mohawk grain filler and I’ll give it a go. I appreciate the feedback and tips.
Craftsmanship is an ongoing cycle of learning fueled by patience, persistence, and care, where every project refines our judgment and challenges our skills, in the steady pursuit of the Path to Mastery.
Posts: 1,135
Threads: 54
Joined: Feb 2013
City: Shenandoah,
State, Province, Country: Pennsylvania
Hi George, it is very tempting for someone like me who absolutely hates doing cabinet refinishing to strip a cabinet and wash it down with mineral spirits and then go to the clear lacquering stage. My 37-116 is a big floor model and after stripping it and wiping it down, it looked so good and I was tempted to just do the clear lacquer. After stripping, it spread the color or tint around so good that all the blemishes and scratches were gone and wiping it down made it really pop so much so I thought why take a chance with rattle cans and possibly ruin what already looked terrific. When Ron was still with us he insisted that I wouldn’t be sorry to do all the steps leading up to the clear finish. I do like the way it finally came out but I can’t help wondering what it would have been like if I just went to clear lacquer after stripping it and wiping it down. It surely would have saved many hours of labor and money. I did just that with a Majestic radio and very pleased with the way it turned out, so much so that that was what tempted me to do the same with my 37-116. So I guess what I’m trying to say is it depends on how much you like or dislike doing cabinet refinishing. Hope this helps more than adding confusion, have fun either way!
Ron
Bendix 0626. RCA T64 Philco 20B
Philco 41-250. Philco49-500
GE 201. Philco 39-25
Motorola 61X13. Philco 46-420 Crosley 52TQ
Philco 37-116. Philco 70
AK 35 Philco 46-350
Philco 620B. Zenith Transoceanic B-600
Philco 60B. Majestic 50
Philco 52-944. AK 84
Posts: 109
Threads: 15
Joined: Mar 2024
City: BERTHOUD
State, Province, Country: CO
Hi Ron,
This input is really helpful, thank you. I don't yet enjoy the cabinet refinishing process, but I think mainly it is because I am so much more comfortable with the electronic repair, and not much of a wood-worker, so I just hesitate too much due to lack of skills on the cabinet work. But, now that I have time in retirement, I am determined to learn cabinet refinishing better. I figure this "craft" of vintage radio restoration is a two step thing and mastering the craft means digging into both aspects. For this model 45, I am going to go ahead with the full process and see how it goes. I have had some other cabinets where I didn't even get the old lacquer fully stripped down and regretted the final outcome, so I have at least got the stripping process pretty well nailed. I may as well learn the grain filling process on this model since it is only on those three walnut panels. I really appreciate the feedback from this group of veterans, it helps to hear the range of experiences.
George
Craftsmanship is an ongoing cycle of learning fueled by patience, persistence, and care, where every project refines our judgment and challenges our skills, in the steady pursuit of the Path to Mastery.
Posts: 3,187
Threads: 226
Joined: May 2008
City: Omak
State, Province, Country: WA
Hello George,
I agree with Ron, and I’m not a fan of cabinet refinishing either. However, I did one years ago, following Ron’s and other members’ advice. It’s a Philco 610B, and here’s a photo of it in our gallery.
1936 (June 1935) - Philco Radio Gallery
Anyway I have always wanted to get a 45 butterFly to restore I do have Philco bullet thou.
Sincerely Richard
Posts: 109
Threads: 15
Joined: Mar 2024
City: BERTHOUD
State, Province, Country: CO
Hey Richard,
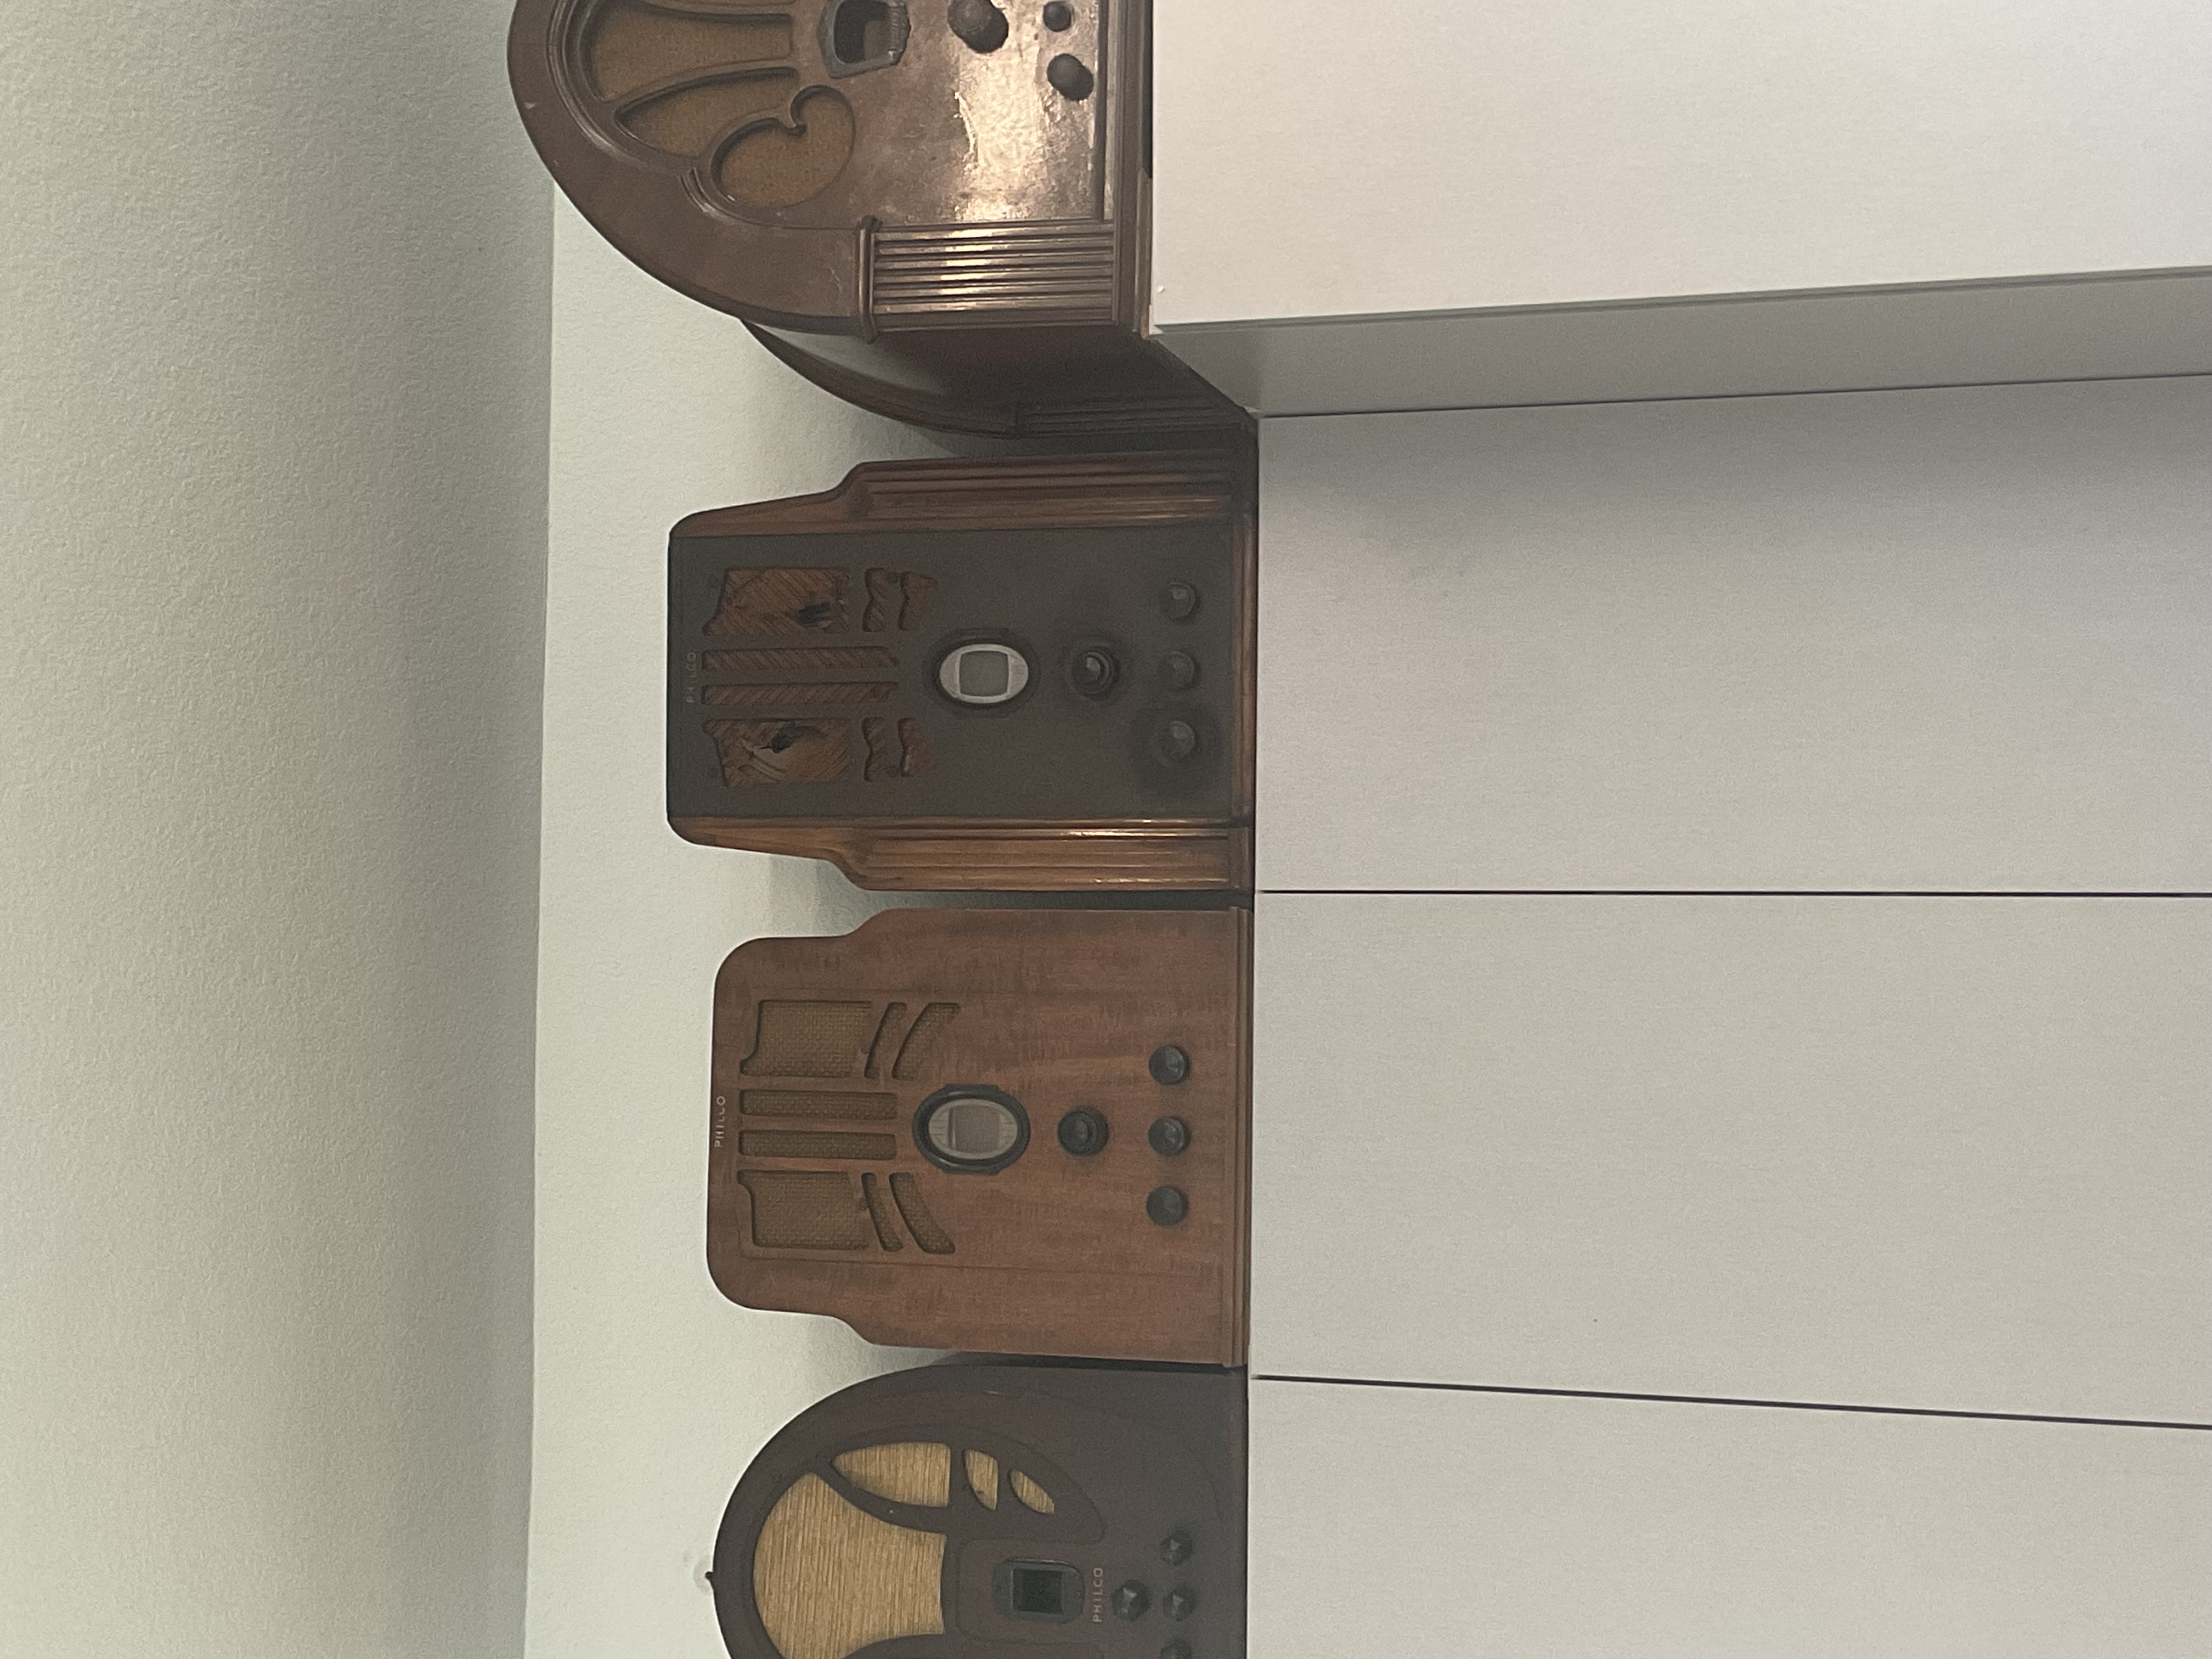
Wow, that 610B looks incredible, like it just rolled off the assembly line. Probably better, nice job! That gives me inspiration to work on the similar models I have stored up on top of my garage cabinets. Not sure if mine is a 610B. I really like that tombstone look.
Craftsmanship is an ongoing cycle of learning fueled by patience, persistence, and care, where every project refines our judgment and challenges our skills, in the steady pursuit of the Path to Mastery.
(This post was last modified: 04-11-2026, 05:39 PM by SRv2.)
Posts: 1,135
Threads: 54
Joined: Feb 2013
City: Shenandoah,
State, Province, Country: Pennsylvania
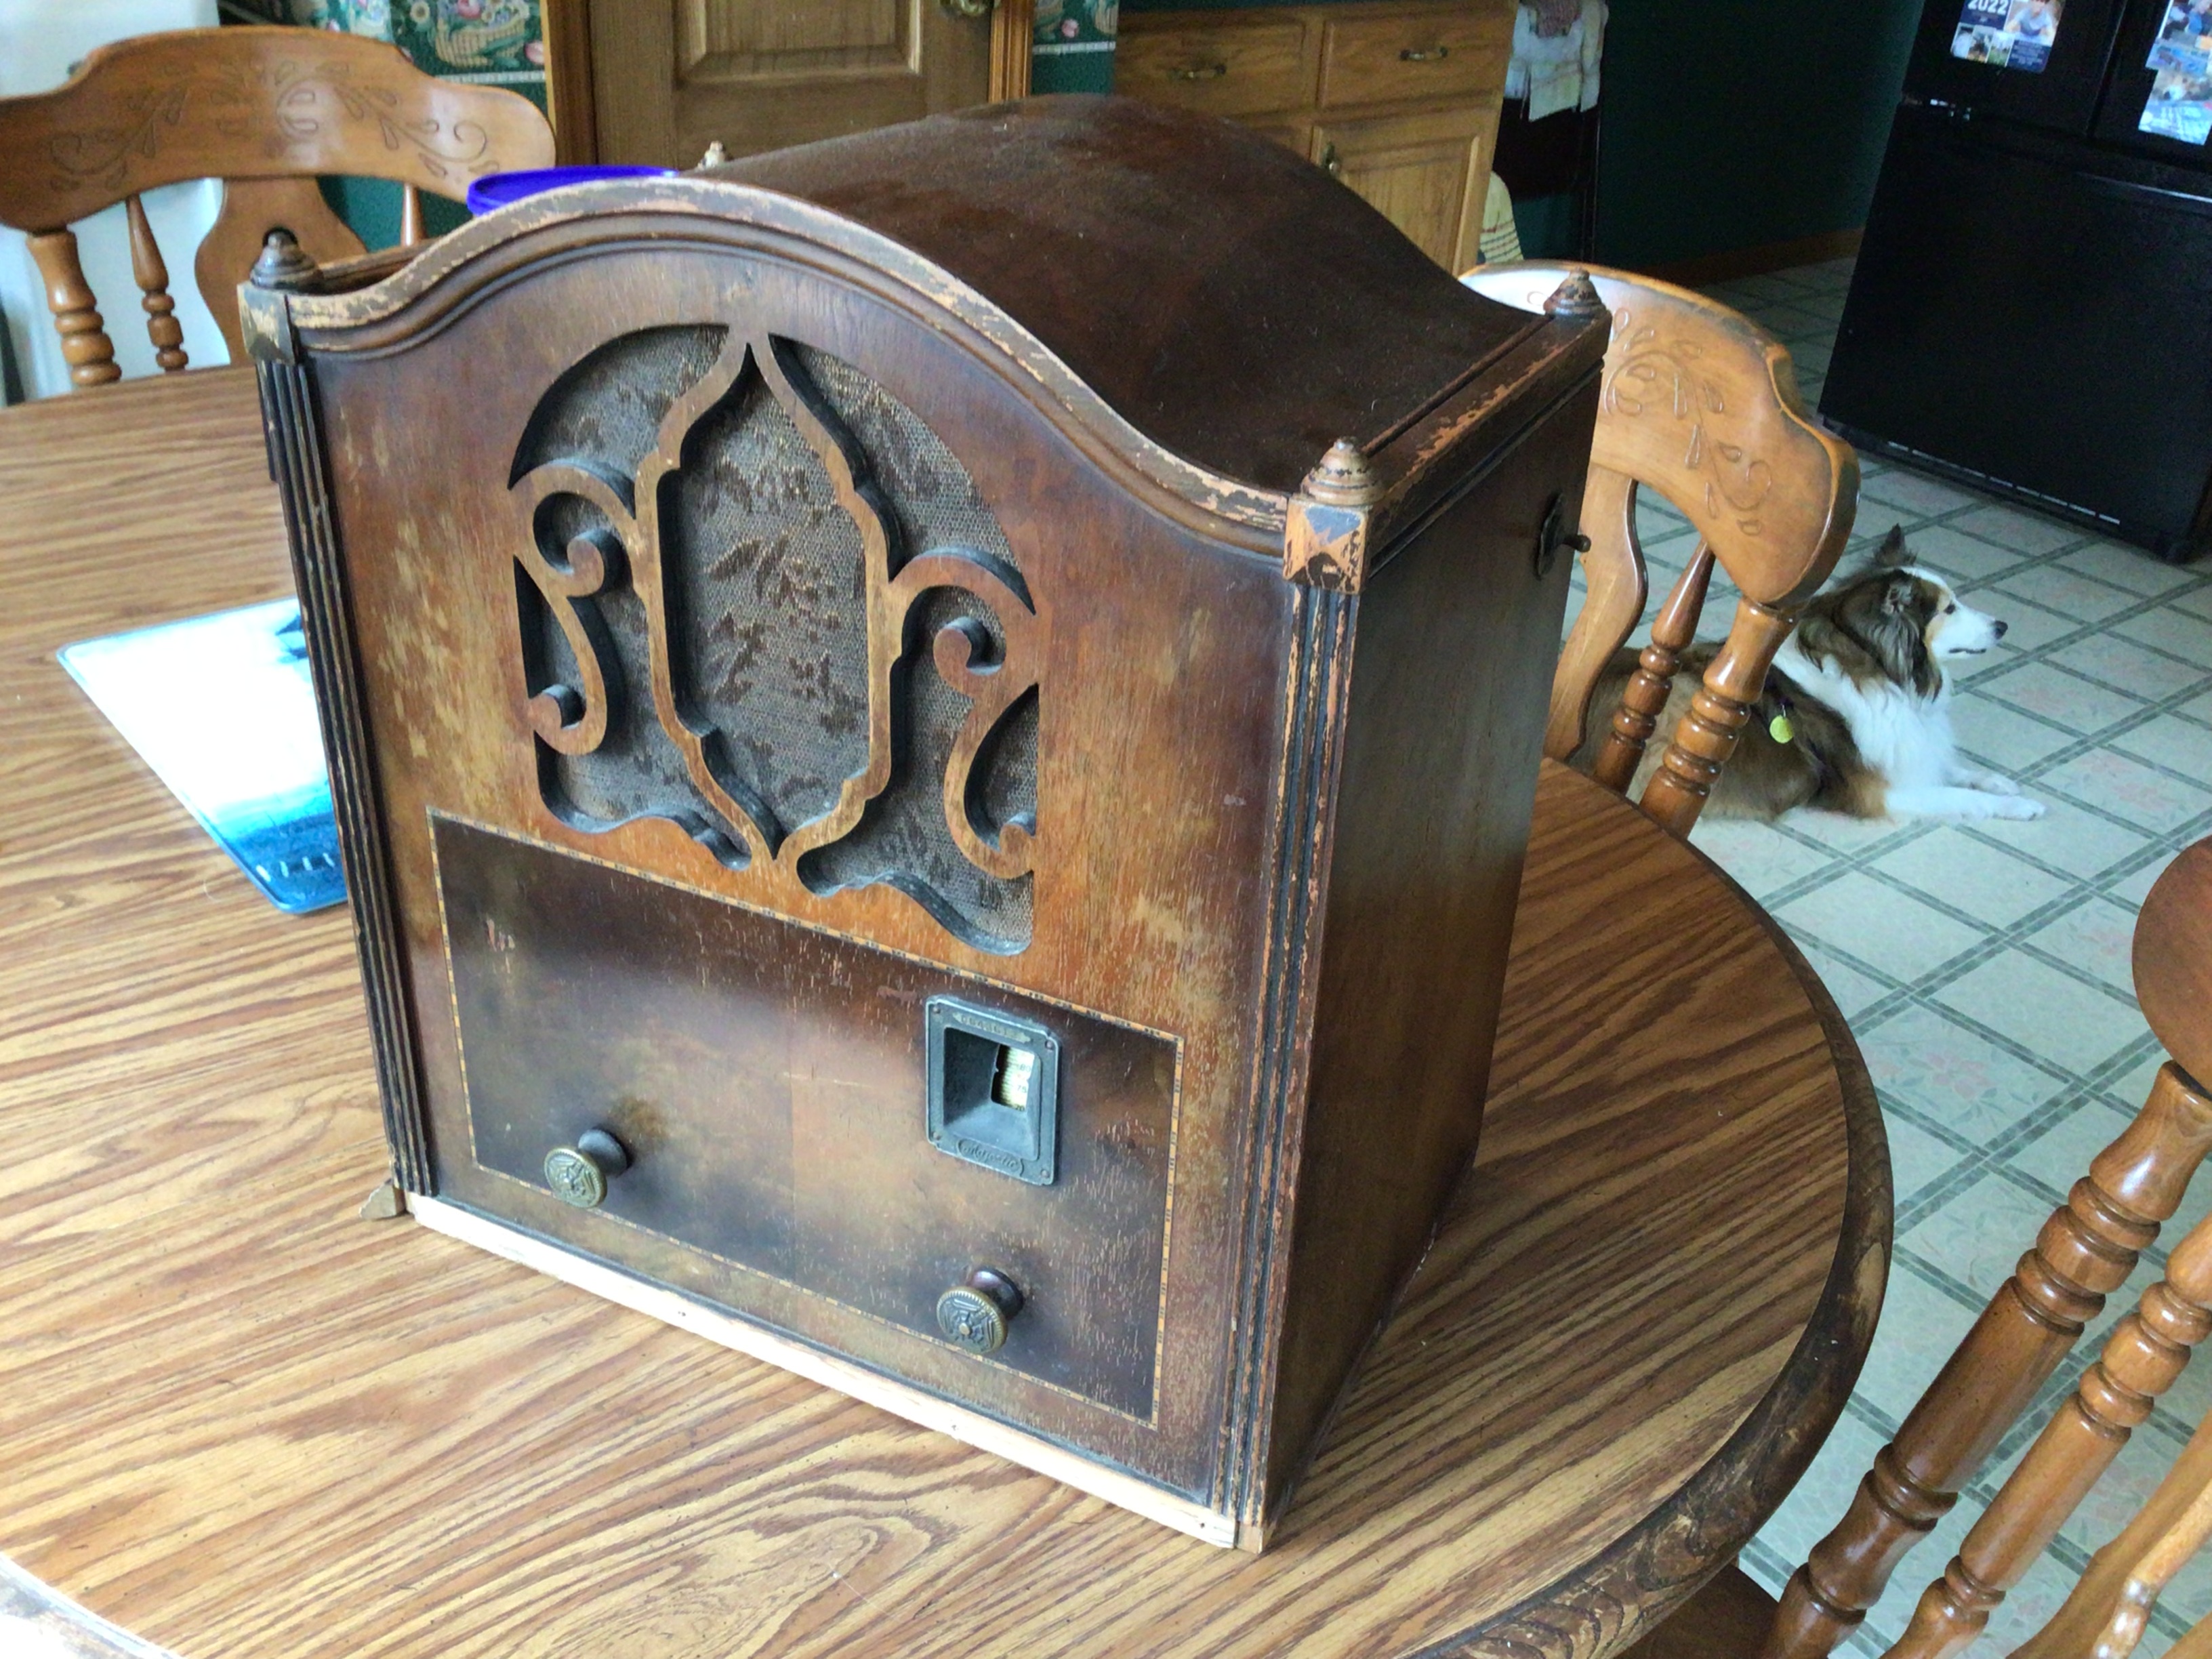
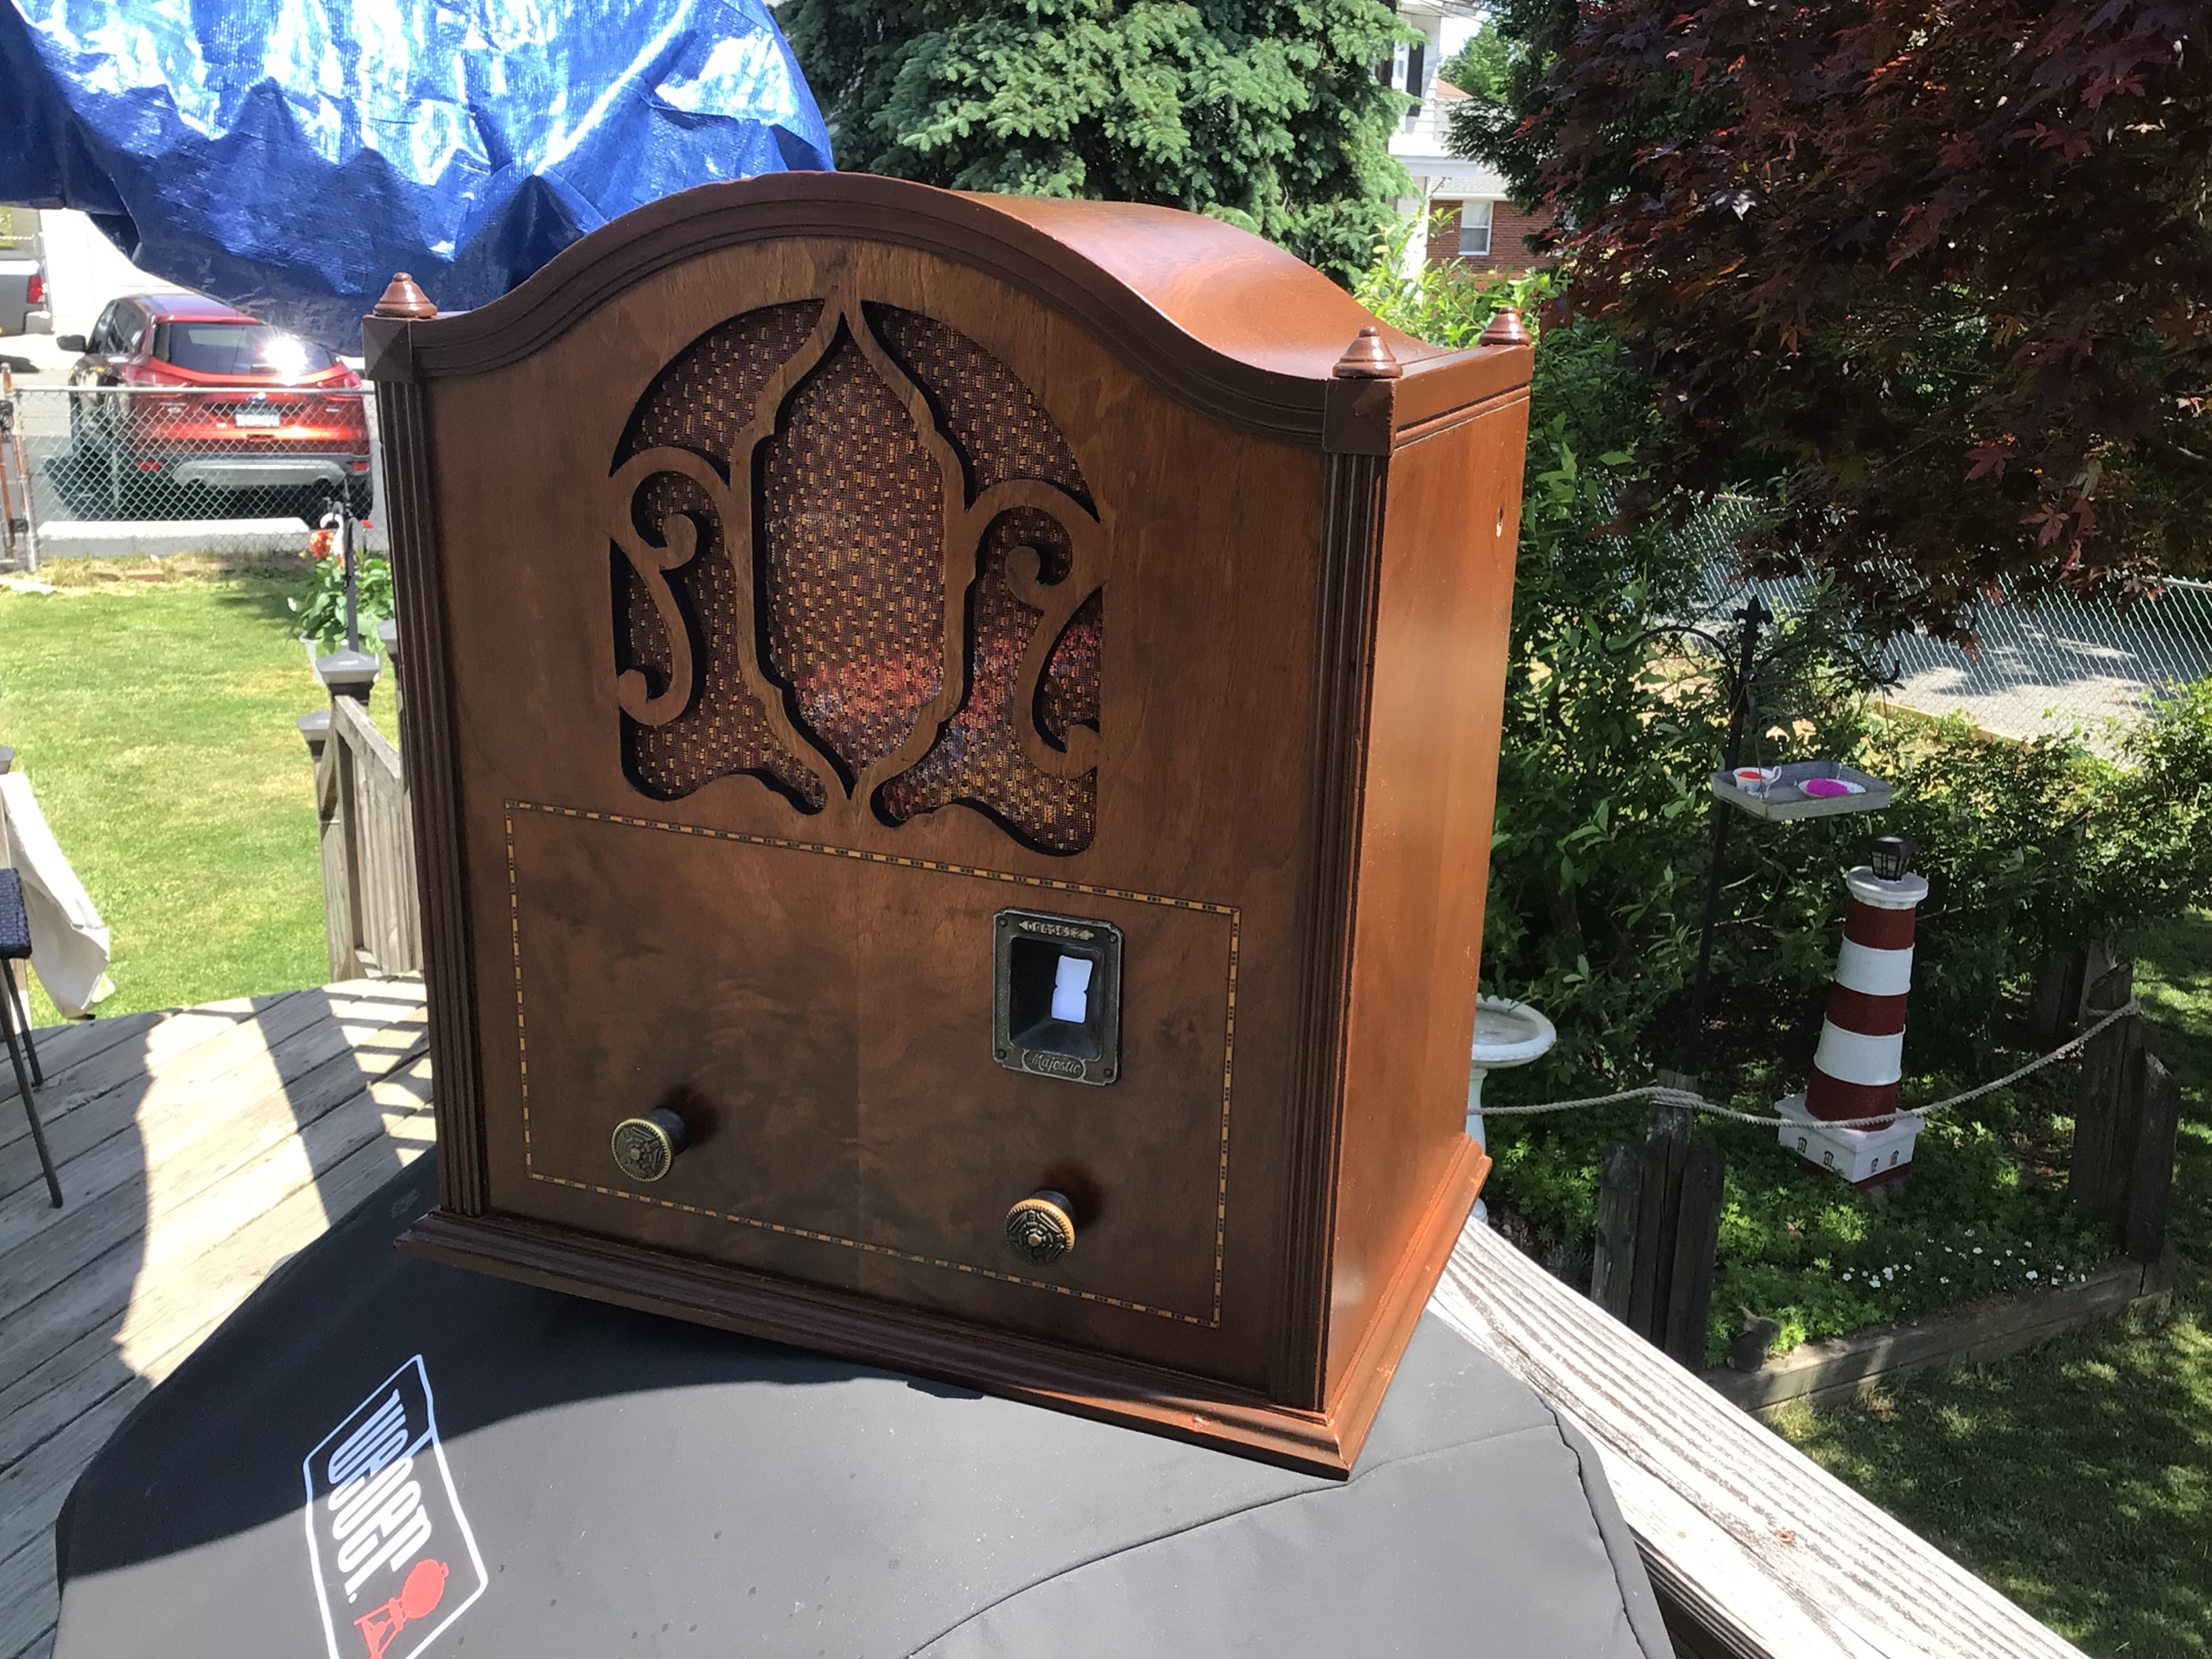
George, looking at your cabinet in its current stripped condition, it would benefit from a full refinishing process only for the fact that the color on the cabinet is wore through on the edges, wore or stripped down to bare wood. I will attach pictures of my Majestic where I just stripped then wash down with mineral spirits and went straight to clear lacquer.
Richard, your 610 came out top notch!
Ron
Bendix 0626. RCA T64 Philco 20B
Philco 41-250. Philco49-500
GE 201. Philco 39-25
Motorola 61X13. Philco 46-420 Crosley 52TQ
Philco 37-116. Philco 70
AK 35 Philco 46-350
Philco 620B. Zenith Transoceanic B-600
Philco 60B. Majestic 50
Philco 52-944. AK 84
Posts: 109
Threads: 15
Joined: Mar 2024
City: BERTHOUD
State, Province, Country: CO
Craftsmanship is an ongoing cycle of learning fueled by patience, persistence, and care, where every project refines our judgment and challenges our skills, in the steady pursuit of the Path to Mastery.
Posts: 4,832
Threads: 437
Joined: Jun 2011
City: Boston
State, Province, Country: Massachusetts
Looking good sir, keep at it. Paul
Tubetalk1
Posts: 3,187
Threads: 226
Joined: May 2008
City: Omak
State, Province, Country: WA
Hello George,
Thanks, and yours looks like a Philco 610b as well. I even restuffed the capacitors on mine. Ron, you should have seen it before I started—it was painted white with latex paint, the knobs were painted too, and they had used a pillowcase or sheet for the grille cloth. I also used grain filler and Homestead’s TransTint® dyes to even out the color.
Sincerely Richard
https://homesteadfinishingproducts.com/t...quid-dyes/
Posts: 1,135
Threads: 54
Joined: Feb 2013
City: Shenandoah,
State, Province, Country: Pennsylvania
Thanks George, after seeing the way the Majestic turned out, I was so tempted to forgo the grain filler, sanding, and tinted lacquer and go right to clear lacquer after stripping on my 37-116 but I didn’t. Your 45 is coming along spectacularly!
Richard, refinishing a painted cabinet and knobs…just shoot me now, ugh. Never had the pleasure. You have more will power than me!
Ron
Bendix 0626. RCA T64 Philco 20B
Philco 41-250. Philco49-500
GE 201. Philco 39-25
Motorola 61X13. Philco 46-420 Crosley 52TQ
Philco 37-116. Philco 70
AK 35 Philco 46-350
Philco 620B. Zenith Transoceanic B-600
Philco 60B. Majestic 50
Philco 52-944. AK 84
Posts: 109
Threads: 15
Joined: Mar 2024
City: BERTHOUD
State, Province, Country: CO
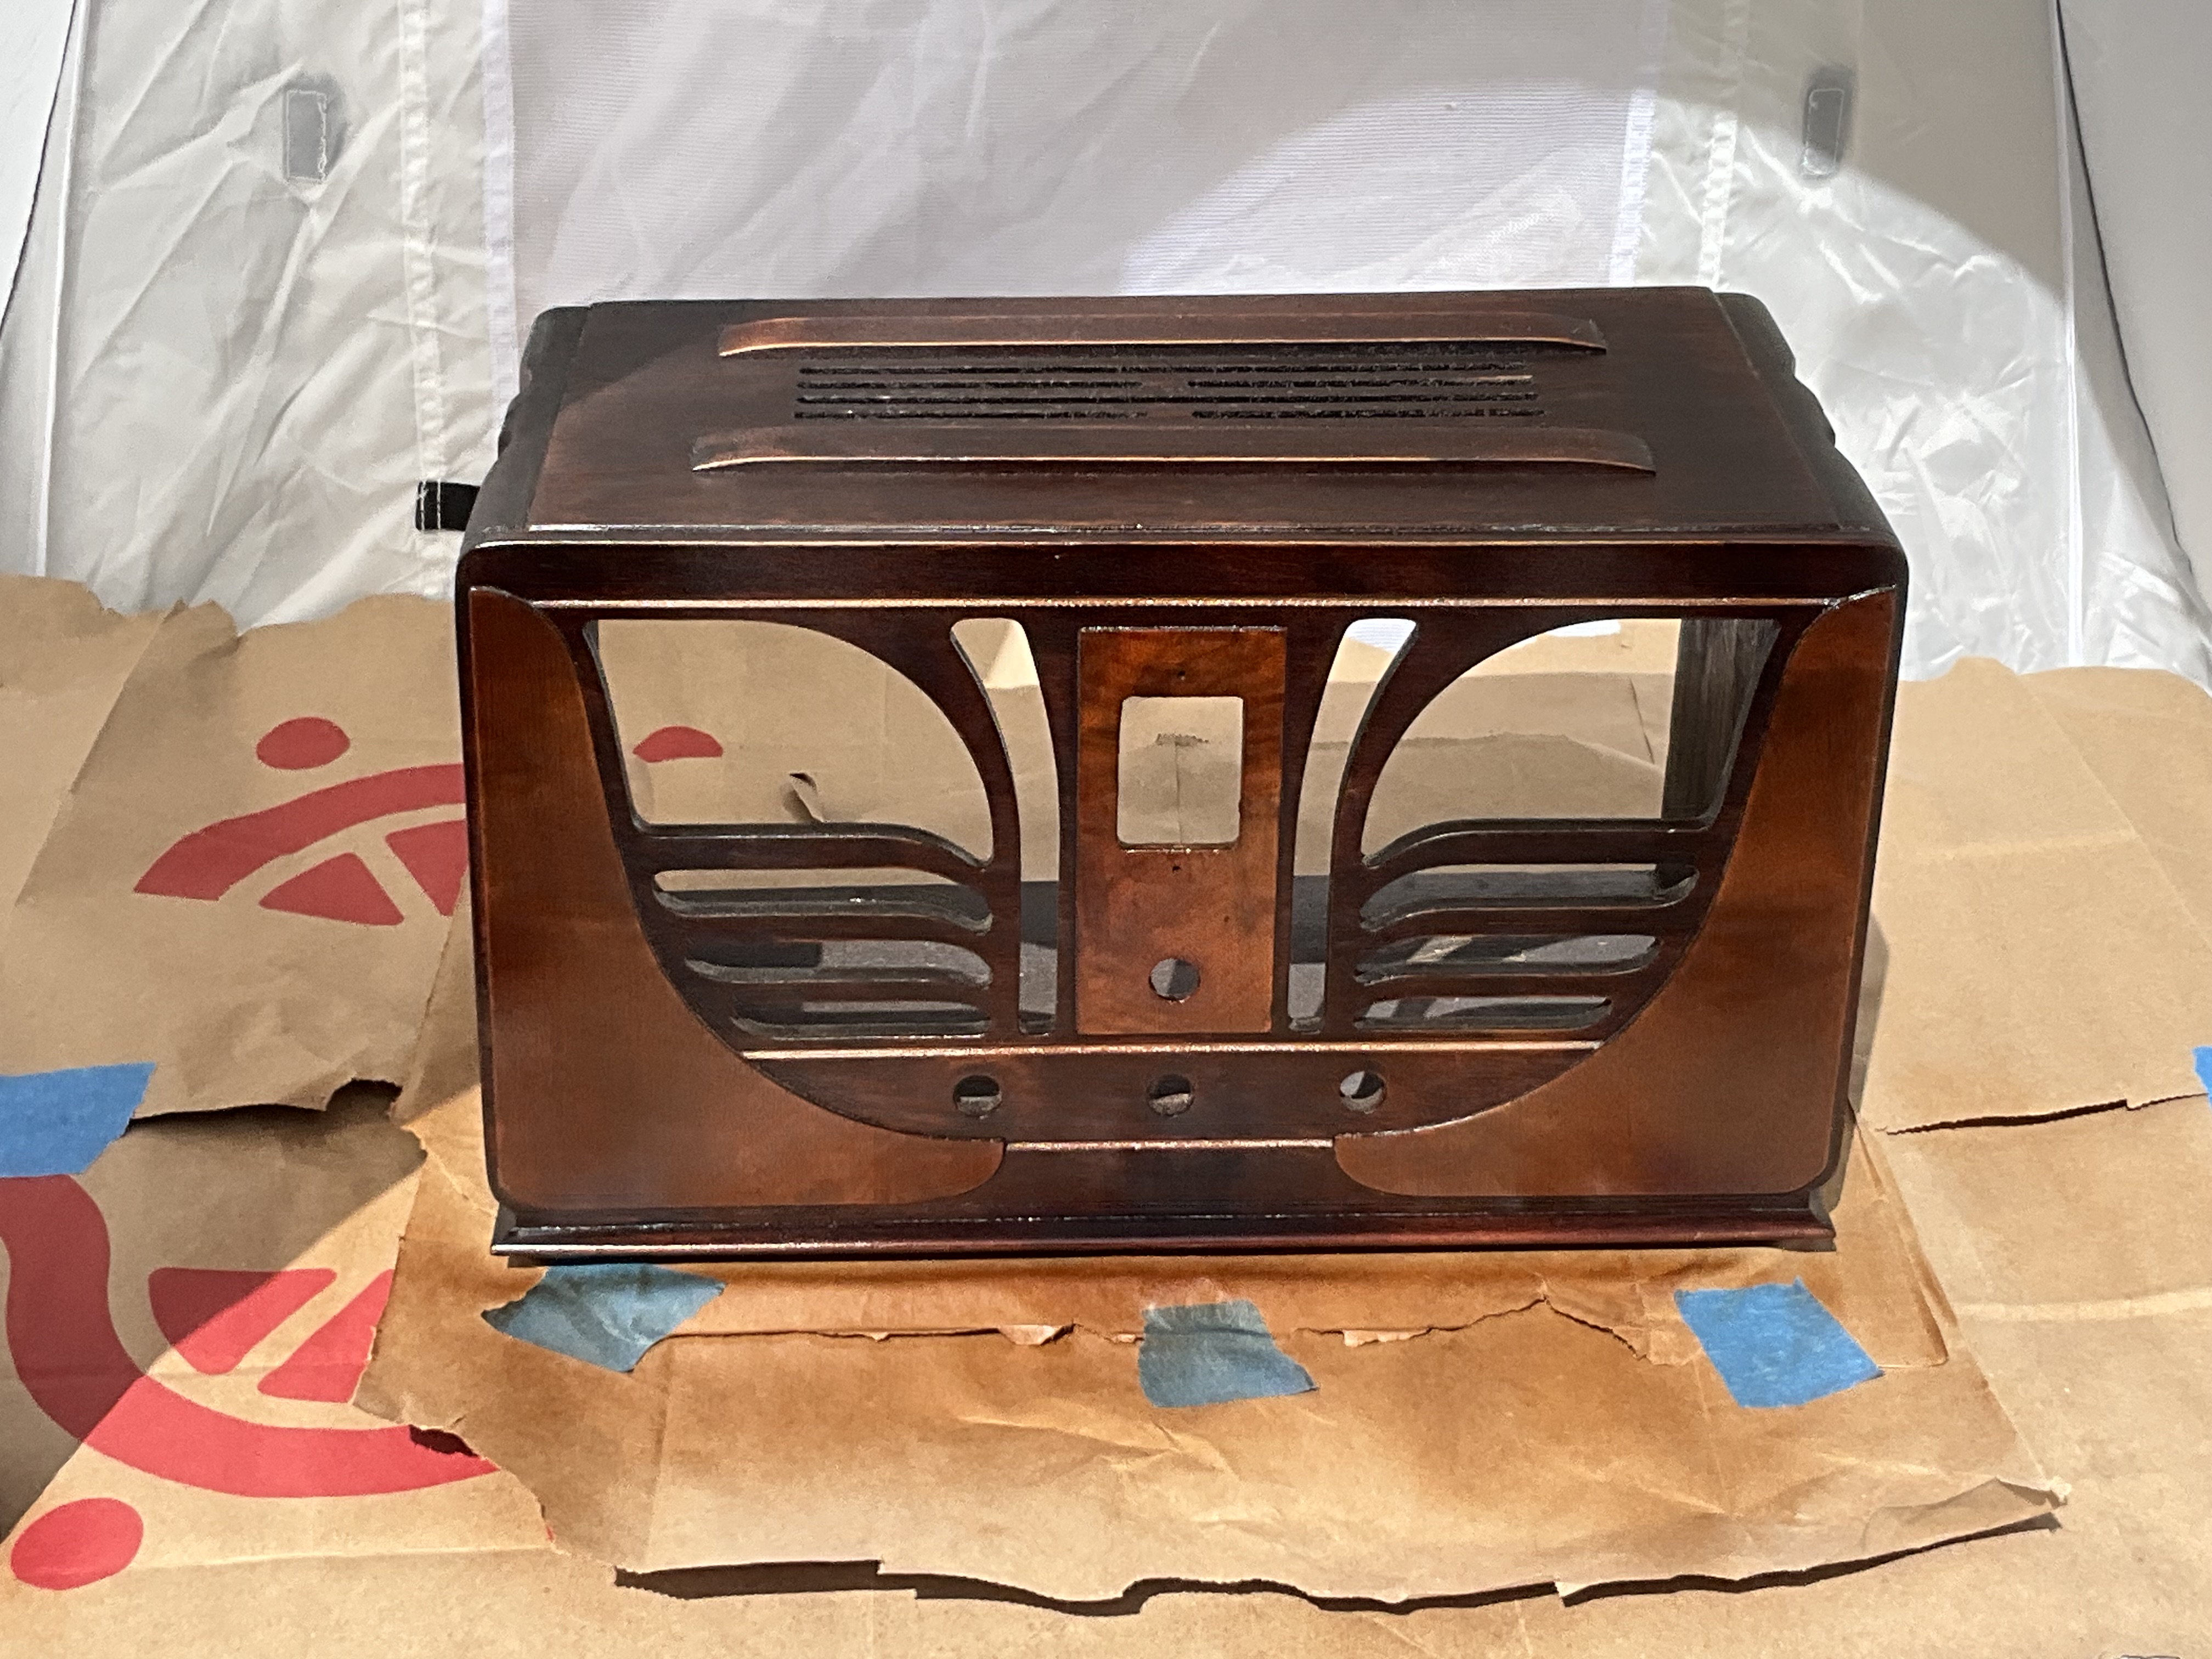
Toner day - with my portable paint booth
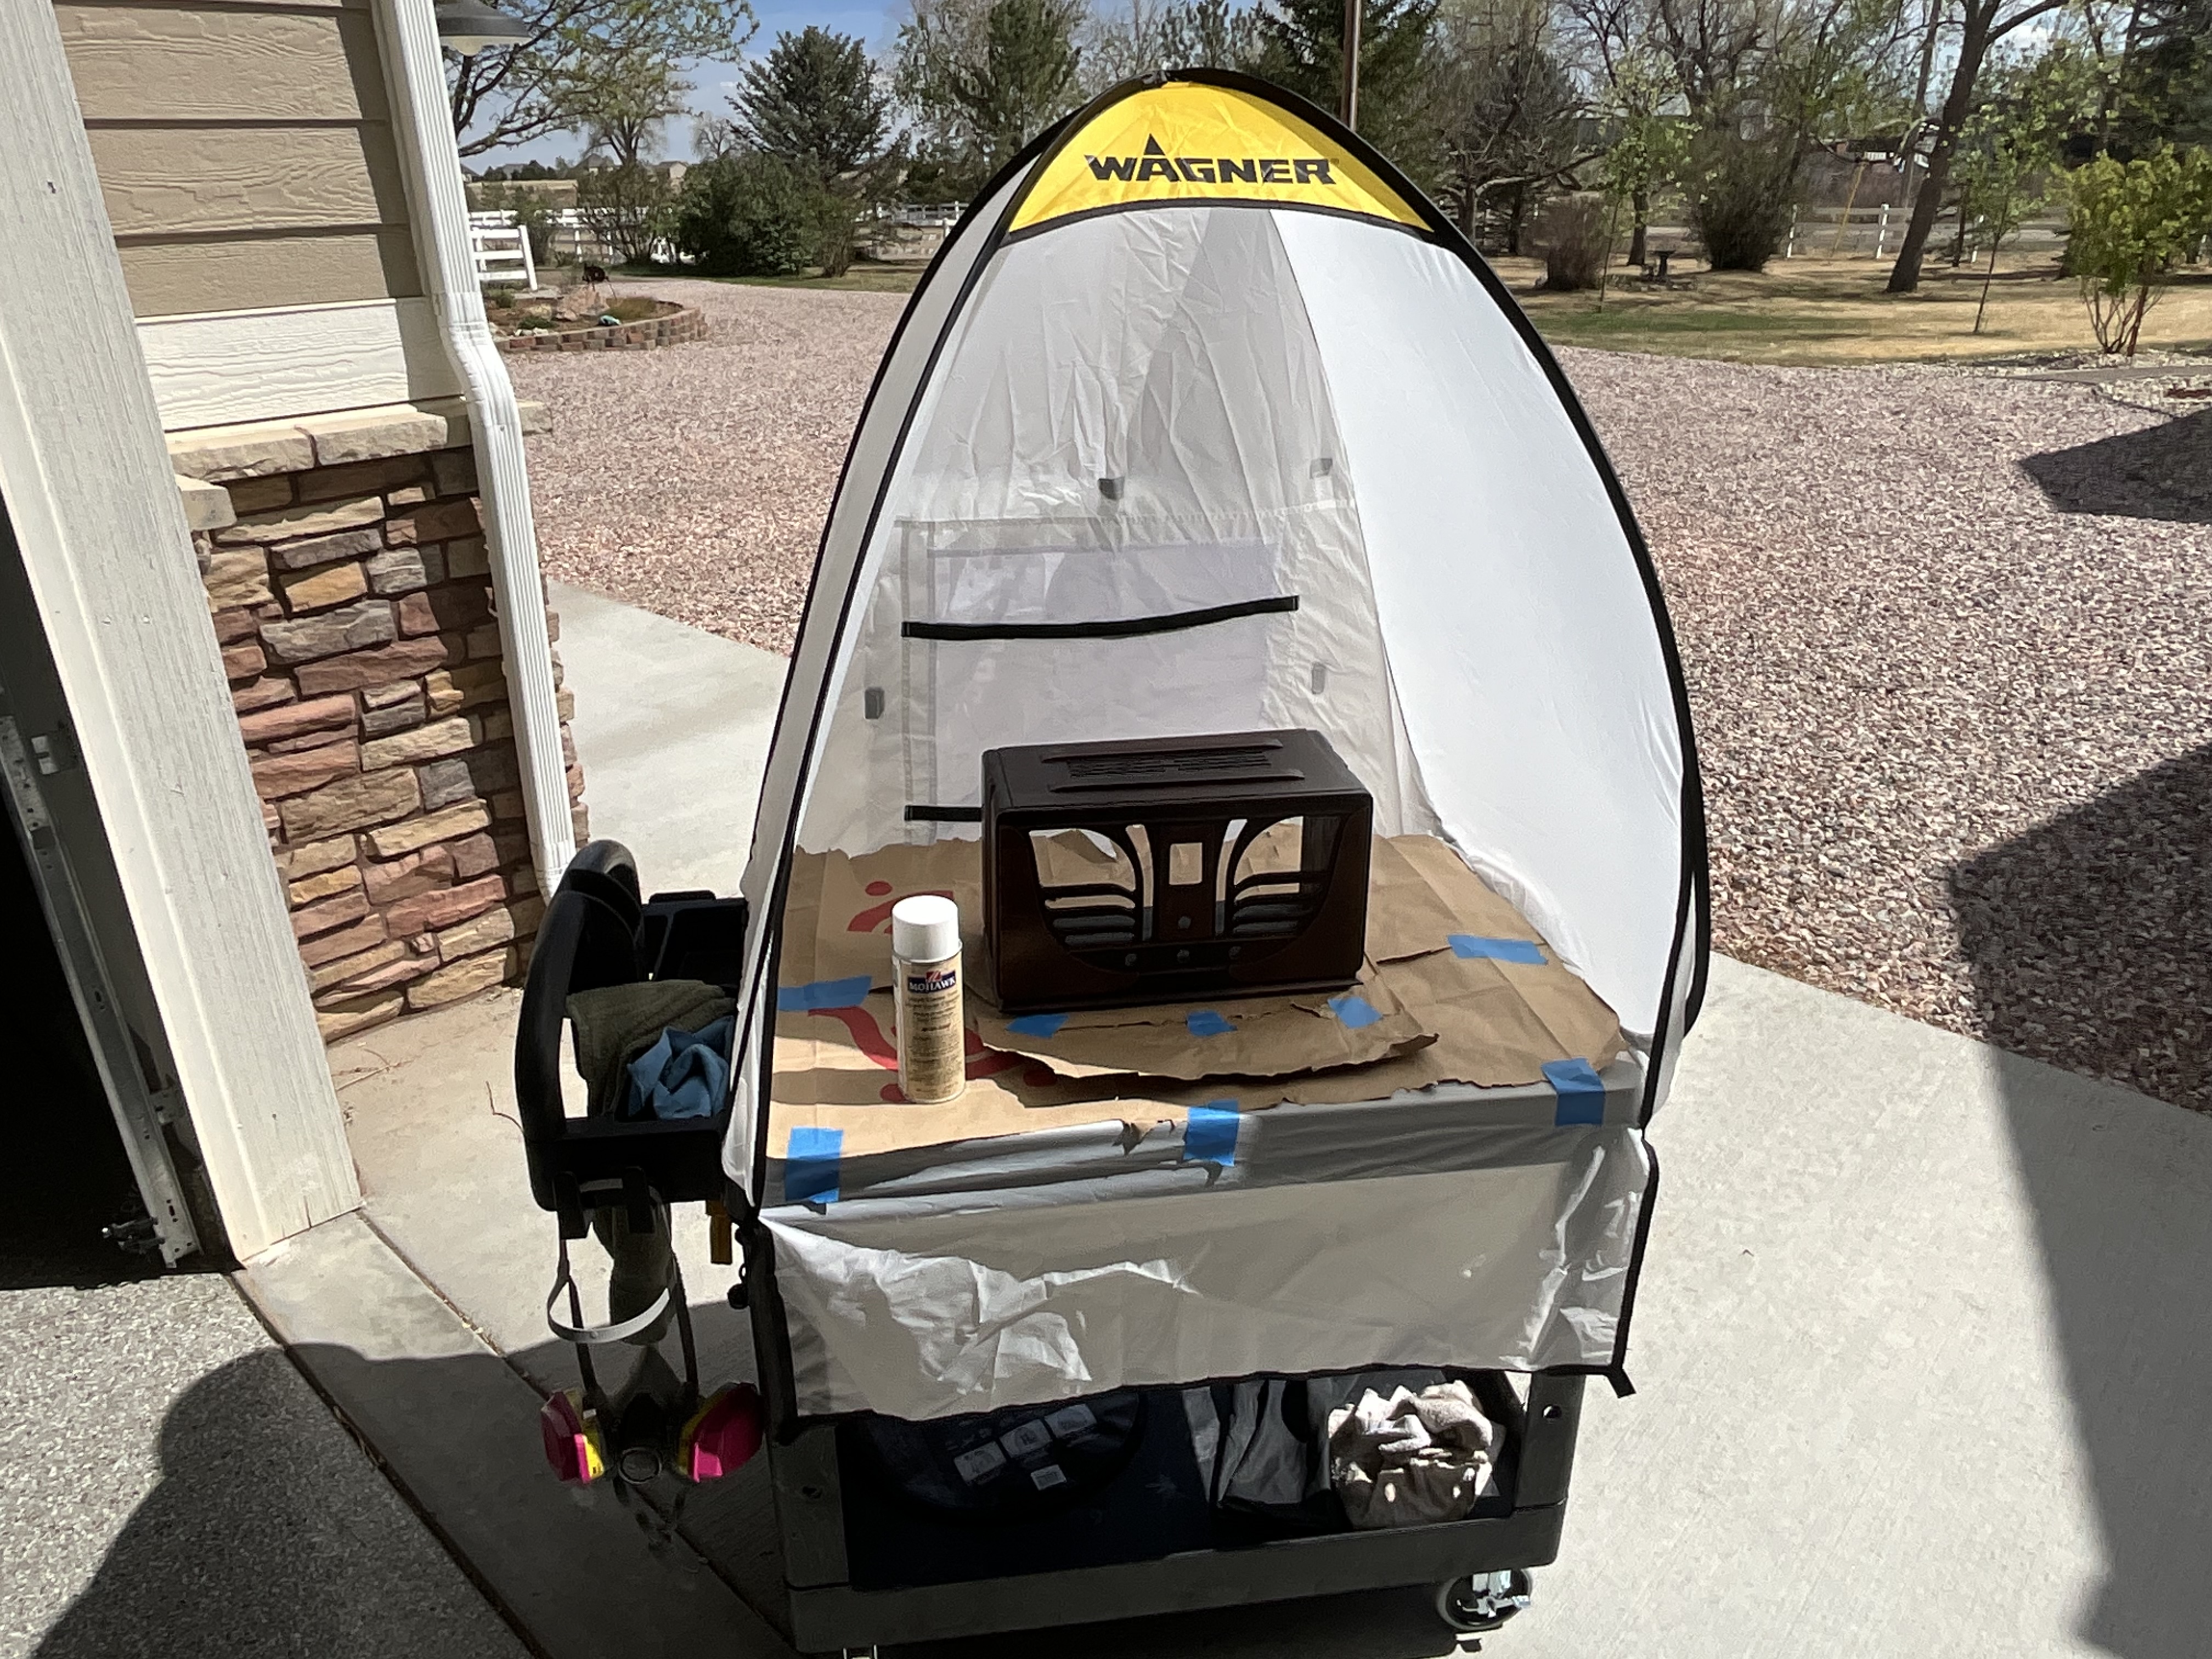
Front walnut sections toned with medium walnut.
Craftsmanship is an ongoing cycle of learning fueled by patience, persistence, and care, where every project refines our judgment and challenges our skills, in the steady pursuit of the Path to Mastery.
(This post was last modified: 04-13-2026, 05:13 PM by SRv2.)
Posts: 109
Threads: 15
Joined: Mar 2024
City: BERTHOUD
State, Province, Country: CO
Craftsmanship is an ongoing cycle of learning fueled by patience, persistence, and care, where every project refines our judgment and challenges our skills, in the steady pursuit of the Path to Mastery.
Posts: 109
Threads: 15
Joined: Mar 2024
City: BERTHOUD
State, Province, Country: CO
Craftsmanship is an ongoing cycle of learning fueled by patience, persistence, and care, where every project refines our judgment and challenges our skills, in the steady pursuit of the Path to Mastery.
Users browsing this thread: 1 Guest(s)
|
|
Recent Posts
|
|
under chassis parts locator diagram for 1938 Zenith 9s262
|
| Has anyone gone to the trouble of creating an under chassis parts locator image? Yes, I can identify components by foll...bobloney — 08:57 PM |
|
Plug Voltages Needed For A 1943 CRV-20130 Power Supply
|
| Try looking at this site the book mark is for a old generator that I was given. David https://radionerds.com/index.ph...David — 08:36 PM |
|
Plug Voltages Needed For A 1943 CRV-20130 Power Supply
|
| Hello Everyone,
I am looking for voltage identification for all the pin positions on the socket of a CRV-20130 power su...Tonym4704 — 08:16 PM |
|
Philco P45-6365 Universal Transformer Instruction Manual
|
| Can anyone guide me to where this may be found?GRG — 03:00 PM |
|
54C Complete Teardown/Rebuild
|
| I don't think that I have encountered a 12Z3 before, curious how it uses one of those but includes a #43, which is a 25 ...Arran — 02:17 PM |
|
HiFi (Chifi) tube amp build - but my own design.
|
| It's the other forum. I'm also in DIY, but mostly read there. Honestly, I kinda jumped into this without much thought to...TV MAN — 10:43 AM |
|
Philco 71 Code 125
|
| Hello,
I am in need of a schematic for this radio. Mine has the three separate circular tube shields and a shadow me...dconant — 08:06 AM |
|
Stromberg Carlson 1500 Squeal
|
| And life just keeps getting more complicated.dconant — 07:57 AM |
|
54C Complete Teardown/Rebuild
|
| Hello Roy,
here is this one
sincerely Richardradiorich — 12:45 AM |
|
54C Complete Teardown/Rebuild
|
| Richard,
Had grabbed it already but thank you just the same. I find myself wanting to find some way to block out the...glyphmon — 12:03 AM |
|
Who's Online
|
There are currently 1945 online users. [Complete List]
» 1 Member(s) | 1944 Guest(s)
|
|
|

|
 
|