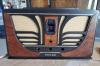
Hi -- As a newbie in this group I have a simple question that I'm sure will be looked upon as heresy but I would like opinions and guidance. The Model 16 I have in belongs to a good friend. It is a family piece and he would like it to play, etc., but is not concerned with complete restoration. Incidentally, the cabinet is perfect annd absolutely gorgeous. On the question of the bakelite box caps and their replacement, he doesn't want to invest in what I would have to do to take out 13 or so of them and replace the innards. My suggestion is to epoxy the replacements on to the bakelite boxes to fix them in place and then do the necessary wiring. Is this a bad idea, and if so, what is a better way to get this problem solved (other than the internal replacement of the caps) ? Any and all responses will be most appreciated. Dick Bidwell, VA
Posts: 69
Threads: 14
Joined: Sep 2005
City: Woburn, MA
Hi,
I certainly wouldn't use epoxy, since this will just leave a problematic mess for the next guy tp clear up. If you really, really don't want to replace the innards, I would try breaking the tiny lead-in wires that lead inside the bakelite blocks (the tiny wires that connect to the block's lug and disappear through the eyelets). Do this on at least one end of each component, thereby isolating the old parts therein. Then simply wire the replacements between the lugs on the blocks; the wires will keep the component securely in place if kept short.
It really doesn't take too much to do the job properly though. One re-building procedure is decsribed here:-
http://www.philcorepairbench.com/capbuild.htm
There are even some who rebuild with the blocks in-situ, with all leads attached. The trick is to break the tiny lead-in wires as described above, heat the block just enough then poke a small jeweller's screwdriver though the eyelet on the top of the block so as to push the tar-encased innards down against the chassis. Then remove the screw holding the block to the chassis (taking care to capture the little washer), carefully rotate the block and remove the loosened innards. New components can then be mounted inside without ever detaching the original wiring to the block. I've never tried it this way, but some swear by it.
Whatever you do, ensure that the original components inside the blocks are isolated. Also make sure you access to the Philco bakelite block bulletins:-
http://www.philcorepairbench.com/bblokcap.htm and be aware that some blocks have resistors wired inside as well as caps.
The Philco 16 is a highly desirable tombstone and in my opinion it is worth taking the effort to do it right!
Good luck with it,
Paul
Posts: 1,703
Threads: 55
Joined: Sep 2005
City: Evanston, IL
Also, some of those bakelite block caps may have an integral resistor in there and not accounting for this can cause many problems or burnout irreplaceable components and kill a tube or take out the power transformer.
Replace them all. Including all the filter caps and the metal can caps and tone control potted caps.
Also check ALL resistors for out of tolerance values (+/-20% of nominal value).
This is WAY too good a set to give it short schrift in restoration.
Convince your customer he's flirting with the prospect of "yet again" having it restored in the very near future or cause a fire if not restored properly, if he intends to be playing it a lot and keep it plugged in.!!
I'd hate to see a 16 turn into a Shelf Queen. It may work for a while and then the non-replaced parts will go out and your customer will call you all names in the book.
Please do it right the first time.

Posts: 49
Threads: 5
Joined: Oct 2005
When people bring me sets to work on, I dont care what they "want". I do the best possible repair that I'm capable of, regardless of the time involved (obviously its a hobby for me) and if they dont agree, then just have them go to the repair guy down the street

Its easier to take a little time and restuff the Philco blocks correctly, than goofin around with glue and various what nots.
Dick - this is NOT directed at you, just my 2cents on this subject.