Posts: 292
Threads: 17
Joined: Aug 2010
City: Yorkville IL
Ok I finally got around to winding the shadowmeter coil and I can't remember and can't find what the heck the resistance is supposed to be. I think it was around 1000 Ohms, but want to be sure. Can someone please confirm this? If it is I need to pull off some wire..I'm at 1900..oops. Thanks for your help.
Glenn
Happily back in Illinois..not.
Posts: 7,323
Threads: 270
Joined: Dec 2009
City: Roslyn Pa
Should be about 1.1K.
Terry
Posts: 292
Threads: 17
Joined: Aug 2010
City: Yorkville IL
Terry,
Thanks for the confirmation. Now the bad part unwinding 800 ft of 40 ga. oh well.
Glenn
Happily back in Illinois..not.
Posts: 18,427
Threads: 622
Joined: Oct 2011
City: Jackson
State, Province, Country: NJ
I just wonder how 1K can become 1.9K, if it is wirewound. Or have I not understood?
Posts: 7,323
Threads: 270
Joined: Dec 2009
City: Roslyn Pa
If it is a real hassle you could just add a resistor across the coil to lessen it's sensitivity.
Terry
Posts: 292
Threads: 17
Joined: Aug 2010
City: Yorkville IL
When I was winding it I was thinking "I don't think this much came off this spool, but if I'm short I really don't want to start over" I was shocked when I took a reading and it was a little over 1.9k.
Taking it off won't be too bad just want to wind it on something to save it for another project. I found a little 100 rpm gear motor that has the perfect shaft size for the coil "bobbin". What a monotonous job.
Morzh,
it's not "wirewound" as in a resistor, it is the wire wound coil for the shadow meter vane.
Here is a picture of the coil and shadow meter assembly from Chuck's website.
http://www.philcorepairbench.com/images/smrepair04.jpg
Glenn
Happily back in Illinois..not.
Posts: 292
Threads: 17
Joined: Aug 2010
City: Yorkville IL
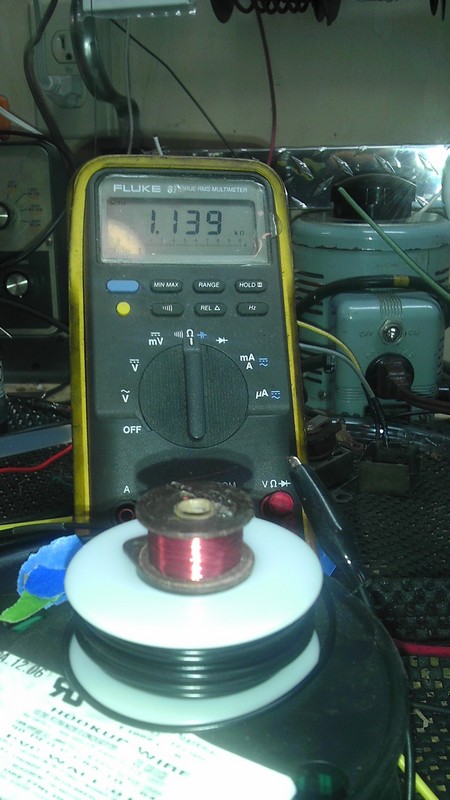
Success!!

Question, as usual, the original was sealed in a stiff paper wrap and wax. Should I seal this in hot glue, clear nail polish...??

any other suggestions.
Thanks,
Glenn
Happily back in Illinois..not.
Posts: 7,323
Threads: 270
Joined: Dec 2009
City: Roslyn Pa
Nail polish has some nasty solvents in it I'd go with the hot glue or candle wax.
Terry