Posts: 2,118
Threads: 112
Joined: Jun 2010
City: Medford OR (OR what?)
Or a Photo of the finish - which is not finished.
I went for the look of a 610 because the radial grain pattern on the edge of a 620 is easy when it's not real (photo art) but not so easy to create with real wood.
I have not decided if I want to bring up the definition of the vertical lines more or leave them as they are, leaning to leaving them less distinct.
I will put the Philco decal under the next coat.
[attachment=1623]
(This post was last modified: 01-05-2015, 10:34 PM by
Phlogiston.)
Posts: 2,118
Threads: 112
Joined: Jun 2010
City: Medford OR (OR what?)
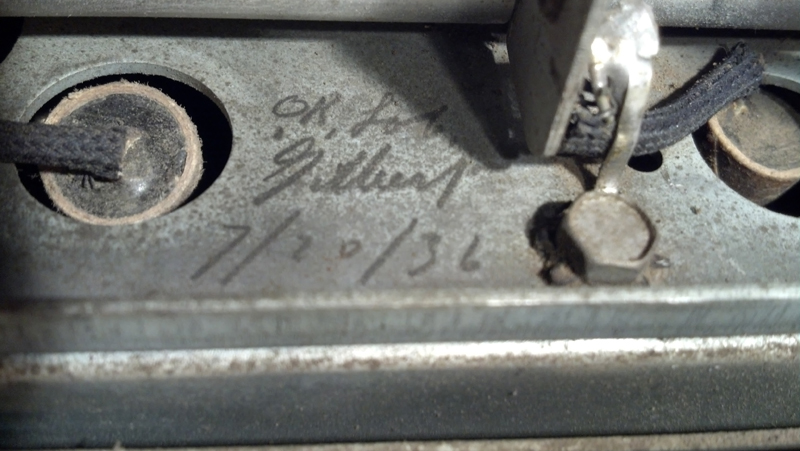
And I just found this mark on the tuner sub-chassis.
OK for ??? 7/20/36

Posts: 220
Threads: 56
Joined: Oct 2011
City: Lompoc CA
Very nice looking


Posts: 142
Threads: 15
Joined: Nov 2008
City: Glenshaw, PA
Posts: 2,118
Threads: 112
Joined: Jun 2010
City: Medford OR (OR what?)
OK for Gilbert?
Who's Gilbert?
Posts: 2,118
Threads: 112
Joined: Jun 2010
City: Medford OR (OR what?)
Update. A little better light, stripes and logo:
[attachment=1633]
(This post was last modified: 01-05-2015, 10:35 PM by
Phlogiston.)
Posts: 811
Threads: 43
Joined: Dec 2008
City: Chicago, IL
Fantastic job

Can you fill us in on the details of your process ?
Posts: 5,205
Threads: 276
Joined: Nov 2012
City: Wilsonville
State, Province, Country: OR
Wow. Outstanding!

yes, let us know what you did.
Posts: 2,353
Threads: 92
Joined: May 2010
City: Clayton, NC
If that "Photo Finish" is something that you did from scratch on that cabinet, it is one of the nicest attempts that I have seen thus far.


Please let us know how you did it!!!!
Posts: 2,118
Threads: 112
Joined: Jun 2010
City: Medford OR (OR what?)
The lighter part is book-matched Bird's Eye Maple surrounded by Book-matched Walnut Burl. Toner is custom. I decided on a slightly darker shade for the vertical lines. The black lines are black. The top coat will be about VOC 75, slightly less than gloss.
(This post was last modified: 03-15-2013, 07:40 PM by
Phlogiston.)
Posts: 2,353
Threads: 92
Joined: May 2010
City: Clayton, NC
Very nice!!!


Posts: 1,411
Threads: 71
Joined: Oct 2007
City: Linn Creek, MO
Posts: 7,305
Threads: 270
Joined: Dec 2009
City: Roslyn Pa
Posts: 4,928
Threads: 54
Joined: Sep 2008
City: Sandwick, BC, CA
That's now a more deluxe cabinet then the 640 and above tombstone cabinets, at least on the front panel. I'm not sure about the best way to do that radial edge banding with real veneer, it's something a guitar maker would be able to handle I'm sure. Of course there is nothing stopping one from combing a faux edge banding with real veneer on the rest if one wanted to do that.
Regards
Arran
Posts: 2,118
Threads: 112
Joined: Jun 2010
City: Medford OR (OR what?)
Well it had been stripped by the owner before me. So it was either that or the garbage. Good thing I had nothing else to do.


![[-] [-]](https://philcoradio.com/phorum/images/bootbb/collapse.png)


