04-14-2015, 07:08 PM
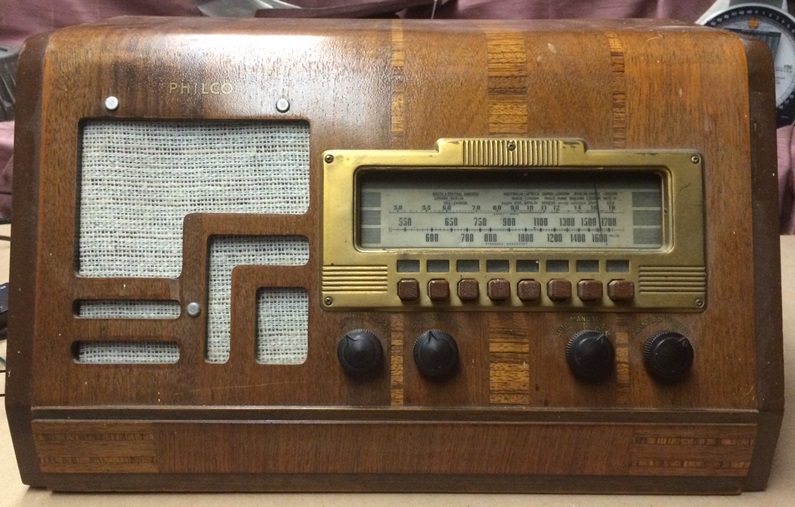
I just picked up a 39-30 table top in really good condition last night. I haven't delved into the chassis yet, but have some questions on the outside. Here it is before a application of Gojo (which I didn't take an after pic, but did a great job cleaning this up, even removed what looked like white paint splatters). It does look like someone may have put a coat of brown paint on the edges of the end boards, as seen from the front/top of the chassis.

First question is the grille cloth. From pictures I have seen on the web, i think the closest match is #14 from Radio Daze. Is that correct, or is there a better pattern?
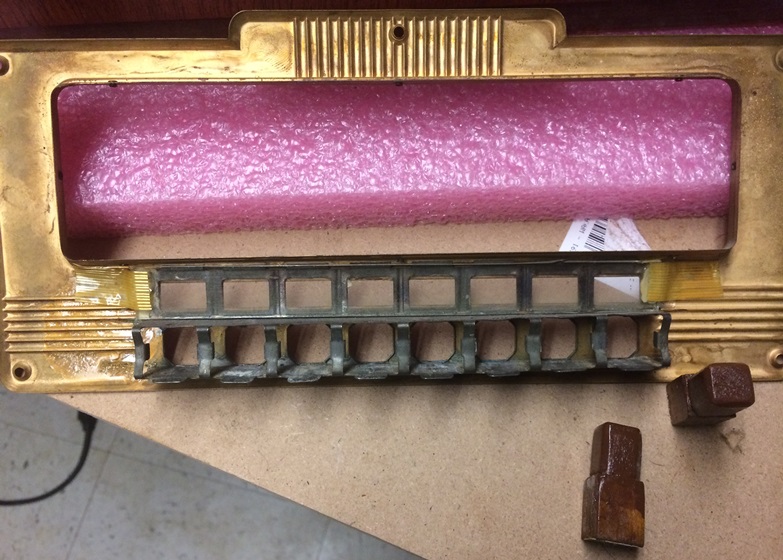
The next is the bezel. The dial cover is missing. I see Mark P makes one, and looking at the bezel, the original must have been held in by tiny little rivits. I'm assuming this is one of the cases where it's easiest to send him your bezel, and have him install it. Is that true? And the dial itself has gotten dirty over the years. I know on the phenolic/brown dials, water is a no-no to clean them with. Does the same hold true to this white plastic dial? If so, sugggestions for cleaning it, maybe mineral spirits)?
Also the buttons were replaced with custom cut and painted wooden blocks. Someone obviously liked this radio enough to make their own after the originals deteriorated. I will be getting replacement buttons from Ed at RR. And a new set of corner chassis mounts. As long as I'm ordering form him, does anyone else happen to know if there are any other grommets that I should get from him to replace (like on the pushbutton mount, or the tuning capacitor)?
Also on the bezel, it looks like someone cut a piece of glass and taped it on with packing tape behind the preset tab holes. It doesn't look factory. What was originally there, and is this a good enough substitute?

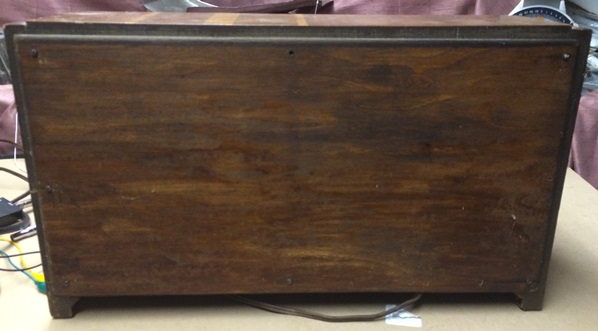
And here is something I never thought I would see. Someone thought it would be a really good idea to put a non-vented back on this radio. Nothing like trapping all that heat in the cabinet!

Thanks in advance for any info. Not sure when I'll start looking at the chassis, but I'm assuming its pretty straight forward. I know it's got some rubber wiring, including the PT, so II know I'll have to address that. But any questions on the chassis and I'll start a post in the electronic forum. I have 2 other projects I really need to finish up (Fisher 800C and RCA 811k) before I get side tracked on this one. But it's new (to me), so it's got my attention now...
-Nick
First question is the grille cloth. From pictures I have seen on the web, i think the closest match is #14 from Radio Daze. Is that correct, or is there a better pattern?
The next is the bezel. The dial cover is missing. I see Mark P makes one, and looking at the bezel, the original must have been held in by tiny little rivits. I'm assuming this is one of the cases where it's easiest to send him your bezel, and have him install it. Is that true? And the dial itself has gotten dirty over the years. I know on the phenolic/brown dials, water is a no-no to clean them with. Does the same hold true to this white plastic dial? If so, sugggestions for cleaning it, maybe mineral spirits)?
Also the buttons were replaced with custom cut and painted wooden blocks. Someone obviously liked this radio enough to make their own after the originals deteriorated. I will be getting replacement buttons from Ed at RR. And a new set of corner chassis mounts. As long as I'm ordering form him, does anyone else happen to know if there are any other grommets that I should get from him to replace (like on the pushbutton mount, or the tuning capacitor)?
Also on the bezel, it looks like someone cut a piece of glass and taped it on with packing tape behind the preset tab holes. It doesn't look factory. What was originally there, and is this a good enough substitute?
And here is something I never thought I would see. Someone thought it would be a really good idea to put a non-vented back on this radio. Nothing like trapping all that heat in the cabinet!
Thanks in advance for any info. Not sure when I'll start looking at the chassis, but I'm assuming its pretty straight forward. I know it's got some rubber wiring, including the PT, so II know I'll have to address that. But any questions on the chassis and I'll start a post in the electronic forum. I have 2 other projects I really need to finish up (Fisher 800C and RCA 811k) before I get side tracked on this one. But it's new (to me), so it's got my attention now...
-Nick


![[-] [-]](https://philcoradio.com/phorum/images/bootbb/collapse.png)


