Philco 48-482 Restoration
Posts: 486
Threads: 28
Joined: Jan 2024
City: Tulsa
State, Province, Country: Oklahoma
Good evening, folks:
Work has been pretty busy since I bought the 48-482, but lately I’ve been getting down to business on this restoration. I stripped the finish off the cabinet, and it’s pretty evident that the cabinet has been exposed to water or something that has eaten away the lacquer. I tried using vinegar to lighten the dark spots, and it was somewhat effective but not completely. I also used peroxide. That helped quite a bit, but still not enough. I then started reading about oxalic acid. I’ve given it several liberal coats, really trying to saturate the dark areas, but I still haven’t eliminated those pesky stains on the top piece of veneer. At this point I think I’ll replace that piece of veneer and move on. If anything , I’ve only succeeded in bubbling it loose from the underlying wood. At least the rest of the cabinet is good! Attached is a photo of the dark spots prior to treatment.
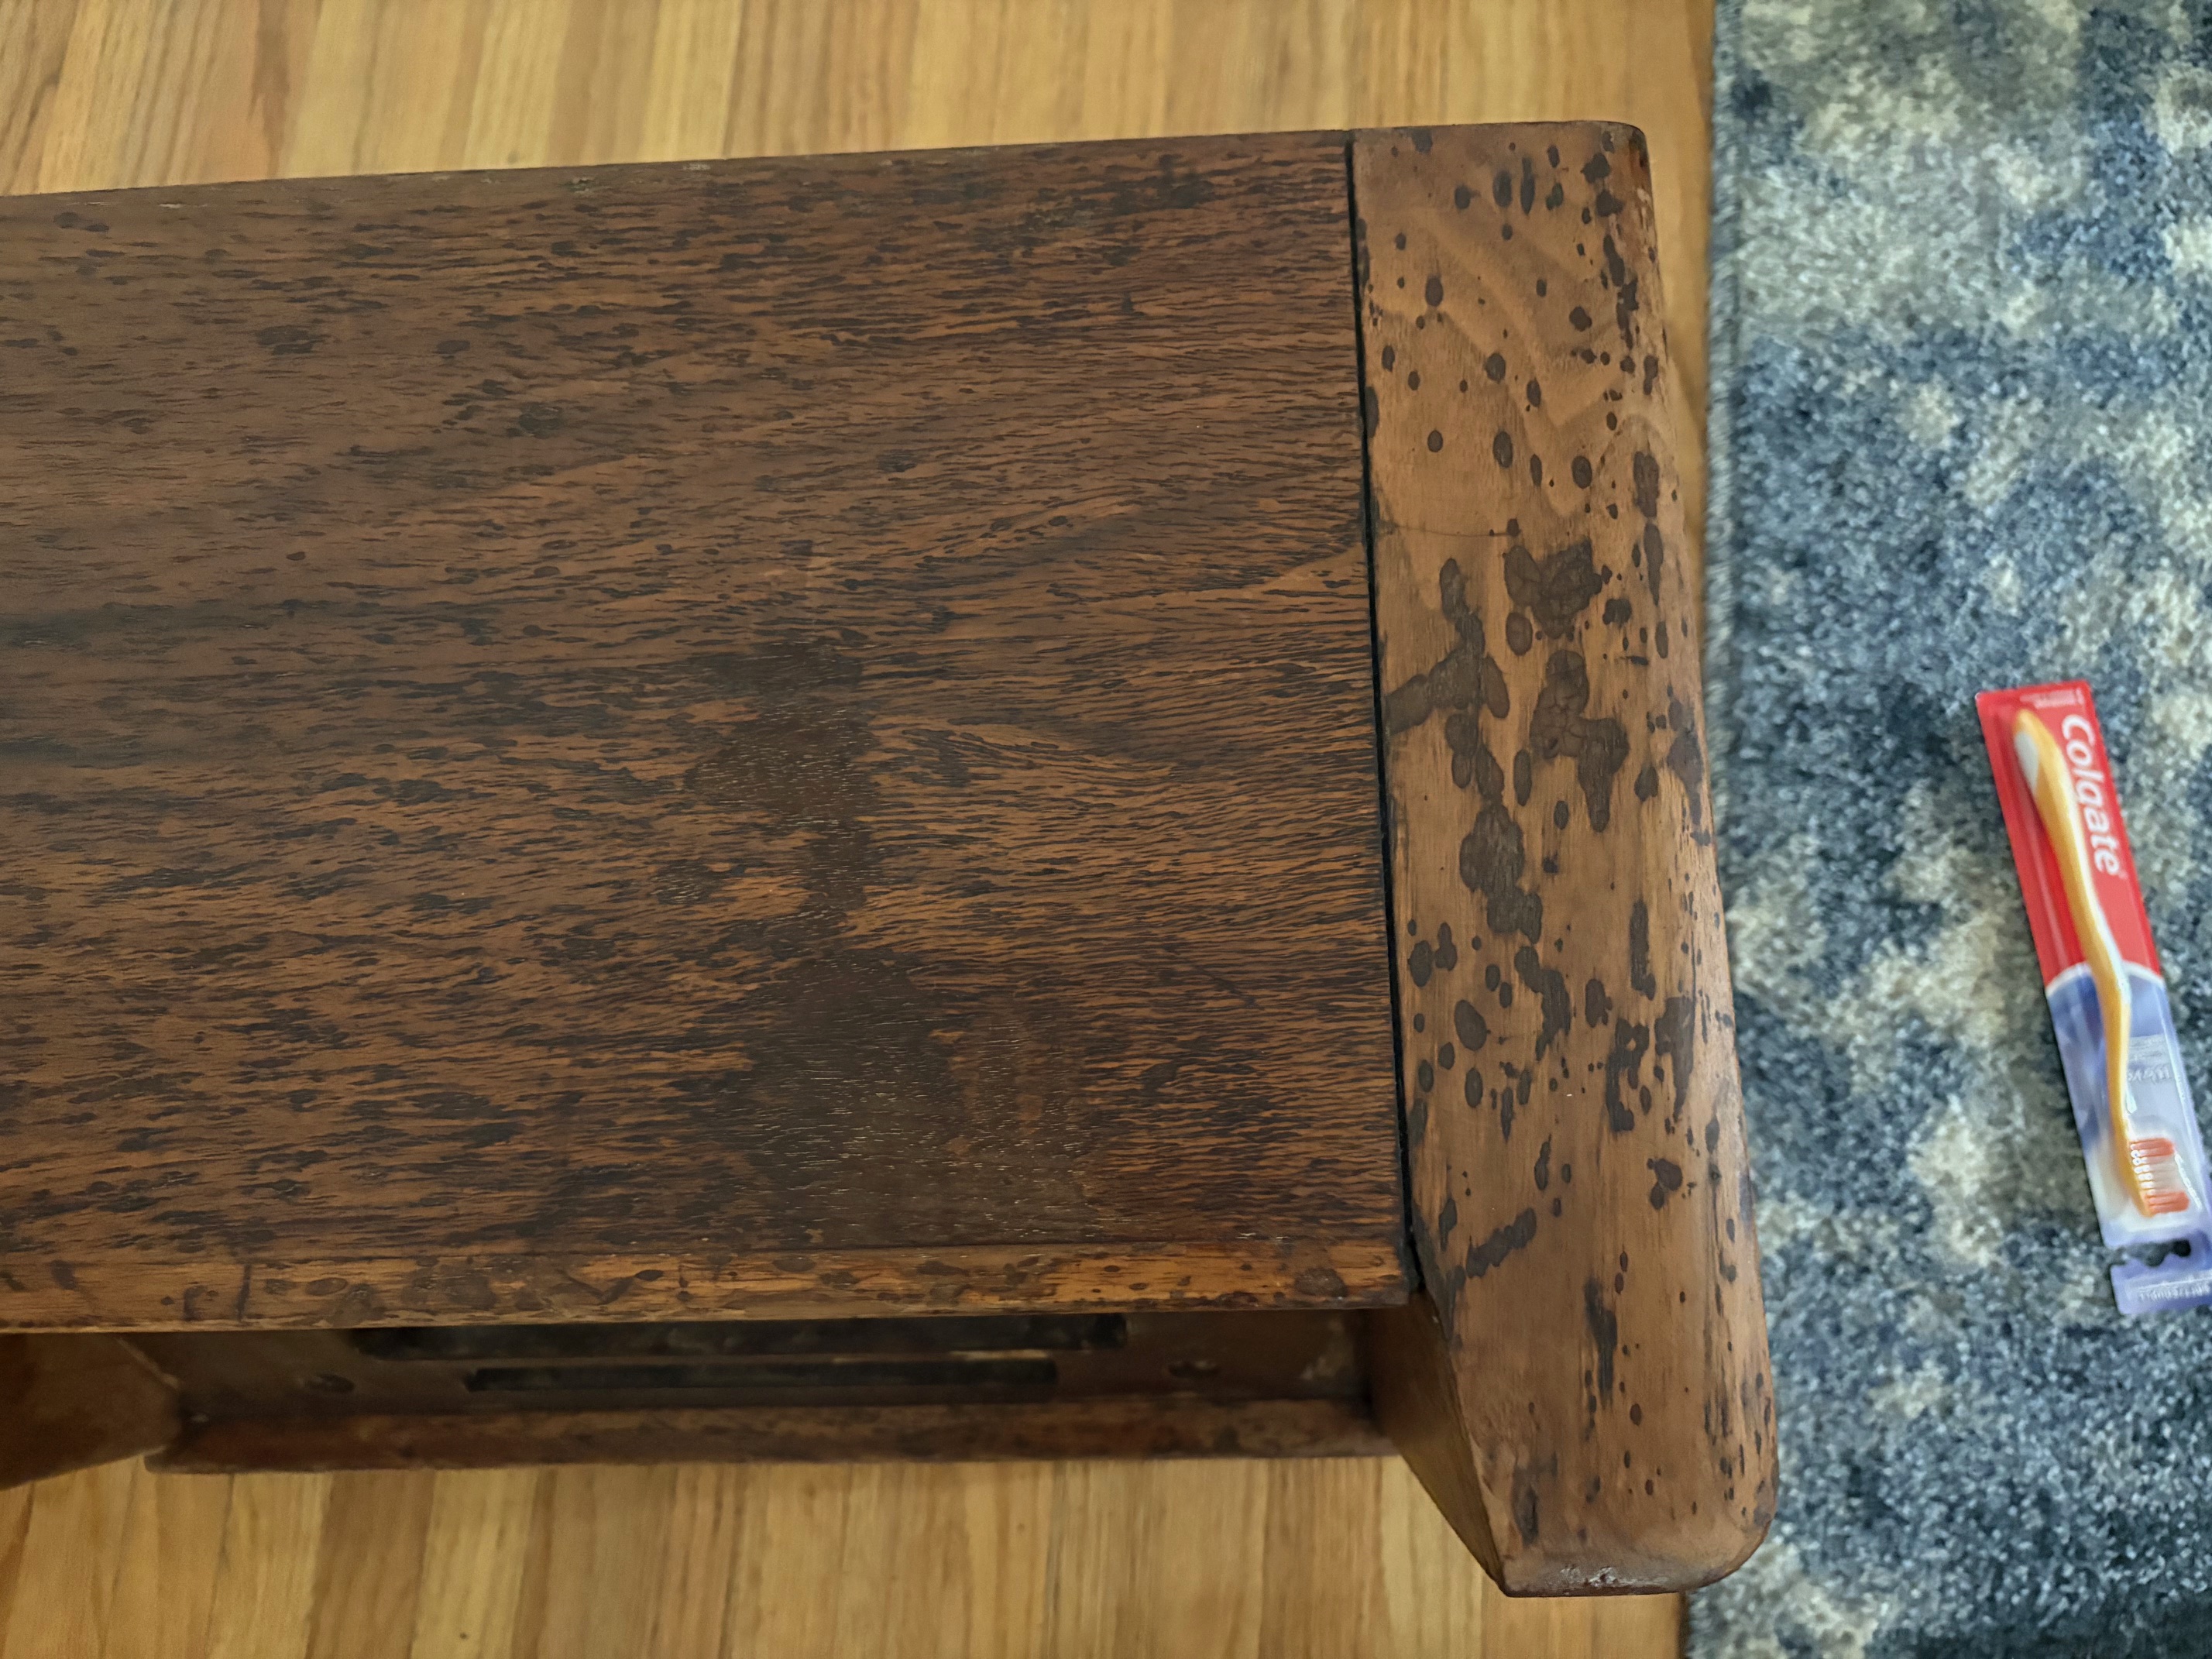
But, I wanted to ask how you all generally use oxalic acid. The stuff I bought says to mix a heaping tablespoon per quart of water, but that hardly did anything. I ended up using a tablespoon per 6oz mason jar. Reading online, though, a lot of people keep pouring in the powder until it stops dissolving. I was tempted to do so, but I’m weary about these unknown chemicals. I made certain to use gloves when mixing it up, but I’ll admit that I didn’t always glove up every time I walked out to reapply another coat. I simply made sure to wash my hands afterward.
I also see different opinions about letting it dry. Some folks say it ruins the wood while others say it doesn’t. I let it dry and then hosed it off very well. I toweled it dry and then dried it a bit more with a blow dryer on low. Then I scoured it with baking soda to help neutralize the oxalic acid. It just seemed like it needed a long time to work, so I felt like letting it soak and dry got the best results. But how do you all normally do it?
Joseph
Philco 39-750 EZ
Philco 46-480
Philco 47-1230
Philco 48-482
Philco 49-906
(This post was last modified: 11-24-2025, 12:37 AM by jrblasde.)
Posts: 5,652
Threads: 56
Joined: Sep 2008
City: Sandwick, BC, CA
Joseph;
What does the cabinet look like now? I would not be embarrassed about posting a picture of the after, the before certainly wasn't presentable, and the top veneer isn't a rare or exotic wood or anything. I have heard of people mixing oxalic acid into a paste an applying it directly onto stains, but what I am wondering is what those stains are? Are they actually water marks or are they something else like battery acid, or engine oil, or what? I'm wondering if you might try different solvents on the spots, see if they react?
I once got some black marks out of walnut by using a phosphoric acid based rust remover. Maybe try wood bleach, or that stuff they use to revive wood decks, on small areas of course? You really have nothing to loose. If all else fails you could paint the cabinet, or use extra dark walnut tone spray all over the bad parts.
Regards
Arram
Posts: 5,584
Threads: 291
Joined: Nov 2012
City: Wilsonville
State, Province, Country: OR
I don’t recall the concentration I used but I brushed the solution on the stained area, kept it moist with added brushing for 30 minutes or so and then rinsed it off with water. Worked ok for a mild water stain.
However, a furniture restorer I watch on YouTube, Tom Johnson Antuque Furnuture Restoration, brushes on a coat of the solution over the entire surface and lets it dry overnight. Next day he rinses it off with water. As with all chemicals, don’t get it on your skin or eyes. I wear safety glasses and nitrile gloves.
Posts: 486
Threads: 28
Joined: Jan 2024
City: Tulsa
State, Province, Country: Oklahoma
No shame at all in sharing! It was simply too late last night to get out of bed for another photo! 
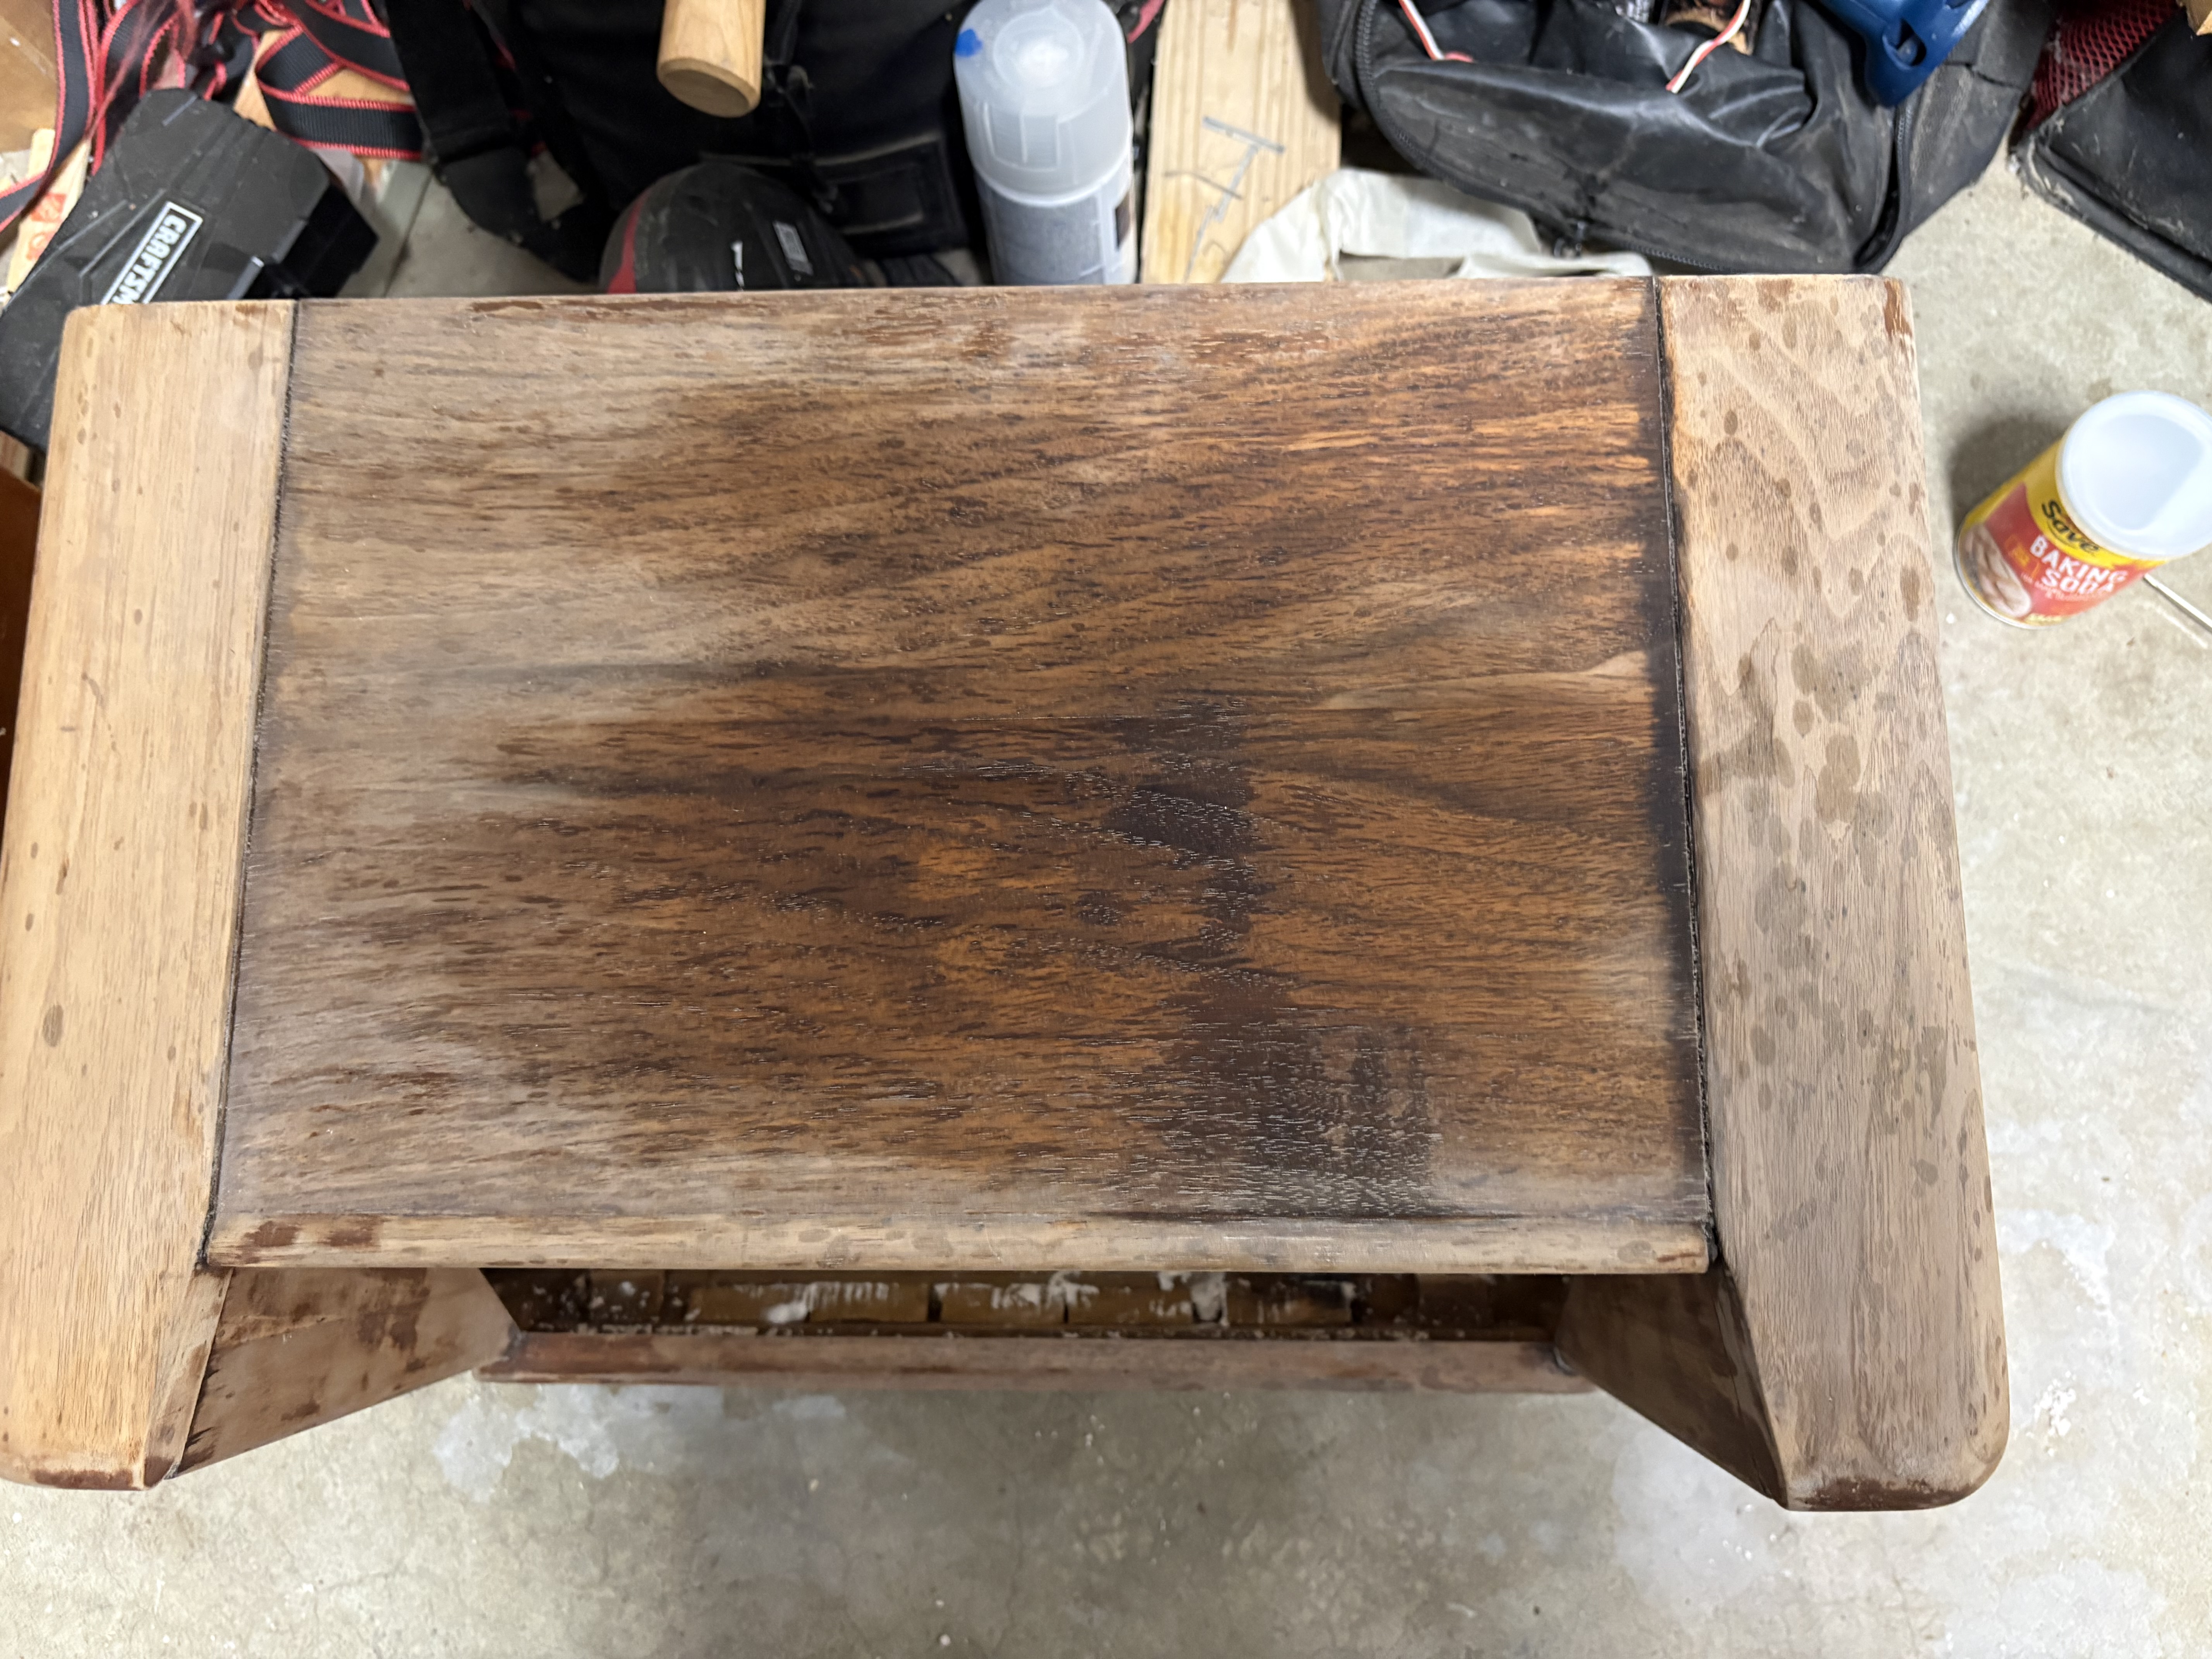
Anyway, I walked out this morning to get some more photos. I applied some mineral spirits, and you can see that the large stain comes back to life. I’m thinking it would be best to replace this top piece of veneer. I’ve still got plenty of suitable veneer from when I restored the 46-480 last year.
Joseph
Philco 39-750 EZ
Philco 46-480
Philco 47-1230
Philco 48-482
Philco 49-906
Posts: 1,797
Threads: 55
Joined: Feb 2015
City: Roseville, MN
Yeah, we don't need to see a picture of you getting out of bed.  
I'd say you've done enough work on that stain. You proved it's more permanent than it's worth to remove. And it looks like sanding won't help take it out. But you can try a small section and see what happens. So, from here you put effort in to working on removing the stain or replacing the veneer. Now try to see the end result of each.
Posts: 486
Threads: 28
Joined: Jan 2024
City: Tulsa
State, Province, Country: Oklahoma
What other types of solvents are available? If it could possibly be a grease or an oil stain, are you thinking of something like degreaser?
I’ll go the route of replacing the top veneer, but there are some little spots on the right and front sides of the cabinet which are much smaller and probably could be removed with the right product.
Joseph
Philco 39-750 EZ
Philco 46-480
Philco 47-1230
Philco 48-482
Philco 49-906
Posts: 5,652
Threads: 56
Joined: Sep 2008
City: Sandwick, BC, CA
I was thinking of some of the solvents they sell at Home Depot, like ketone, xylene, acetone, or cleaners like ammonia, I don't know what sort of stripper you used but most of them have at least one of those in it, other then ammonia. Ammonia used to be used to darken oak at one time. I think replacing the walnut veneer is the best option, whatever stained it up has gone through it, and it looks mechanically damaged anyhow. One more idea, have you tried steaming out the stains, a wet rag and an old clothes iron might be worth a shot?
Regards
Arran
Posts: 486
Threads: 28
Joined: Jan 2024
City: Tulsa
State, Province, Country: Oklahoma
Yes, I did try steaming as well. Tonight I got the veneer off and discovered that the stain had seeped all the way through to the underlying wood. There would have been no removing that! I decided to remove the veneer on the top and the two side panels. When I reapplied mineral spirits to the right-hand panel I noticed some lingering staining as well, so I figured I would just go ahead and refresh those three matching panels. I suppose I could have left the left-hand panel original, but I thought what the heck? It sure will look snazzy when it’s done!
Joseph
Philco 39-750 EZ
Philco 46-480
Philco 47-1230
Philco 48-482
Philco 49-906
Posts: 5,652
Threads: 56
Joined: Sep 2008
City: Sandwick, BC, CA
Joseph;
I'm wondering if it was something really nasty like battery acid, something that ate through the finish and right into the wood, because I don't think I have seen water do that. The veneer you want is French walnut, I think, plain cut judging by the top. Although you could go custom and put whatever you want on there, the control panel has a faux grain on it, I think they were trying to make it look like a burl.
I have a set like yours downstairs, the finish is crazed but the wood under it is structurally fine. So somehow it avoided any potted plant obsessed house wives during it's 78 years, it doesn't even have a ring on top. The chassis may be another matter, the last I looked I think it was complete, other then a missing tube, and a mouse had paid a visit at some point. As usual the clear plastic covers for the pushbuttons at missing, though I would not have known since they look almost identical to the ones on my 42-327 which never had any.
Regards
Arran
Posts: 486
Threads: 28
Joined: Jan 2024
City: Tulsa
State, Province, Country: Oklahoma
Well, you may be right. More likely than not, it was definitely a drink more stiff than water! It is an AC-only set (as in, no battery), but that certainly doesn’t mean there never were any batteries around it. This radio could have been in a garage or attic for years, and there’s no telling what could have been placed on it.
I do wonder about candles. Those old silver candelabras have a propensity to tarnish and discolor certain woods like oak with prolonged exposure. Plus there looked to be some spattering all over the top and side of the radio. Kind of makes me wonder if melted wax may have damaged the lacquer and opened up the wood to open air and other contaminants.
Joseph
Philco 39-750 EZ
Philco 46-480
Philco 47-1230
Philco 48-482
Philco 49-906
Posts: 486
Threads: 28
Joined: Jan 2024
City: Tulsa
State, Province, Country: Oklahoma
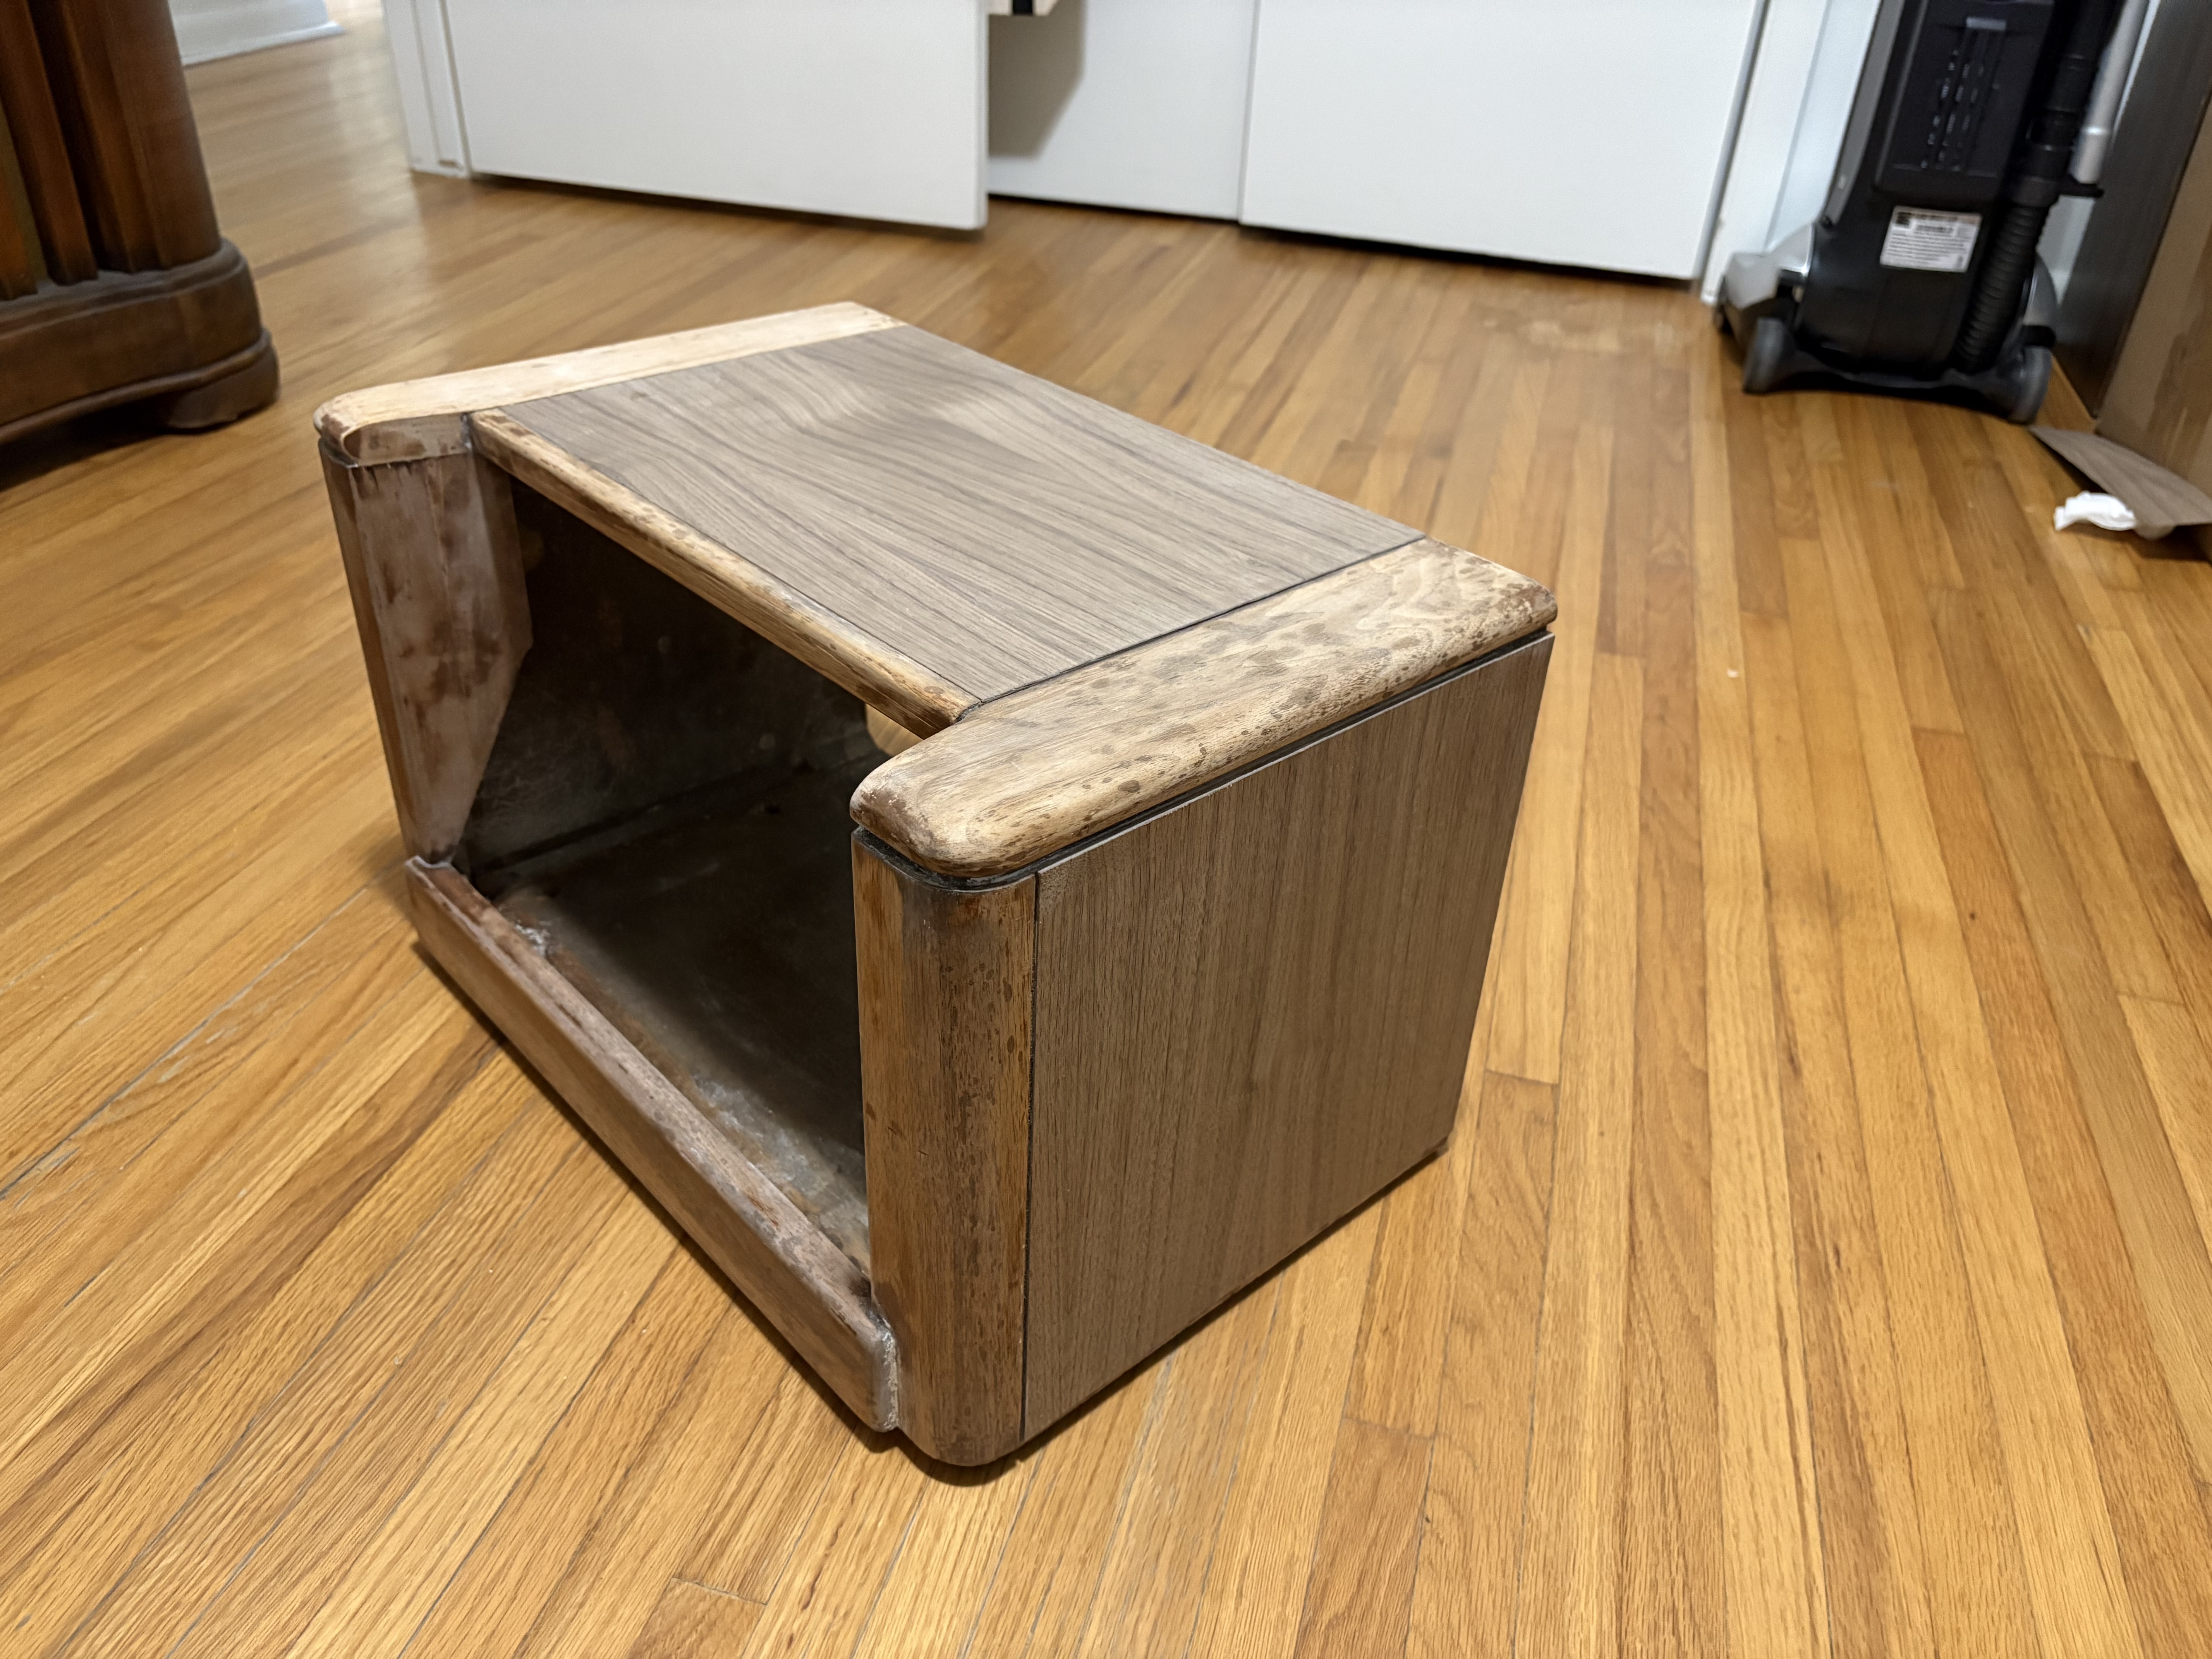
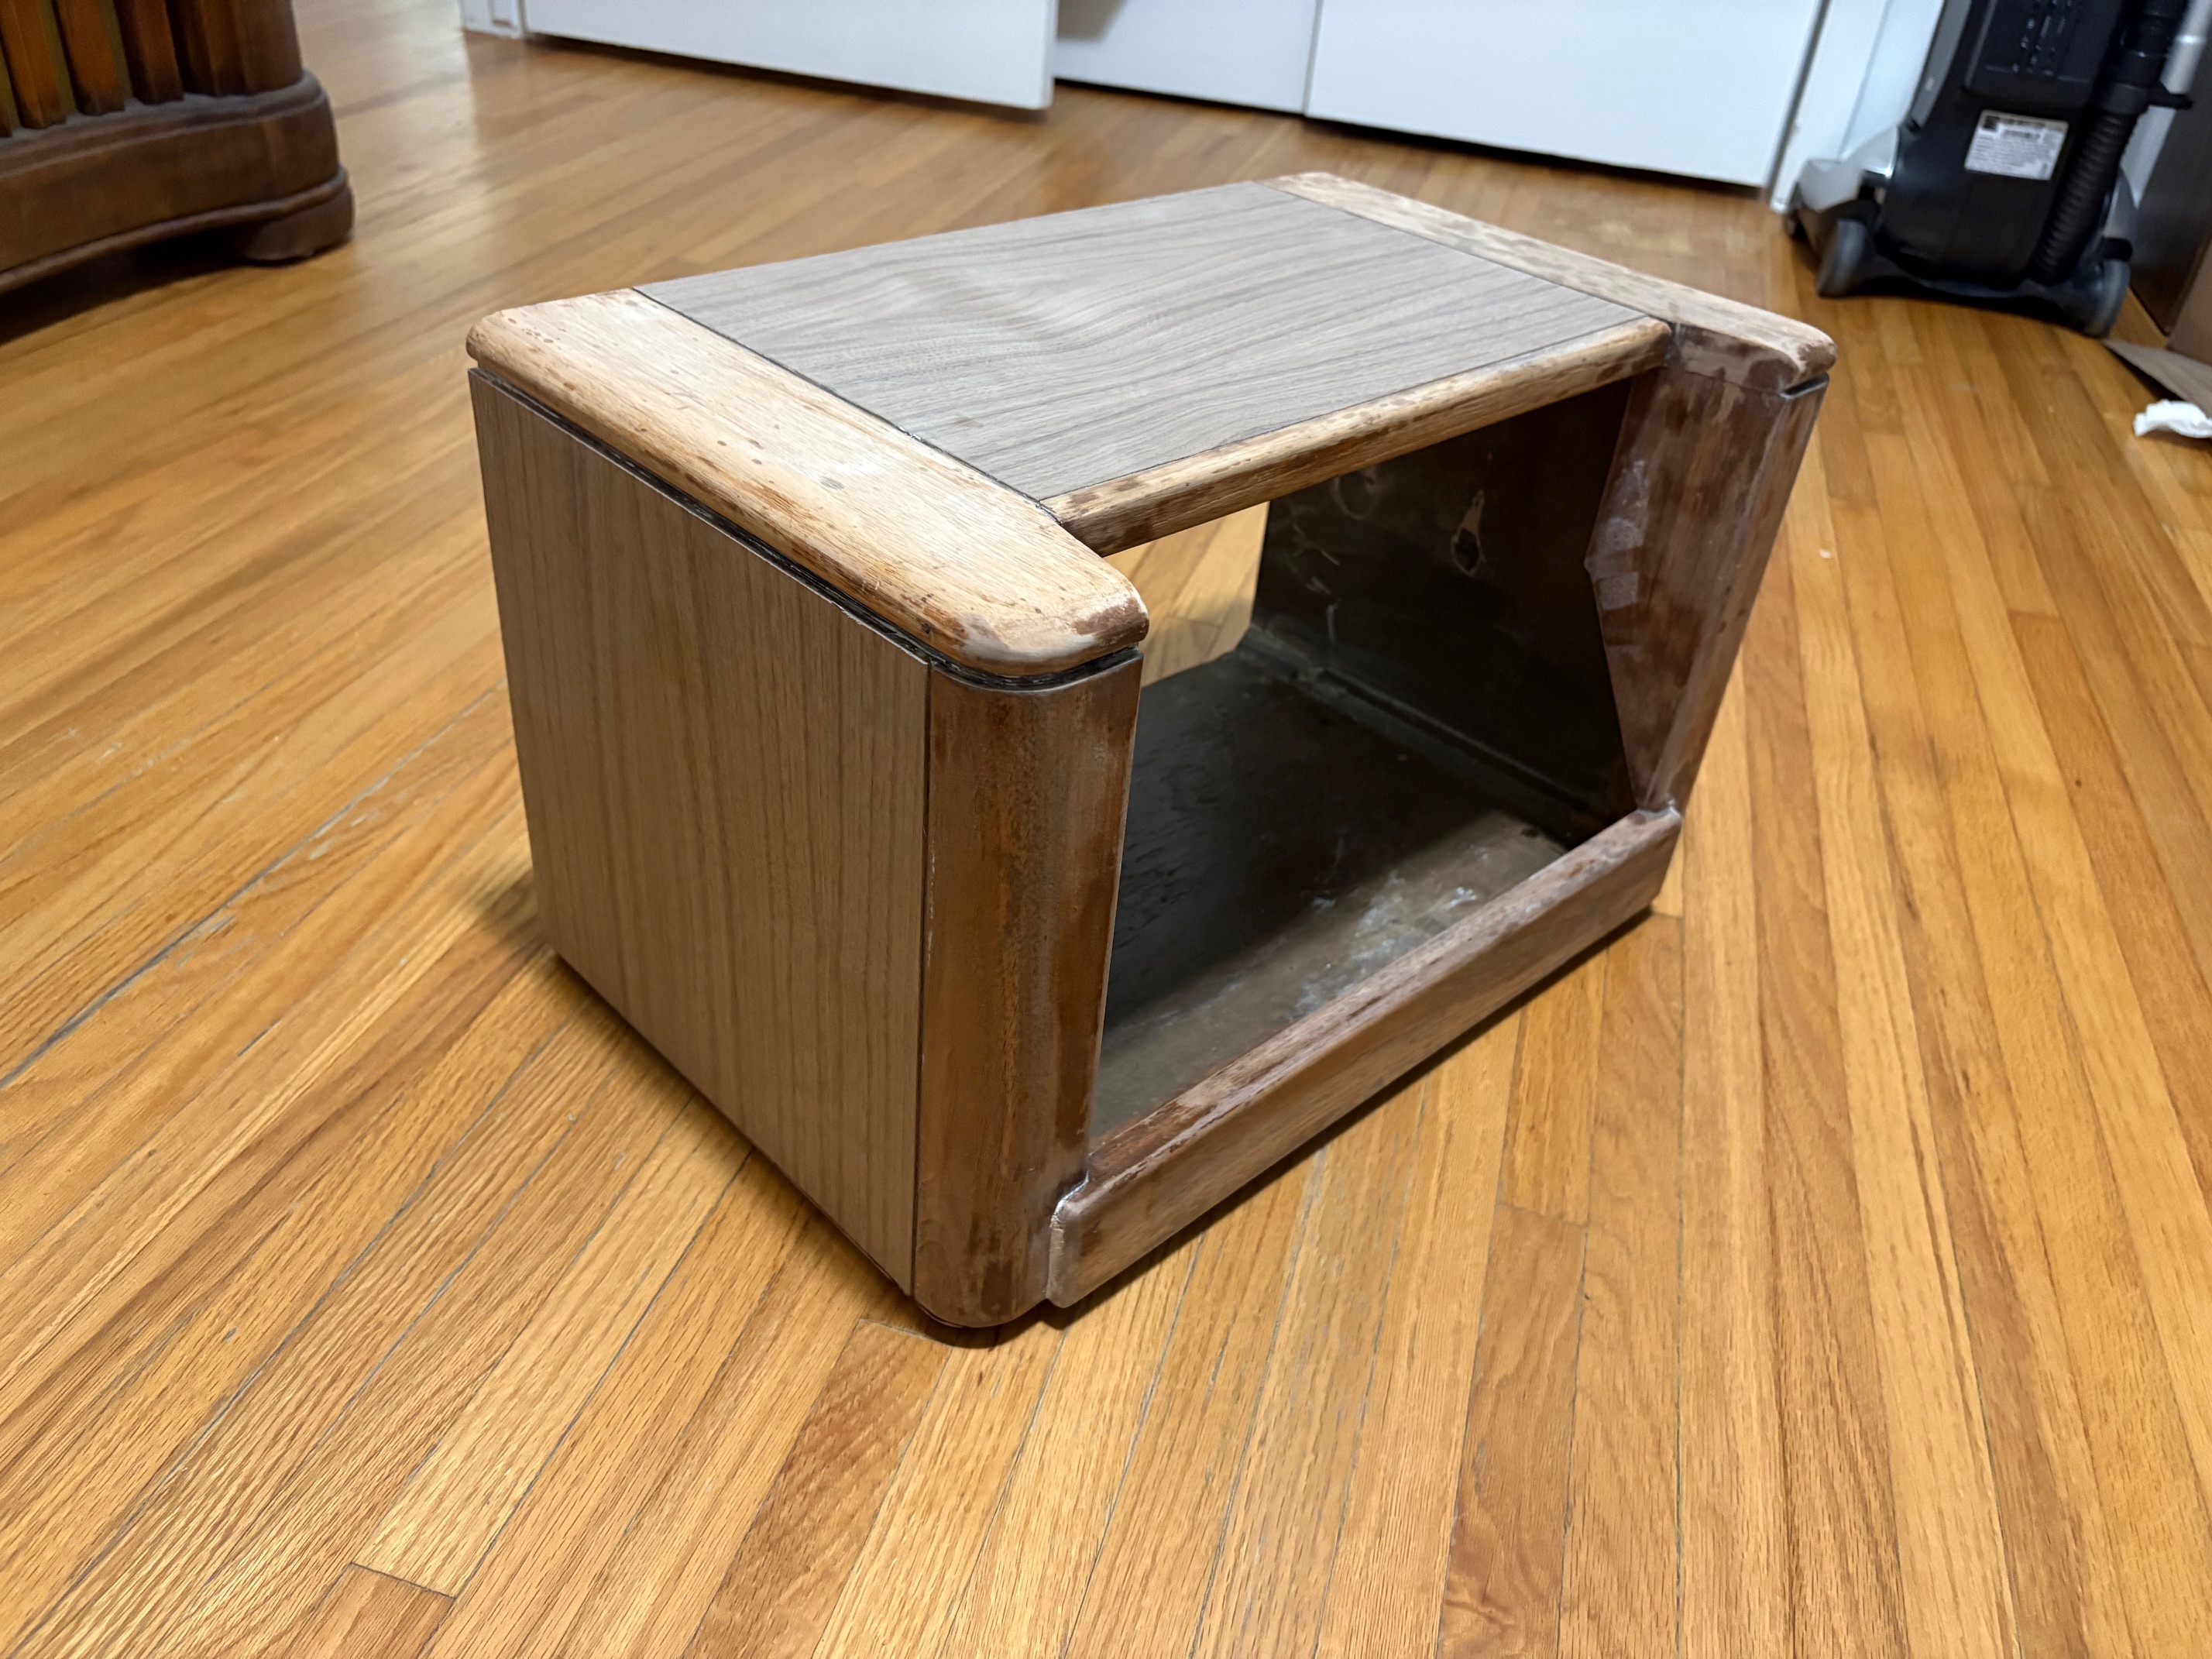
It was quite the bit of work, but I finished replacing the top and both side panels of veneer. I am truly satisfied by the results! Now I just need to try some other solvents to clean up a few lingering splatters of discoloration on the solid wood pieces.
Joseph
Philco 39-750 EZ
Philco 46-480
Philco 47-1230
Philco 48-482
Philco 49-906
Posts: 1,519
Threads: 69
Joined: Nov 2012
City: Kansas city, MO.
Good job on the veneer.
Looking forward to see your finished cabinet.
Posts: 5,584
Threads: 291
Joined: Nov 2012
City: Wilsonville
State, Province, Country: OR
looking good 
Posts: 486
Threads: 28
Joined: Jan 2024
City: Tulsa
State, Province, Country: Oklahoma
I have been working behind the scenes on this cabinet. I tried all kinds of solvents to remove the dark spots on that top right shoulder—acetone, oil-based stain and paint thinner, mineral spirits, etc. I had no luck. Finally I saw a recommendation for oxygenated bleach (i.e., Oxy Clean). Apparently you mix it with hot water just as I did when I tried the oxalic acid. Brush it into the wood with a stiff brush and keep reapplying every 10-15 minutes until the stains lighten. I did have a good degree of success. I saw the detergent bubbling in those areas and I eventually started brushing a lot of black material out of the pores of the wood. I really thought I had done it!
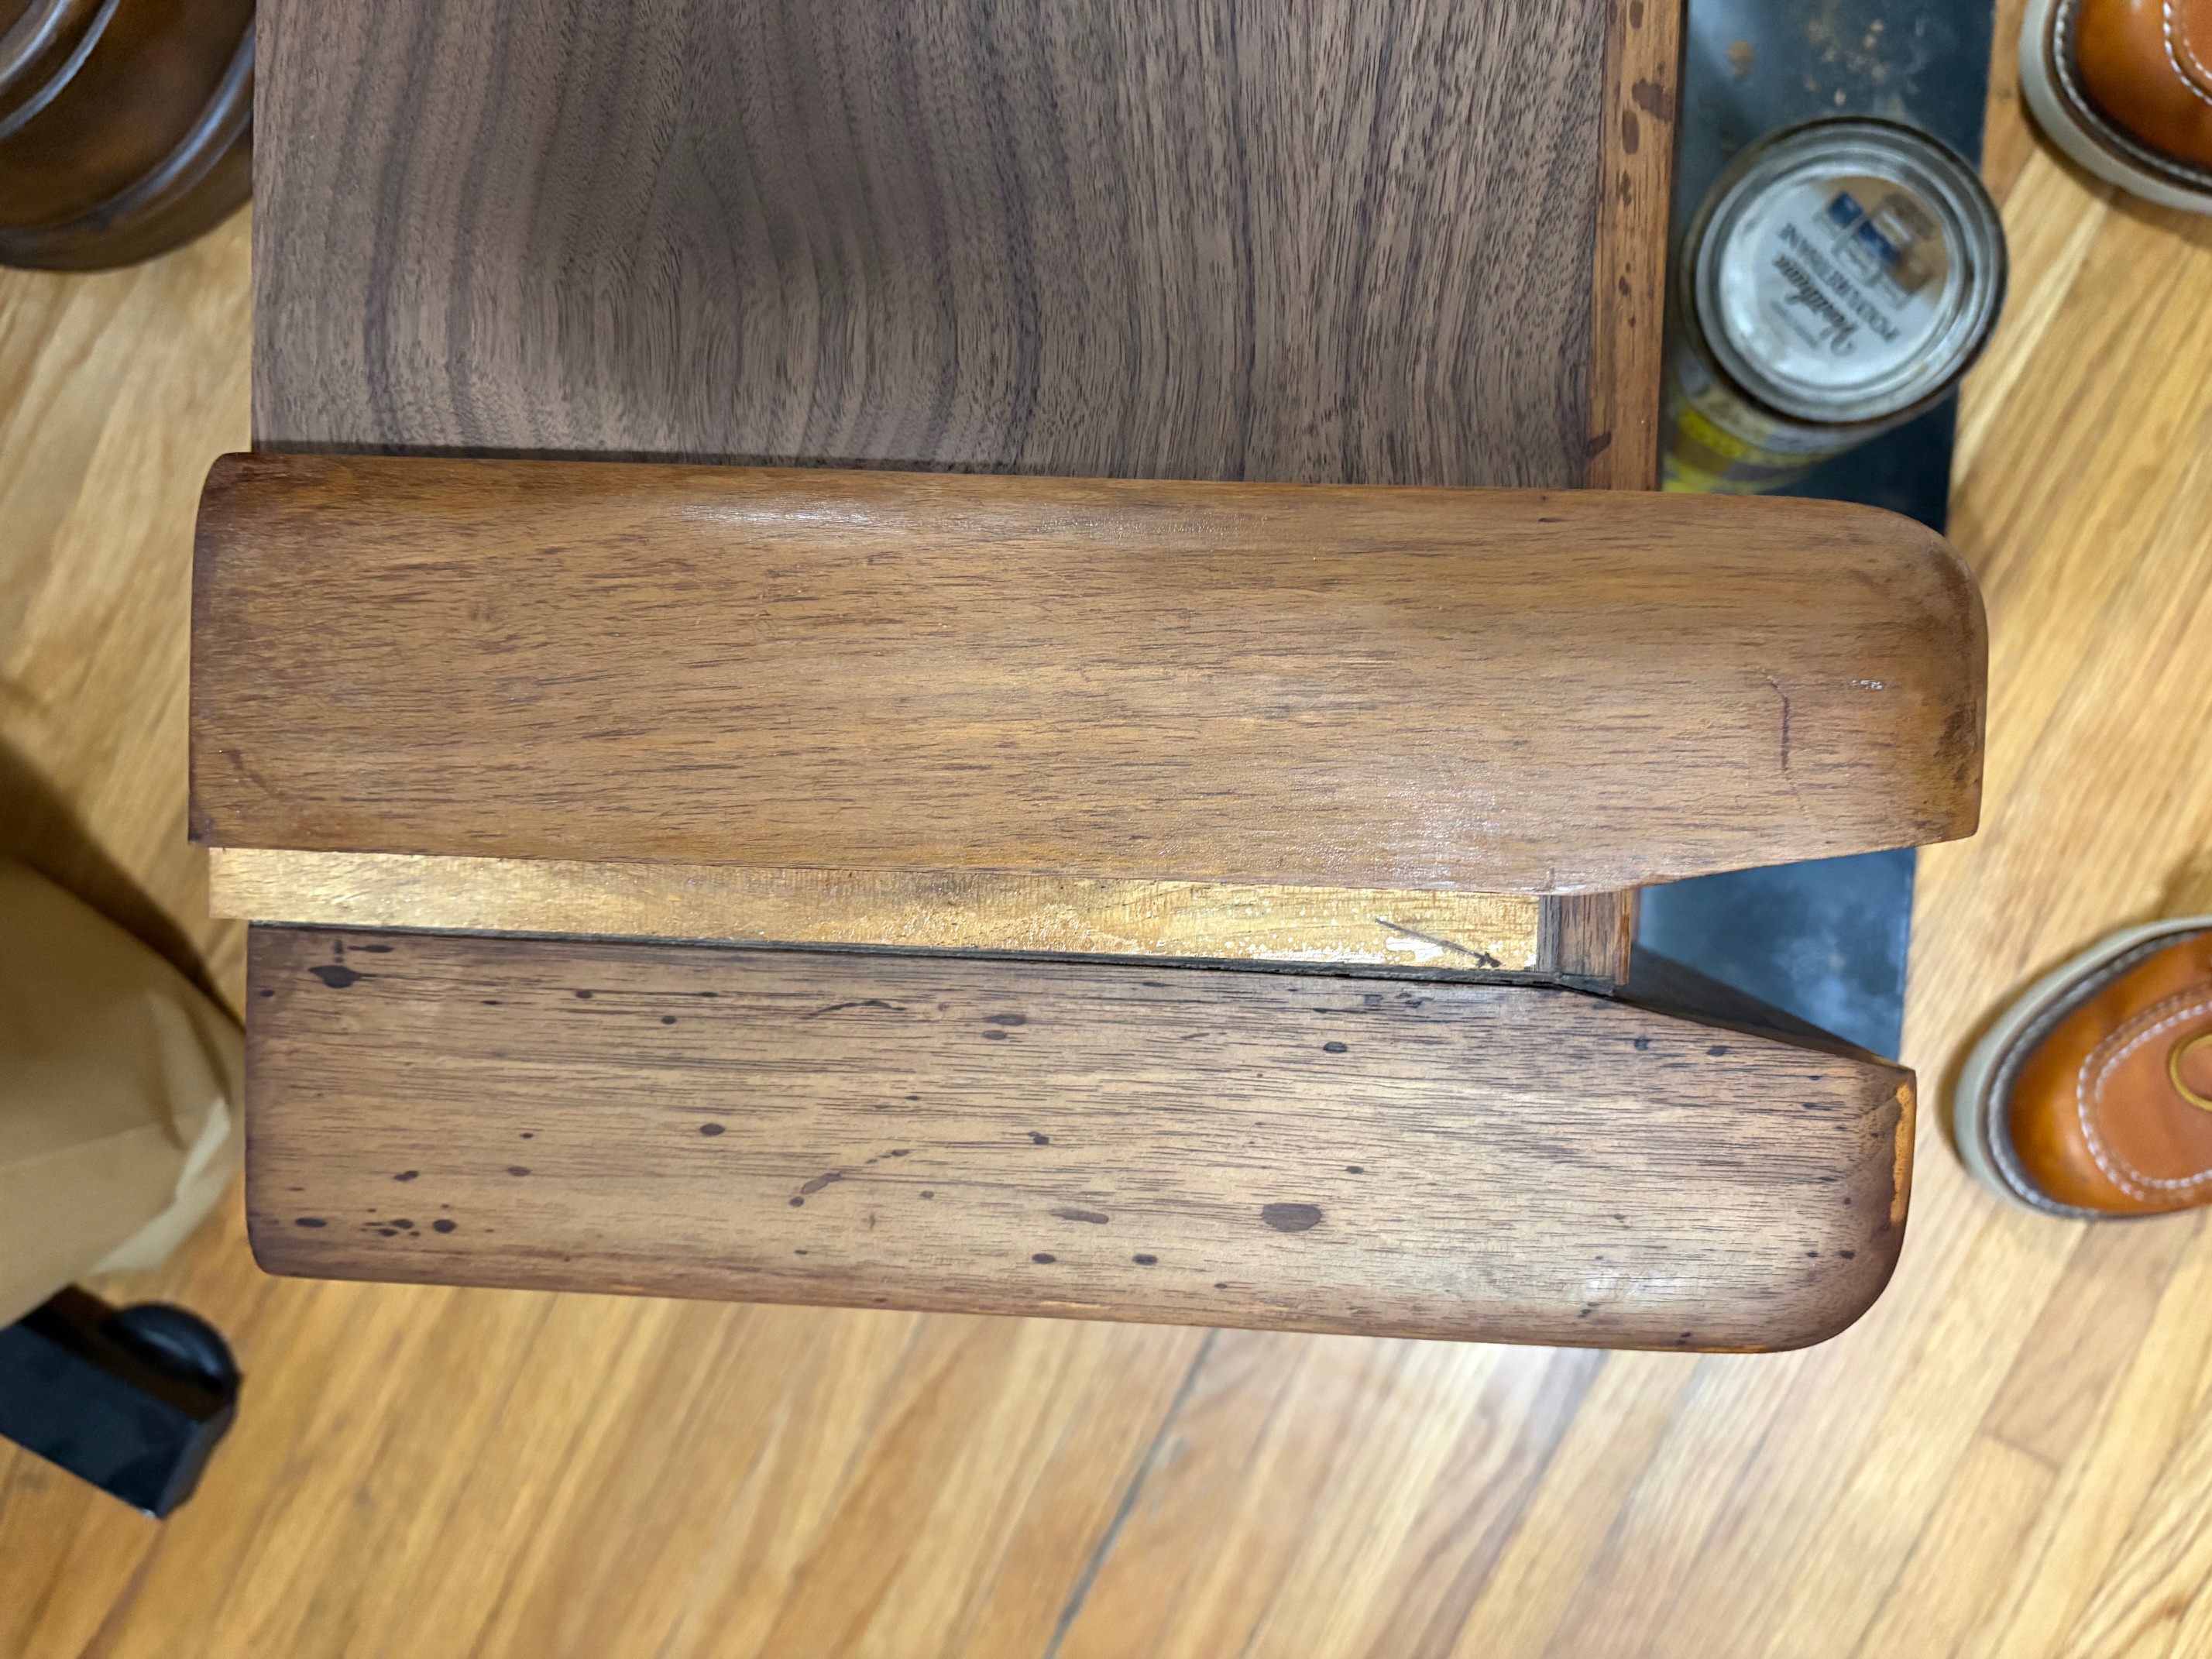
That is, until I started the process of restaining. Immediately those pesky dark spots came right back. I grew frustrated and gave it up for the night. But the next morning I noticed the yucky set I bought locally in the garage. It’s got a lot of deep gouges on the cabinet, but I happened to notice that the same right shoulder had no damage! The left shoulder and the top veneer are both ruined, but it occurred to me that I can dismantle it and use that right shoulder in place of the one on the radio I’ve been refinishing. I was able to remove it from the scrap radio, strip the finish, and clean up the joint grooves a bit. Here it is, shown laying on top of the console in progress. This evening I’m going to attempt to remove the stained up shoulder and replace it with this one.
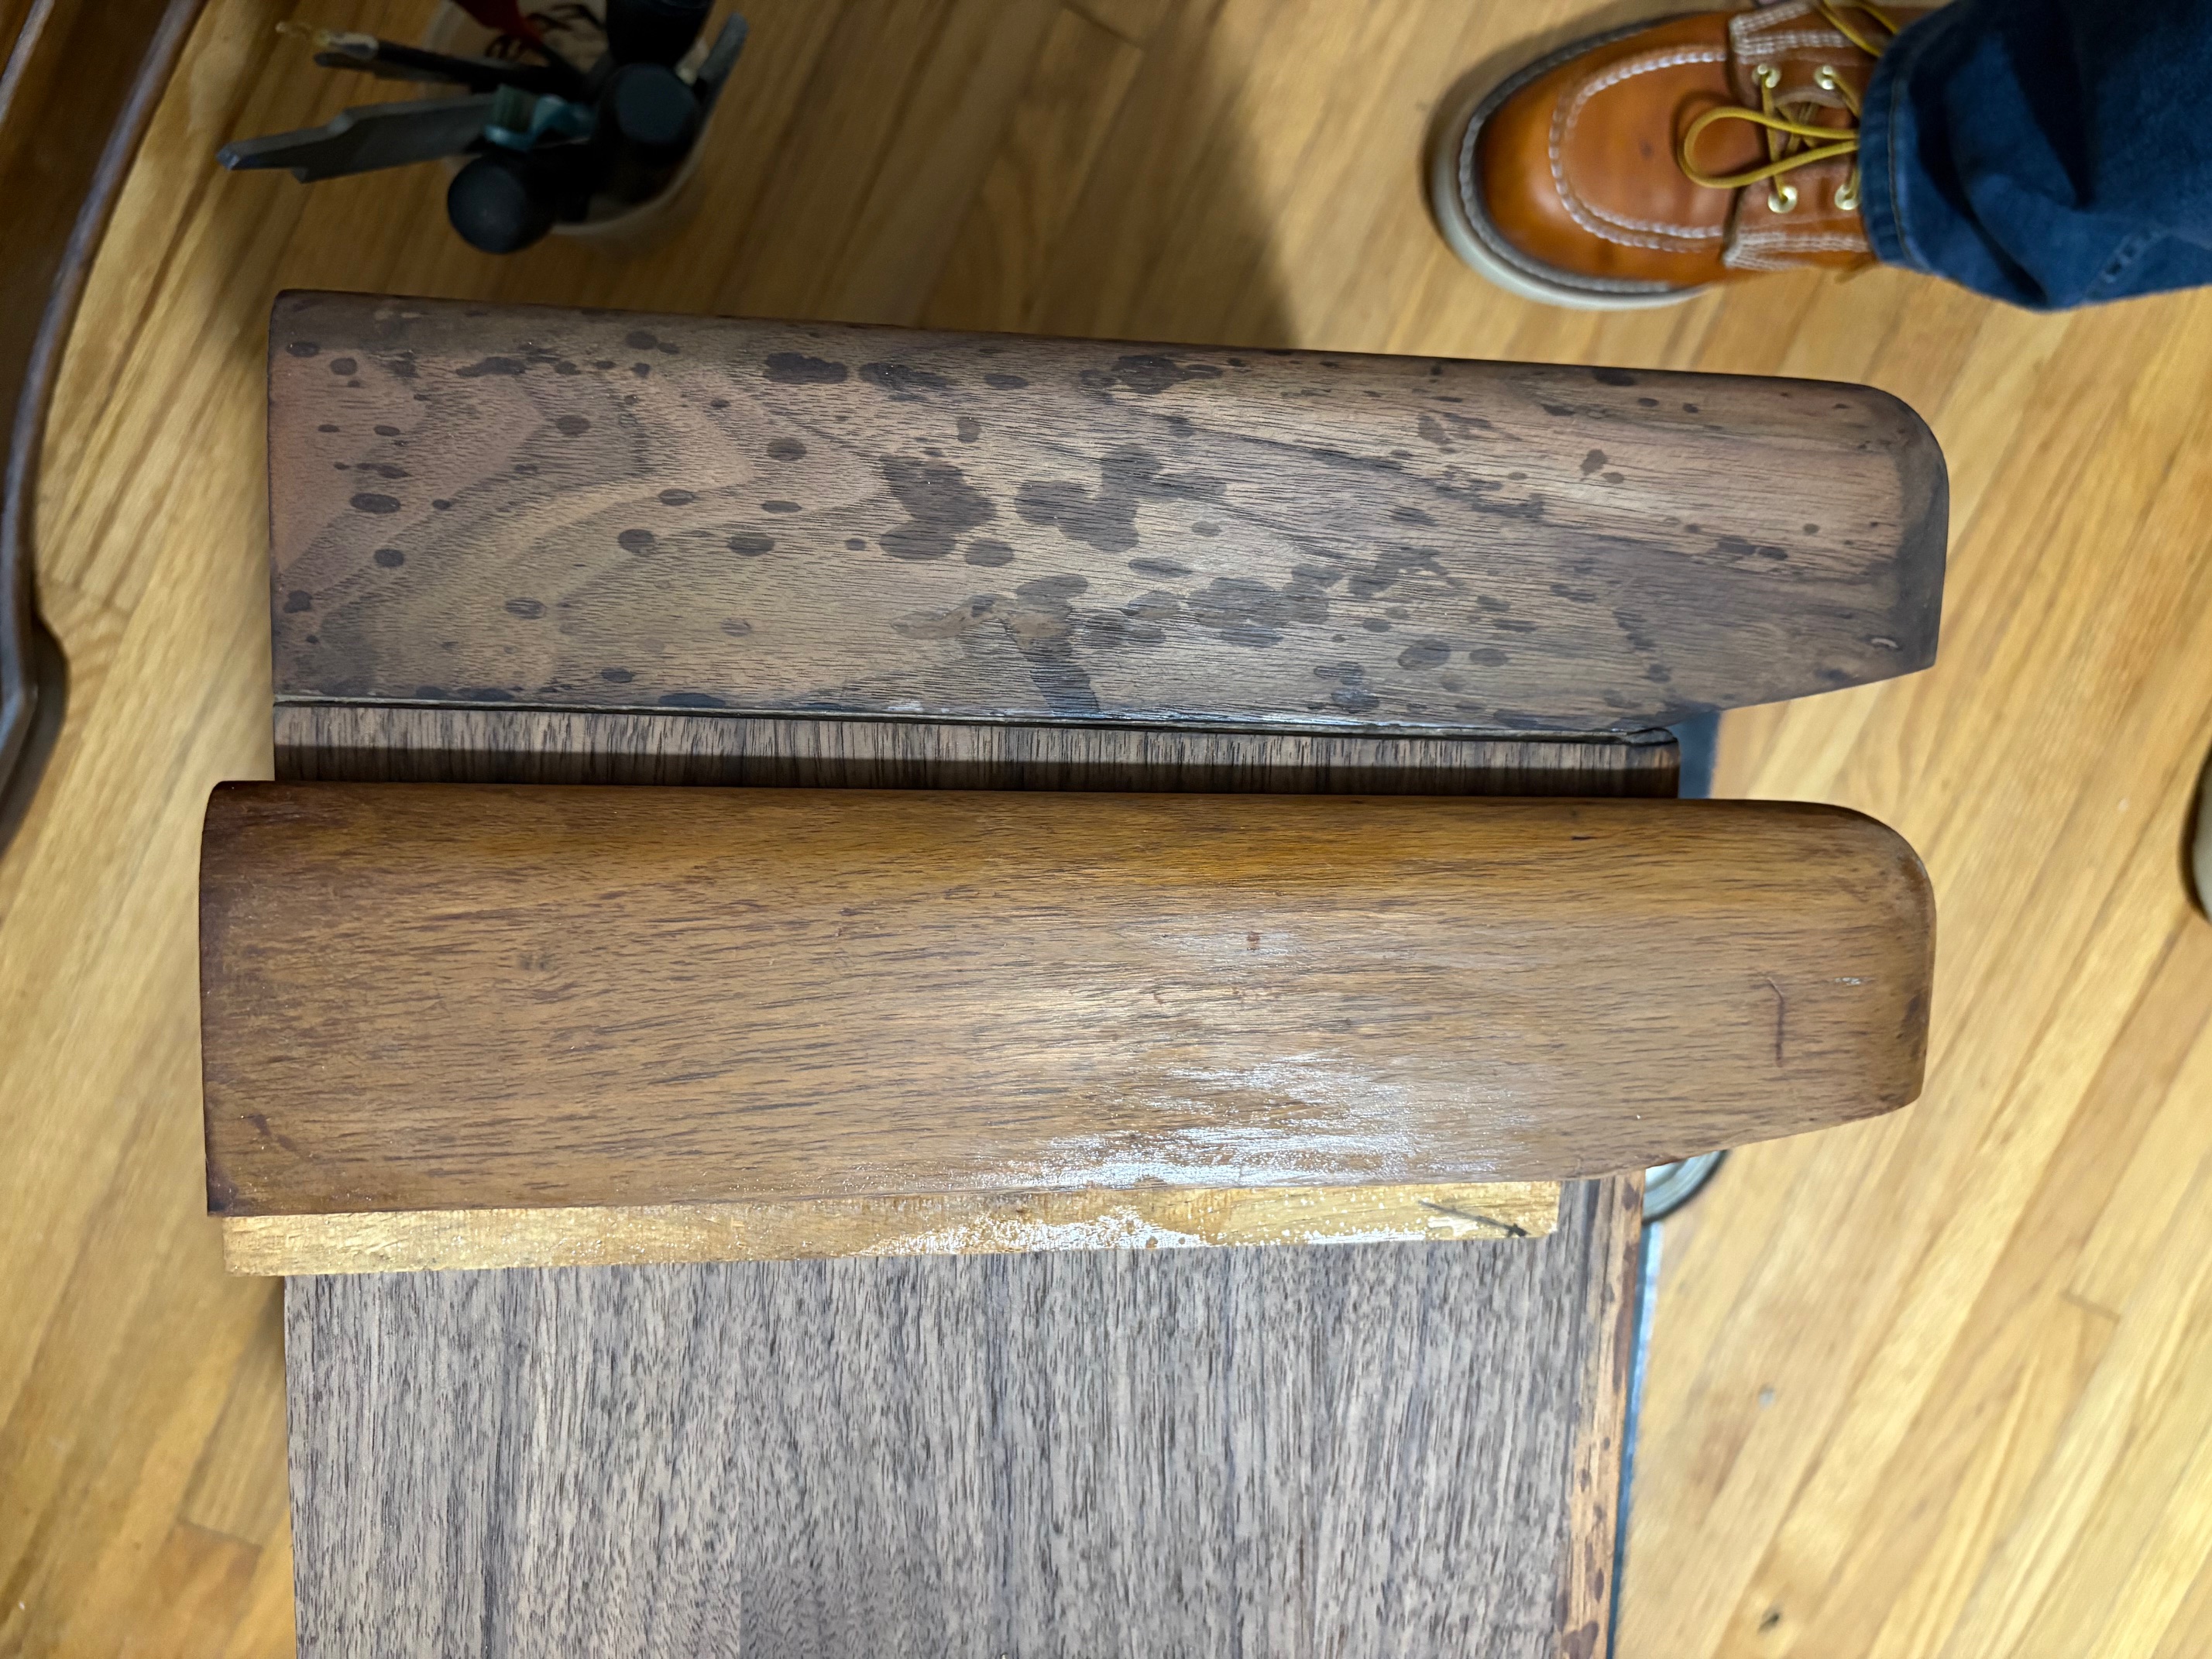
It’s nice to see that I’m slowly matching the color of stain that I need to achieve! Here it is, shown against the left shoulder that I’ve been restaining.
Joseph
Philco 39-750 EZ
Philco 46-480
Philco 47-1230
Philco 48-482
Philco 49-906
Posts: 486
Threads: 28
Joined: Jan 2024
City: Tulsa
State, Province, Country: Oklahoma
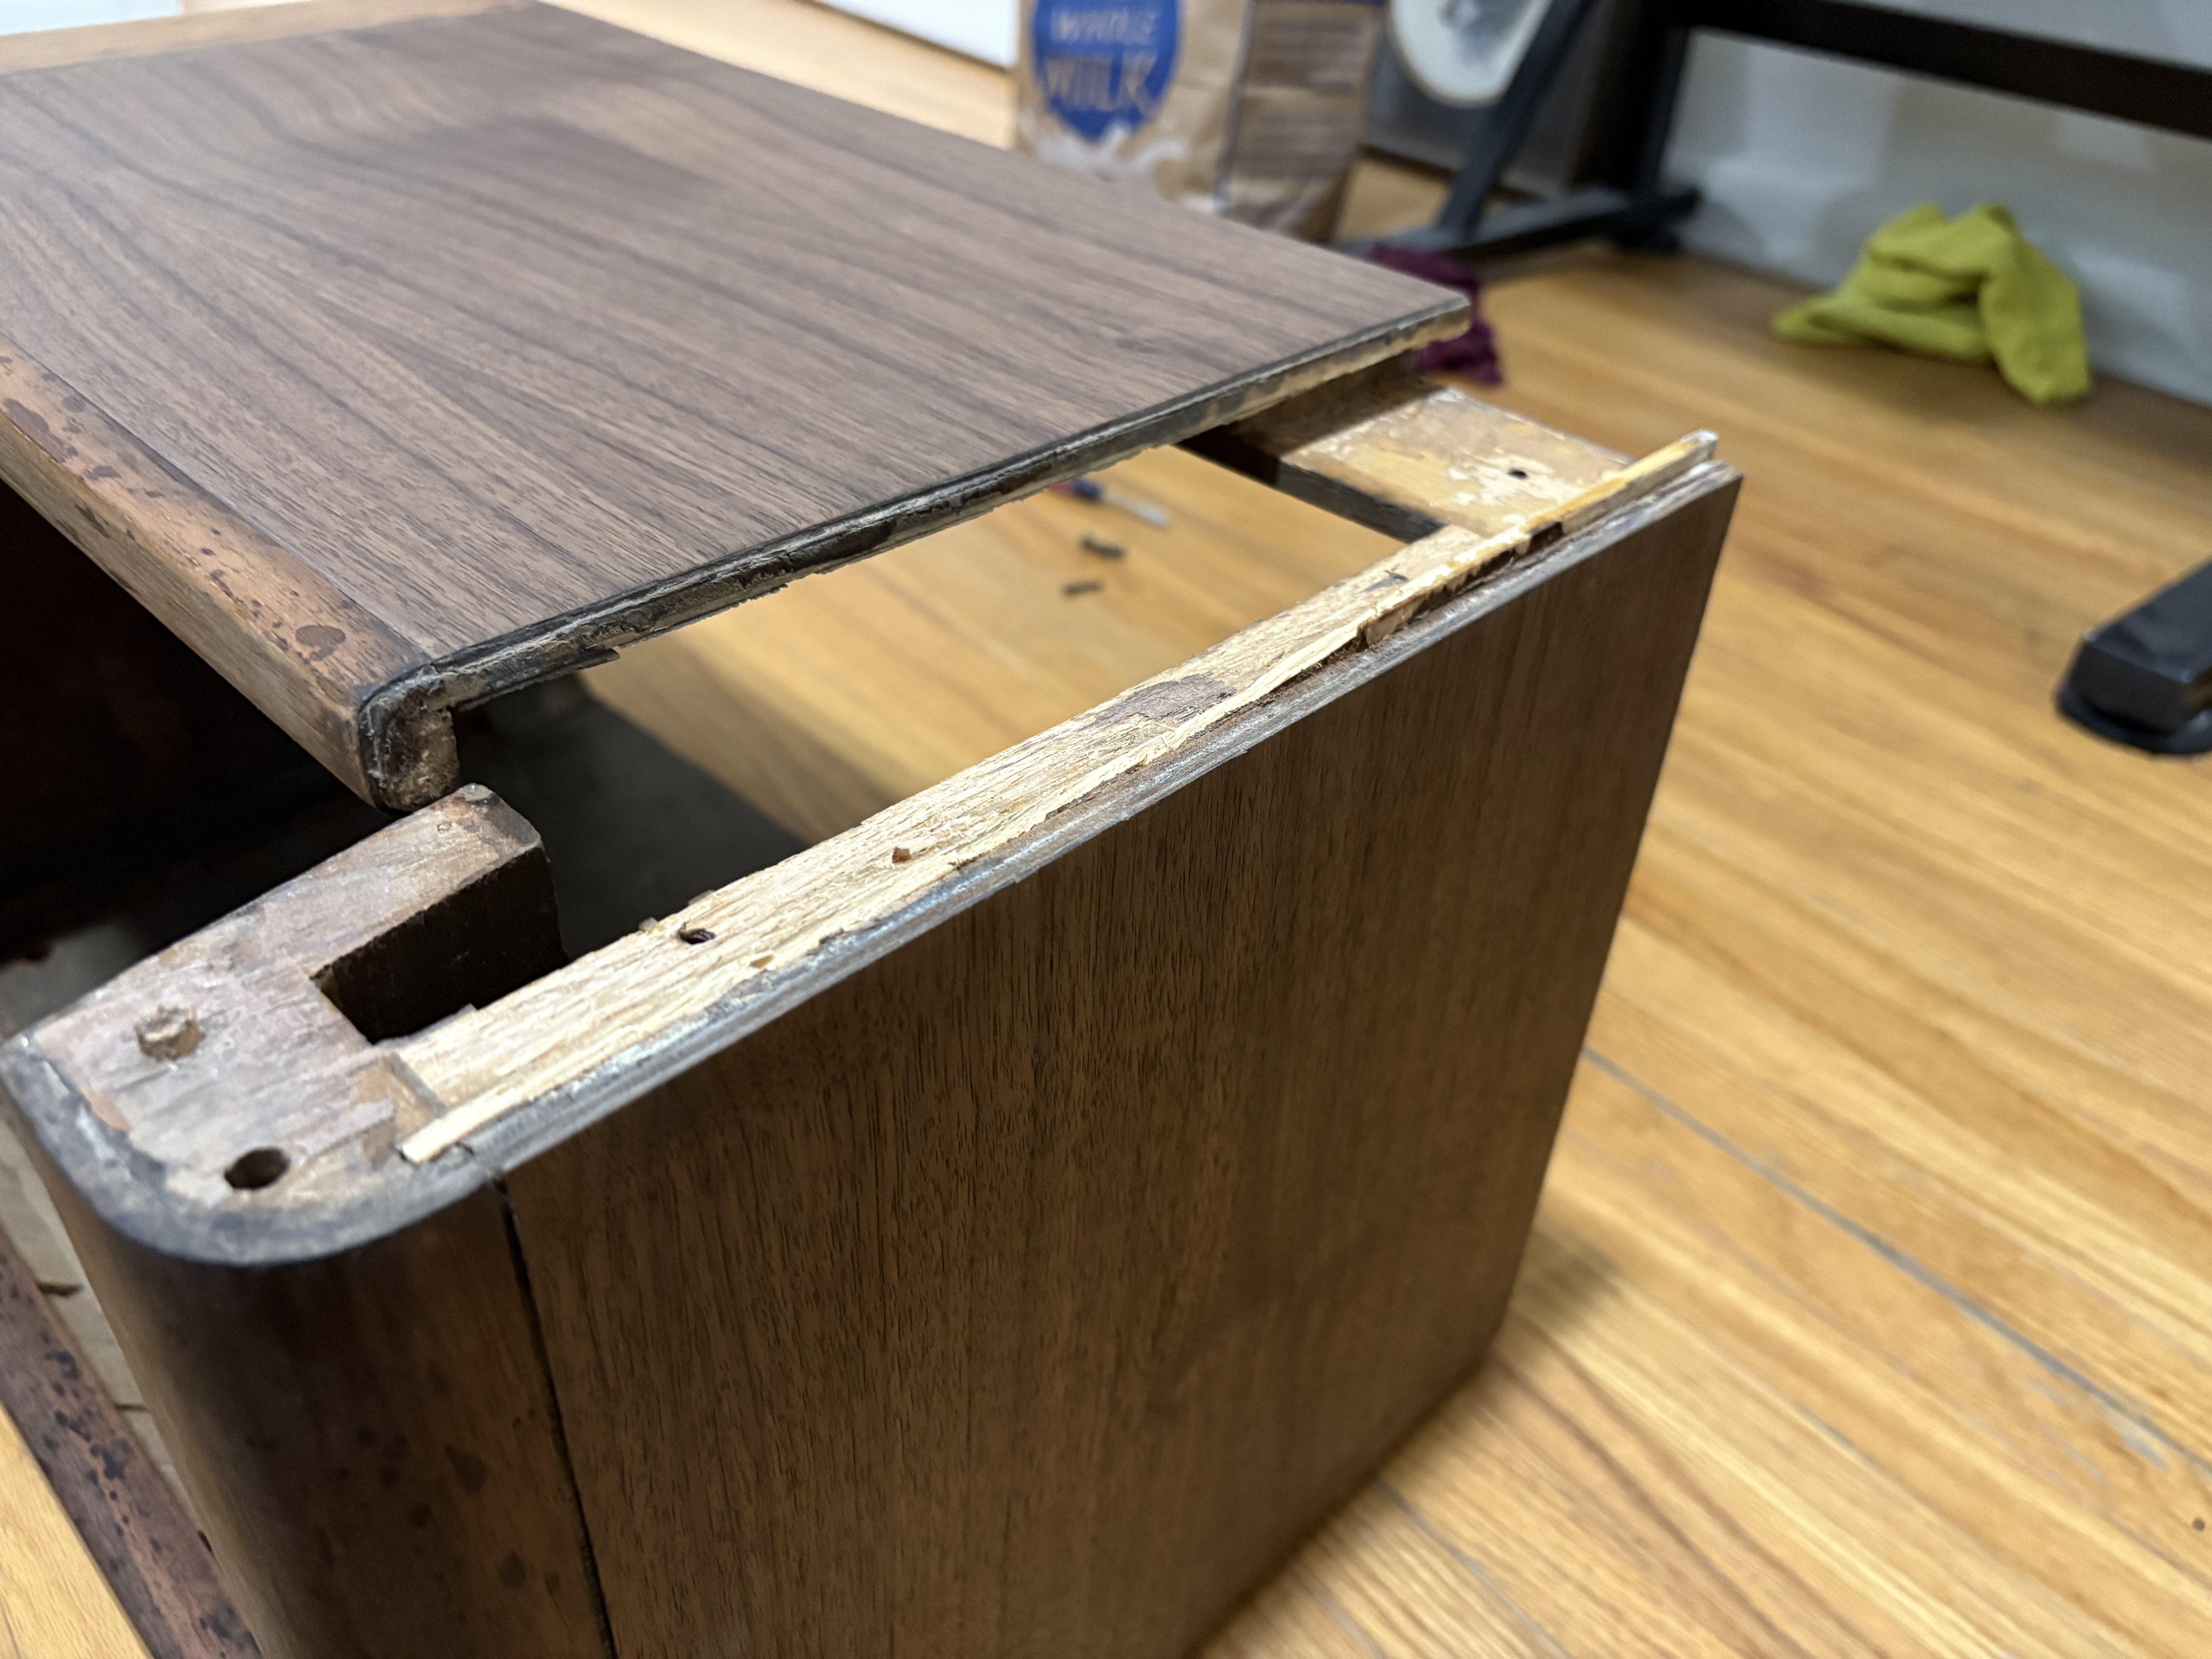
Success! Here’s a dry fit.
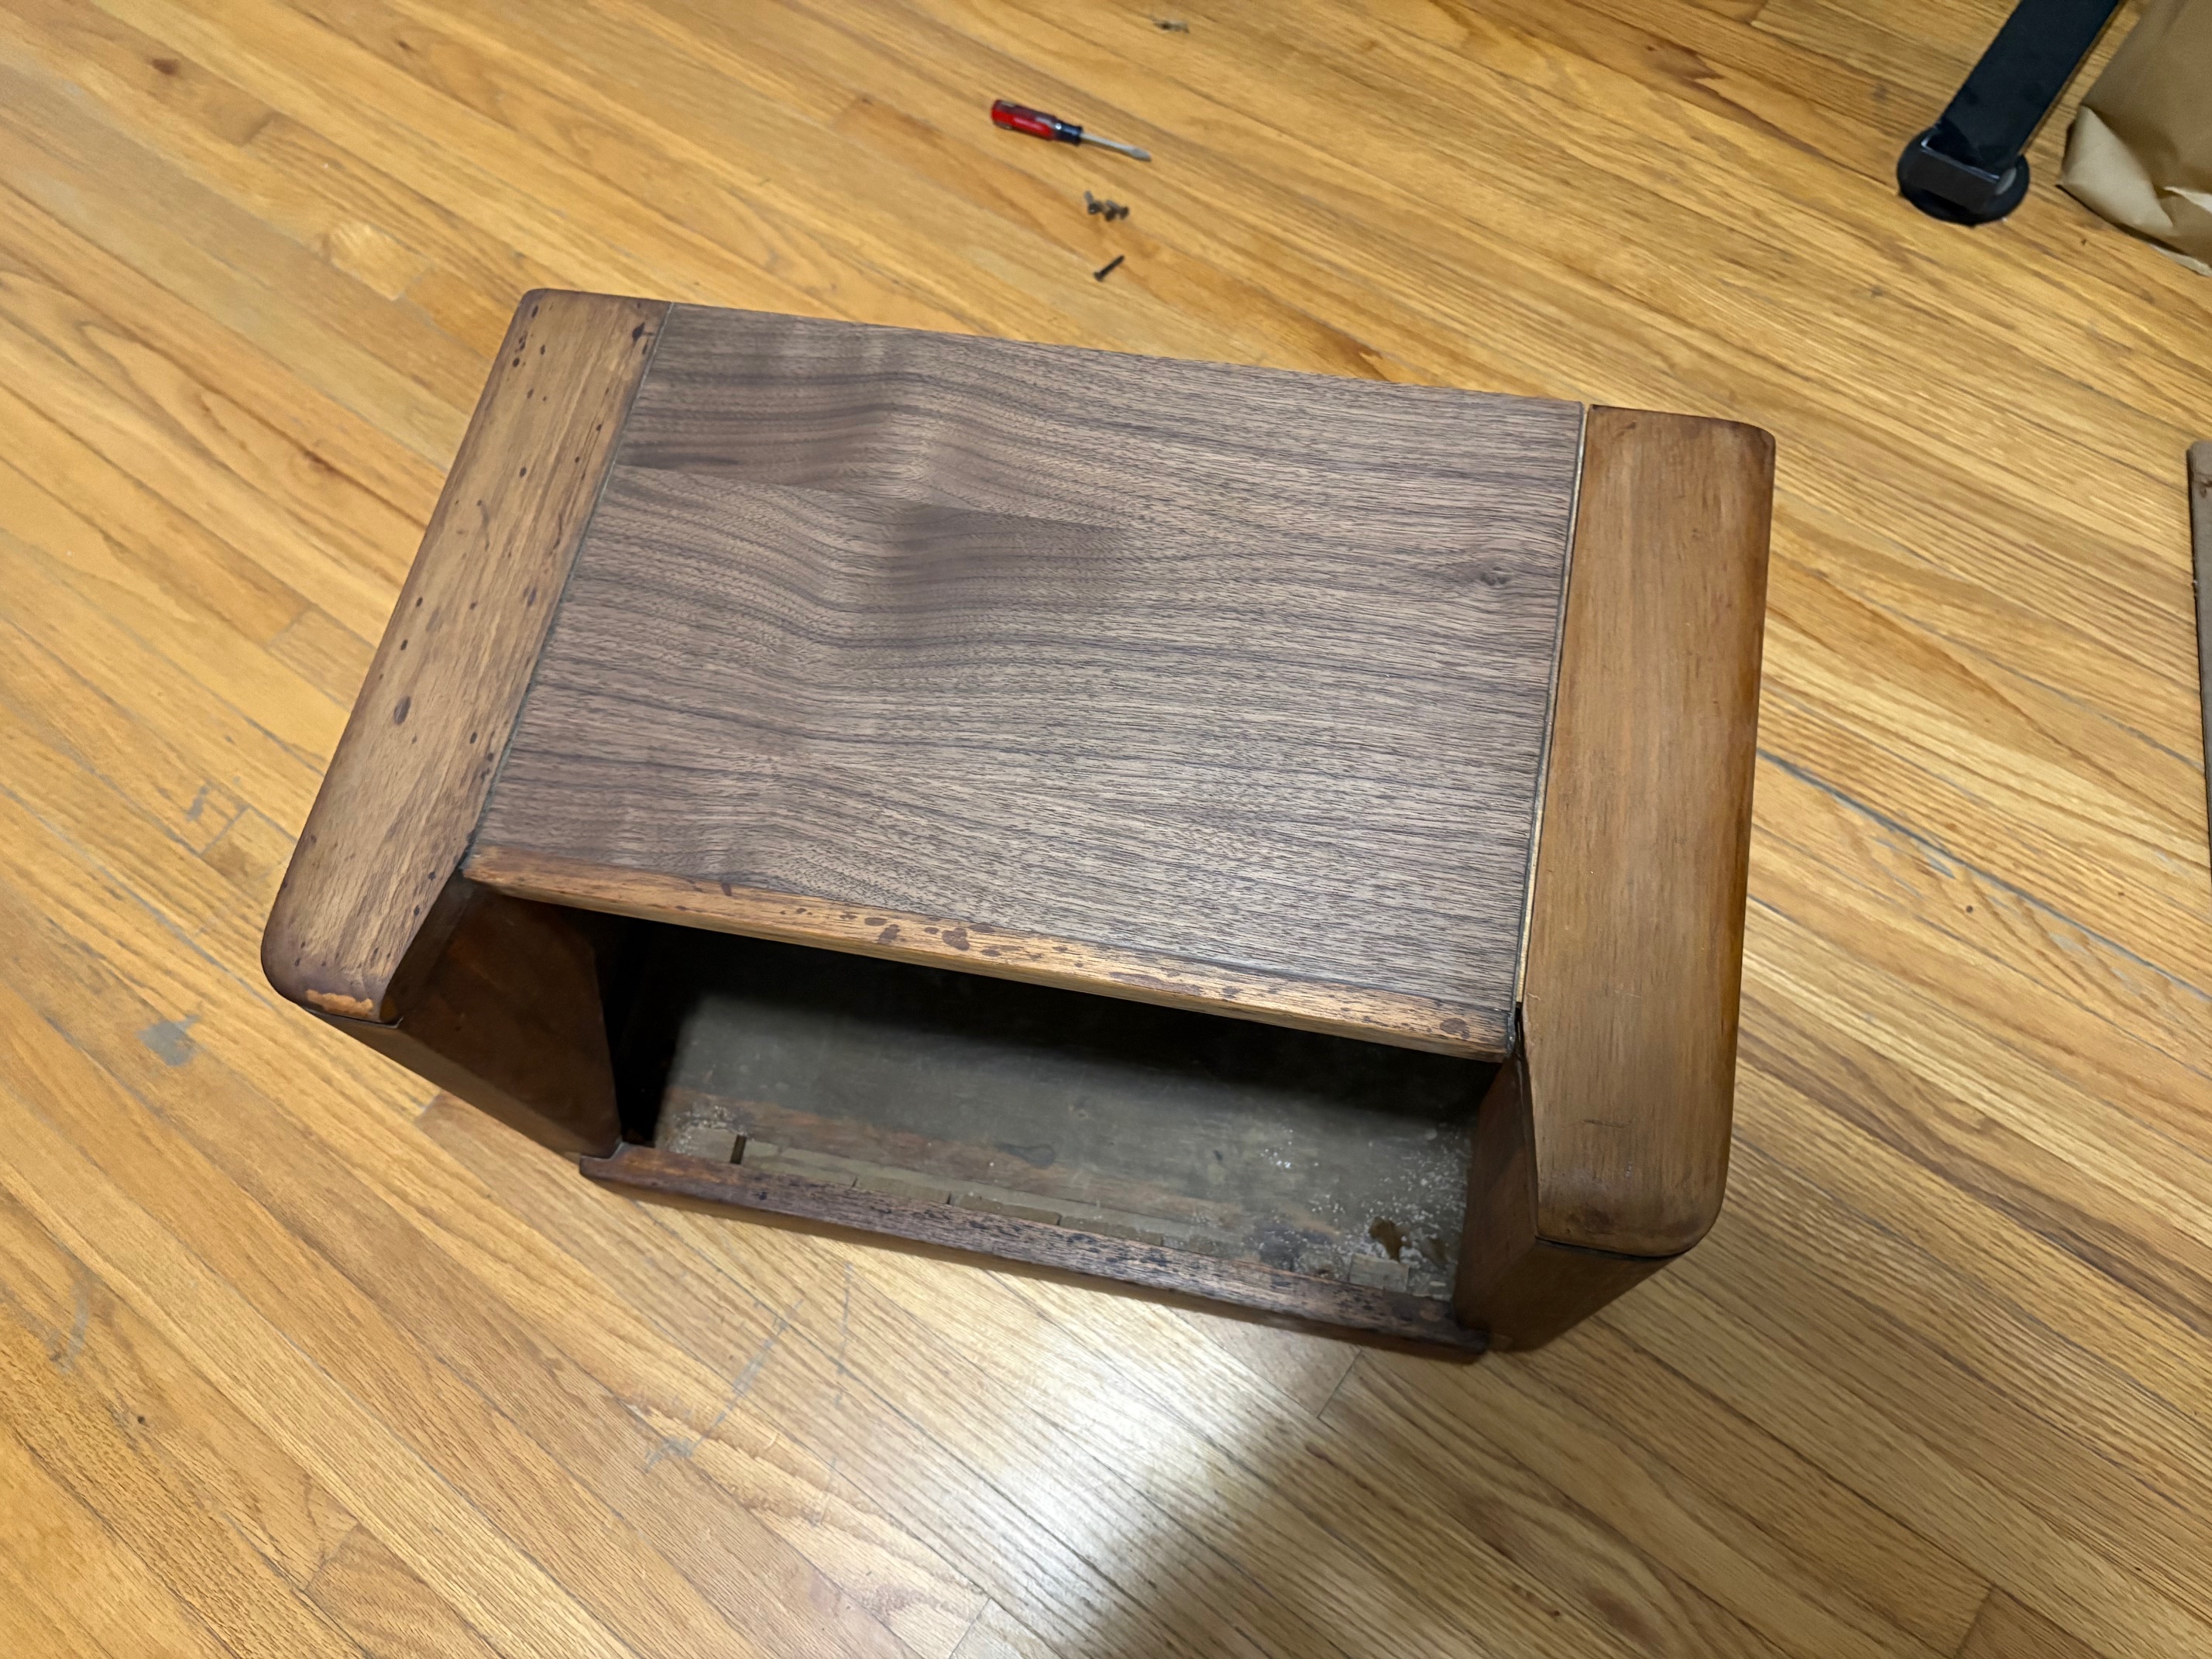
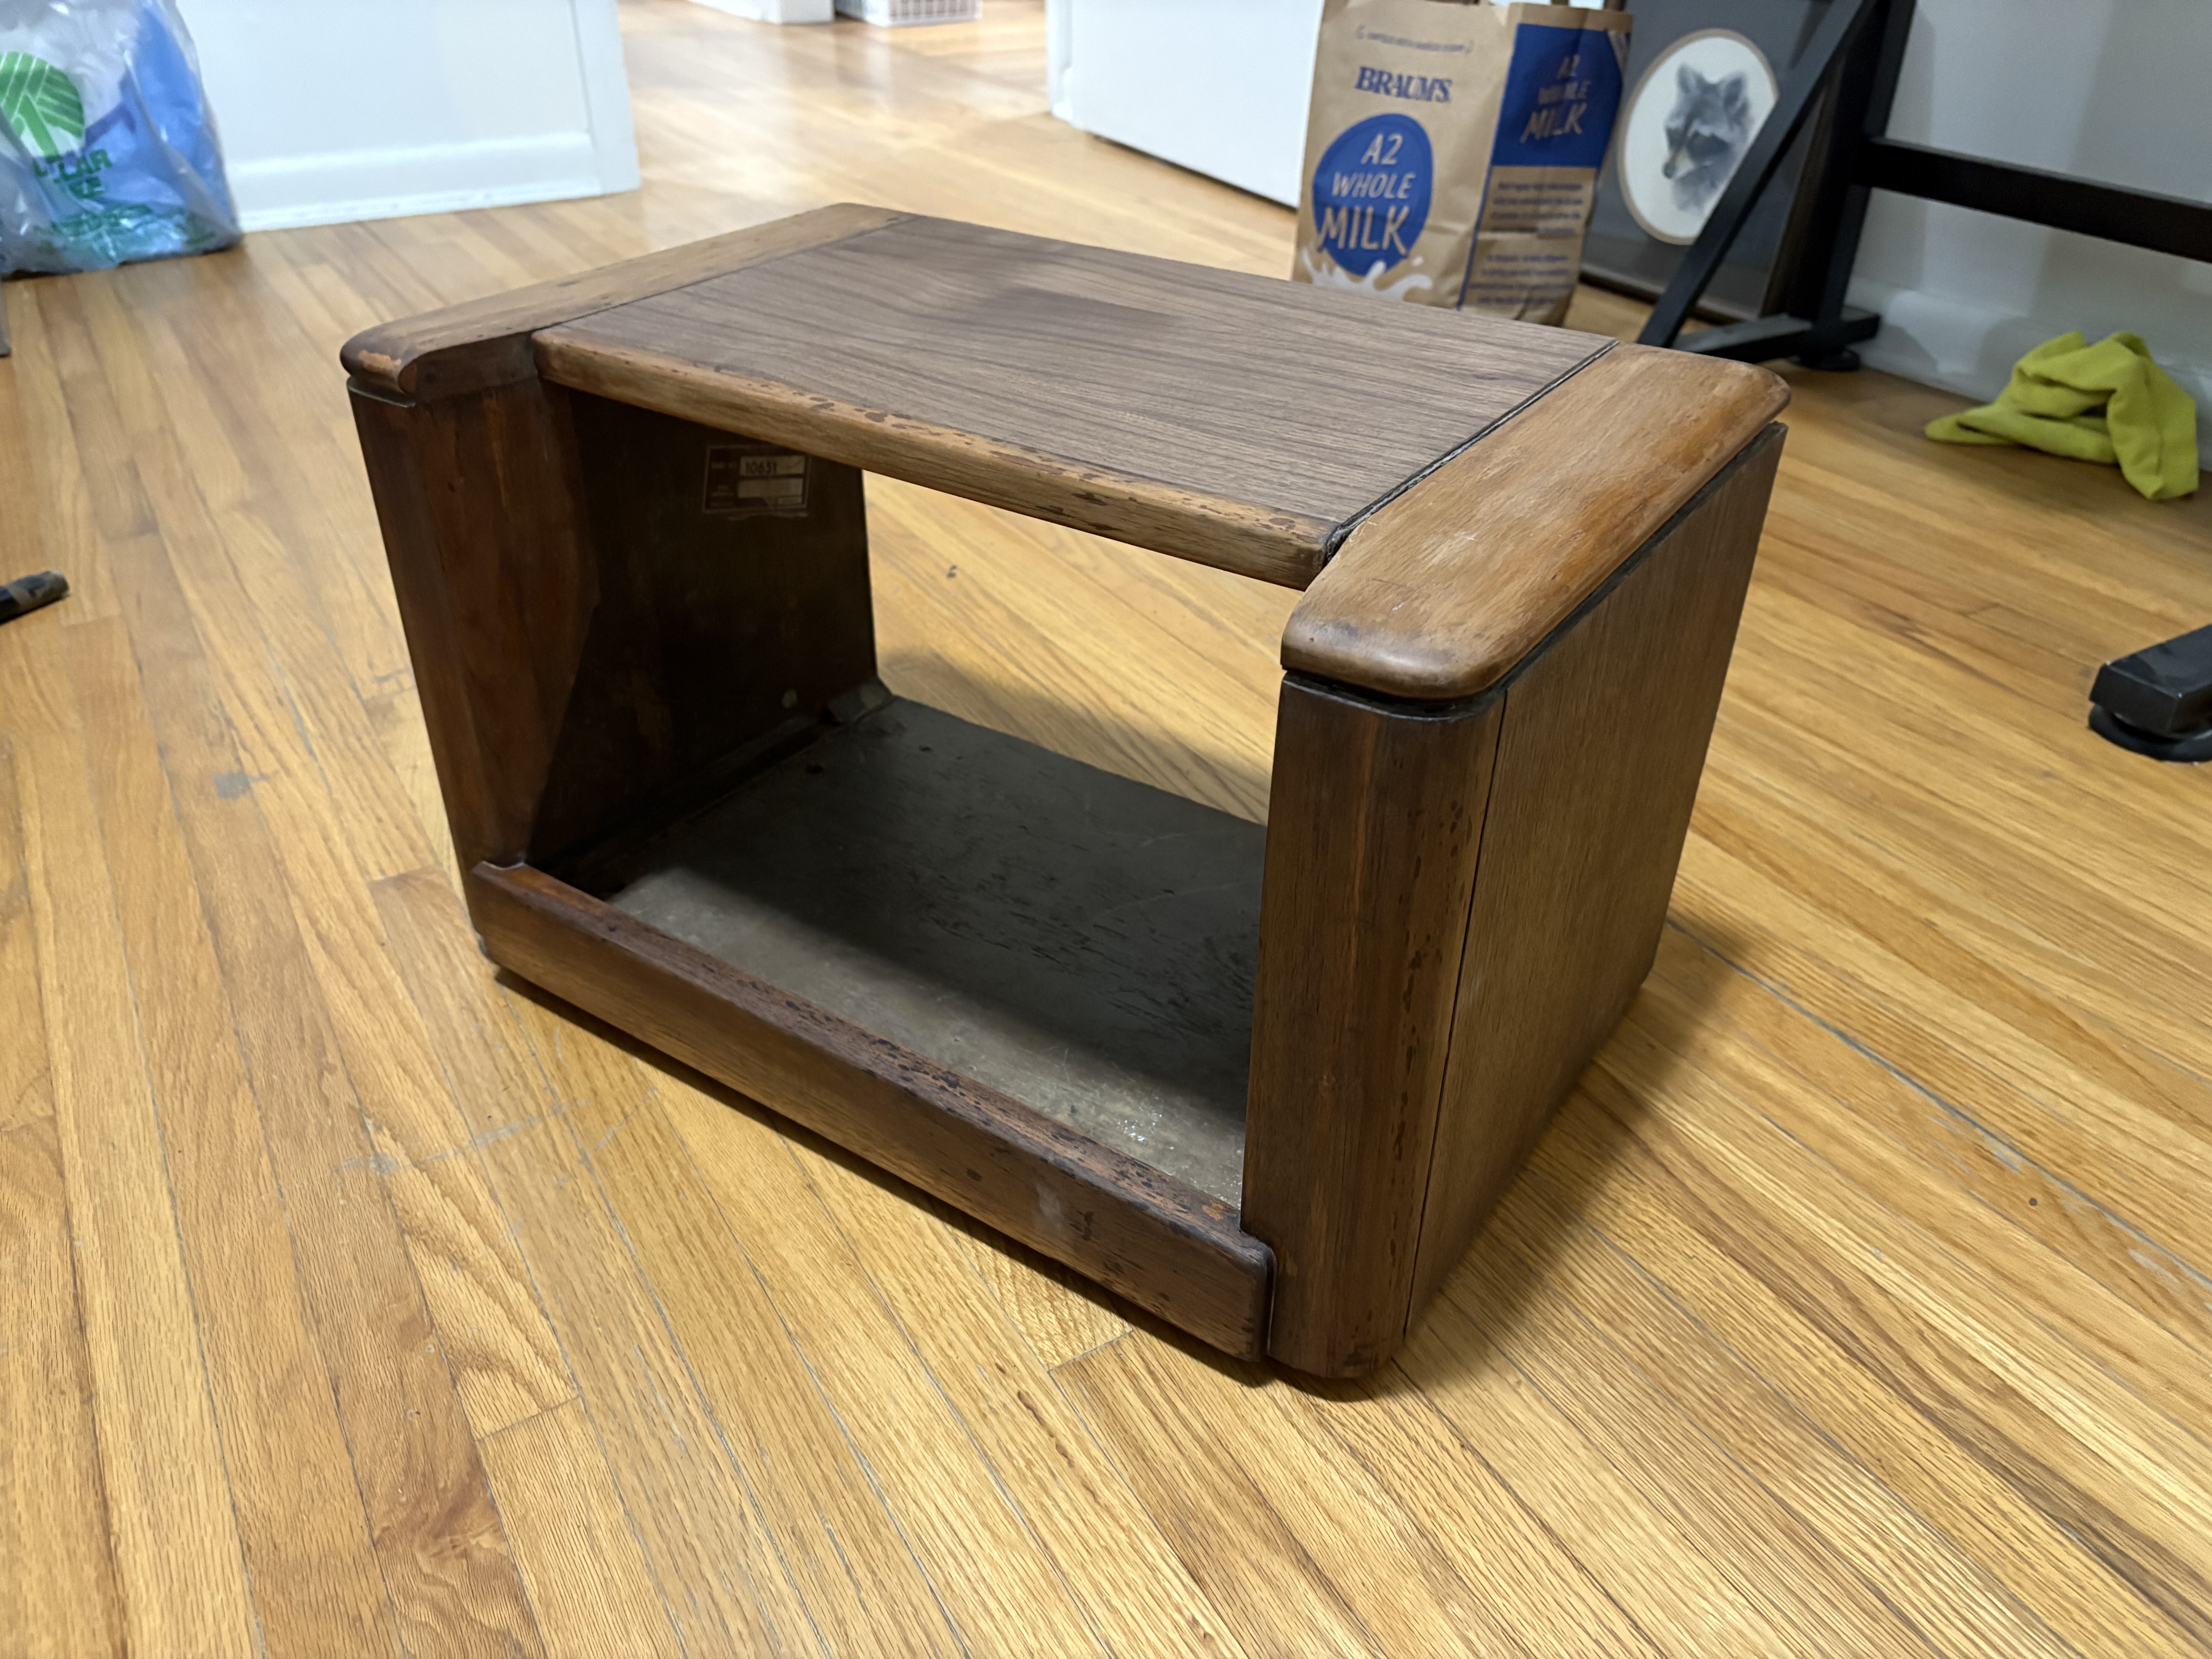
Before locking it all into place with glue and screws, I need to fix this one groove. I’ll mill a channel into the side panel and insert fresh piece of 3/16” plywood to rebuild the damaged part.
Joseph
Philco 39-750 EZ
Philco 46-480
Philco 47-1230
Philco 48-482
Philco 49-906
Users browsing this thread: 1 Guest(s)
|
|
Recent Posts
|
|
Philco P45-6365 Universal Transformer Instruction Manual
|
| Can anyone guide me to where this may be found?GRG — 03:00 PM |
|
54C Complete Teardown/Rebuild
|
| I don't think that I have encountered a 12Z3 before, curious how it uses one of those but includes a #43, which is a 25 ...Arran — 02:17 PM |
|
HiFi (Chifi) tube amp build - but my own design.
|
| It's the other forum. I'm also in DIY, but mostly read there. Honestly, I kinda jumped into this without much thought to...TV MAN — 10:43 AM |
|
Philco 71 Code 125
|
| Hello,
I am in need of a schematic for this radio. Mine has the three separate circular tube shields and a shadow me...dconant — 08:06 AM |
|
Stromberg Carlson 1500 Squeal
|
| And life just keeps getting more complicated.dconant — 07:57 AM |
|
54C Complete Teardown/Rebuild
|
| Hello Roy,
here is this one
sincerely Richardradiorich — 12:45 AM |
|
54C Complete Teardown/Rebuild
|
| Richard,
Had grabbed it already but thank you just the same. I find myself wanting to find some way to block out the...glyphmon — 12:03 AM |
|
54C Complete Teardown/Rebuild
|
| Hello roy,
here is a link to the schematic .
Sincerely Richardradiorich — 11:54 PM |
|
54C Complete Teardown/Rebuild
|
| Richard,
The Silvertone 2014 also is a transformerless set, so I am incorporating a 1:1 600 ohm audio isolation transfo...glyphmon — 11:37 PM |
|
Preliminary work on wife's Silvertone 2014
|
| Did an alignment today which was interesting. IF alignment went great, almost all was already spot-on. Adjusting on th...glyphmon — 11:35 PM |
|
Who's Online
|
There are currently 1670 online users. [Complete List]
» 1 Member(s) | 1669 Guest(s)
|
|
|

|
 
|








