04-09-2014, 08:28 AM
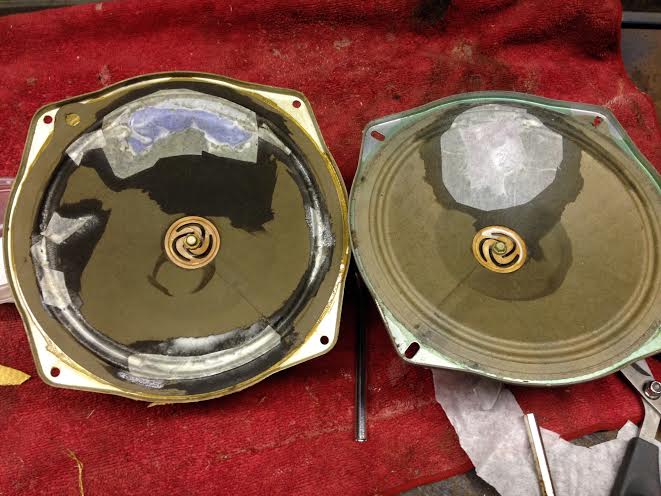
I figured since I did not see any threads on speaker repair, I would make a post on how I do mine. I spent $75.00 to mail a speaker, have it repaired, and have it mailed back. the radio is worth about that. It was very poor condition so it could not be fixed with this method but most of the time it can. average cost: $10 and you can repair 100 speakers!
What you will need for this project:
1. Tacky Glue (can be found at craft stores or fabric stores)
2. Coffee filters ( can use tea bags but I felt they were too thin)
3. Scissors
4. Water
5. Masking tape
6. Soft brush
7. Mixing container
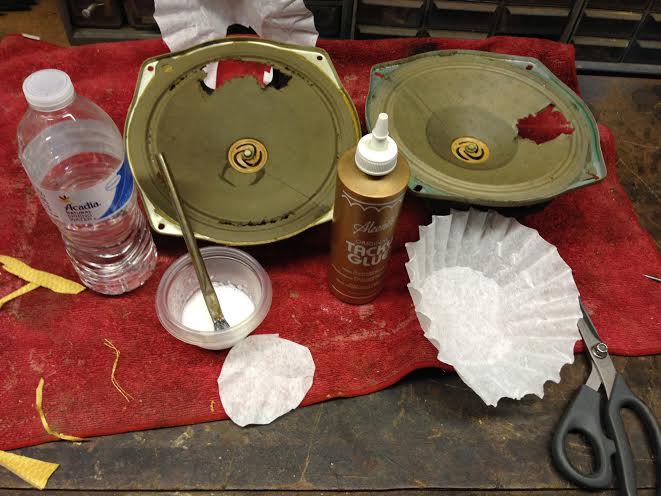
Step 1:
You will need to mix 2 parts water to 1 part glue. This is not exact....
You will be able to tell if it is too thin if it soaks the filter and runs down to the center quickly. It should be thickened to a melted icecream consistency.Use the brush to mix as it will not mix well with a stick mixer.
step 2.
Cut the coffee filter so it is about 1/4 inch past the hole on all sides. (Larger is fine).
3. Then take the filter and soak it in with solution by dipping it or brushing it.
4. Take the wet filter and apply it to the hole.
5. Brush AWAY from the hole lightly all around. (do not brush over the hole. it will push the filter down.) Work out the wrinkles ( you can pull the filter off and re-apply if needed.
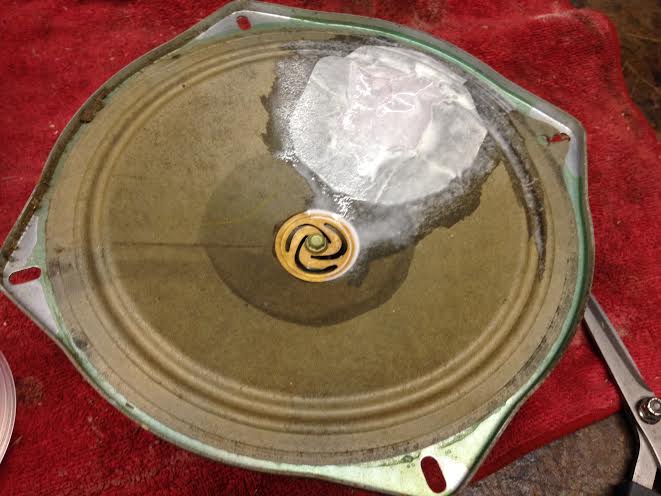
6. Let it dry fully, usually over night. Check the bounce in the morning. if it feels too thin you can put another layer over it.
Notes:
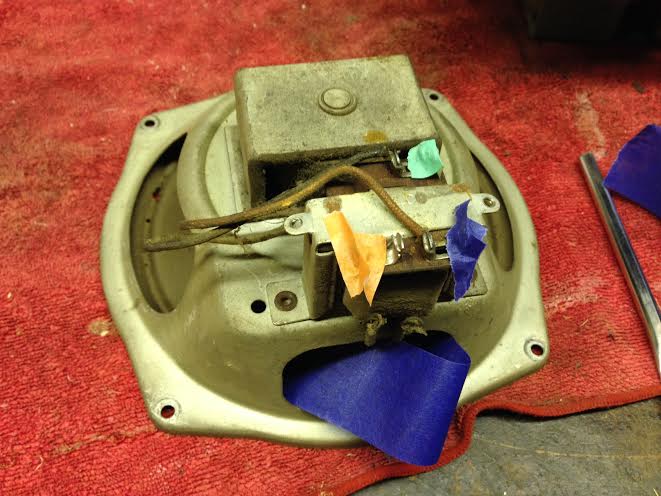
1. For larger holes you can use masking tape to back the filter. Apply to the back after brushing any dust off the speaker back. Dont worry about the tape sticking, It doesn't. For larger holes it is recommended (by me) that you apply 2-3 layers.
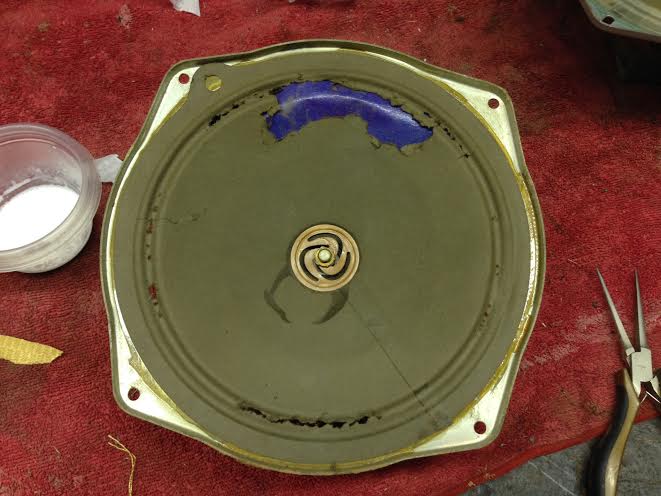
2. For cracks you don't need to use filter. you can simply brush on the glue and it will fill the crack.
3. You can coat the entire speaker with the solution if the cone is brittle. it is a soft flexible glue so it does not muffle the sound in my experience.
Thats it.
What you will need for this project:
1. Tacky Glue (can be found at craft stores or fabric stores)
2. Coffee filters ( can use tea bags but I felt they were too thin)
3. Scissors
4. Water
5. Masking tape
6. Soft brush
7. Mixing container
Step 1:
You will need to mix 2 parts water to 1 part glue. This is not exact....
You will be able to tell if it is too thin if it soaks the filter and runs down to the center quickly. It should be thickened to a melted icecream consistency.Use the brush to mix as it will not mix well with a stick mixer.
step 2.
Cut the coffee filter so it is about 1/4 inch past the hole on all sides. (Larger is fine).
3. Then take the filter and soak it in with solution by dipping it or brushing it.
4. Take the wet filter and apply it to the hole.
5. Brush AWAY from the hole lightly all around. (do not brush over the hole. it will push the filter down.) Work out the wrinkles ( you can pull the filter off and re-apply if needed.
6. Let it dry fully, usually over night. Check the bounce in the morning. if it feels too thin you can put another layer over it.
Notes:
1. For larger holes you can use masking tape to back the filter. Apply to the back after brushing any dust off the speaker back. Dont worry about the tape sticking, It doesn't. For larger holes it is recommended (by me)
2. For cracks you don't need to use filter. you can simply brush on the glue and it will fill the crack.
3. You can coat the entire speaker with the solution if the cone is brittle. it is a soft flexible glue so it does not muffle the sound in my experience.
Thats it.
Times I have been electrocuted in 2021
As of 1/01/2021
AC: 4 DC: 1
Last year: 6


![[-] [-]](https://philcoradio.com/phorum/images/bootbb/collapse.png)


