Veneer Repair Walkthrough..
Posts: 761
Threads: 56
Joined: Jul 2013
City: Kentucky
Veneer repair seems to be a frequent topic here, so I thought I'd show you how I do it. I've got this little Crosley that's been needing finished up. It has very typical veneer damage.
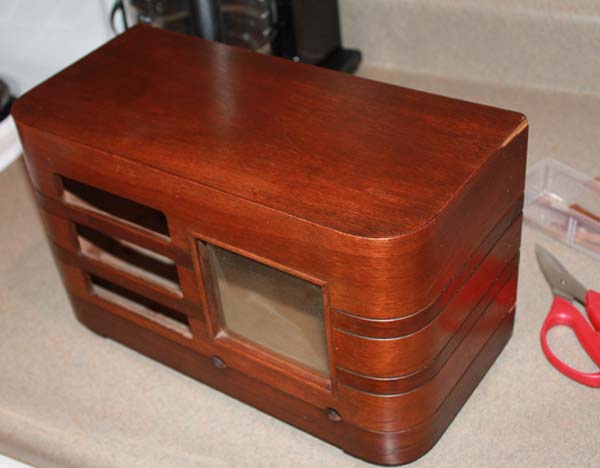
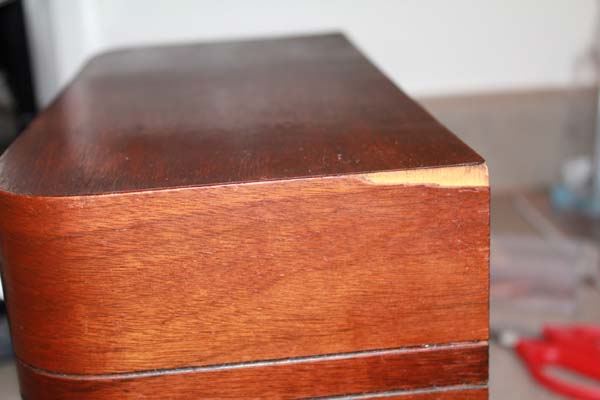
Here you see it... I've already gone over the cabinet with Howard's Restore. It really cleaned up nice... Now on to the repairs..
The artist formerly known as Puhpow! 8)
(This post was last modified: 09-17-2013, 01:45 PM by Jamie.)
Posts: 761
Threads: 56
Joined: Jul 2013
City: Kentucky
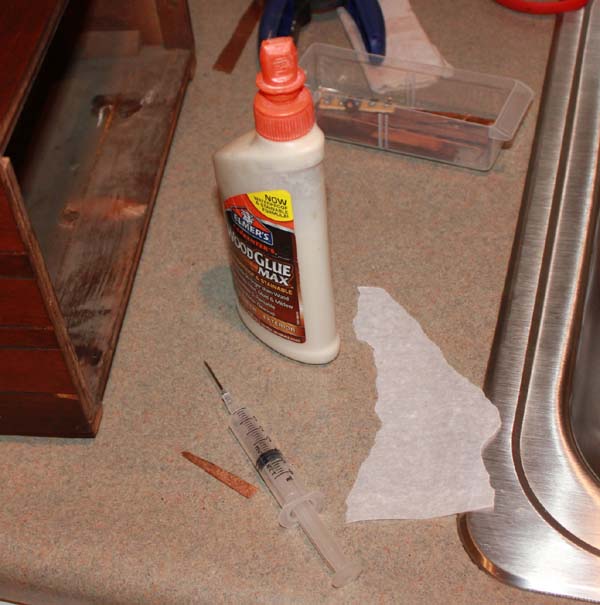
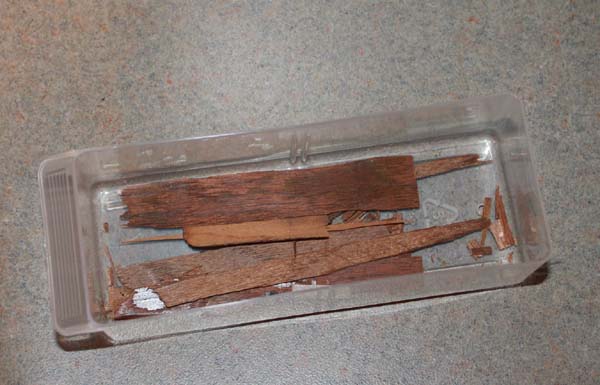
Here are the supplies we will use.
400 grit sandpaper
Needle and Syringe
Wood Glue
Wax Paper
Clamps
Med Walnut Toner and Clear Lacquer (Mohawk Brand)
Dremel with cutting wheel..
...and my supply of scrap veneer.
The artist formerly known as Puhpow! 8)
Posts: 761
Threads: 56
Joined: Jul 2013
City: Kentucky
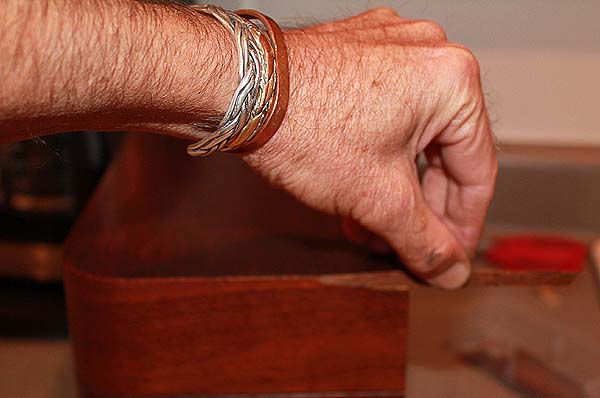
On the first picture, I am test fitting my veneer piece. When you have a bunch of scrap pieces, there is usually always one edge that fits your needs. Don't worry about color too much. It needs to be close, but not perfect. Same with the fit.
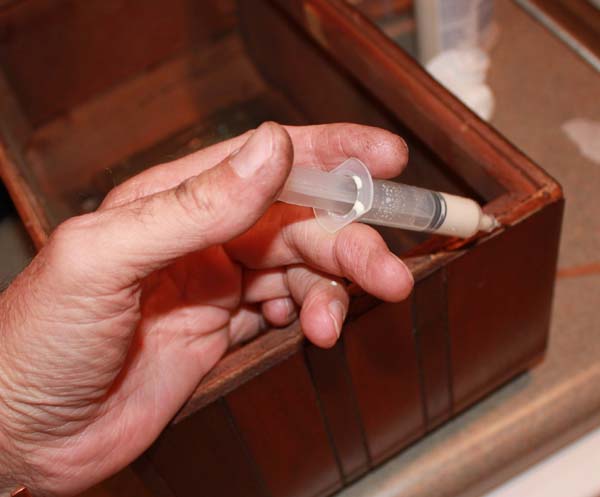
Second photo, this cabinet has a chip in the veneer, but it also has loose veneer on the other side. I am injecting wood glue under this loose veneer. You don't need much glue. Keep a wet paper towel handy to wipe up the excess that squeezes out the side.
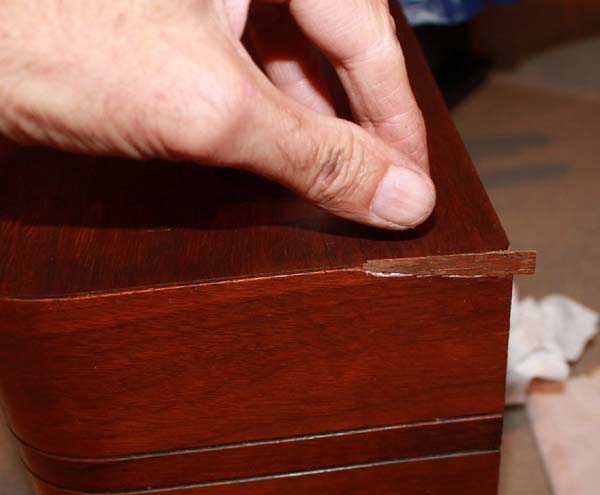
The final photo shows the chipped area with the new piece glued in place.
The artist formerly known as Puhpow! 8)
(This post was last modified: 09-17-2013, 02:36 PM by Jamie.)
Posts: 761
Threads: 56
Joined: Jul 2013
City: Kentucky
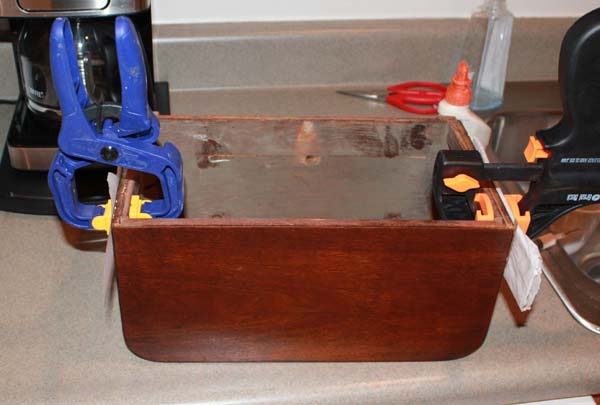
Here I have clamped both sides. I use a stick of wood to spread out the pressure. A paint mixer stick is perfect, just cover it with wax paper so it doesn't stick to any excess glue. Those clamps are cheapo plastic clamps. I think I paid $5 for one and $10 for the big one. They come in handy.
You should leave it clamped overnight. These were small repairs, so I left it for four hours.
The artist formerly known as Puhpow! 8)
Posts: 761
Threads: 56
Joined: Jul 2013
City: Kentucky
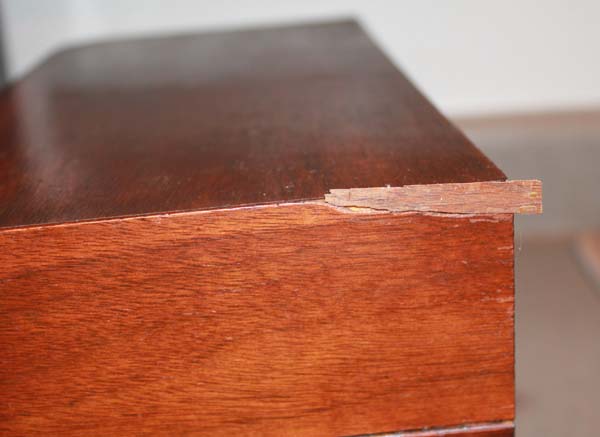
The first photo shows the veneer when the clamp was removed. You can see it isn't a perfect fit. It's close enough for government work, so it's good enough for me..
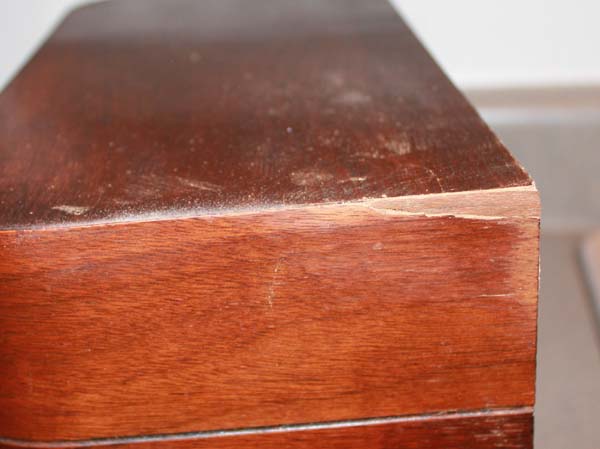
The second photo shows the veneer after I trimmed and sanded it. I like to use a dremel with a cutting wheel to snip off the edges. I try to get pretty close. Then I finish it up with 400 grit sandpaper. If you don't have a dremel, use an exacto knife. Score the veneer deeply, then snap it off.
Once the edges are nice and even, I go to work on the surface. The idea is to sand the new veneer down until your sandpaper starts hitting the cabinet. Use a little sanding block. Anything will work, as long as it's perfectly flat. I use a metal ruler with sandpaper taped around one end. You want to get everything nice and flat.
The artist formerly known as Puhpow! 8)
(This post was last modified: 09-17-2013, 02:37 PM by Jamie.)
Posts: 761
Threads: 56
Joined: Jul 2013
City: Kentucky
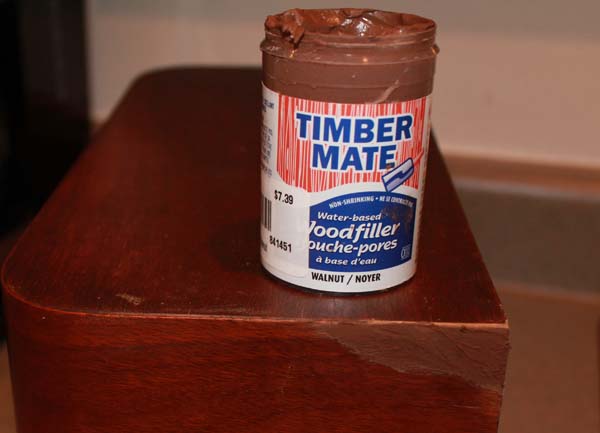
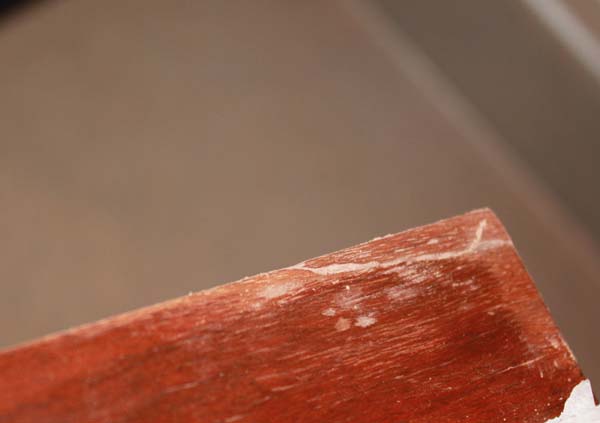
Time for wood filler. I can't say enough good things about Timbermate. I've tried every wood filler under the sun. NONE of them work like this stuff. It's the first wood filler I've used that you cannot see when you are finished. It's good stuff.
First photo shows the veneer with a little Timbermate smeared on.
Second photo shows the filler after sanding. The idea is to sand off all of the filler, only leaving the cracks full. 400 grit and a sanding block were used.
The artist formerly known as Puhpow! 8)
(This post was last modified: 09-17-2013, 02:10 PM by Jamie.)
Posts: 761
Threads: 56
Joined: Jul 2013
City: Kentucky
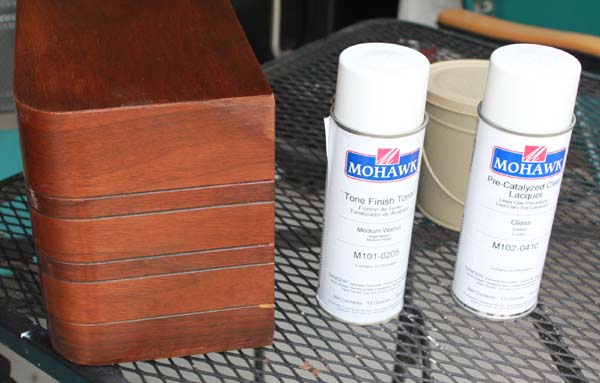
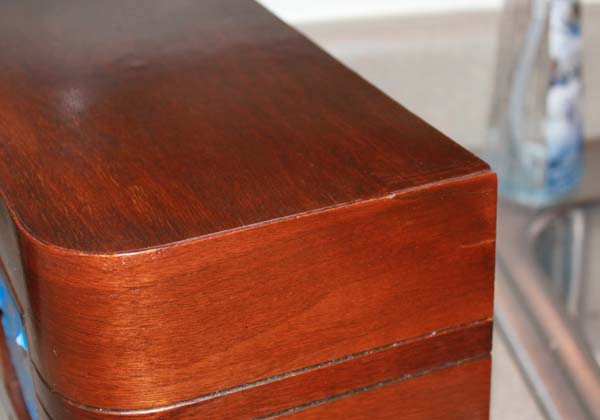
It's toner time! .. Mohawk Medium Walnut was chosen. I tested some dark walnut and it was too dark.
Second photo shows the repaired area after being sprayed with toner. I try to use enough toner to hide the repair, but still leave the wood grain visible. It takes a little finesse, but it's not too hard.
The artist formerly known as Puhpow! 8)
Posts: 761
Threads: 56
Joined: Jul 2013
City: Kentucky
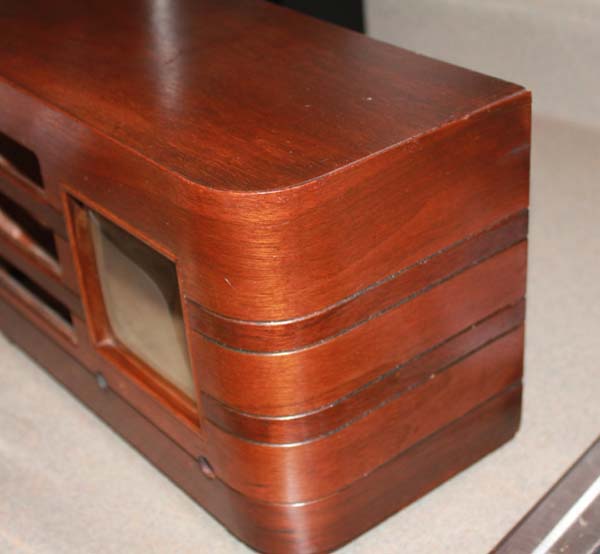
Here is a better shot of cabinet. I panned out to show how well it all blends in. Is it perfect? Nope. I'm not a professional, nor am I an expert. I think it looks pretty good though.
Now I'm going to spray a little clear lacquer over the repair and it will be finished.
The artist formerly known as Puhpow! 8)
Posts: 761
Threads: 56
Joined: Jul 2013
City: Kentucky
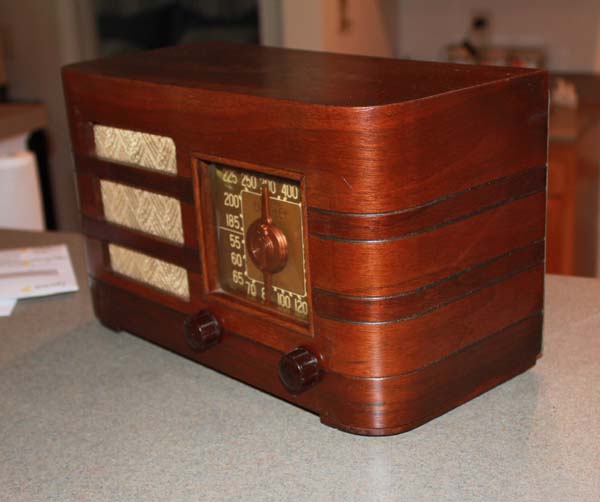
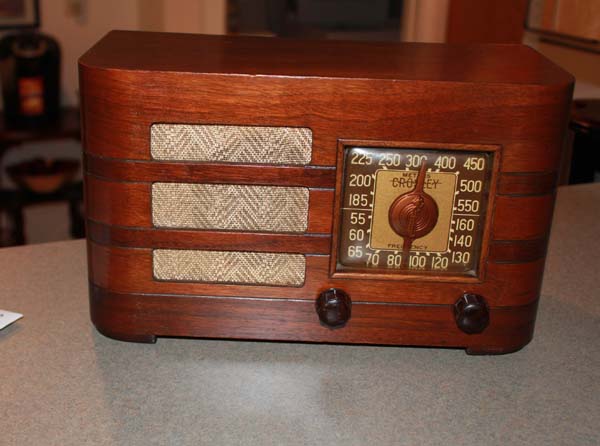
All done! 
I steal veneer off of a Philco 42-1206 console cabinet. It was a typical Craigslist find... cabinet was water damaged and destroyed. No way to save it and no one would ever want it... except me. I got it for $10. Each time I need veneer, I go peel some off of it. Wayyy cheaper than buying new veneer. Great for small repairs.
Next time you are at a garage sale, flea market, etc... look for an old table or cabinet with really bad peeling veneer damage. You can pick up something like that for $5. Then you'll have a supply for your radios.
Thanks for looking and I hope this helps someone out. Once again, there are other methods that work too. This is just the way I do it. If you have a better way, let me know! 
The artist formerly known as Puhpow! 8)
Posts: 1,475
Threads: 69
Joined: Nov 2012
City: Kansas city, MO.
Thanks PuhPow for taking the time to post your work. I just started reading the cabinet restore posts 2 wks ago to start learning how to repair & restore radio cabinets. Seeing a step by step process helps make trying a repair less intimidating
Radio looks good.
Posts: 761
Threads: 56
Joined: Jul 2013
City: Kentucky
You're welcome! Don't be intimidated. Just get in there and do it. It seems like it's a lot more complicated than it really is. Once you do a couple of radios, it becomes second nature. Just be sure to get the right supplies.
The artist formerly known as Puhpow! 8)
Posts: 139
Threads: 8
Joined: Aug 2013
City: Central PA
Thanks for sharing your methods! How much effort do you spend to match the color of the wood filler to the specific cabinet you are working on? Do you have 4 or 5 cans of wood filler laying around, or does this not matter so much since it gets covered with grain filler and/or toner before lacquer?
Posts: 761
Threads: 56
Joined: Jul 2013
City: Kentucky
I've only got one color - walnut. The Woodcraft store is about 50 miles from our home. When I was out there, the salesman was raving about Timber Mate and talked me into trying it. They had just begun carrying the product. I only bought the one color. So far, I haven't needed anything different. I've used it on about 6 radios.
I don't think it matters much. I've tried all the minwax, elmers, etc.. and they just don't compare. Plus, Timber Mate cleans up with water, so if you accidentally get some where it shouldn't be, it's no problem. One time I accidentally smeared some Elmers on a cabinet, and it was a bear to get off.
The artist formerly known as Puhpow! 8)
Posts: 5,072
Threads: 269
Joined: Nov 2012
City: Bandon
State, Province, Country: OR
Thanks for the tip on Timbermate! I agree the other fillers seem difficult to stain or tone. If you are not close to a Woodcraft store they can be ordered on-line at http://www.woodcraft.com/category/202058...iller.aspx
Posts: 825
Threads: 113
Joined: Aug 2012
City: The Villages
State, Province, Country: Florida
Thanks for all of the tips Puhpow, at present I consider myself almost an amateur when working with wood. And thanks Klondike98, I just placed my order for the Timbermate. I also ordered some grain filler. According to their website there's a Woodcraft store about 40 miles from me but with online ordering I don't have to move very much!
Eric
The Villages, FL
Member: Philco Phorum, ARF, ARCI & Radiomuseum.org
Users browsing this thread: 1 Guest(s)
|
|
Recent Posts
|
|
HiFi (Chifi) tube amp build - but my own design.
|
| What may be lacking in the PP Tube amps may be the 2nd harmonics, which some, especially RCA back in the day called &quo...MrFixr55 — 05:32 PM |
|
Jackson 715 not working
|
| Usually in an emission tester, the tube under test is measured as if it were a diode. So, some testers connect all the g...RodB — 04:17 PM |
|
Restoring Philco 37-604C
|
| Yep. F5 is green, D5 is Red.
Red is Bad.
Green is Clean.morzh — 01:30 PM |
|
Jackson 715 not working
|
| I did start to do that but I stalled out because I could not figure out how the grid and plate get voltage. In this diag...daveone23 — 11:52 AM |
|
Restoring Philco 37-604C
|
| (Insert Homer Simpson "DOPF" Here.)
When all fails, look at the can. Took the Ron Ramirez advice, red Caig D...MrFixr55 — 09:23 AM |
|
Philco 91 Speaker Replacement
|
| From your text I am not sure if you intend to use the existing speaker with a resistor instead of the field coil.
It wo...morzh — 08:44 AM |
|
Philco 91 Speaker Replacement
|
| My field coil is bad. I am still hoping to find an original, but if I can't I will go with a fitting Philco speaker, 125...dconant — 08:34 AM |
|
Philco 91 Speaker Replacement
|
| As Rod said, it is OK to use a fitting speaker, and then look for an original one.
If you buy a Hammond 125 output tr...morzh — 08:15 AM |
|
Philco 91 Speaker Replacement
|
| Yes, I often have to substitute, then keep an eye out for an original. In the meantime, the radio is working and being e...RodB — 08:02 AM |
|
Philco 91 Speaker Replacement
|
| I was wondering if I could use a more common Philco speaker and just add the resistance I need for the coil and get a ne...dconant — 07:45 AM |
|
Who's Online
|
There are currently 2271 online users. [Complete List]
» 2 Member(s) | 2269 Guest(s)
|
|
|

|
 
|


![[-] [-]](https://philcoradio.com/phorum/images/bootbb/collapse.png)


