I decided to shim all 4 corners with a 1/16" thick rubber washer I found at Ace. The OD was perfect, the ID was a little larger than the part I got from RR. But it did the trick nicely. My tuning hub is now centered perfectly in the bezel, and all the shafts have plenty of clearance around them For the rear mount, Ace had a stepped rubber busing where the OD of the larger part of the bushing was 3/4" and the ID was 1/4". I took a pair of side cutters and trimmed off the smaller part of the busing. The only problem was it was only 3/16" thick. So I added an additional 1/6" thick rubber washer to get me to 1/4". Probably nit necessary, but now I know the chassis is sitting as relatively close as possible to the way it should.
I never heard back from RD (I didn't send them a 2nd email as I had intended either), so I started wondering what I could do at home to replicate the tabs. So I took a trip to my local Hobby lobby and walked around for a while until I got an idea. Shrinky Dink plastic would probably make a good material. So I grabbed a pack of clear and a pack of inkjet comparable (which is a matte white), and went home to see what I could do. I checked the sheets with my caliper when I got home, and it turns out they are close to the proper thickness, and have enough rigidity that they will slide in to the hub easily.
I scanned in 2 broken pieces to make a single tab and went to work in a graphics editor.

I also scanned in the back side of my 38-10 dial to get a better sample of the color, as that looked better than the color of the tabs. I then edited up the scan to replace the color with the pattern I scanned in from my 38-10 dial. Then I was stuck trying to figure out a font. I know the font used in the 1940's tab, but the letters were too narrow. Some how by a miracle, I went to a font site, and found one that almost matches perfectly right away - Gothic CG no 2.
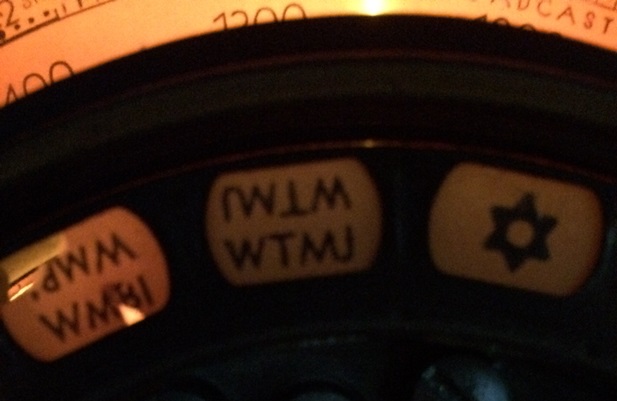
So I put in one of the local stations, and made mself a local tab for my SSTRAN. But then I realized I didn't have a "star" tab to scan and reproduce for the presets that are not used. Looking at it, it reminded me of a Torx security screw. So I found an image online of the outline of that screw head, and scaled it down to fit on my tab. It's probably not exactly the same, but it's close enough. And here is what I came up with:

I printed them out, let the ink try, and cut them up I inserted them in to the dial, and powered u the radio. Flipped the mag tuning to get the floodlights on, and was both happy and disappointed at the same time. I was happy as they do look very close to the originals in style and color. But sad as they block more light than the originals do. Here you can see my two new tabs next to a broken original one. They are clearly darker than the original. Still usable, I just wish they let a little more light through.

I guess the only other thing I could try is finding a spray paint that would stick to the clear, non-inkjet matte finish that would match well, and hopefully let more light through. Then I could print up water slide decals (which I also ran across at Hobby Lobby). So, not sure what I'll do. I've already got 6 sheets of the inkjet paper. So I'll probably make myself a set of tabs from that.
I also have the 6 clear sheets (which I can't take back, as I experimented on one of them). So maybe I'll keep my eye open for some kind of paint. Not sure what kind you have to use. I imagine whatever it is, I would have to spray it to get nice uniform coat without brush marks.


