Thread Rating:
  • 0 Vote(s) - 0 Average
  • 1
  • 2
  • 3
  • 4
  • 5

Re-Stuffing Canned Electrolytics - Part 64000
#1

Ok, I know there is a lot of info out there on re-stuffing canned electrolytics, but I've never seen anything that shows how to dig out the old remains and clean it up, so I thought I'd show how I did it.

I'm using the method that Warren documented here:  http://philcoradio.com/phorum/showthread.php?tid=7533

I had two cans...one a single cap and the other a dual cap.

First, cut the can open using a sturdy sharp knife.
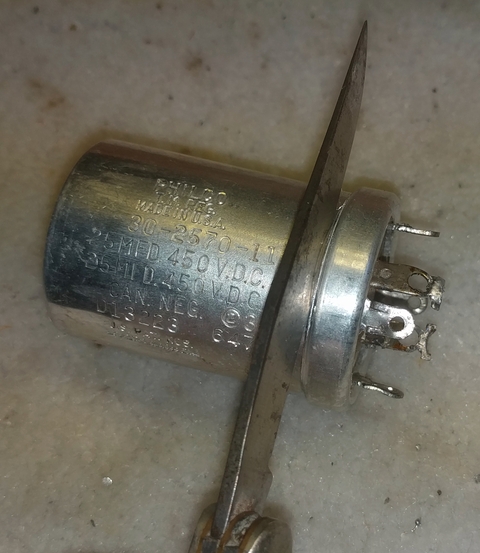
   

I found that it worked pretty well to try to get a bit of a track cut in all the way around, then focus on one area by rolling the can back and forth on the bench (I had it on an old carpet square on top of the bench) with mild pressure on the knife.  I think this rolling action resulted in cutting about 20% of the circumference.  Once the blade gets through the can in that area roll it so that you can cut into the next adjacent section.  I found that once I got through in one spot the rest went pretty easy.  Here's what the larger dual cap looked like when I got it open
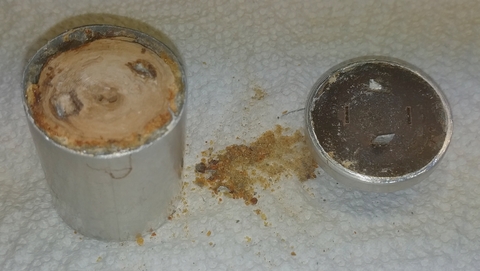
   

And here's what the smaller single cap looked like
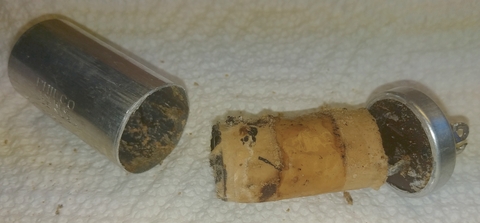
   

As you can see, the smaller one came out of the can fairly easily, but it did leave some black tar like substance in the end of the can.
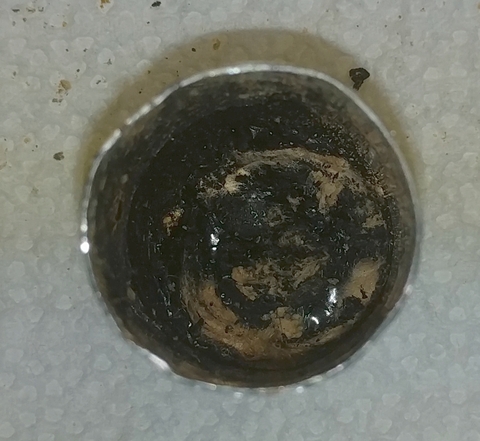
   

But the larger one was stuck...tight.  I couldn't make much headway trying to dig it out with a knife or screwdriver, and didn't want to risk marring or damaging the can.  So I started drilling:
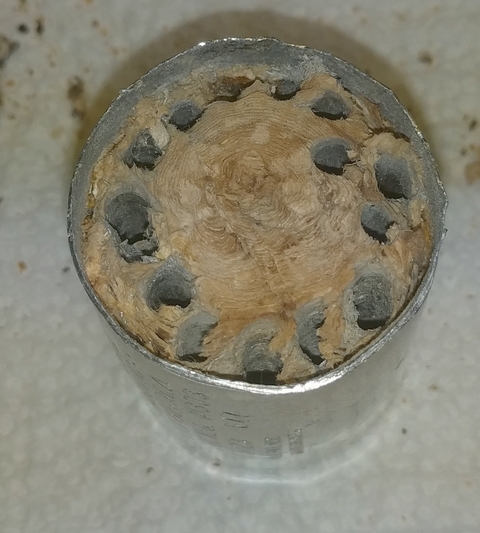
   

Apparently there is a limit on the number of attachments per post so I'll continue this in another post.  If this is frowned upon please let me know.

Rich
#2

Continued!

After drilling holes around the circumference it was still stuck so I started using a larger bit and worked my way out from the center to the edges.  Eventually I got it to where I could pull out fairly decent sized chunks using some needle nose pliers and finally had it cleaned out to within about 3/4" of the bottom (or top if you will)
   

At this point it seemed like I was getting into some of the black tar-like substance similar to what was in the smaller cap.  So I resorted to heat.  Using a heat gun I warmed it up until it was obvious that the black substance was softening than started digging with a small screwdriver.  Finally the remains popped out
   

Now both cans had that black substance in the bottom so I filled them with lacquer thinner and let them sit a few minutes.  Using a screwdriver I swabbed a paper towel around inside them and after two or three repetitions they were both clean.


This is as far as I've gotten.  As soon as I find a Dremel attachment with a fairly sharp point I'll cut the get them re-stuffed!

Rich
#3

Hello. Many ways to do this operation. I have did what you have but found securing a large lag bolt to vice and screwing the can after its cut open onto the bolt. Then a little heat from Bernzomatic torch it will pull the can right off.
Oh yea, I use a rag to hold the can. Icon_smile
#4

Yes, Mike, I do the same and it is so much easier and faster. Icon_thumbup

I also keep an old range (oven) in the shop for heating caps/transformers embedded in tar, as well as, crock pots with tar and wax for resealing. Mineral spirits is good for cleaning up tar and wax. It may sound a little overboard, but I think that I have OCD. I also have nice finished products. Icon_crazy
#5

(03-22-2017, 09:16 PM)KCMike Wrote:  Hello. Many ways to do this operation. I have did what you have but found  securing a large lag bolt to vice and screwing the can after its cut open onto the bolt. Then a little heat from Bernzomatic torch it will pull the can right off.
Oh yea, I use a rag to hold the can. Icon_smile

Thanks KCMike - I KNEW there was an easier way because the way I did it was not easy at all  ;)

Rich
#6

Another suggestion is to use a jewelers saw to cut the can instead of a knife. I originally used the knife method, but it was difficult and time consuming, and found it distorted the edge of the can.

The jewelers saw blade is only a few thousandths of an inch thick, has very fine teeth and produces a precise clean cut with no burrs or distortion. The saw is also very useful for all sorts of metal work like cutting volume control shafts, etc. Definitely a handy tool to have. They are very inexpensive on ebay:

http://www.ebay.com/itm/JSP-Jewelers-Adj...SwJQdXDCkr
#7

Yesterday I finished restuffing the electrolytics.  Here's the Dremel bit I found to dig the 'trench' in the base for the top to fit into.
   

And here is a picture of base for the dual cap after digging the trench.  I also had to shave off some of the aluminum lip where the cut was made in order for the top to fit into place.
   

Then I drilled holes in the base for the leads and pushed the positive leads through.  I make my own circuit boards for small projects so I have a selection of small drill bits and selected one that gives a nice snug fit.
   

After I spliced the negative leads into one lead and pushed it though the base, I soldered it to one of the tabs on the base of the can.
   

Then it dawned on me that I'll need to remove the ground lead until I've inserted the can into the chassis.  I then applied a few dabs of epoxy in the trench and glued the tops back onto the bases for each of the two cans.  I used the epoxy I use when I glue golf clubs heads onto the shafts when I build golf clubs.  For some reason I didn't take any 'after' pictures, but I can tell you I didn't do as nice a job on the smaller, single can as I did on the larger one.  Around the base where to top and base are glued you can see several small gaps.  But for a first effort I'm happy with it.  Other than reinserting the cans into the chassis mounting slots this job is complete!

Rich
#8

nice work! i think have two of these on my 46-1226, im documenting wire terminations and such so i can take them out and upgrade the caps.
#9

This is a big surprise to me, but I've become a big fan of documentation.  When I was writing code they wanted all sorts of documentation and I hated it.  But for this type of thing I'm pretty good at it.  Tons of pictures...some hand-drawn notes.  I want to be able to put it back together.  I think I learned that from restoring two cars.  Take pictures even if you don't think they're relevant.  I can't count the number of times I've found a clue to something I needed to see from a picture of something else.  Digital photos are free...just need some hard disk space to store them.  Good luck!

Rich
#10

Yup,,, im a fox body follower,, Tbird/Cougars. 1983-88 and especially 87-88 years.
im at the same user name at http://foxtbirdcougarforums.com/

I like fixing the original engineering faults as i restore a car.

these cars chassis started with the first falcon and continued up to 1989, spanning tbird, continental, crown vic, mustang, cougar spanning almost 3 decades,,, essentially the same body


Users browsing this thread: 1 Guest(s)