12-31-2018, 12:07 AM
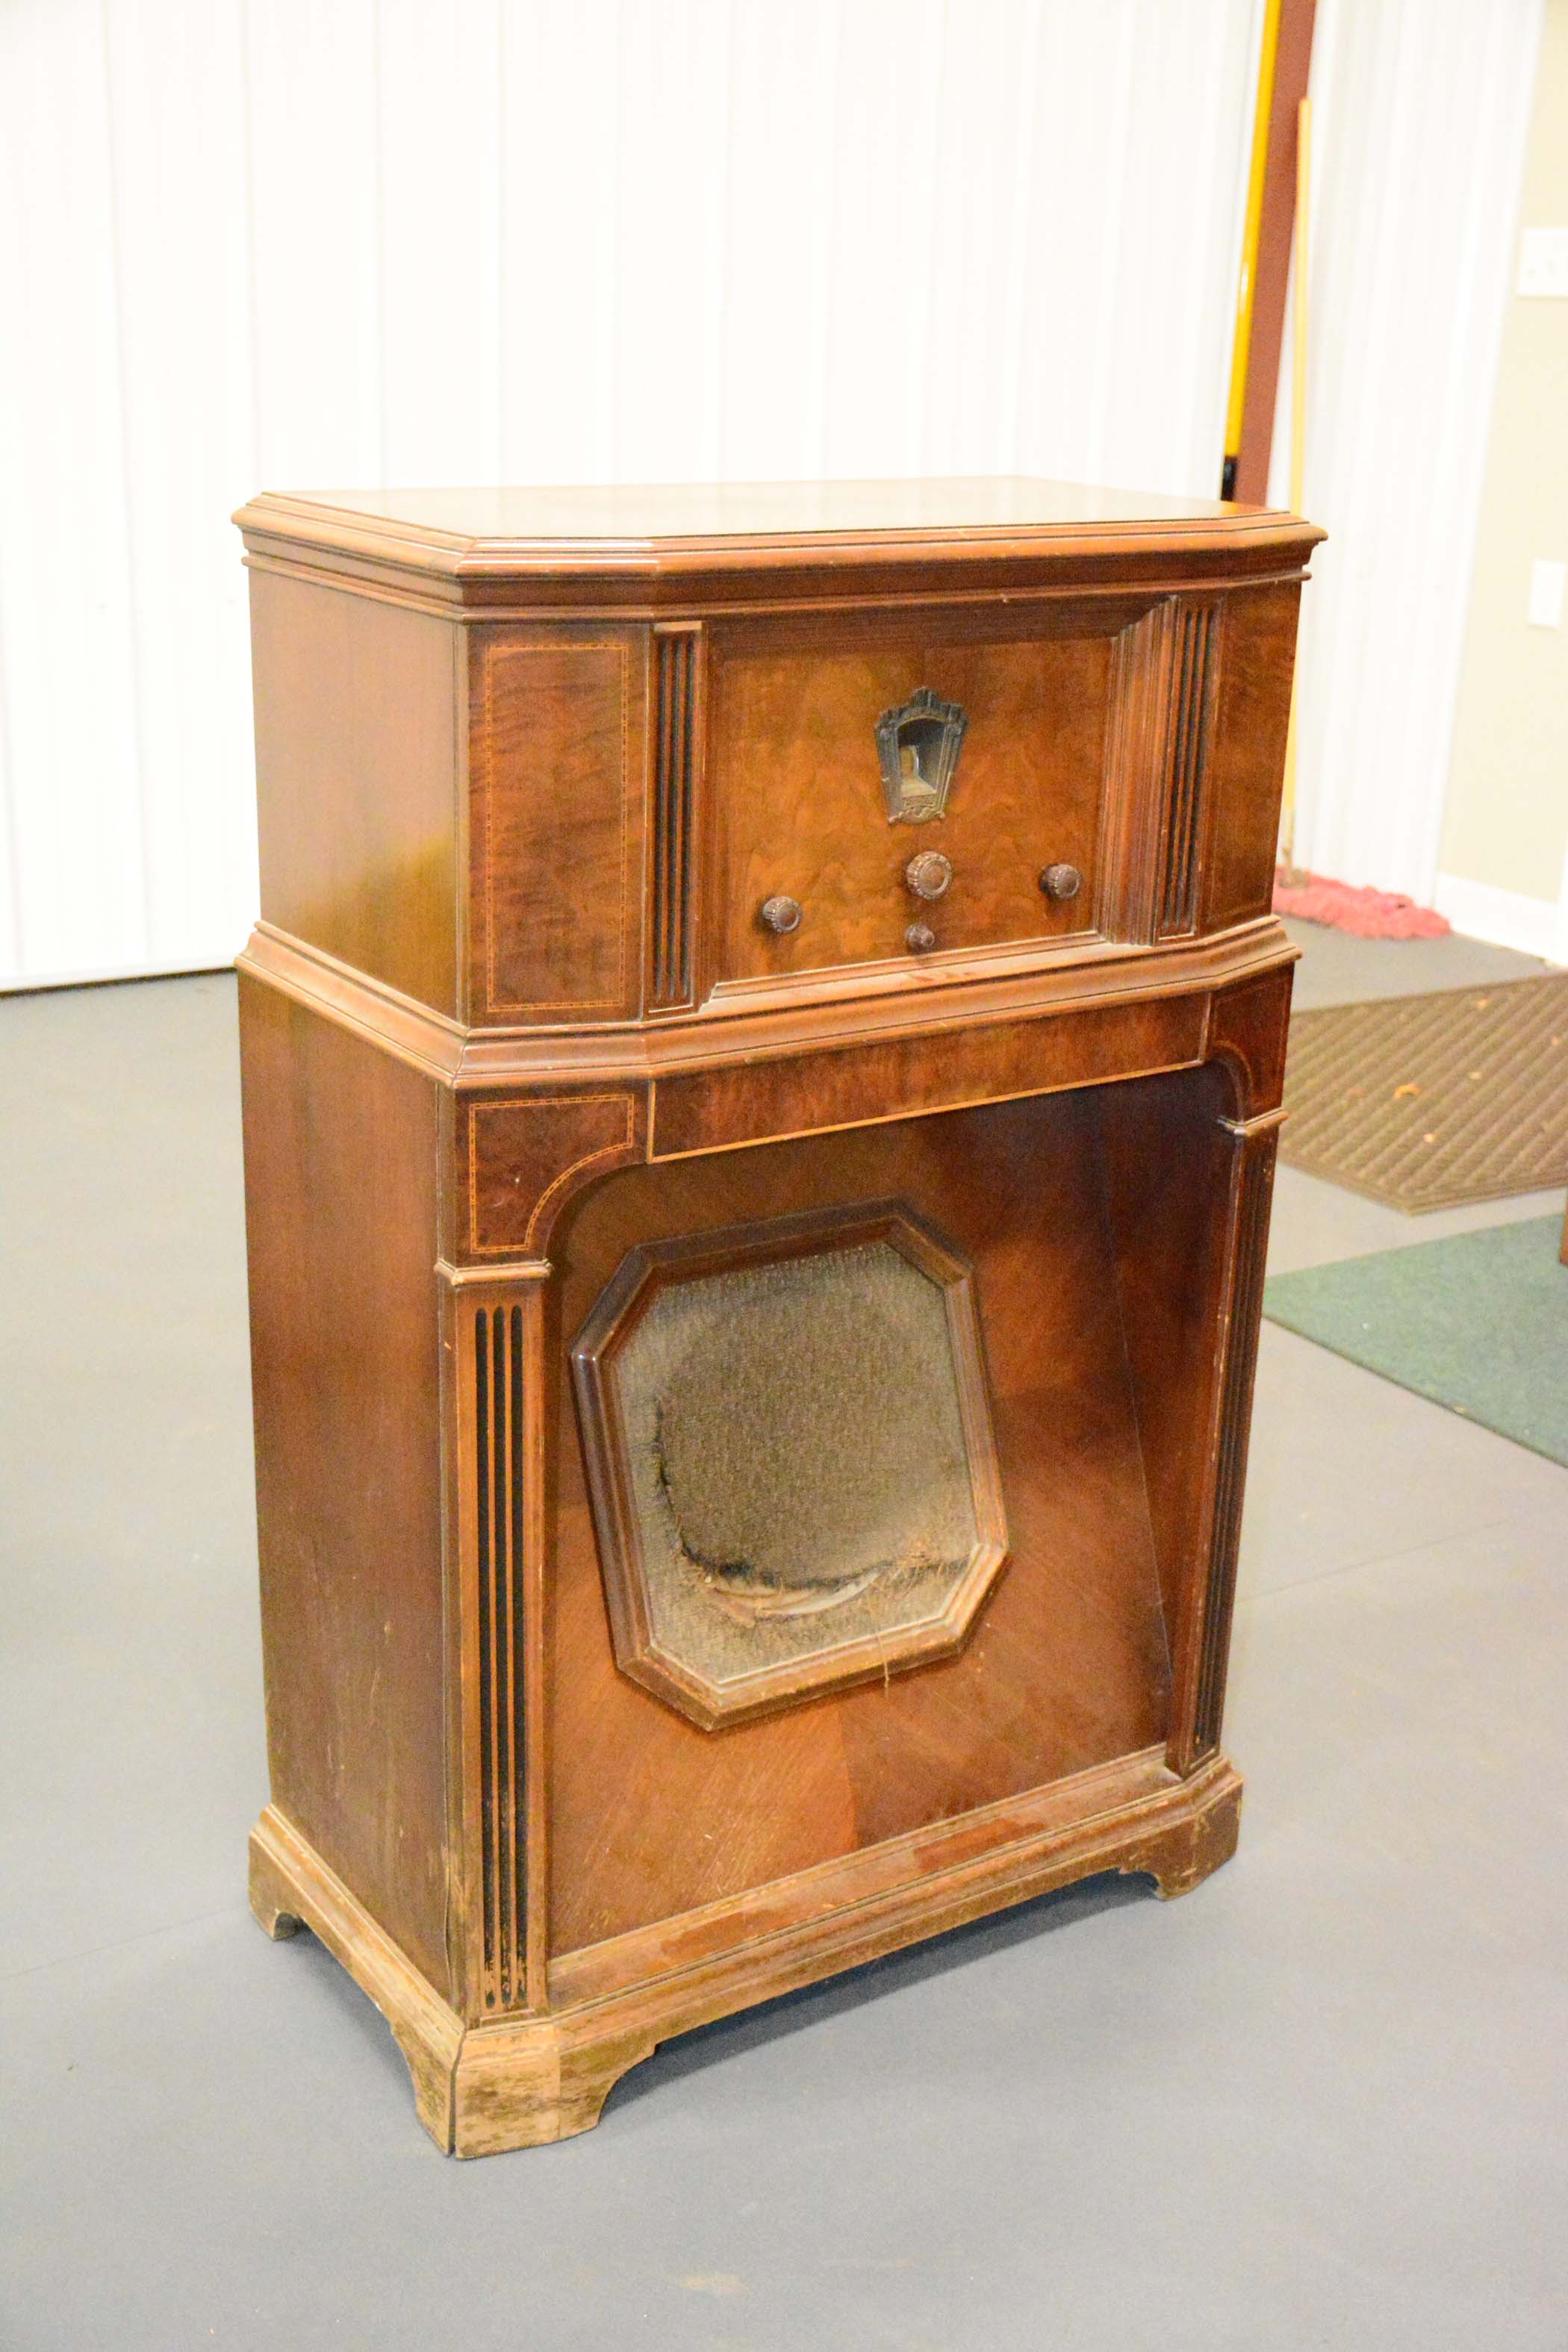
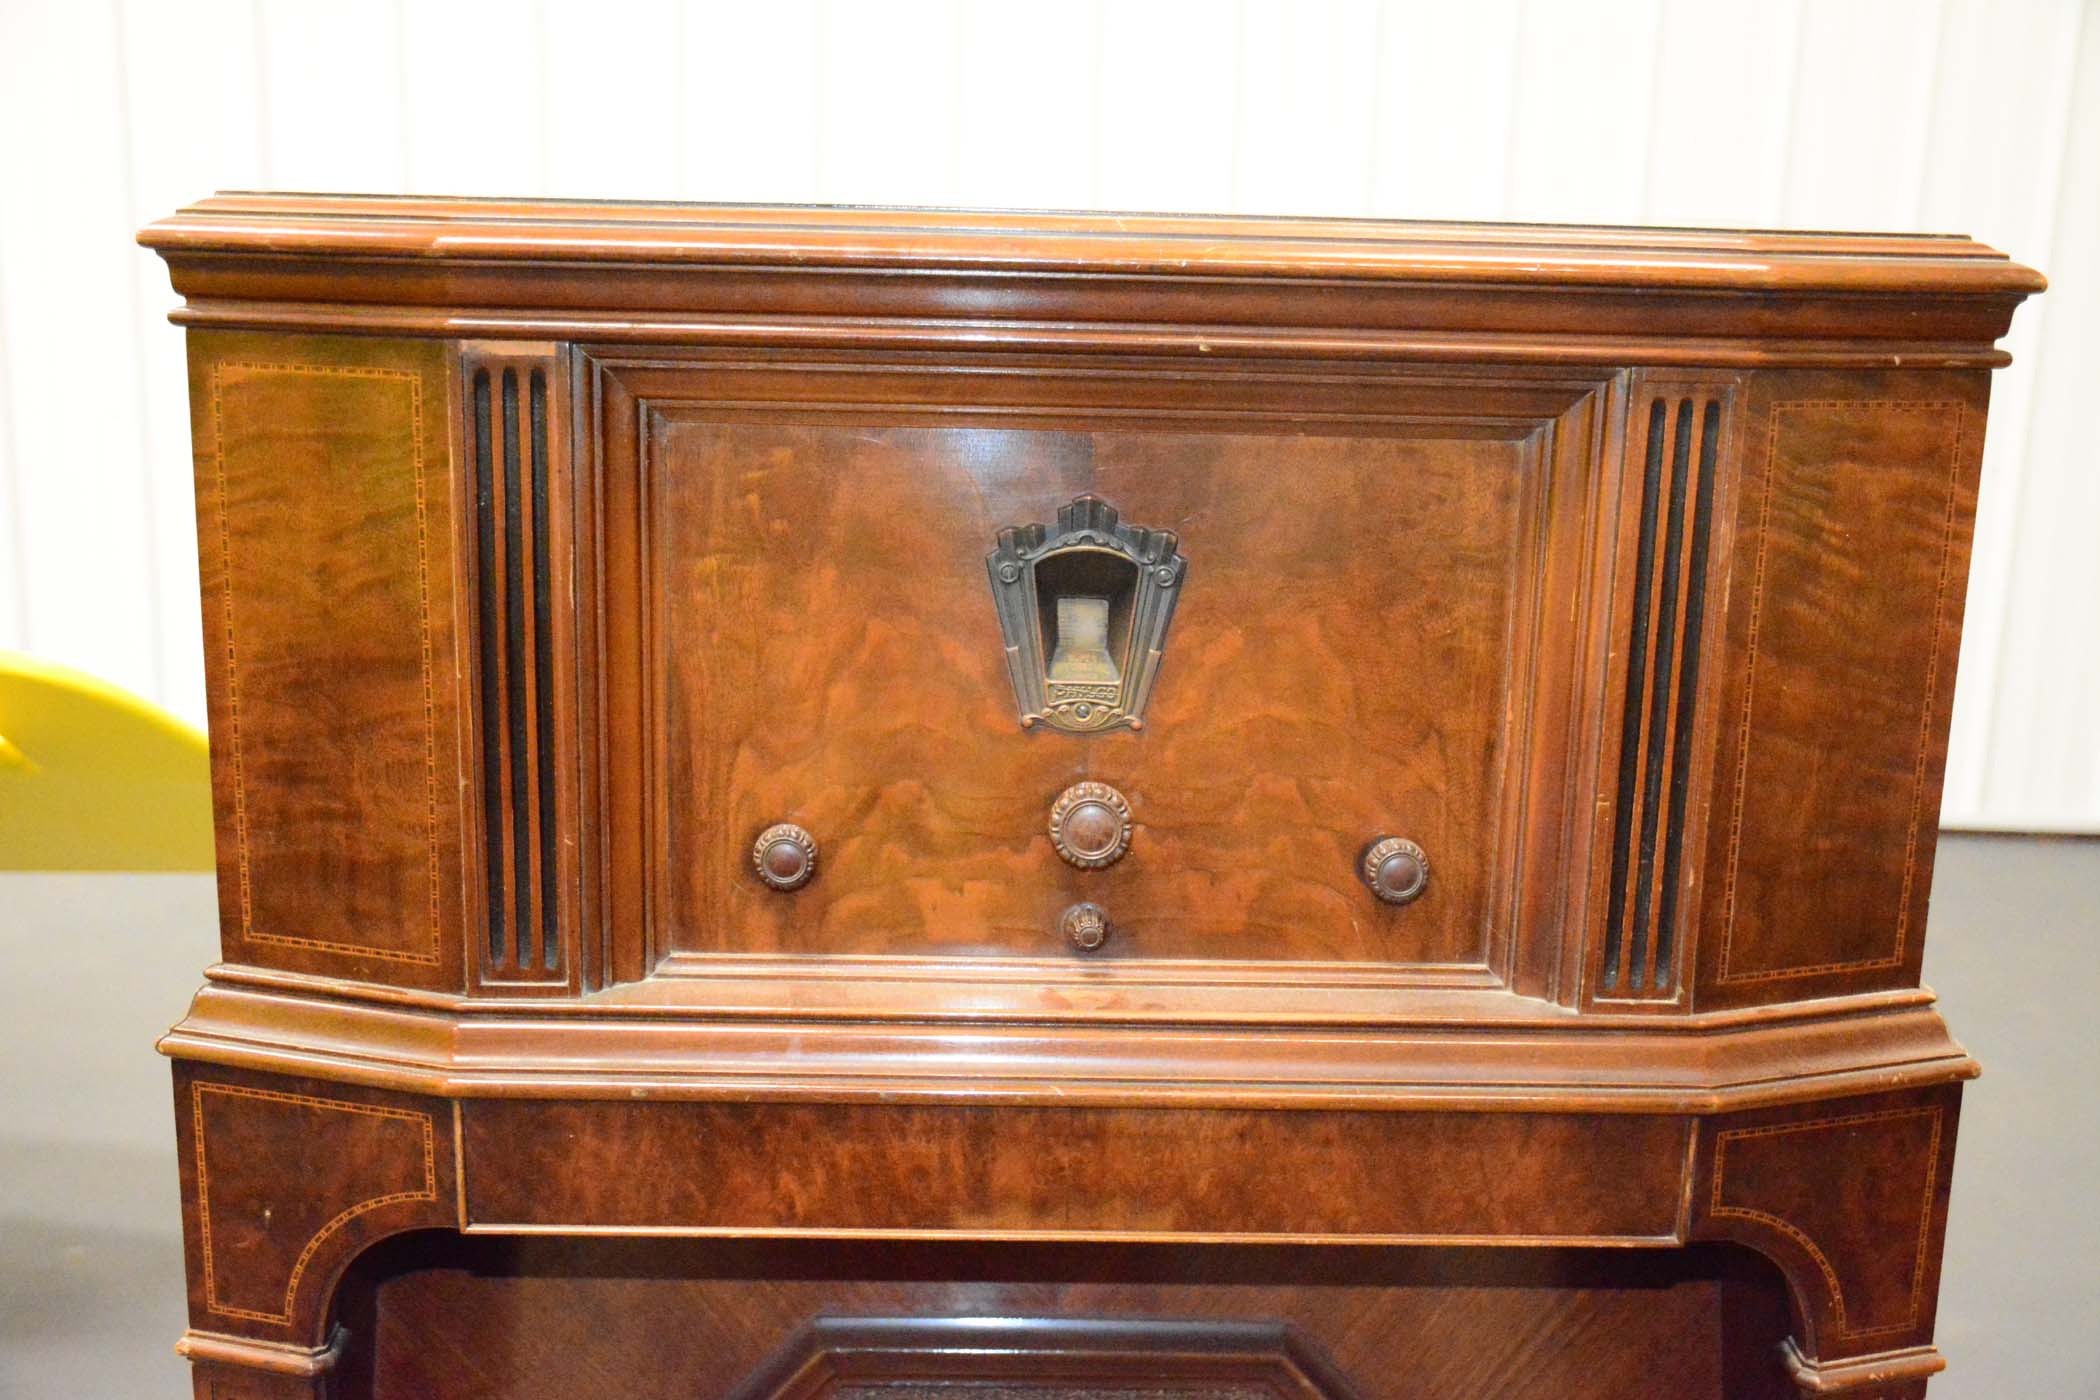
Here are some photos of my 112X before, and in process. I have a couple of questions. After photos and questions will be in the second post.
Before:


Before:
|
112X Cabinet restoration
12-31-2018, 12:07 AM
Here are some photos of my 112X before, and in process. I have a couple of questions. After photos and questions will be in the second post.
Before:
12-31-2018, 12:20 AM
To continue. the after photos are with one wash coat of sealer and then the grain filler rubbed in.
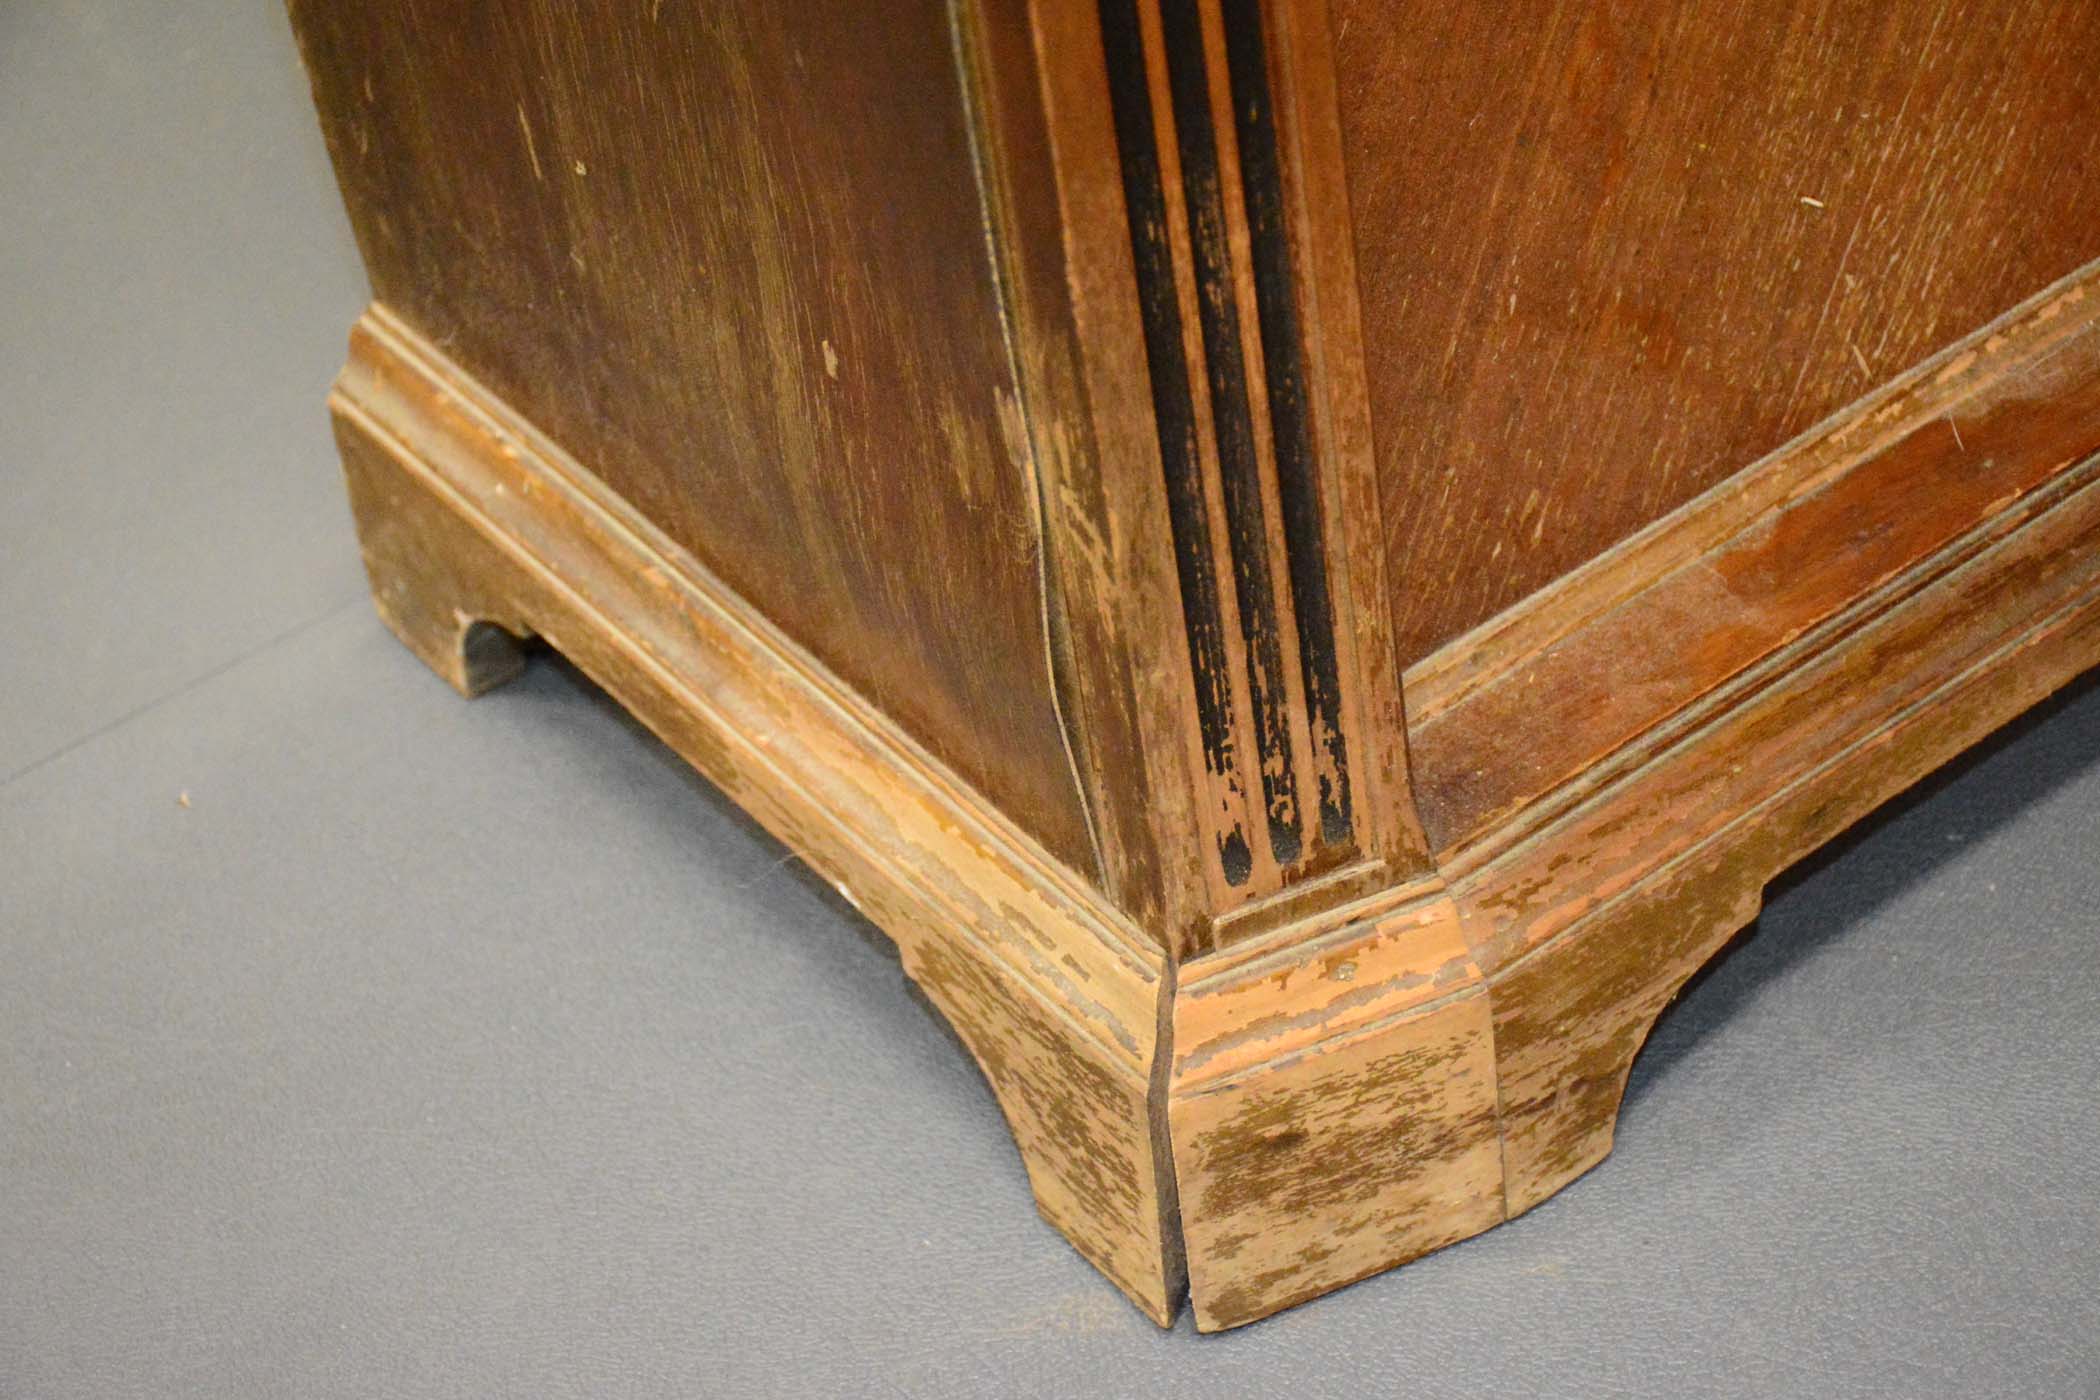
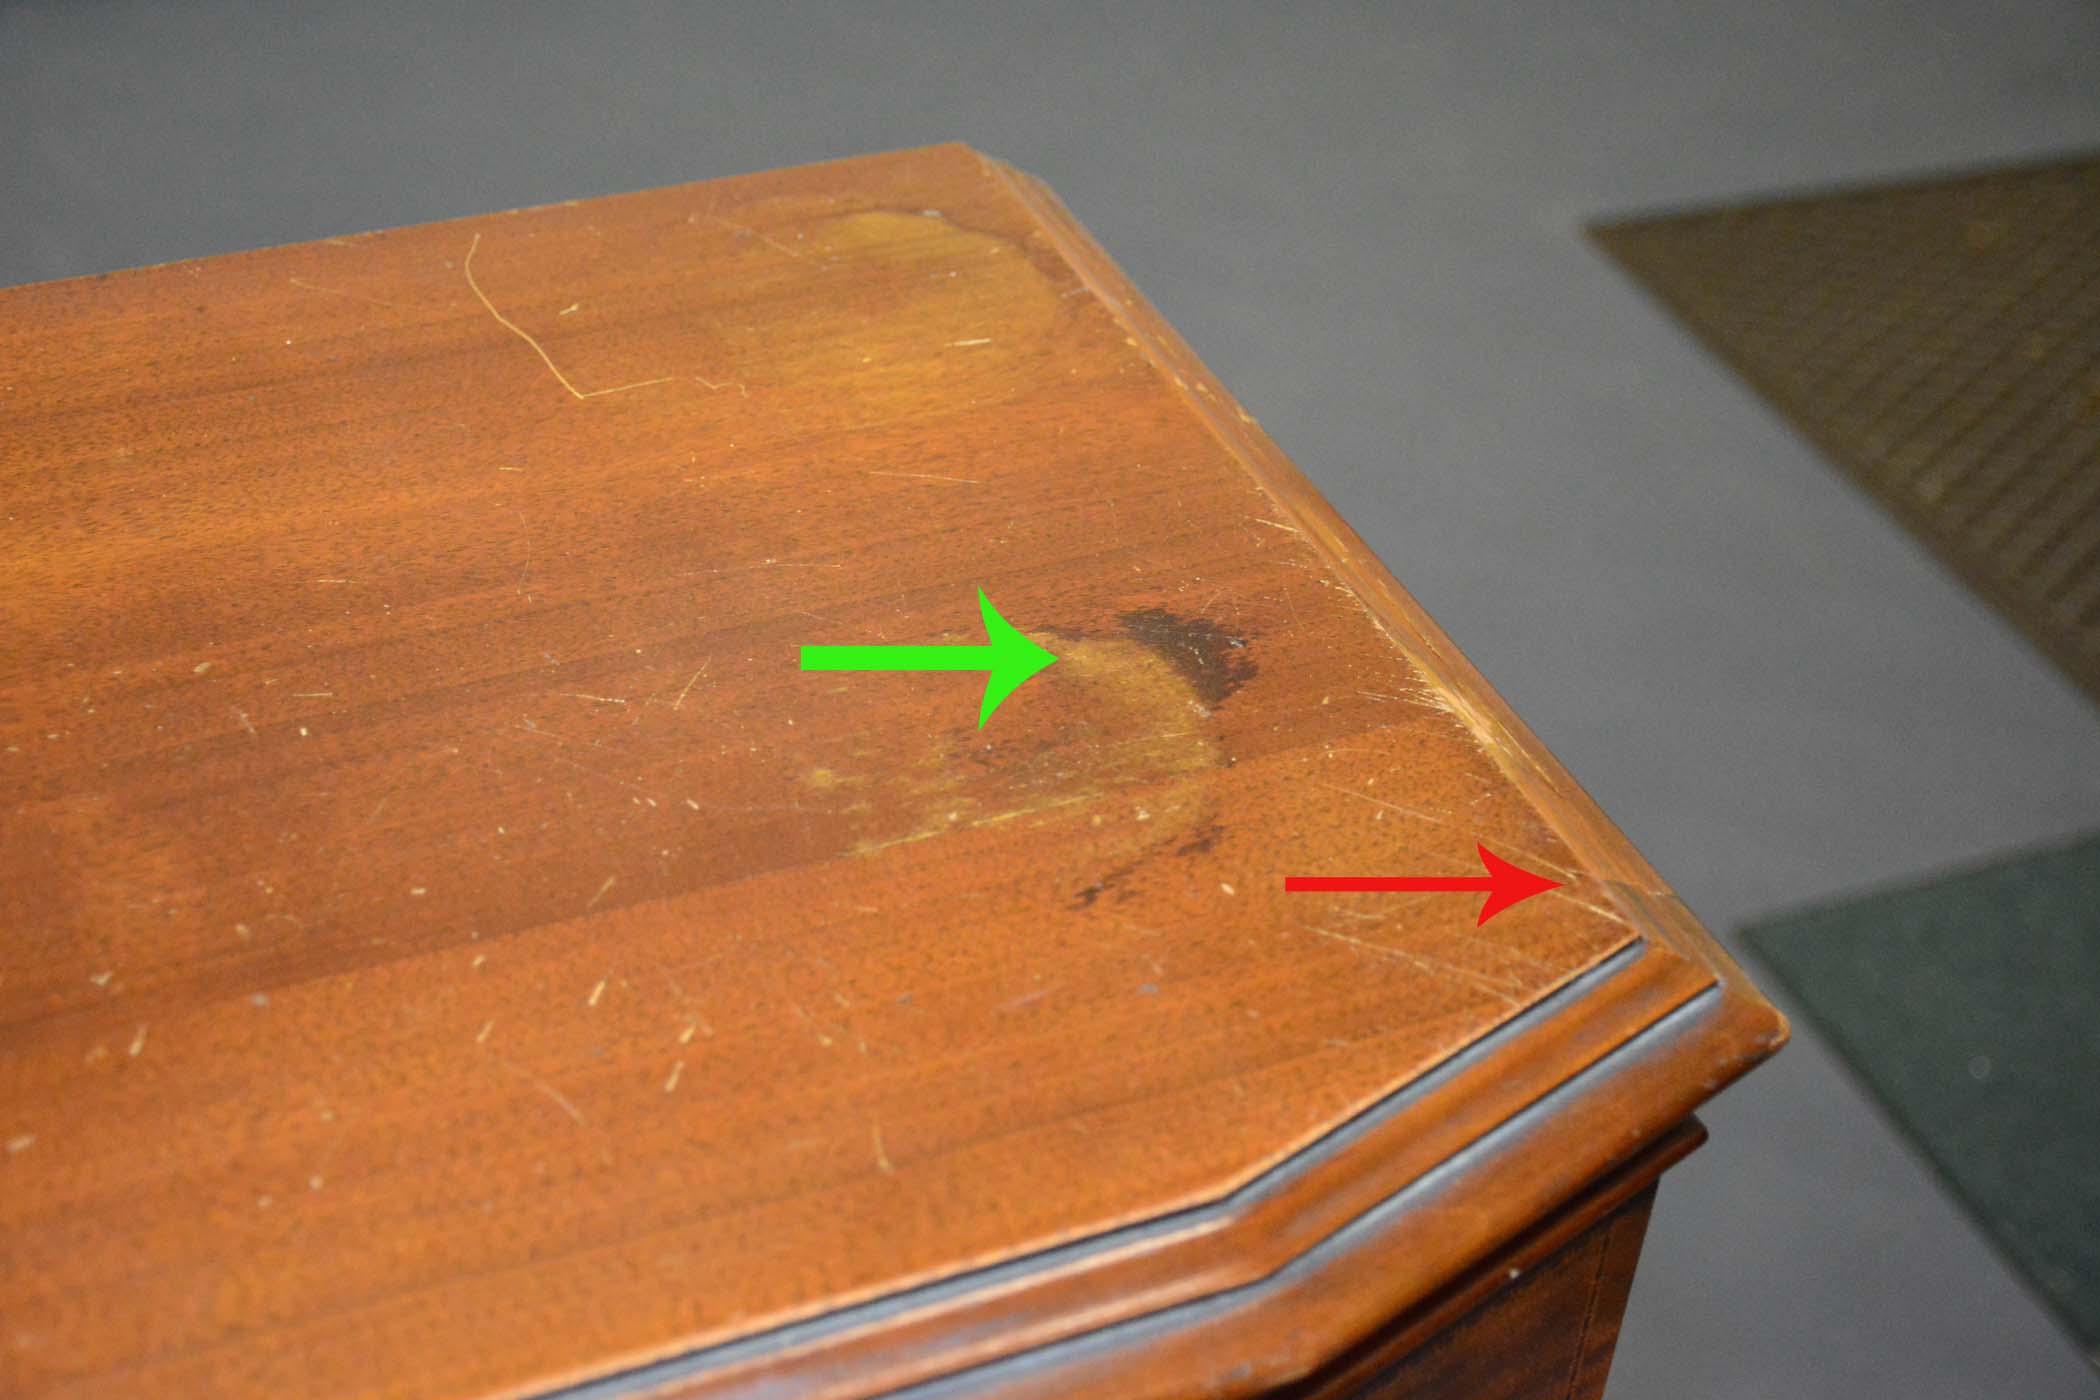
Questions: 1. The red arrow in the first post points to the transition from the front molding piece to the side piece. There is a definite color change at the transition and it is on both sides of the cabinet. Is this typical or should I attempt to minimize the transition using toner? 2. Notice the before and after of the dark water stain. Using bleach and oxalic acid, I reduced the stain to what you see in the after pics. Is it possible to reduce it further on future projects (this one is already sealed with sanding sealer so I'm as far as I can go)? I am tempted to tone the trim wood slightly darker for contrast from what the original finish appears to be. It also would help hide some small flaws in the wood.
12-31-2018, 07:28 AM
That's a beautiful cabinet! I would sand out the water stain and the whole top then tone it back to match the cabinet, but that's just me. I think the transition is the end grain on the front piece. You could try to tone to match it, but then the other mouldings might need to be darkened as well to follow that theme. What do photos in the gallery or at the radio museum show it as?
1929 Victor R-32, 1933 60L, Phil 40-158, Phil 42-400X, Phil 47-1230 Radio/Phono,, 1950 Phil TV t-1104, Air King 4000, Philco 41-105, Philco 37-675, RCA Victor 9K2, PT-50, Phil 54C, PT-44 Cabinet, Phil 118X Cabinet Gregg
12-31-2018, 10:36 AM
1. What you see is the transition to end-grain. It can't be avoided without redesigning the cabinet. A little toner might help, but I would not try to cover it up entirely. That is just the way they were.
Here is my 15:
12-31-2018, 12:40 PM
Russ, that's what I thought too. However, it appears that some sort of stain was used on the front piece of white wood, and not on the side pieces. On one side, the color transition is right on the joint of the 2 pieces of wood. On the other side, they apparently stained part of the side piece (about an eighth of an inch). A closeup explains what I mean. The trim around the lower portion matches the top front piece, though there is no end grain on that trim. My question is, did they purposely leave the top side pieces lighter as part of the aesthetic design? If the front trim is stained, as I suspect, they could have made the side piece match as well, as is obvious with the eighth inch of the side seen in the second picture. I'm thinking that I will tone the side pieces to more closely match, but not completely as the original finish did have the side pieces lighter. By the way, I like the looks of the 15 much better! The legs look better than the straight sides with the inset, angled sound board. Now the work of masking and toning begins!
Greggshere, I started to sand the stain, but it didn't change the appearance. I suspected then that the stain went all the way through the veneer, so I decided to try and bleach it out. that was mostly successful. A faint stain remains that I can live with.
12-31-2018, 12:43 PM
Russ, I like the light on the bottom of the 15. Is that original or an added effect?
12-31-2018, 01:31 PM
The light is original.
That does look intentional and odd. They probably used dye since it is less likely to make such a difference in the end-grain. I would have had to see the original finish. Then replicate what was there. I have never seen an application such as you have.
12-31-2018, 04:15 PM
This was noticeable in the original finish. I wish I had take a picture of it. It really does appear that they intended the side pieces to be lighter, while the lower trim was all the color of the front piece. A little strange. I may tone it down a bit though.
12-31-2018, 04:24 PM
Probably a good idea.
12-31-2018, 04:53 PM
You have to remember that this was production cabinetry, likely better then others, but still not a long way from the high end, or custom stuff. In repairing, and refinishing cabinets in the past you see all sorts of flaws and mistakes, especially on cheaper models, veneer sanded through, gaps, cracks, moldings with flaws, or moldings not tacked on properly, then there are the finishing errors and variations. You could put it back the way it was, even though it looks odd, or put it the way it was likely supposed to be. I would probably go with having the molding shaded the same all the way around the top.
Regards Arran
12-31-2018, 06:06 PM
Thanks for the input guys!
01-02-2019, 07:04 AM
That is beautious!
Times I have been electrocuted in 2021
As of 1/01/2021
AC: 4 DC: 1
Last year: 6
01-02-2019, 11:29 AM
3 coats of sanding sealer at this point. That means I have a lot of sanding to do! Then, 2 or three coats of clear. I'm not a huge fan of high gloss so I typically will use about a 40 sheen lacquer. What is typically done? Russ, I know you use gloss and then rub it out. What do you use to rub it out and how much gloss does that remove?
Another question: I find that these radios turn out fairly red. I suspect that in the stripping process, the liquefied toner is staining the wood. The toners that I used on the trim pieces are shades of brown walnut. Yet, since the wood has a red tint to start with, they end up with a red hue. Even the Walnut veneer, where I added no toner (except the top), the tint is red. I'm not opposed to that as I like the warm finish, but wondering if there is a way around this. My learning curve is still high!
01-02-2019, 12:12 PM
That looks about right.
You are going to find that toner colors are not what most people expect: VD Brown is brown, but it has a greenish cast if applied heavily turning almost black with heavy applications. Walnut/ dark gives the English walnut look but will be too red if applied too heavily. Perfect Brown is brown but takes on a brown-plastic look if applied heavily. There is a difference between the "classic" and "tone" types of toner though the "tone" type can become less opaque with successive coats, used lightly, you can still see grain through it. A few passes with VD brown tone (toner) is probably what the trim edge of the top of your radio needs. GO LIGHTLY most people use toner like they were painting a wall - way too much. On some radios I use a mix of Rudd gloss and Rudd semi-gloss to take the gloss down just a bit. Buffing with 3M compound and a air (power) buffer will knock the gloss down quite a bit. Wait at least a couple of weeks before buffing.
01-02-2019, 02:23 PM
Thanks for the info, Russ. My toner application is almost like over spray. Many very light applications until I get the color I want. I couldn't match the color of the end grain of the front piece though the color is close to the front of the front piece.. I may try your suggestion. Using toners all pretty new to me. For former non-radio projects, I always used wiping stain. I kind of like this cuz I can get more control.
« Next Oldest | Next Newest »
Users browsing this thread: 1 Guest(s) |