My Next Project - worse than the last?
Posts: 761
Threads: 56
Joined: Jul 2013
City: Kentucky
The artist formerly known as Puhpow! 8)
Posts: 2,353
Threads: 92
Joined: May 2010
City: Clayton, NC
Self esteem issues???
You sure can choose 'em. BUT.... IF you think that you can bring it back from the dead radio planet, I recommend that you chronicle the steps of your resto. WHY??
Because there are "Lazarus" catagories of radio awards that are given to the radio that went from a basket case to nice.
ARC recently documented such a contest.
It CAN be done!
Posts: 262
Threads: 27
Joined: Jan 2010
City: Rochester, NY
Glutton for punishment?
Will be fun to watch.
Looks like someone left the hood open!
Tim
Posts: 761
Threads: 56
Joined: Jul 2013
City: Kentucky
She's pretty rough, that's for sure. I think it may have been buried in the mud. It looks like someone dug it up. That strip laying on the counter is the dial. I think the tube on the counter is the ballast tube. Restored one of these same radios a short while back and sold it for a decent price. I hope this one comes out just as nice; they are pretty radios.
I don't go out and look for nasty radios, but when this one came along, I couldn't pass it up. These are kinda rare, so I may never find another one. I'm familiar with the chassis, and they are pretty simple radios. The last one had "the hood open" too, but not as bad as this one. I just hope the speaker and all of the coils are good.
TA, I'll be sure to chronicle every step. It should be a lot of fun. Plan to start on it in the next couple of days.
The artist formerly known as Puhpow! 8)
Posts: 5,007
Threads: 267
Joined: Nov 2012
City: Bandon
State, Province, Country: OR
Yes, keep us posted on progress!!
Posts: 761
Threads: 56
Joined: Jul 2013
City: Kentucky
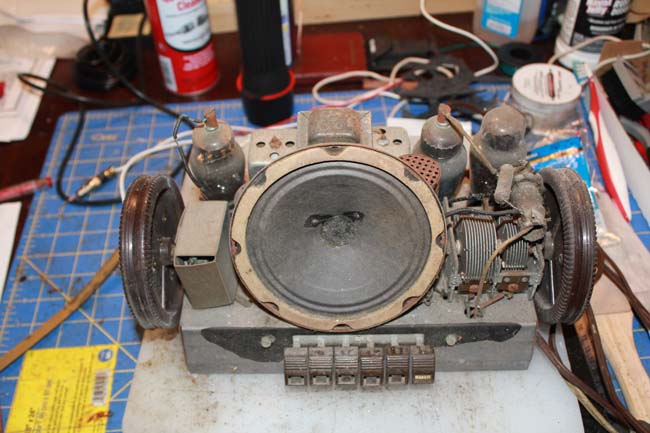
I got started on this today. This is right after I pulled the chassis. It's looking pretty crusty..but the good news is - the speaker looks fine.
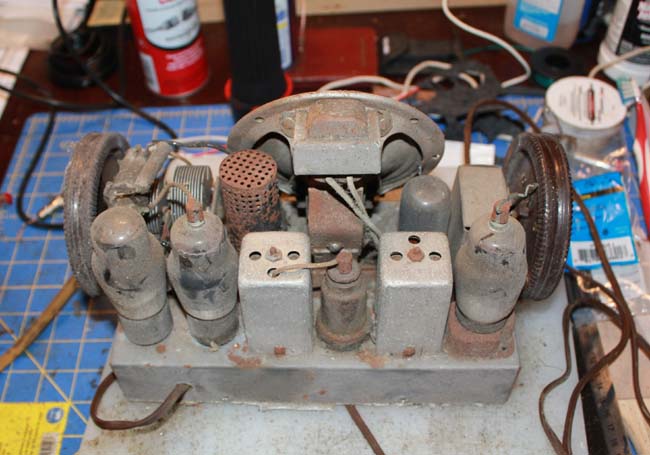
The flip side - everything looks like it's there...
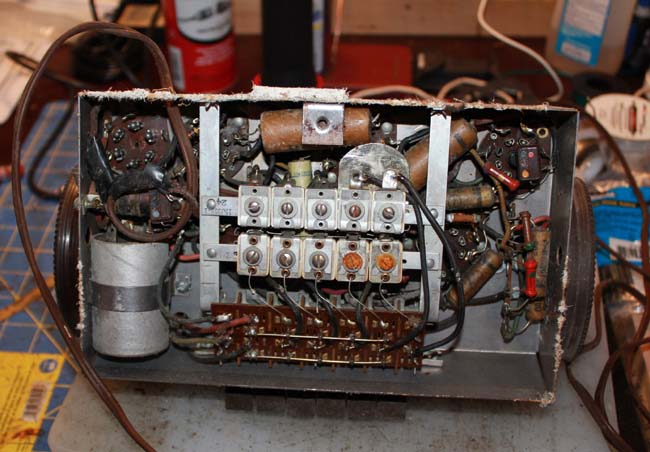
Under the hood... like a virgin! 8) More good news!
The artist formerly known as Puhpow! 8)
Posts: 761
Threads: 56
Joined: Jul 2013
City: Kentucky
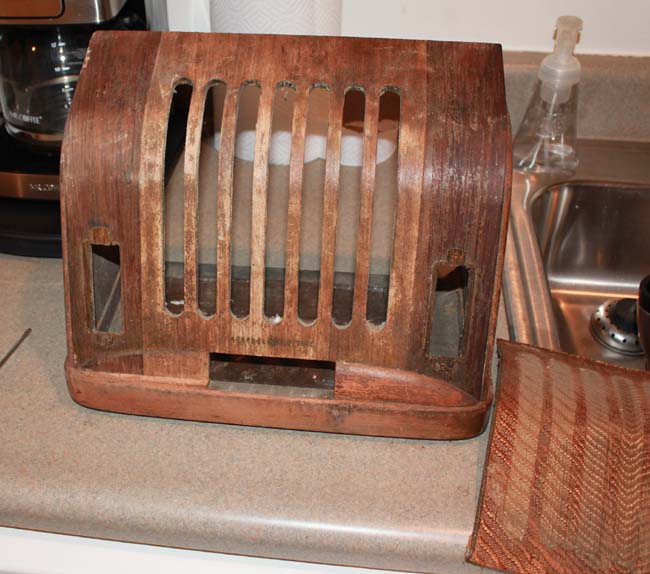
Time to get started on the cabinet. It's pretty funky... I normally get a radio playing before I do cabinet work, but this radio depends on my ability to repair this cabinet. So, I'll be working on the cabinet and chassis at the same time.
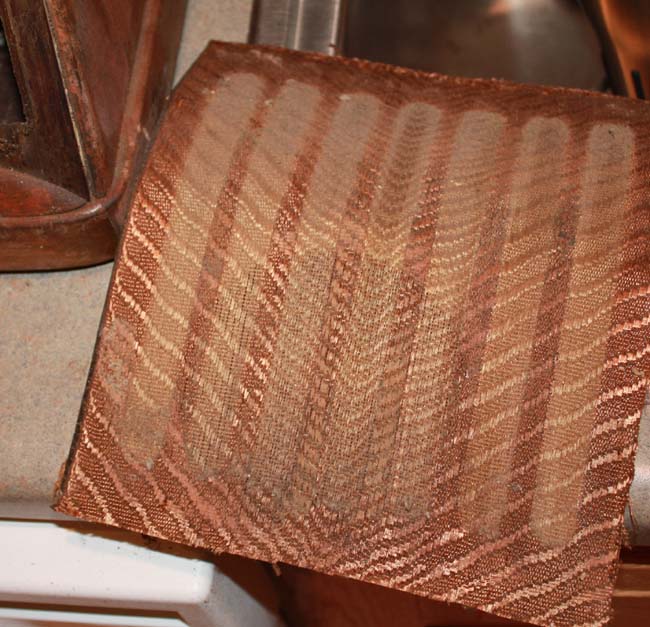
Surprisingly, the grill cloth doesn't look all that bad. I may try to save it. We will have to see how that works out...
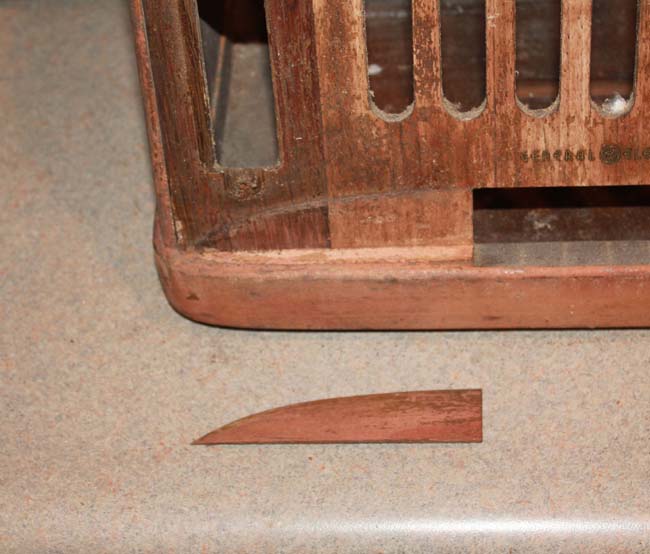
First order of the day is to glue this little piece back on. I glue on any pieces before I get started stripping. This way all of the cabinet goes through the same process. Less chance of weird coloration later..
The artist formerly known as Puhpow! 8)
(This post was last modified: 10-16-2013, 02:08 PM by Jamie.)
Posts: 761
Threads: 56
Joined: Jul 2013
City: Kentucky
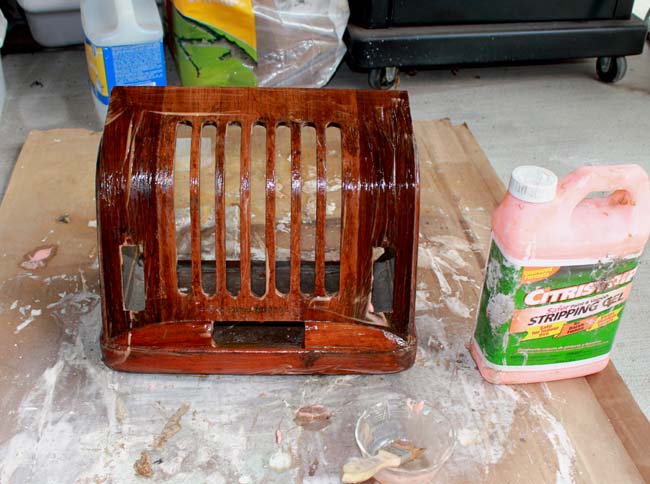
Stripper time! Do-dah-dah-do 8) (sung to the tune of Hammer Time!)
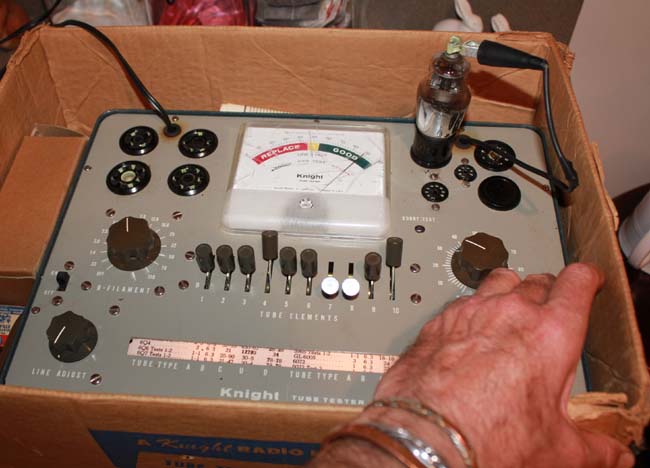
While the stripper is working, I think I will check the tubes. I always check the tubes as soon as possible. That way, if I need to order a tube, I'll have it before the radio is done.
More good news! Every tube in the radio is good, except one - the ballast tube. (Second radio like this that I've done, and both have bad ballest tubes.) Even so, isn't it amazing how tubes are so incredibly tough? This radio is trashed and abused, yet the tubes are good. 
The artist formerly known as Puhpow! 8)
(This post was last modified: 10-16-2013, 02:36 PM by Jamie.)
Posts: 761
Threads: 56
Joined: Jul 2013
City: Kentucky
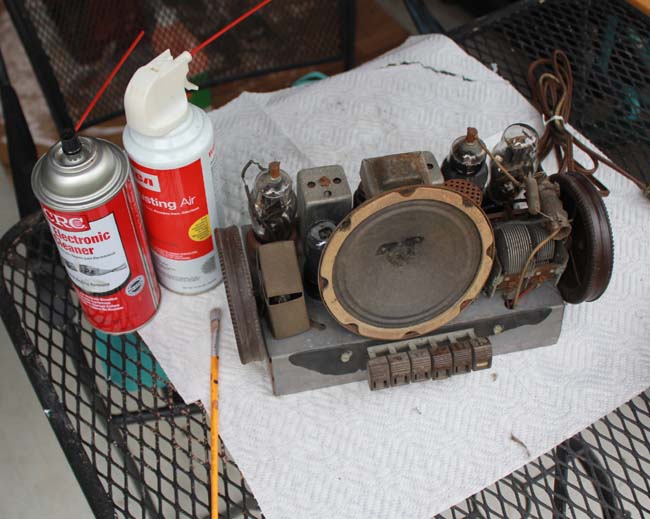
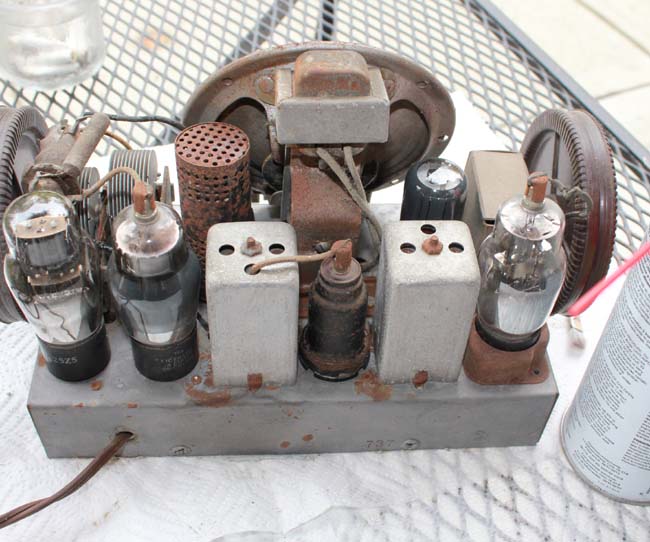
Here's the chassis after a quick clean up. A little brushing, some compressed air, and contact cleaner goes a long way. It's actually looking like a radio now.  (A word of warning to new guys - be careful with the compressed air. You can cause some serious problems if you hit the wrong thing with it... Avoid anything that looks like an adjustment screw..and don't use it under the chassis)
This is probably the last you'll see of the chassis. This is the cabinet forum, so I'll stay on topic. It's just a simple chassis anyway. Hopefully, it'll just be a boring recap and resistor replacement, followed by an alignment....
The artist formerly known as Puhpow! 8)
(This post was last modified: 10-16-2013, 02:26 PM by Jamie.)
Posts: 761
Threads: 56
Joined: Jul 2013
City: Kentucky
The artist formerly known as Puhpow! 8)
Posts: 244
Threads: 11
Joined: Oct 2011
City: Black Mountain, NC
Great work so far. You probably don't need my suggestion but it looks like the fabric ratchet straps would be great to pull the cabinet together while the glue sets; worked on my car door panels that are curved.
Good luck,
Mike
Cossor 3468
GE 417A
Philco 118H
Radiola 17/100
Scott 800B6
Silvertone 6130
Stromberg 535M
Truetone D1952
Posts: 761
Threads: 56
Joined: Jul 2013
City: Kentucky
Thanks Mike! That's a great idea. Unfortunately, I don't have any ratchet clamps. I've already got a set of woodworking clamps, so I'll be using those instead.
Speaking of clamps... I tried using a clamp to bend the top back down. I got within 1/2" of where I need to be...and began to hear the dreaded sound.... Crrrraacckk! ... so, I released the clamp right away. No damage. Dry clamping worked on the previous GE I restored, but it's not gonna work this time.
That leaves option #2 - water. I need to get this wood wet before I bend it back into shape. The downside to using water is possible delamination of the veneer. That would be a pain in the rear, but it would be repairable, whereas a huge crack is not.
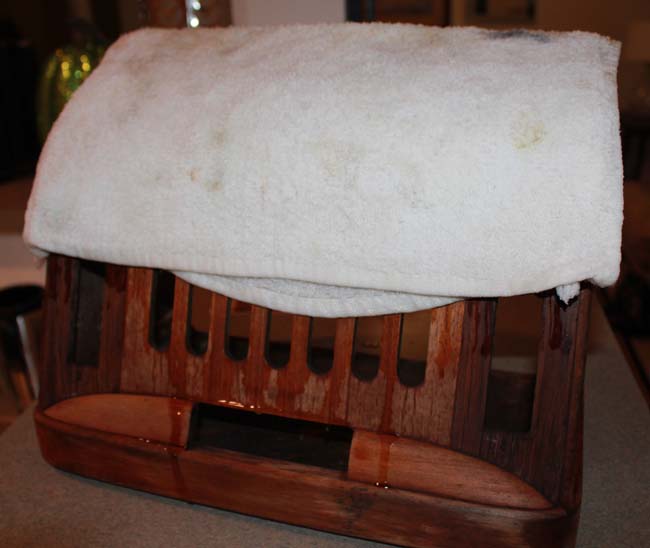
Ever shave a radio?  .. Same principle here. Hot, wet towel across the face. I'll let it soak for about 15 minutes, then try the clamp again.
The artist formerly known as Puhpow! 8)
Posts: 1,845
Threads: 140
Joined: Jan 2013
City: Westland, MI
Nice work so far. Just a suggestion...if you have a soup pot large enough to place the cabinet in try steaming the wood before attempting to bend it back. Put about a half inch of water in the pot, then a pie plate to keep the cabinet from coming in contact with the water. Add the cabinet and slowly bring the water to a slow boil with the lid on the pot. Ten or so minutes should rehydrate the wood so it will flex easier. Take care, Gary
"Don't pity the dead, pity the living, above all, those living without love."
Professor Albus Dumbledore
Gary - Westland Michigan
Posts: 1,113
Threads: 14
Joined: Feb 2013
City: Irvington, NY
You might want to wet the inside surface of the cabinet also. That way the inner surface will also become more flexible and be able to compress while the outer surface is in tension and stretches under the force of the clamp.
Posts: 761
Threads: 56
Joined: Jul 2013
City: Kentucky
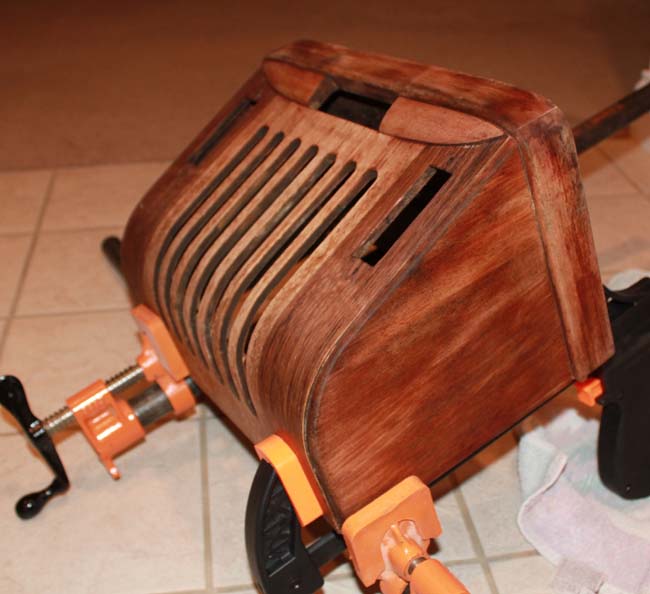
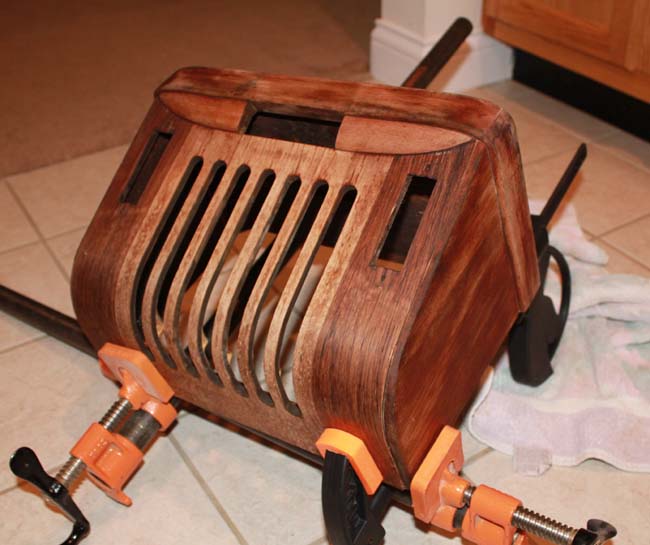
Good idea Mondial..!... and it was perfect timing!.. (Edited to add - Sorry Gary, I missed your post. I think the pot of water is good idea and would have worked just as well)
Success! .. Glued and clamped down tight. I used Extra Strength Elmer's Wood glue. It's good stuff...
Now for the bad news - We did have some delamination, but it's not a disaster..
The artist formerly known as Puhpow! 8)
(This post was last modified: 10-16-2013, 05:12 PM by Jamie.)
Users browsing this thread: 1 Guest(s)
|


