Posts: 1,106
Threads: 88
Joined: Jun 2011
City: Tacoma
State, Province, Country: Washington
Started working on the cabinet for the 116B this evening. Got a good look at it. It was UGLY (see first pic). Someone had apparently painted the whole thing with some crappy flat brown house paint, then some sort of plasticized clear coat that flaked off into big flakes when I worked the stripper into it.
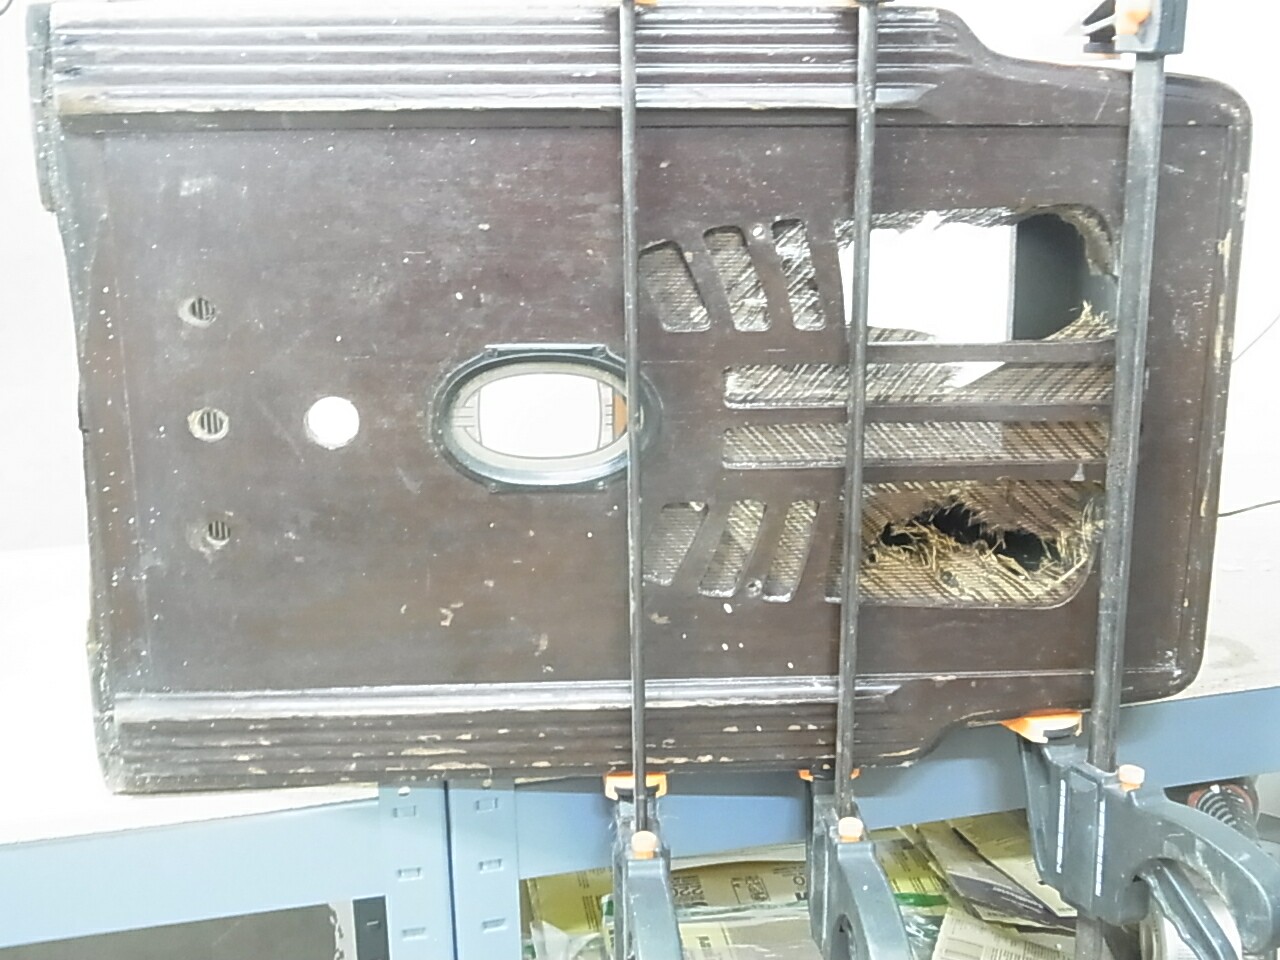
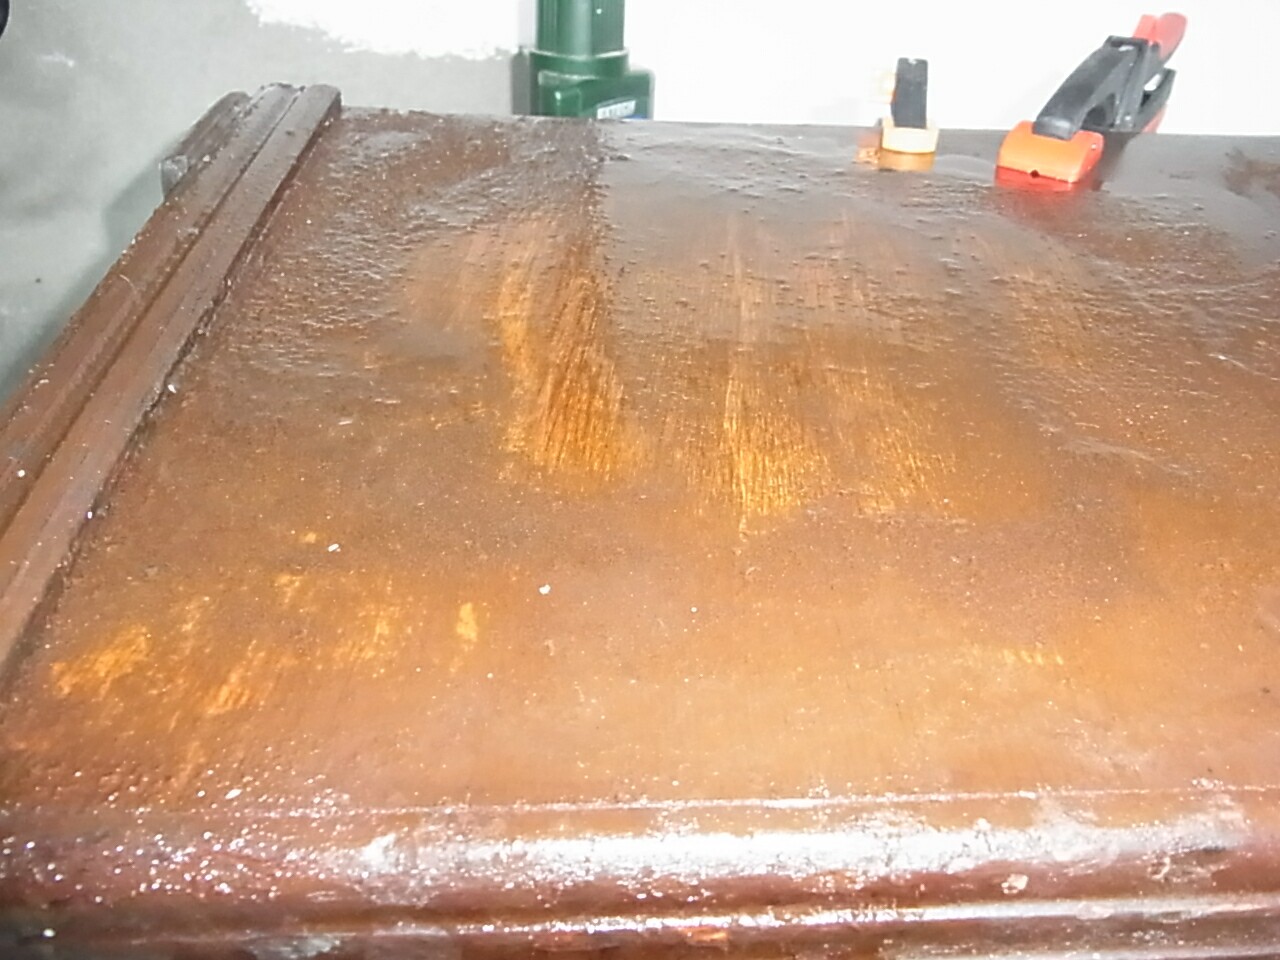
You can see in the second pic that after getting through the paint the actual grain started coming out.
In the third pic, you can see that by carefully removing the paint I have gotten through to the pattern underneath. I'm wondering, is this photo finish? It seems pretty resistant to the stripper and my efforts to get the paint off. It would be nice if this were real wood/veneer that could all be saved and worked with.
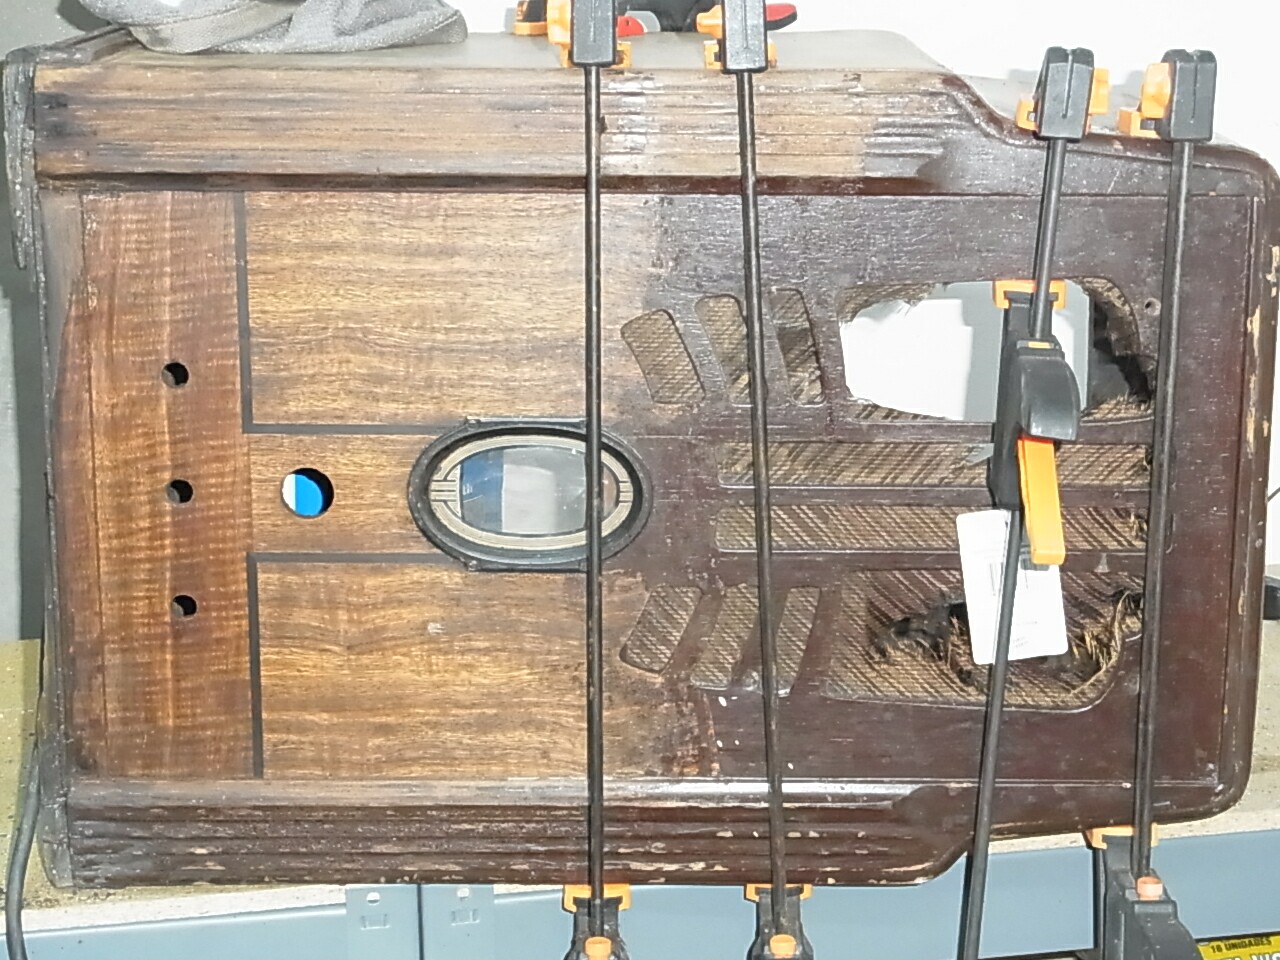
Also, as can be easily seen, I've reglued the separated sides. I have some work that will need to be done to the bottom in the front, as the cabinet seems to have sat in water or at least a wet location for some time.
Posts: 765
Threads: 147
Joined: Aug 2012
City: Dallas, TX
Hello Brenda, there is no photo finish on that set, one thing you have going for you is that the brown paint has actually protected the wood veneer from the elements. Stop where you are and let the glue dry then remove the clamps and dial frame along with grill cloth , then finish stripping. Be very careful not to damage the veneer when removing old paint and factory finish. If there is veneer already lifting do not get any stripper under the veneer. If you need help with cabinet I can walk you thru it 
(This post was last modified: 11-29-2015, 03:17 PM by Fred Taylor.)
Posts: 1,909
Threads: 216
Joined: May 2015
City: Seattle
State, Province, Country: WA
Fred are you sure there is photo finish? A 116B would be s fairly high end set:
http://www.philcoradio.com/gallery/1936a.htm#i
It's also not included in Ron's list of models with Photo finish:
http://www.philcoradio.com/phorum/showth...p?tid=5473
Posts: 765
Threads: 147
Joined: Aug 2012
City: Dallas, TX
(11-29-2015, 03:13 PM)Nathan Slingerland Wrote: Fred are you sure there is photo finish? A 116B would be s fairly high end set:
http://www.philcoradio.com/gallery/1936a.htm#i
It's also not included in Ron's list of models with Photo finish:
http://www.philcoradio.com/phorum/showth...p?tid=5473
Hello Nathan I had corrected myself, I misspelt my wording and now has been corrected , my fault sorry  I meant to say there isn't instead of is.
Posts: 1,909
Threads: 216
Joined: May 2015
City: Seattle
State, Province, Country: WA
Ha ok good. I frequently miss that crucial 'not' when I write emails too. 
Posts: 1,106
Threads: 88
Joined: Jun 2011
City: Tacoma
State, Province, Country: Washington
Anyone got a working email addy for Steve Davis?
Posts: 1,909
Threads: 216
Joined: May 2015
City: Seattle
State, Province, Country: WA
stevd47@aol.com isn't working?
I emailed him at that address in May.
Posts: 1,106
Threads: 88
Joined: Jun 2011
City: Tacoma
State, Province, Country: Washington
N/M... I added an "e" where there wasn't one.
Posts: 1,106
Threads: 88
Joined: Jun 2011
City: Tacoma
State, Province, Country: Washington
Have the cabinet almost completely stripped now, just a few small spots that are resisting my efforts, but they'll come along by and by.
Now that it's so close, I'm REALLY having a hard time understanding why they painted it that gawdawful color:
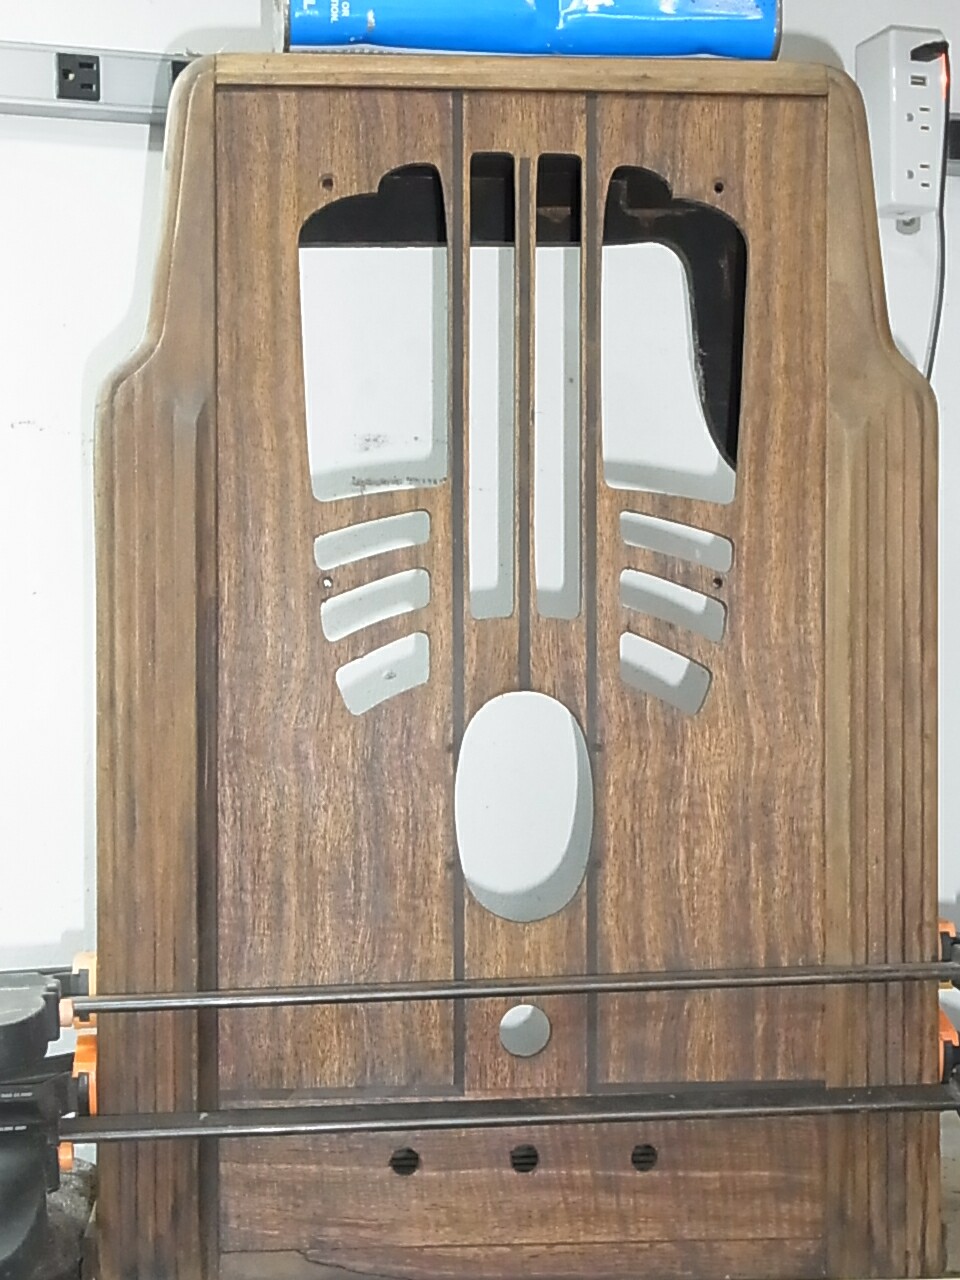
Tomorrow, I'll take my GOOD camera out there and get another shot. For some reason the cheapie Ricoh I use for snapshots is really making it look washed out, and it really looks much better than the above pic.
Suggestions for working up a replacement for the bottom trim in front?
Posts: 1,106
Threads: 88
Joined: Jun 2011
City: Tacoma
State, Province, Country: Washington
I see from other pics online that there seem to be two versions, one with a vertical grain and one with a horizontal grain.
Posts: 1,106
Threads: 88
Joined: Jun 2011
City: Tacoma
State, Province, Country: Washington
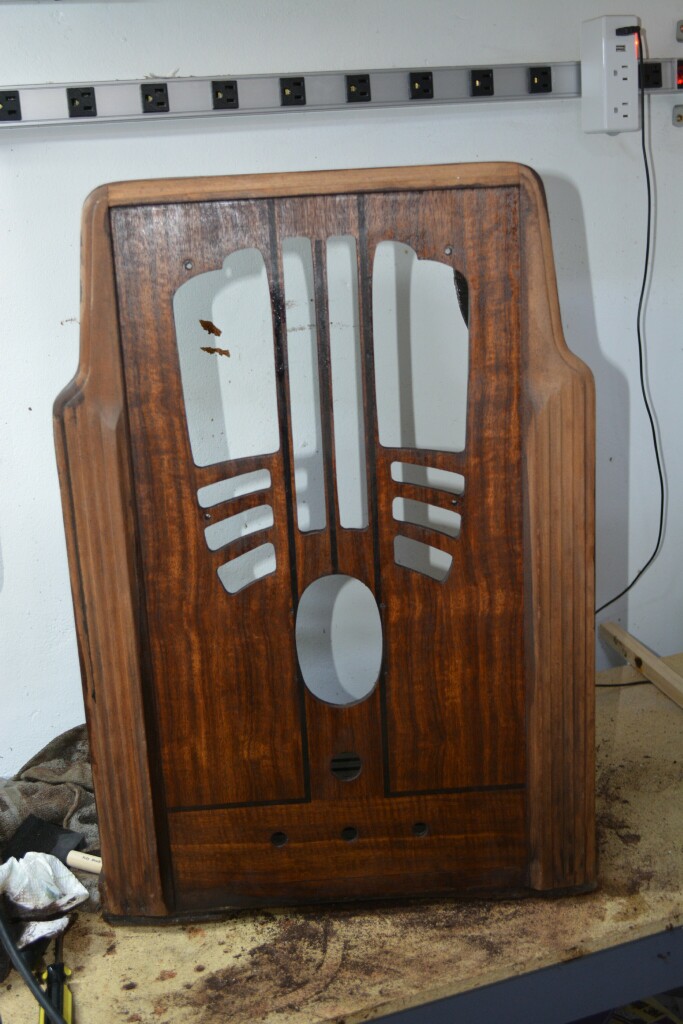
Well, what do you guys think? Nothing done to the sides yet, and only a single application of stain on the front and sides, and a wipedown with paper towels.
Posts: 1,106
Threads: 88
Joined: Jun 2011
City: Tacoma
State, Province, Country: Washington
Gloss black on the trim.. what a pain to mask it off.
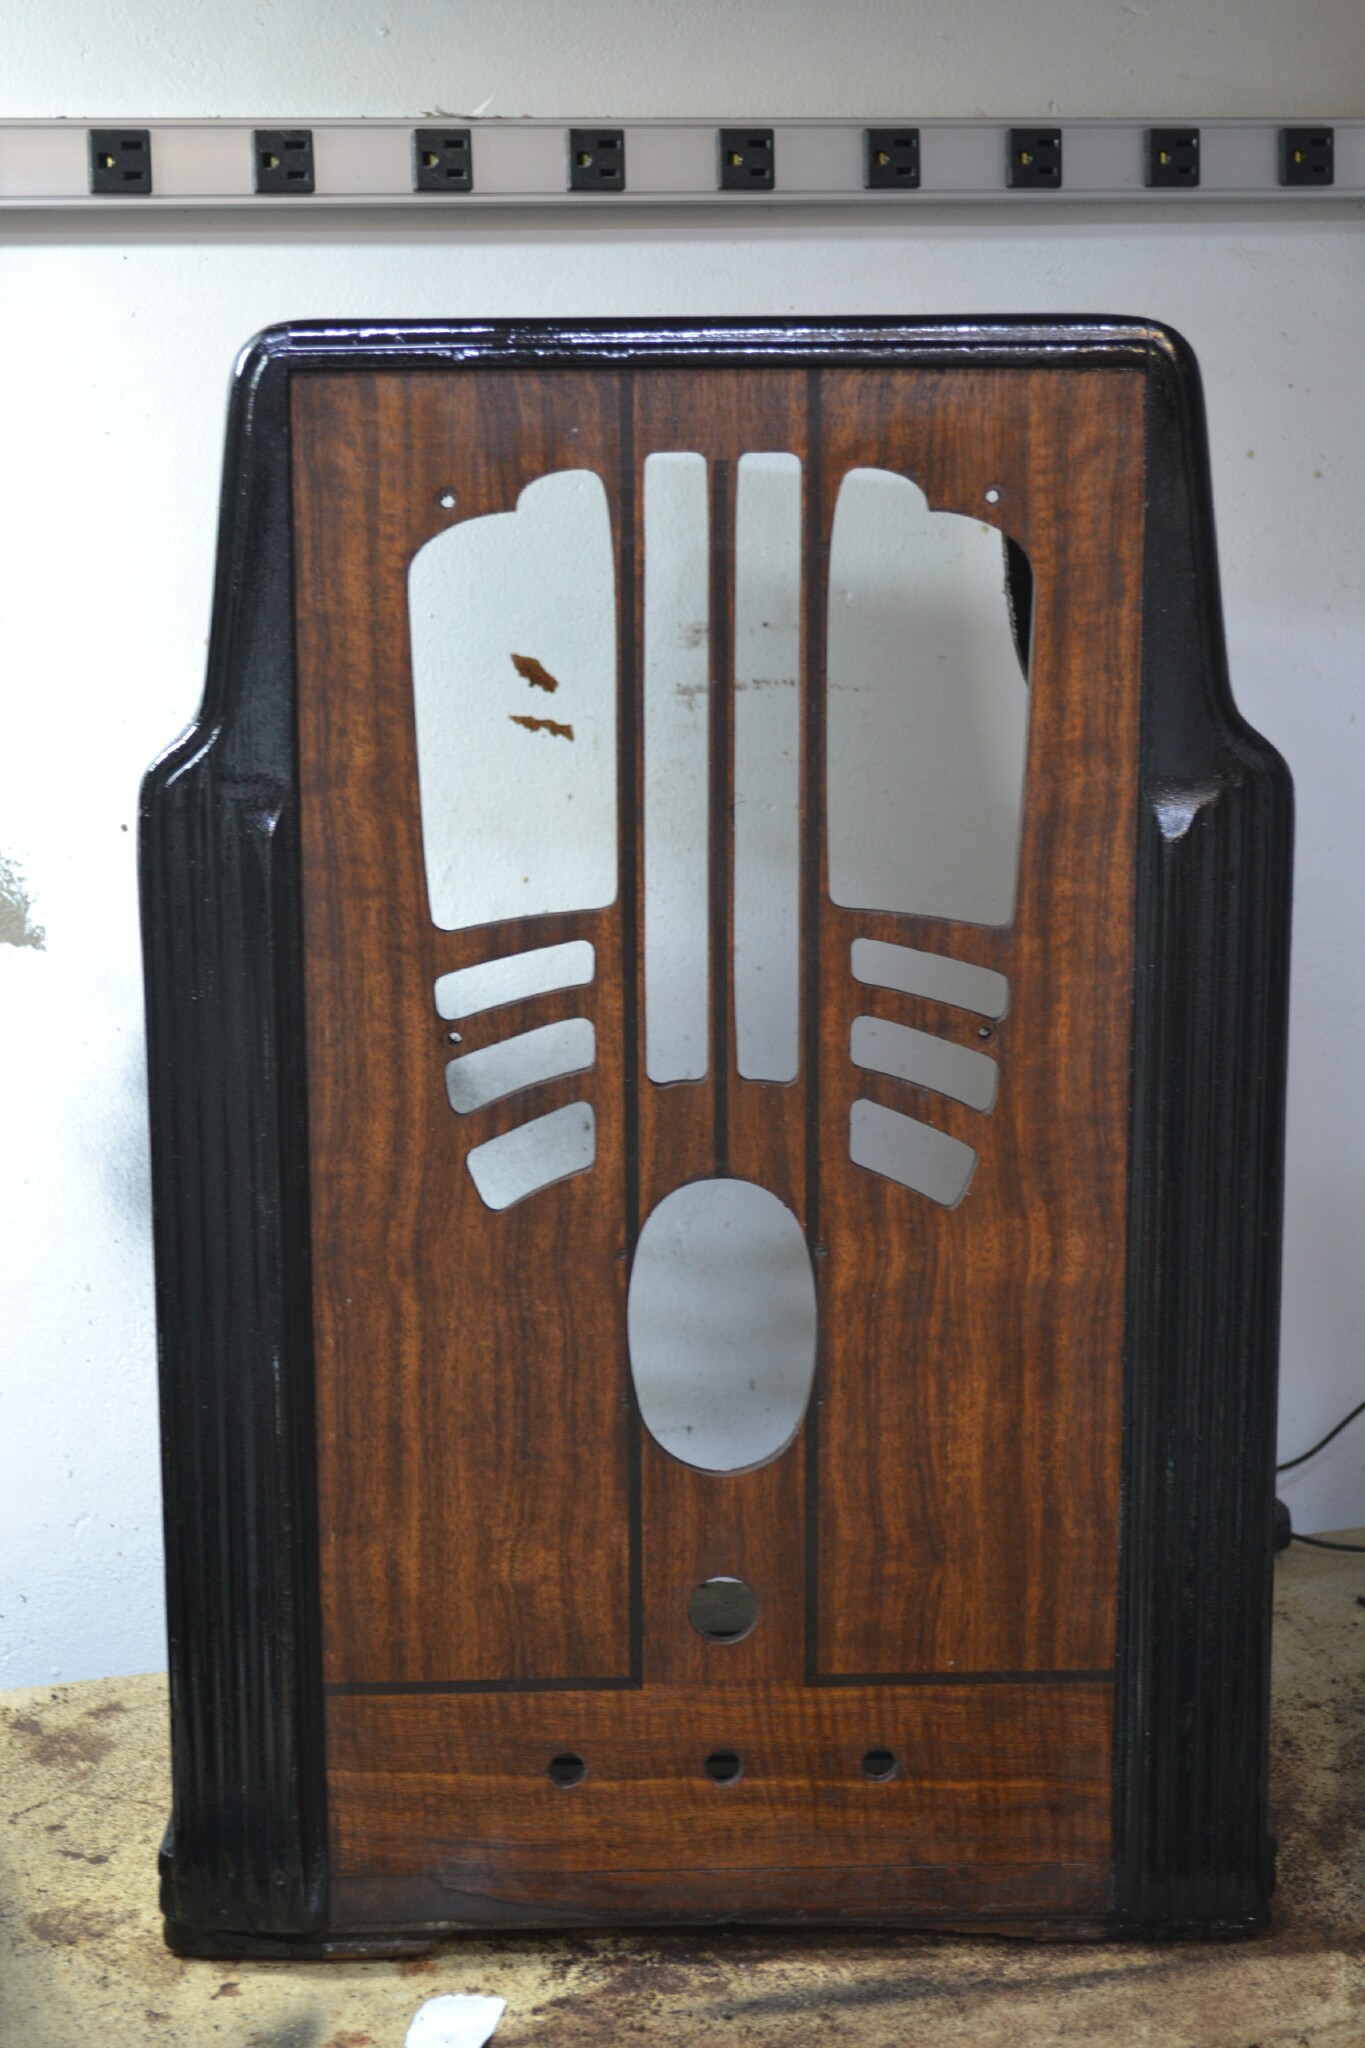
First coat of lacquer. Going to be putting on two more coats over the next few days.
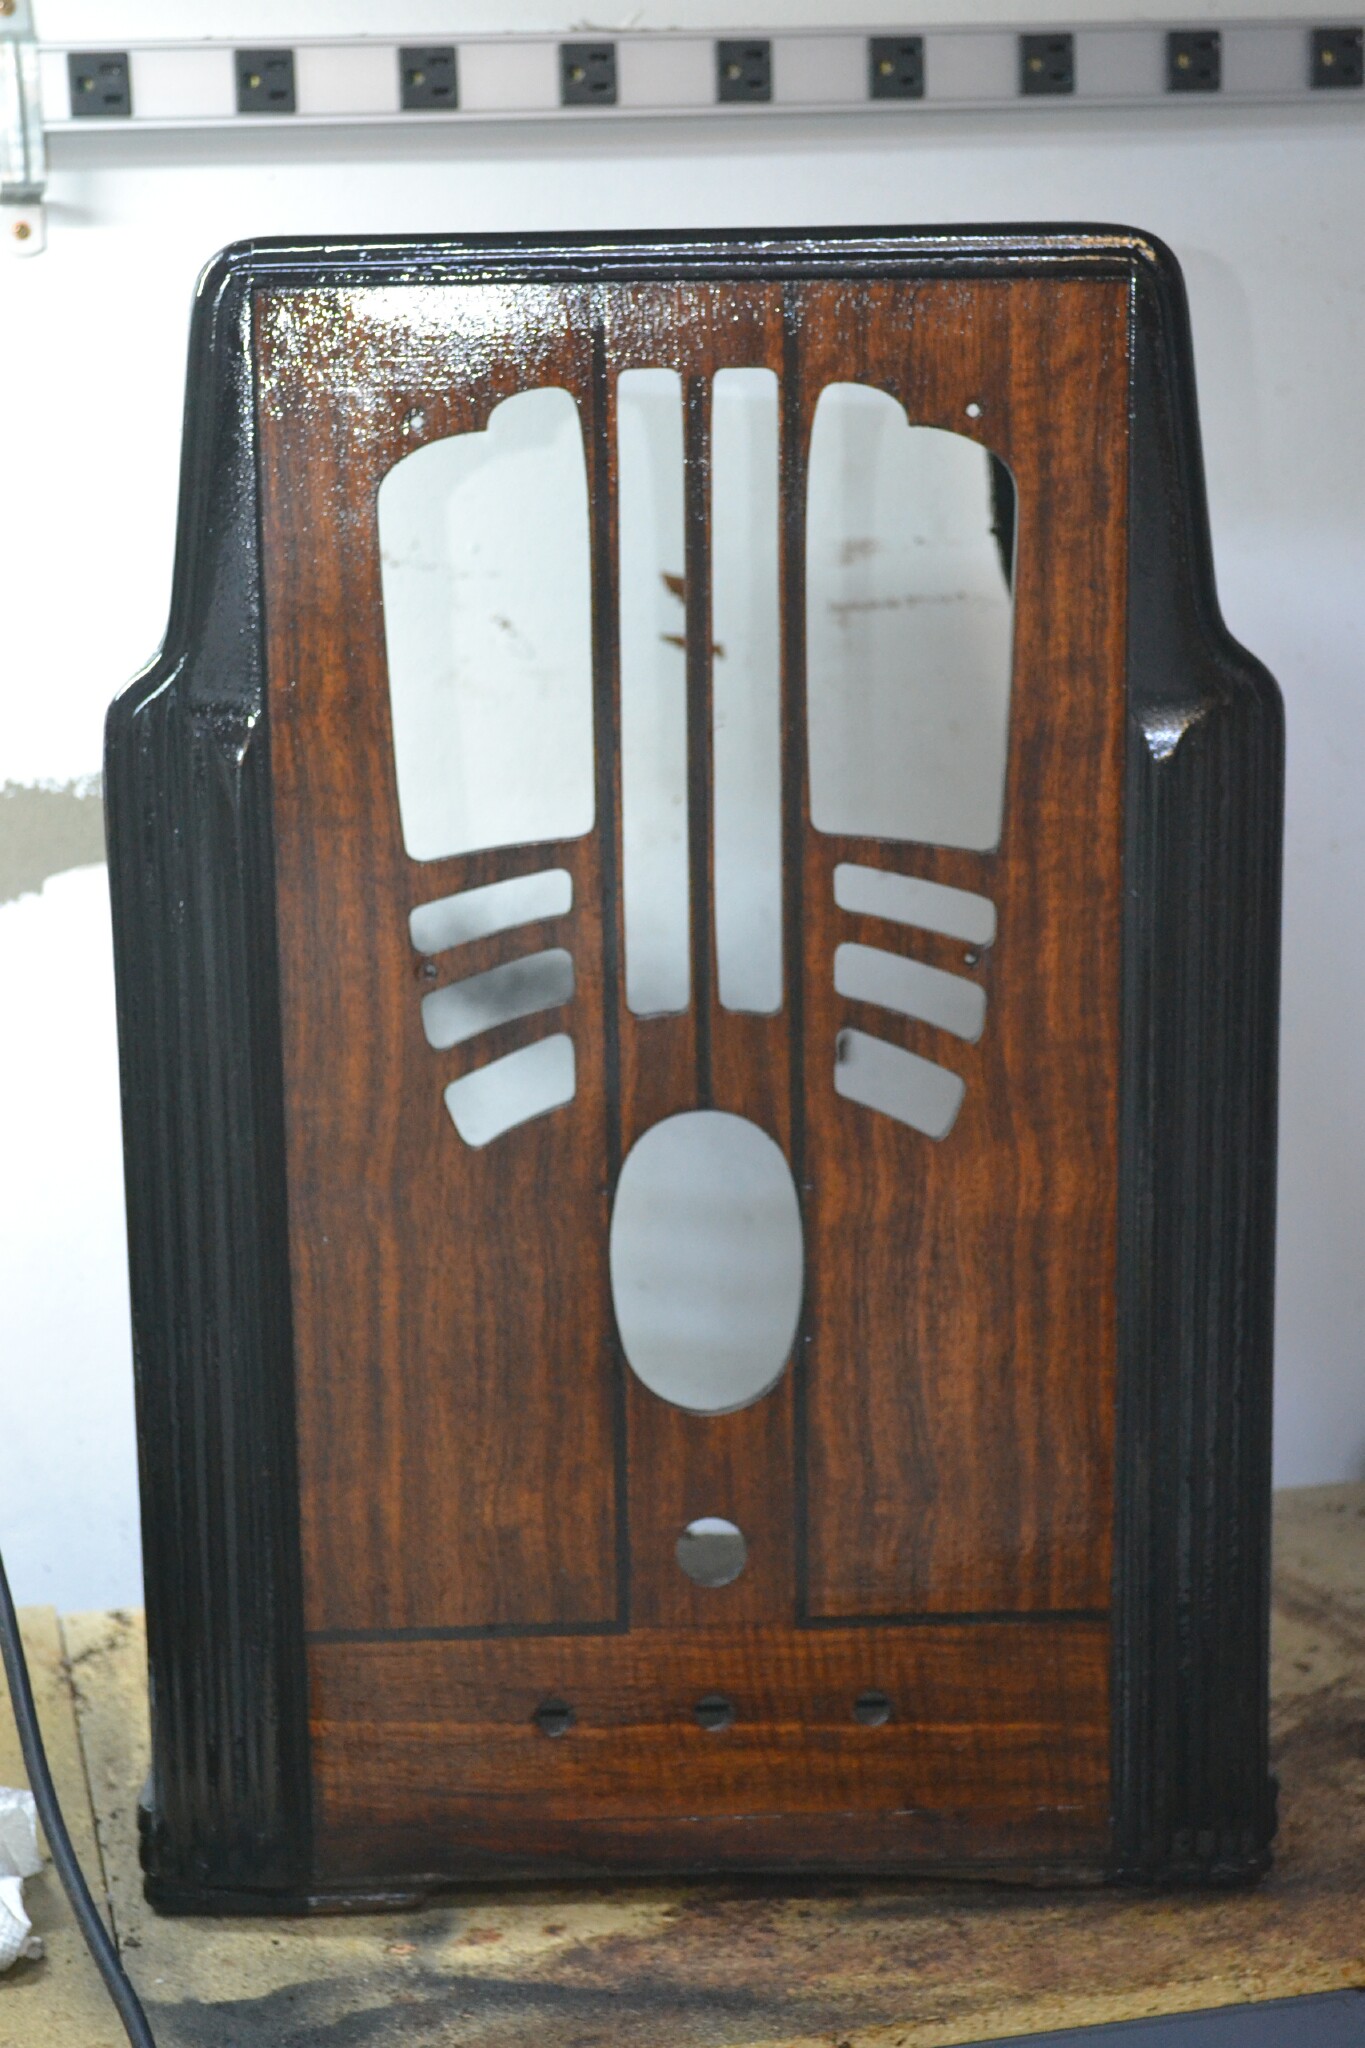
Comments? Not too late to start over if I've really made a horrible mistake.
Posts: 1,106
Threads: 88
Joined: Jun 2011
City: Tacoma
State, Province, Country: Washington
Also looking for pointers on how to smooth out the gloss of the lacquer once it's all applied.
Posts: 2,579
Threads: 338
Joined: Jun 2013
City: lawrenceville nj
Brenda
that's great looking 
wonder why they painted match their décor ?
looks like it will be easy restore  
sam
Some day, and that day may never come, I will call upon you to do a service for me. But until that day, accept this justice as a gift
mafiamen2
Users browsing this thread: 3 Guest(s)
|
|
Recent Posts
|
|
54C Complete Teardown/Rebuild
|
| Hello roy,
here is a link to the schematic .
Sincerely Richardradiorich — 11:54 PM |
|
54C Complete Teardown/Rebuild
|
| Richard,
The Silvertone 2014 also is a transformerless set, so I am incorporating a 1:1 600 ohm audio isolation transfo...glyphmon — 11:37 PM |
|
Preliminary work on wife's Silvertone 2014
|
| Did an alignment today which was interesting. IF alignment went great, almost all was already spot-on. Adjusting on th...glyphmon — 11:35 PM |
|
54C Complete Teardown/Rebuild
|
| The main problem with adding a Bluetooth input is that this set lacks a traditional power transformer to isolate it from...radiorich — 11:19 PM |
|
54C Cabinet Refinish
|
|
I started stripping this cabinet before it got super chilly out because I knew I wasn't going to be able to work on ...glyphmon — 11:18 PM |
|
54C Complete Teardown/Rebuild
|
| While I'm waiting to wrap up the final steps on my wife's Silvertone 2014, I started disassembly on the next project. O...glyphmon — 11:07 PM |
|
Preliminary work on wife's Silvertone 2014
|
| Hello roy,
that great news glad it worked out for you !!
Sincerely Richardradiorich — 10:50 PM |
|
Preliminary work on wife's Silvertone 2014
|
| Safety caps arrived today. Soldered one in and had a successful first power-up. No magic smoke escaped and it tunes in...glyphmon — 09:53 PM |
|
HiFi (Chifi) tube amp build - but my own design.
|
| Tim, you refer to “AK”. Is that Alaska or Atwater-Kent, or… JoeJoe Rossi — 11:49 AM |
|
Grundig 5088
|
| Skip,
you are back to this one?
As for fixing, Mark Oppat fixes vol. controls. Don't know about Grunding, but woul...morzh — 10:30 AM |
|
Who's Online
|
There are currently 2298 online users. [Complete List]
» 1 Member(s) | 2297 Guest(s)
|
|
|

|
 
|