Rebuilding Sprague Electrolytics - HELP
Posts: 13,776
Threads: 580
Joined: Sep 2005
City: Ferdinand
State, Province, Country: Indiana
OK Russ, Bob, anyone else who has done this:
Just HOW IN THE BLUE H**l DO YOU OPEN THESE D**n THINGS???
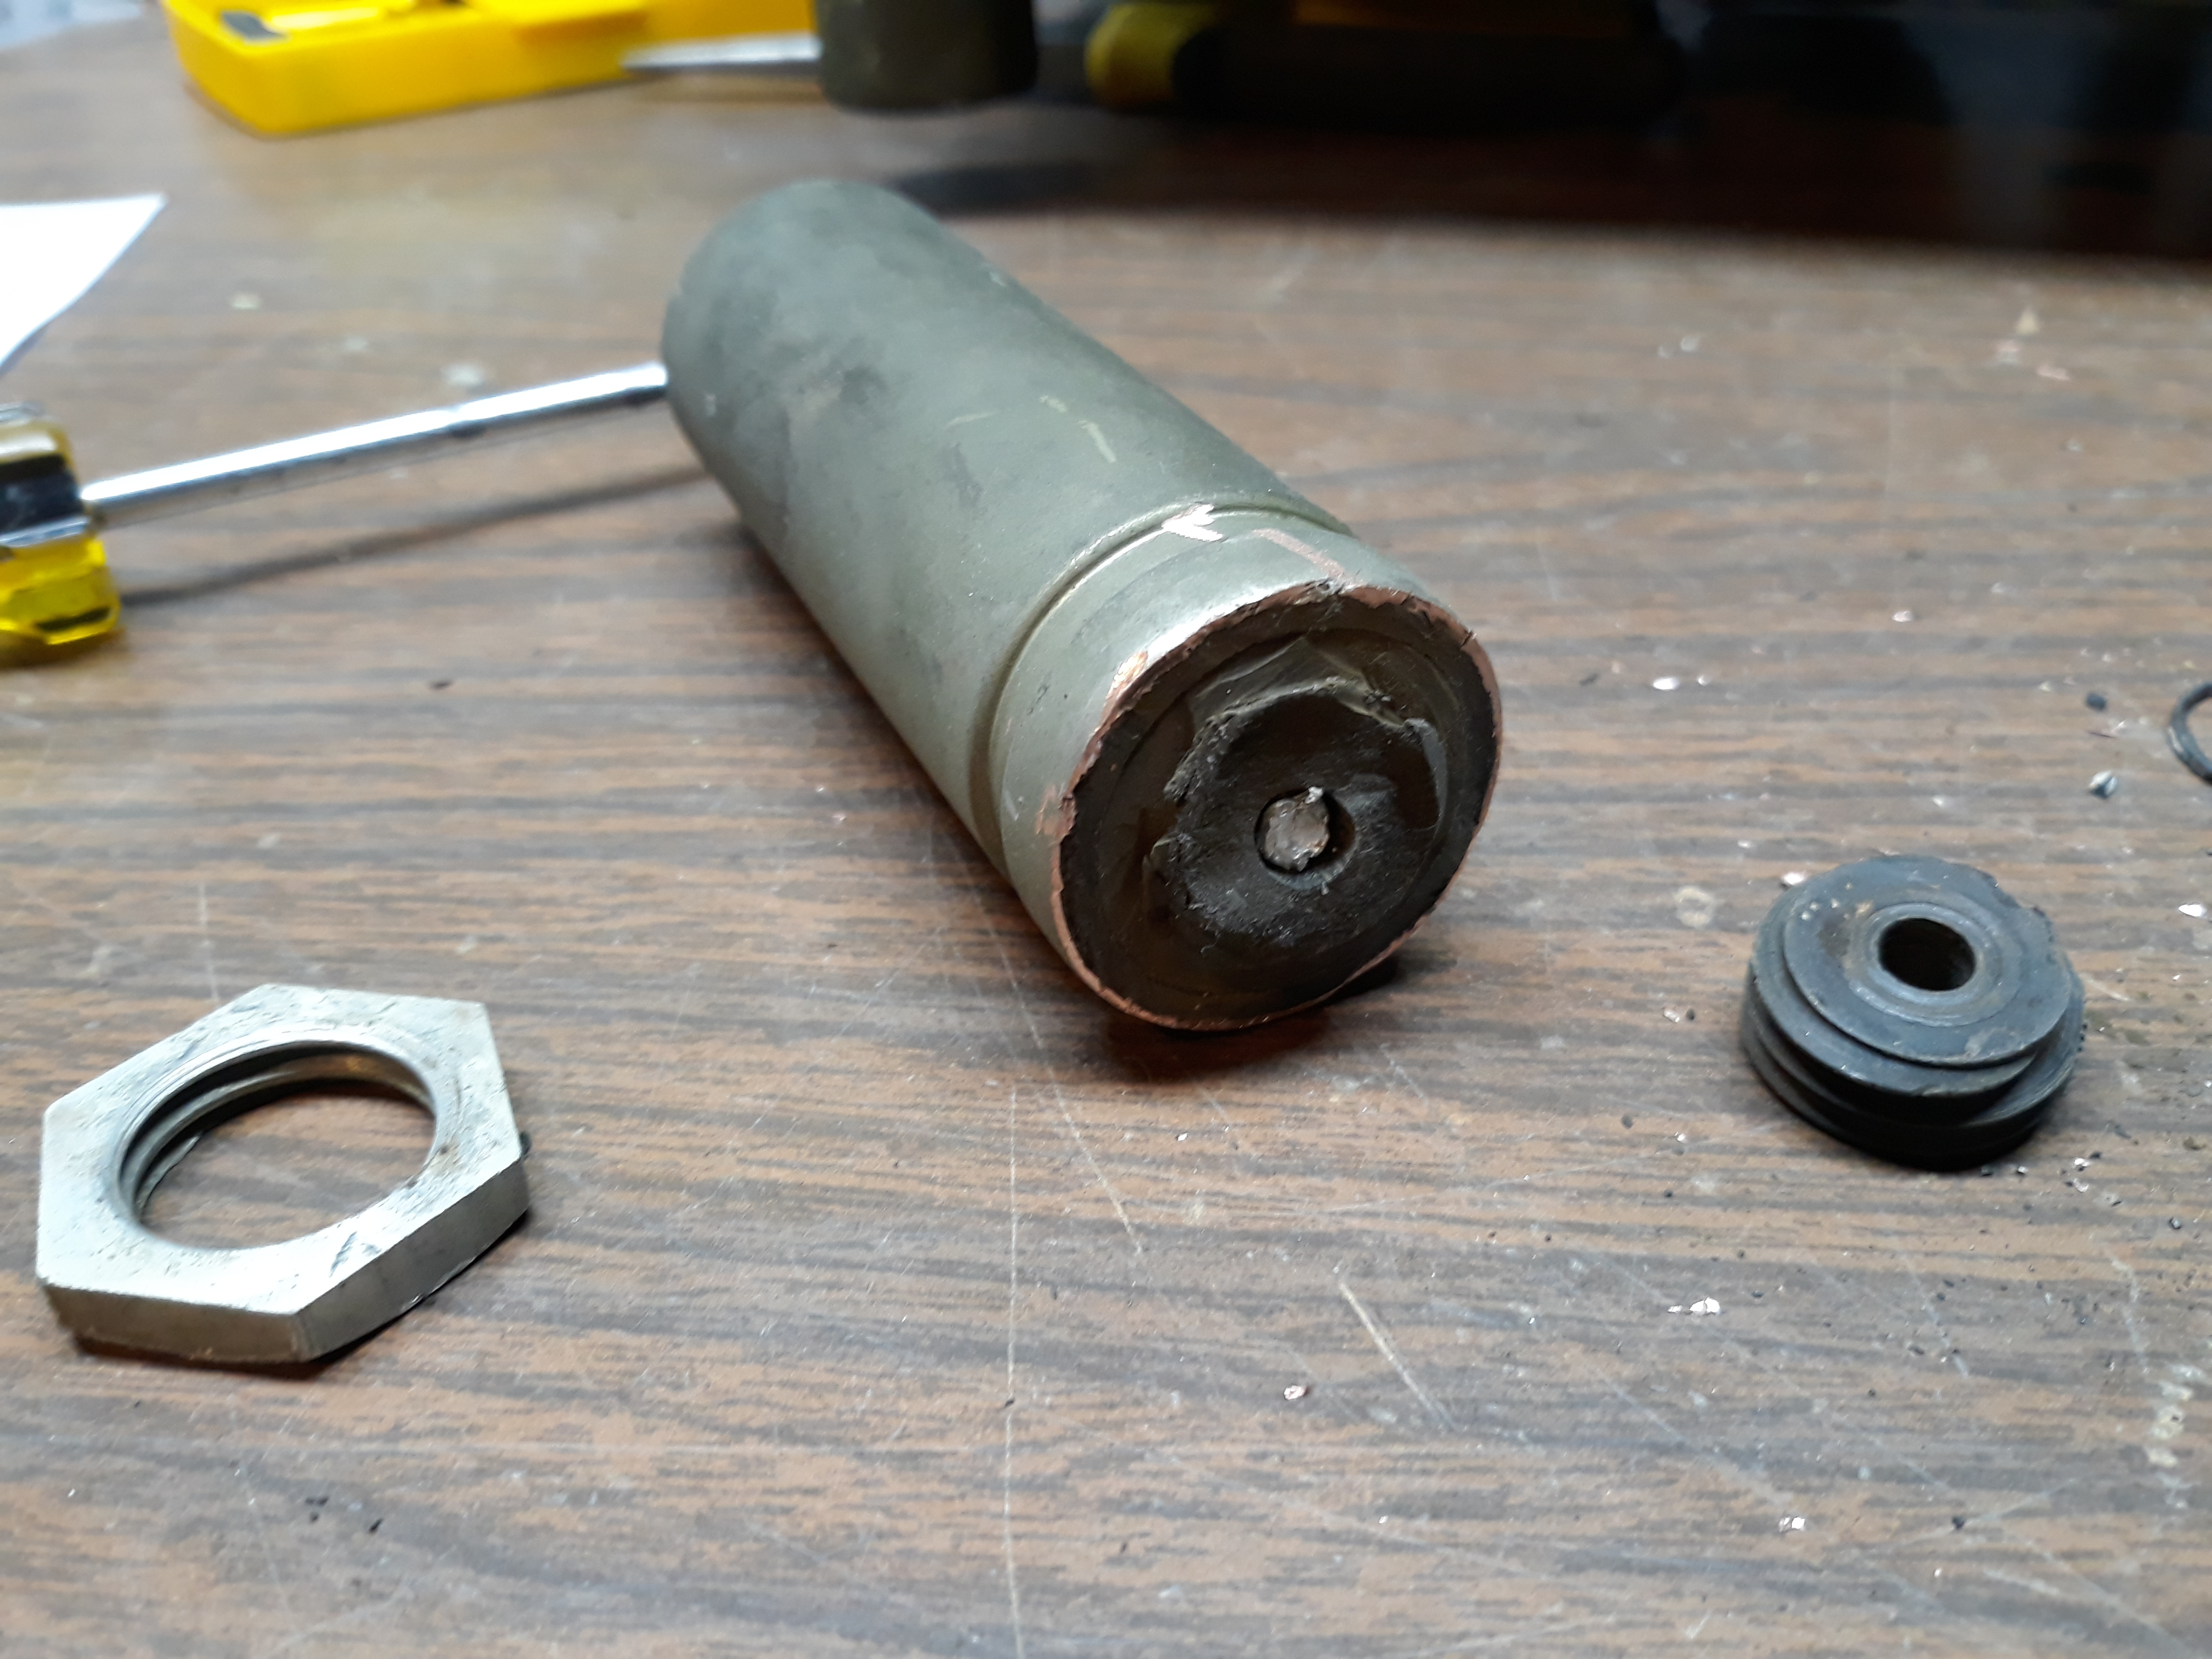
After reading this thread as well as this thread, I thought I would try my luck at opening up one of those nickel-plated copper Sprague electrolytics by grinding the lip off the end and wiggling the Bakelite base out.
Only, just my luck, it did not go so well.

As you can see, the Bakelite base broke at the threads.
Suggestions welcome. I'm tempted to just cut the D**n things at the top of the narrow part, restuff, then slip the top over the narrow part. It won't look original but it should work. Thoughts?
VERY frustrating...
--
Ron Ramirez
Ferdinand IN
Posts: 1,199
Threads: 49
Joined: Oct 2017
City: Allendale, MI
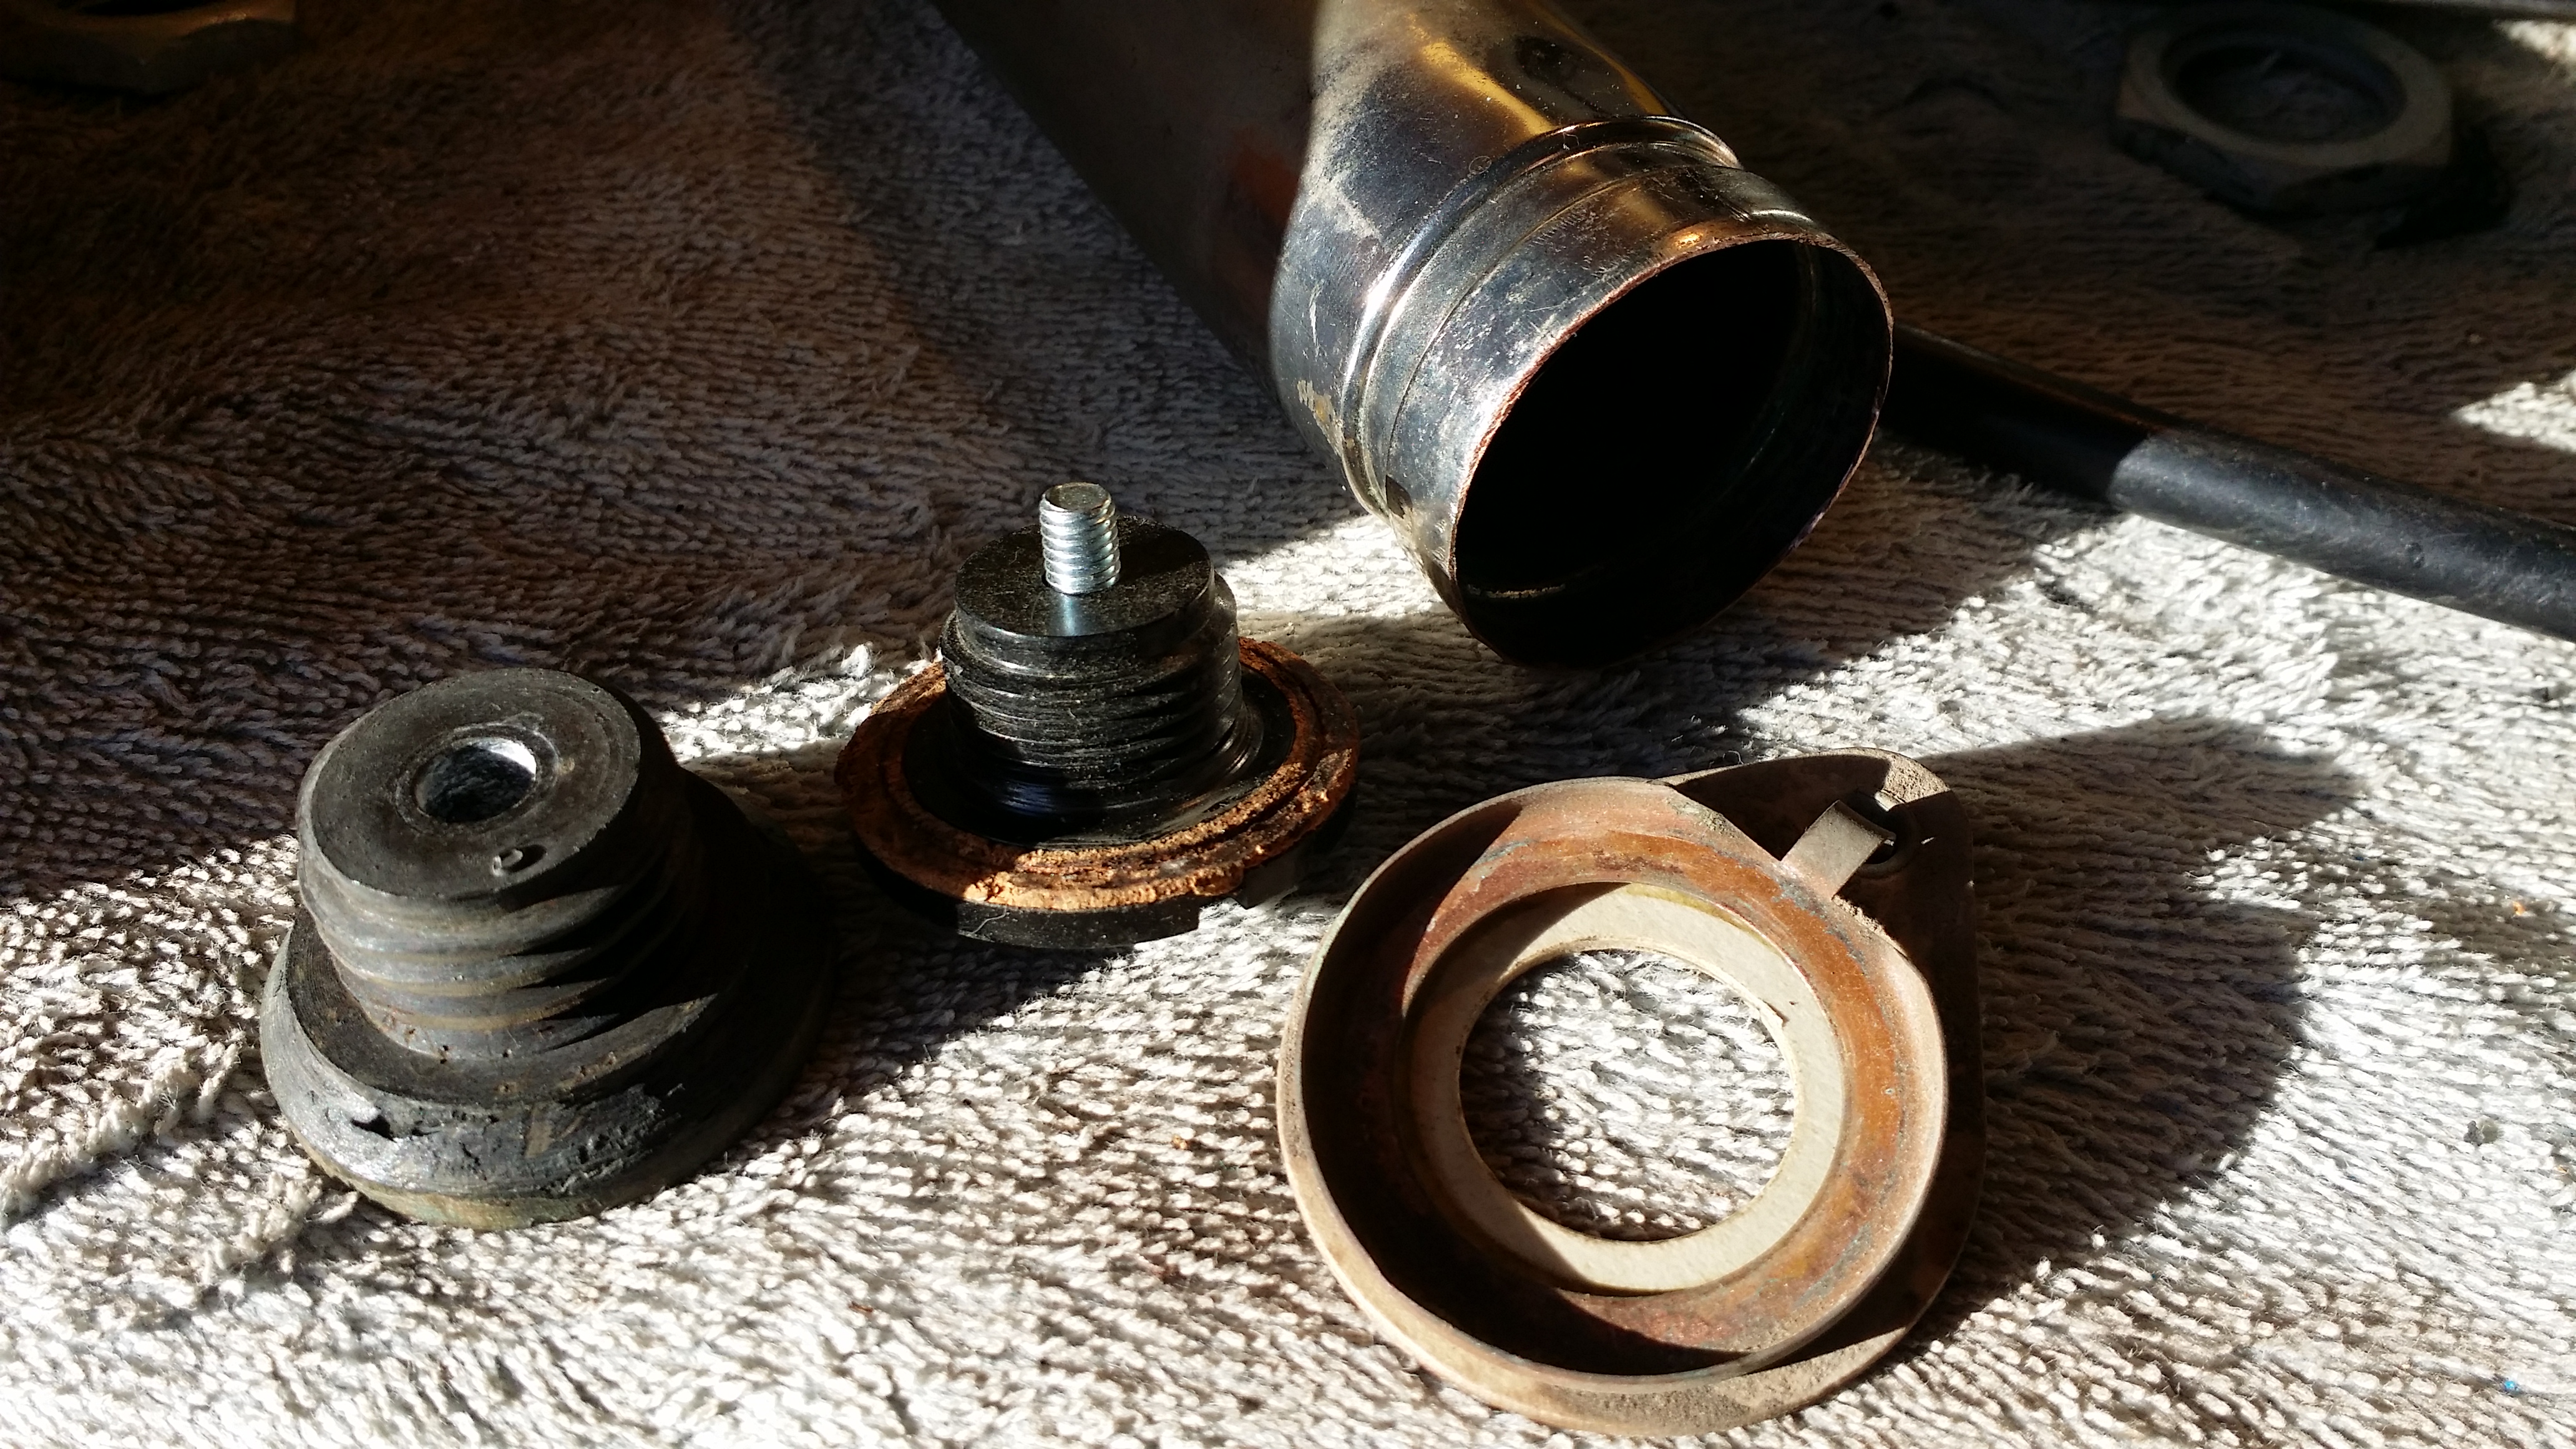
that Bakelite can be in there a bit tight. I've done a couple of these and 4 Mershons that are assembled the same way. I use a belt sander to take the lip off. I've found that you need to go a bit farther than what it appears that you did. I think I can see a tiny bit of crimp left holding the Bakelite in tight. Then, I put the nut on the threads and gently tighten it and even have put another nut on to give as much support to the Bakelite threads as possible. I'm trying to distribute the forces of rocking and twisting the Bakelite plug away from the thread part and onto the plug itself. A couple of them that I did took a lot of gentle working to break the corrosion before the plug came loose. Once the plug is out, I drill a small hole through the Bakelite right next to the stud for the positive lead and another farther out for the negative. I sand the edge of the plug so that the plug will seat farther into the can up to the narrow crimp section. This allows me to roll the sanded edge of the can to re-crimp the plug. Where the negative wire comes out, I indent the can slightly to accommodate the negative wire which is then soldered to the negative terminal ring. I'll also solder the wire to the can with a tiny solder connection.
A couple of pics here: https://philcoradio.com/phorum/showthread.php?tid=19313 You can see the edge of the plug I sanded to allow the plug to seat deeper in the can. You can also see the edge of the can rolled in slightly to hold the plug.
(This post was last modified: 05-12-2019, 07:04 PM by rfeenstra.)
Posts: 205
Threads: 5
Joined: Sep 2005
City: Newark, Ohio
Possibly, you can glue the broken bakelite back together with JB weld or I've found "super glue" works great on bakelite. Clean up the lip some (emery cloth)....it looks like there is some material left, preventing the base from coming out. Might try some WD-40 around the junction of bakelite and copper. 
I'm just guessing......good luck.
Ed
Posts: 5,220
Threads: 275
Joined: Nov 2012
City: Wilsonville
State, Province, Country: OR
The way I did them can be seen here: https://philcoradio.com/phorum/showthrea...#pid111855
Similar to rfeenstra's description. The first one I did, the bakelite came right out of the cylinder. The second was more stubborn and took some rocking back and forth. I think it would be very easy to have the bakelite fail as it did in your case. Yes I agree, it looks like the lip still needs some grinding..its a PITA but a dremel tool helps. I'm not sure what to do at this point to get a grip on the bakelite. You might try drilling two holes on either side of the center hole and thread in a machine screw in each to give yourself something to grab??
Posts: 16,579
Threads: 574
Joined: Oct 2011
City: Jackson
State, Province, Country: NJ
Ron
Find my Philco 90 restoration. Had same problem. Solved it.
https://philcoradio.com/phorum/showthrea...106&page=2
People who do not drink, do not smoke, do not eat red meat will one day feel really stupid lying there and dying from nothing.
Posts: 13,776
Threads: 580
Joined: Sep 2005
City: Ferdinand
State, Province, Country: Indiana
I read over everyone's efforts (other than Mike's) prior to attempting this myself. I even linked to two, including Bob's, in my original post.
I was grinding into the Bakelite when I stopped grinding. So you say I need to go further? Wow...
I may just try Mike's method instead - it looks a lot easier.
--
Ron Ramirez
Ferdinand IN
Posts: 816
Threads: 25
Joined: Mar 2014
City: Louisville, KY
I can't offer anything. The 39-6 C I had the liquid types. That was a disaster.
Posts: 16,579
Threads: 574
Joined: Oct 2011
City: Jackson
State, Province, Country: NJ
The backelite in those is EXTREMELY tough to grind. I still remember me suffering.
People who do not drink, do not smoke, do not eat red meat will one day feel really stupid lying there and dying from nothing.
Posts: 2,118
Threads: 112
Joined: Jun 2010
City: Medford OR (OR what?)
Ron, I have done many of the Spragues the way you are doing them. It is not my preferred method, but in the case pictured below, I also wanted to change the coarse thread base to a finer thread. So removal of the plastic base was necessary .

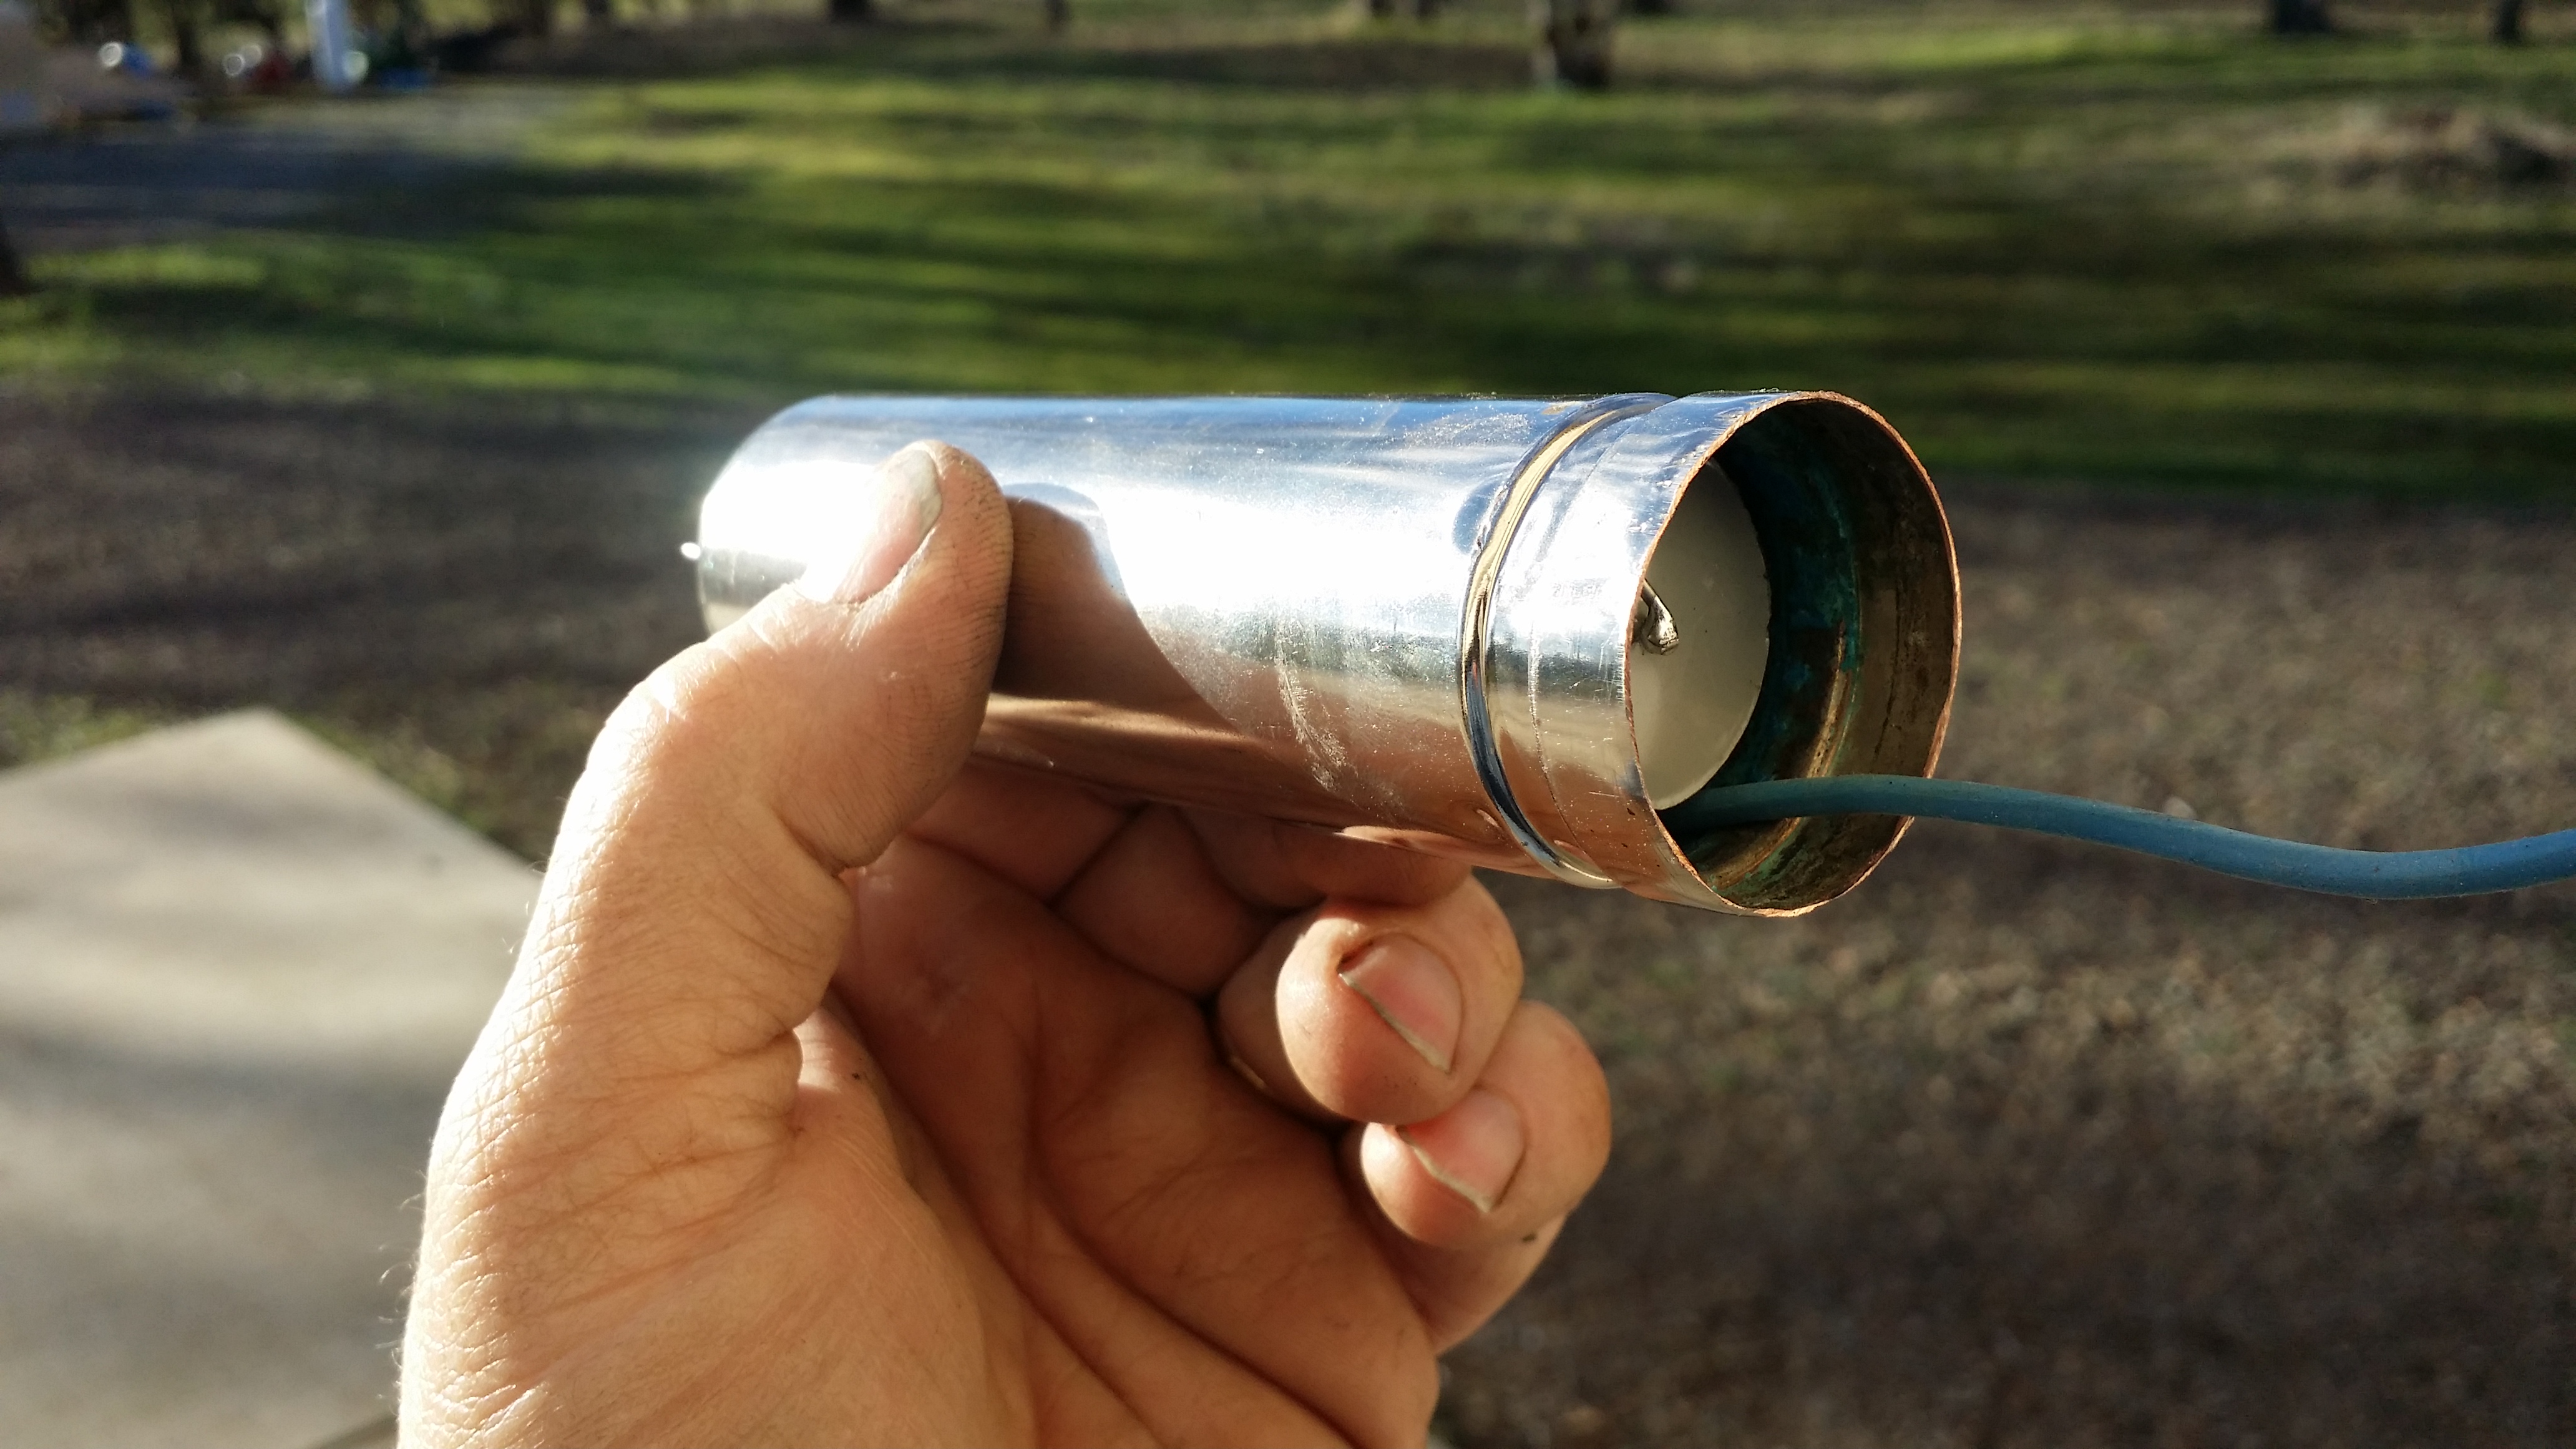
My preferred method is to cut the body of the cap at the pinch and then resolder the parts together, followed by replating. I know that I am the only one that would do this, but it also resolves the issue with strength. See, I like to use those caps as grab points or I just set the chassis down on them. This will often pull the can off of the base. For me, even with replating, this is easier.
I think that I already posted some pictures of the second method - - somewhere.

"I just might turn into smoke, but I feel fine"
http://www.russoldradios.com/
(This post was last modified: 05-13-2019, 07:26 PM by Phlogiston.)
Posts: 13,776
Threads: 580
Joined: Sep 2005
City: Ferdinand
State, Province, Country: Indiana
Thanks Russ.
With nothing to lose, I'll try grinding the end of this can a little more and then see if I can remove the remnant of the base.
I found two extra Spragues in case I can't salvage the two that are in this model 70 which I'm getting ready to work on and convert to AVC using Ed Locker's mod. But I'm hoping I can salvage this one, and then hopefully be able to open the other one up.
--
Ron Ramirez
Ferdinand IN
Posts: 1,199
Threads: 49
Joined: Oct 2017
City: Allendale, MI
Ron, my 70's have Mershon's. Did they switch to Sprague later? Except for the oscillator, Ed's mods basically turn it into a late model 70. I don't have 35's yet but I am encouraged by the results of the modification so far.
Posts: 13,776
Threads: 580
Joined: Sep 2005
City: Ferdinand
State, Province, Country: Indiana
Most of the 70/90/late 112 Philcos have Mershons, but some production runs apparentlly used Spragues as enough of them have been found with Sprague caps to make it apparent that Philco did install Spragues at the factory to some extent.
The 70 chassis I am getting ready to work on has two Spragues, and they appear to be original.
--
Ron Ramirez
Ferdinand IN
Posts: 16,579
Threads: 574
Joined: Oct 2011
City: Jackson
State, Province, Country: NJ
I was always wondering how, on one hand, the threaded part on my Sprague was broken, and on the other, I really had a tough time breaking and extracting the rest of that backelite.
People who do not drink, do not smoke, do not eat red meat will one day feel really stupid lying there and dying from nothing.
Posts: 194
Threads: 43
Joined: Jan 2019
City: Brownsville 42210
State, Province, Country: Kentucky
drill bit and cork screw is how i remove the guts or you can boil it till the innards soften enough to come out.
Posts: 16,579
Threads: 574
Joined: Oct 2011
City: Jackson
State, Province, Country: NJ
Jake
No we are not talking of removing guts. It is the backelite threaded part. It is extremely....intransigent. Cork screw simply doesn't work. In fact it can break if you try to do it with it or you could even hurt yourself with it.
People who do not drink, do not smoke, do not eat red meat will one day feel really stupid lying there and dying from nothing.
Users browsing this thread:
|
|
Recent Posts
|
|
Philco Model 38-7: what caps & resistors do fail typically?
|
| Hello Martin,
Welcome aboard our little community what great Model 38-7
Sincerely Richardradiorich — 12:30 AM |
|
Philco Model 38-7: what caps & resistors do fail typically?
|
| Welcome to the Phorum Martin.
I count about 9 paper caps, the 3 electrolytic caps and 2-Y2 safety caps to replace th...RodB — 09:44 PM |
|
Part numbers to model cross
|
| Jim,
We have this index put together by Dale Cook but I don't think that is quite what you are looking for.
The Parts...klondike98 — 09:37 PM |
|
Philco Model 38-7: what caps & resistors do fail typically?
|
| Yep the dim bulb test is OK but I'd definitely replace all those electrolytics before I did it. Since those #47 conden...klondike98 — 09:18 PM |
|
Philco 42-345 Restoration/Repair
|
| The resistor is a 2.2 Meg, it was the last one I hadn't replaced. The broadcast is coming in after replacing it.osanders0311 — 09:09 PM |
|
Philco 42-345 Restoration/Repair
|
| What does the resistor measure? I think it should be 3.3 Meg.
If the oscillator coil has continuity and the resistanc...RodB — 09:03 PM |
|
Philco Model 38-7: what caps & resistors do fail typically?
|
| Good idea to check the coils... then I'll get hold of an incadescent light bulb and see what happens when the unit is sw...Musaeum — 08:49 PM |
|
Philco 42-345 Restoration/Repair
|
| I have that same set, ain't too much shortwave I like anyway.....it is a good AM DX set. PaulPaul Philco322 — 08:32 PM |
|
Philco Model 38-7: what caps & resistors do fail typically?
|
| Welcome to the Phorum, Martin! Open a new thread in Philco Electronic Restoration when you begin working on your 38-7. ...GarySP — 08:28 PM |
|
Philco Model 38-7: what caps & resistors do fail typically?
|
| Welcome to the Phorum!
:wave:
Here's the schematic for that radio from our digital library:
Something to do bef...klondike98 — 08:05 PM |
|
Who's Online
|
| There are currently no members online. |

|
 
|


![[-] [-]](https://philcoradio.com/phorum/images/bootbb/collapse.png)


